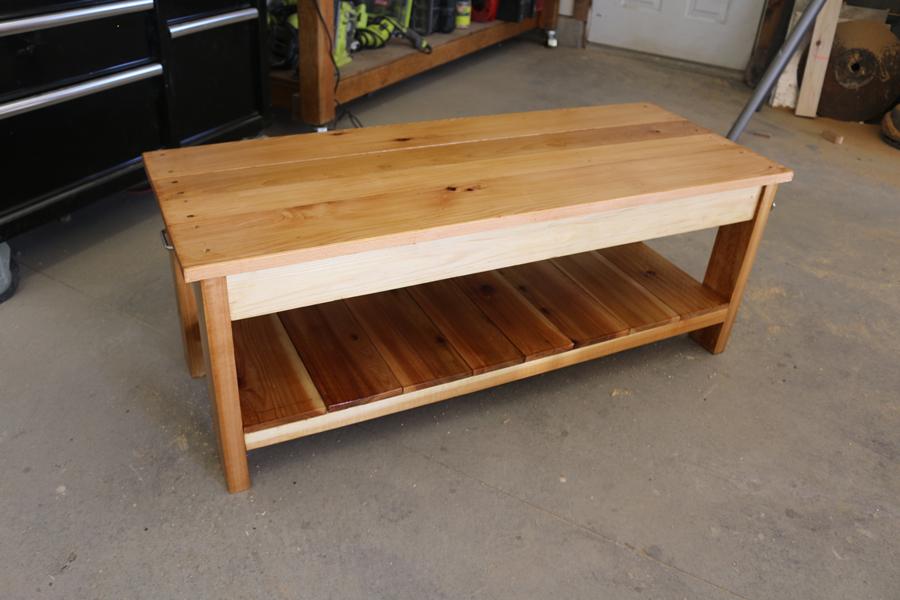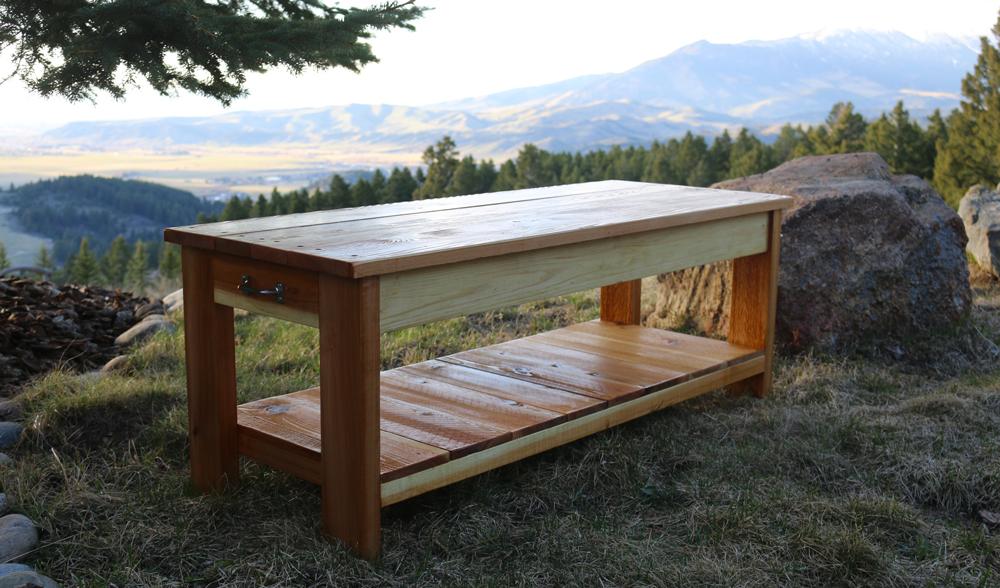
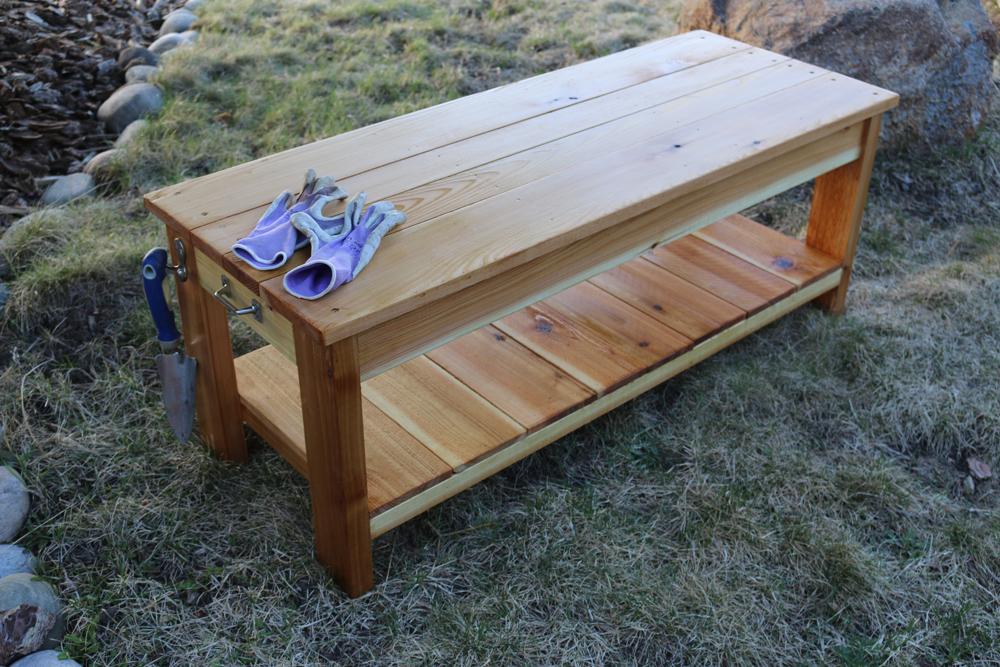
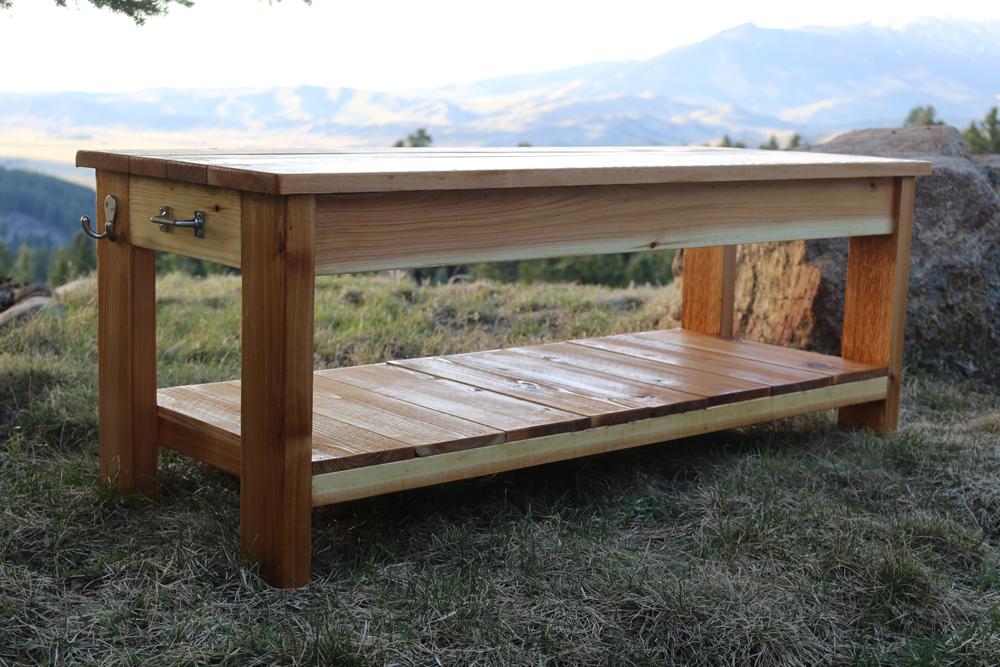


In this tutorial you will learn how to build a cedar bench for the yard or garden. It’s a perfect bench to sit on to enjoy your outdoor space. The bench is constructed out of basic materials including 2×4 boards, fence pickets, and 1×6 boards.
Tools
Kreg Tools

Other Tools
-
Miter Saw

-
Table Saw
-
Clamps
-
Drill (cordless)
-
Impact Driver
-
Nail Gun
-
Sander
Materials
Wood Products
- 4 Board , 2x4 , 96"
- 2 Board , 1x6 Fence Picket , 72"
- 2 Board , 1x6 , 96"
Hardware & Supplies
- 1 Box of 1 1/4 inch screws
- 1 Box of 2 1/2 inch Kreg Screws
- 1 Wood Glue
- 1 Stain or Sealer
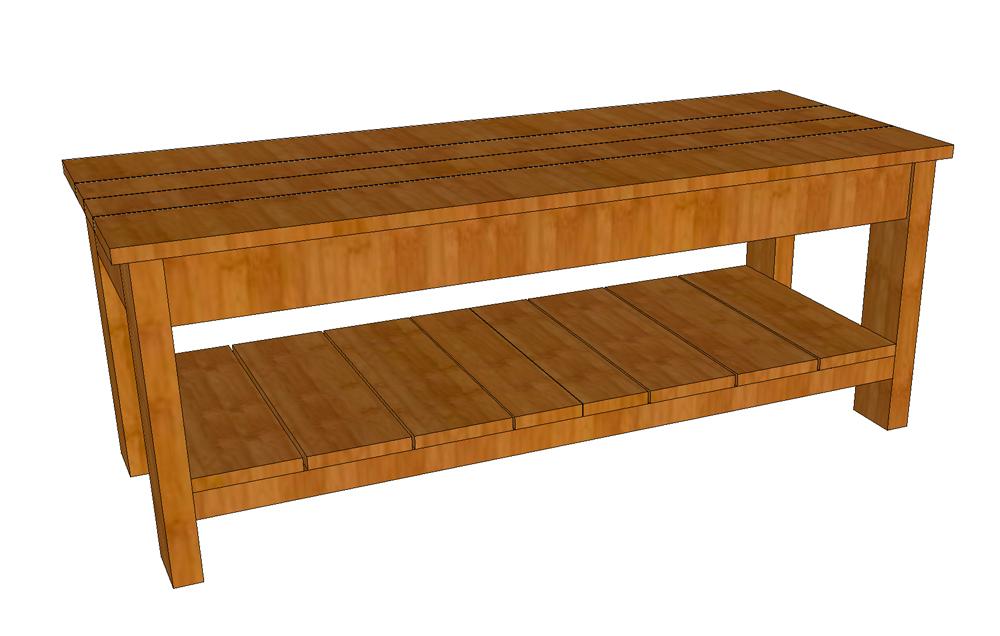
Cut List & Parts
- 2 Utility handles , 3 inches wide
- 1 Coat Hanger , Standard
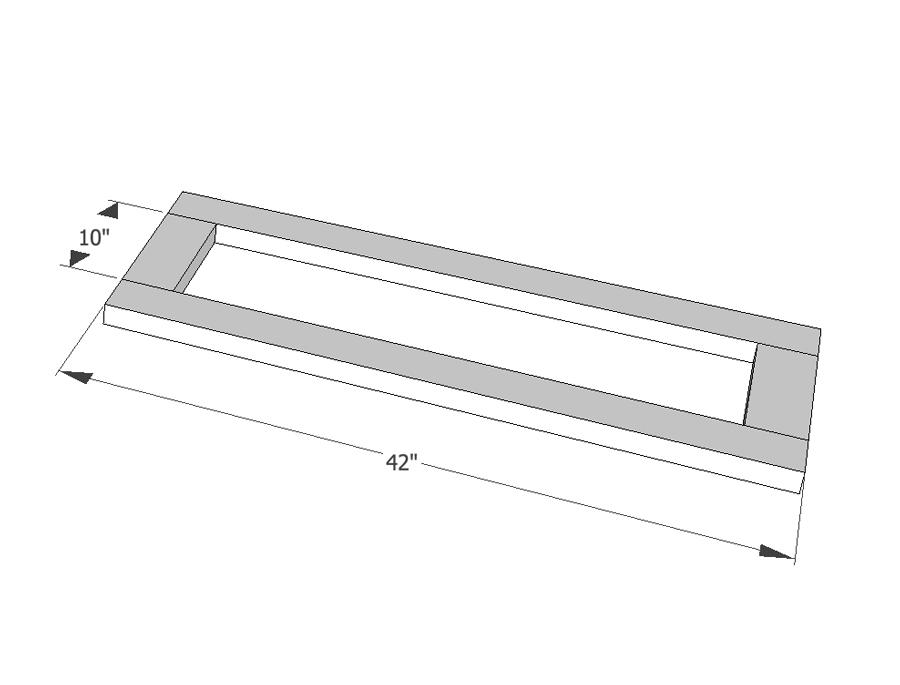
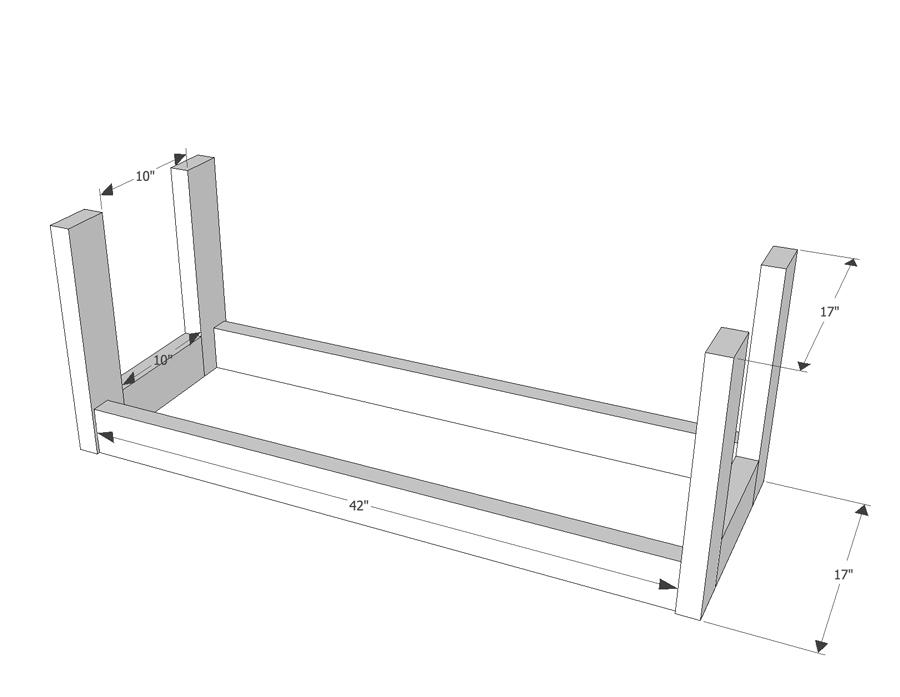
- 4 Long stretchers , 1 1/2" x 3 1/2" x 42"
- 4 Short stretchers , 1 1/2" x 3 1/2" x 10"
- 4 Legs , 1 1/2" x 3 1/2" x 17"
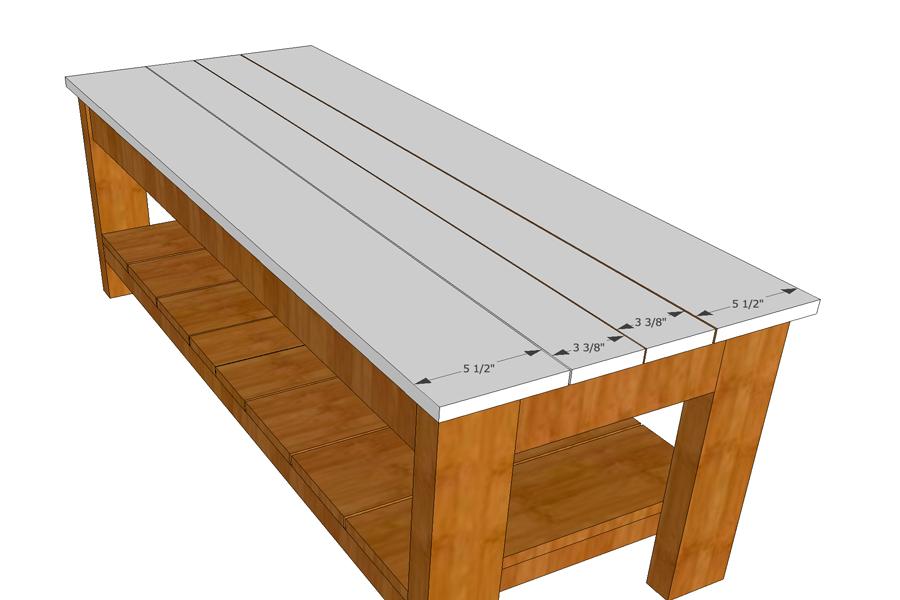
- 2 Outer bench top boards , 3/4" x 5 1/2" x 46 1/2"
- 2 Inner bench top boards , 3/4" x 3 3/8" x 46 1/2"
- 6 Cedar Picket Shelves , 3/4" x 5 1/2" x 17"
- 2 Cedar picket inner shelves , 3/4" x 4" x 17"
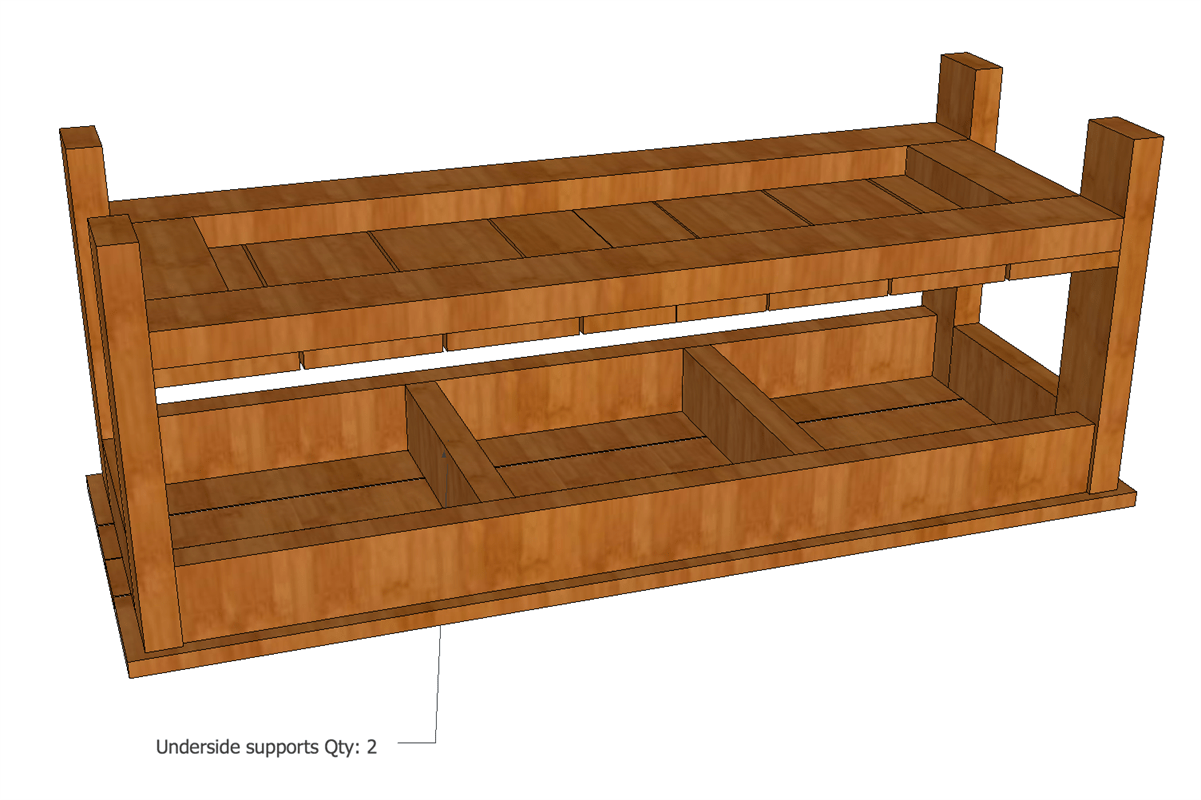
- 2 Underside supports , 1 1/2" x 3 1/2" x 13 1/2"

Directions
-
Gather materials
Gather your materials according to the cutting list. Find a flat surface to assemble your garden bench.
-
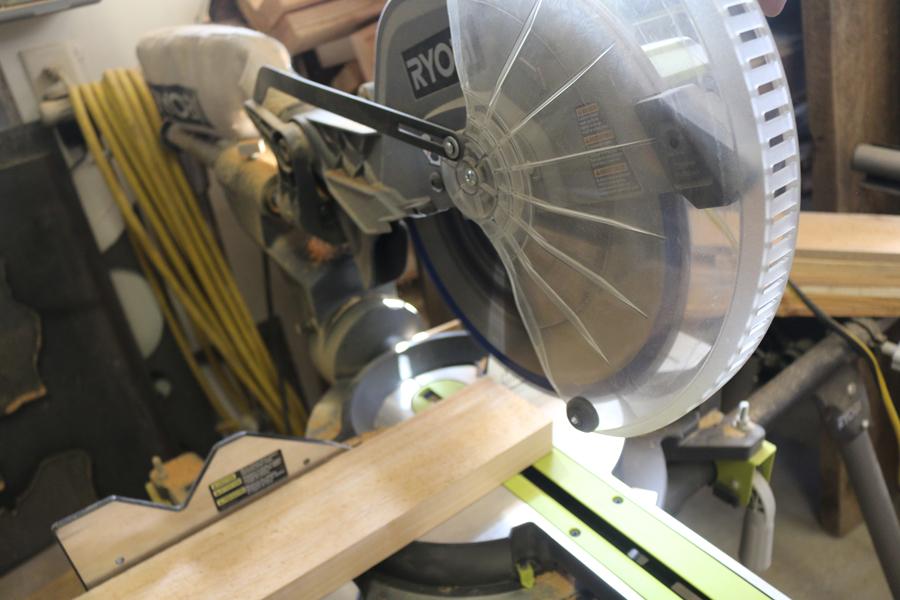
Cut boards
Cut each board according to the measurements in the cut list.
-
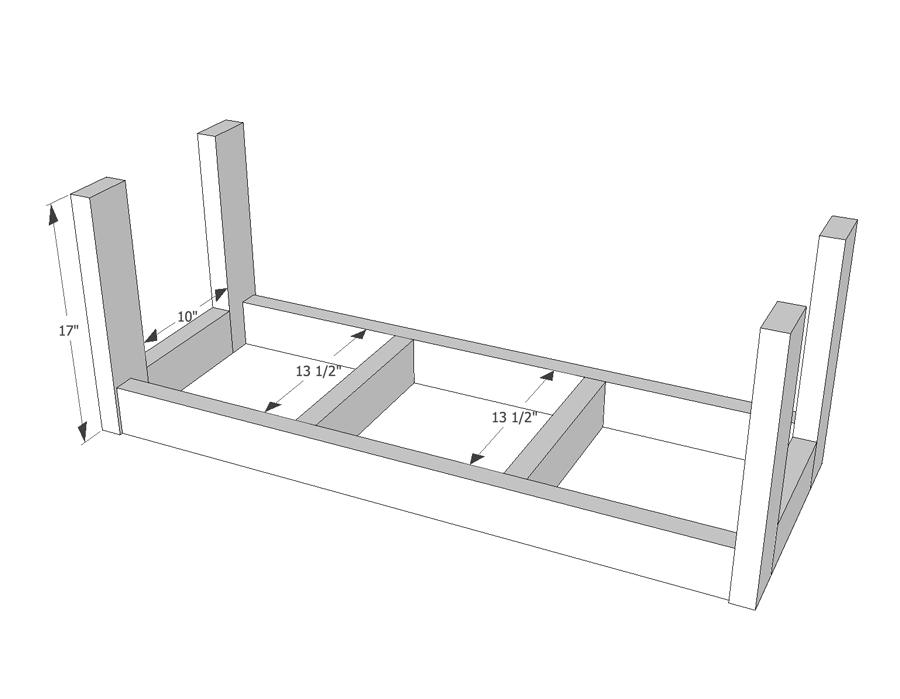
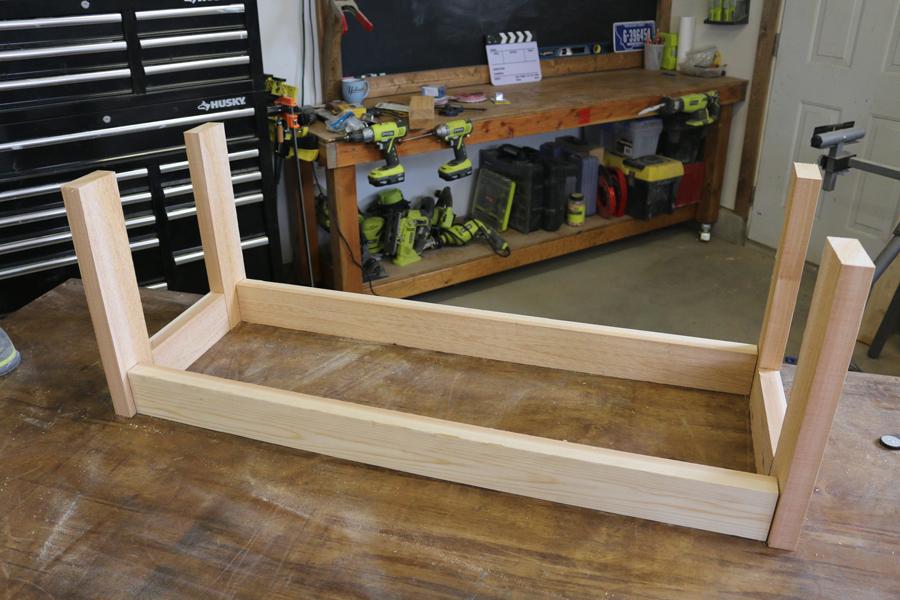
Layout boards
Layout the frame for the bench with the legs and upper stretchers. We'll assemble the frame upside down, so the upper part of the bench is actually resting on the flat work surface.
-
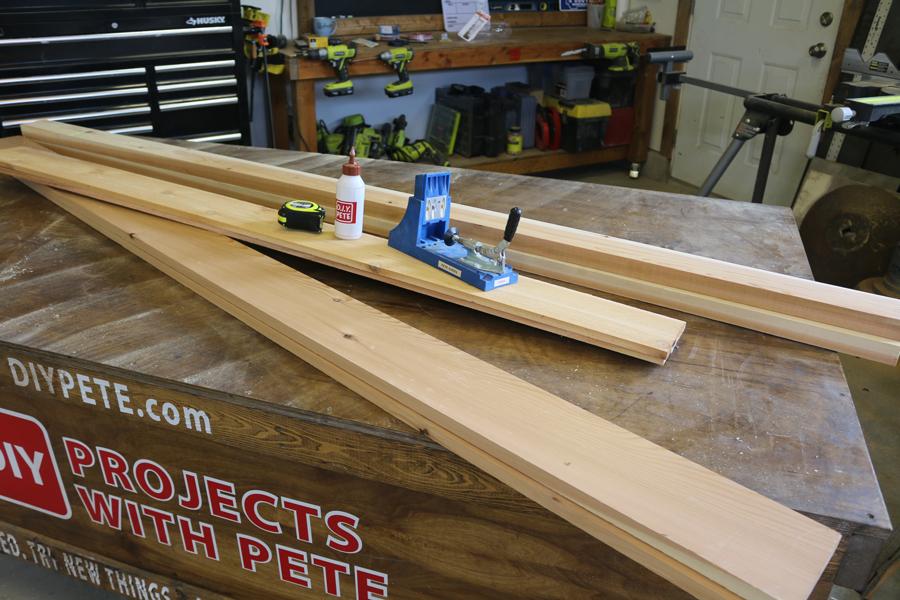
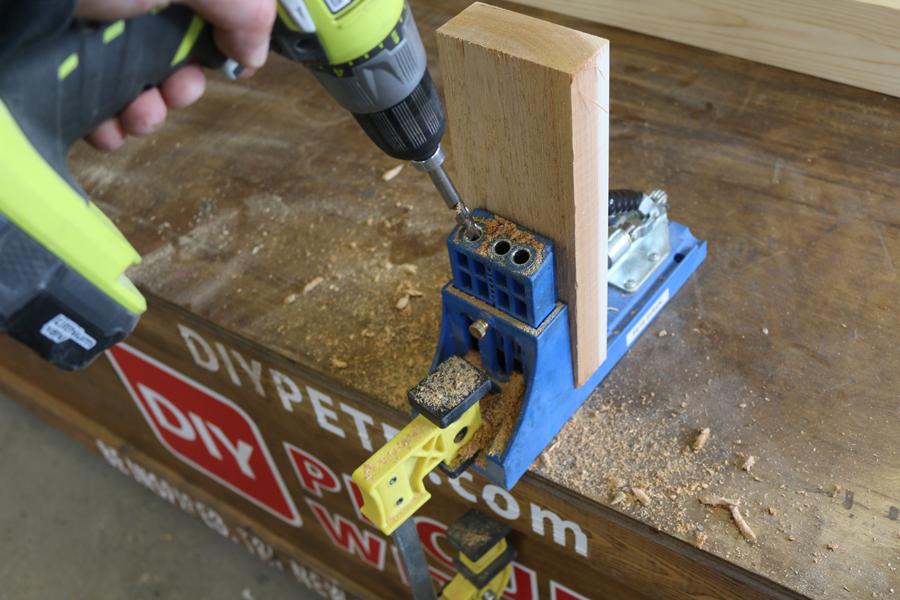
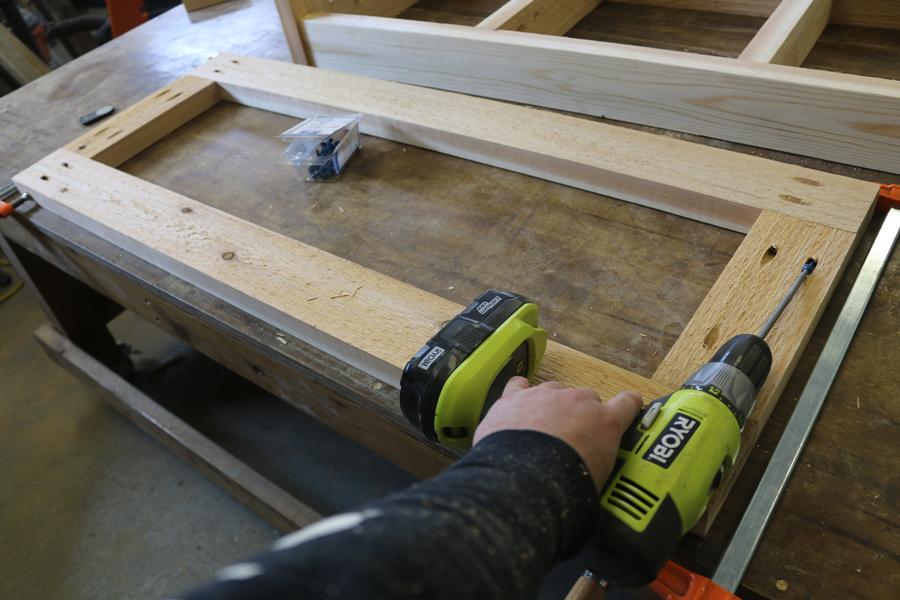
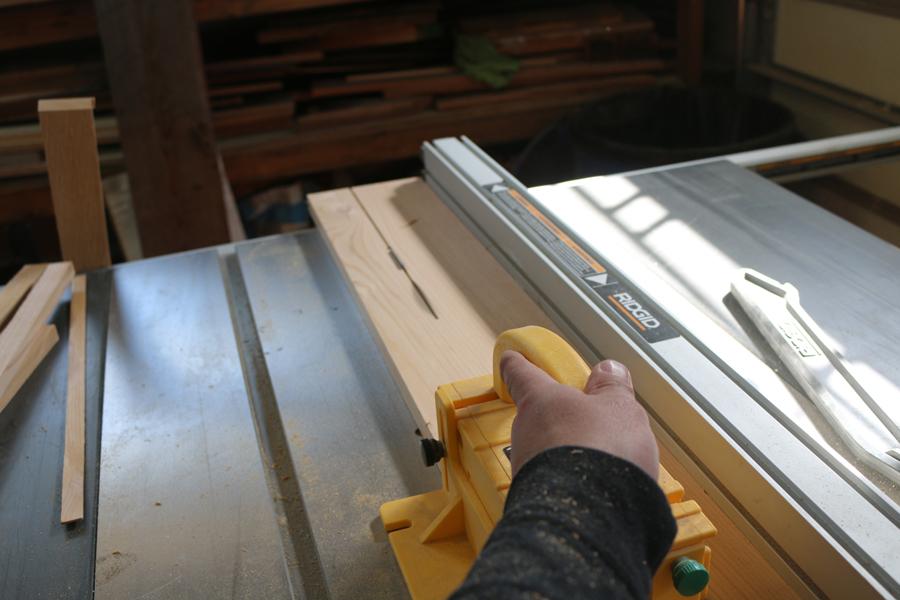
Drill Pocket Holes
Use a pocket hole jig to create two holes in the ends of each stretcher board and under support. Set the jig to the 1 1/2 inch stock setting. Do a light sanding to remove rough edges and smooth out the boards prior to assembling.
-
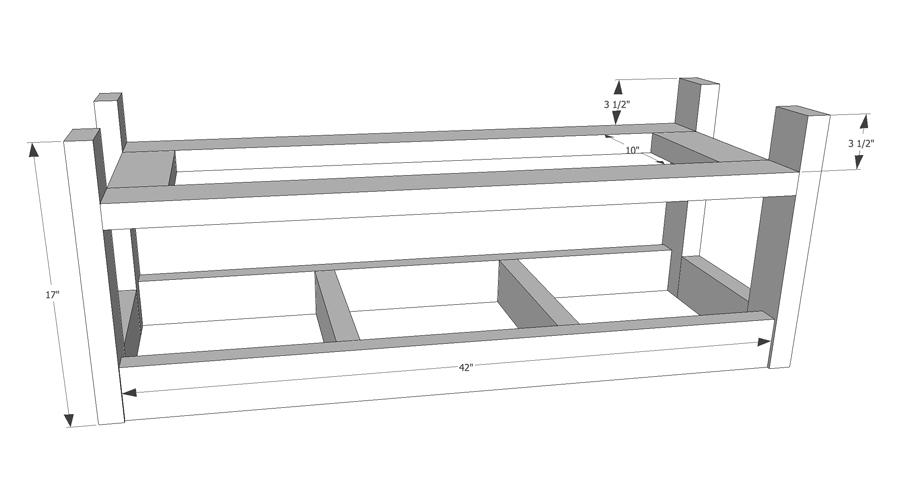
Attach long top stretchers
Use 1/4 spacers to inset the two top stretchers 1/4 of an inch in from the outside of each leg. Then attach using pocket screws.
-
Attach short top stretchers
Attach the two short top stretchers using 2 1/2 inch pocket screws.
-
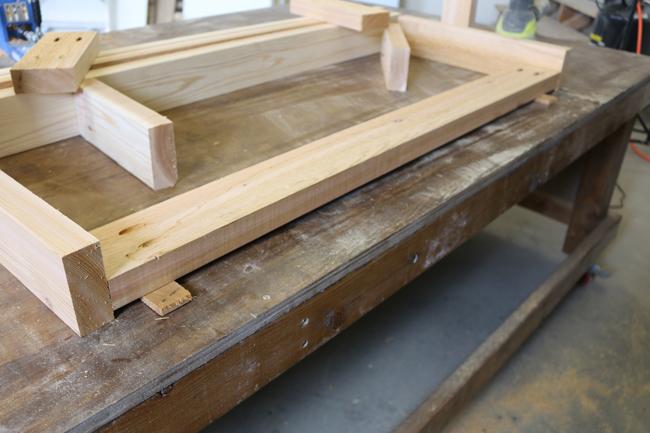
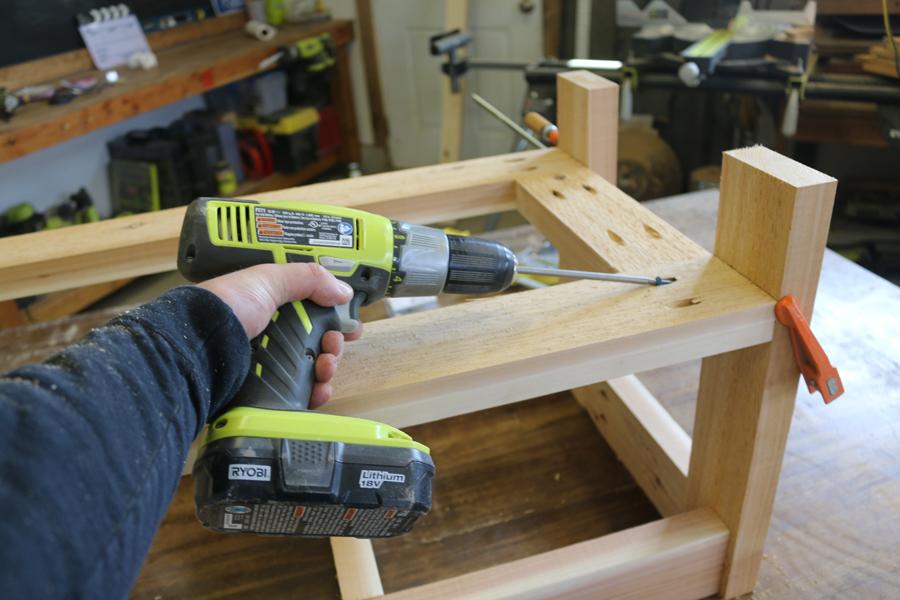
Connect underside supports
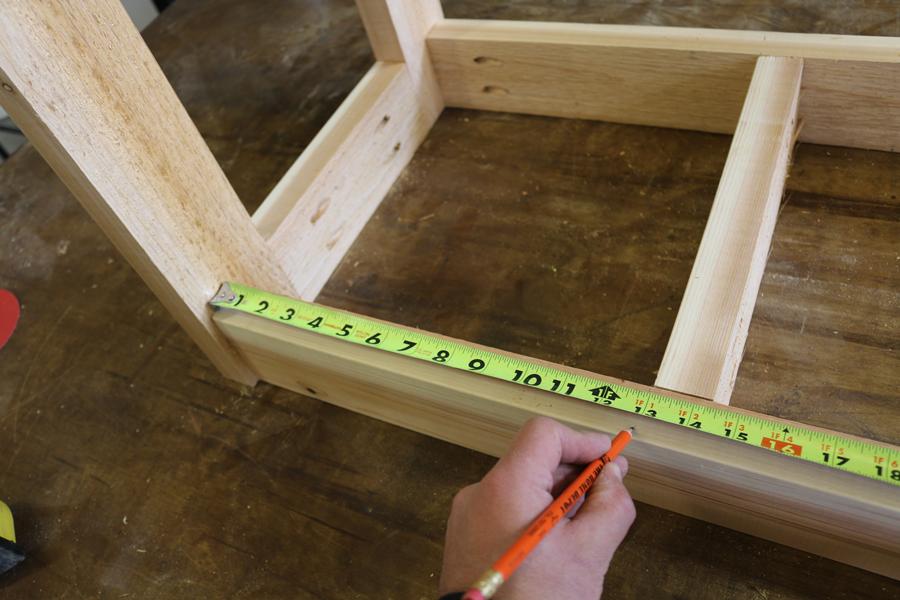
Measure in 13 inches from the inside of each leg. Then connect the two underside support boards using pocket hole screws.
-
Assemble lower shelf support
Assemble the lower shelf support on a flat surface.
-
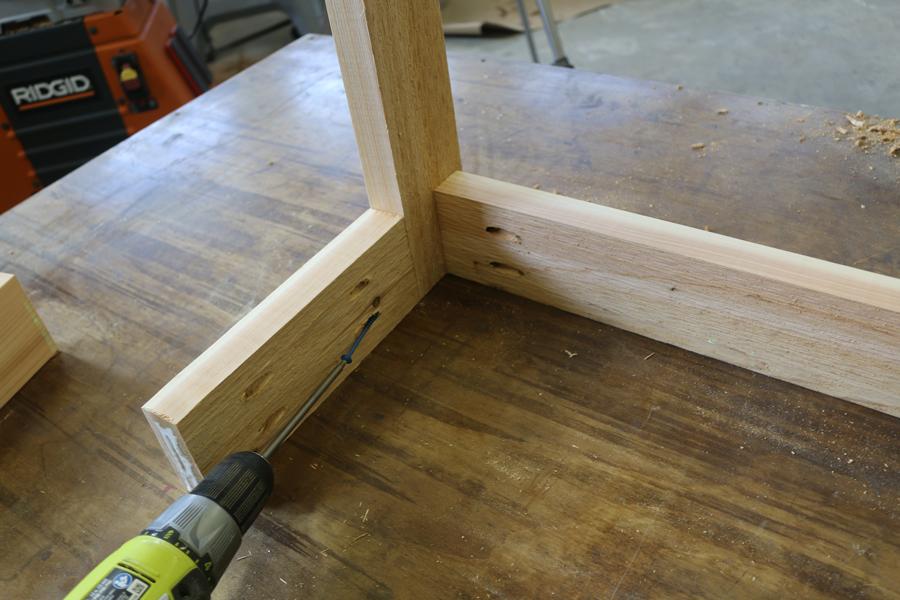
Attach lower shelf
Measure 3 1/2 inches from the bottom of each leg and put a mark. Attach the lower shelf support / bottom stretchers to each leg at the mark (3 1/2 inches from the ground).
-
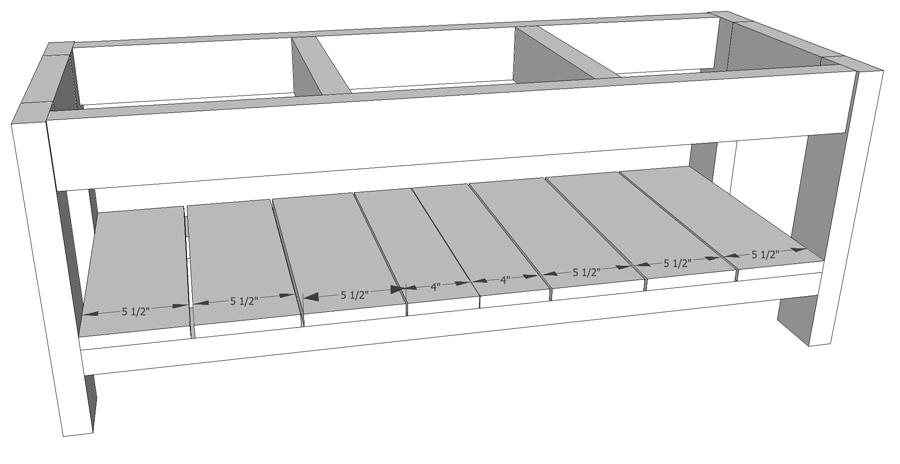
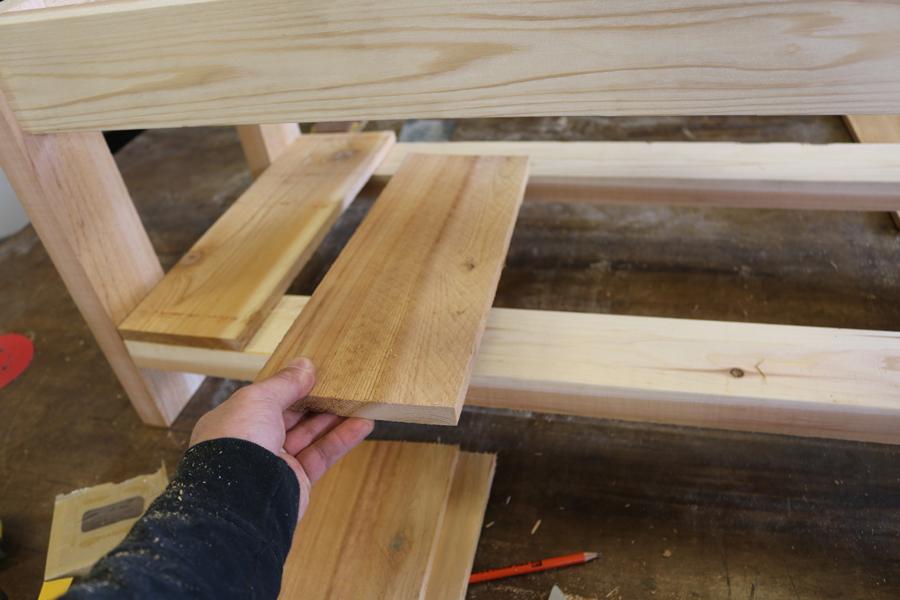
Place pickets for shelf
Cut each fence picket to 17" in length. Six of the pickets will be the full 5 1/2 inch width. Use a table saw to rip two of the pickets down to 4 inches in width for the two center boards. Attach using glue and 1 1/4 inch screws or nails.
-
Cut bench top boards
Cut the bench top boards to 46 1/2 inches long. Then use a table saw to rip the width of the two inside boards to 3 3/8 inches.
-
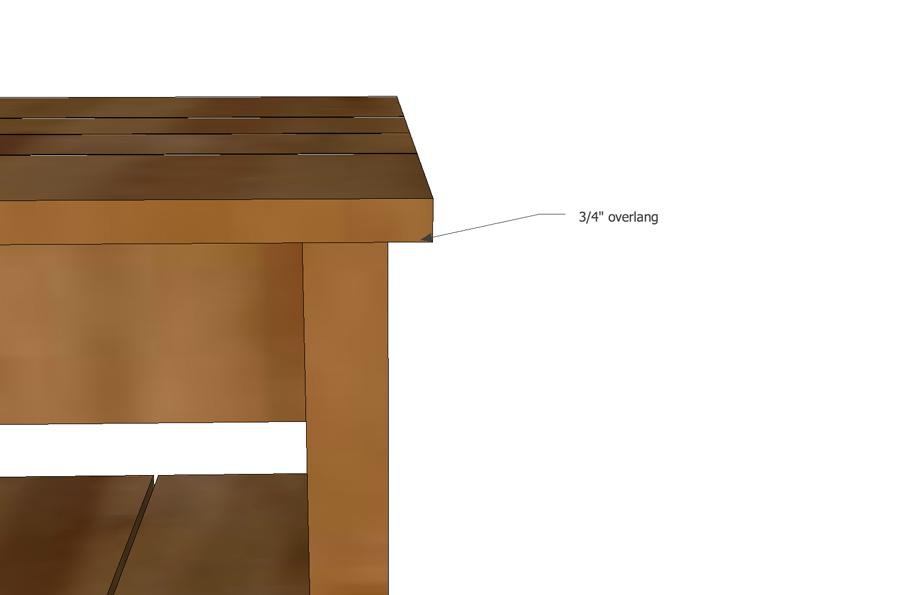
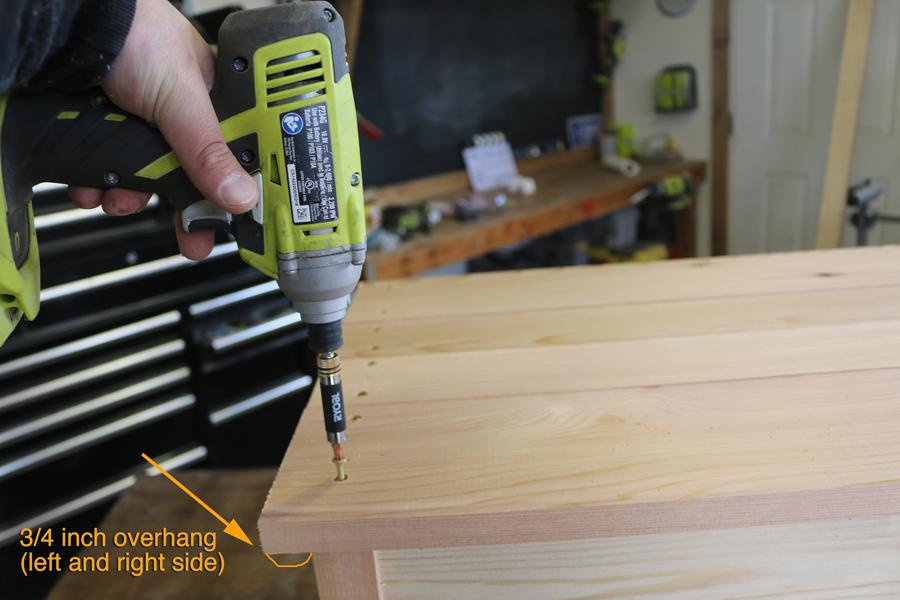
Assemble bench top
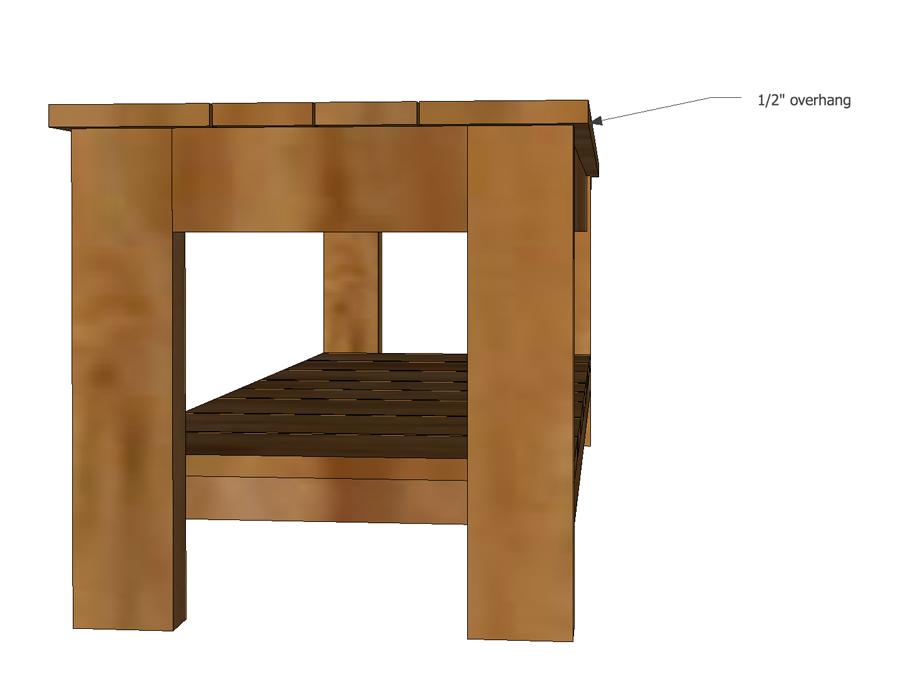
Assemble the bench top. Use a combination of wood glue and 1 1/4 inch screws. The left and right side will have a 3/4 inch overhang similar to the diagram. The front and back will have a 1/2 inch overhang. The boards will have a slight gap between each.
-
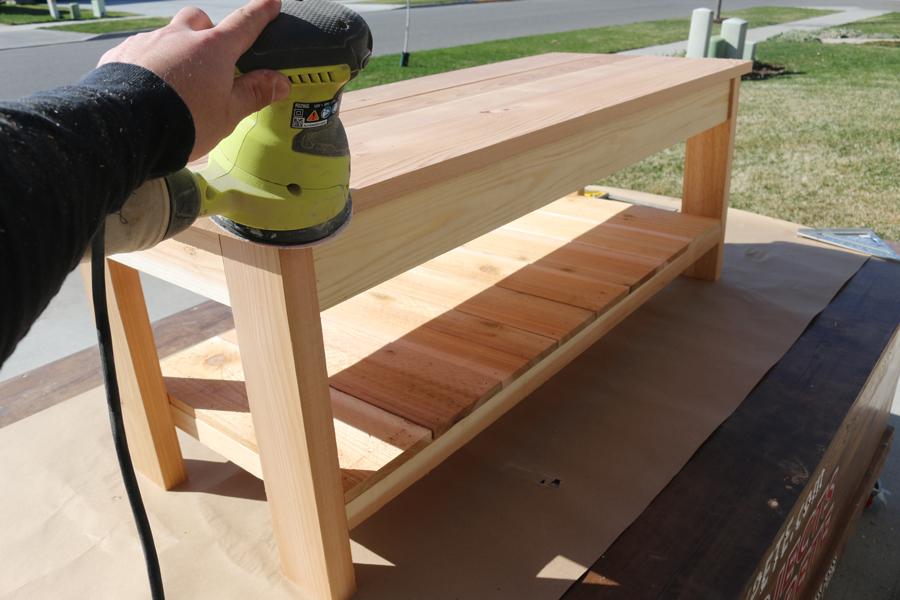
Sand
Sand the finished piece prior to staining or sealing using 120 or 220 grit sandpaper.
-
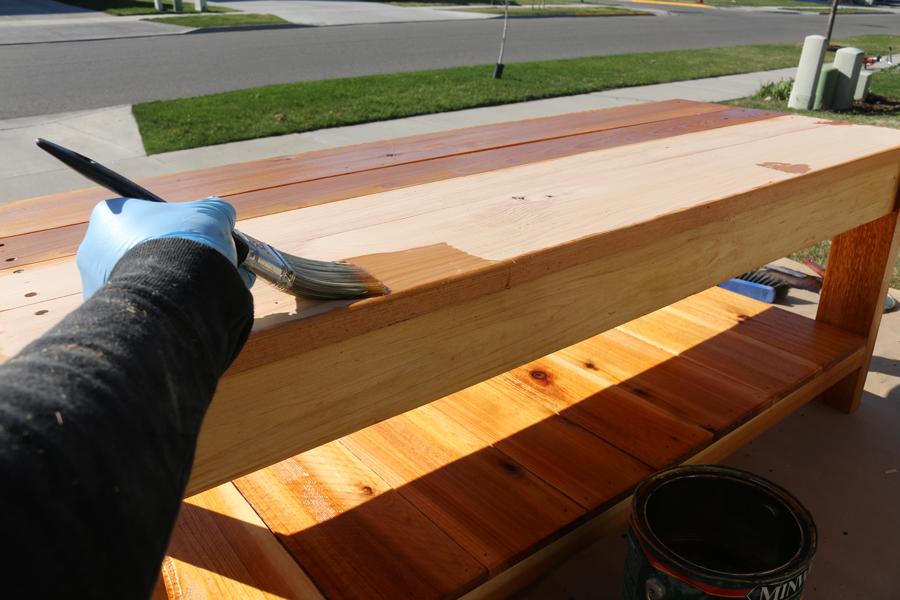
Stain, Paint, or Seal
Complete the project with your choice of finish. I used an outdoor clear finish oil based spar varnish.
-
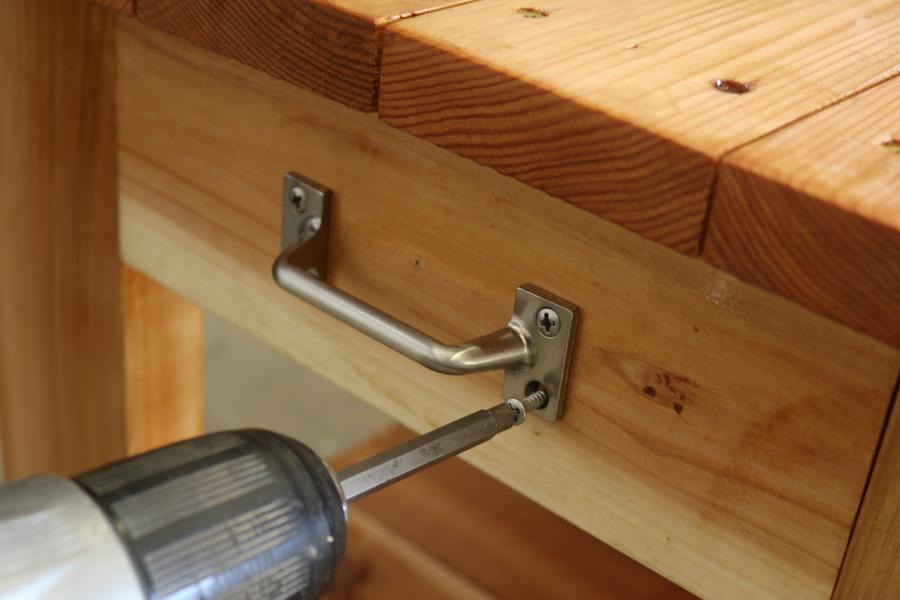
Attach hardware
Attach hardware as needed once the finish is dry. I used a couple utility handles on each side, and one coat hanger to hang work gloves or a hand garden shovel.
-
Enjoy
Congratulations on your build!