

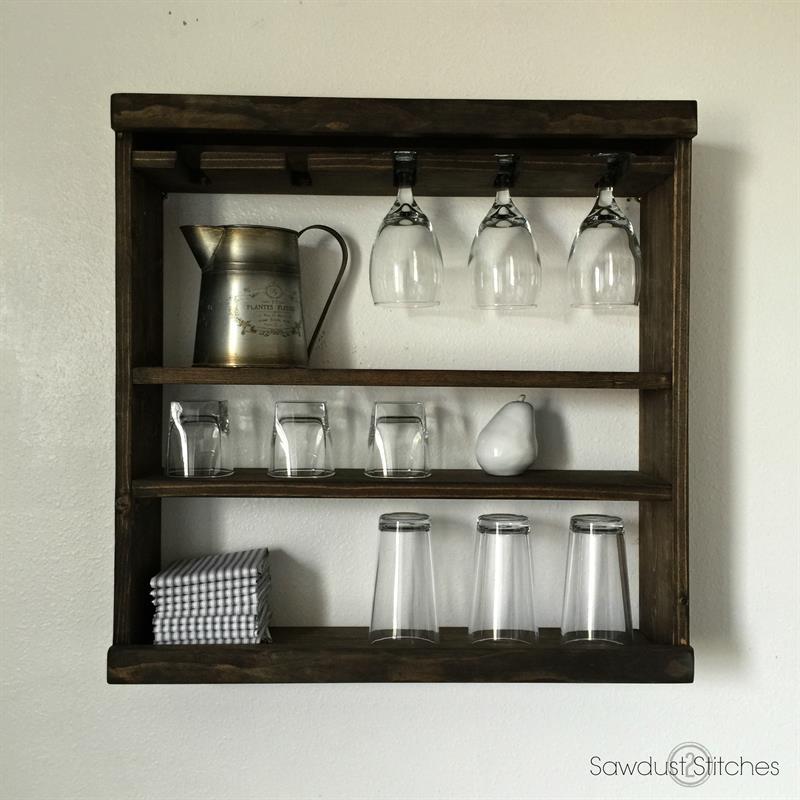
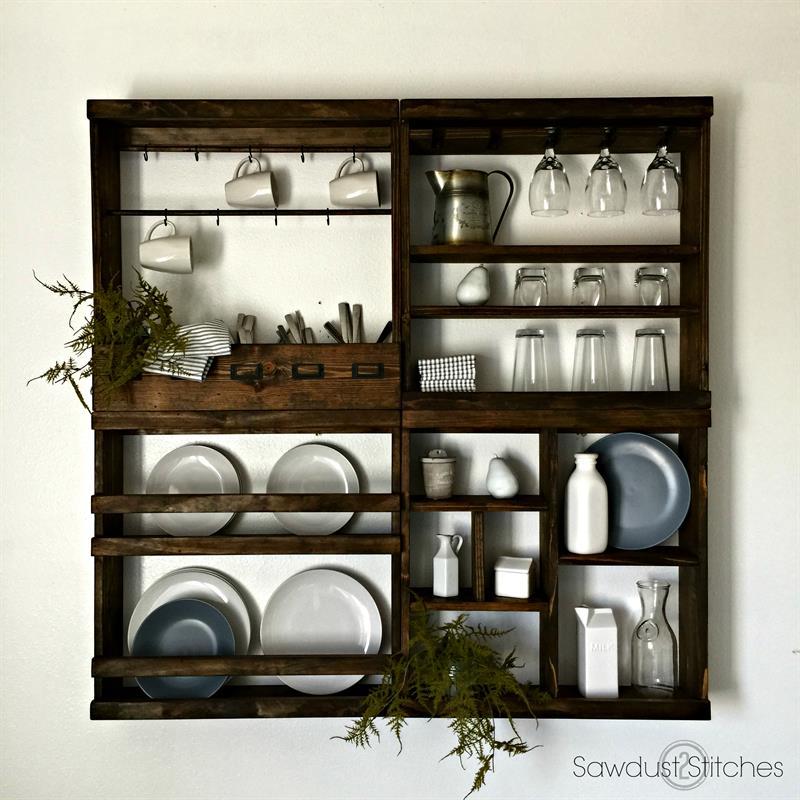


A great compromise of form and function. This Pottery Barn inspired glass rack, is part of a modular set that can be used in combination with other modular pieces (see image 2), or it can be used alone!
Tools
Other Tools
-
Jigsaw

-
Miter Saw
-
Tape Measure
-
Drill (cordless)
-
Nail Gun
-
Sander
Materials
Wood Products
- 1 Board , 1x2 , 96"
- 2 Board , 1x6 , 96"
Hardware & Supplies
- 1 2" 16 gauge finish nails
- 1 Wood Glue
- 2 Mounting brackets
- 1 Desired Paint and/or Stain
Directions
-
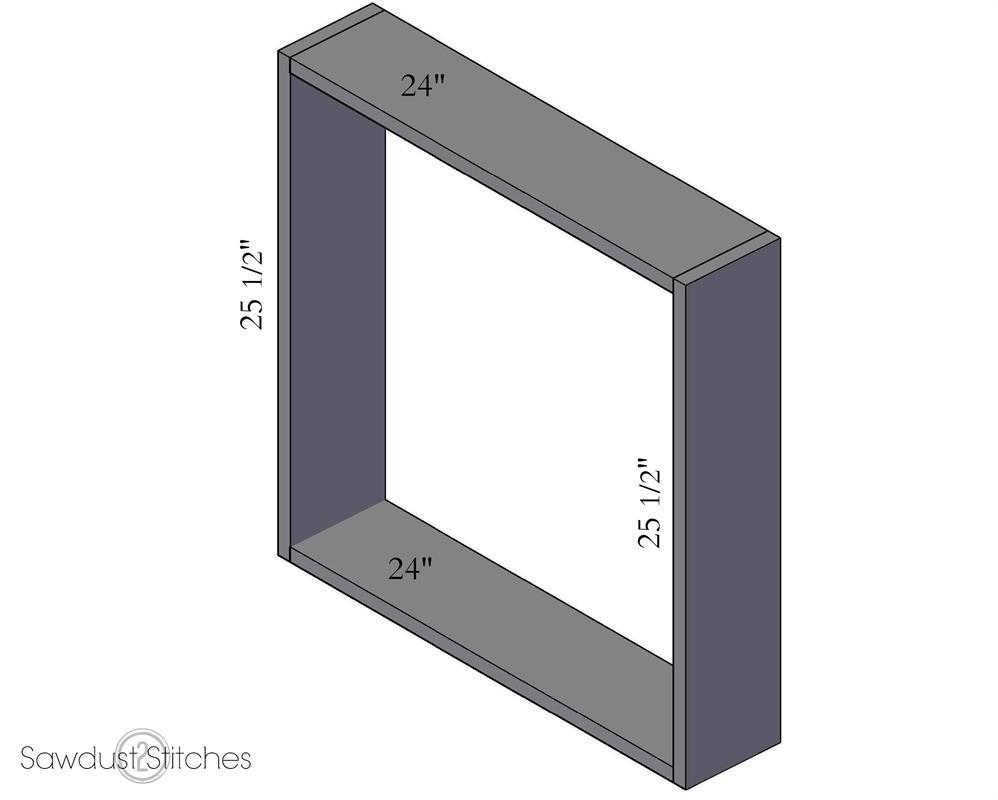
Frame
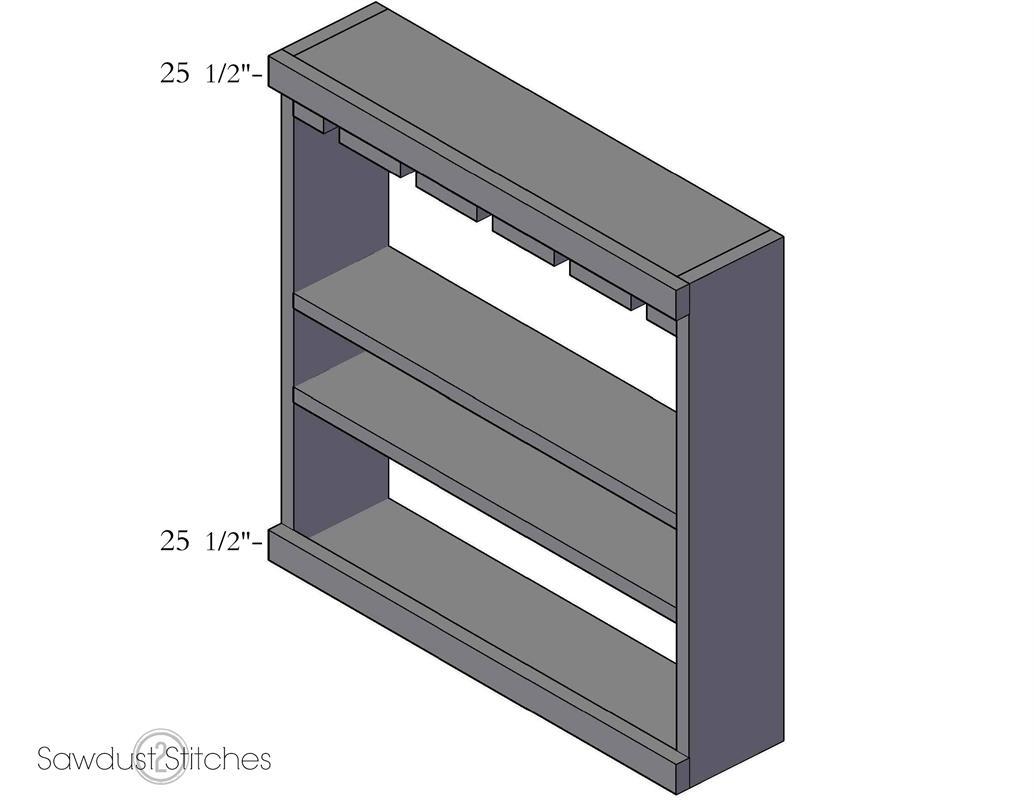
Join both 25 1/2" and 24" 1x6" boards using wood glue and 2 inch, 16 gauge finishing nails. This will form a 25 1/2" square. Secure using glue and 2" 16 gauge finishing nails.
-
Shelves
Place cut out 1"x 6"x 24" so that the base of the board is 3" from the top of the unit. Secure with wood glue, and 2" 16 gauge nails.
Place 1"x 6"x 24" so that the base of the board is 12" from the top of the unit. Secure with wood glue, and 2" 16 gauge nails.
Place 1"x 6"x 24" so that the base of the board is 18" from the top of the unit. Secure with wood glue, and 2" 16 gauge nails.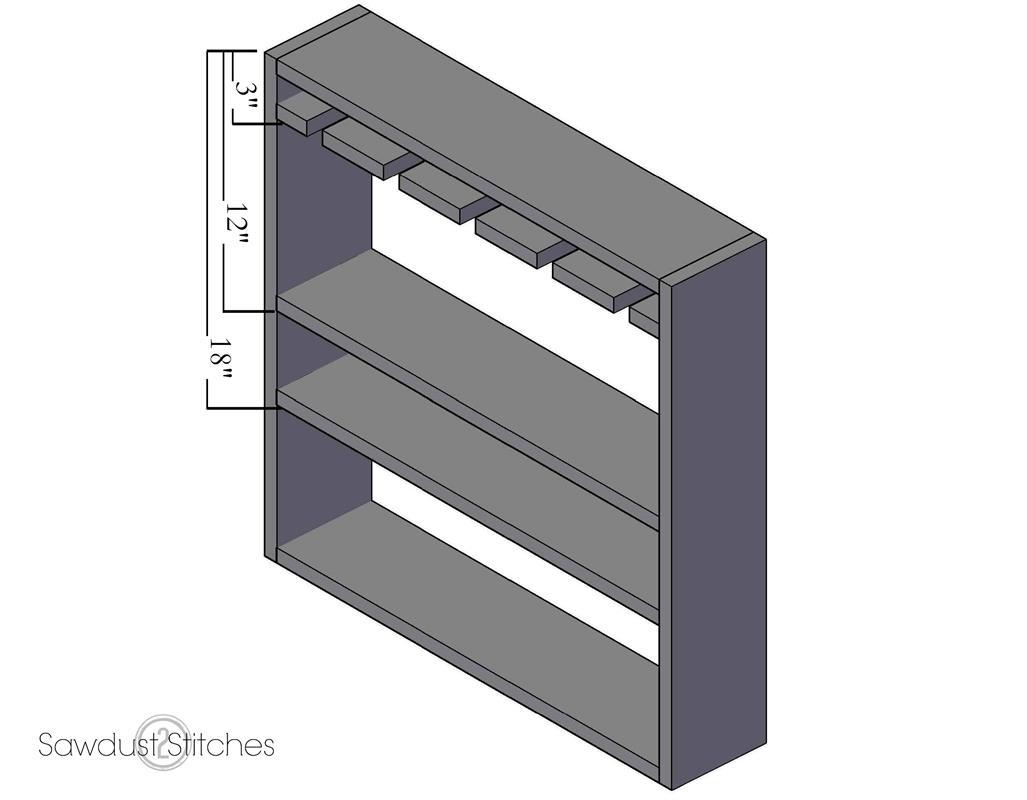
-
Front Rails
Attach the 25 1/2" 1x2" board(s) to the face of the unit using wood glue and 2 inch 16 gauge finishing nails.
-
Back Support
Attach the remaining 24" 1x2"board using wood glue and 2 inch 16 gauge finishing nails. This is an ideal place to attach the unit to the wall, or you can attach hanging hardware to the back.
-
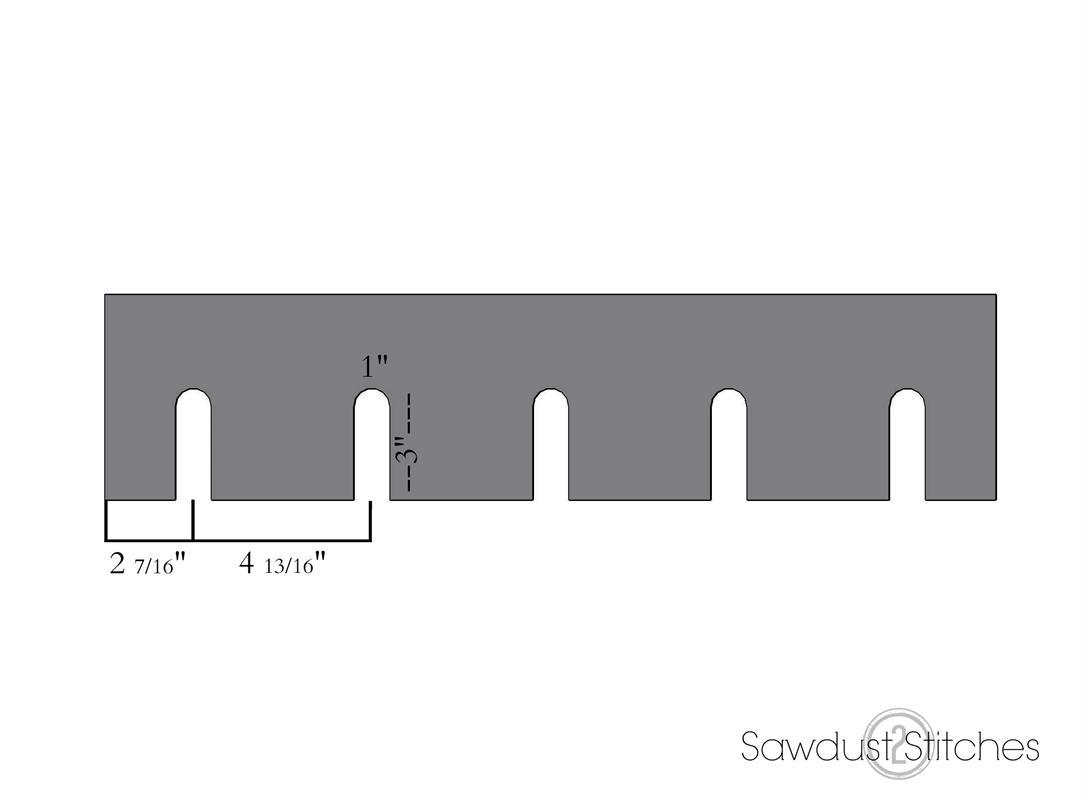
Glass Rack Cut Out
The glass rack cutout will be made out of one of the 1"x 6" x 24" boards. Use a jigsaw to cut out 1' wide and 3" deep cut outs. Use the dimensions on the diagram to find the center to center placement of the cutouts.
-
Finish
Fill all nail holes with wood filler. Sand smooth, then apply desire stain and/or paint.