

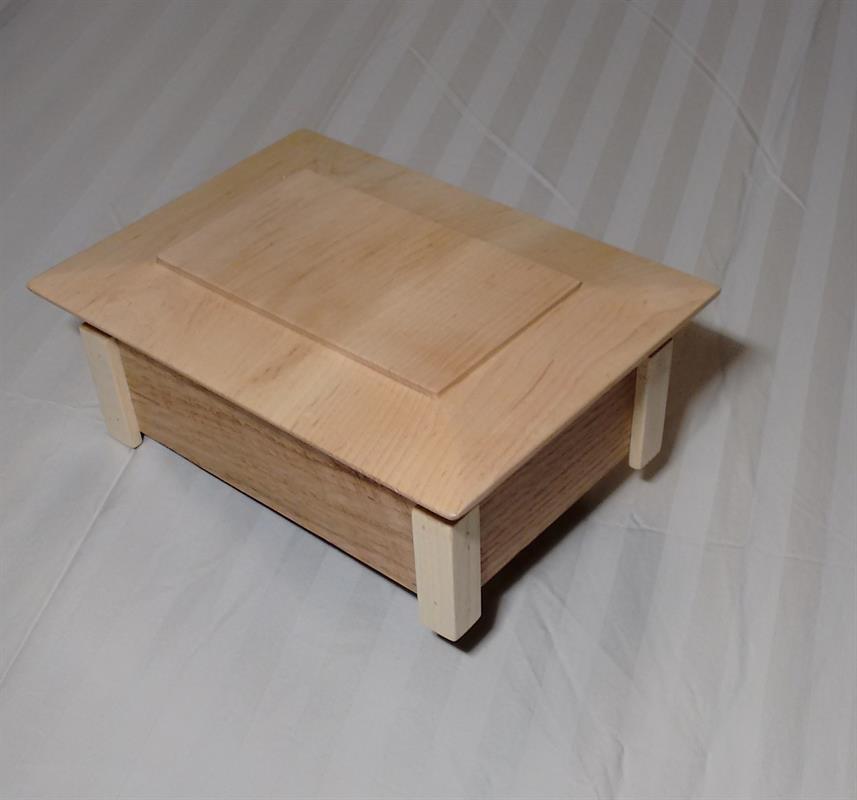
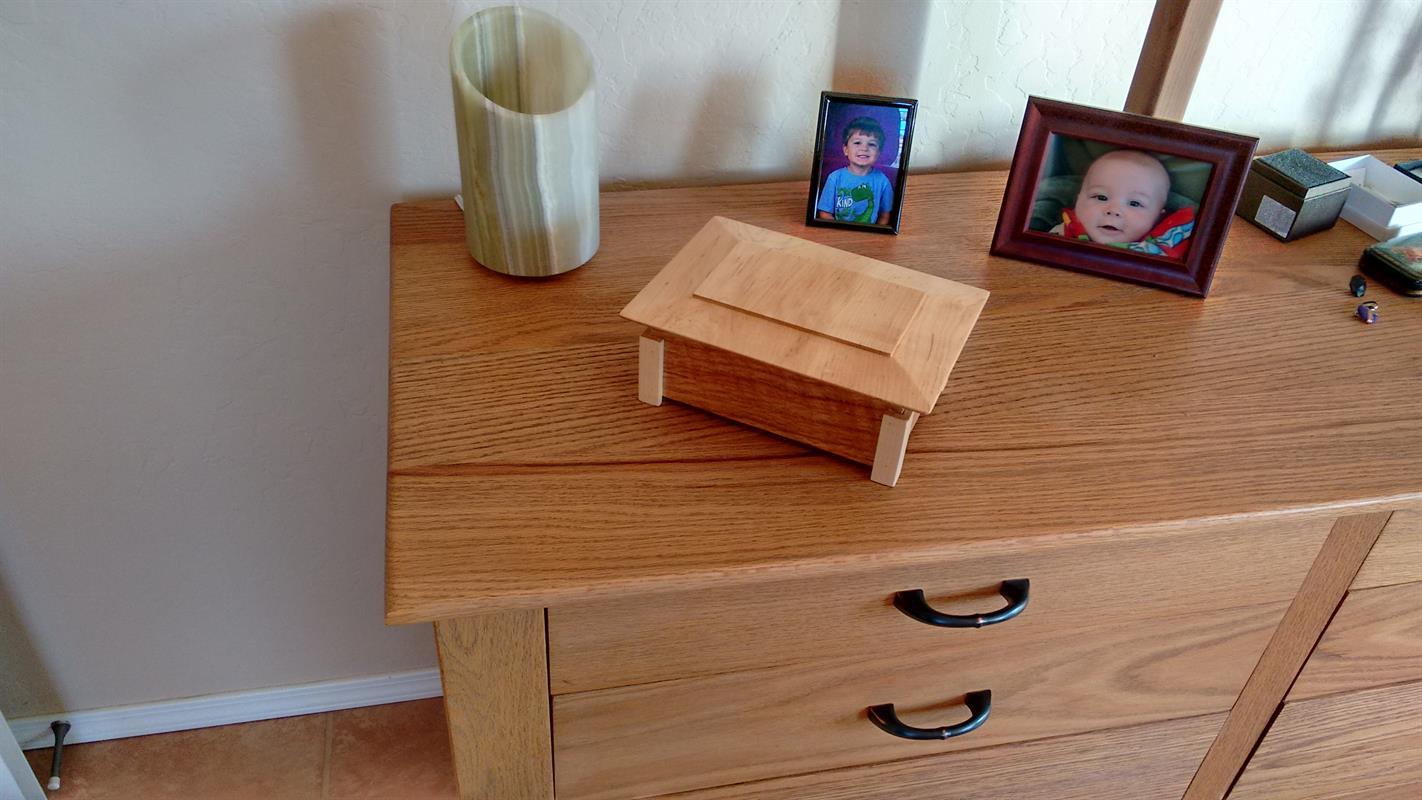


Designed in the style of the arts and crafts movement this charming little storage box makes a great weekend project. Whether made as a gift, for personal use or to sell, this box will be greatly appreciated. The contrast between two wood species highlights the design and is quite visually pleasing.
Tools
Kreg Tools

Other Tools
-
Jointer

-
Miter Saw
-
Table Saw
-
Tape Measure
-
Thickness Planer
-
Nail Gun
-
Router
-
Sander
-
Air Compressor
-
Shop Vacuum
-
Dust Collector
Materials
Wood Products
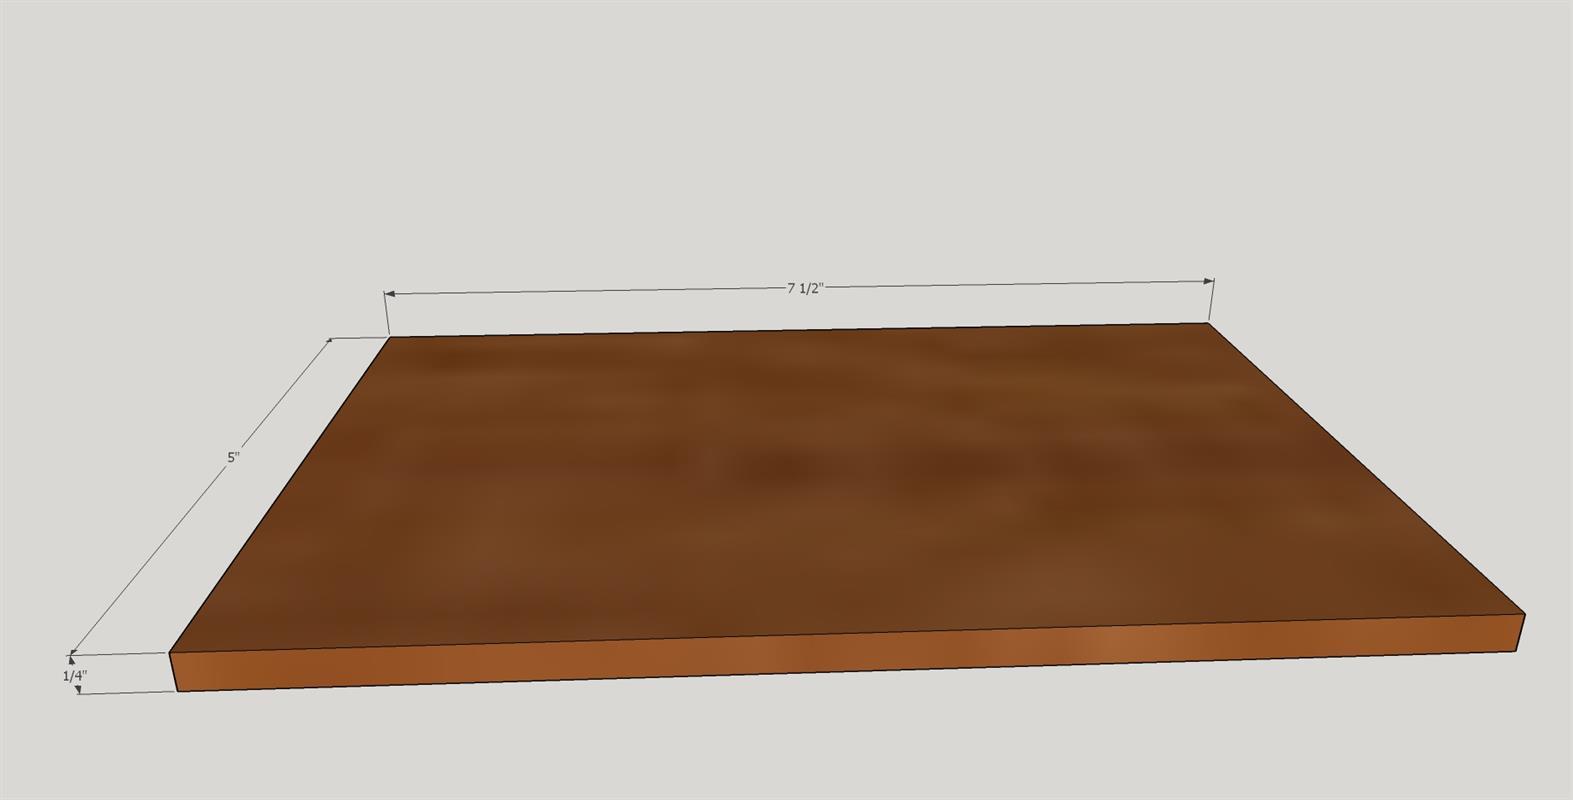
- 1 Oak Plywood , 1/4" Thick , 7 1/2" X 5"
- 1 1/2" Oak board , 1x4 , 36"
- 1 1/2" Hard Maple board , 1x8 , 12"
- 1 1/2" Poplar board , 1x4 , 12"
- 1 3/4" Hard Maple board , 1x2 , 12"
Hardware & Supplies
- 20 5/8" pin nails
- 1 Titebond 1 wood glue
- 3 Sandpaper 100 - 220 grit
- 1 Minwax Weathered Oak Stain
- 1 Minwax Tung Oil
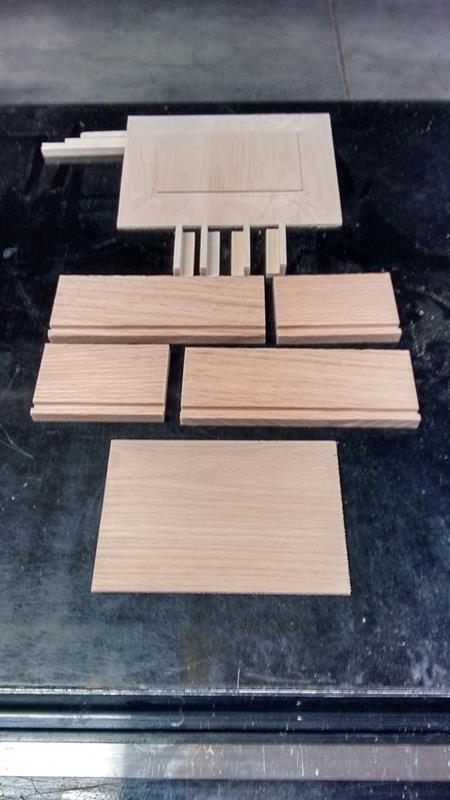
Cut List & Parts
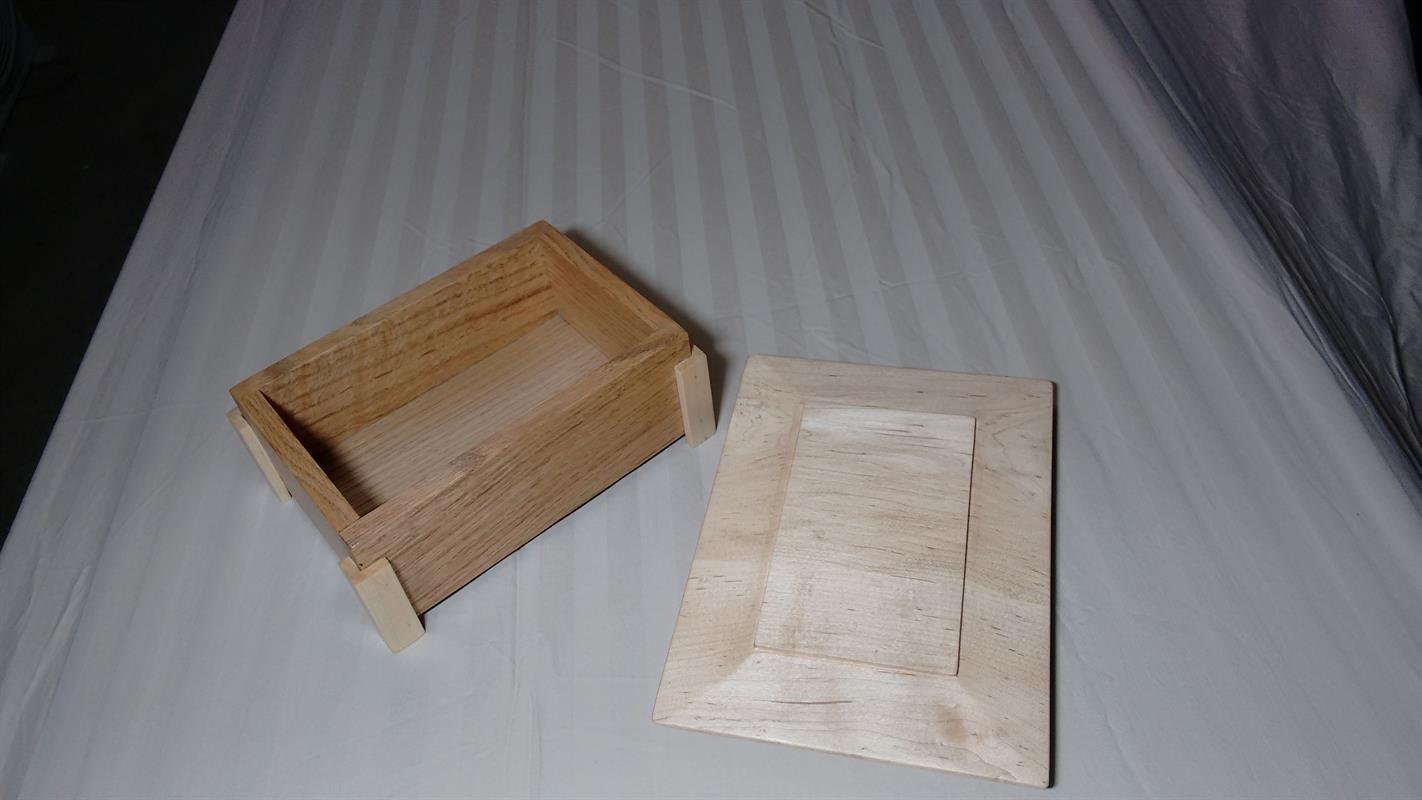
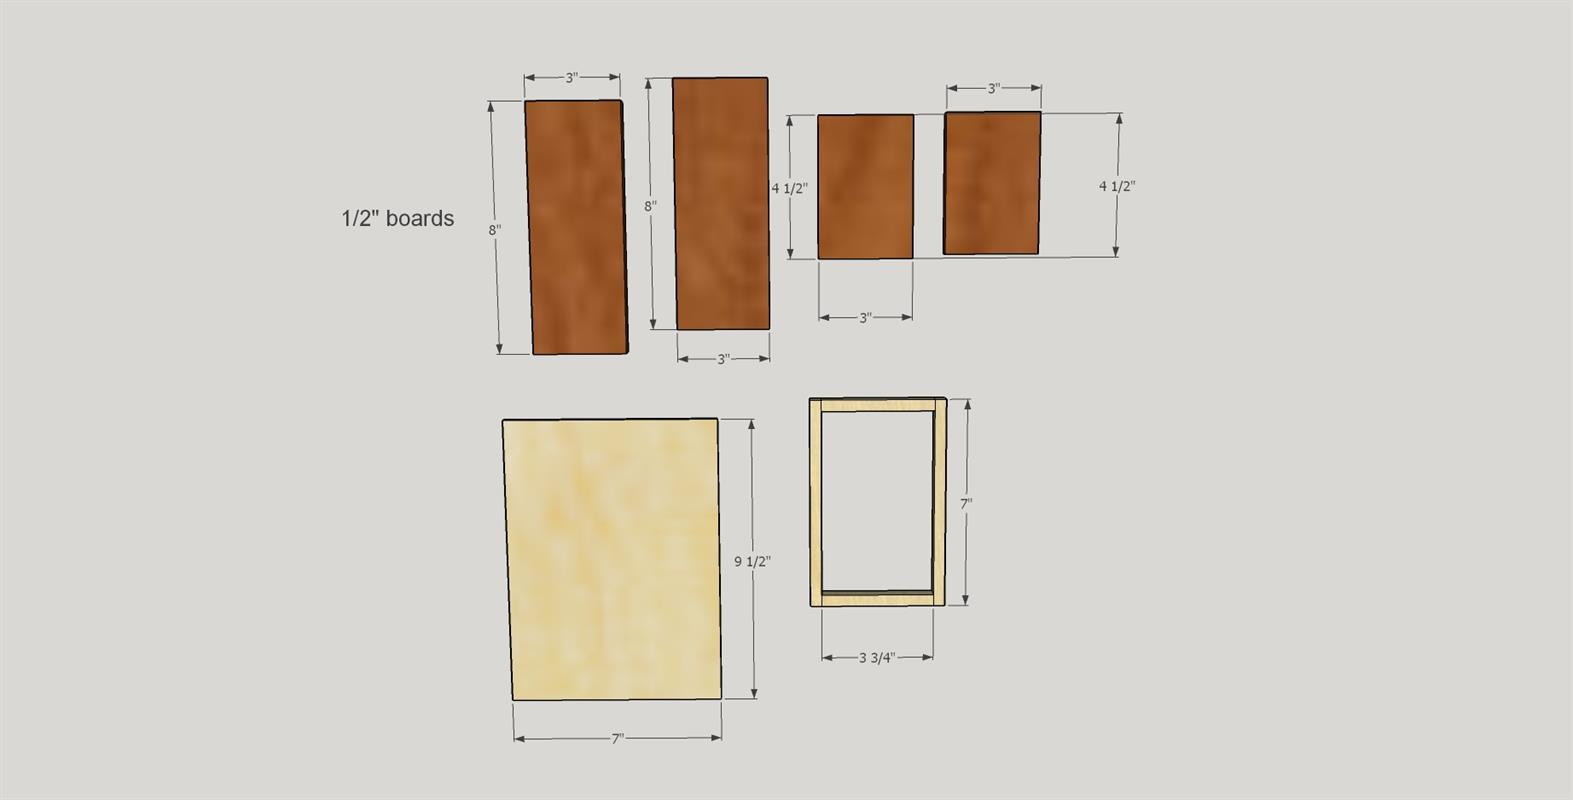
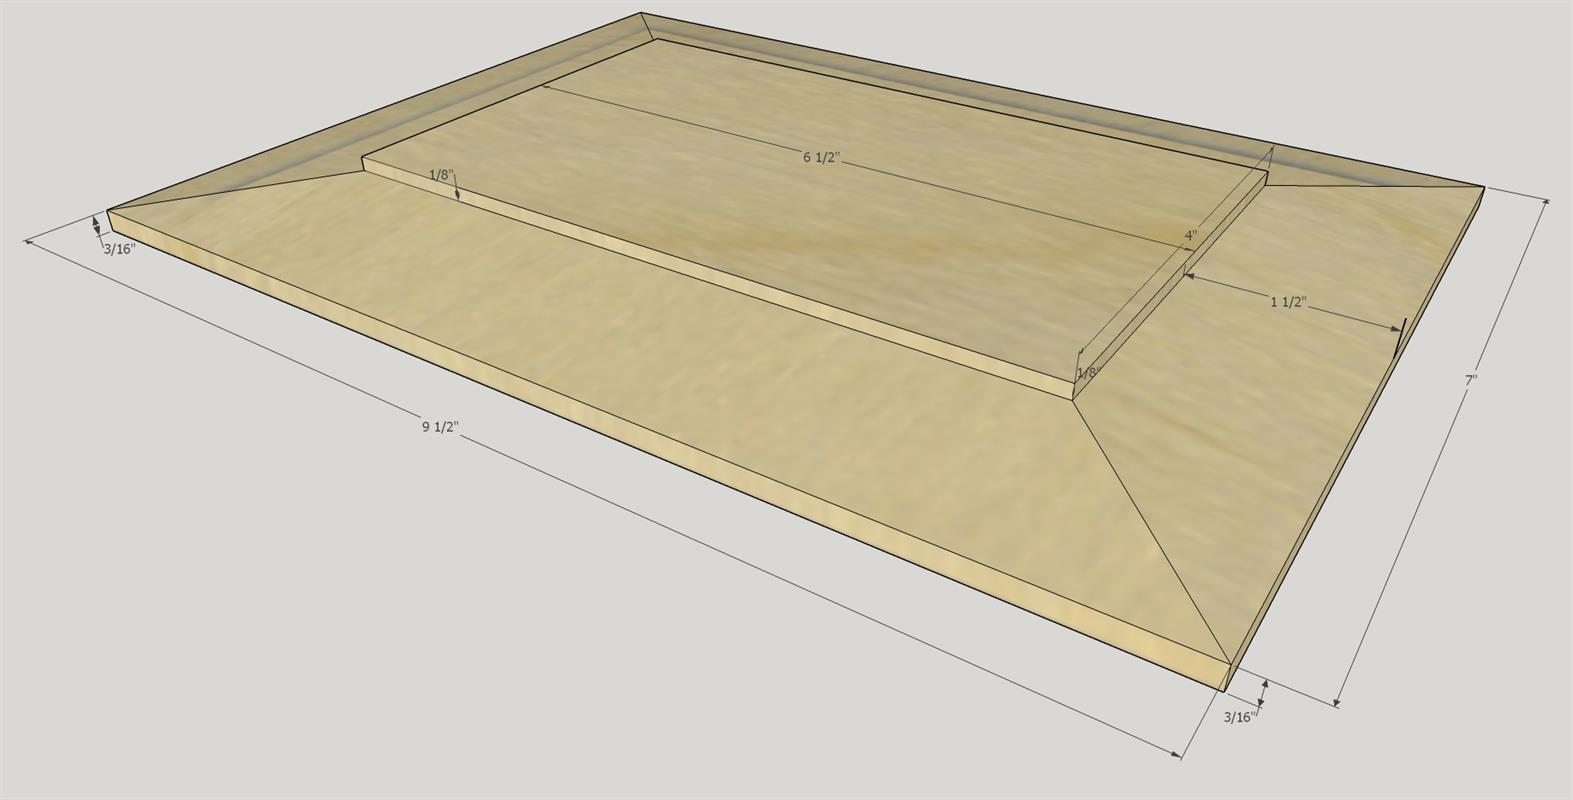
- 1 Maple Box Top , 1/2" X 9 1/2" X 7"
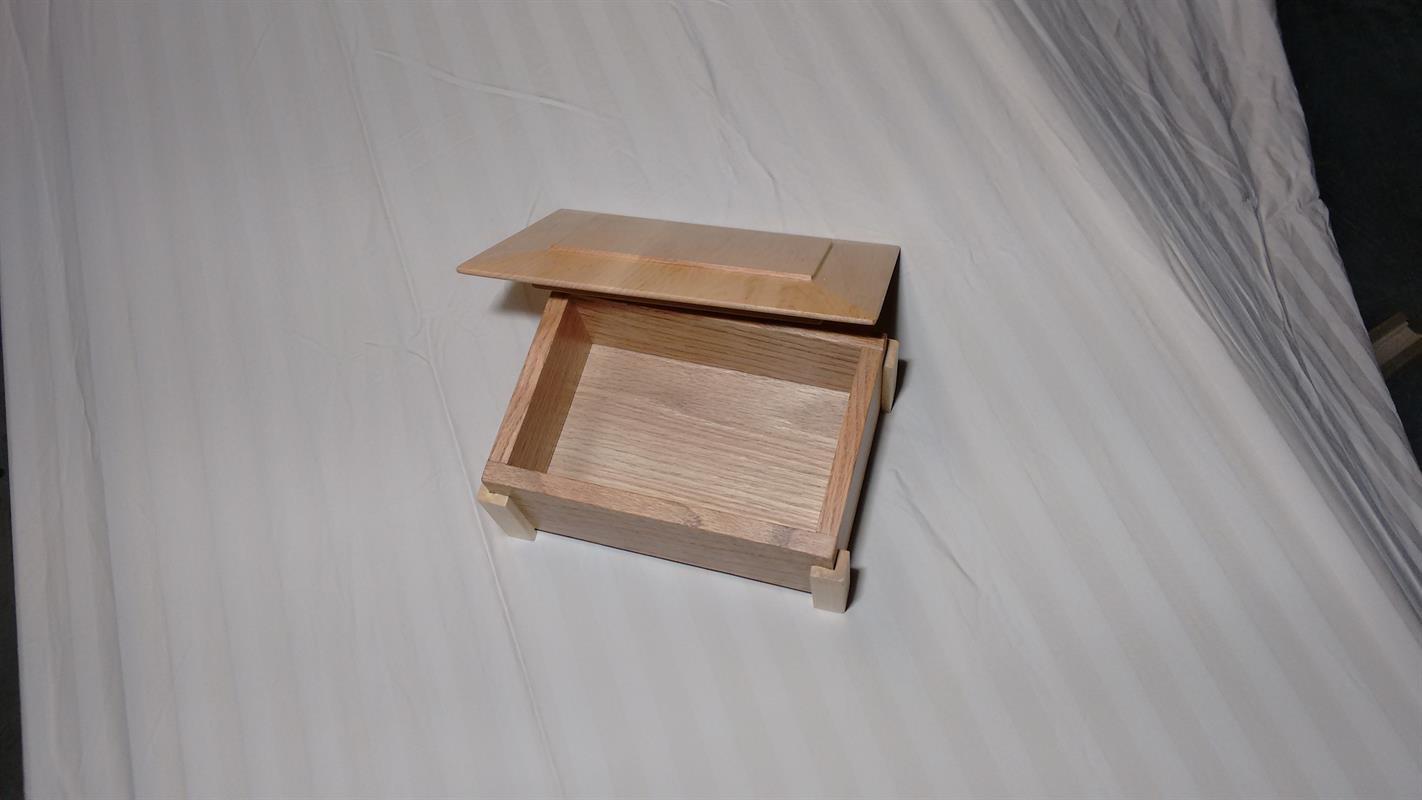
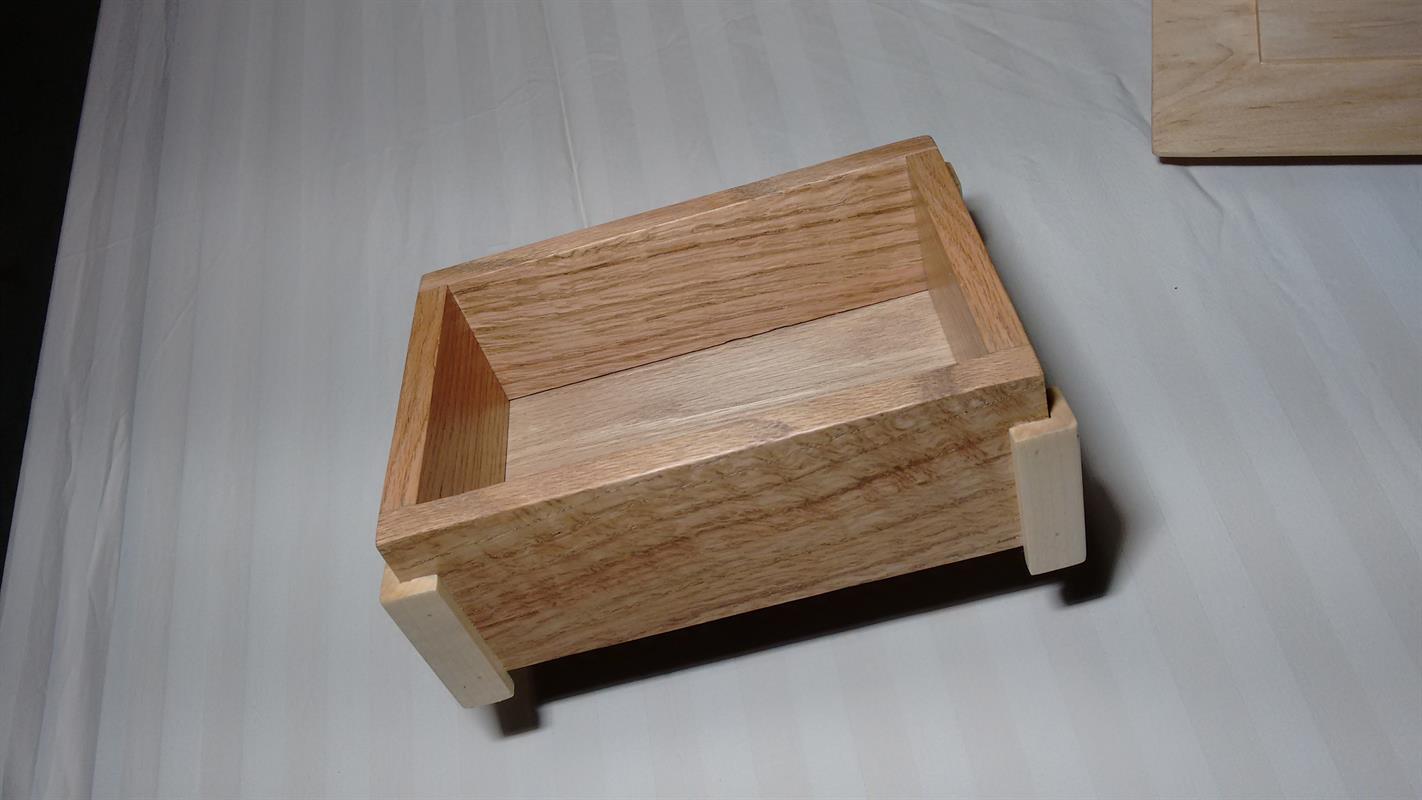
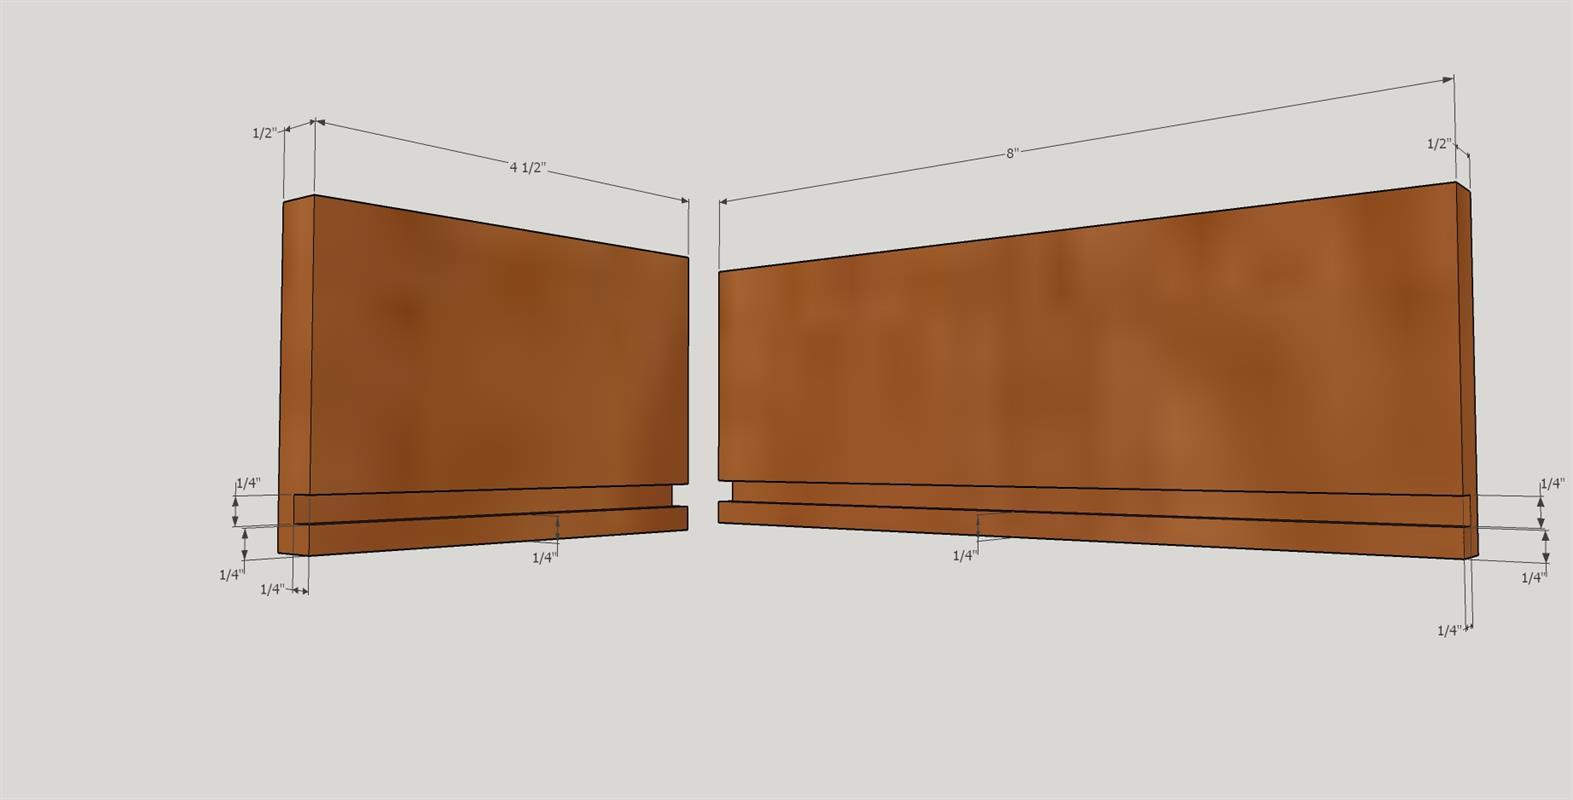
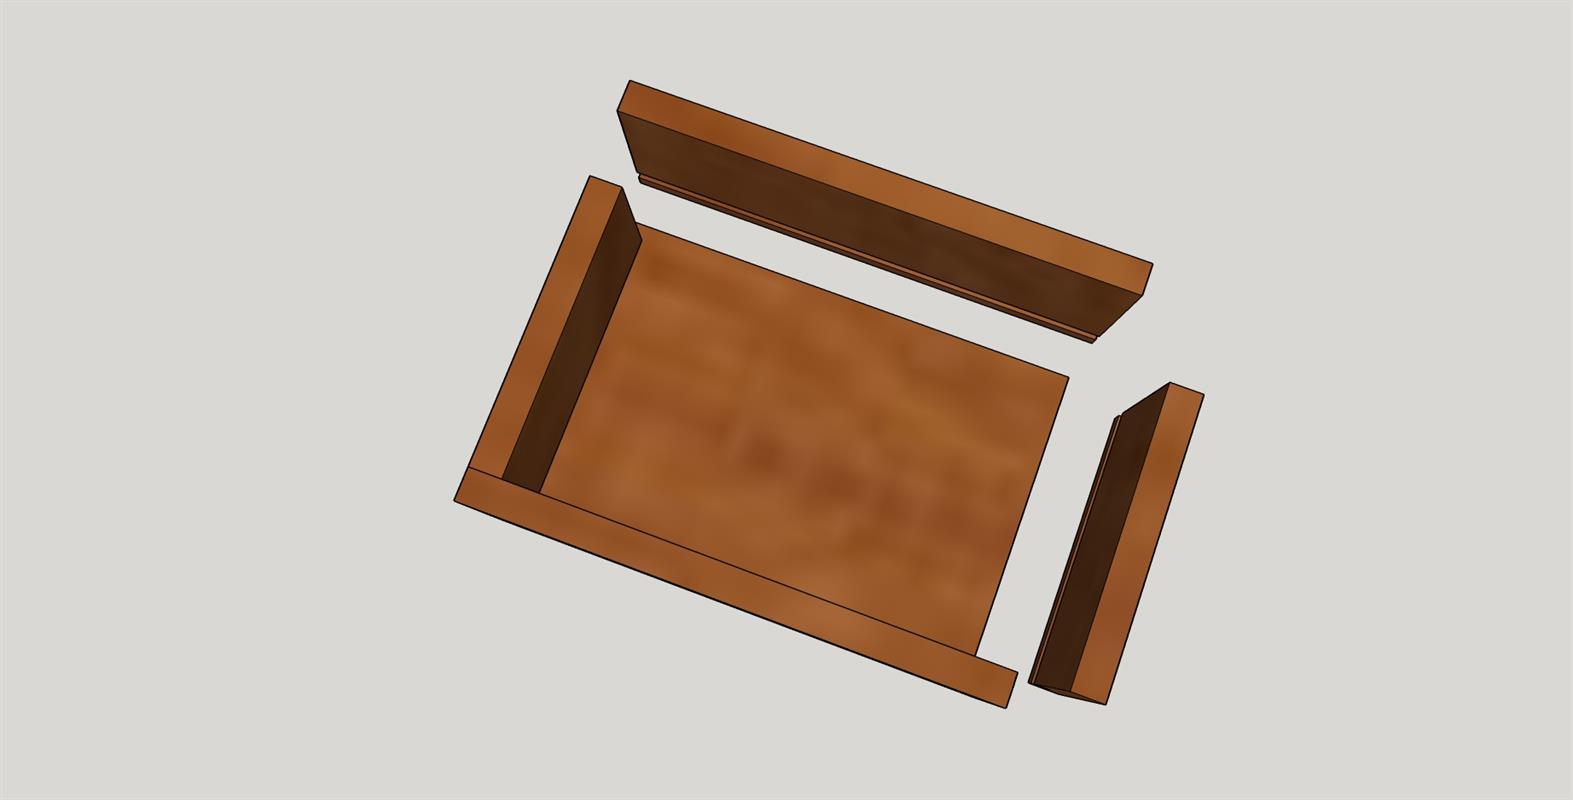
- 2 Oak Long Sides , 1/2" X 8" X 3"
- 2 Oak Short Sides , 1/2" X 4 1/2" X 3"
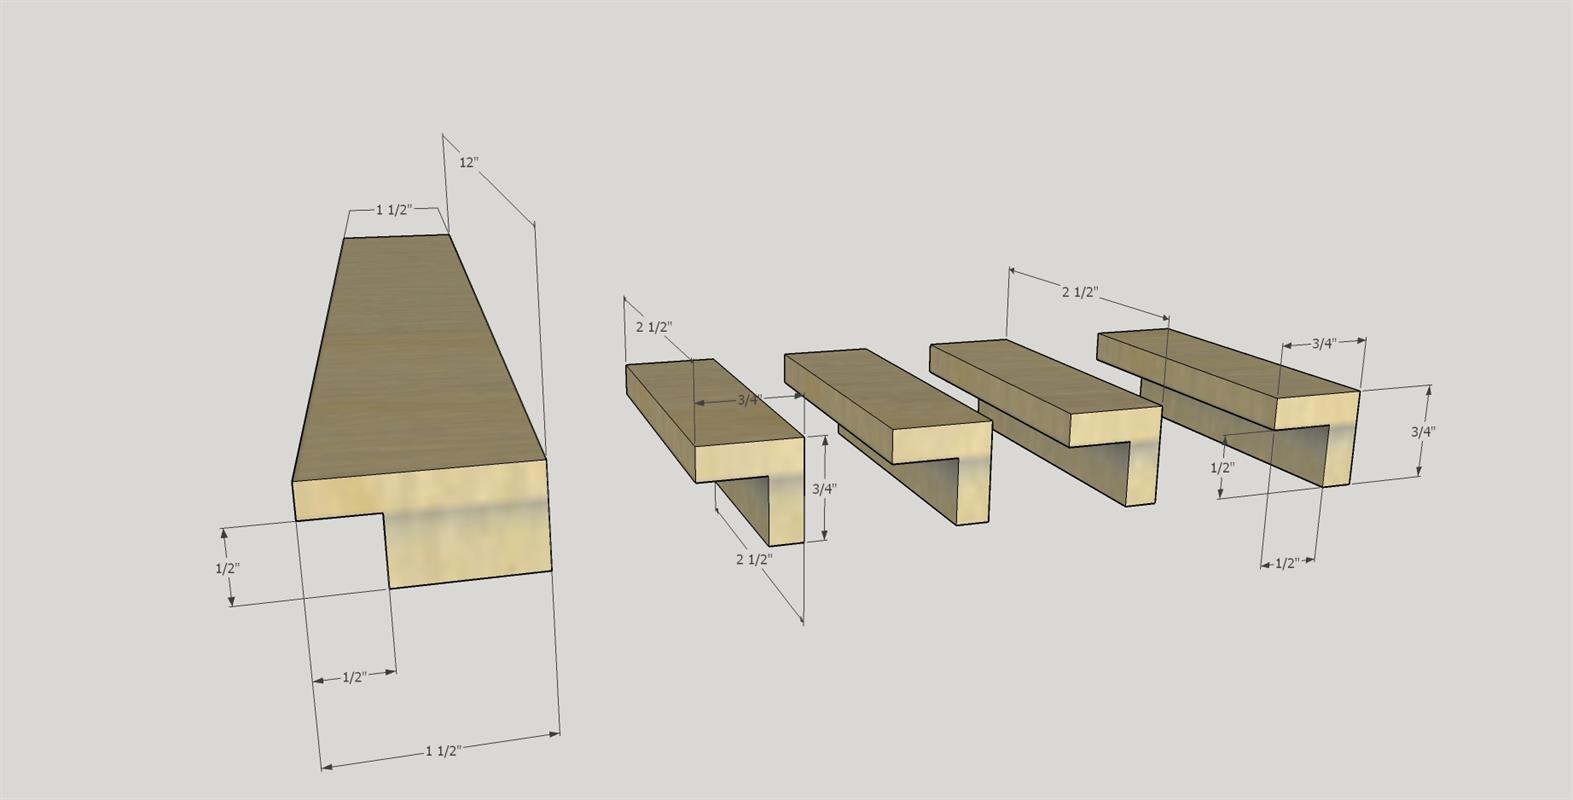
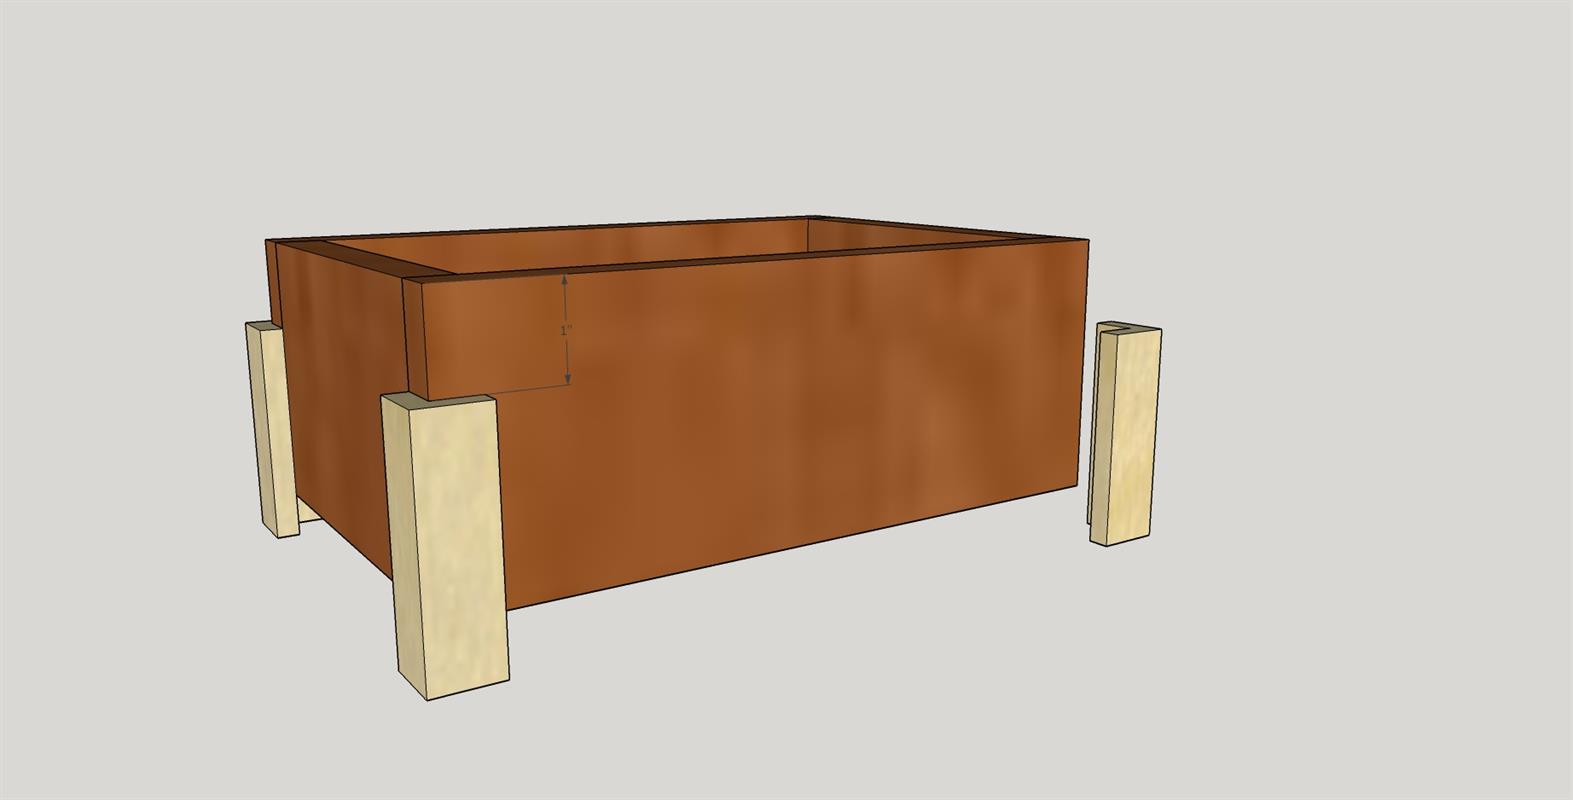
- 4 Maple Legs , 3/4" X 3/4" X 2 1/2"
- 1 Oak Plywood Bottom , 1/4" X 7 1/2" X 5"
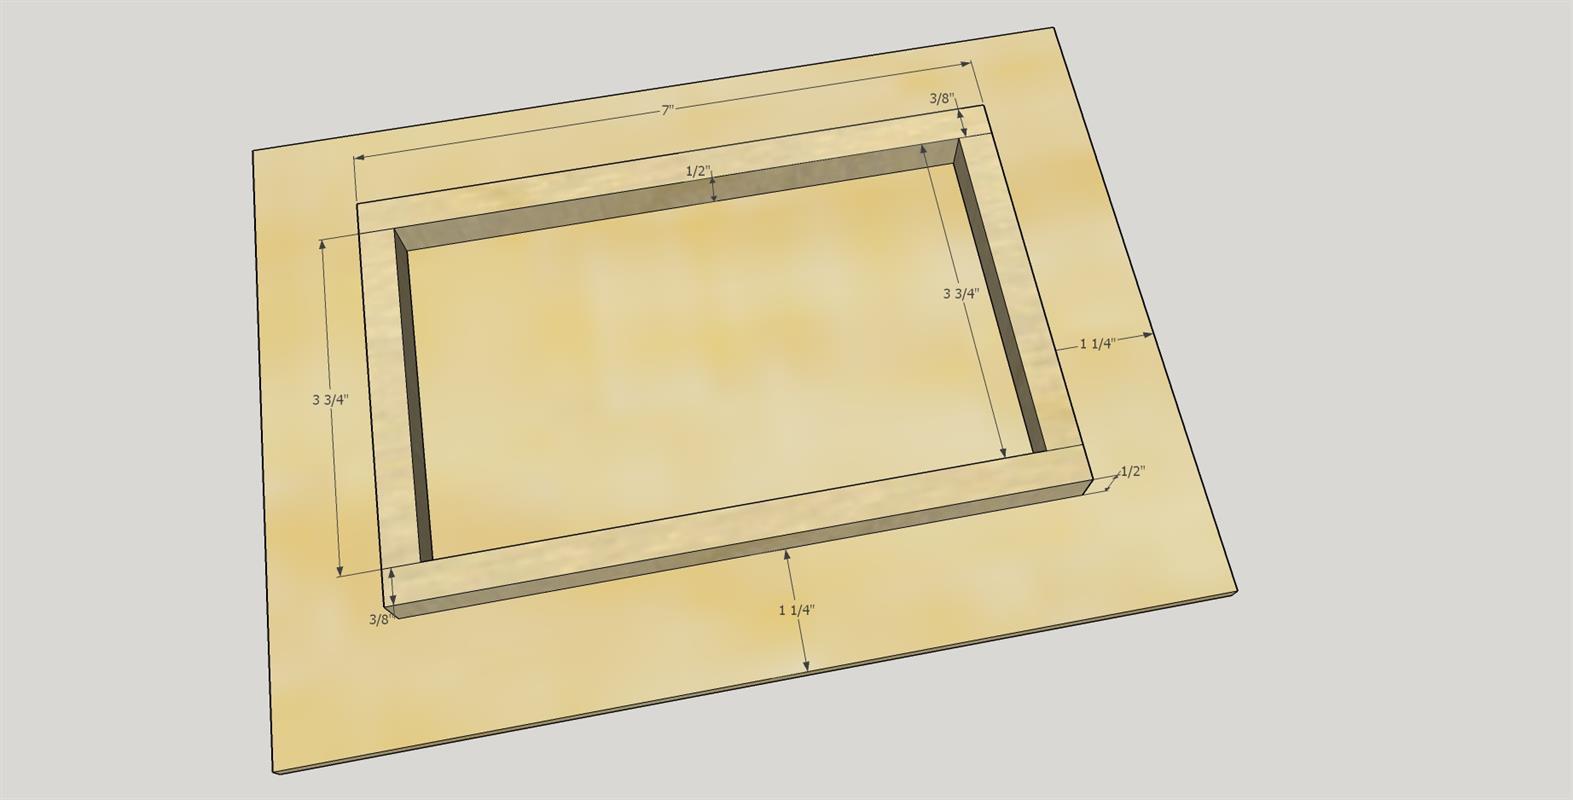
- 2 Poplar Long Top Frame , 1/2" X 3/8" x 7"
- 2 Poplar Short Top Frame , 1/2" X 3/8" X 3 3/4"
Directions
-
Introduction
Please be sure to read through complete instructions before you begin any work on this project.
-
Cut 1/2" boards
Following the cut list provided - cut the top, short sides, long sides, short top frame sides and long top frame sides from the 1/2" thick boards.
-
Cut legs from 3/4" board
Use either a table saw or a router table with a straight bit to cut a 1/2" X 1/2" rabbet in the edge of the 1 X 2 X 12 inch board. Then use a table saw to rip a 3/4" X 3/4" X 12" board from the rabbeted edge. Then cross cut that board into the four 2 1/2" long legs. Use 100 and 150 grit sandpaper to smooth all of the leg surfaces.
-
Cut bottom from 1/4" plywood
Use a table saw to cut the bottom board from 1/4" plywood. Use 100 and 150 grit sandpaper to smooth the bottom.
-
Cut dados in the sides
Use either a table saw or a router table with a straight bit to cut a 1/4" X 1/4" dado 1/4" up from the bottom edges of both the short and long sides. Use 100 and 150 grit sandpaper to smooth all of the sides.
-
Cut the top bevels
Use either a table saw or a router table with a raised panel bit to cut the four bevels in the top. The table saw method is what I used as raised panel router bits cost over $100. Please note that the border of the field is 1 1/2" X 1/8" deep and the bottom of the bevel is 3/16" deep. The angle I used on my table saw was 8 degrees. Use 100 and 150 grit sandpaper to smooth the top.
-
Attach top frame
Use 100 and 150 grit sandpaper to smooth the 4 top frame pieces. Measure the opening of the box and make any small adjustments to the length of the frame components so that the frame will fit snugly inside the box. Use Titebond I wood glue to attach the frame to the underside of the top.
-
Assemble box
Use Titebond I wood Glue at the corner butt joints and in the side dados. Assemble box using short sides. long sides and bottom. Hold the assembly together with clamps until glue drys. Check that the box assembly is square. If necessary loosen clamps and adjust until square.
-
Attach legs
Use Titebond I wood glue and 1" pin nails to attach the four legs to the box.
-
Finish
Now that the build is complete fill all nail holes and other imperfections with wood putty, let dry. Then use 220 sandpaper to do a once over on all surfaces in preparation for the finish. Clean well to remove all dust. (I use compressed air and clean dry rags). As I wanted to use this in our master bedroom with our craftsman style furniture (see designs on this website), I chose to use Weathered Oak Minwax Stain on the box sides and bottom. For the top and legs no stain was used. After the box stain was dry I used Minwax Tung Oil finish on the top and the box. I gave them three coats following manufacturers instructions.
