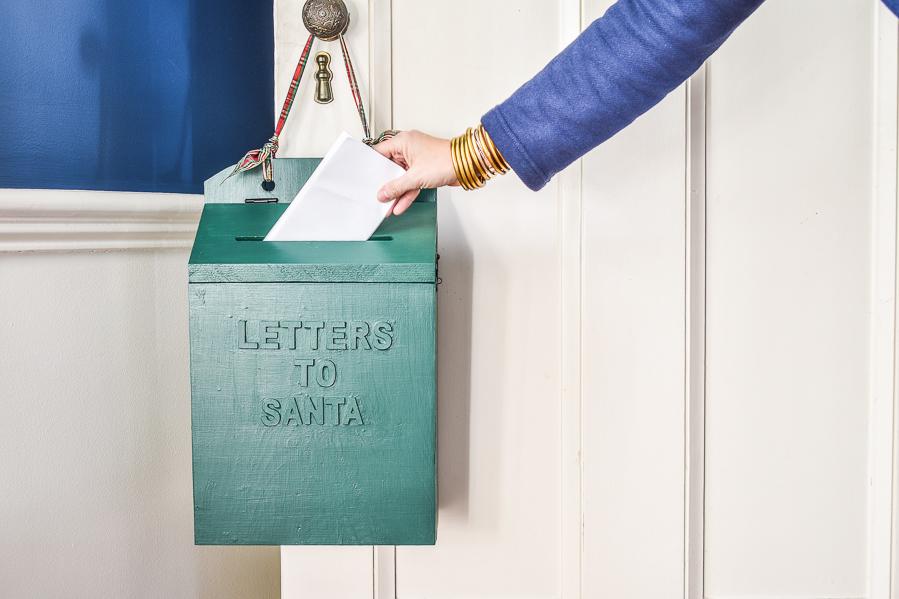


This mailbox will be the hit of your holiday season! What better way for your kids to leave a message for Santa then in their very own wooden mailbox with Letters To Santa label. Modeled after a vintage letter box, this is a fun project for season!
Tools
Kreg Tools


Other Tools
-
Circular Saw (corded)

-
Jigsaw
-
Miter Saw
-
Table Saw
-
Tape Measure
-
Clamps
-
Drill (cordless)
-
Router
-
Sander
Materials
Wood Products
- 1 Board , 1x12 , 72"
- 1 Board , 1x4 , 48"
Hardware & Supplies
- 2 1 1/2" hinges
- 12 1 1/4" kreg pocket screws
- 1 Small hobby hook and eye
Cut List & Parts
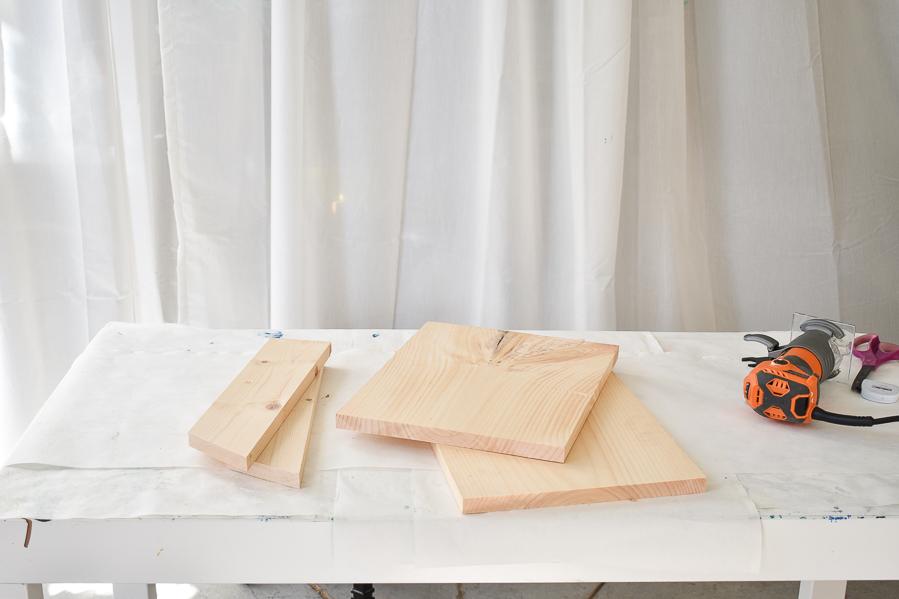
- 1 Front , 3/4" x 11 1/4" x 12 3/4"
- 1 Back , 3/4" x 11 1/4" x 17 7/8"
- 2 Sides , 3/4" x 3 1/2" x 14 7/8"
- 1 Bottom , 3/4" x 3 1/2" x 9 3/4"
- 1 Top , 3/4" x 5 3/8" x 11 1/4"
Directions
-
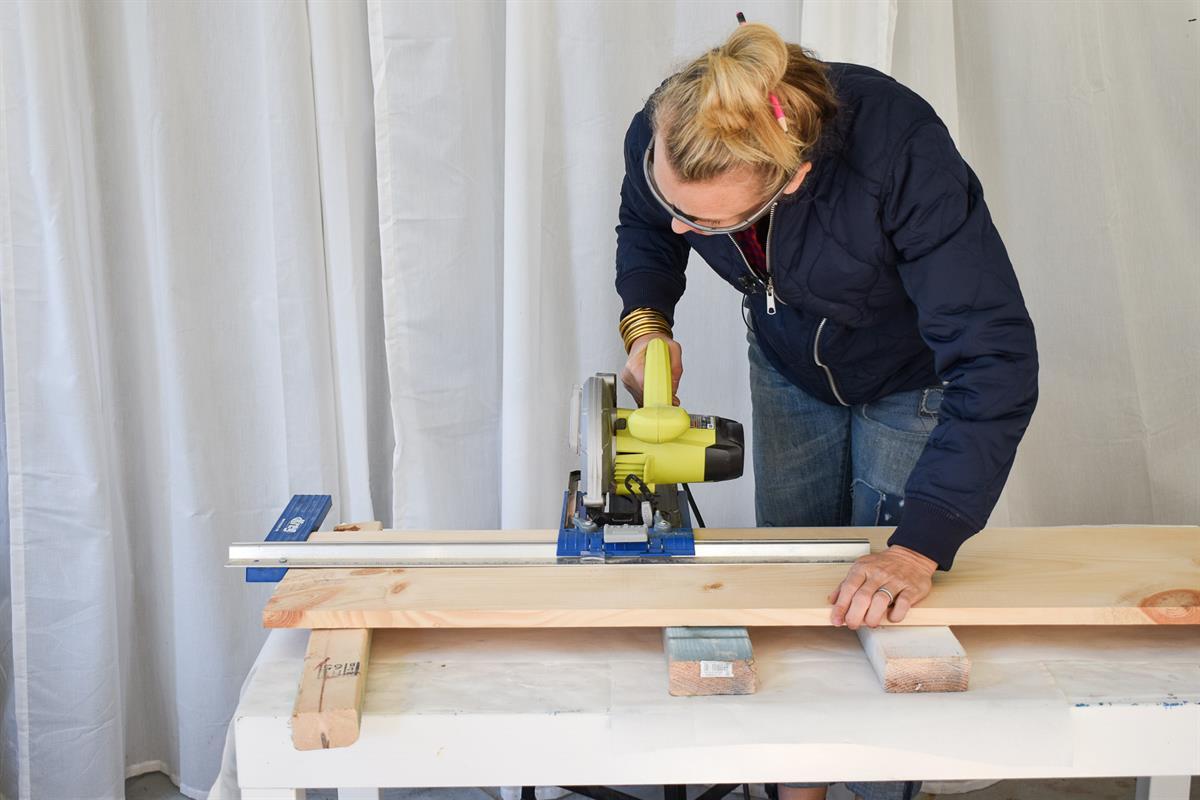
Cut Back and Front of Mailbox
Cut the 1x12 into two pieces for the front and back of the mailbox. Cut the back to 17 7/8" and the front to 12 3/4".*
*One end of the front piece should be cut at a 30-degree beveled angle; the long side will be 12 3/4"
-
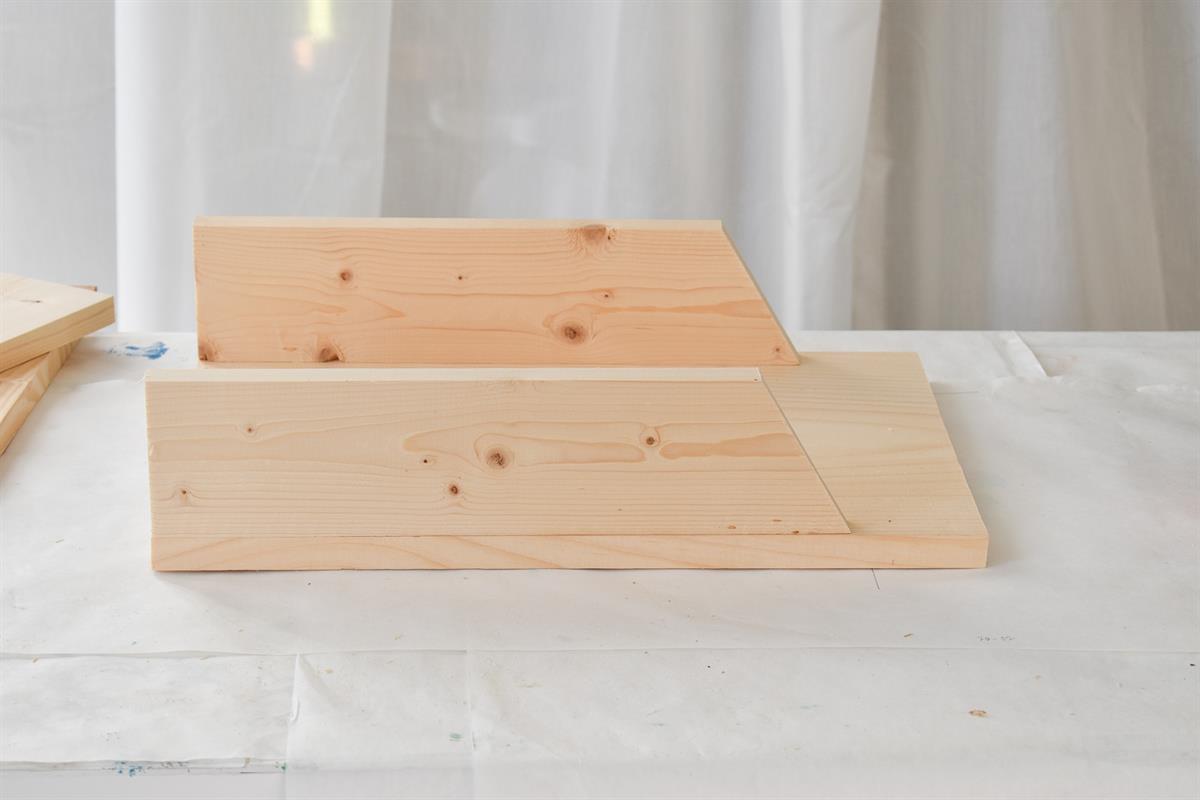
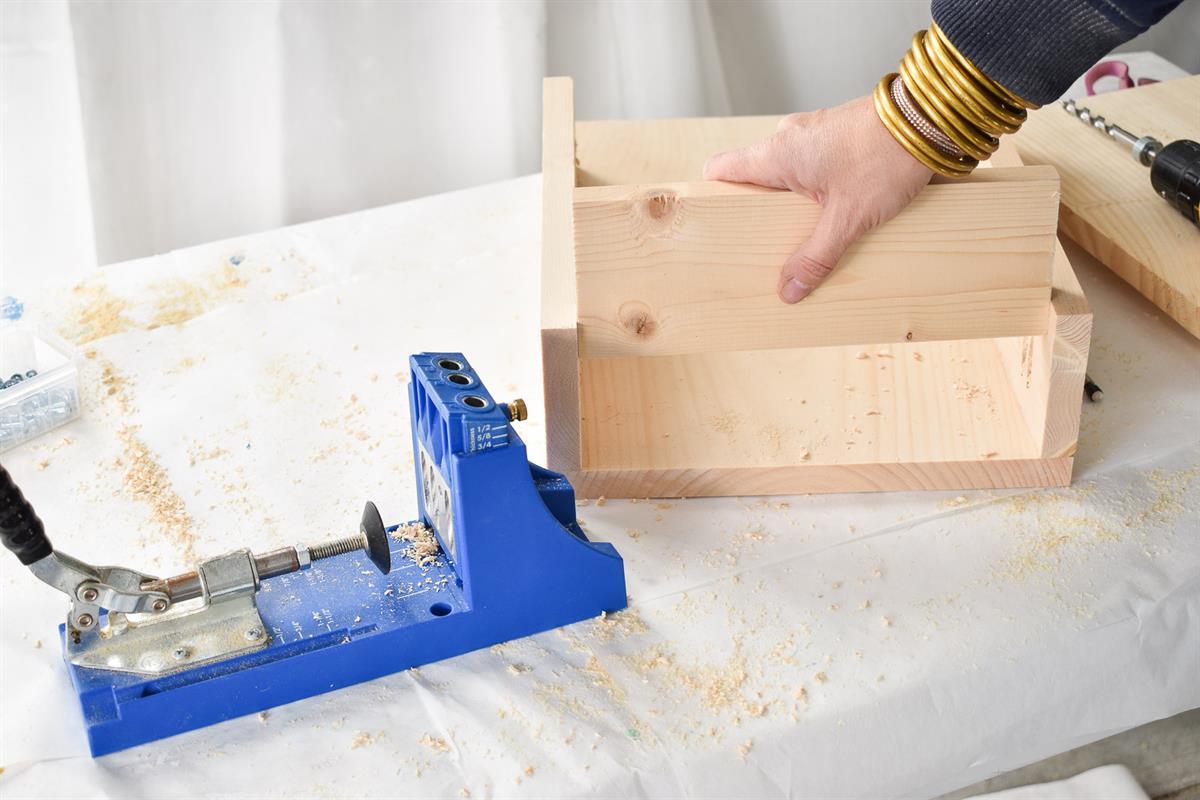
Cut Sides of the Mailbox
Cut 1x4s for sides of the mailbox. The sides should be cut at 90 degrees on one end and then at a 30-degree miter at the other end. The length at the longest side should be 14 7/8".
-
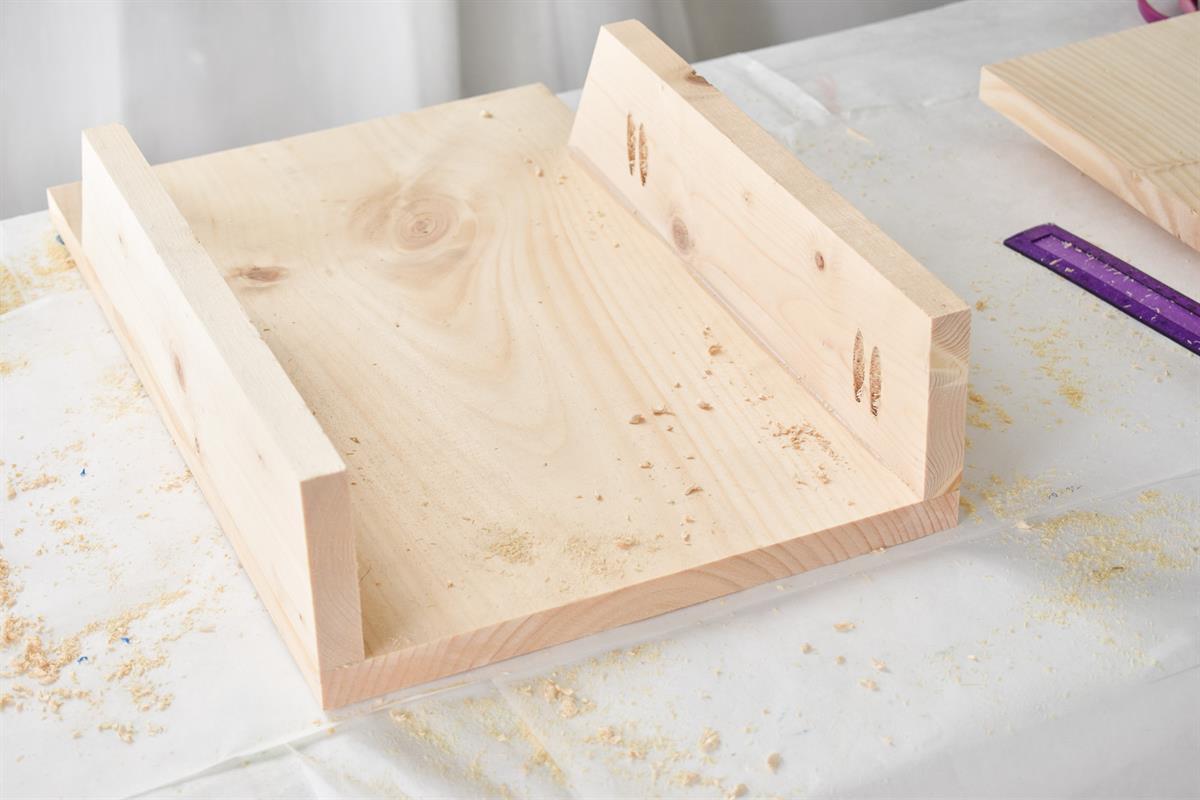
Attach Sides to Back of Mailbox
Using a Kreg jig, drill pocket holes and then attach the two sides of the mailbox to the back. Align the 90-degree ends with the bottom of the mailbox as shown in Step 2.
-
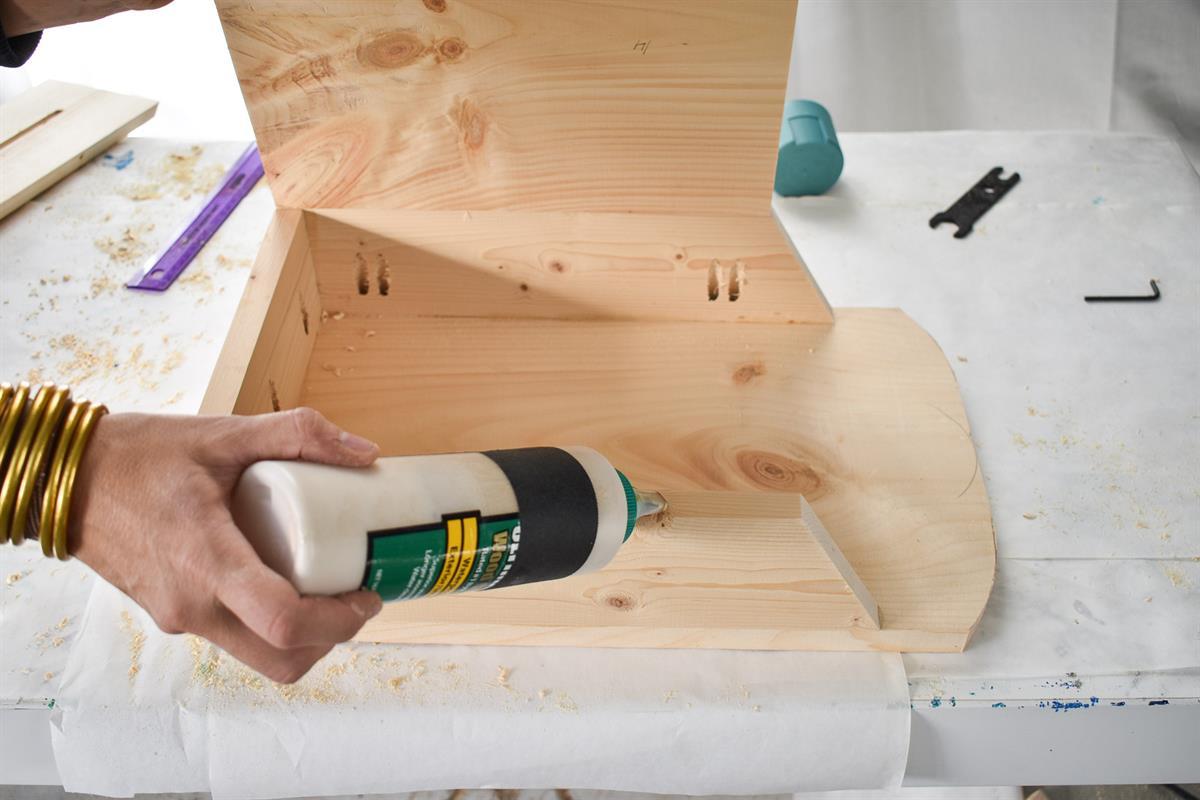
Measure and Cut Bottom of Mailbox
In order to ensure a tight fit, I wait to measure and cut the bottom portion of the mailbox until after I'd assembled the sides.
Using pocket holes through the long edge and wood glue on the ends, attach the bottom to the mailbox as shown.
-
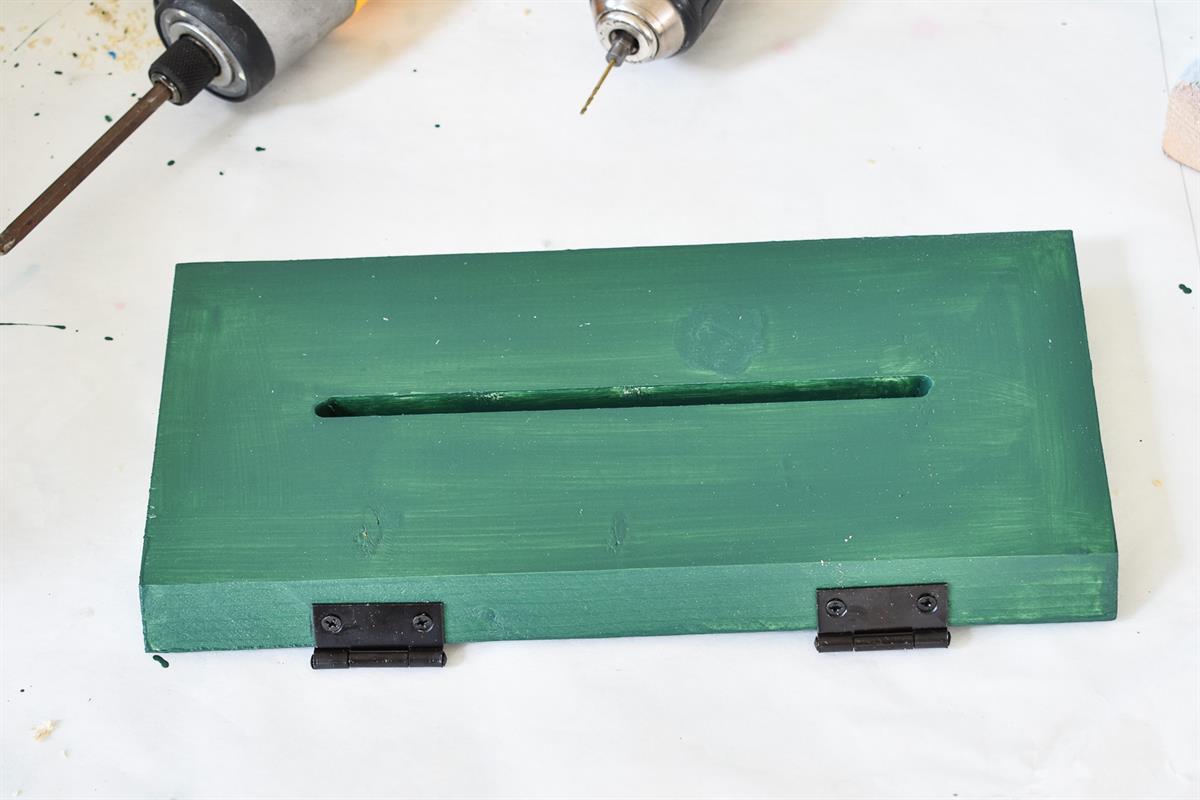
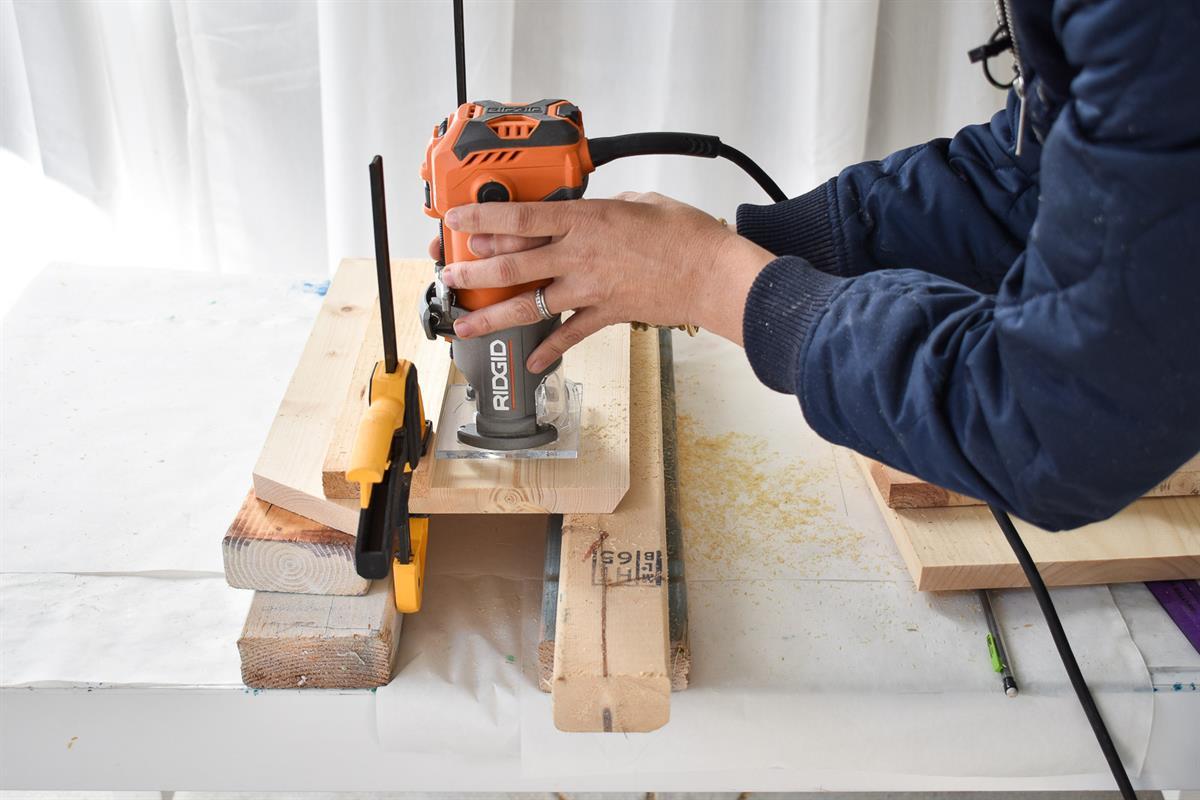
Cut Out Top of Mailbox
Cut the top of the mailbox out of the 1x12. Either side should be parallel 30-degree beveled edges and 5 inches.
Use a router to carve out a 7 1/2" x 3/8" mail slot in the middle of the board.
-
Assemble Top of Mailbox
Using wood glue and clamps, glue the top of the mailbox in place being careful to align the 30-beveled edge with the 30 mitered sides.
-
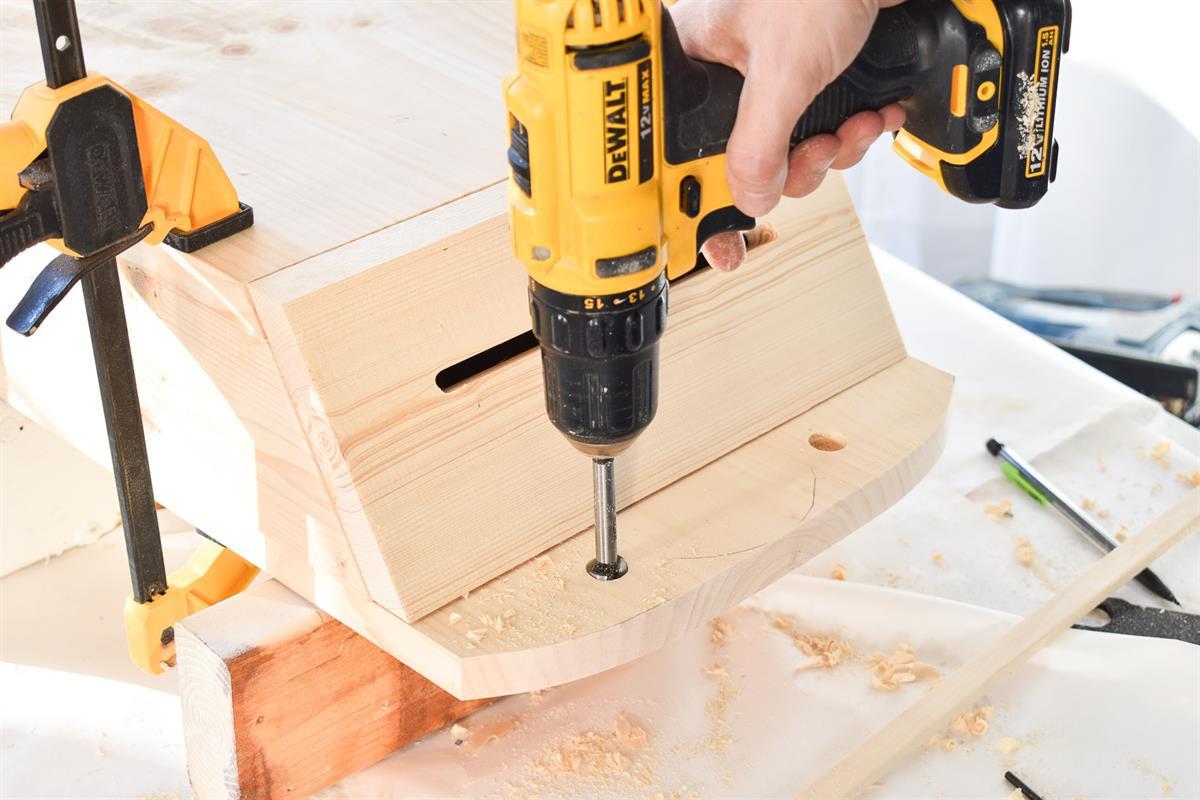
Drill Holes for Door Hanger
With 5/8" forstner bit, drill 2 holes through the back piece of wood. Make sure each hole is centered and equidistant from the board edge.
-
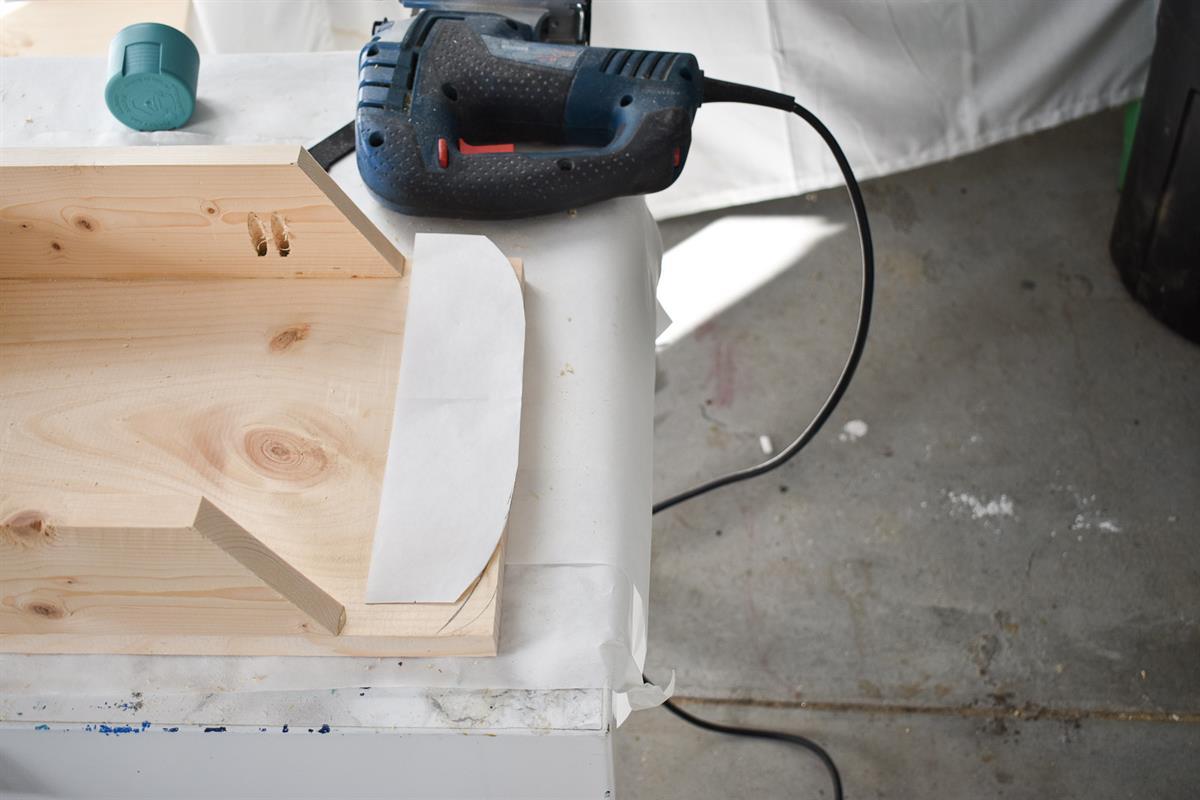
Optional: Shape Top of Mailbox Back
Make a template out of paper to ensure symmetry, and then use your jigsaw to careful cut an angle into the back of the mailbox.
-
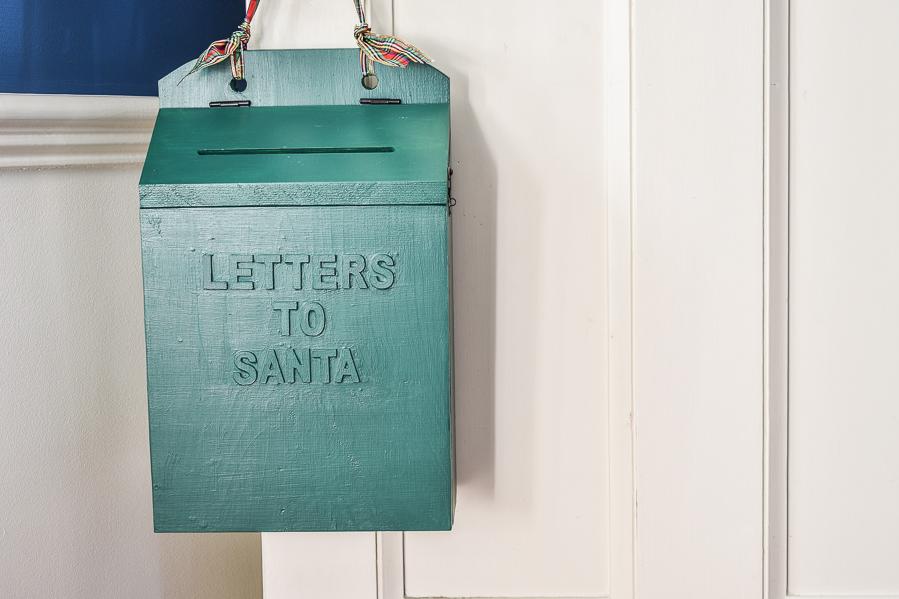
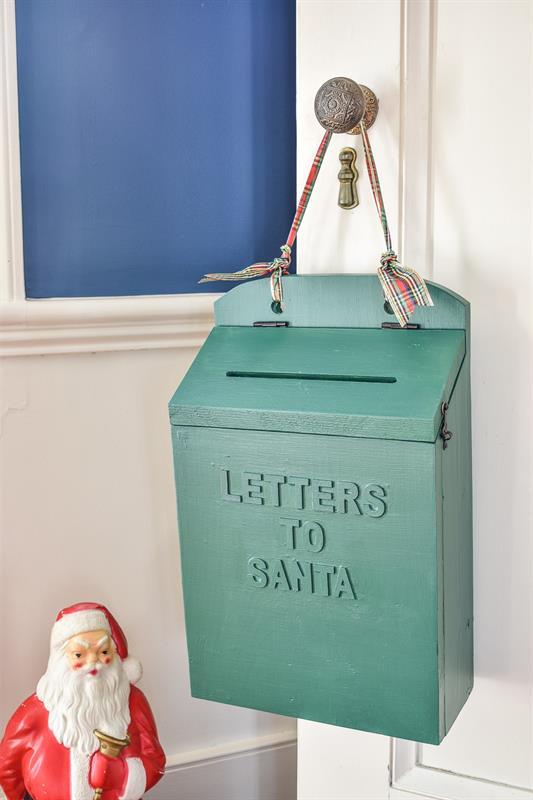
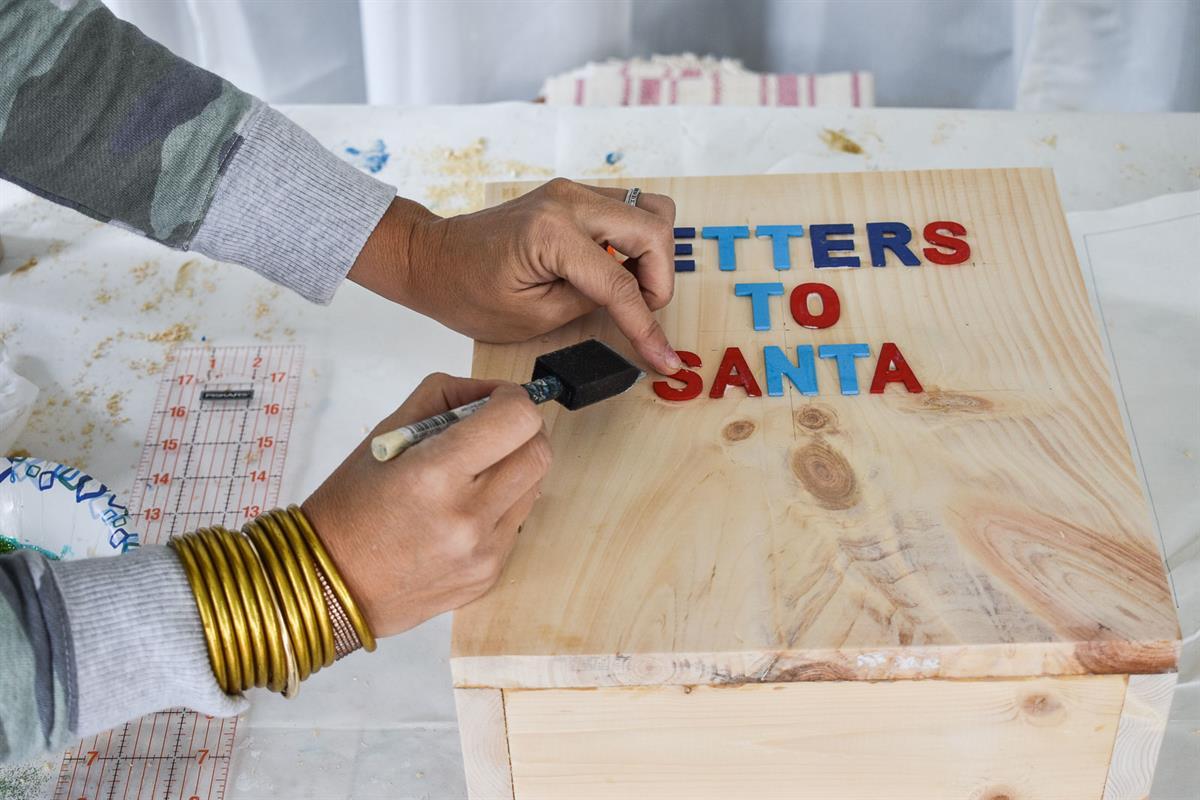
Add Letters
Glue wooden letters in place, centered and equidistant from each other.
-
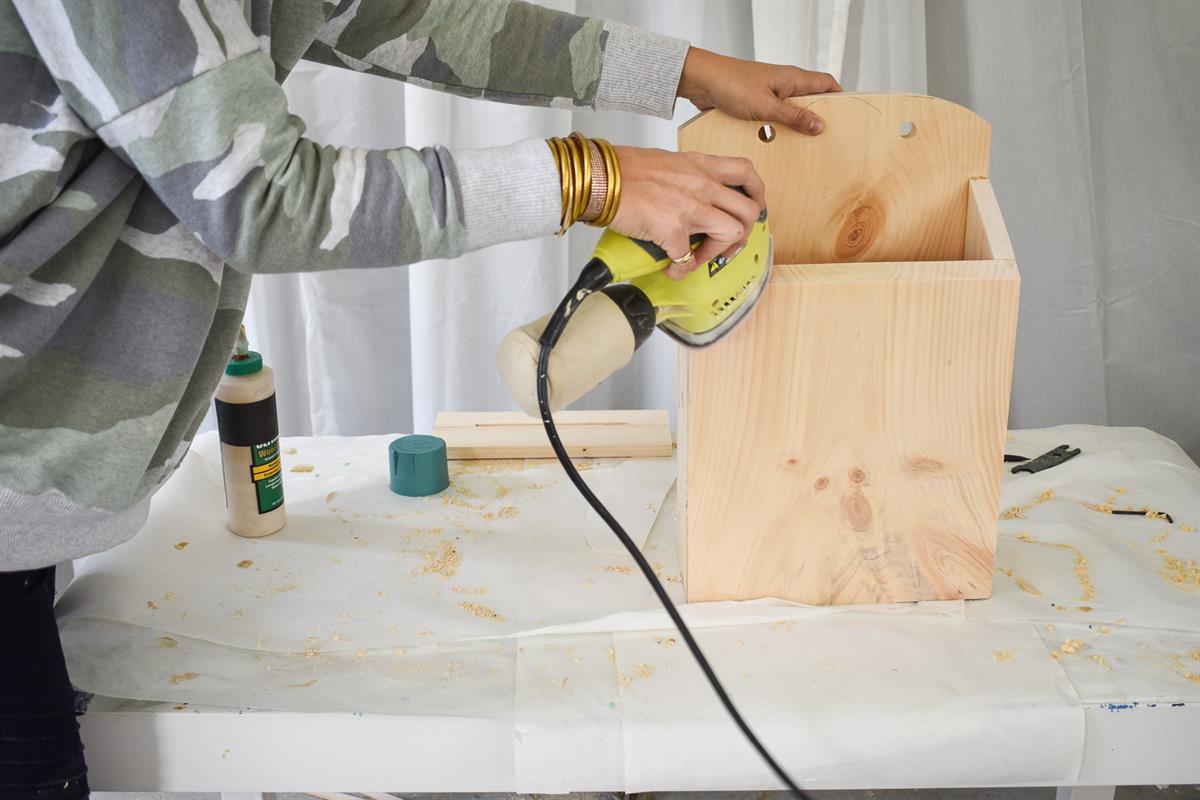
Sand
Using fine grit sandpaper, sand the mailbox and the mailbox top.
-
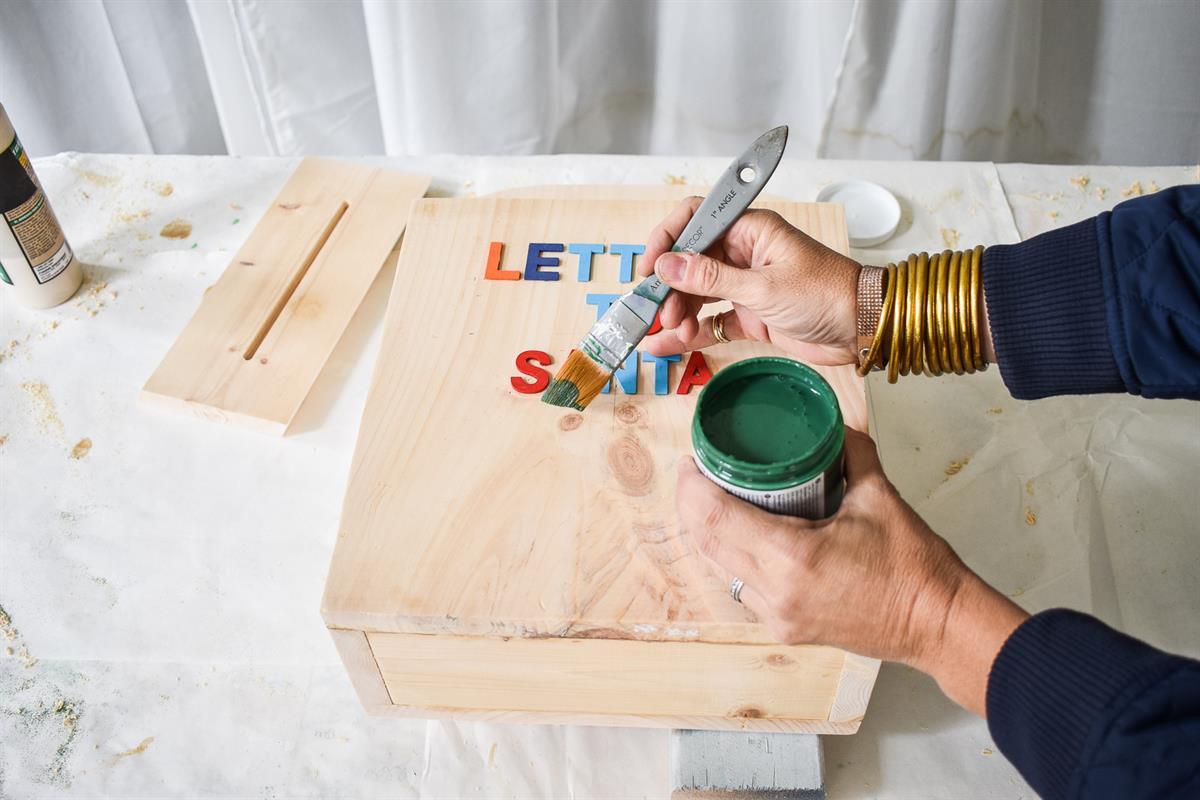
Paint
Give the mailbox and the top of the mailbox a coat of paint. Note: If unable to paint the entire inside of the mailbox, then consider painting before you assemble.
-
Add Ribbon or Rope
To hang the mailbox onto a doorknob or hook, thread ribbon or rope through the holes and secure with knots.

-
Attach Hinged Lid
Screw one side of each hinge into angled edge of the mailbox top. Line it up, and secure in place with painter's tape before you go back and screw in the opposite side of the hinges.