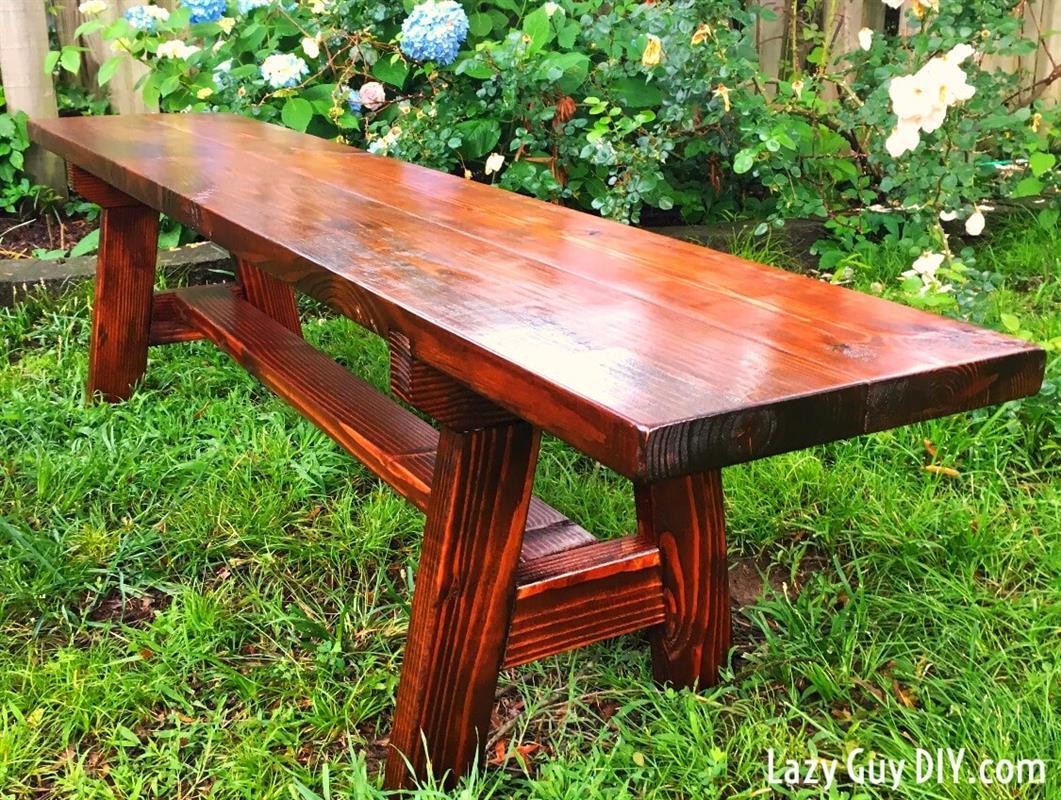
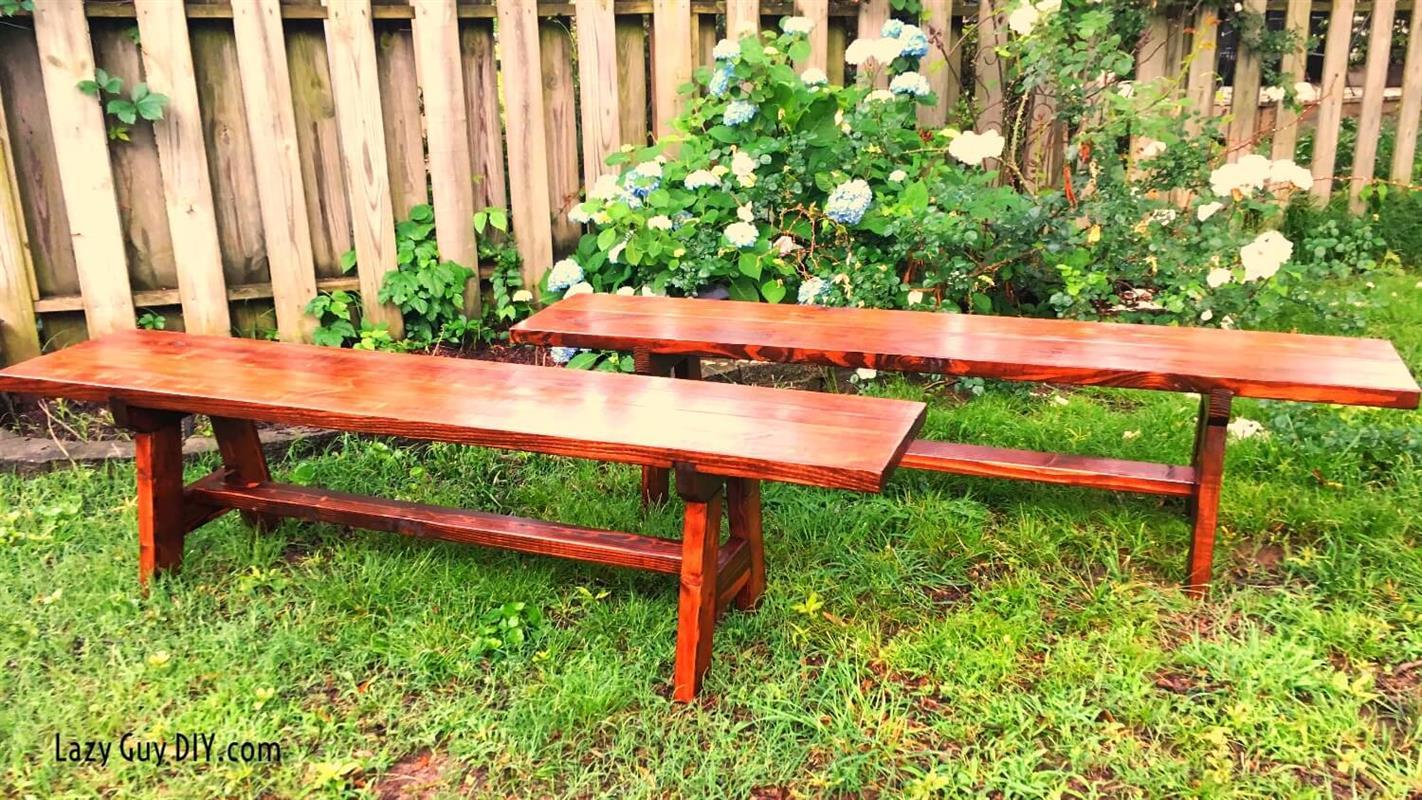


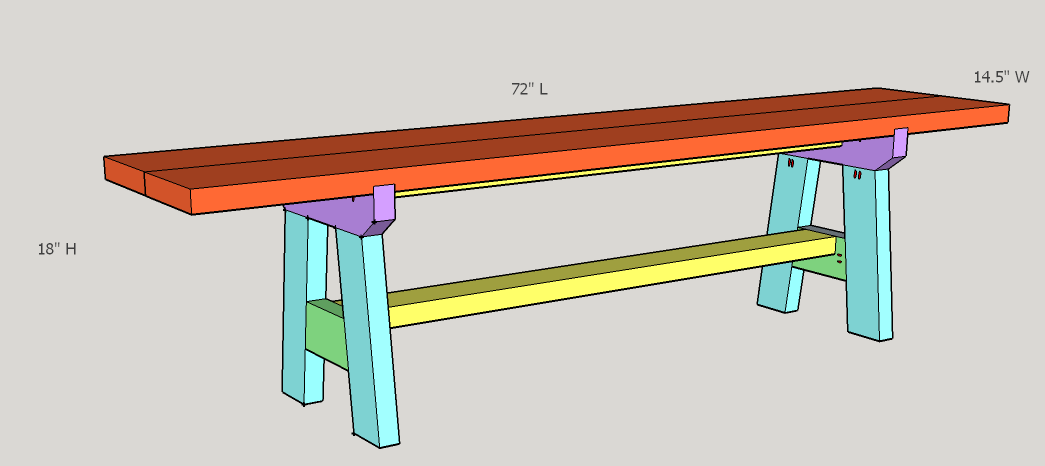
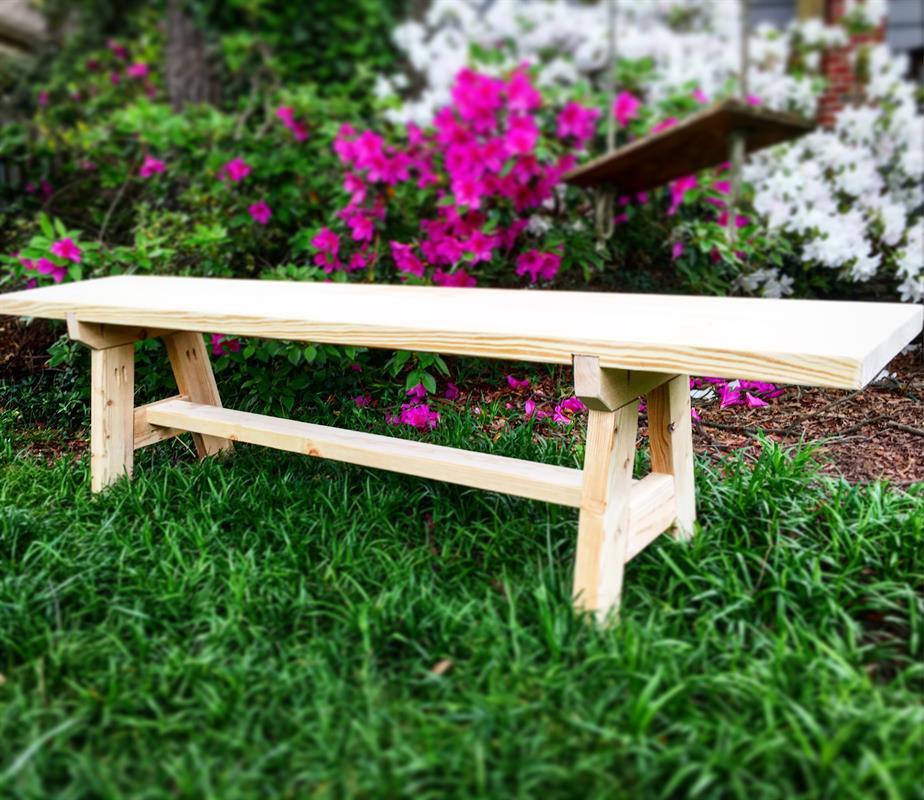
This farmhouse style bench was made to match a table a client already had purchased. It’s a little different than the normal rustic X frames you generally see. This is a quick build but requires a dado cut. Oh, and they are sturdy enough that we jumped up and down on them with zero shakiness.
Tools
Kreg Tools

Other Tools
-
Miter Saw

-
Square
-
Tape Measure
-
Clamps
-
Impact Driver
-
Sander
Materials
Wood Products
- 2 Board , 2x8 , 96"
- 3 Board , 2x4 , 96"
Hardware & Supplies
- 1 2" Kreg Jig Self Tapping Screws
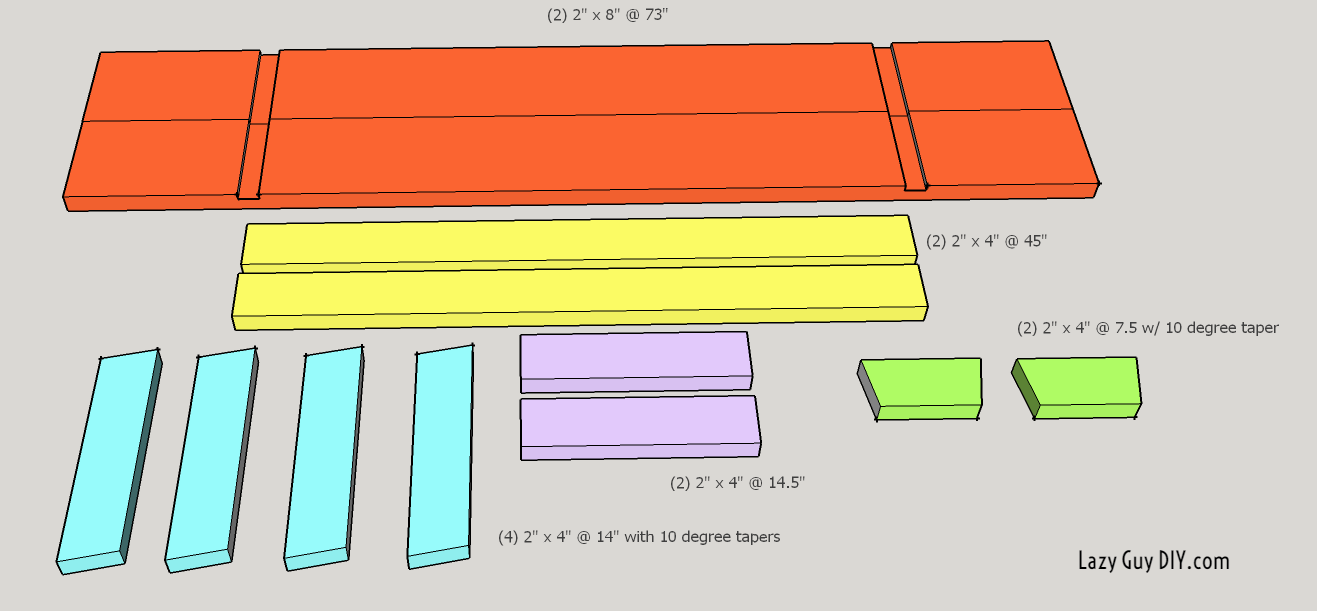
Cut List & Parts
- 2 2x8 , 96"
- 3 Premium Cut 2x4 , 96"

Directions
-
Cut Bench Top
Before you even start cutting, I highly recommend sanding all surfaces so you don't have to go back after assembly to smooth out rough patches.
Step 1 - Cut (2) 2x8's to 6 foot lengths. Make sure the boards are straight and any knots are in the middle of the piece and not on the edges. When you join the two pieces you don't want to hit a knot with your pocket holes.
-
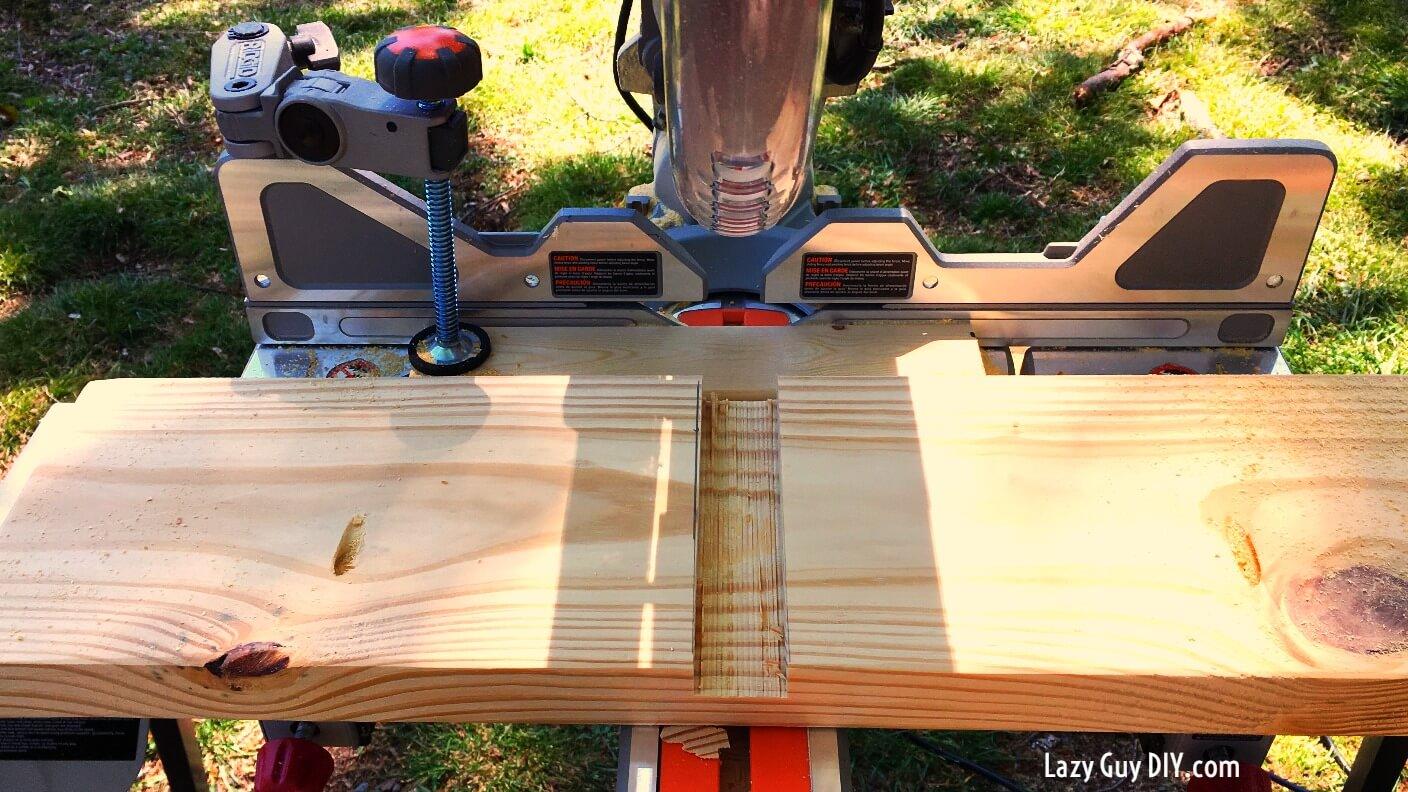
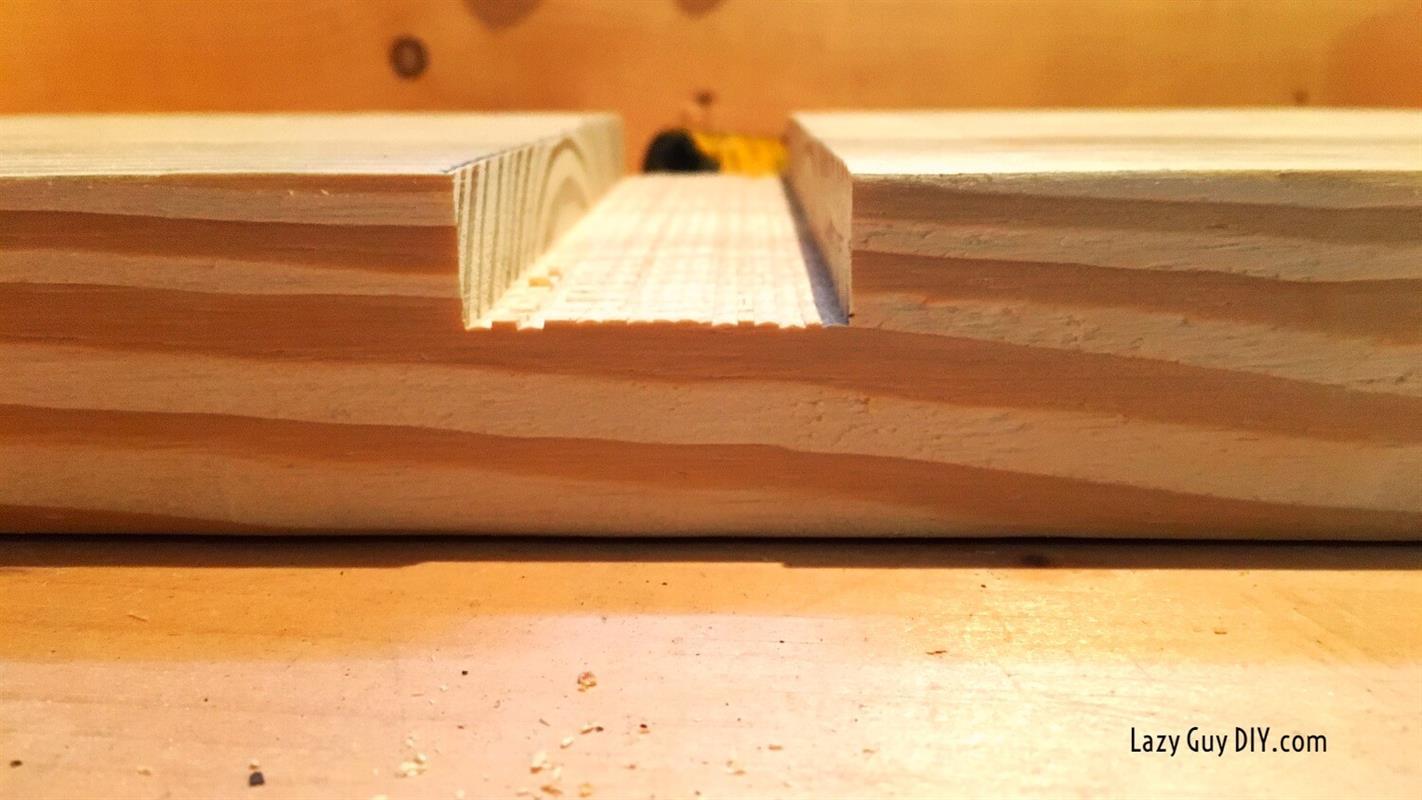
Dado Cut The Bench Top
If you aren't familiar, dado cuts are a perpendicular groove cut into your lumber. These make for strong joints. You can use a table saw and make several passes at the correct depth or you can take a sliding compound miter saw like I used to do the same. I find the sliding compound miter easier.
Cut 2 dado grooves on each 2x8, 12 inches from each end. The groove should be roughly 1.50" to accommodate the 2x4's. You may have to adjust slightly to compensate for the thickness of the wood. I made the depth slightly less than .75" so my pocket hole screws don't go too deep.
**I 100% recommend trying this dado cut depth on a scrap piece of 2x8 to test your pocket holes on later. Cut too much and your screws poke through.
-
Join The Bench Tops
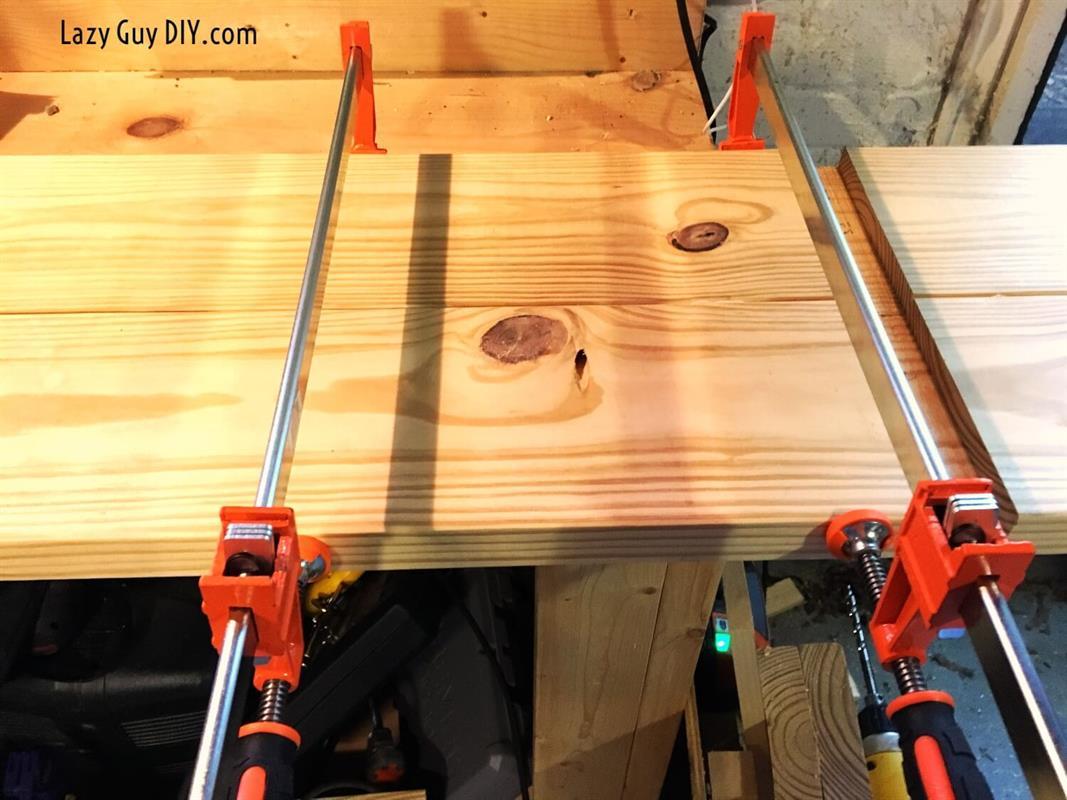
Using your Kreg Jig, pilot pocket holes alternating sides along the lengths of the 2x8's. You'll be drilling these holes on the same side as the dado cuts. You should be using 2.50" Kreg self tapping screws and your depth settings should be 1.50".
Once you have plenty of holes, glue and screw the two pieces together. I use more than one bar clamp and make sure I've applied pressure on each side of the hole before I add my screws. This makes for a tighter joint.
-
Dado Leg Joint
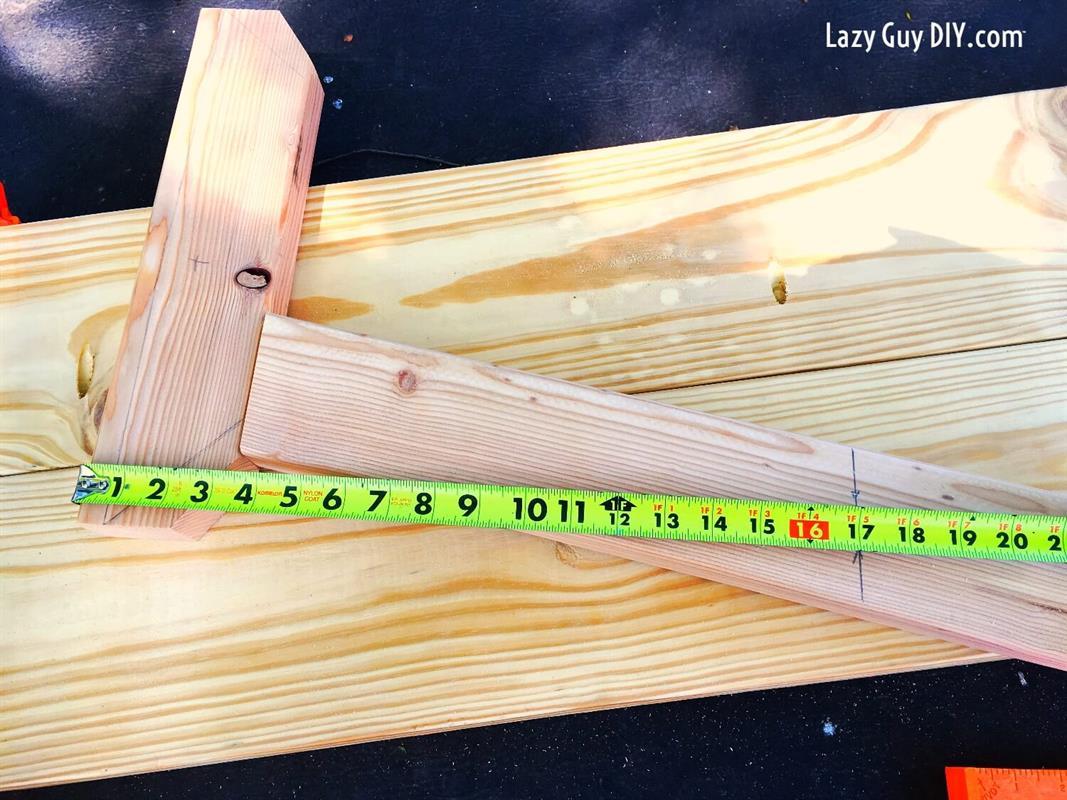
Measure the distance across the dado groove you cut. It should be 14.50" across for both grooves (it's a dance off!), but if not, use those measurements and cut two pieces of 2x4 to those lengths. Dry fit them to make sure they fit in the groove and are flush. Adjust as needed with a chisel.
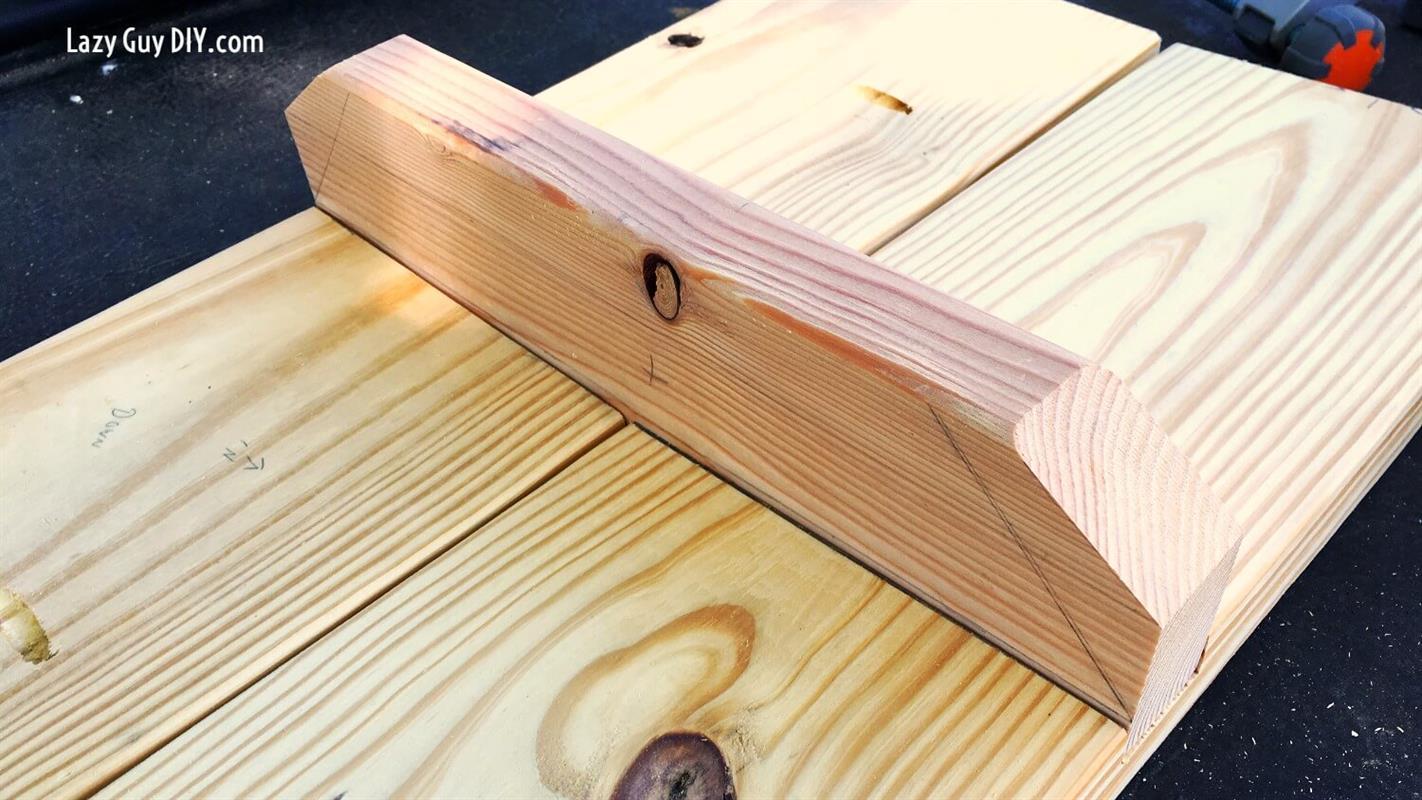
On each end of your 14.50" mark 2.25" down from the side you want sitting in the dado groove. Now, adjust the angle of your miter saw so you'll be cutting at 55 degrees. Cut off the 1.25" portion at the 55 degree angle.
-
Building The Legs
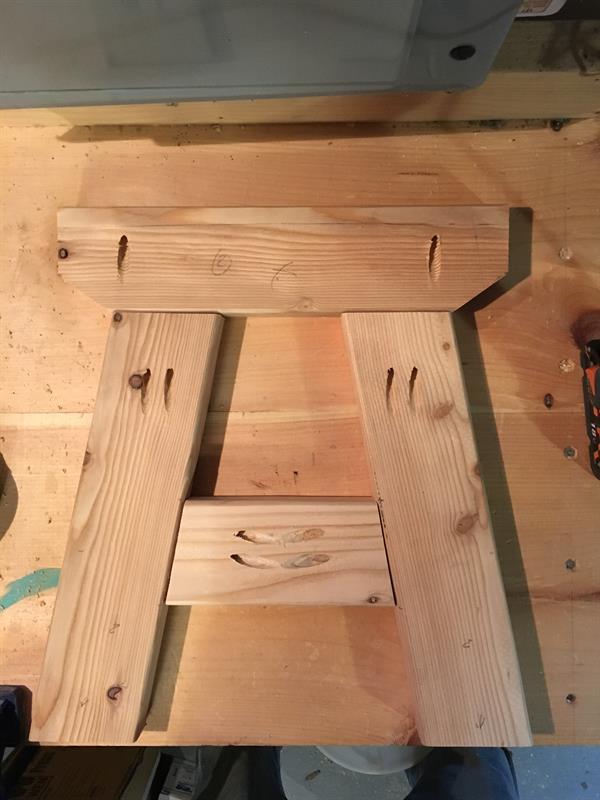
Setting the angle of your saw at 10 degrees cut (2) pieces at 14.00" for each end. Angles going in the same direction /____/ . Dry fit those pieces with the Leg Header you cut for the dado joint.
-
Cut A Billion Pocket Holes
Using your Kreg Jig, attach all of the pieces of the legs with 2.5" self tapping screws and a depth of 1.50".
The 14.50" piece that fits into the dado groove needs an adjusted pocket hole. Since you cut a 3/4 inch groove into your 2x8, a 2.5" pocket screw will go through your bench top, don't use it. Use the 1 1/2" screws instead.
**Absolutely test the 1 1/2's out on a scrap piece of 2x4 and 2x8 you cut a test dado groove in. I definitely had trial and error when my dado cut was too deep. You're better off trying on scrap than the real thing. It comes down to how much torque you put on your screw.
-
Cut Leg Brace
Keeping your saw at 10 degrees. Cut a piece of 2x4 to a length of 7.50". This will fit in between the legs as a brace and sit 6.00" from the bottom.

-
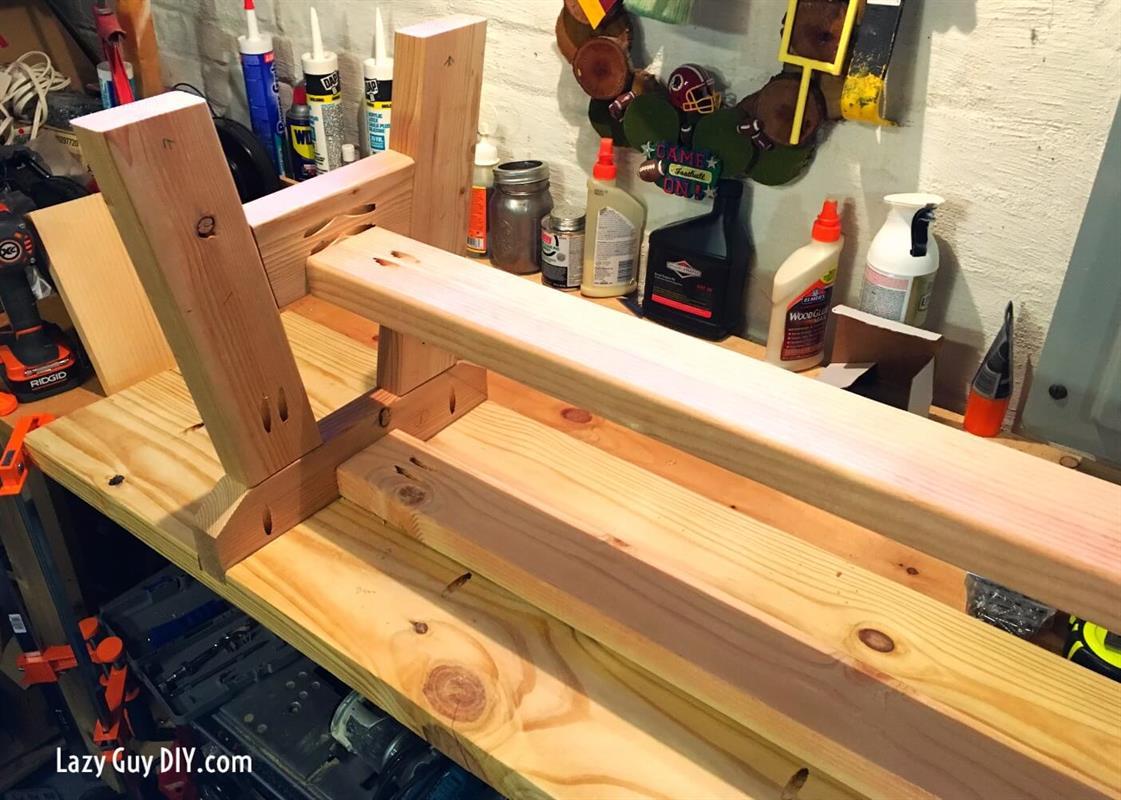
Attach Legs to Bench Top
Attach your legs! Using the pre-drilled pocket holes on your headers, glue and screw the legs into place in your dado grooves. Be sure to make sure your edges are flush and use your speed square to check for errrr... squareness. Don't tighten your screws all the way yet. This will not only keep you from over torquing your screws through the seat, but also from driving the legs at funny angles.
If you haven't already, you might want to do a dry run with a few scrap pieces of 2x you have left over. If your dado joint is cut too deep, then your 1 1/2" pocket hole screws will drive through the top of your bench.

-
Attach Leg Supports
Double check and measure the inside distance between your bench legs. It should come out to 45.00". If not.. meh. Cut both pieces to length and then drill 2 pocket holes (1 1/2" setting for 2 1/2" screws) into each end. Glue and screw the first piece between the headers.
-
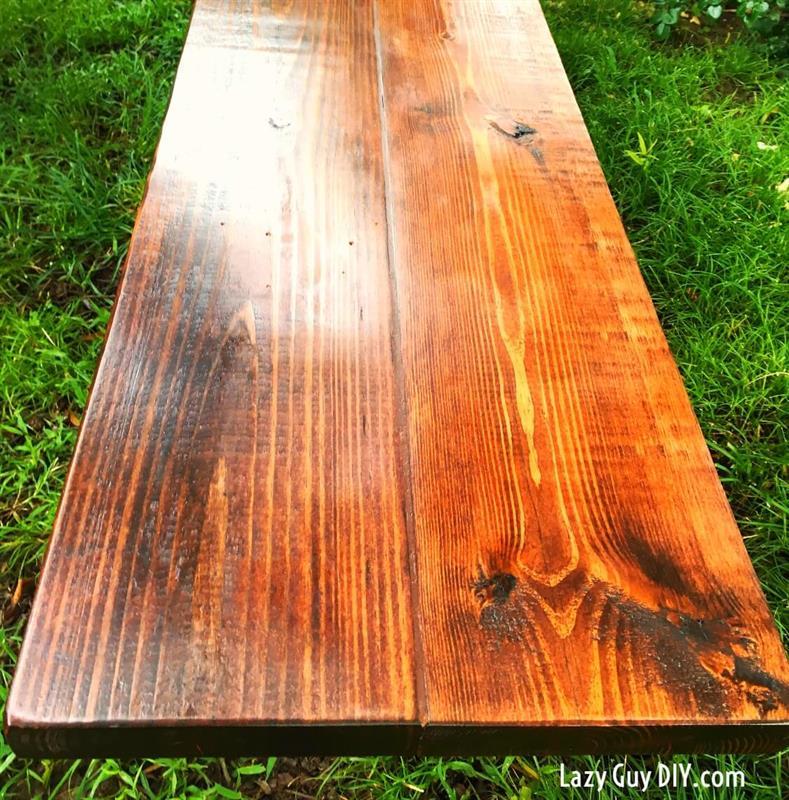
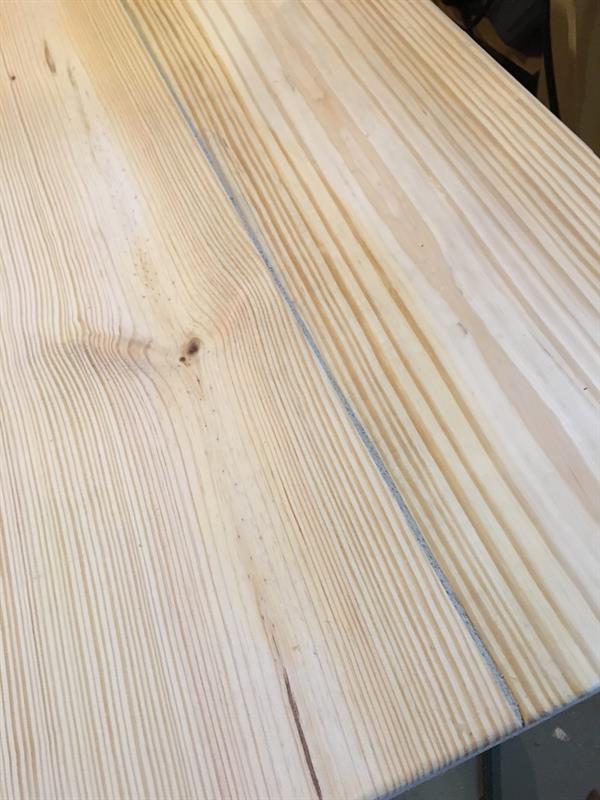
Finishing The Bench Top Joint
Knowing i'm going to stain this bench, I used a stainable wood filler to fill the gap between my 2" x 8"s. Run a bead into the crack, wipe smooth with a dry cloth or paper towel. Next take a wet cloth or paper towel and wipe off the excess wood filler. Technically you could let it dry and sand it off too. I just wiped it clean and then quickly ran over the area with the sander the next day for anything I might have missed.
While you're at it, fill in all of those visible pocket holes too with the same stainable wood filler. Once it dries you can sand them flush and then they take the stain fairly well. They won't be invisible, but they won't be as obvious.
-
You're Done!
Stop reading. You're finished! Err... time to add a finish. I used 2+ coats of MinWax Red Oak Stain and 3 coats of MinWax Semi Gloss Poly.
-
Dado Cut Tip
If you use the sliding miter saw, use a scrap spacer against the fence and your material. If your wood is all the way against the fence, then your dado cuts will taper off as the spinning blade reaches the pull limit. With a spacer, you can pull all the way through the 2x8 and have clean cuts.