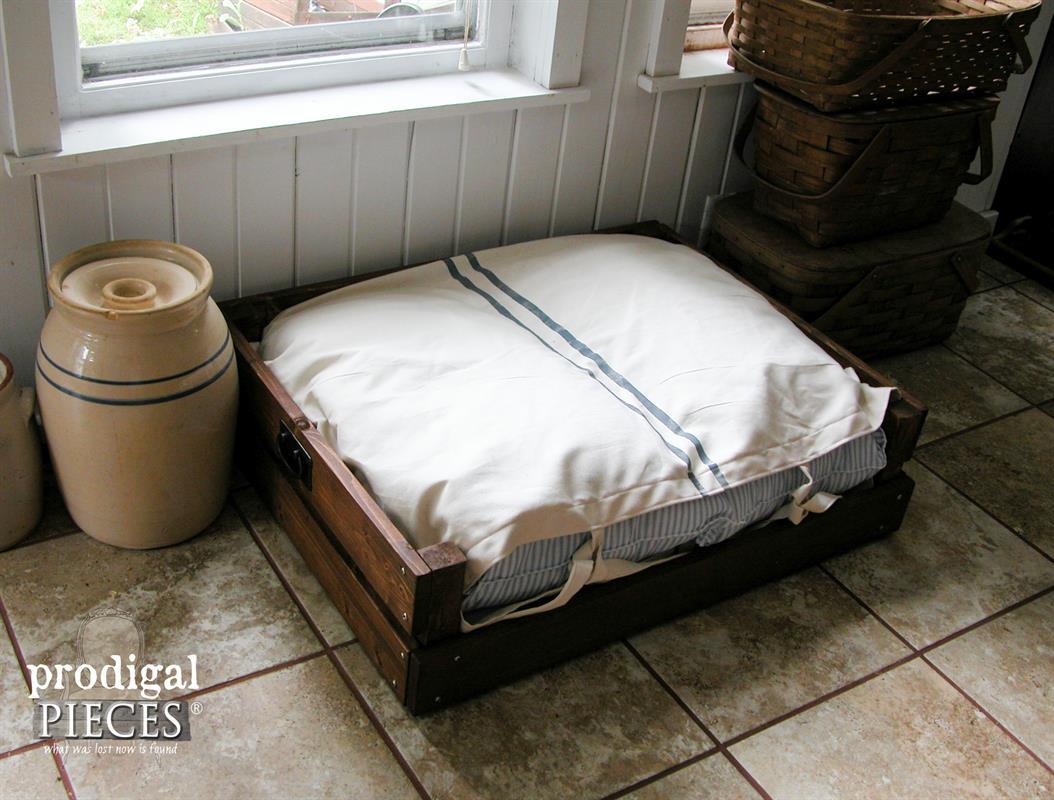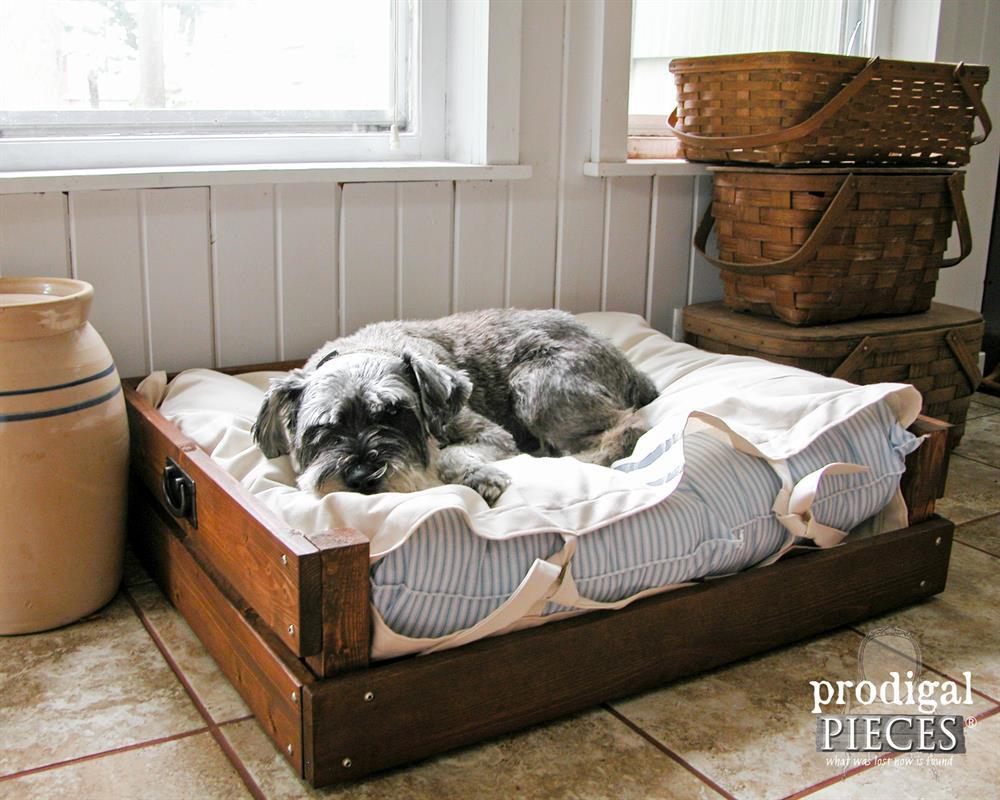


Our furry family members deserves a cozy spot to curl up and rest. A pet bed doesn't have to be unsightly, but can be an accent in our home. Let's build them this versatile custom bed that is sure to please our beloved pets and will add fun and function to our decor.
Tools
Kreg Tools

Other Tools
-
Jigsaw

-
Miter Saw
-
Square
-
Table Saw
-
Tape Measure
-
Drill (cordless)
-
Sander
-
Workbench
Materials
Wood Products
- 1 Plywood , 3/4" Thick , Quarter Sheet
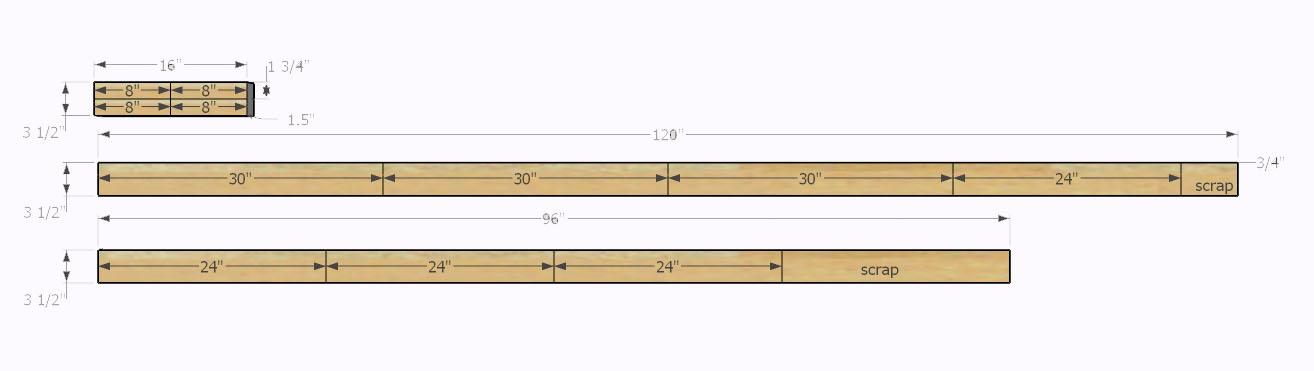
- 1 Board , 1x4 , 120"
- 1 Board , 2x4 , 16"
- 1 Board , 1x4 , 96"
Hardware & Supplies
- 4 Felt Furniture Feet
- 42 1 1/4" Kreg Maxi Lock Coarse screws
- 2 Trunk Handles (optional)
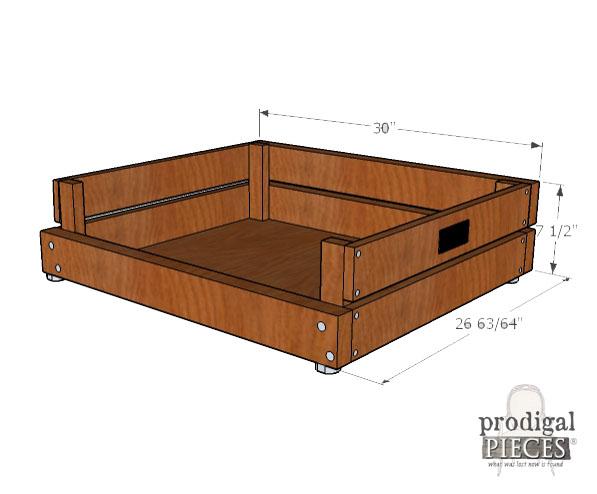
Cut List & Parts
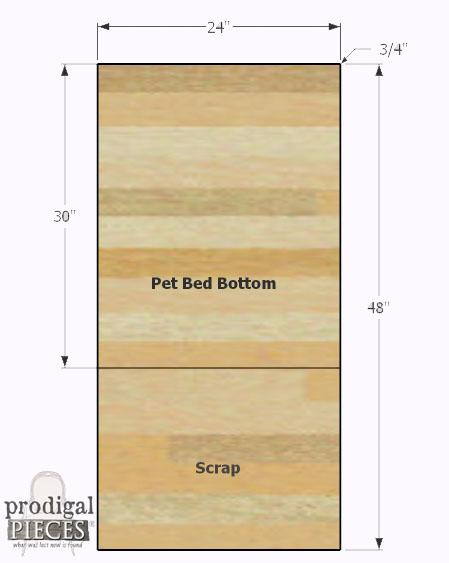
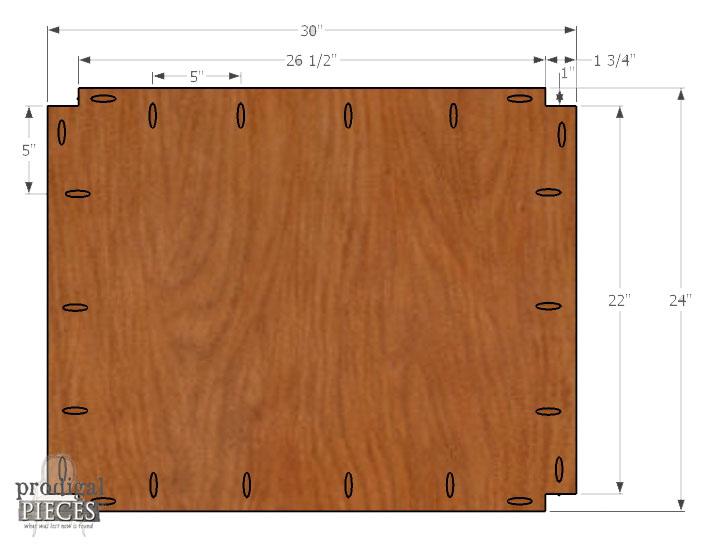
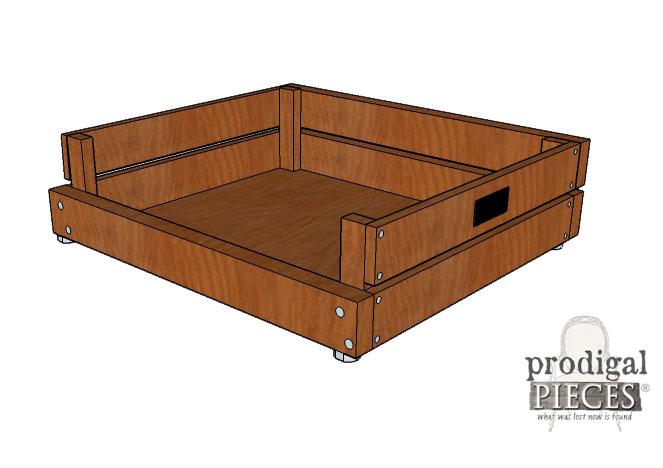
- 1 Pet Bed Base , 30" x 24"
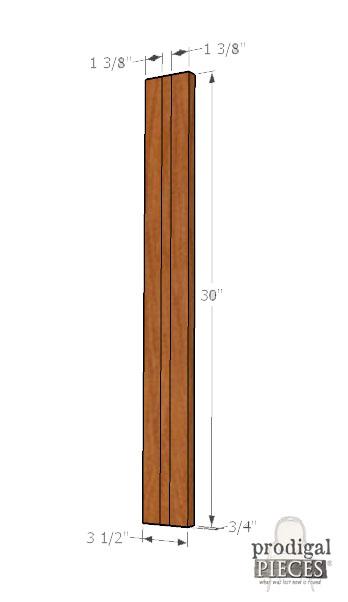
- 4 Bed Posts , 8" x 1 3/4" x 1 1/2"
- 3 Long Side Rails , 31 1/2" x 4" x 1"
- 4 Short Side Rails , 24" x 4" x 1"
Directions
-
Cut bed parts
Using the provided cut list and diagrams, cut the wood for your pet bed and sand smooth with a 120-150 grit sandpaper.
-
Prepare bed base
Drill pocket screw holes on backside of bed base for 3/4" material following the diagram. See next step for a tip.
-
Trace and cut
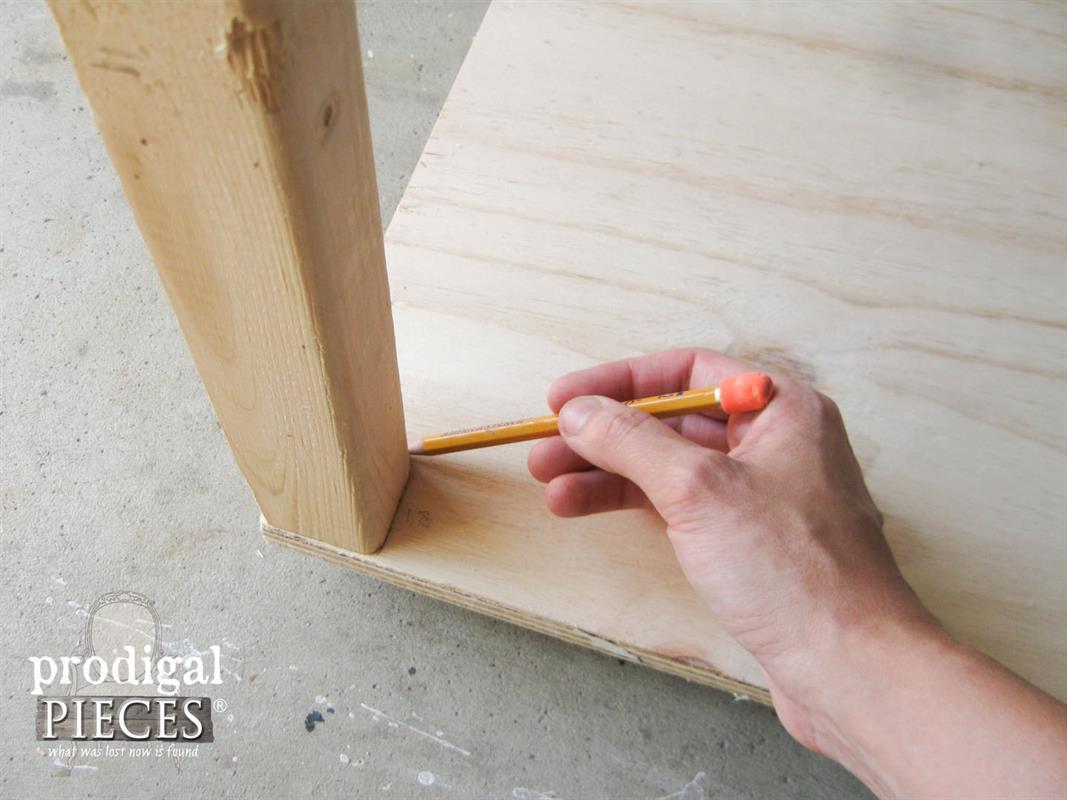
Take one of your 8" corner posts and place the end flush to each corner with the 1 3/4" face facing in and trace. Cut out corners with jigsaw.
-
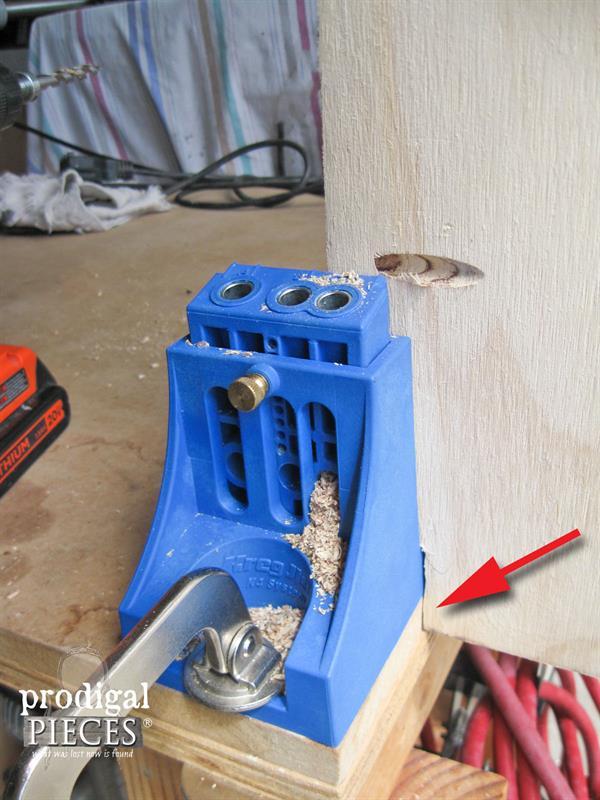
Tip for pocket holes
Since the bed base corners need pocket screw holes that can be tricky, mount your Kreg jig to the corner of your worktable and rest the base as shown.
-
Mark side rails
Find center of your side rails, and then mark for a 3/4" thick bed base lengthwise by measuring at 1 3/8" and 2 1/8" from a long edge and mark. Follow diagram.
-
Attach side rails
Attach your side rails using wood glue and 1" wood screws. By laying your bed base on the table and extending over the edge makes it easy to attach the rails. See photo.
-
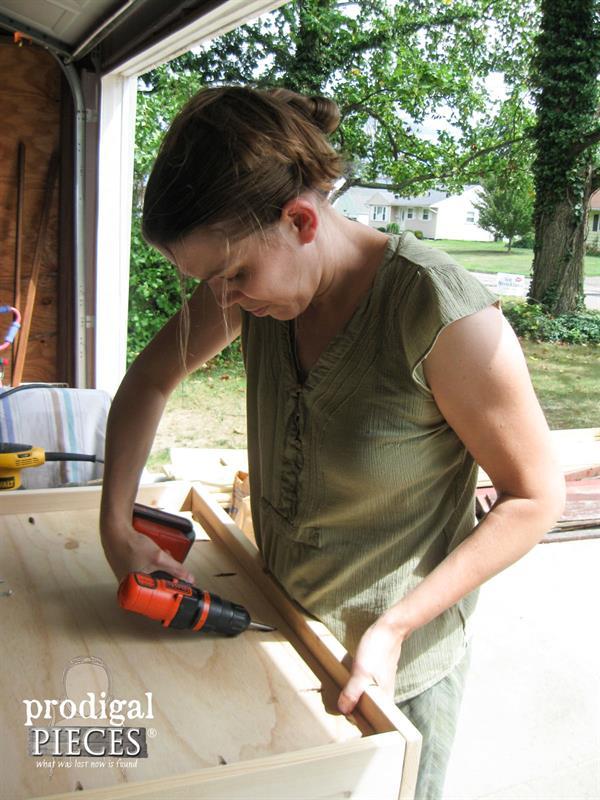
Attach corner posts
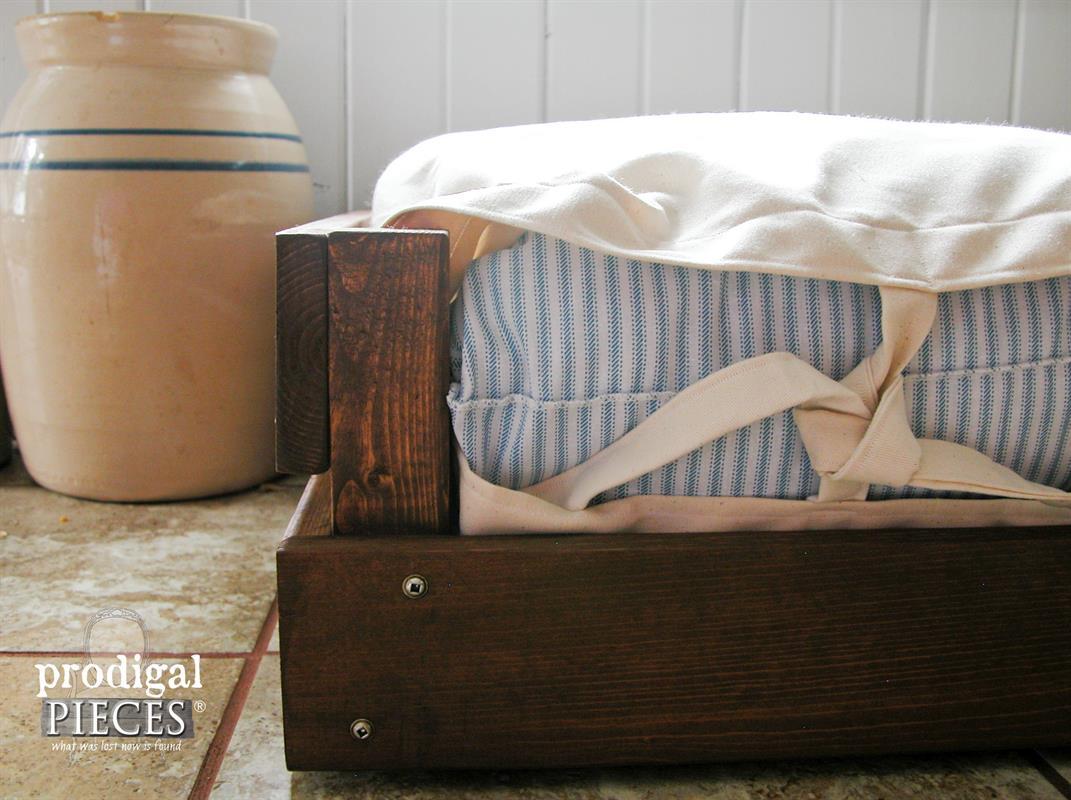
Insert your 8" posts into the corner openings so that they are flush to the bottom edge of the bottom rails. Attach using wood glue and wood screws in the corner pocket hole openings. Pre-drill holes through the side rails into the posts and attach with wood screws.

-
Attach top rails
Pre-drill holes into your top rails and attach flush to the top of your corner post with wood screws. Use a scrap 1" x 4" in between the top and bottom rails to help space the board while drilling and screwing. The 24" rails are flush to the front posts, and the 30" rail extends over the ends of the 24" rails as shown.
-
Finish
Stain or paint your pet bed. Once dry, add felt furniture feet to protect your floor. Also, add a couple of trunk handles on the short sides for mobility and ease of cleaning. Want to know how to create the cushion? Just head to the "Extras" tab to get the tutorial.
Enjoy! Because your pet will love you for this treat.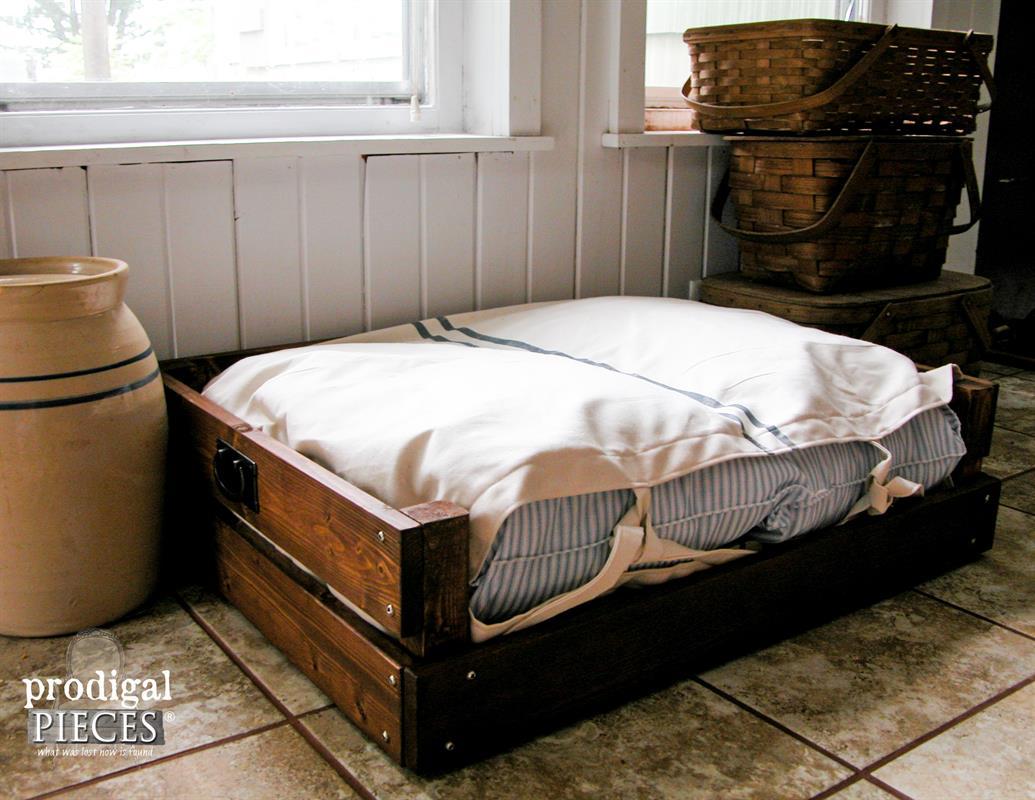
-
Before you cut
This plan is suited to a small to medium size dog or cat, but it can easily be altered to suit your favorite pet cushion and pet size. This design was based on using two bed pillows inside a custom pillow case. Feel free to alter the dimensions to suit any size pet bed.