


These plans are great for building out your shop. This miter station has so many drawers you won't know what to do with all the room. Miter saw station, garage cabinets, cabinet build, cabinets with drawers, shop station, cabinet drawers, miter station.
Tools
Kreg Tools


Other Tools
-
Circular Saw Guide Track

-
Jigsaw
-
Miter Saw
-
Square
-
Table Saw
-
Tape Measure
-
Track Saw
-
Hammer
-
Impact Driver
-
Nail Gun
-
Router
-
Sander
-
Cabinet Hardware Jig
-
Air Compressor
-
Sawhorse
Materials
Wood Products
- 3 Plywood , 3/4" Thick , Full Sheet
- 3 Plywood , 1/2" Thick , Full Sheet
- 3 Plywood , 1/4" Thick , Full Sheet
- 6 Board , 1x10 , 72"
- 9 Board , 1x3 , 96"
Hardware & Supplies
- 100 1 /14" pocket hole screws
- 13 Drawer pulls
- 500 1 1/2" 18 gauge brad nails
- 250 1" 18 gauge staples
- 13 Pairs of 20" drawer guides
- 2 Titebond 2 Wood Glue
- 50 150 grit Gator Sand Paper
Directions
-
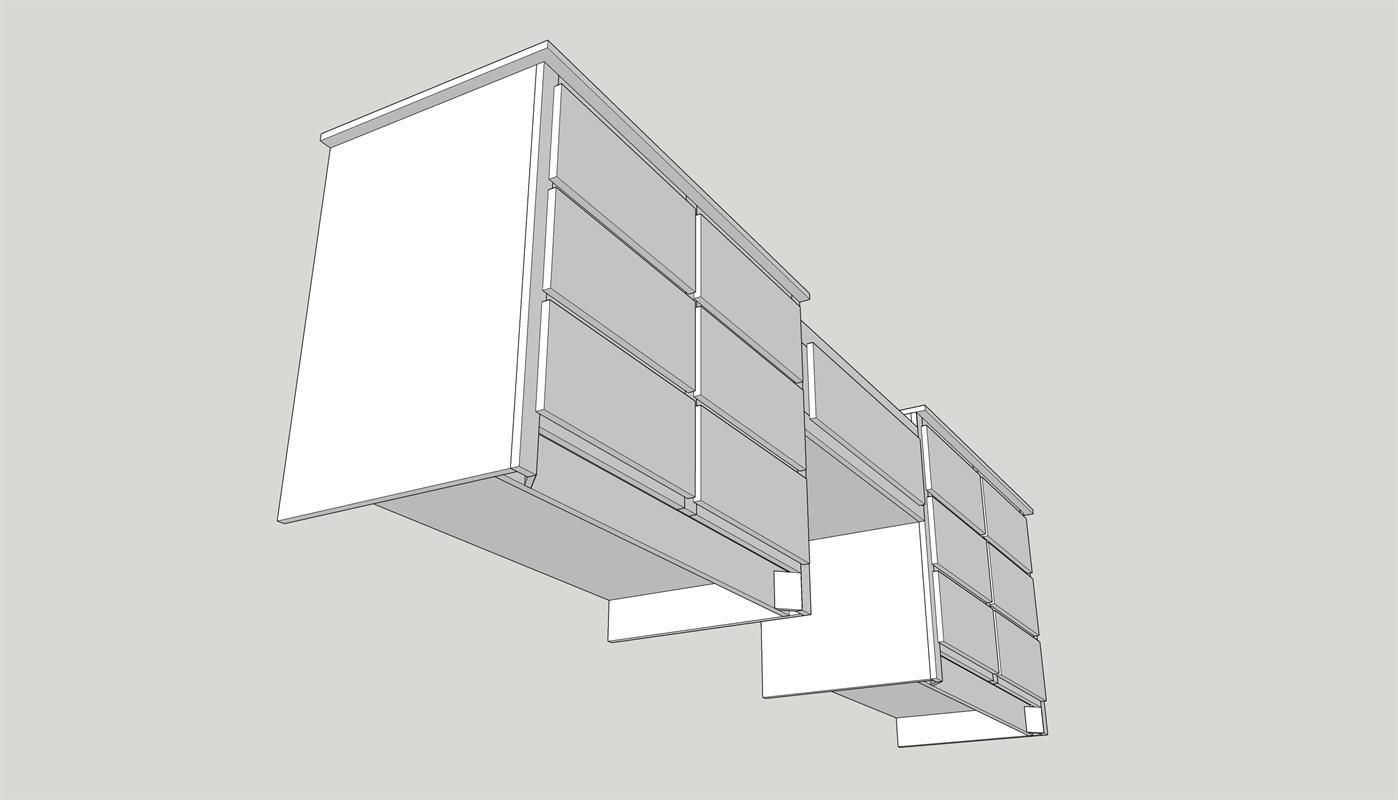
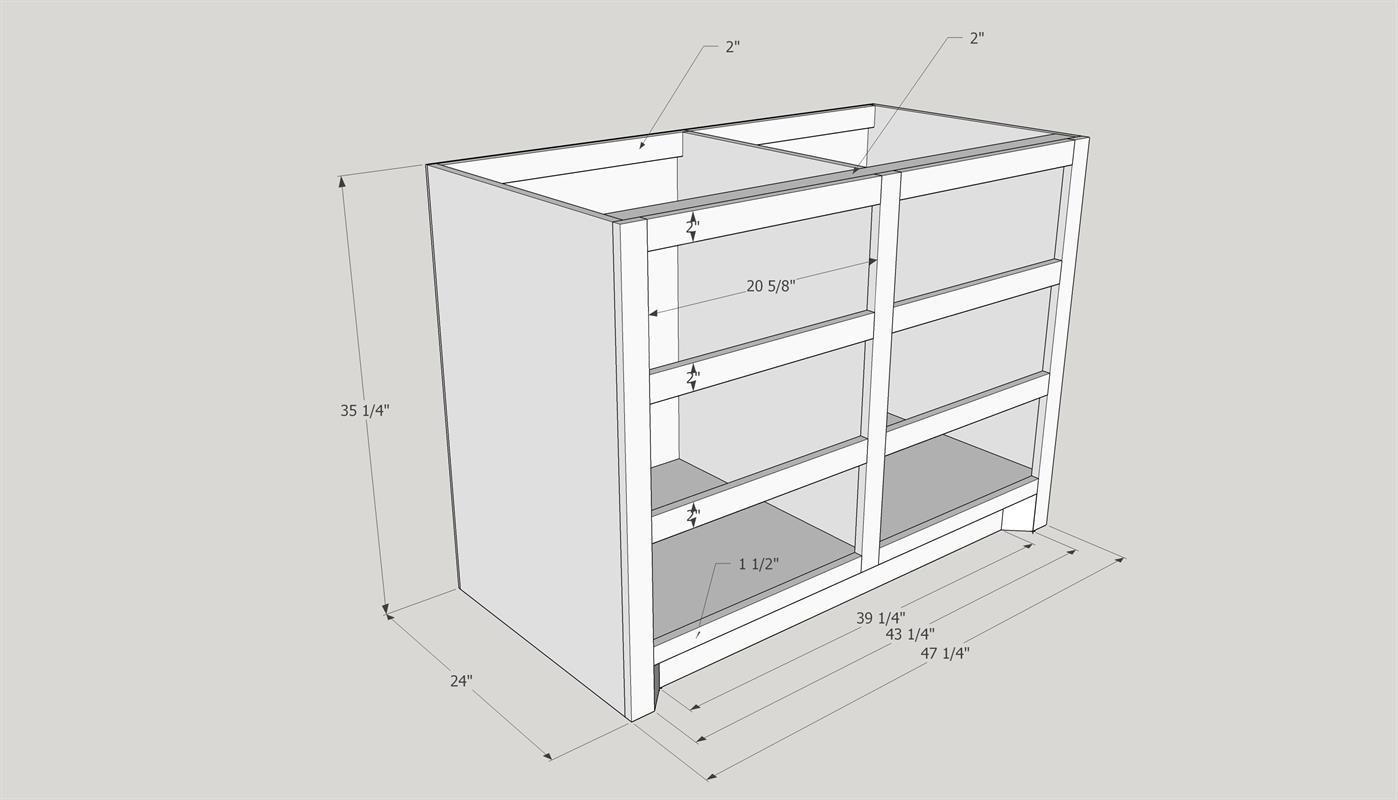
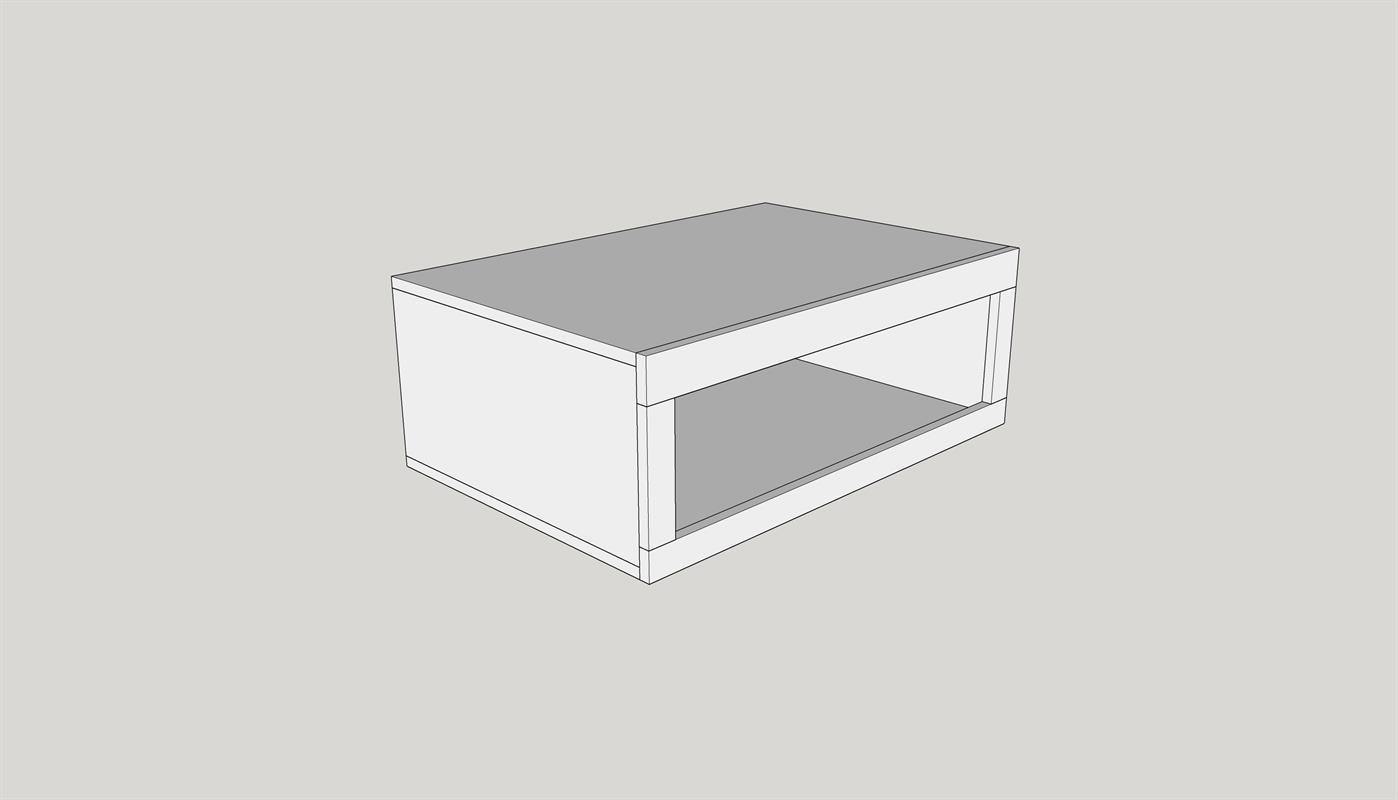
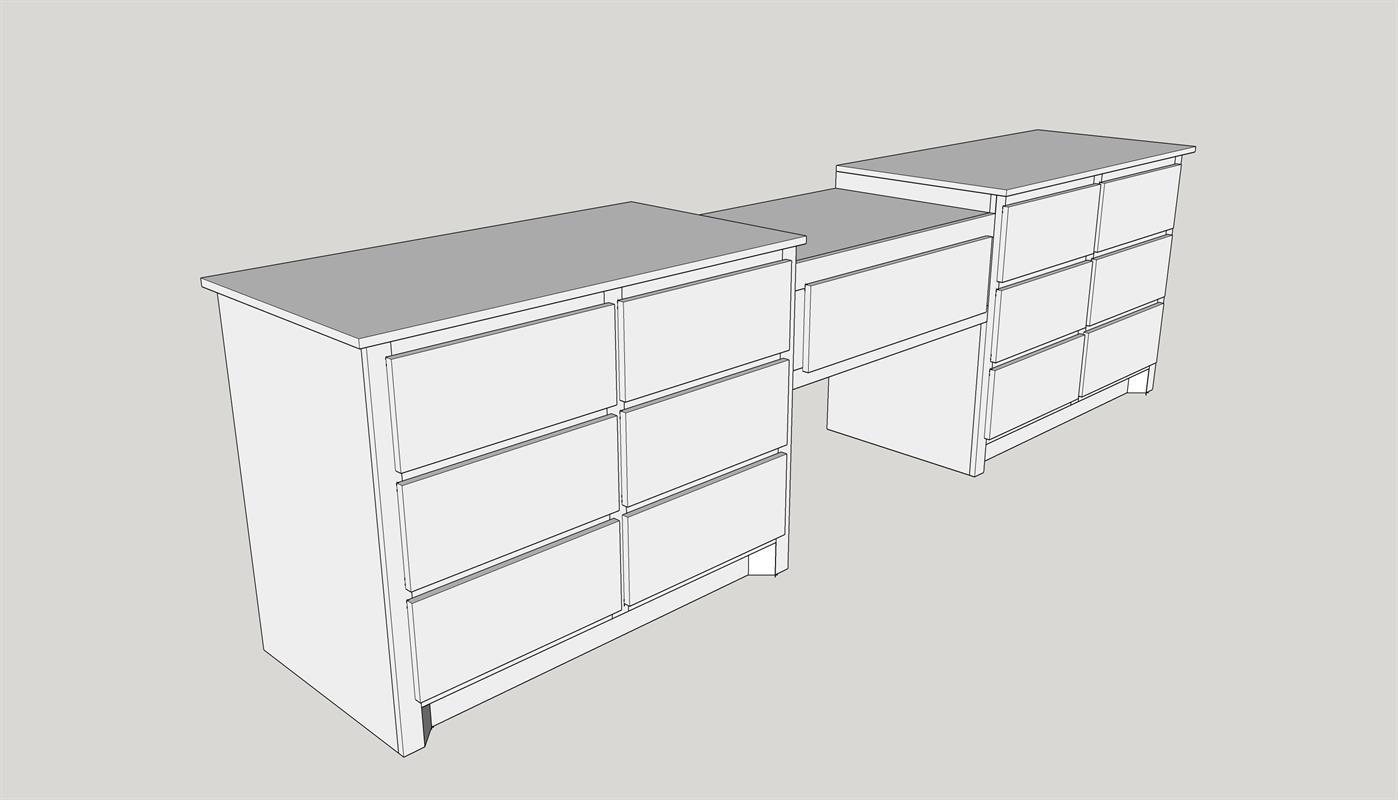
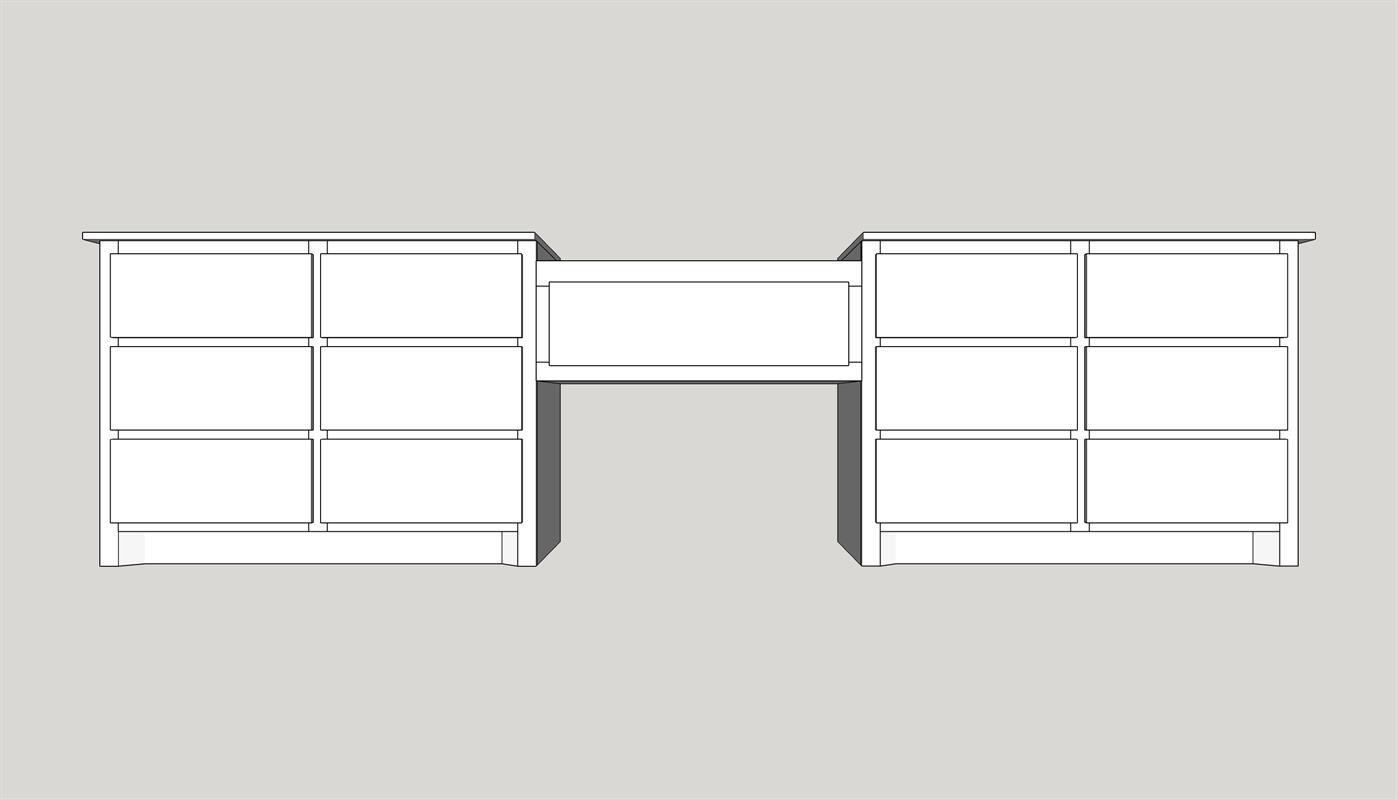
Base Cabinet x 2 Overview
This is the full shot of the Base Cabinets, there will be 2 total, one left and one right. Read all the way through the plan first.
-
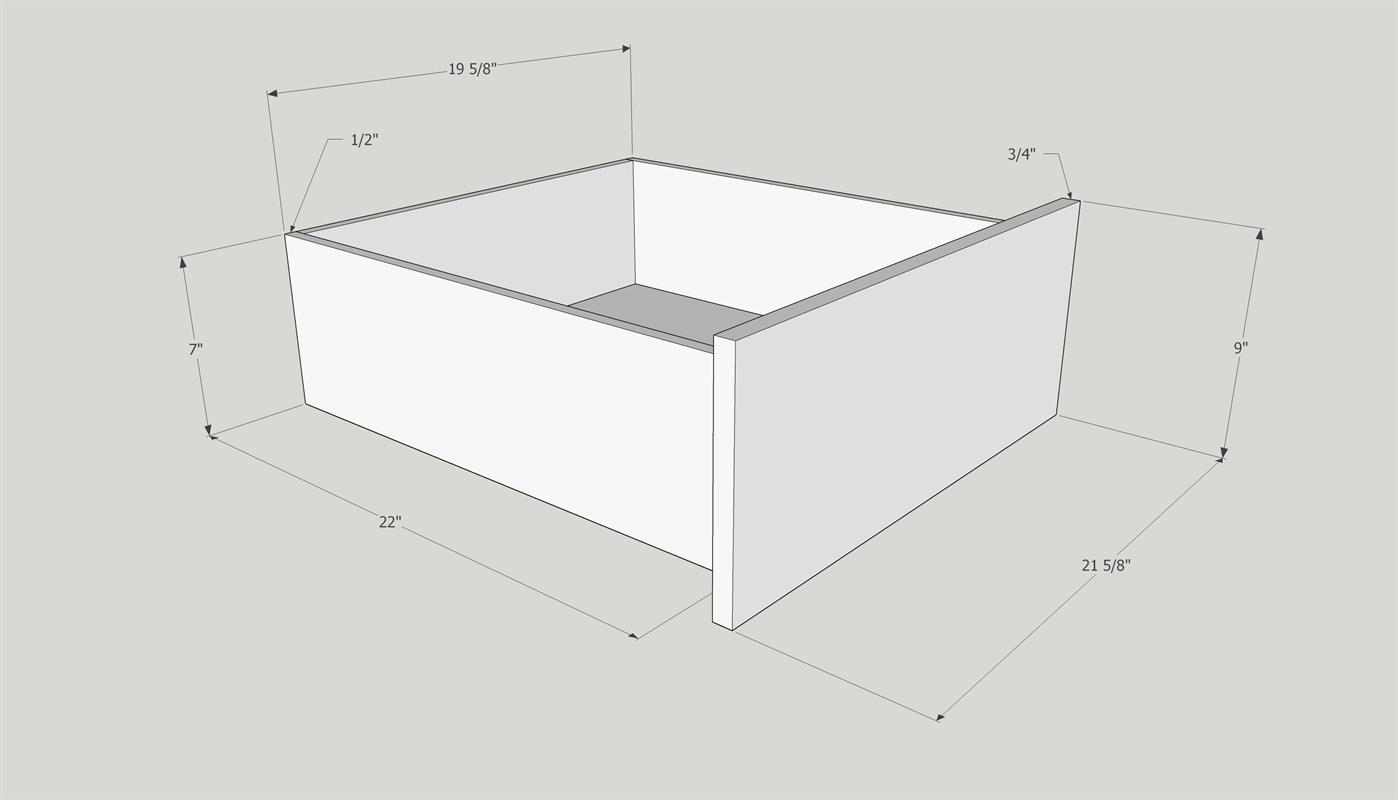
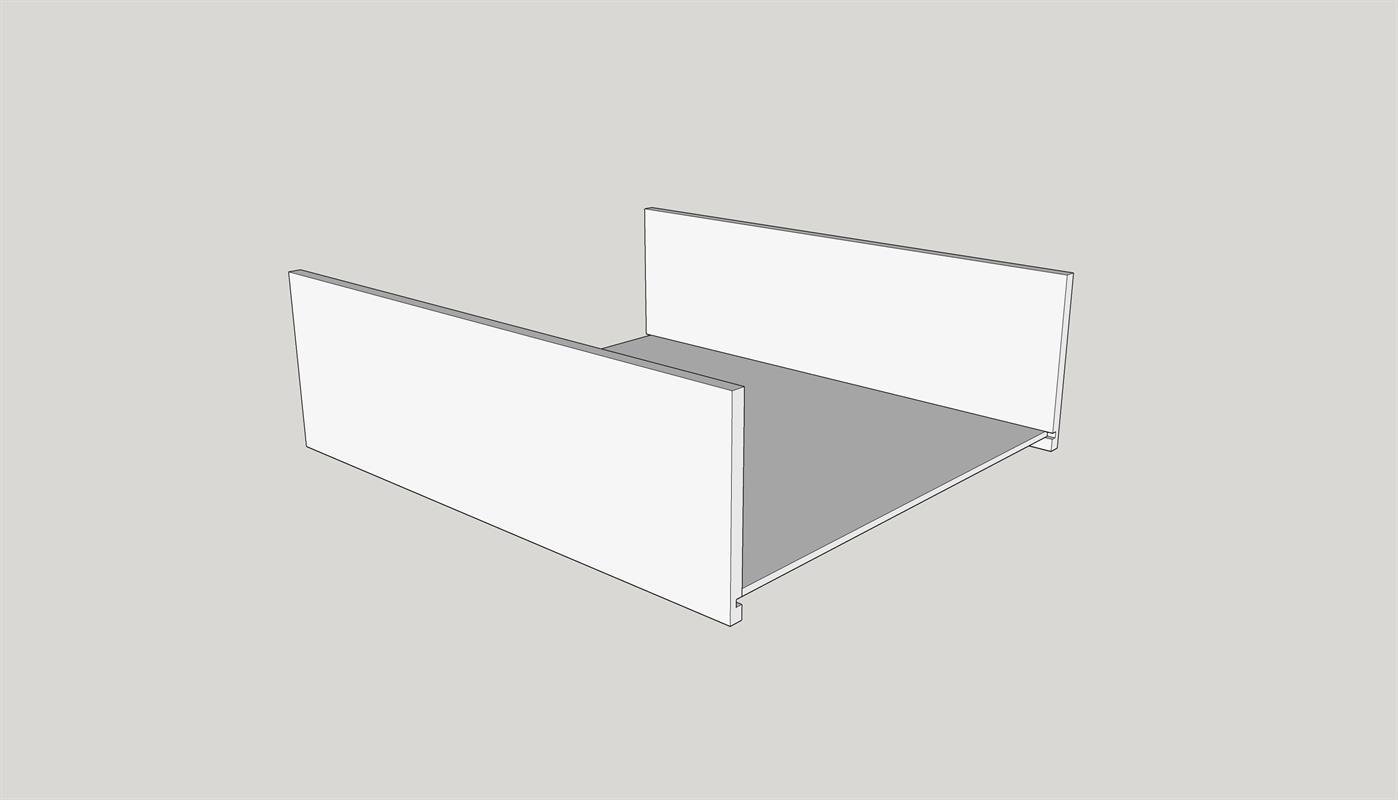
Middle Drawer Box Overview
This box and drawer are different from all the other pieces in this build. Here is the over all view of it before we get started.

-
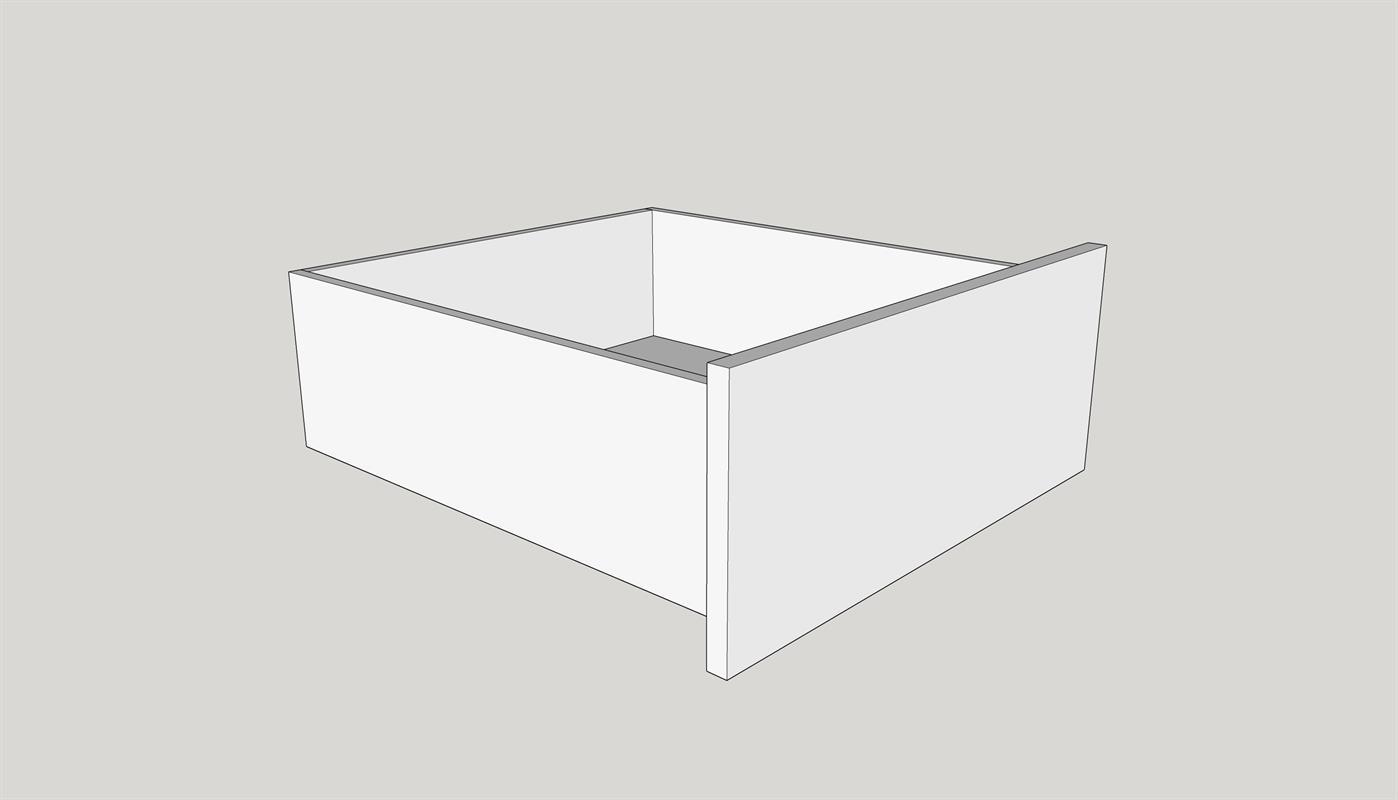
Middle Drawer Build Overview
This drawer is different from all the other drawers. Here is the overall shot before we start.

-
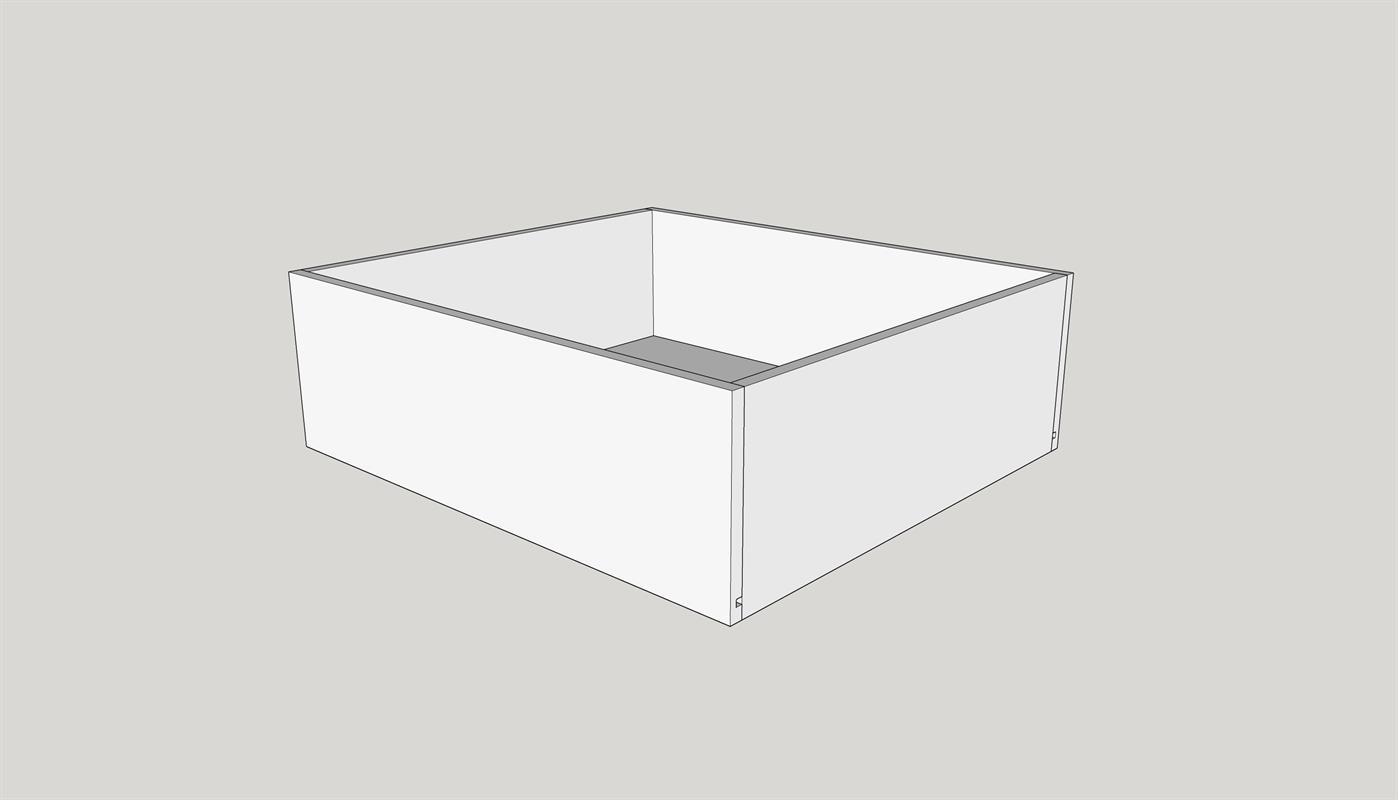
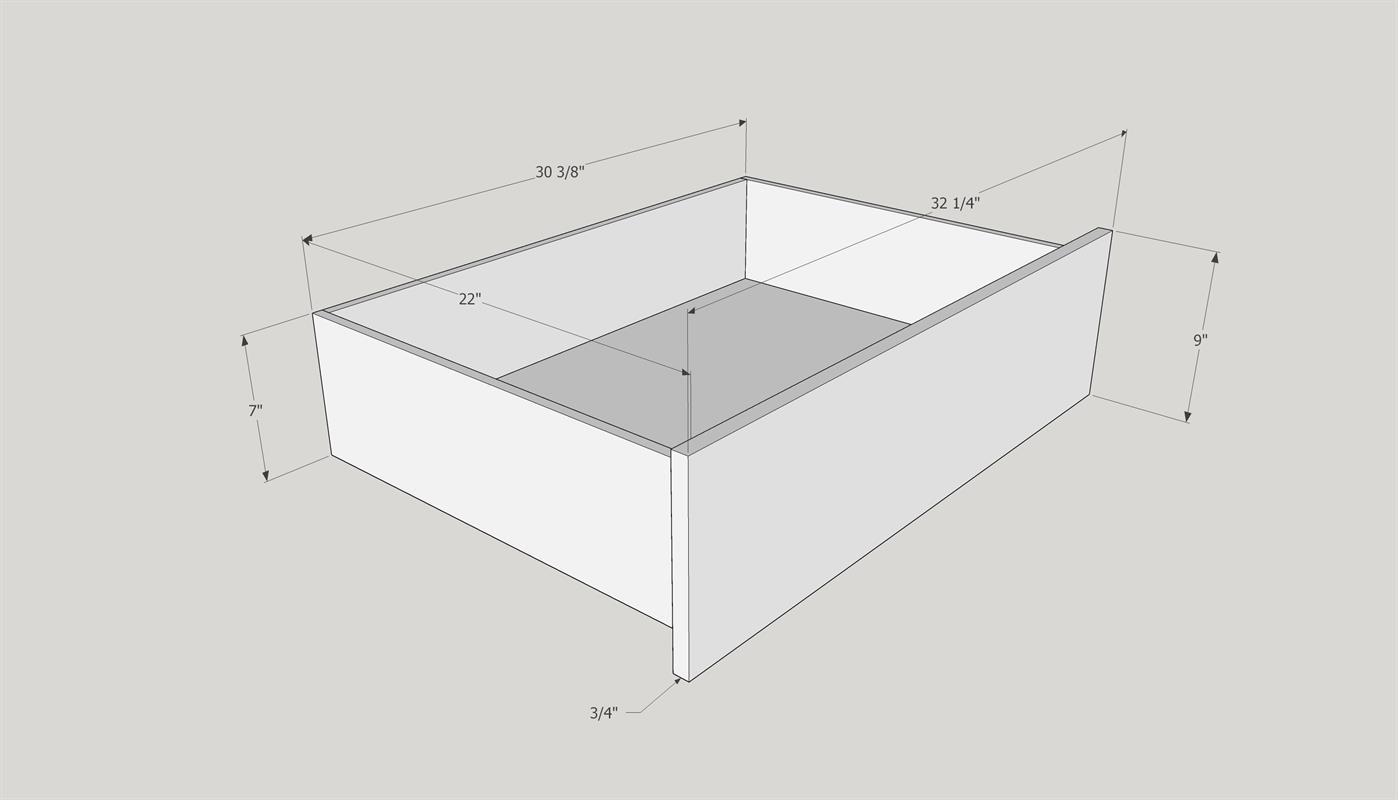
Base Cabinet Drawers Overview
There will be 12 of these drawers that are the same. There will be one other drawer, the middle drawer, that is different. Here is the overall view before we get started.
-
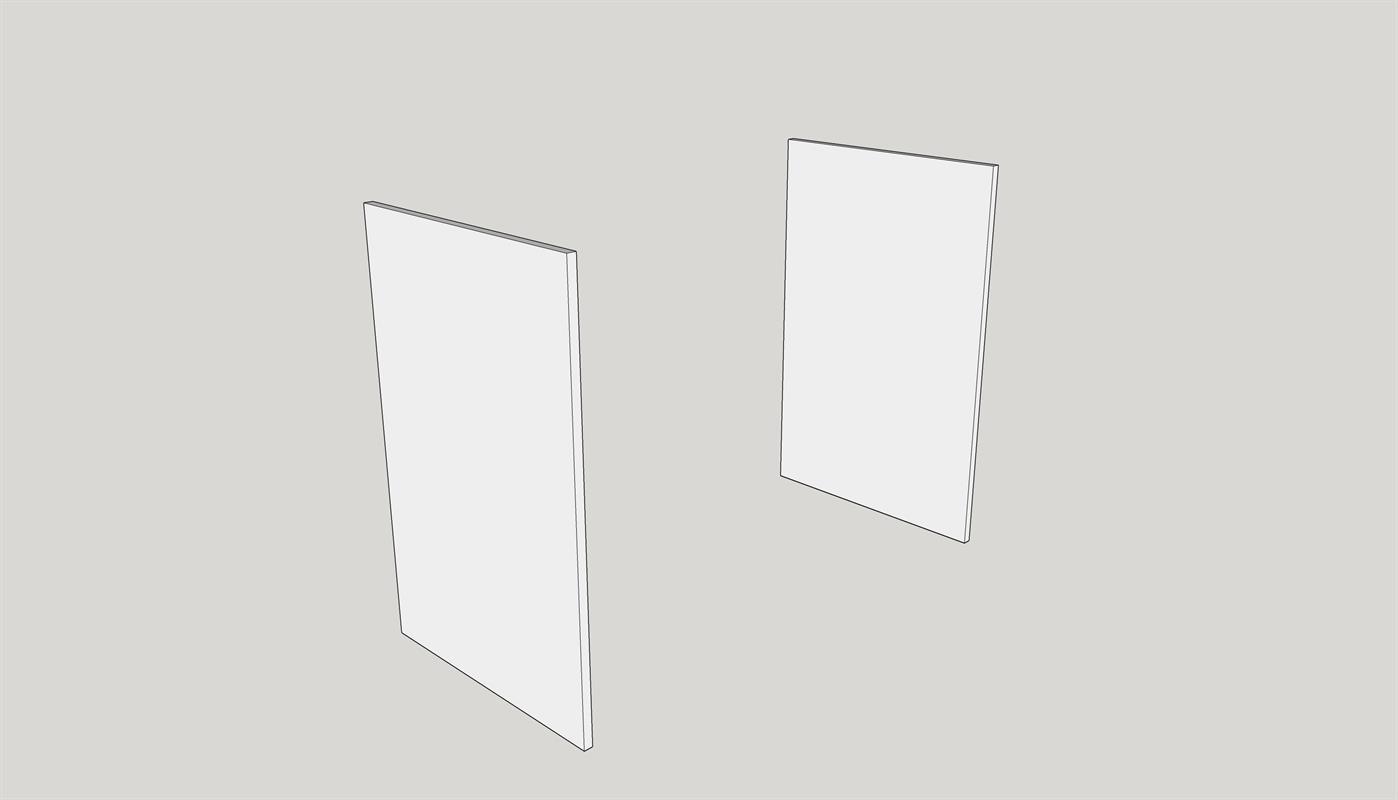
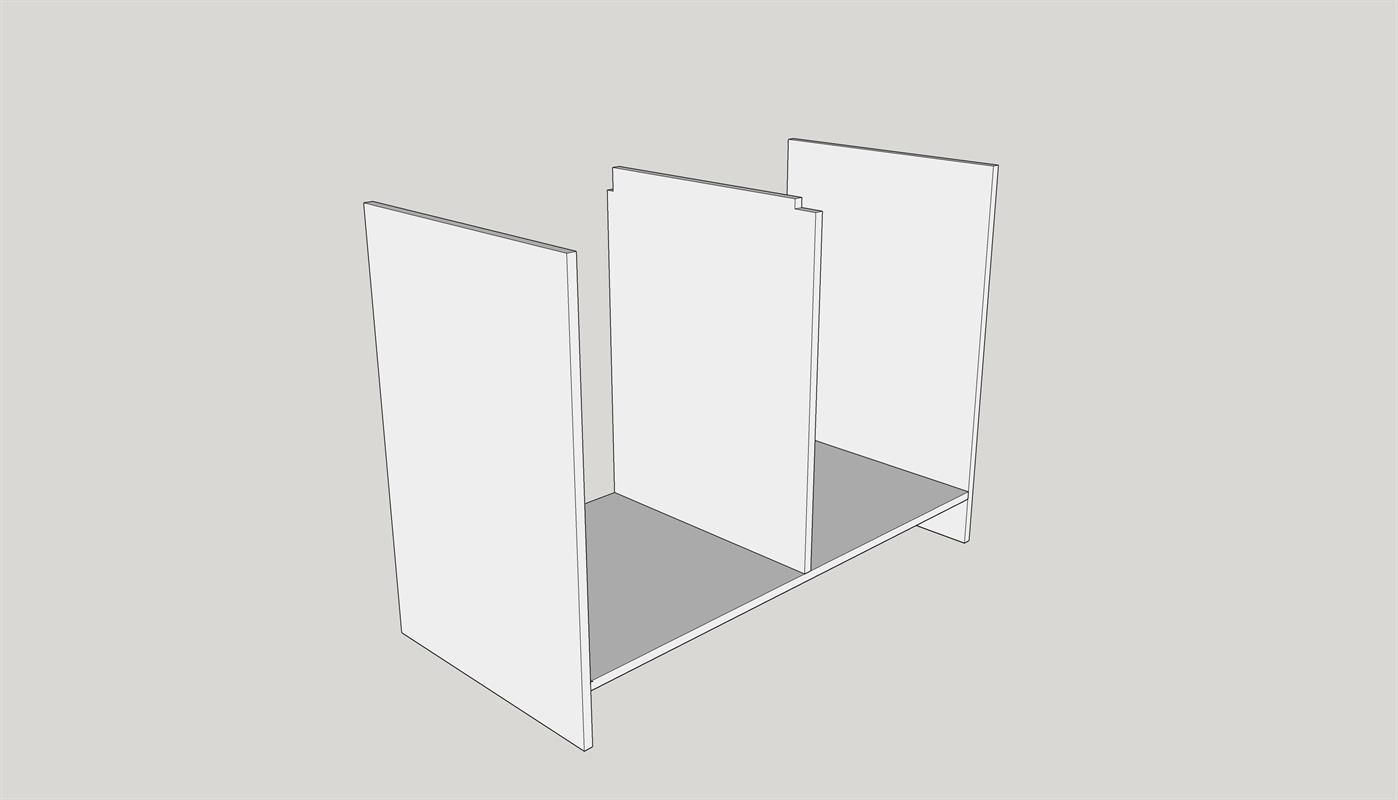
Starting Base Cabinet
My usual first step after cutting is to assemble the boxes first. So first, take your two side pieces made of 3/4" (35 1/4' x 23"). You should have 4 of these total if you are making both bases.
-
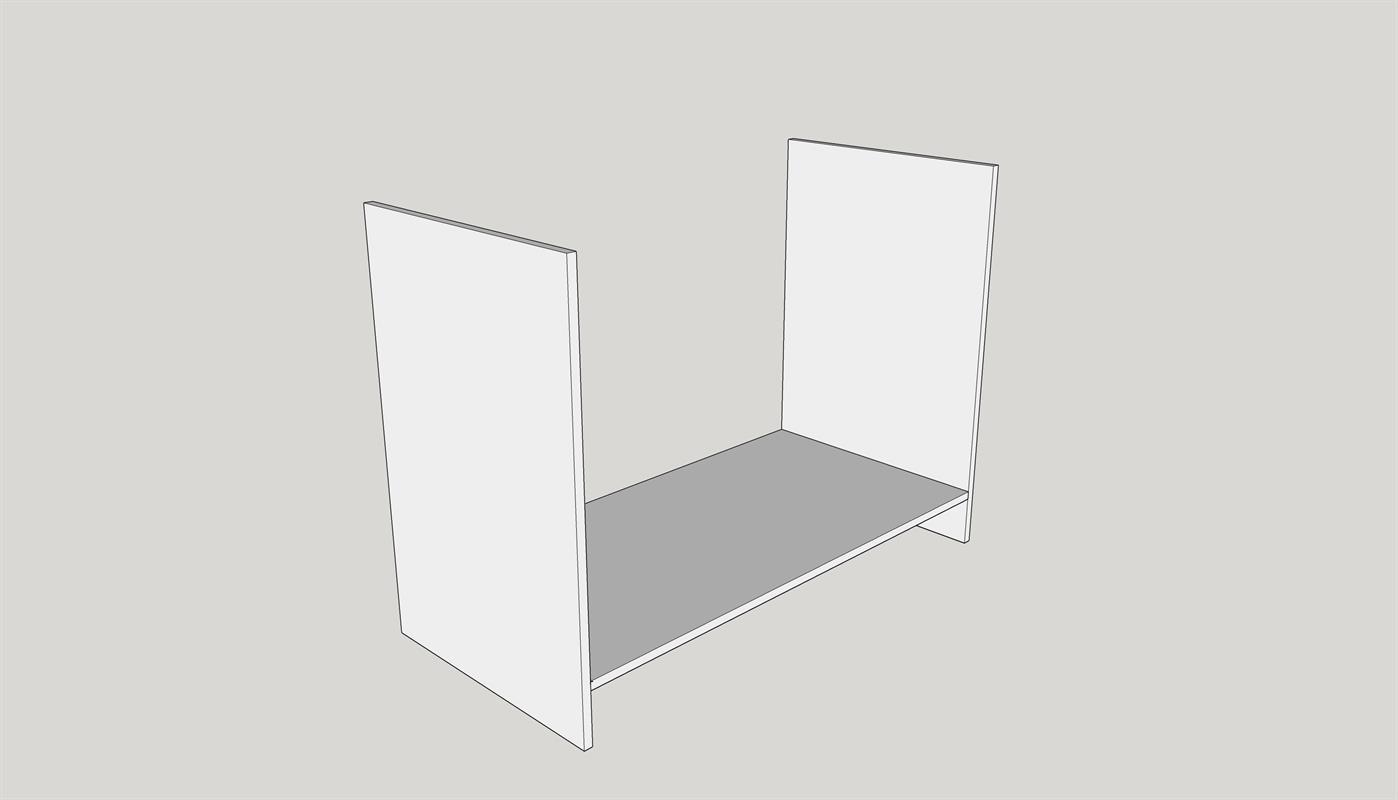
Assemble Sides and Floor
Next, using a 16 or 18 gauge brad nailer attach the floor to the inside of the cabinets sides 5" high. Be sure to attach the floor underneath your 5" mark.
-
Divider Notches
Notice on your divider you'll have a 3/4" x 2" notch on the back and on front top. 2 support will cross here. Instead of attaching the divider first make sure the supports are holding the entire cabinet square first. You'll see this on the next step.
-
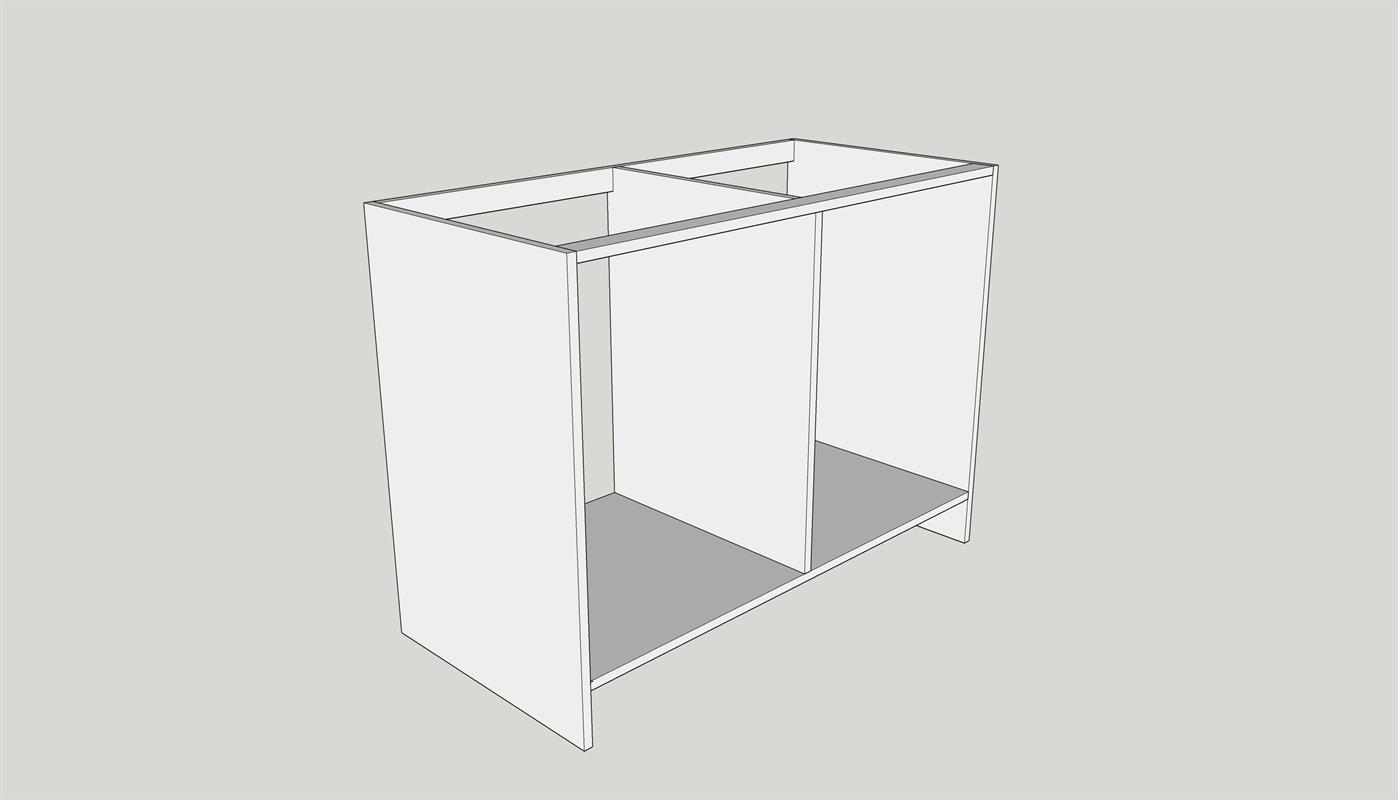
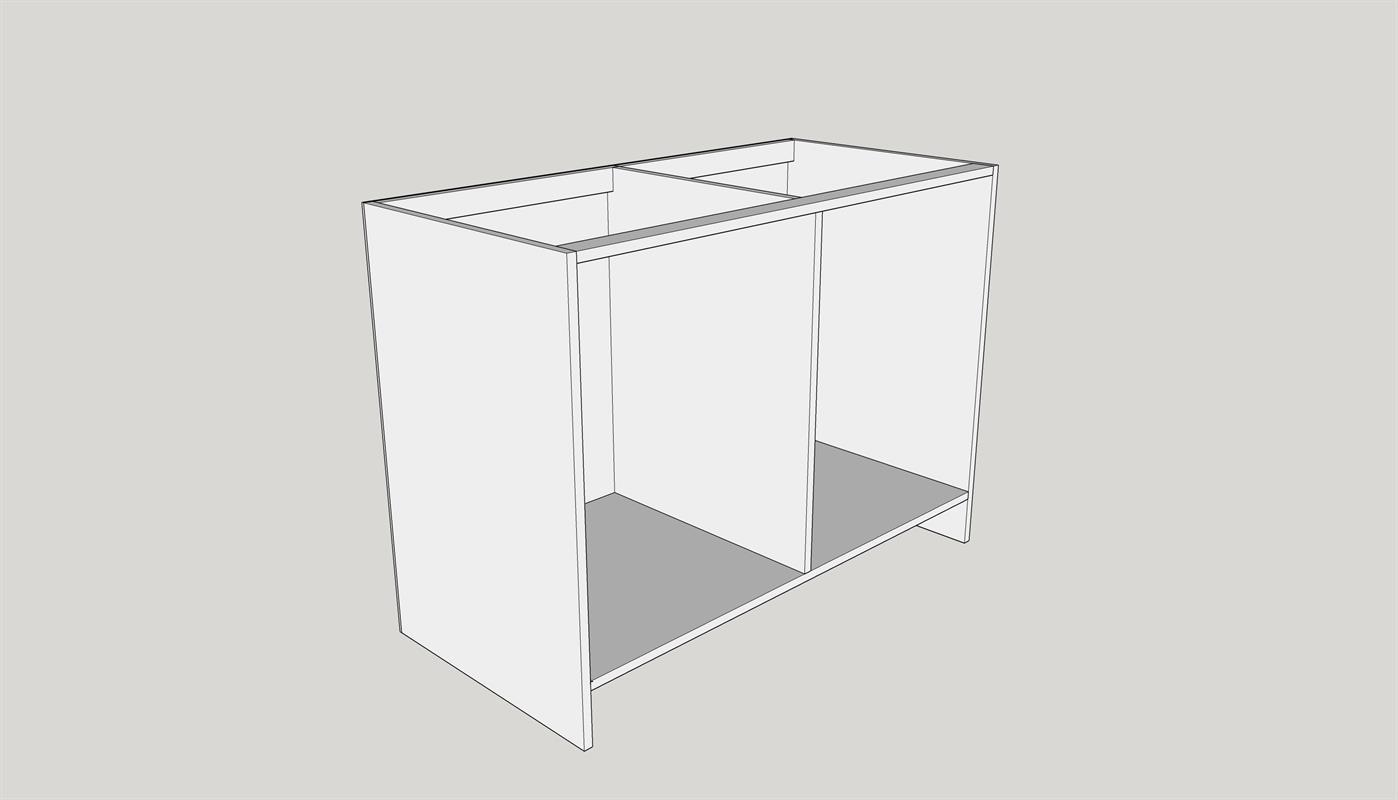
Supports Added and Divider
See here the 2" supports are added. Add these before the divider and you can simply turn the divider into place after. (Or you could wait until you attach the face frame in the next step, then slide the divider into place making sure it is perfectly center with the center stile). Any piece you are attaching from the outside of the cabinet with your brad nailer you could easily use pocket holes and save yourself from having to fill nail holes later. Pocket holes will hide all of that on the inside. The reason I do it this way, is efficiency when building a lot of cabinets, plus working in a cabinet shop for a year. Carry on...
-
Add the 1/4" Back
Your 1/4" back should be 1/16" smaller all the way around, and can actually come up higher than your toe tick to save material. Your backer should be cut at 30 1/8" x 47 1/8". Lay the cabinet on its face and start on one side of the cabinet making sure its pushed in 1/16", staple all the way down the side of the your 1/4" backer. Now work your way around the box making sure each side is 1/16" inside the box or the 3/4" material using a stapler. I use 1/2" staples in an 18 gauge nailer. This can be a little aggressive, but will do the trick. A 20 gauge upholstery stapler is perfect for this.
-
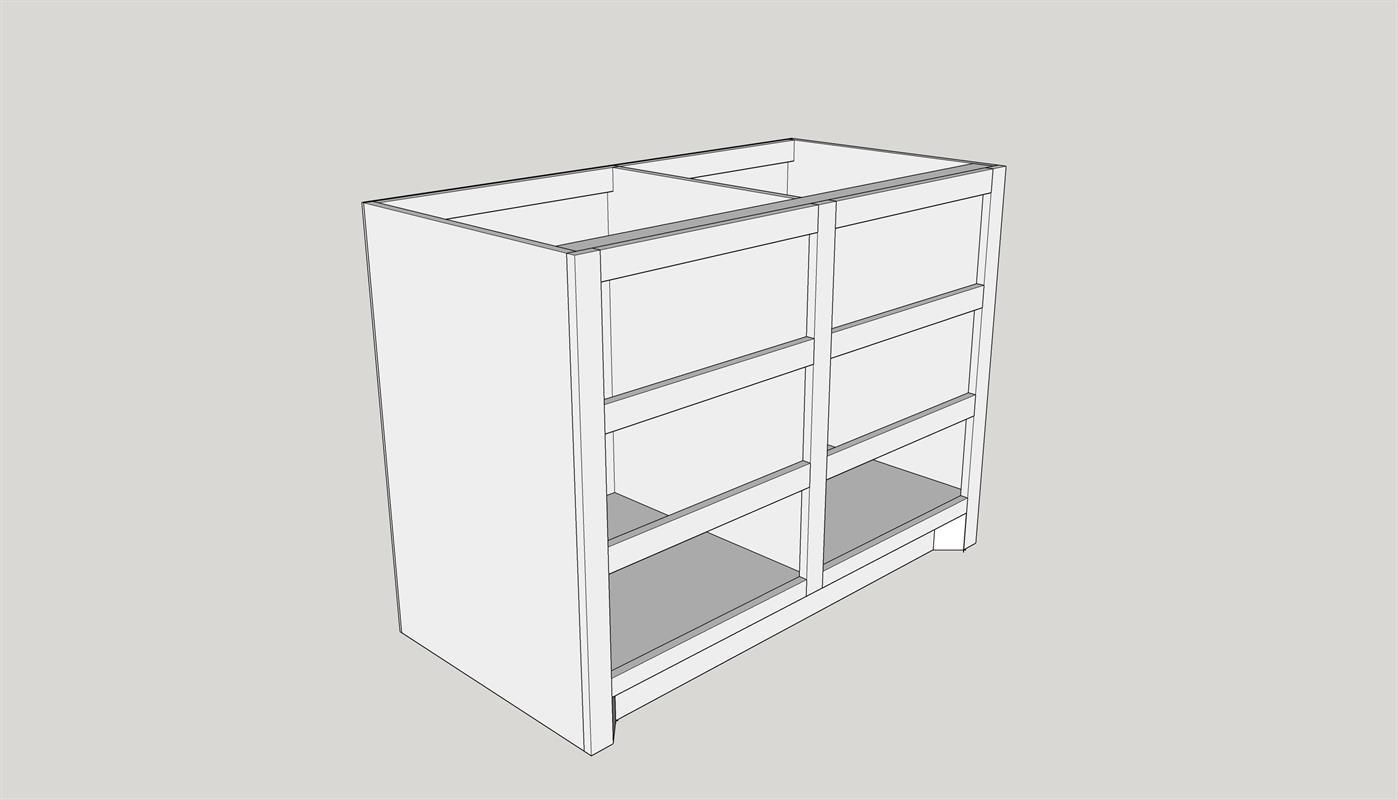
Attach Face Frame
Last, attach your face frame assembled previously. When assembling your face frame, make sure your first two drawer openings equal 8", and your bottom horizontal piece is 3 1/2" high. Your bottom drawer opening may be a little smaller than 8", and that's ok. Just make sure you do the same measuring on each side of the face from. This is my one time to use pocket holes. Make sure you use 2 pocket holes per horizontal runner (rail). Also, before attaching the face frame to the box, lay the box on it's back, spread glue over the 3/4" plywood face of the box. Next, square the face frame up by making sure one of the bottom feet are flush to the face frame and side, and attach using your 18 gauge brad nailer working your way around the cabinet.
-
Center the Divider
Maker sure you divider is centered in the middle of the middle stile of the face from while attaching. After this you are finished with one or both of your base cabinets for now.

-
Drawers for Base Cabinets
There are a ton of drawers in this build, which is great for storage. Be careful not to mix your pieces up or attach them wrong. I did this on this build myself by moving to quickly and using less than close to perfect materials. I originally used OSB, but some of it was swollen and threw my measurements off. Don't worry about this because now you have a cut list that works. First, take your 22" x 7" pieces made of 1/2" plywood and inset one of your 8 5/8" x 7" pieces of 1/2" plywood. Maker sure all of the corners are flush, making it easier to square up later. With one side open slide your 1/4" plywood bottom into your 1/4" dadoed grooves you made previously from the cut list.
-
Dados
The dados should have been made previously from the cut list. You can use a table saw for this, cutting 1/8" width at a time. It'll only take you two passes. Pre cut all of your drawer sides and run them through at 1/2" setting on your saw with the blade raised 1/4". Once you've made one pass, change the setting to 5/8" on your table saw keeping the blade height at 1/4". Congratulations, you just made a 1/4" dado groove without a dado stack. You can use a router for this as well. Once you assemble 3 sides to your drawer, slide the 1/4" bottom into the grooves, and inset the last short side piece 18 5/8" of the drawer. I use an 18 gauge stapler with 1" staples for all the corners. You are now ready to install your drawers.
-
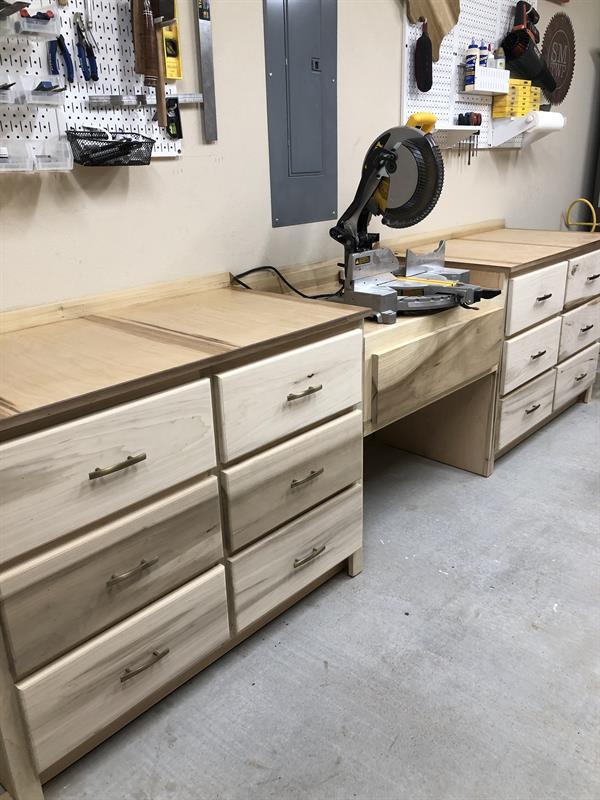
Adding the front
Later you will add the fronts to your drawers once install. I do it this way because it's easier to square the drawer faces once the drawers are installed. I designed the drawer faces to have a half inch overlay all the way around the face of the face from on the cabinet. You can rout your drawer faces to whatever style you want. I did a 1/2" round over all the way around. You can see it in the finished pictures later. All except for the middle drawer piece. I left that one square and with no hardware yet.
-
Installing Drawers
I didn't go into great detail on this build about how to install drawers due to the fact that everyone installs theirs a little differently. I have a previous plan on here "Coffee Bar with Hutch" that goes into greater detail about how I install all my drawers with saddle and supports. I used the same method on these cabinets. If you don't use my way you could easily use under mount slides or even block out the sides of the cabinet and not use saddles. Let me know if you have any questions at all.

-
Middle Box
This box will connect the two cabinets and together and also be dropped a few inches depending on the style of miter saw you buy or own. You eventually want the top shelf of the miter saw to be level with the very top of the base cabinets. This way you can lay a board all the way across and cut it easily without it dropping. Here start with the box and assemble 4 pieces of plywood using the 18 gauge brad nailer.
-
Middle box Face Frame
This face frame is a little different. The top rail is 2 3/4" so make note of that when you are cutting your material. Assemble your face frame again using pocket holes, clamps, and glue. Attach the face frame to the front of the box making sure the top of the box and face frame are flush to each other.

-
Middle Drawer
Take note of all the differences in the measurements on this particular drawer. This is the only drawer that is different. You'll cut and assemble this drawer similar to the other 12. DO NOT mix up the sides with the front and back. This can be easy to do, because I did it. The front and back are quite a bit longer than the sides. The front and back are still inset like the other drawers. Just be sure not to mix these four up. Typically drawers are longer than they are wide. Not in this case.

-
Be Careful
If you are using saddles to install your drawer you might want to build and set the saddle with the slides inside the drawer box before you attach the face frame or before closing in the top. These are two easy ways to fix a difficult drawer install later. 8" is a lot of room to install a drawer, but it is even easier not having to reach into the back of the cabinet to secure the saddle later.
-
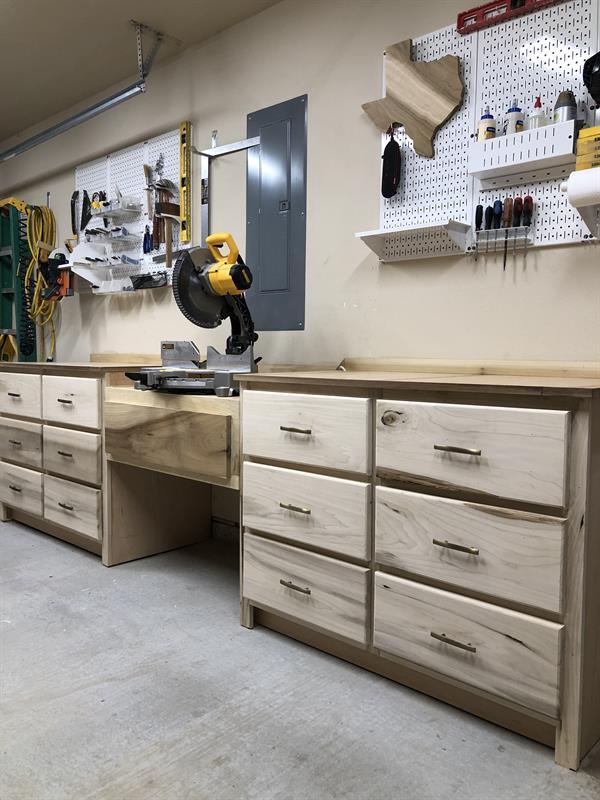
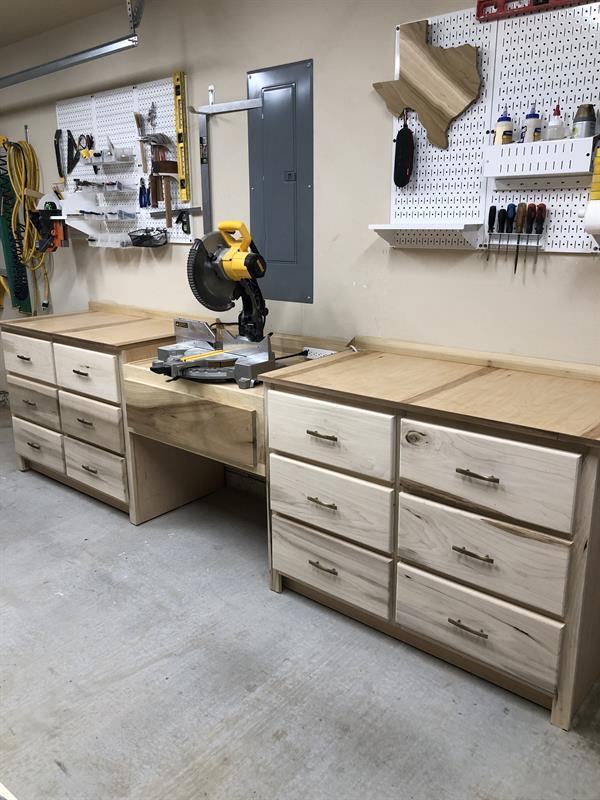
Attaching the 3 pieces together
Determine where and how you want to install your cabinets. I installed mine in my garage and screwed them to studs in the wall. One thing I would avoid if you can is to stay away from your breaker panel. Mine will be covered later and I will also add dust collection on my miter saw. The reason mine is center on the panel is the center it in the garage on the outside wall to minimize noise to the house itself. Plus I knew id cover it later and create easy access to the panel with something removable. Adding dust collection to your saw will help a lot as well.
-
Connecting
You can brace underneath your cabinets to attach the middle box to or screw directly into the plywood from the inside or outside. I use 1 1/4" screws on both sides to attach them to the cabinet after the two base cabinets were mounted to the wall.
-
Table Top
Usually I would add a hardwood top to a nice station, but I had extra 3/4" plywood and wanted to finish it up. This is an option for you as well. The toe kick is also extra, and everyone has their own style of how to do it. Here I set the toe kick runner back 1 1/4" from the face frame all the way across. You can even add a 45 degree angle piece as well. I also go into greater detail about this on the "Coffee Bar with Hutch" in previous plans. Again it's just an extra option. If you look in my completed picture you'll notice I haven't added mine myself yet. However I did add walnut trim around the top edge of the plywood top.