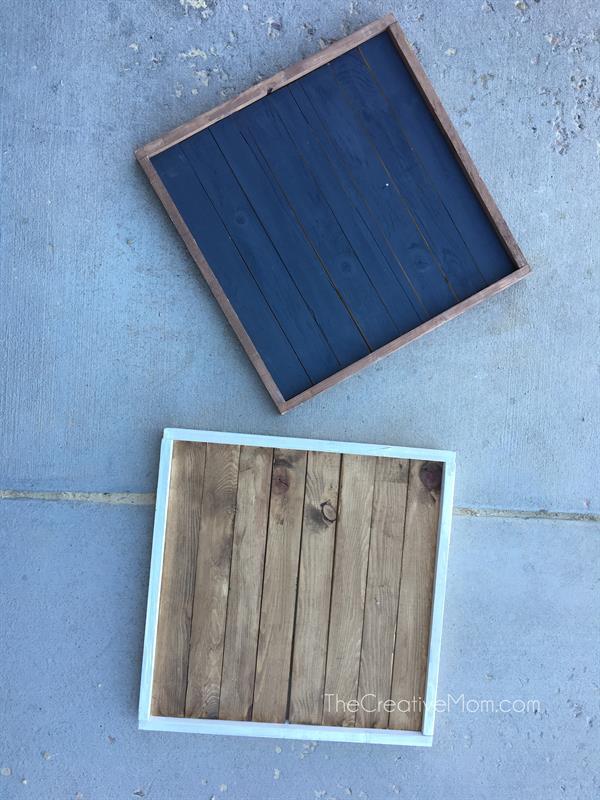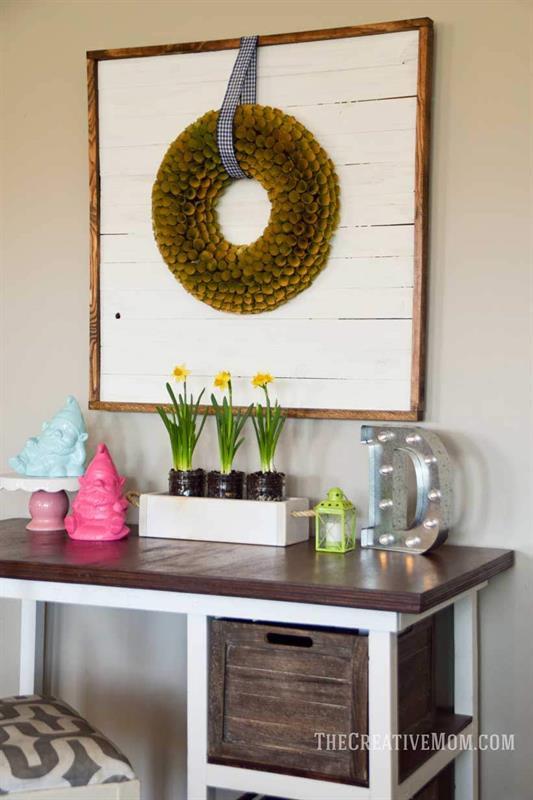
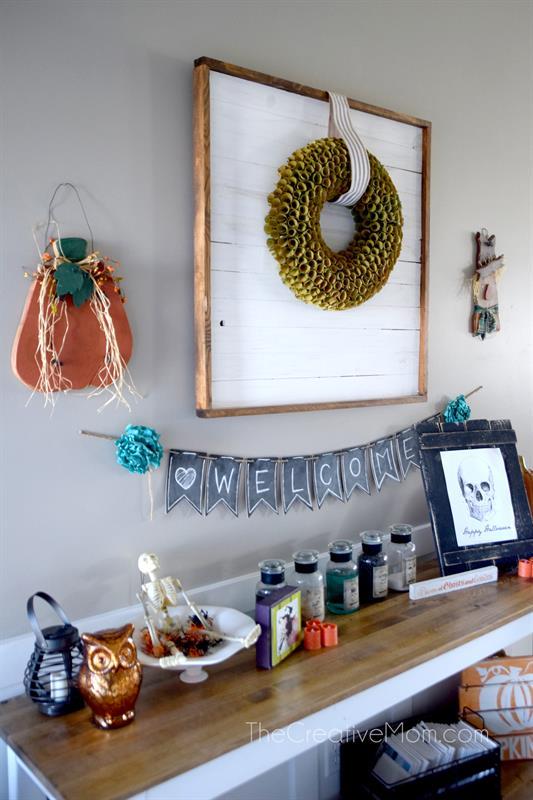
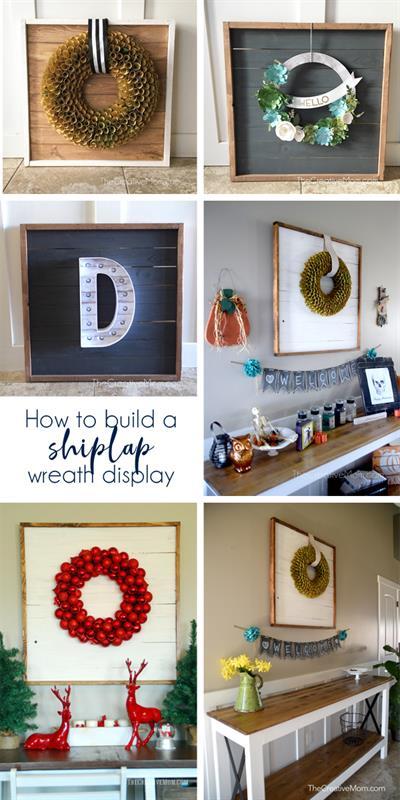
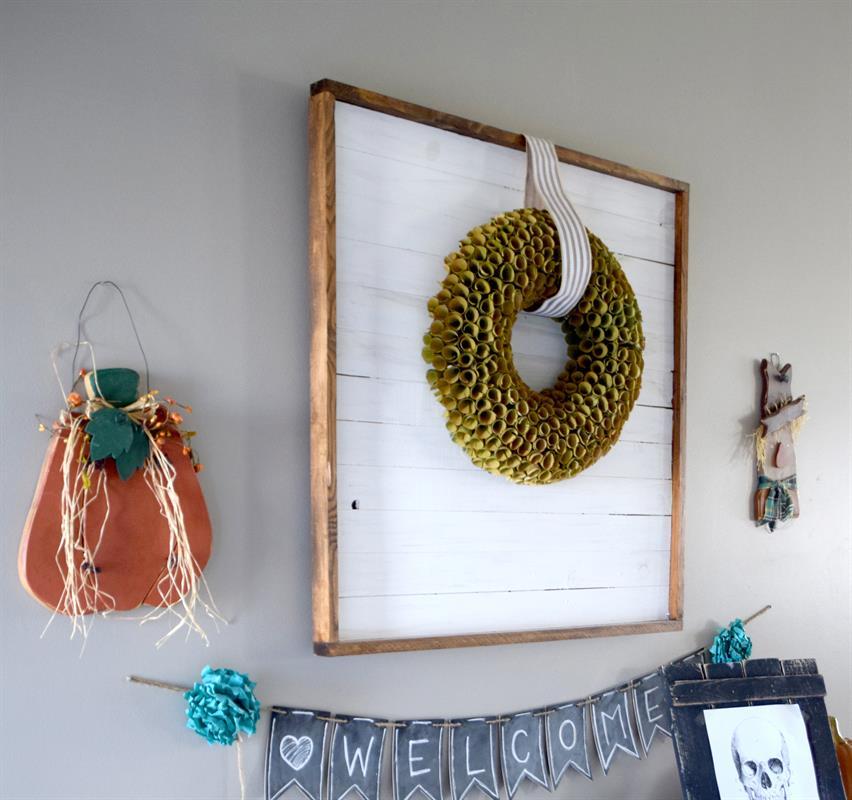
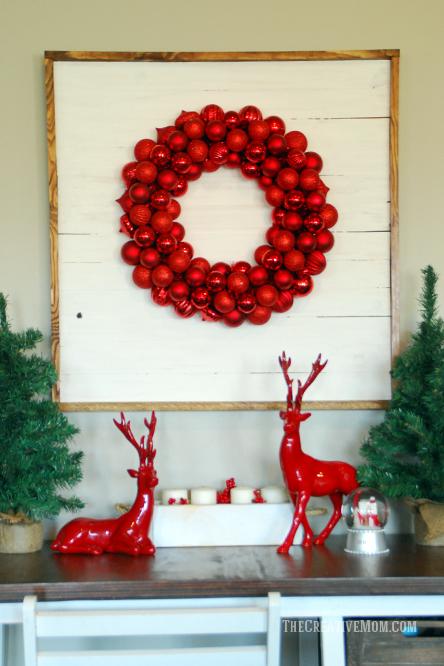


This is a quick and easy build. Perfect for beginners! This wreath display frame is designed to look like SHIPLAP, so it's perfectly rustic and fits with any farmhouse or industrial decor. While it's great for wreaths, you can display anything on it.
Tools
Kreg Tools


Other Tools
-
Miter Saw

-
Tape Measure
-
Nail Gun
Materials
Wood Products
- 4 Board , 1x3 , 96"
- 1 Board , 1x2 , 96"
Hardware & Supplies
- 100 1 1/4" brad nails
- 8 1 1/4" pocket hole screws
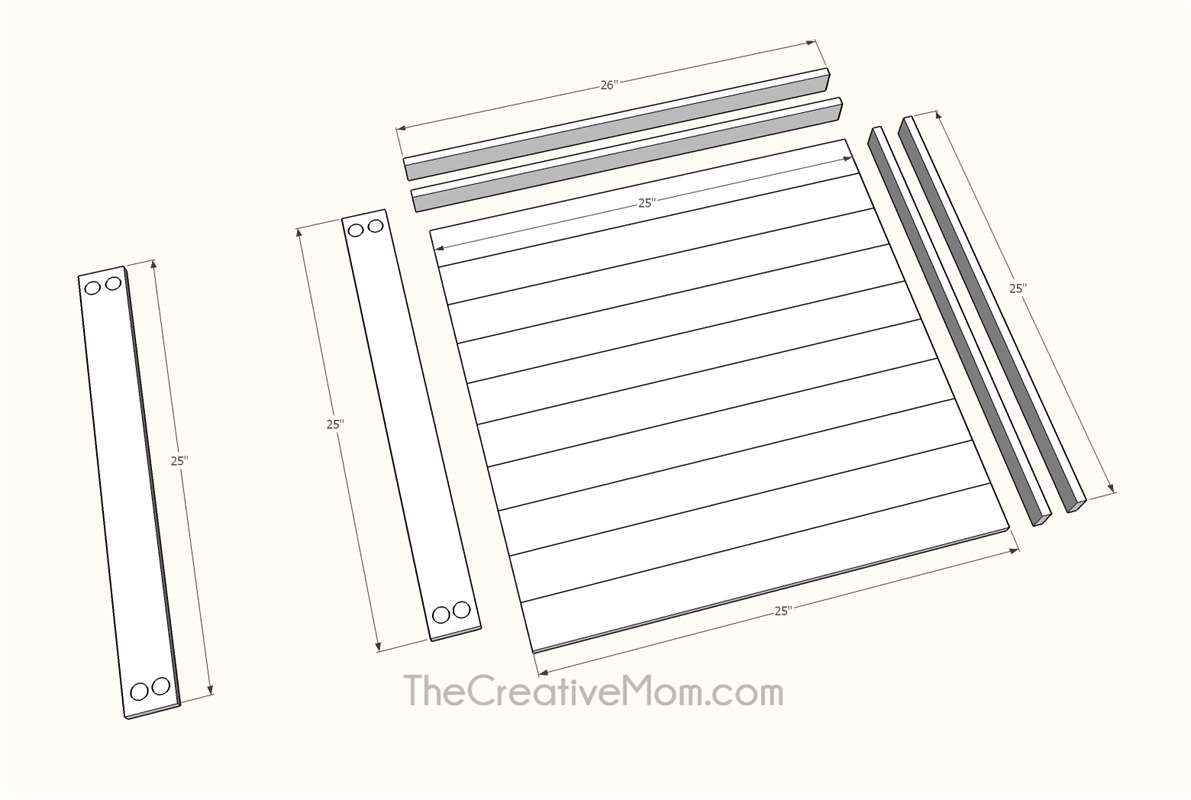
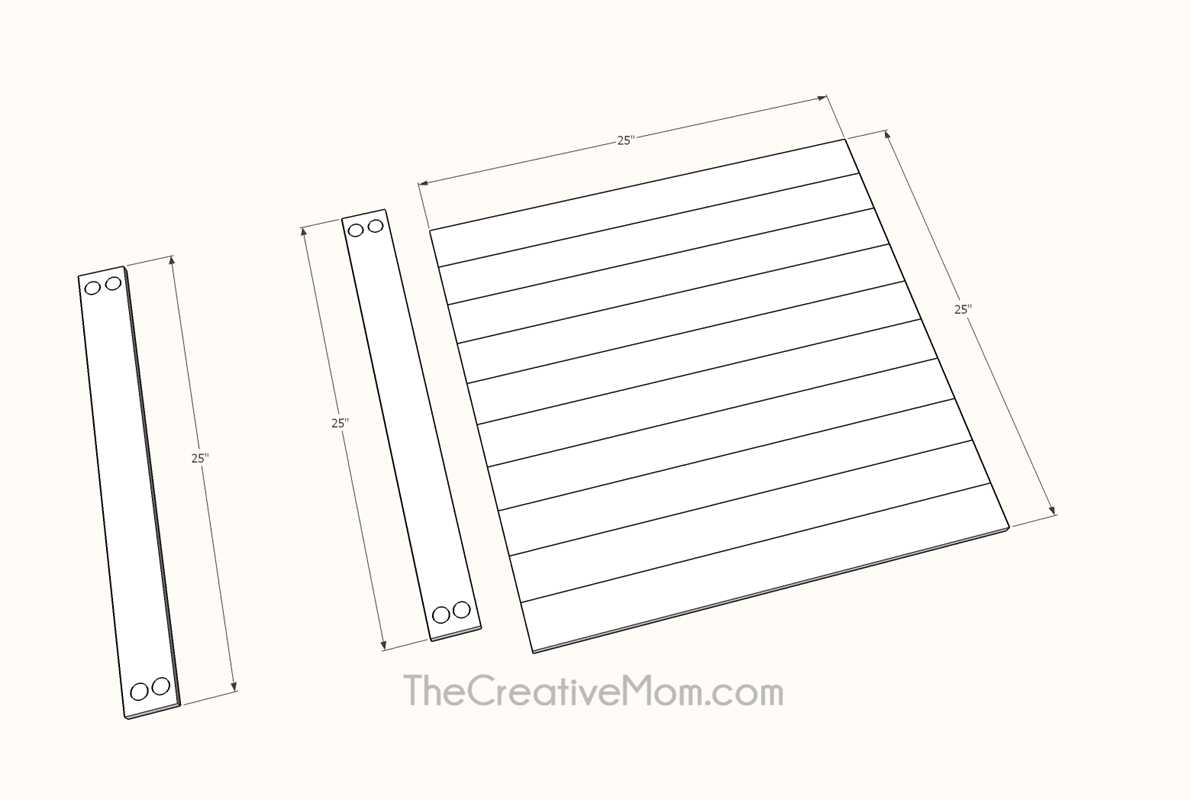
Cut List & Parts
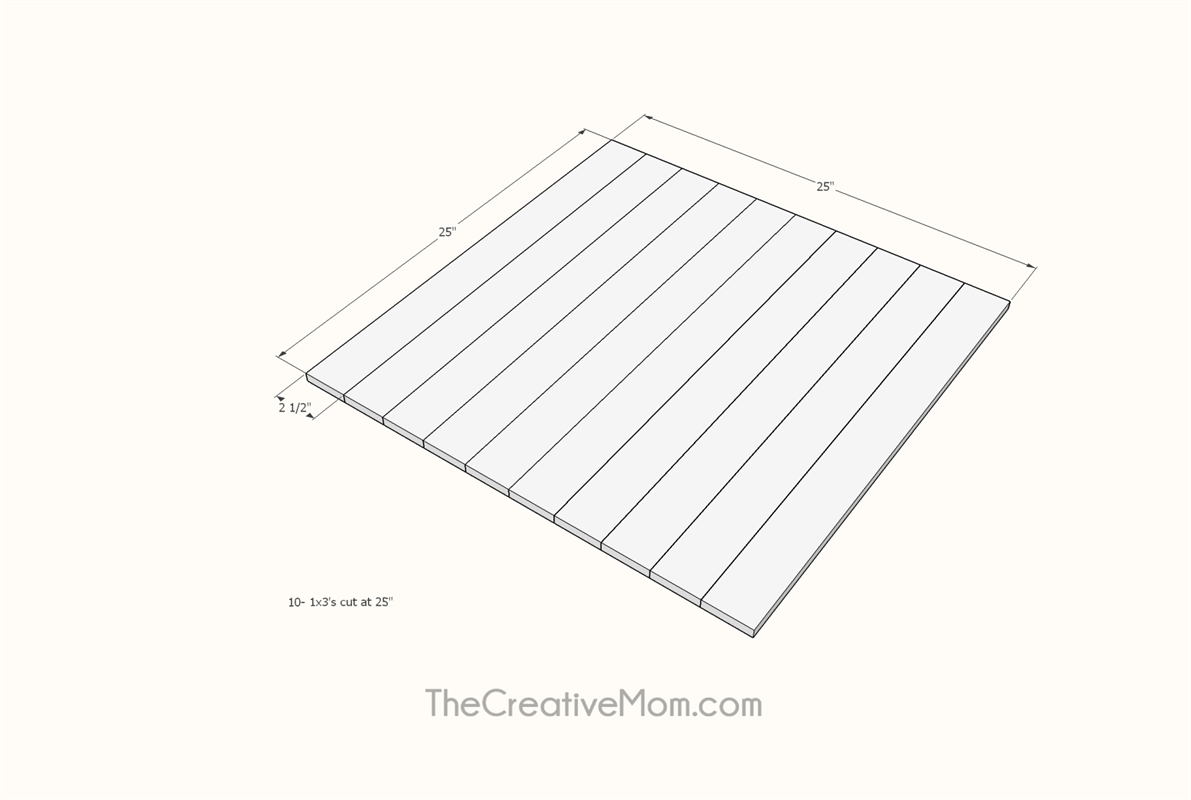
- 10 Planks , 25" 1x3's
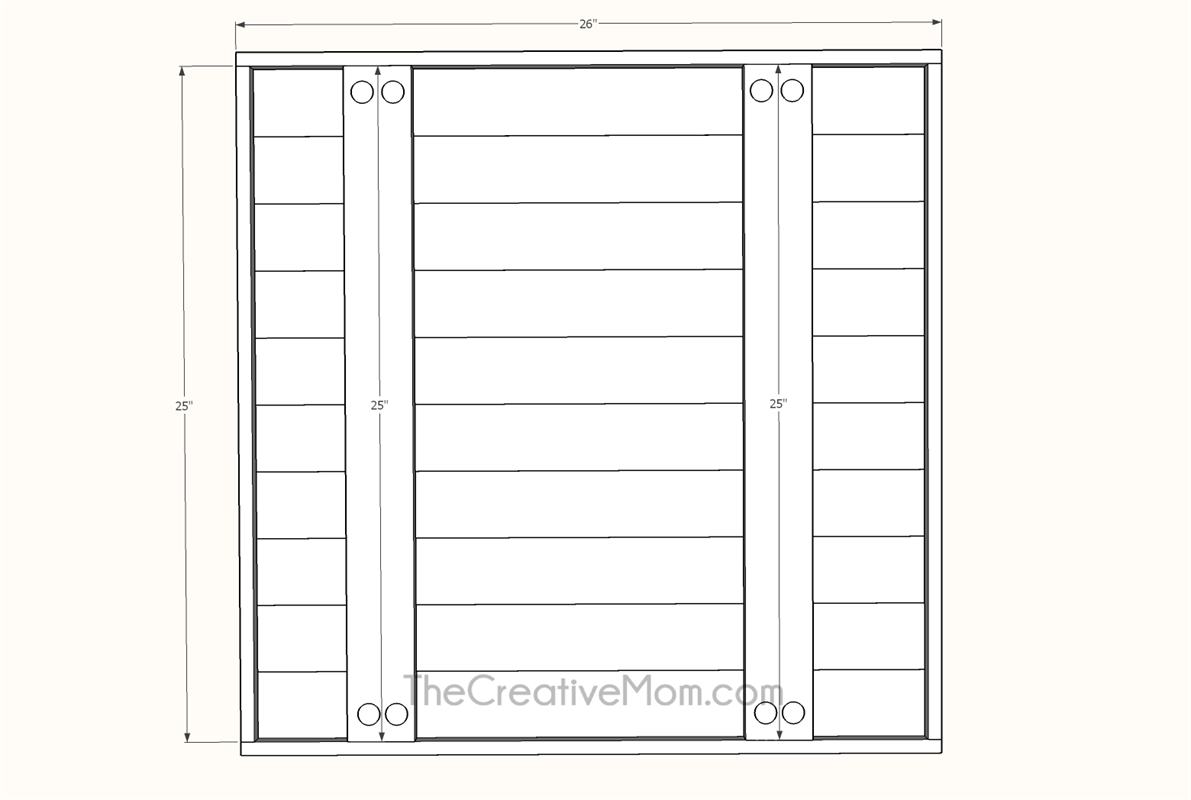
- 2 Support pieces , 25" 1x3's
- 2 Frame pieces , 25" 1x2's
- 2 Frame pieces , 26" 1x2's
Directions
-
Cut Support Pieces
Place all of your planks together in a row. Measure the width of your planked pieces (across the planks). It should be about 25". Cut two 1x3's to match that measurement.
-
Cut Planks
Cut 10- 1x3's at 25 inches.
-
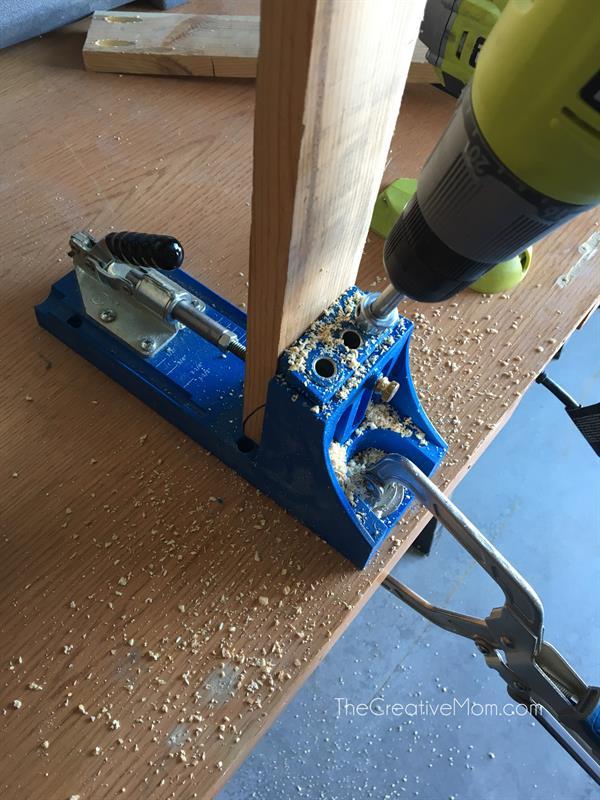
Drill Pocket Holes
Drill pocket holes in the ends of the two support boards.
-
Cut Frame Pieces
Cut 2 1x2's at the same length as your support pieces (that you drilled pocket holes in)- should be about 25 inches.
Measure the width of the planked pieces including the frame pieces you just cut, and cut 2 1x2's at that length (should be about 26") see diagram
Do not attach any pieces yet.
-
Dry Fit
We should have everything cut and ready to dry fit. Make sure all of the boards fit together squarely and that the frame pieces match up.
-
Attach Frame
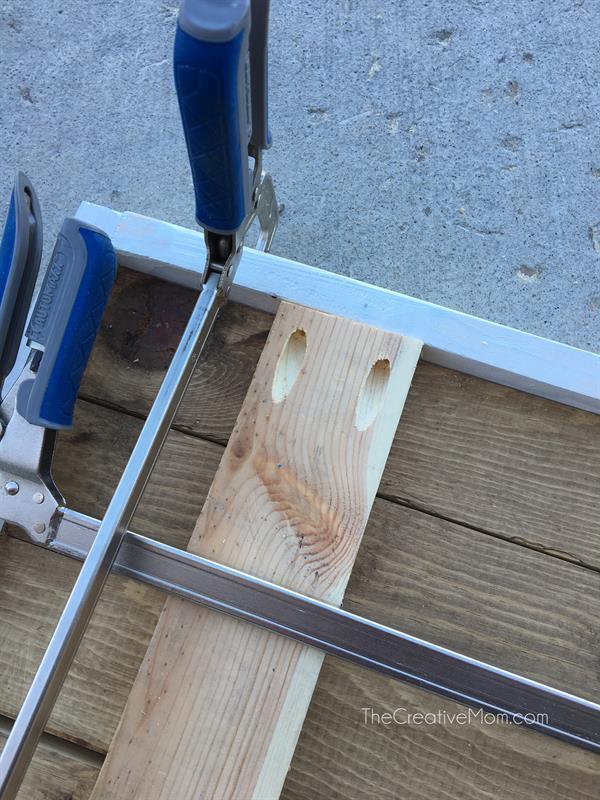
Using 1 1/4" pocket hole screws and wood glue, attach the support pieces to the frame.
-
Attach Suppports to Planks
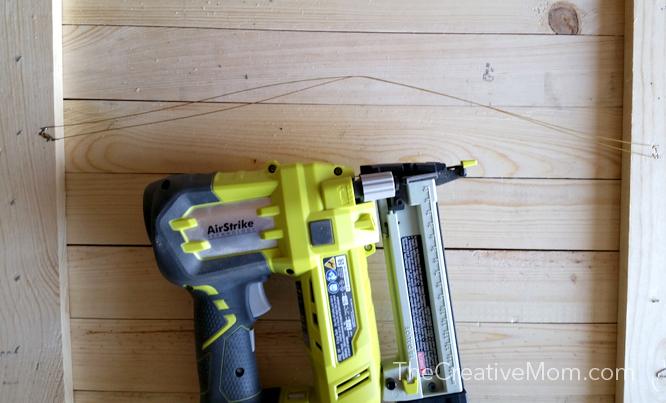
Using a brad nailer and 1 1/4" brad nails, attach the support pieces to the backs of your planks. Use wood glue for extra strength.
Since we will be attaching our frame to our 1x3 support pieces, make sure the ends of your support pieces are flush with the sides of your 1x3s.
I suggest attaching one side of the planks, then the other side, and work your way inward as you attach each piece.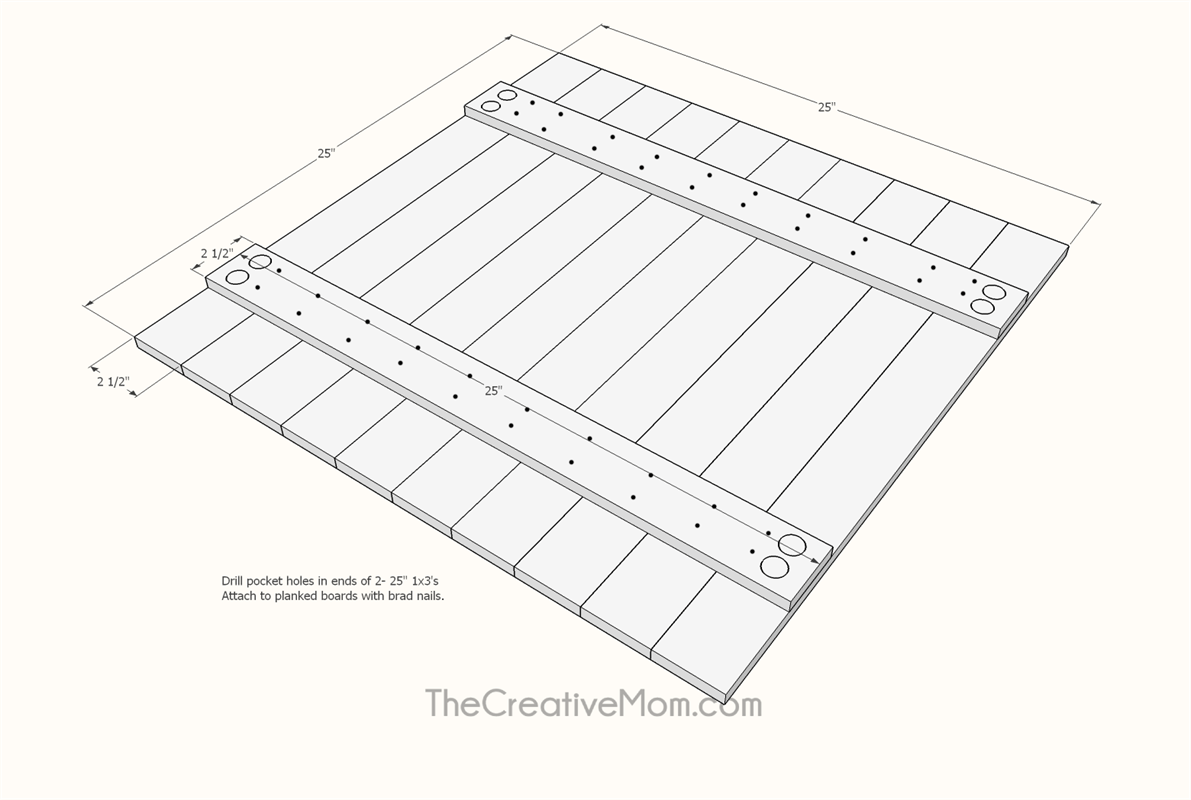
-
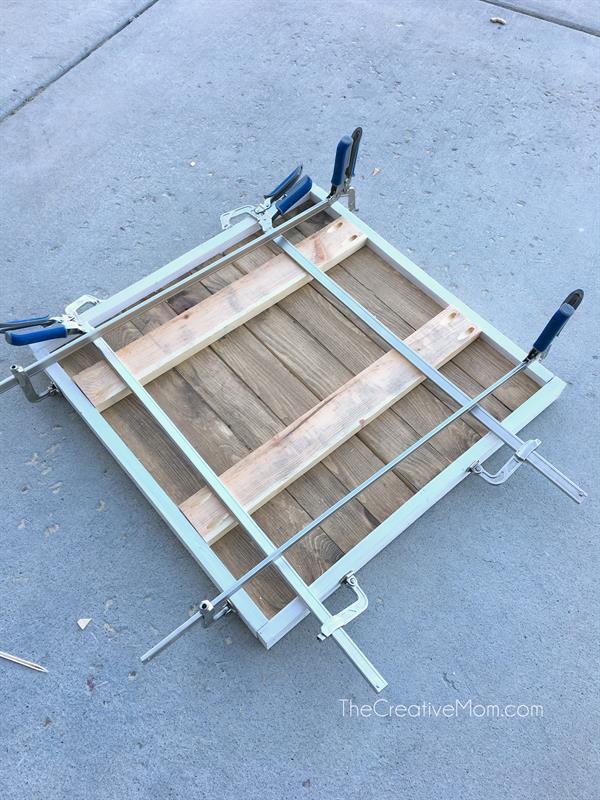
Assemble Frame
Use wood glue at every joint, and assemble the frame in place. Use bar clamps to ensure the frame doesn't wiggle.
-
Paint or Stain
After all of your pieces are cut and fit, paint or stain all of the pieces.
-
Install Picture Hanger
Install whatever picture hanger you prefer. Since this is a heavy piece to hang on the wall, I used a heavy gauge wire, attached to each support piece with a staple.
-
Decorate!
I hammered a simple nail in the front of my wreath display. Then I just hang whatever wreath or decoration I want right on the front.