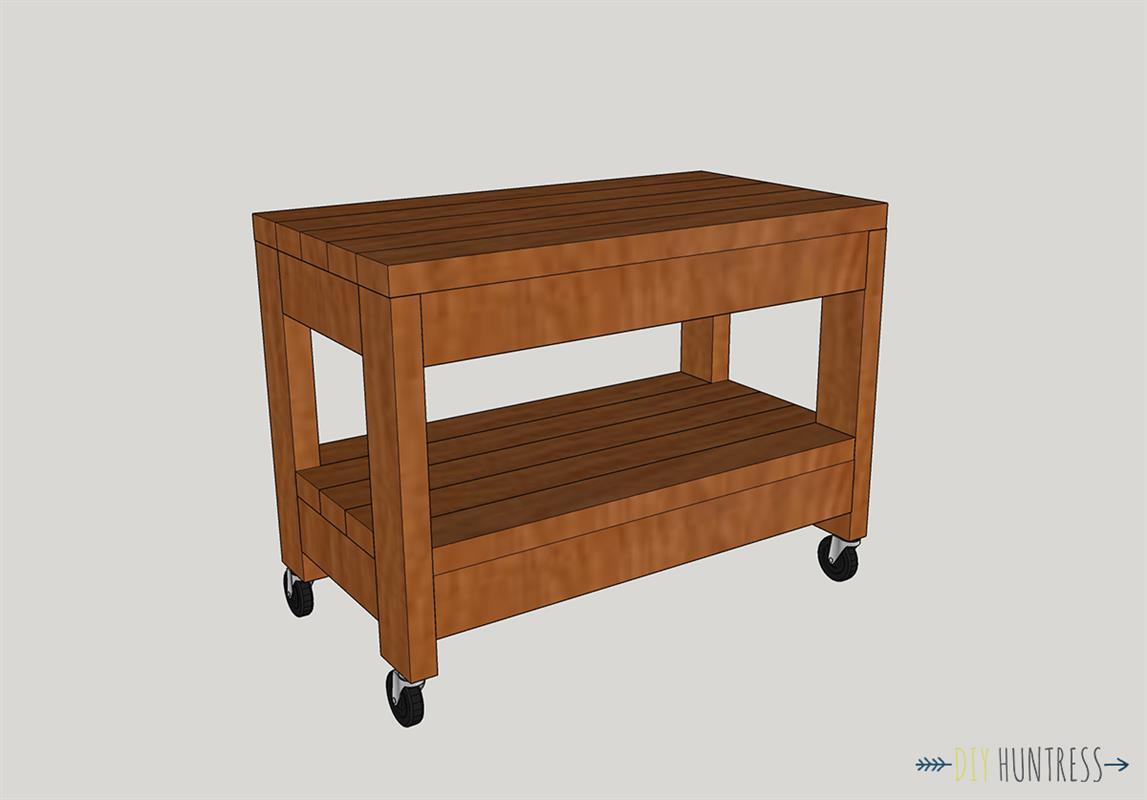
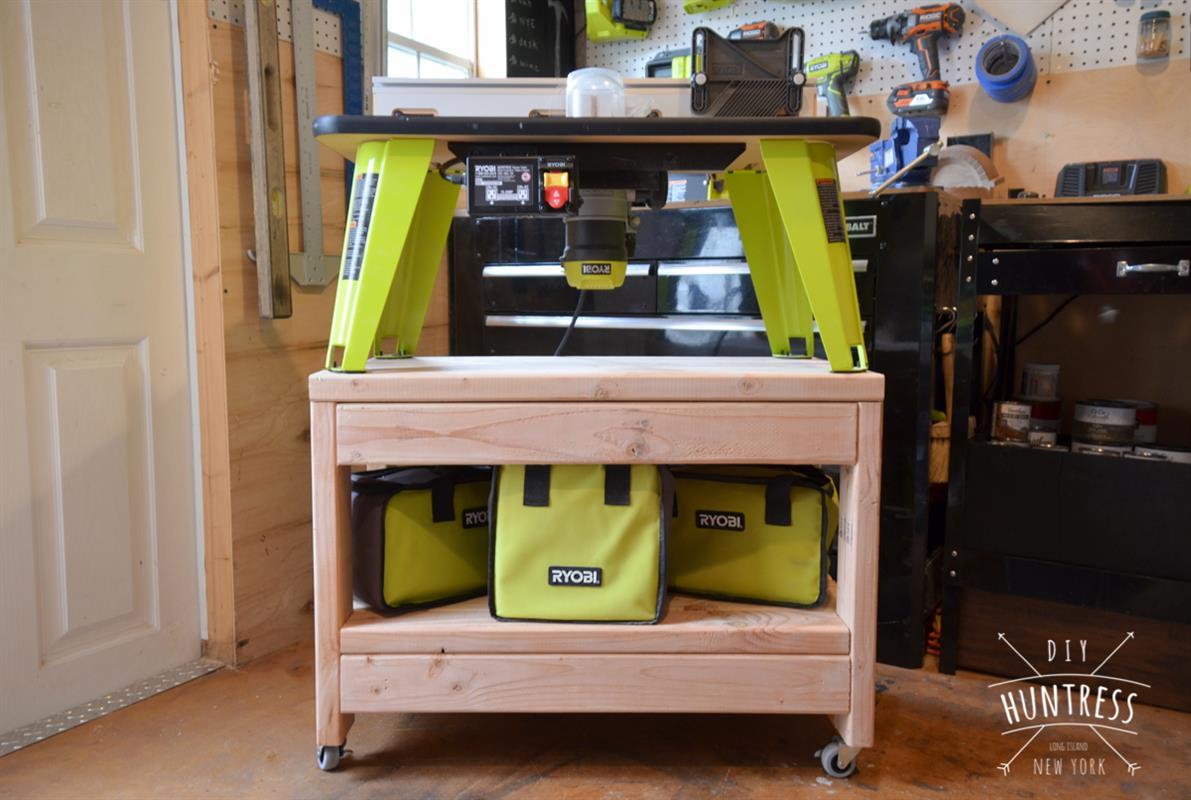


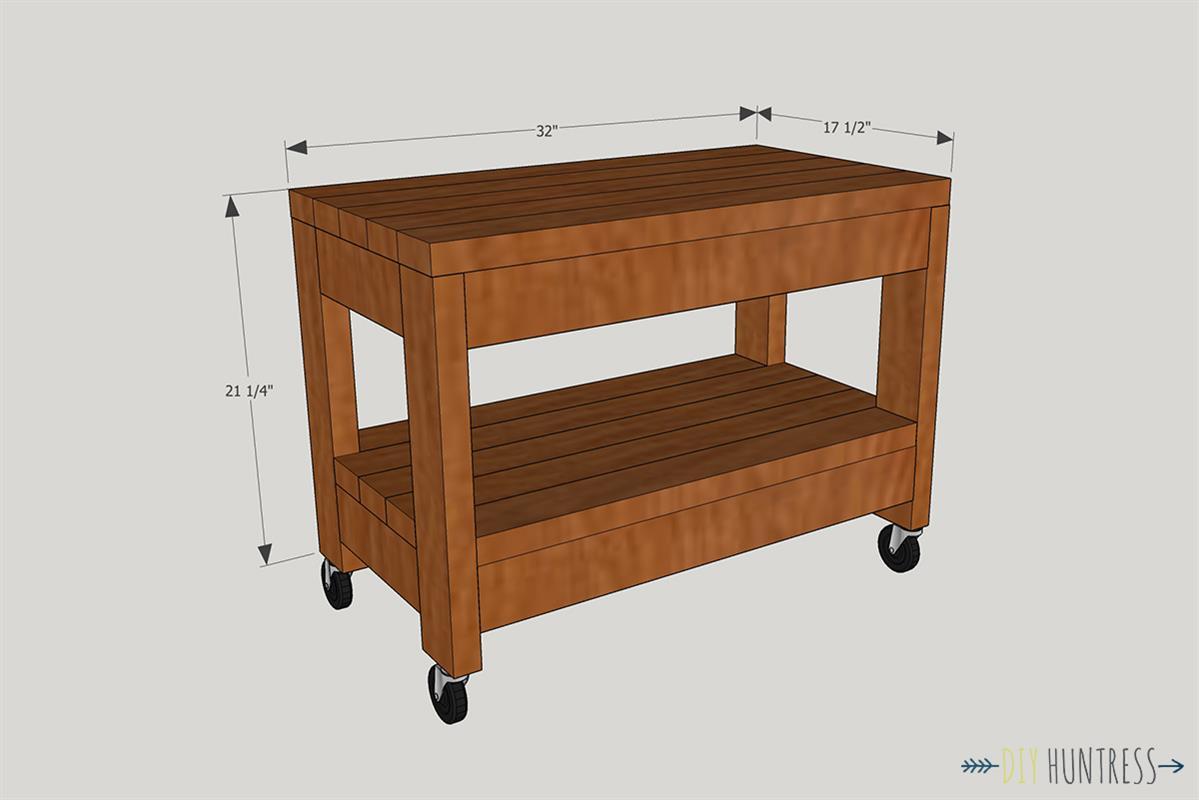
Benchtop tool stands can be expensive, and using your benchtop tools on traditional stands is awkward. This stand is made from 2×4’s and costs under $30 in lumber! Best part about this project? It’s mobile. Now your benchtop tools can travel with you, or be tucked out of the way when not in use!
Tools
Kreg Tools


Other Tools
-
Miter Saw

-
Drill (cordless)
-
Sander
Materials
Wood Products
- 7 Board , 2x4 , 96"
Hardware & Supplies
- 100 2 1/2" Kreg Pocket Hole Screws
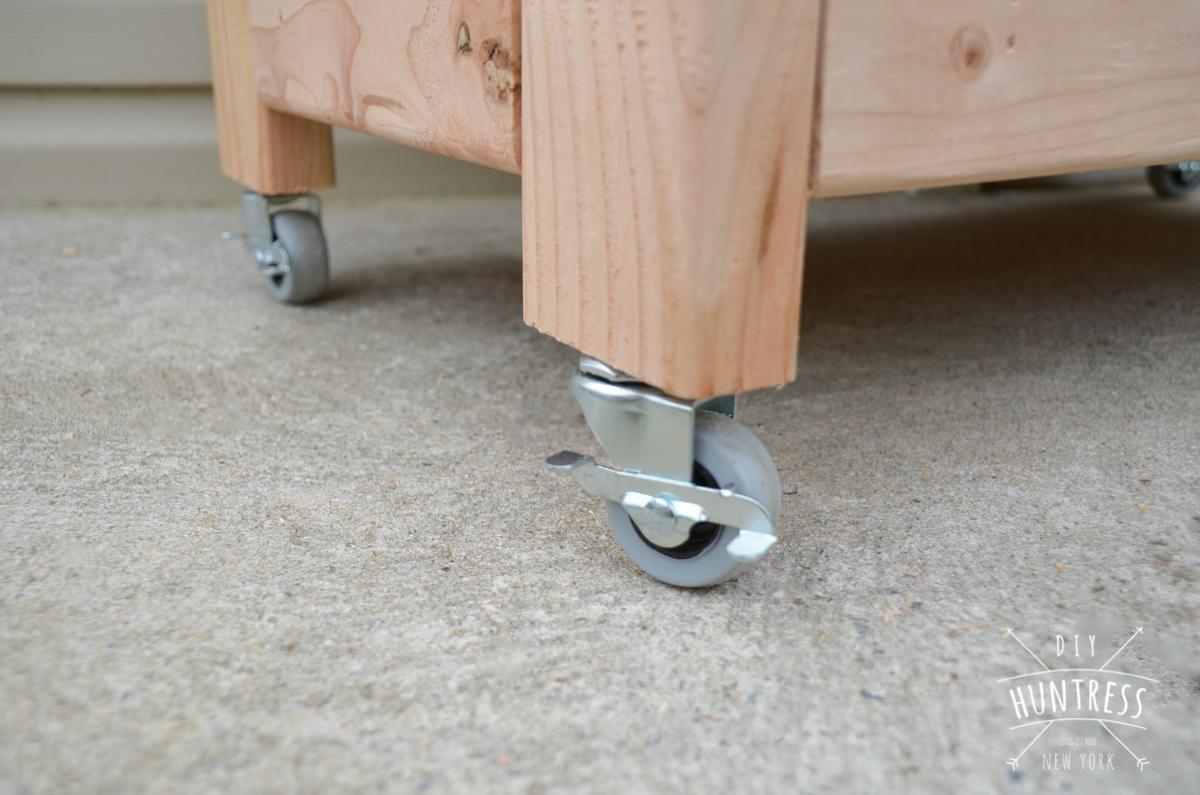
- 4 Rolling Casters
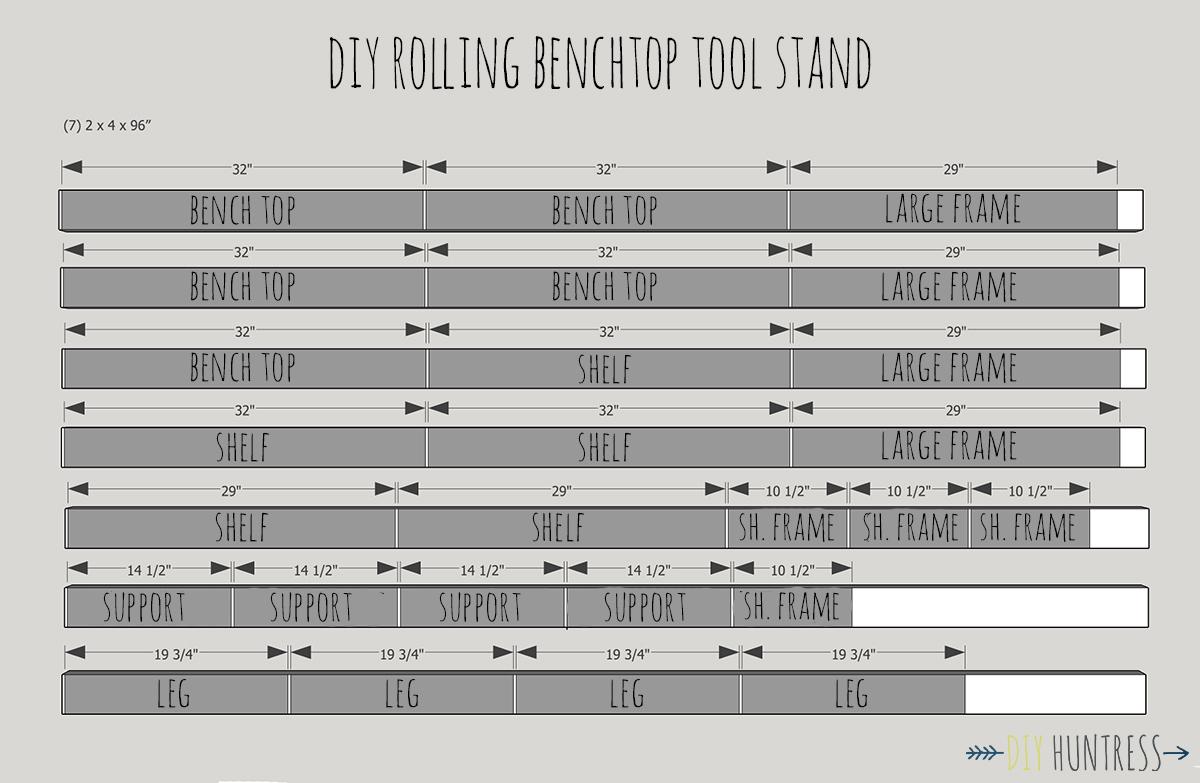
Cut List & Parts
- 5 Bench Top , 2 x 4 x 32"
- 3 Shelves , 2 x 4 x 32"
- 2 Shelves , 2 x 4 x 29"
- 4 Large Frame Pieces , 2 x 4 x 29"
- 4 Short Frame Pieces , 2 x 4 x 10 1/2"
- 4 Legs , 2 x 4 x 19 3/4"
- 4 Supports , 2 x 4 x 14 1/2"
Directions
-
Check Dimensions & Make Any Changes
The dimensions listed for this project are for a benchtop tool stand, so the bench itself is short. For a taller bench, cut the legs to a longer length.
-
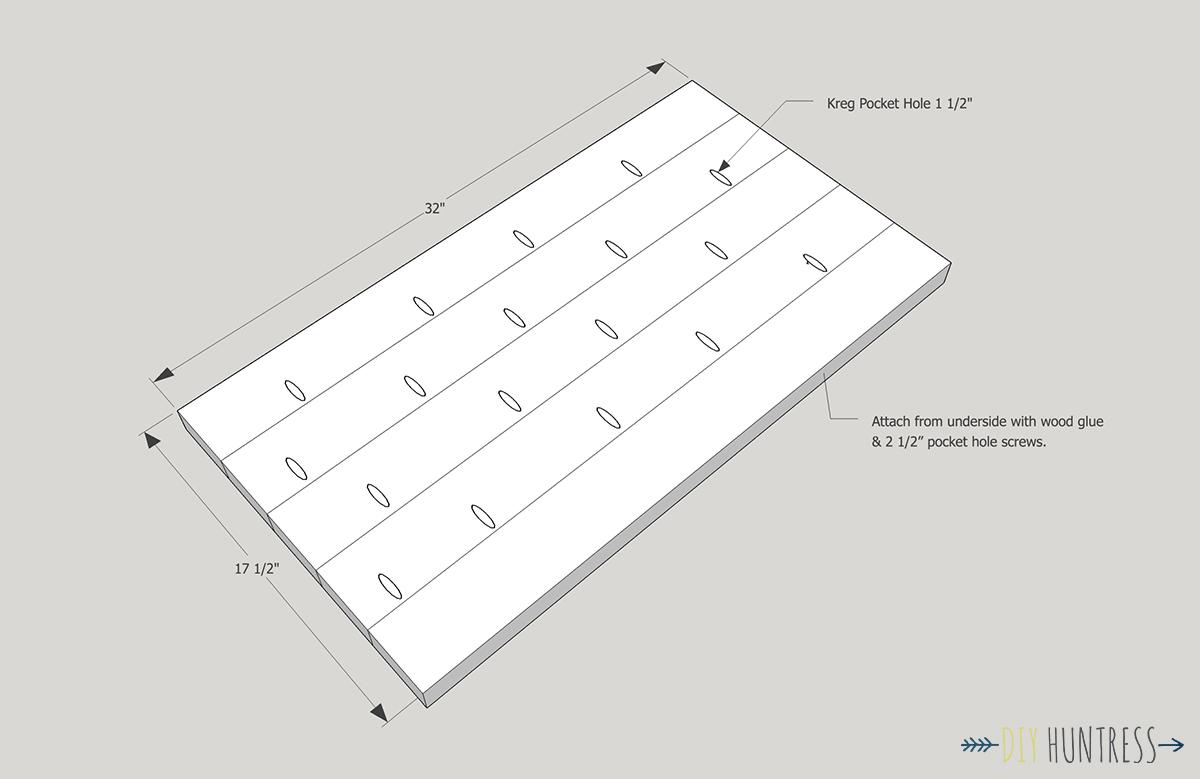
Create The Top Shelf
Drill pocket holes and attach the five 32" top shelf pieces using 2 1/2" pocket hole screws and wood glue from the bottom. The pocket holes will be hidden once the bench top is flipped over and attached to the frame.
-
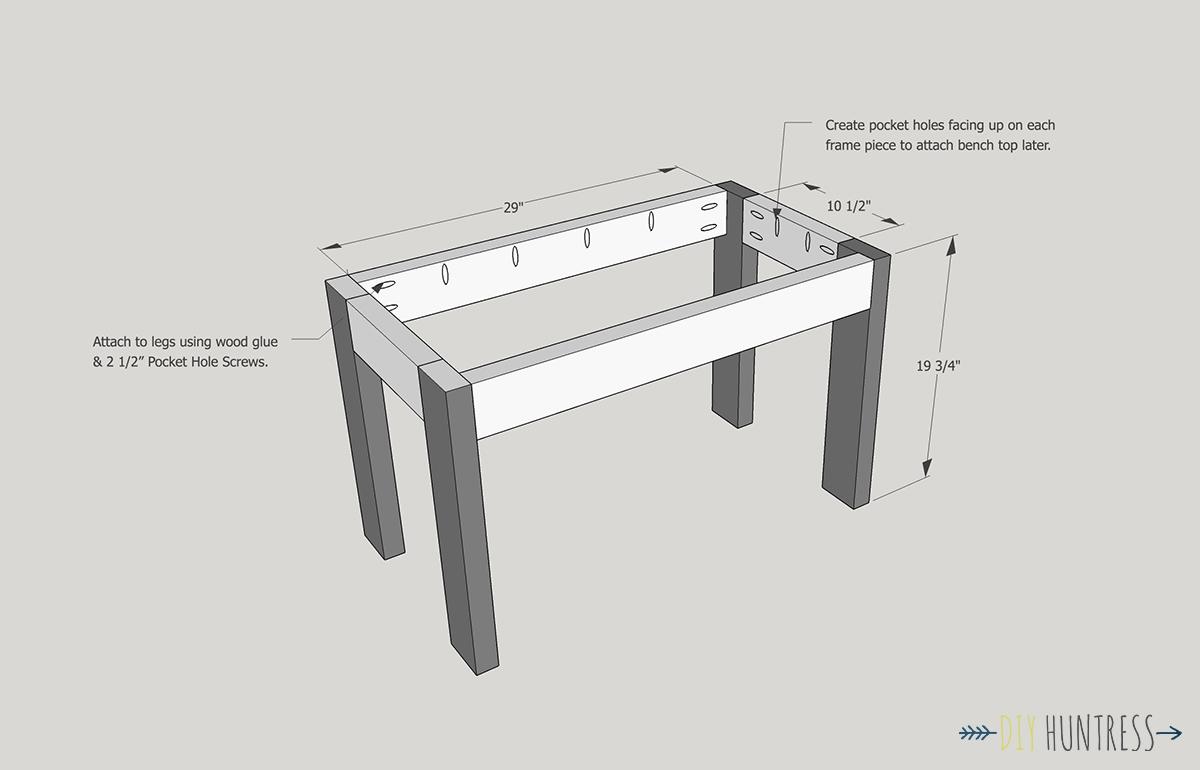
Create The Frame
Drill pocket holes in the frame pieces and attach them to the legs using 2 1/2" pocket hole screws and glue. The frames should be flush with the top of the legs. Make sure to also drill pocket holes facing upward on the inside of the frames for attaching the top later.
-
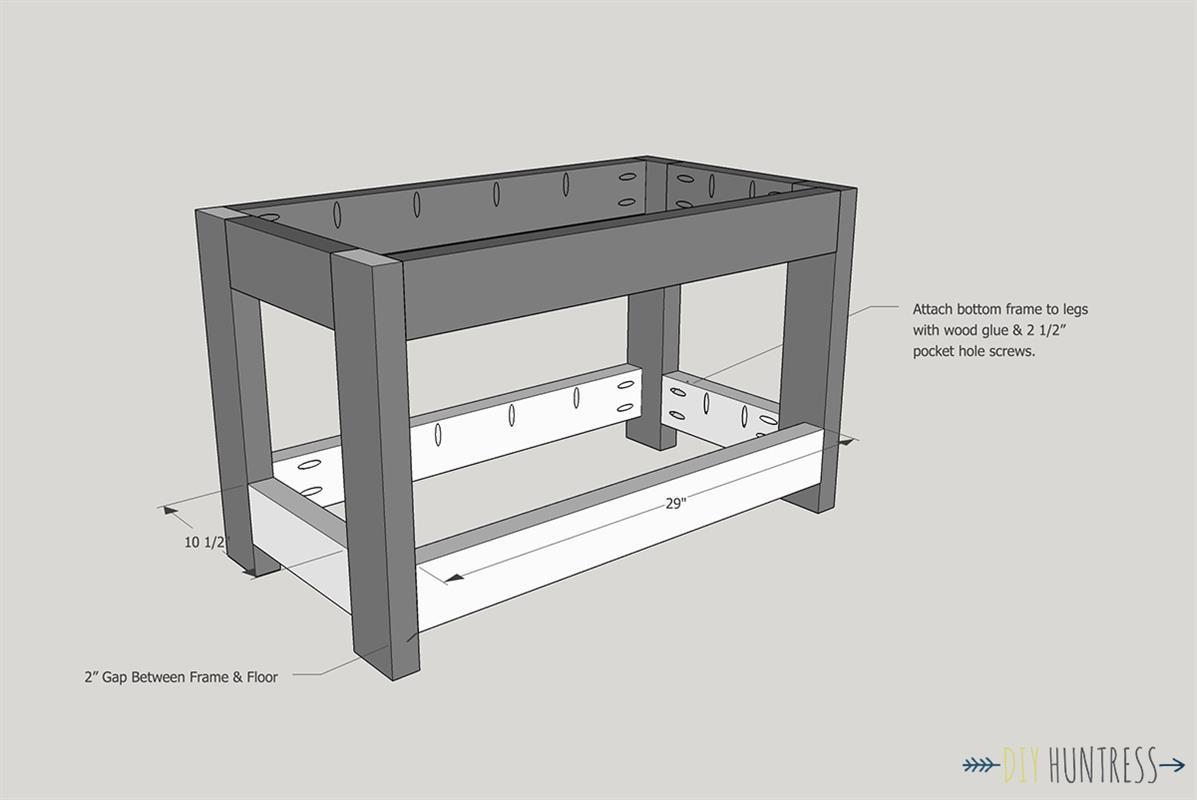
Add The Bottom Frame
Repeat the same steps as before with the bottom frame. This time, attach the frame pieces to the legs 2" from the floor.
-
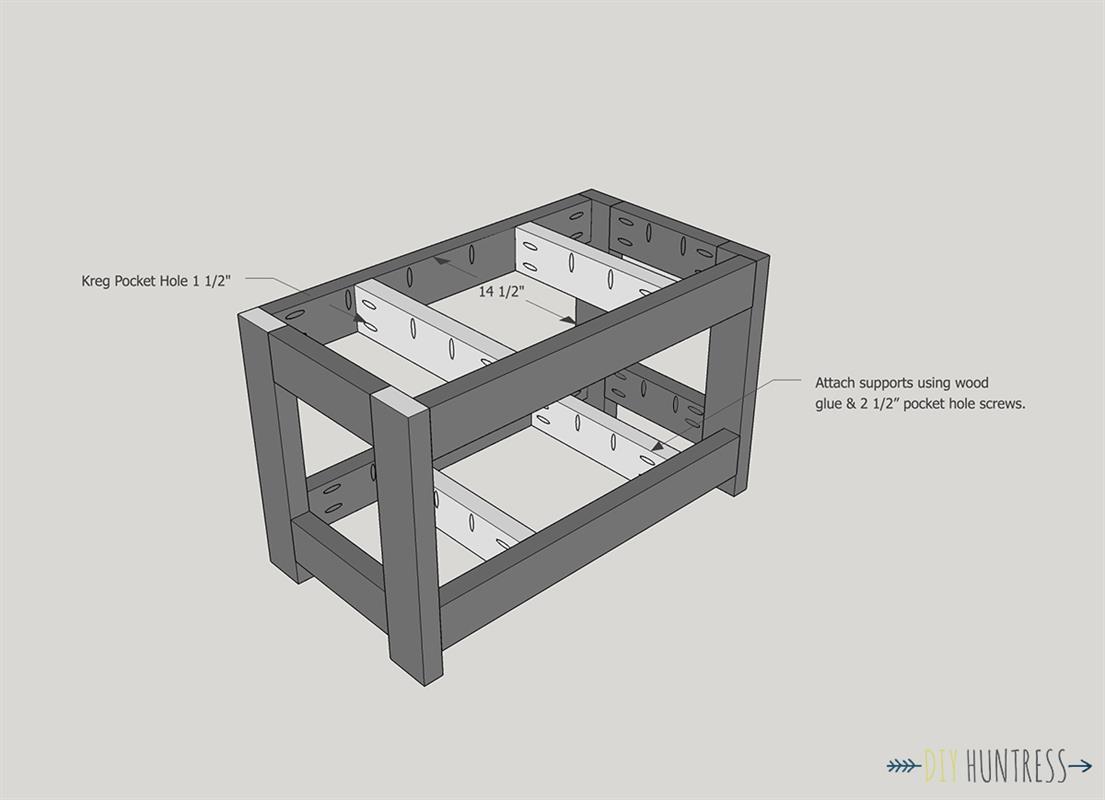
Attach Supports
Attach the supports to the frames with 2 1/2" pocket hole screws and glue. Make sure to create pocket holes facing up for attaching the top shelf from the underneath in the next step.
-
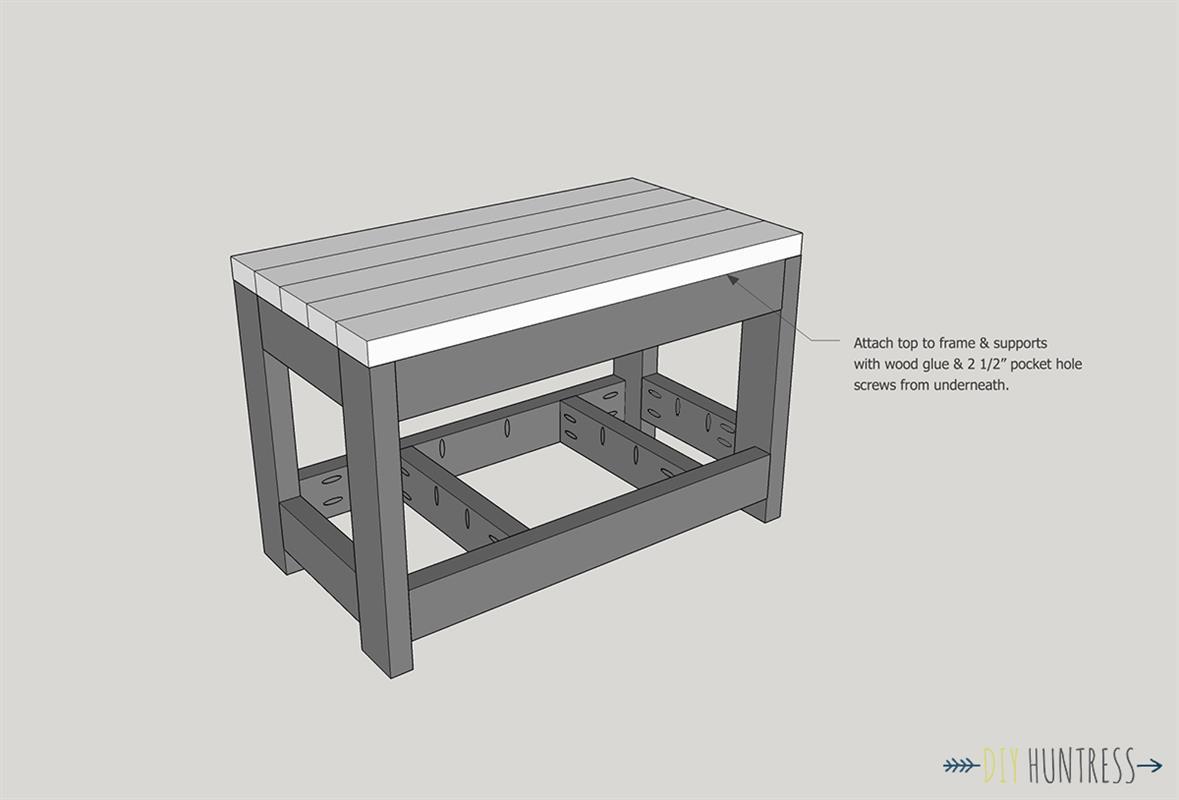
Attach The Top Shelf
Attach the top shelf by screwing 2 1/2" pocket hole screws upward from the frames and support beams.
-
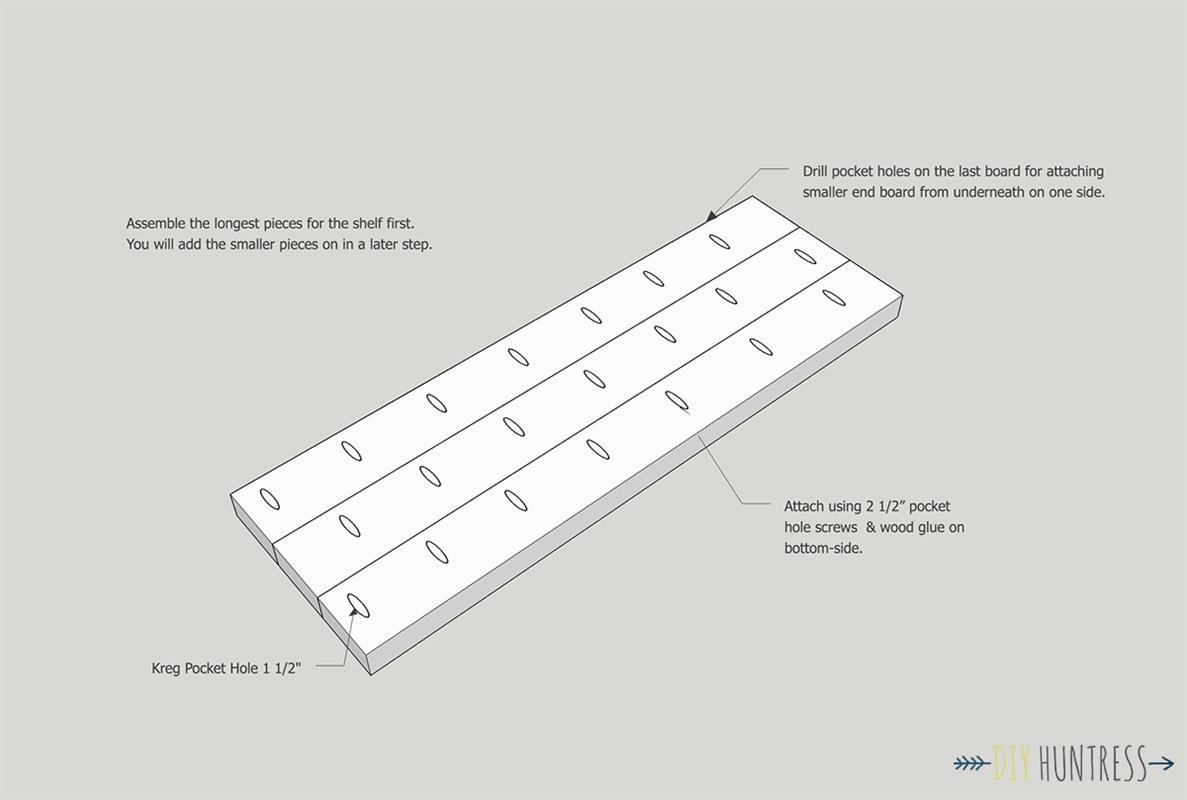
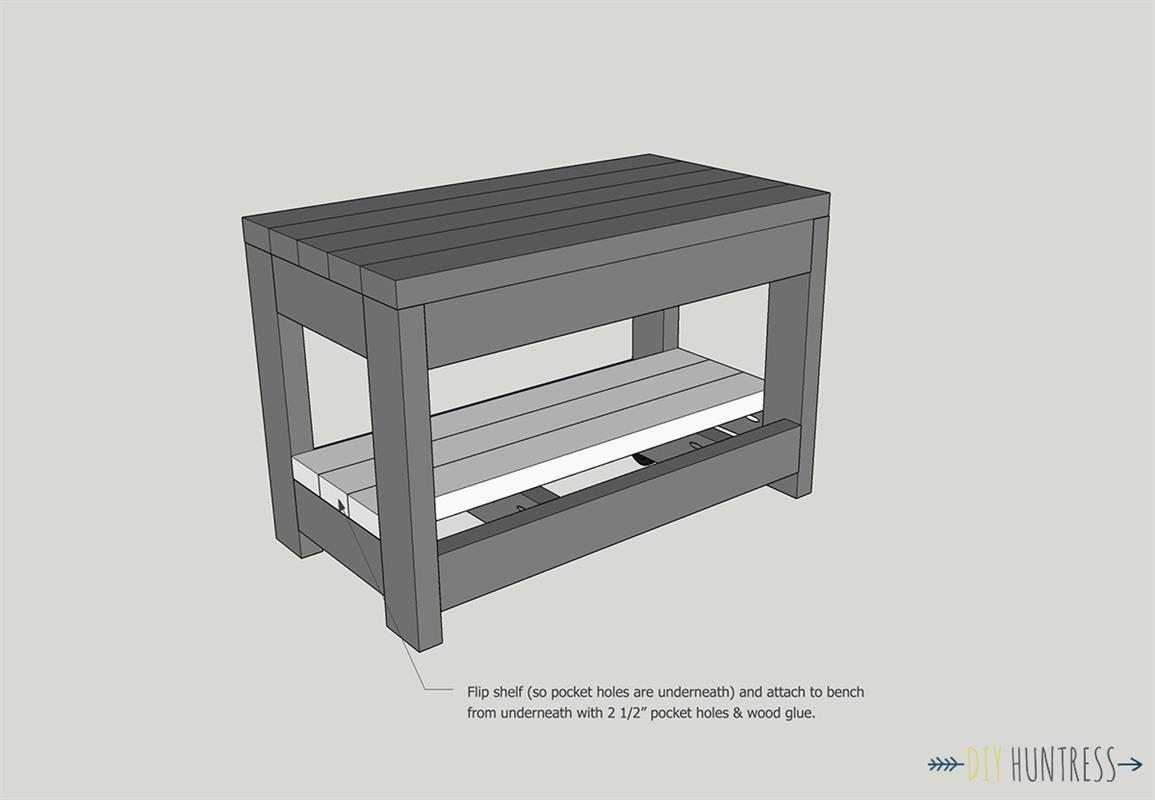
Begin Bottom Shelf Build
Begin building the bottom shelf by using the last three long shelf pieces. Don't add the short pieces yet, otherwise your shelf won't fit. Make sure to drill pocket holes in one of the last boards to attach a small shelf piece later.
-
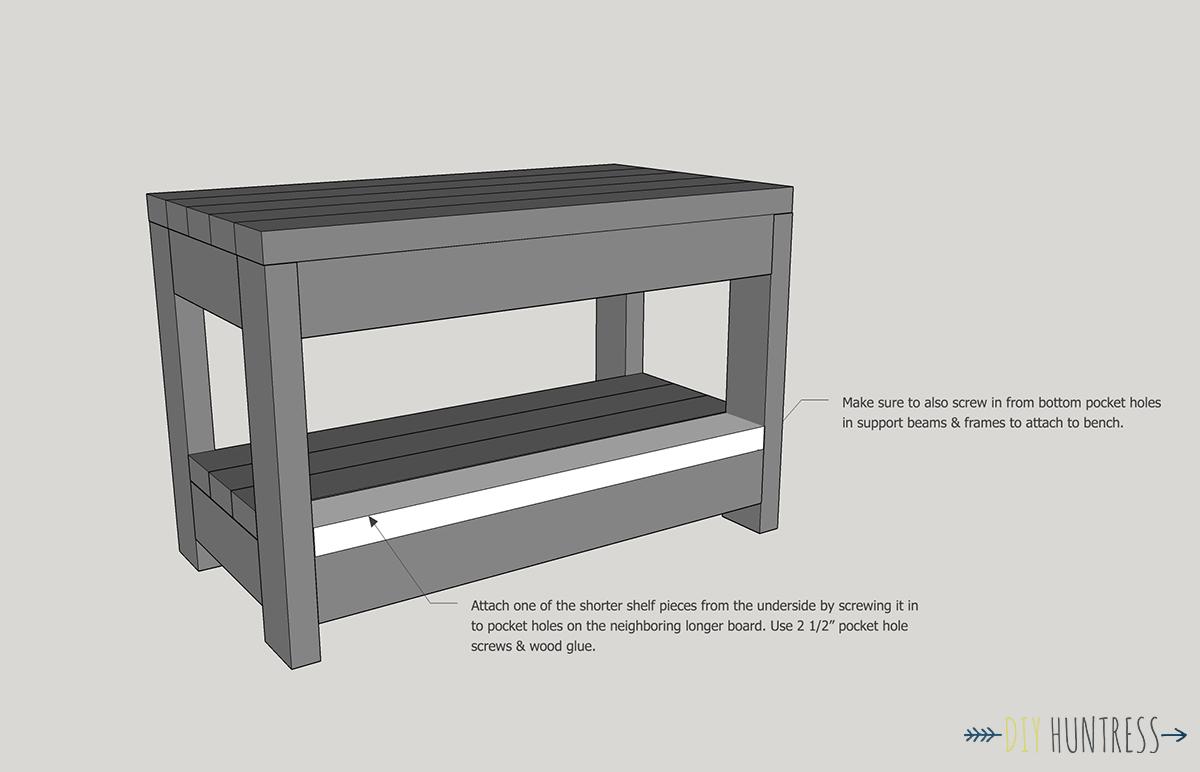
Attach Longer Shelf Pieces
Attach the longer shelf pieces in between the two legs by screwing them in from the pocket holes in the support beams and frames below. Make sure the pocket holes you used to attach the shelf are on the underside of the shelf.
-
Attach First Small Shelf Piece
Attach the first small shelf piece by screwing it into the long board with the pocket holes. Make sure to also attach it to the bench by screwing it in using the pocket holes created in the support beams and frame.
-
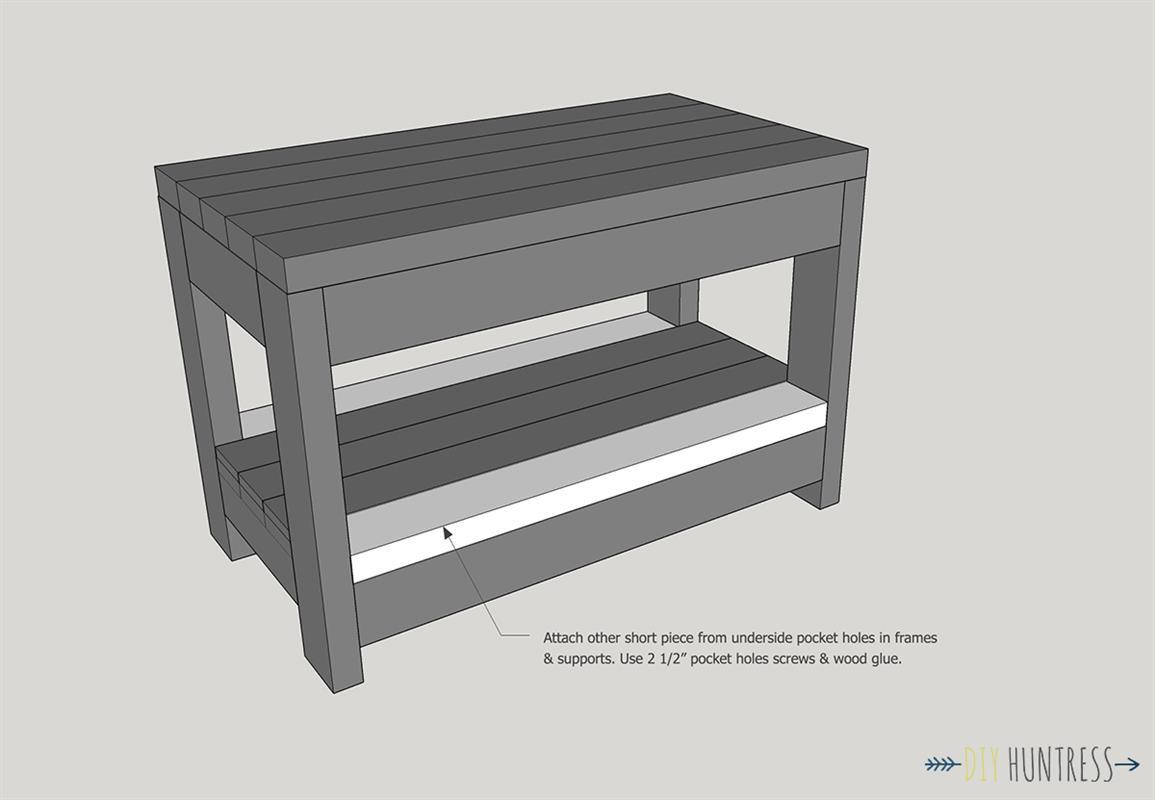
Attach Second Small Shelf Piece
The shelf is a little too tight for you to be able to use pocket hole joinery to attach the final piece to its longer neighbor. So, instead, attach the second small shelf piece by using the pocket hole joinery in your support and frame pieces that are underneath.
-
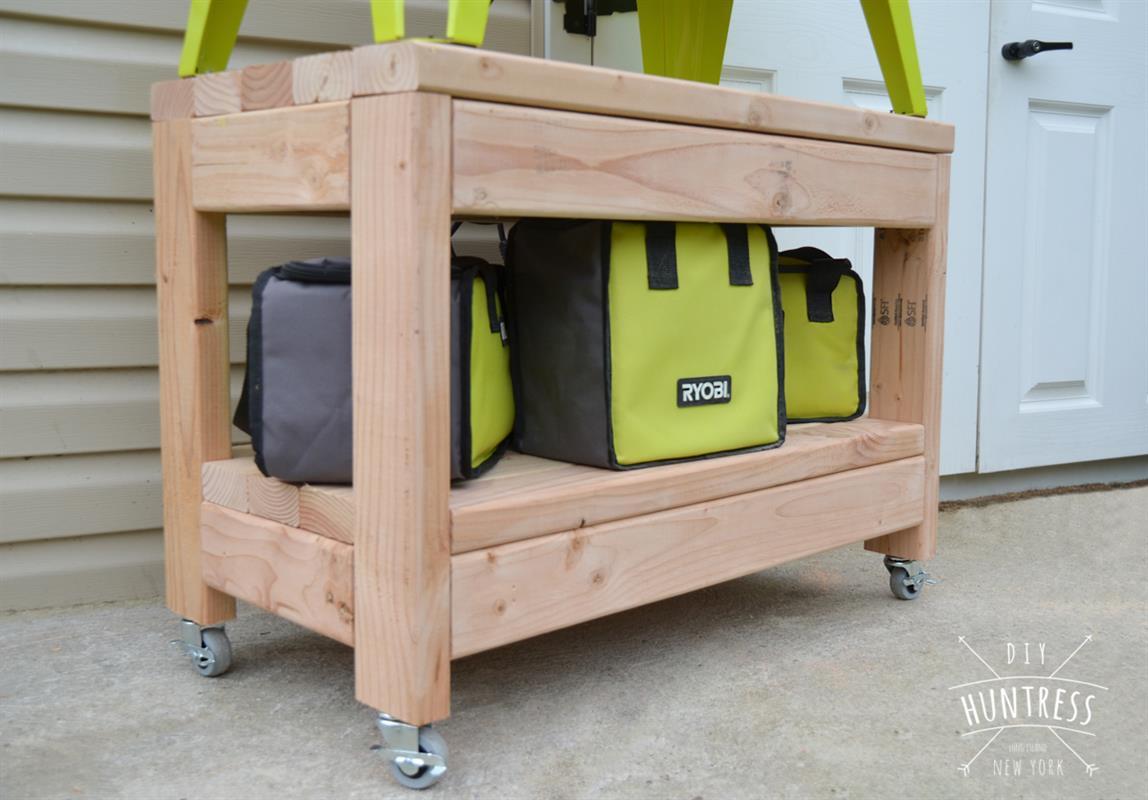
Attach Wheels & Finish
Finish off your bench by attaching the casters and sanding away any imperfections. You can also add hooks for neatly organizing wires as well.