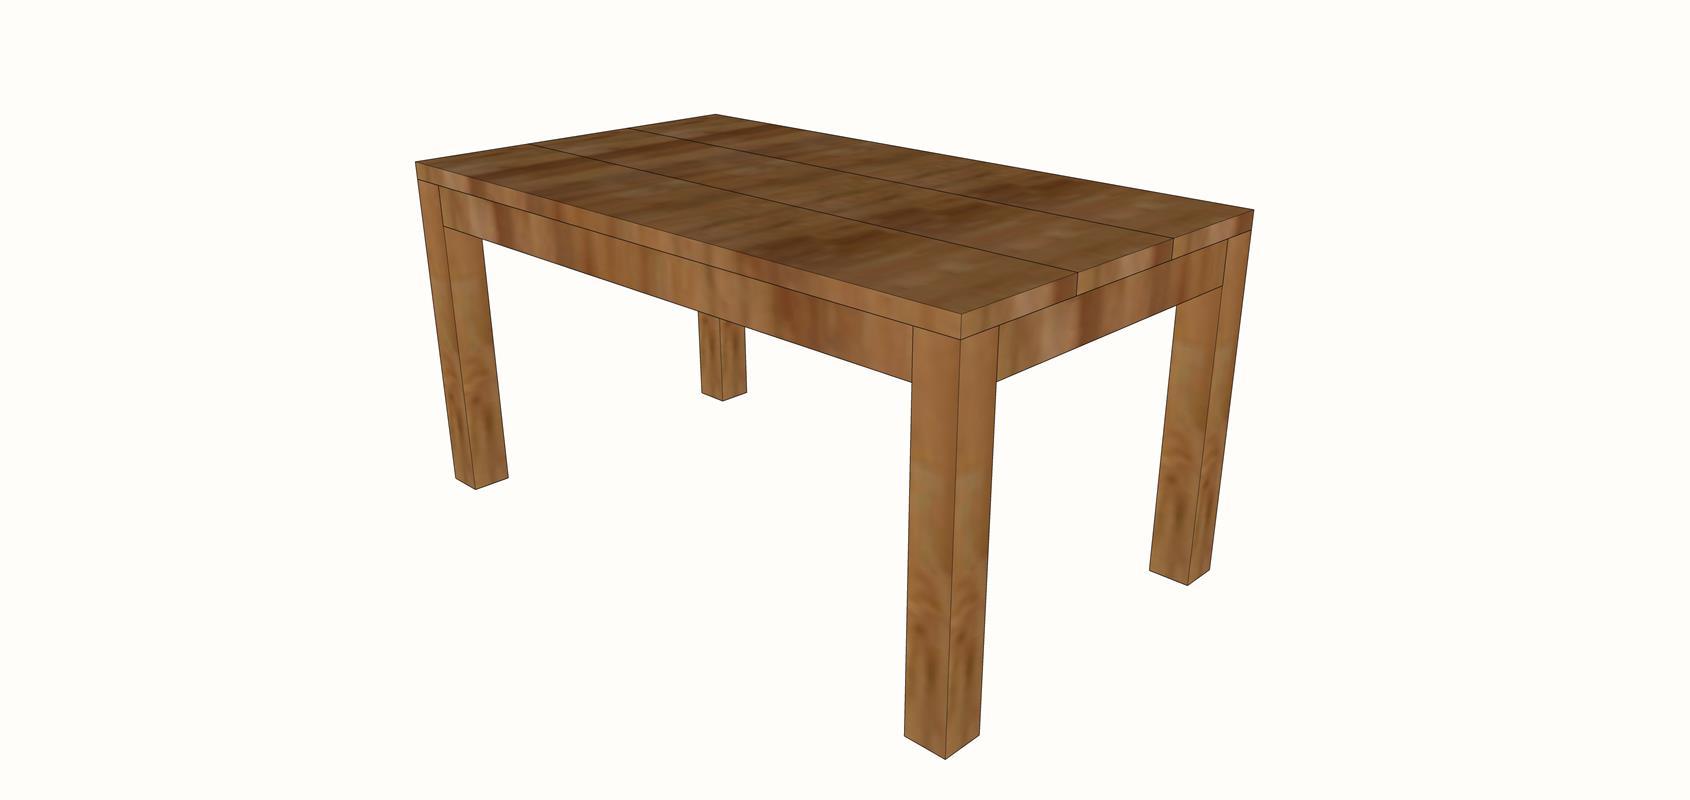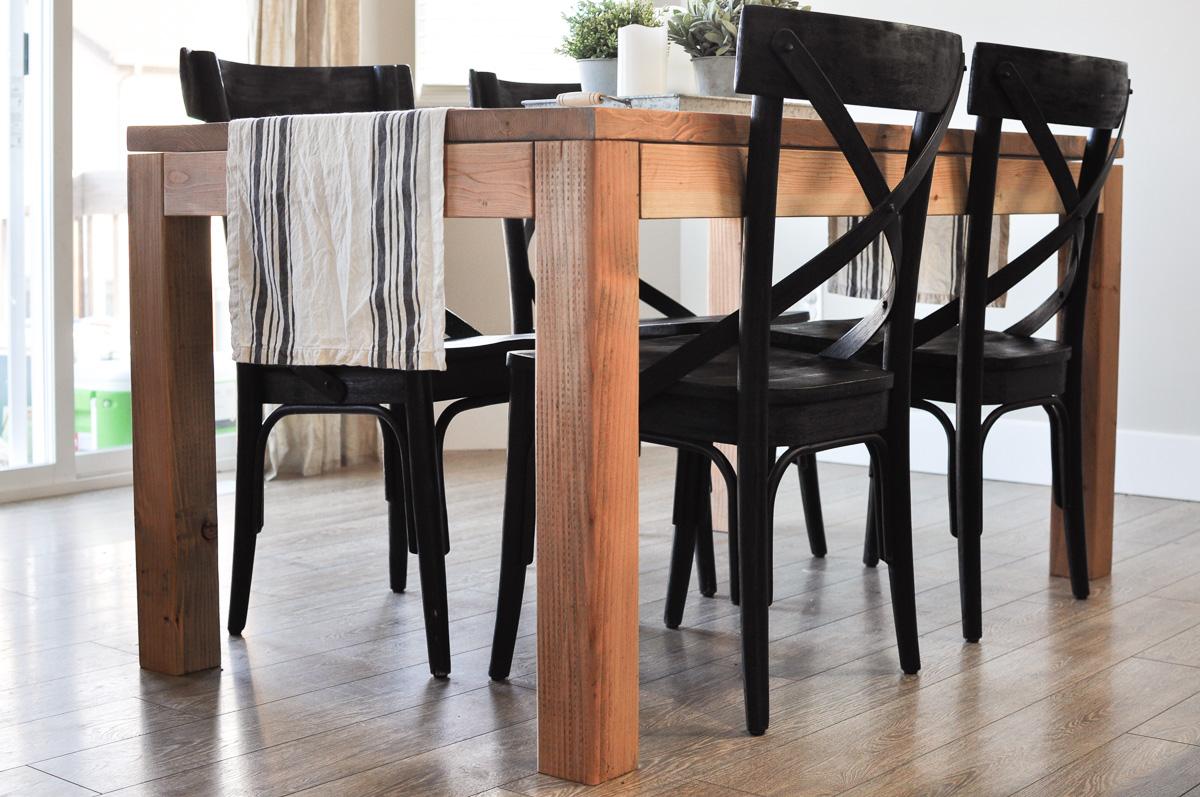
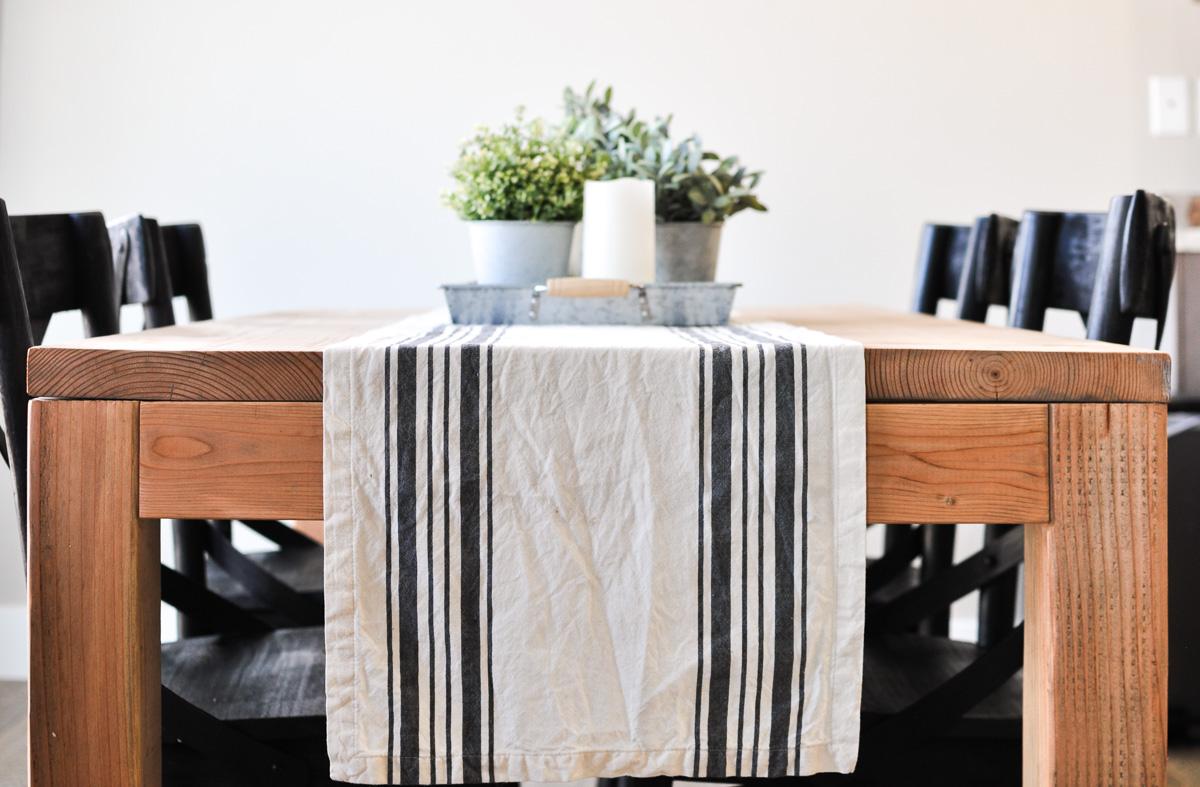
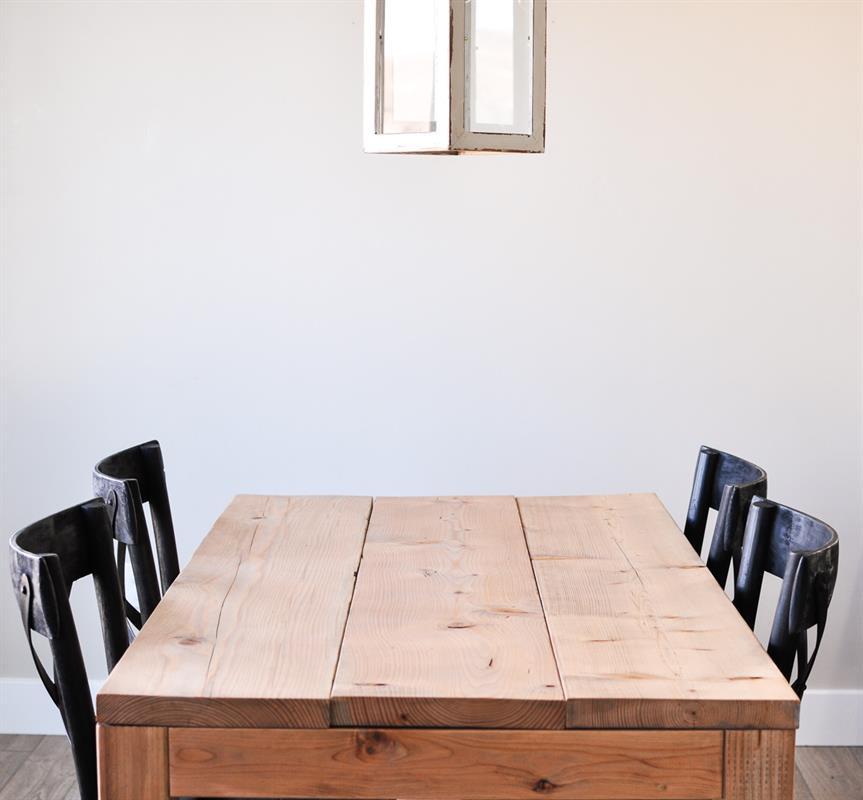


This simple Modern Farmhouse Dining Room Table is the perfect addition to any dining room. Paint it or stain it any color you like to fit your style!
Tools
Kreg Tools

Other Tools
-
Miter Saw

-
Square
-
Tape Measure
-
Drill (cordless)
-
Sander
-
Shop Vacuum
Materials
Wood Products
- 2 Board , 4x4 , 96"
- 2 Board , 2x4 , 120"
- 3 Board , 2x12 , 96"
Hardware & Supplies
- 1 Box of 2 1/2" Kreg Coarse Screws
- 1 Sandpaper
- 1 Minwax Weathered Oak
Directions
-
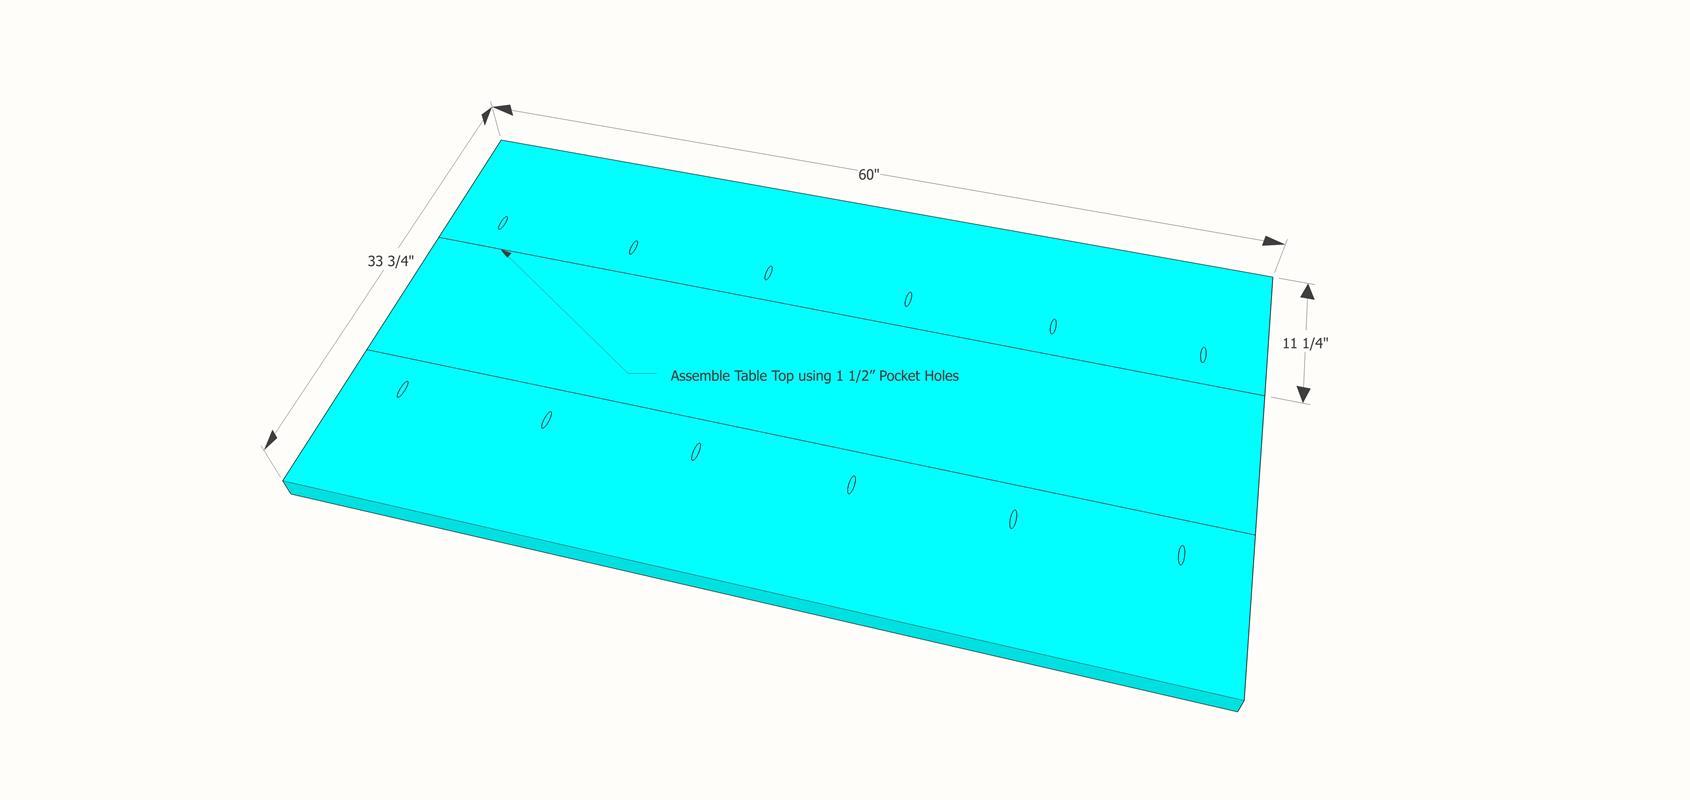
Assemble Table Top
I suggest assembling the table top first since it will sit flush with the base. wood can vary in thickness so you want to make sure you get it exactly the width and length of your table top. Assemble the top with your 2x12's using Pocket Holes and 2 1/2" Pocket Hole Screws.
-
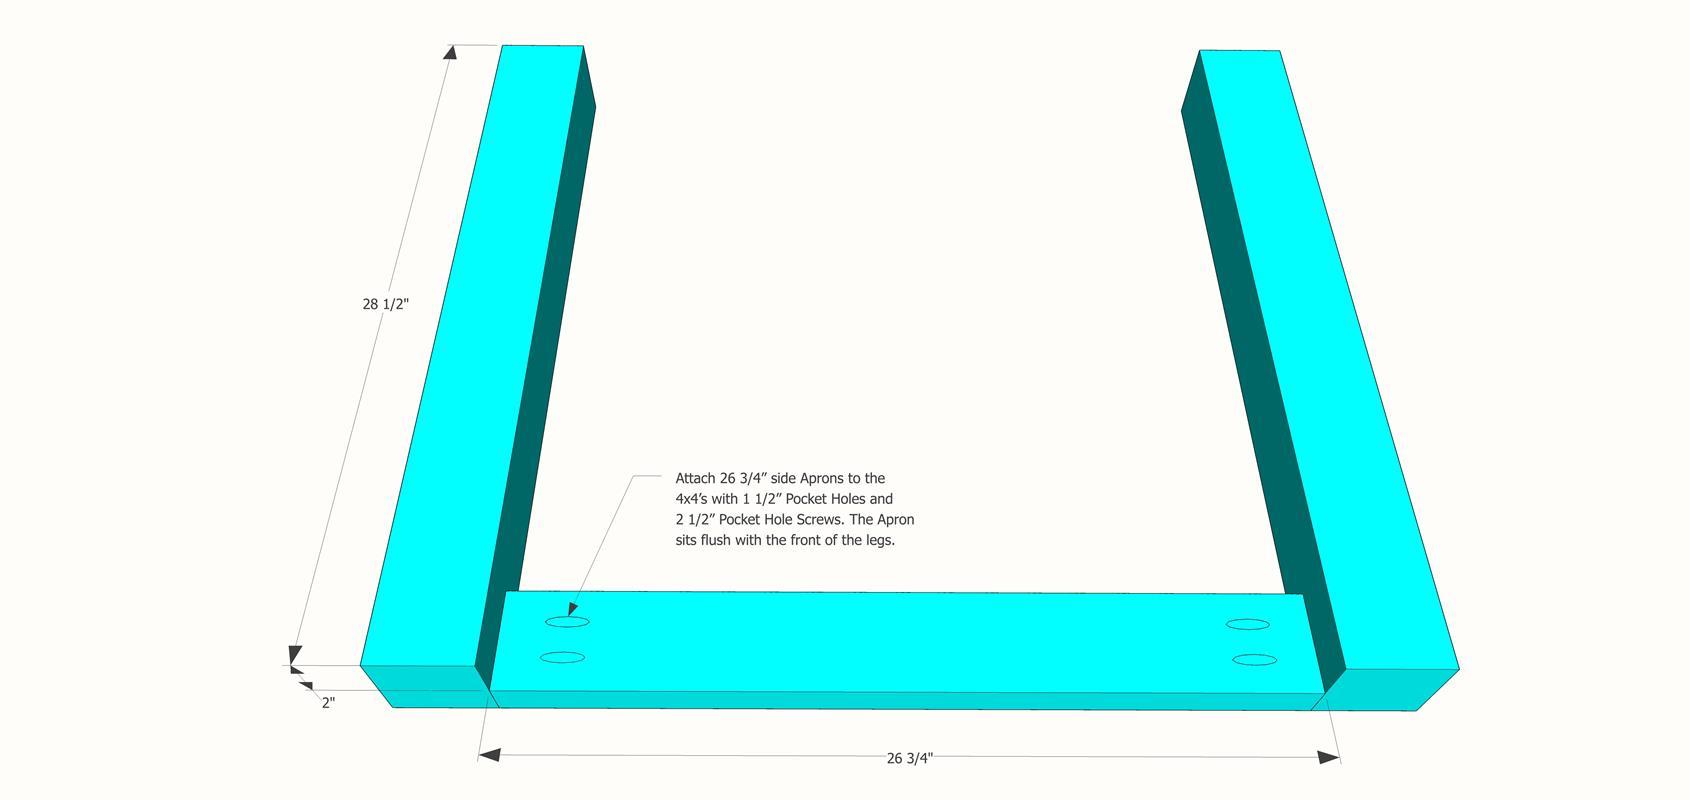
Assemble the Ends
Assemble the ends of the table by attaching the legs to the end aprons with Pocket Holes and 2 1/2" Pocket Hole Screws. The end apron should be flush with the front of the legs. Build 2 of these.
-
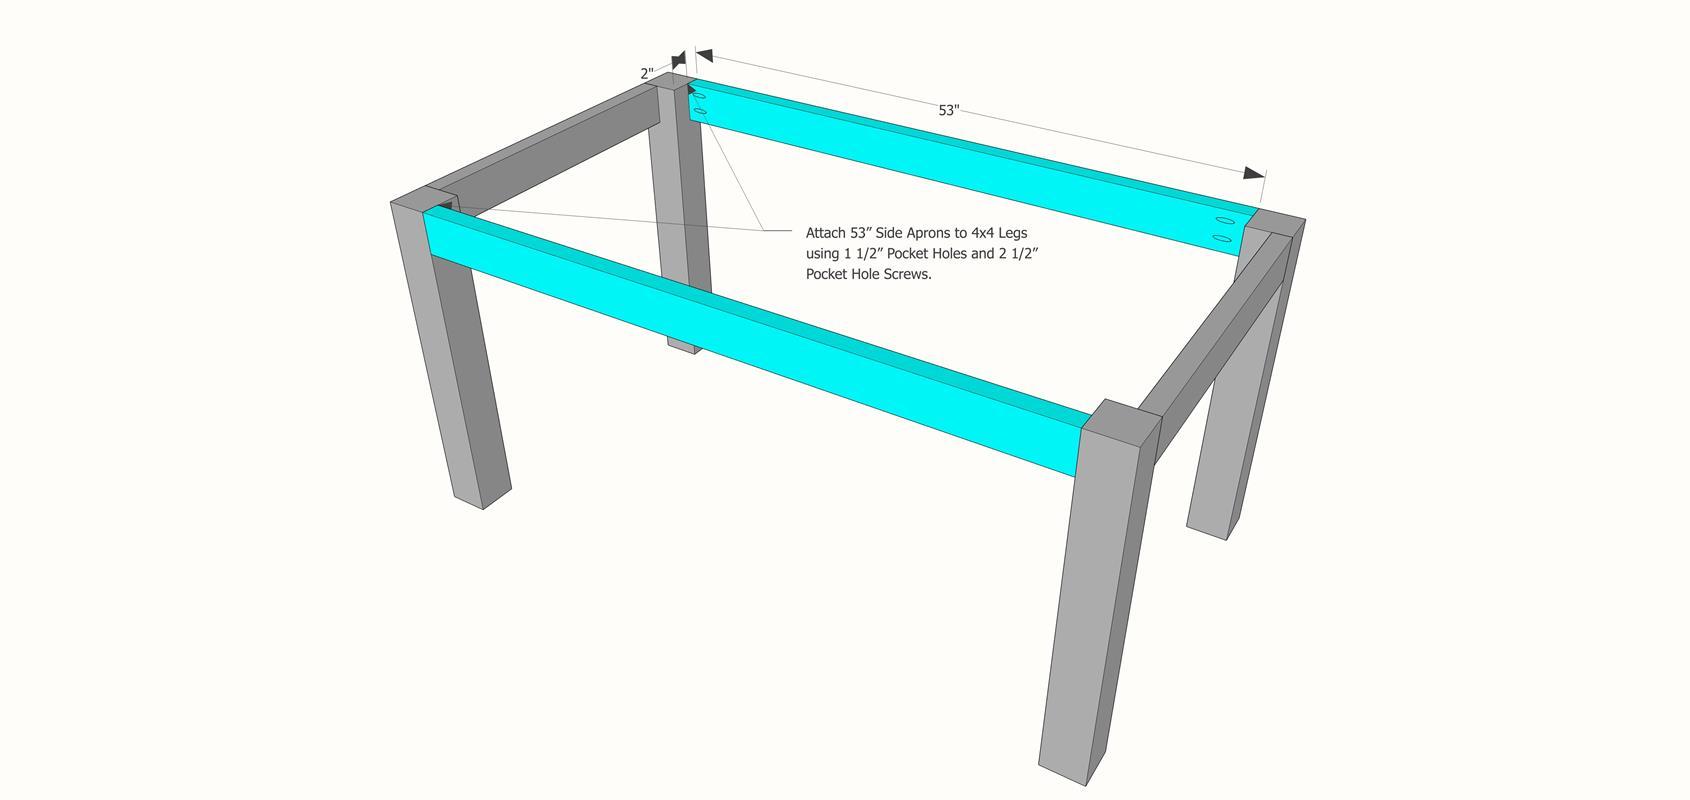
Attach Side Aprons
Attach the side aprons to the legs using Pocket Holes and 2 1/2" Pocket Hole Screws. The side aprons will also be flush with the front of the legs.
-
Pre Drill Pocket Holes
In order to attach the table top to the base of the table, before attaching your apron pieces to the legs, pre drill Pocket Holes that will allow the screws to go through the apron and into the table top.

-
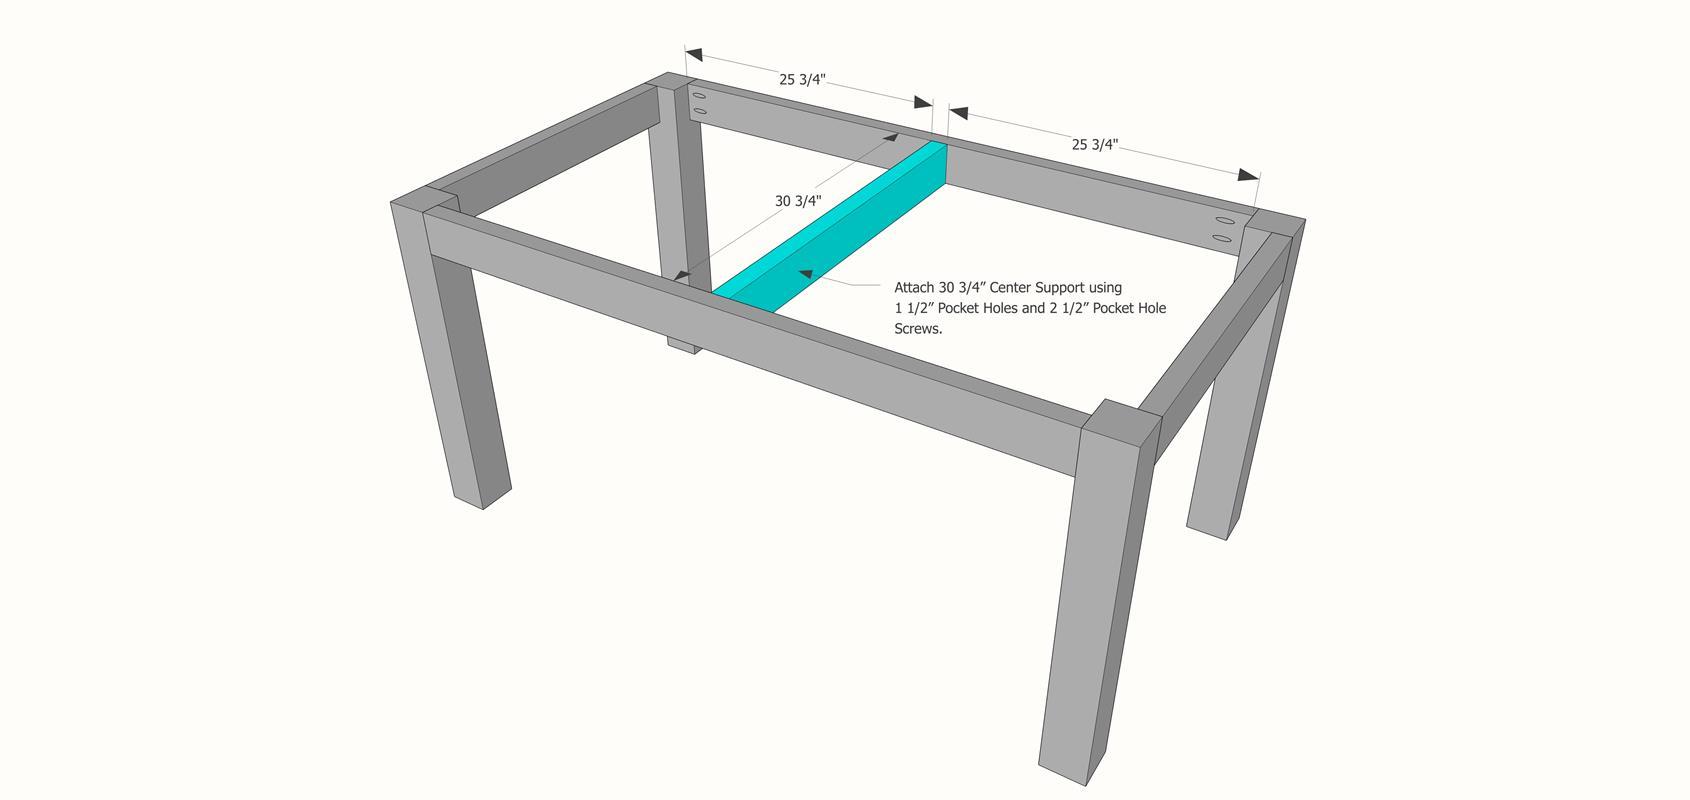
Attach Center Support
Attach the center support between the two side aprons using Pocket Holes and Pocket Hole Screws.
-
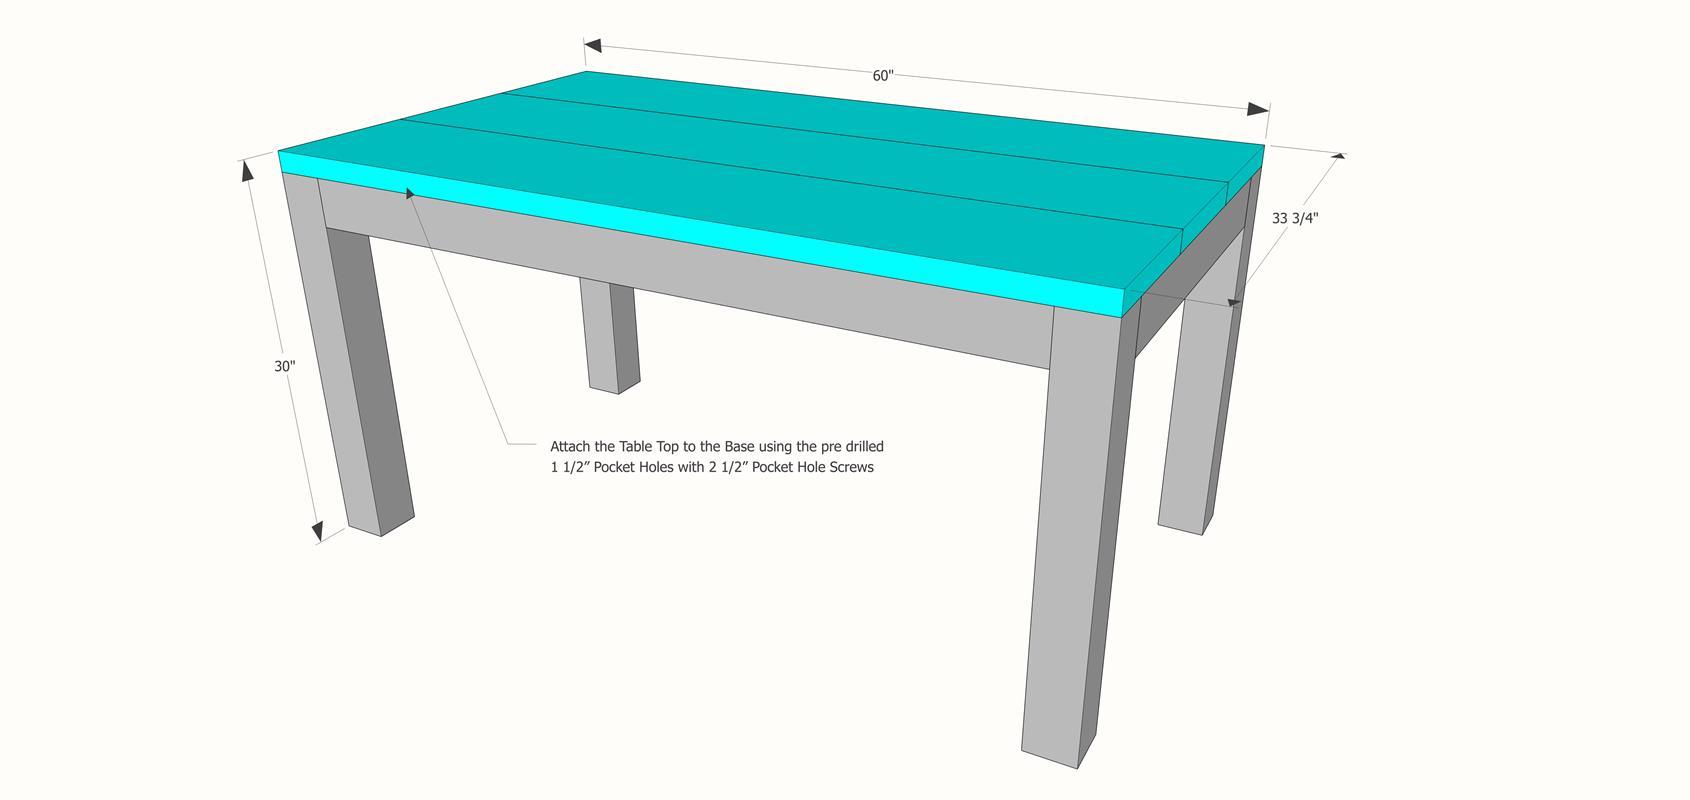
Attach Table Top to Base
Using 2 1/2" Pocket Hole Screws, attach the table top to the base using the predrilled Pocket Holes.
-
Finish the Table
Sand the table starting with 100 grit sandpaper slowly working your way up to 220 grit. Vaccum and wipe down the table with a damp rag to remove any sawdust. Paint or stain in the color of your choice. I used Minwax Weathered Oak. Seal the table.