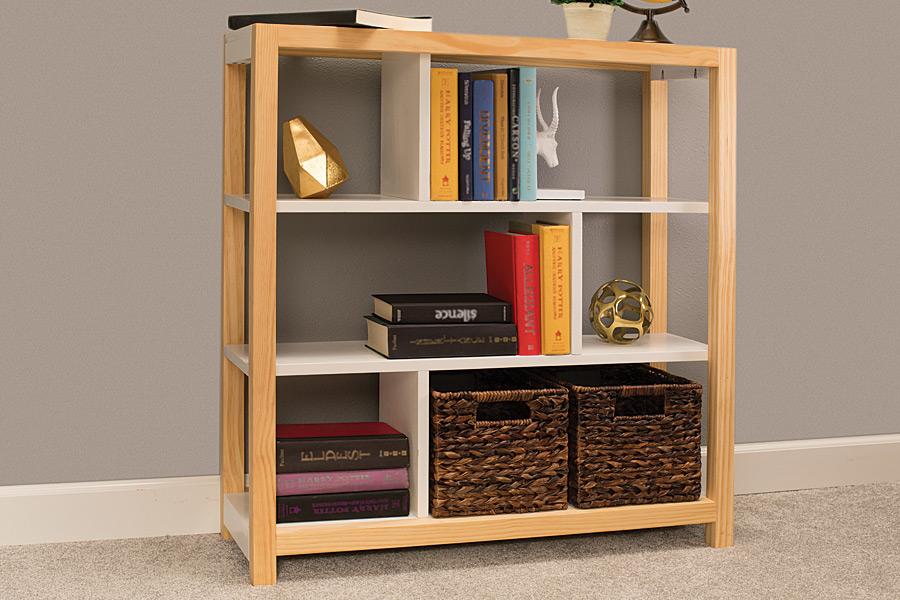
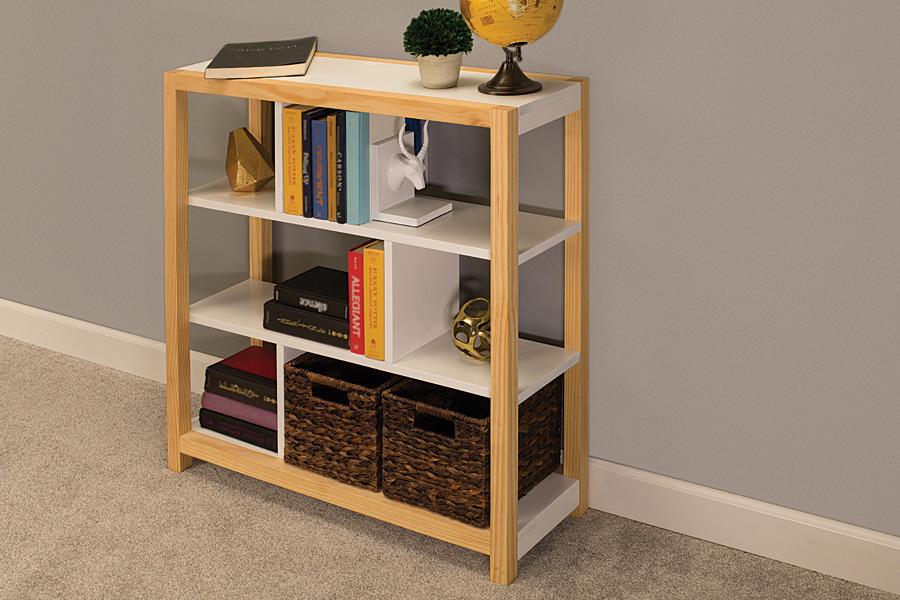
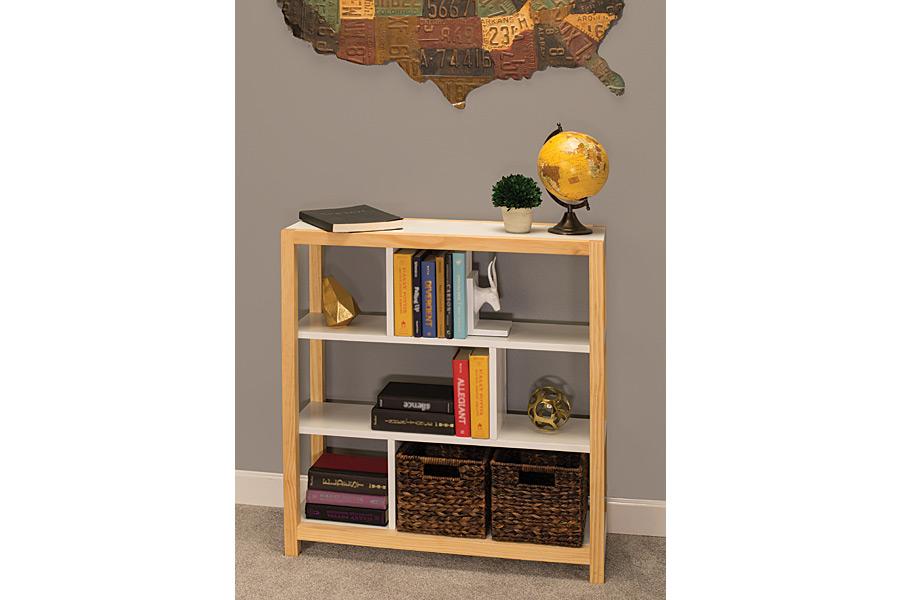


This bookcase offers ample storage and display space in a compact footprint. Plus, it’s super easy to build using 38mm x 38mm and 19mm x 235mm boards, plus pocket-hole screws. The vertical dividers create built-in bookends and make the whole structure stronger without adding complexity.
Tools
Kreg Tools


Other Tools
-
Square

-
Drill (cordless)
Materials
Wood Products
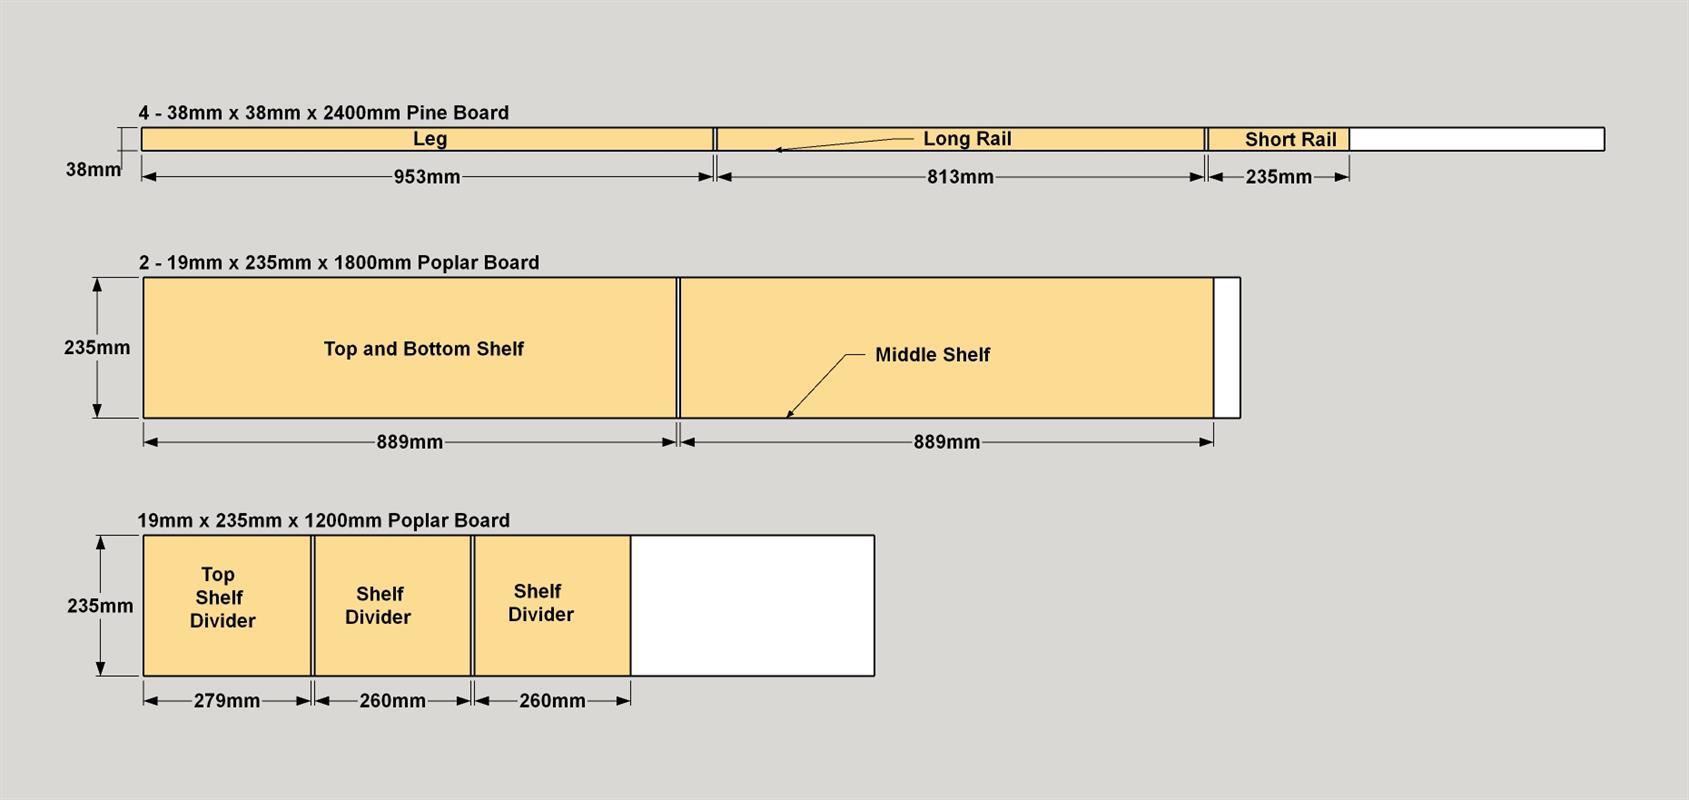
- 4 Board , 38mmx 38mm , 2400mm
- 2 Board , 19mm x 235mm , 1800mm
- 1 Board , 19mm x 235mm , 1200mm
Hardware & Supplies
- 1 Box of 100 - 32mm coarse-thread pocket-hole screws
- 1 Box of 50 - 64mm coarse-thread pocket-hole screws
- 1 50 - paint-grade pocket-hole plugs (optional)
- 1 Wood Glue
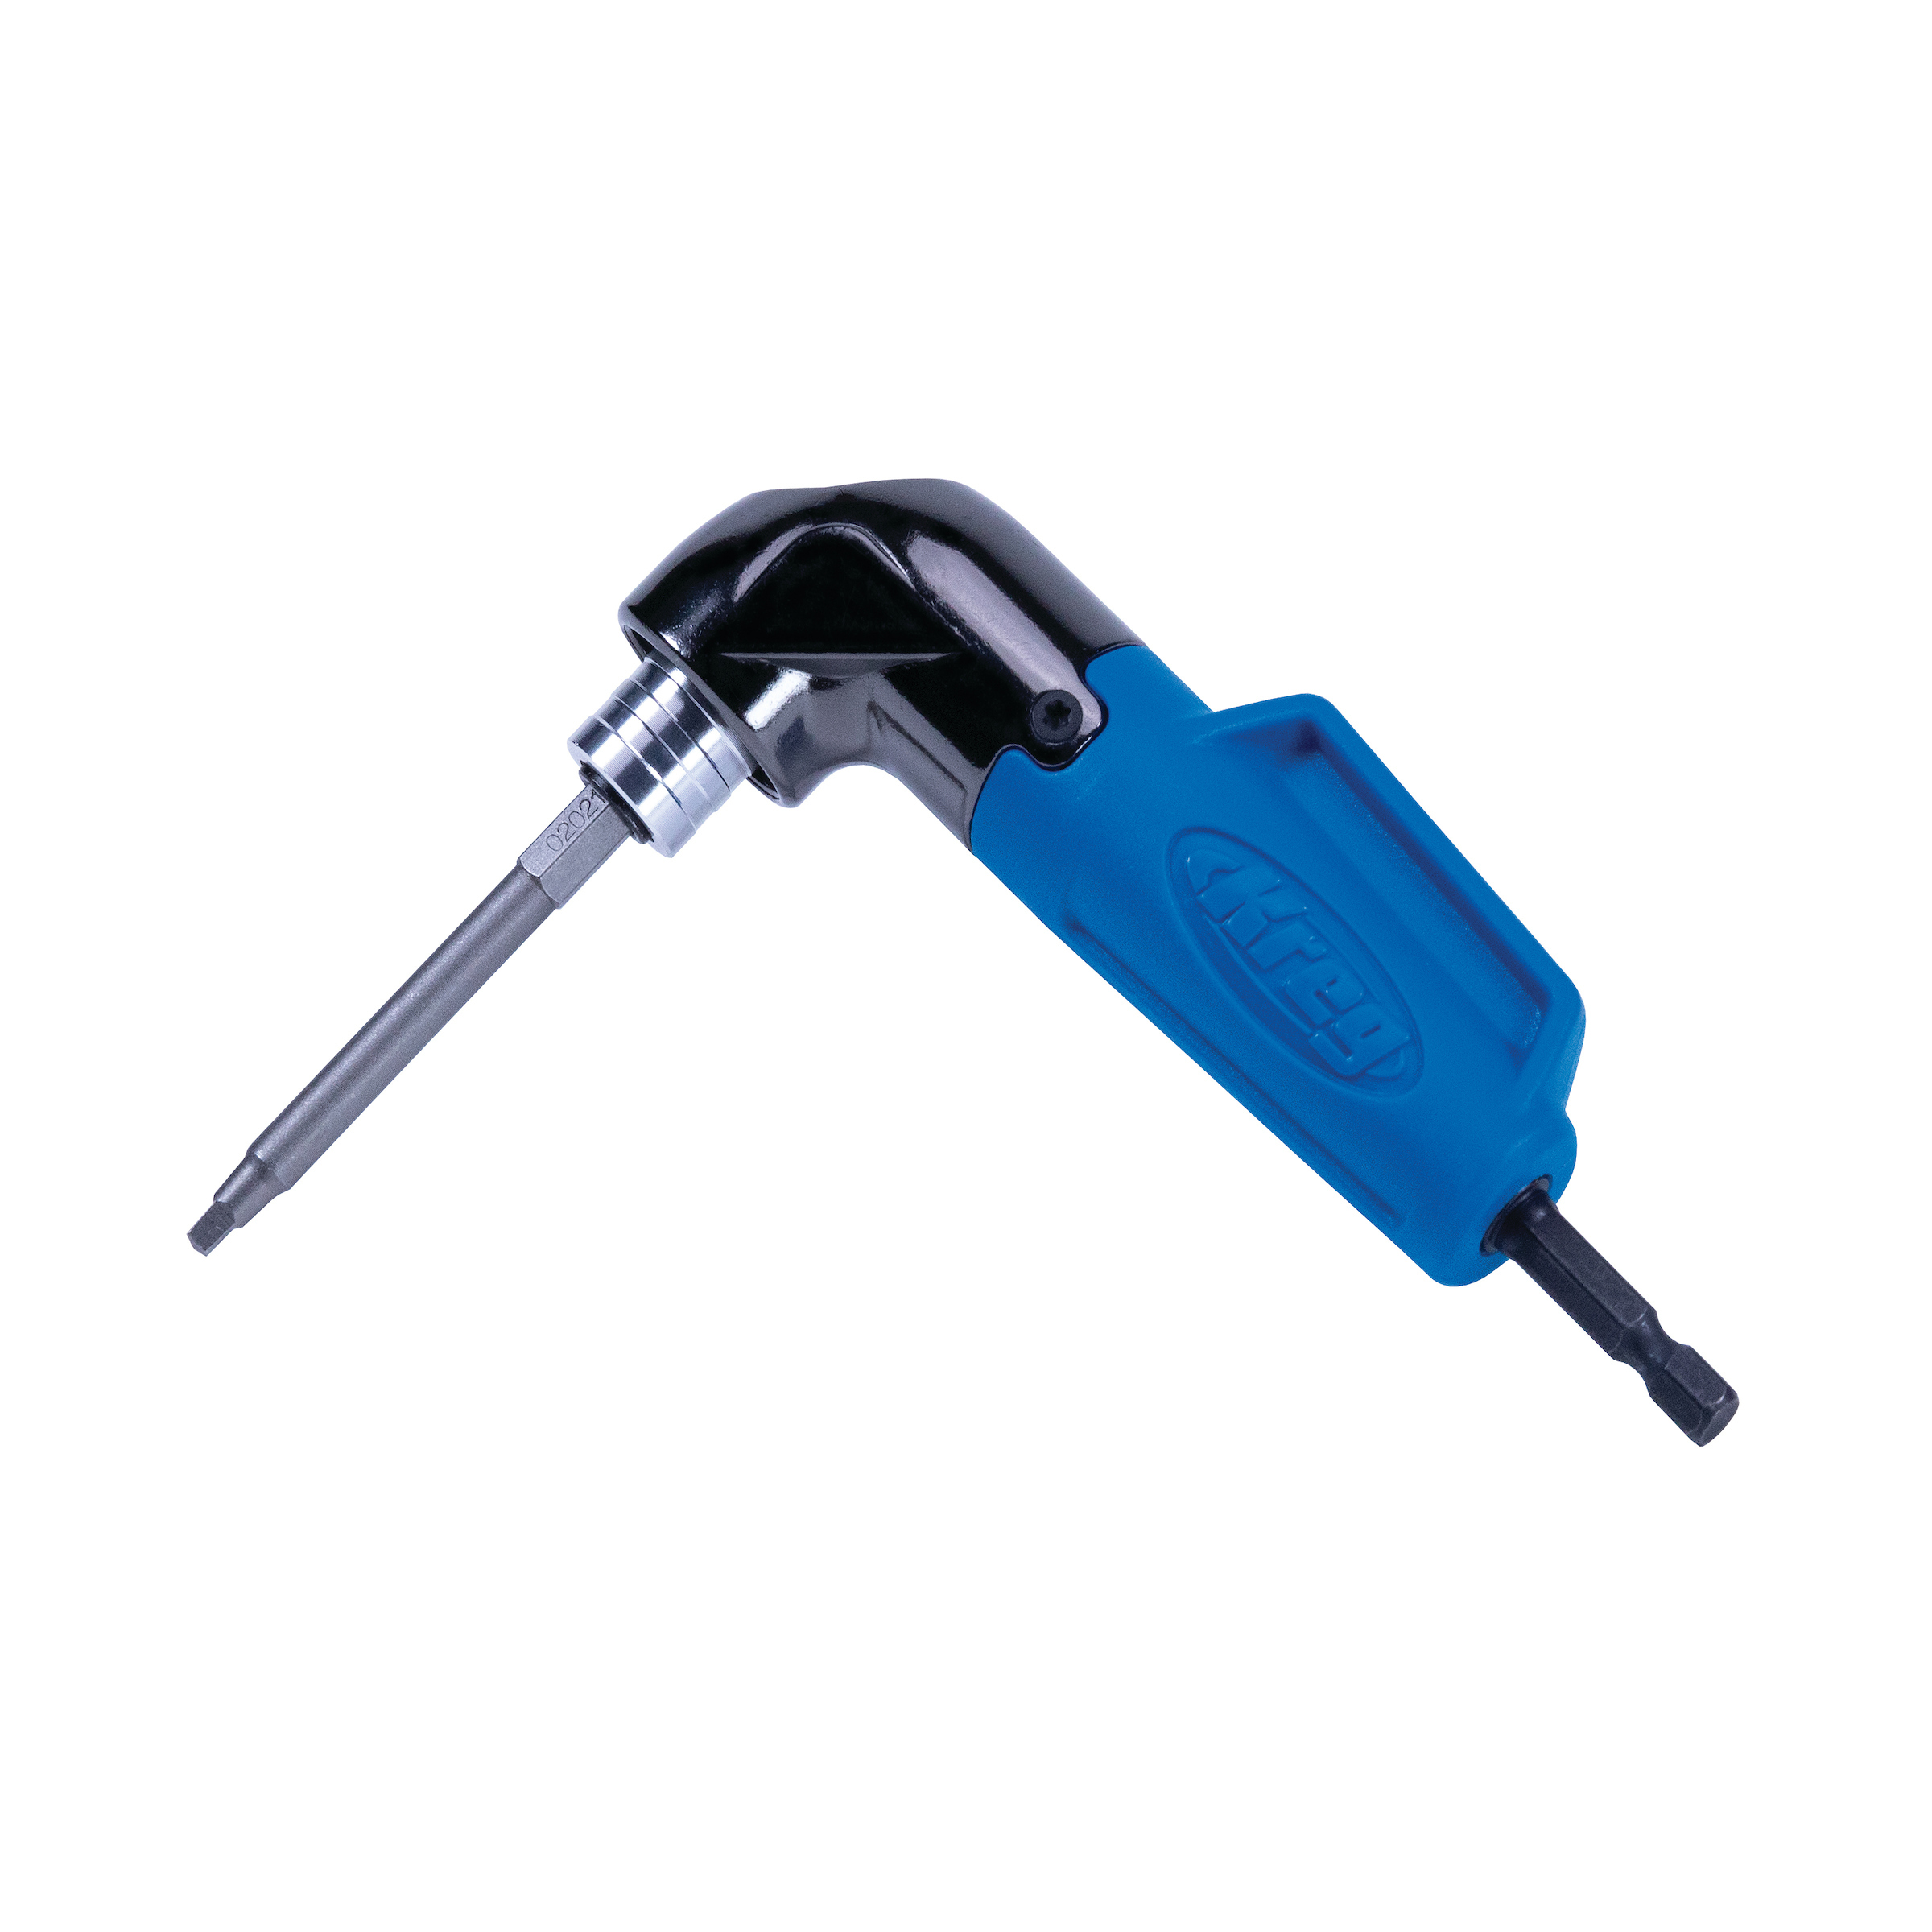
- 1 Right-angle drill attachment
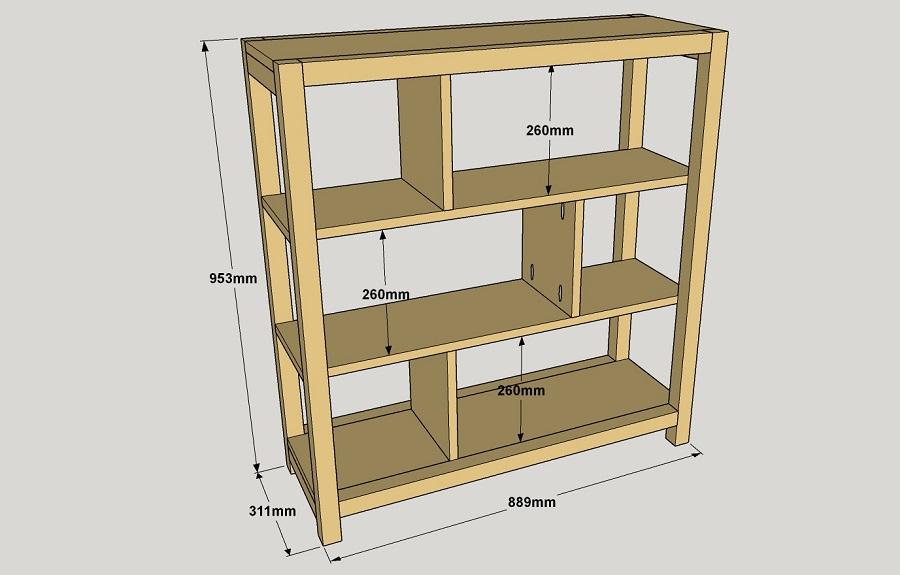
Cut List & Parts
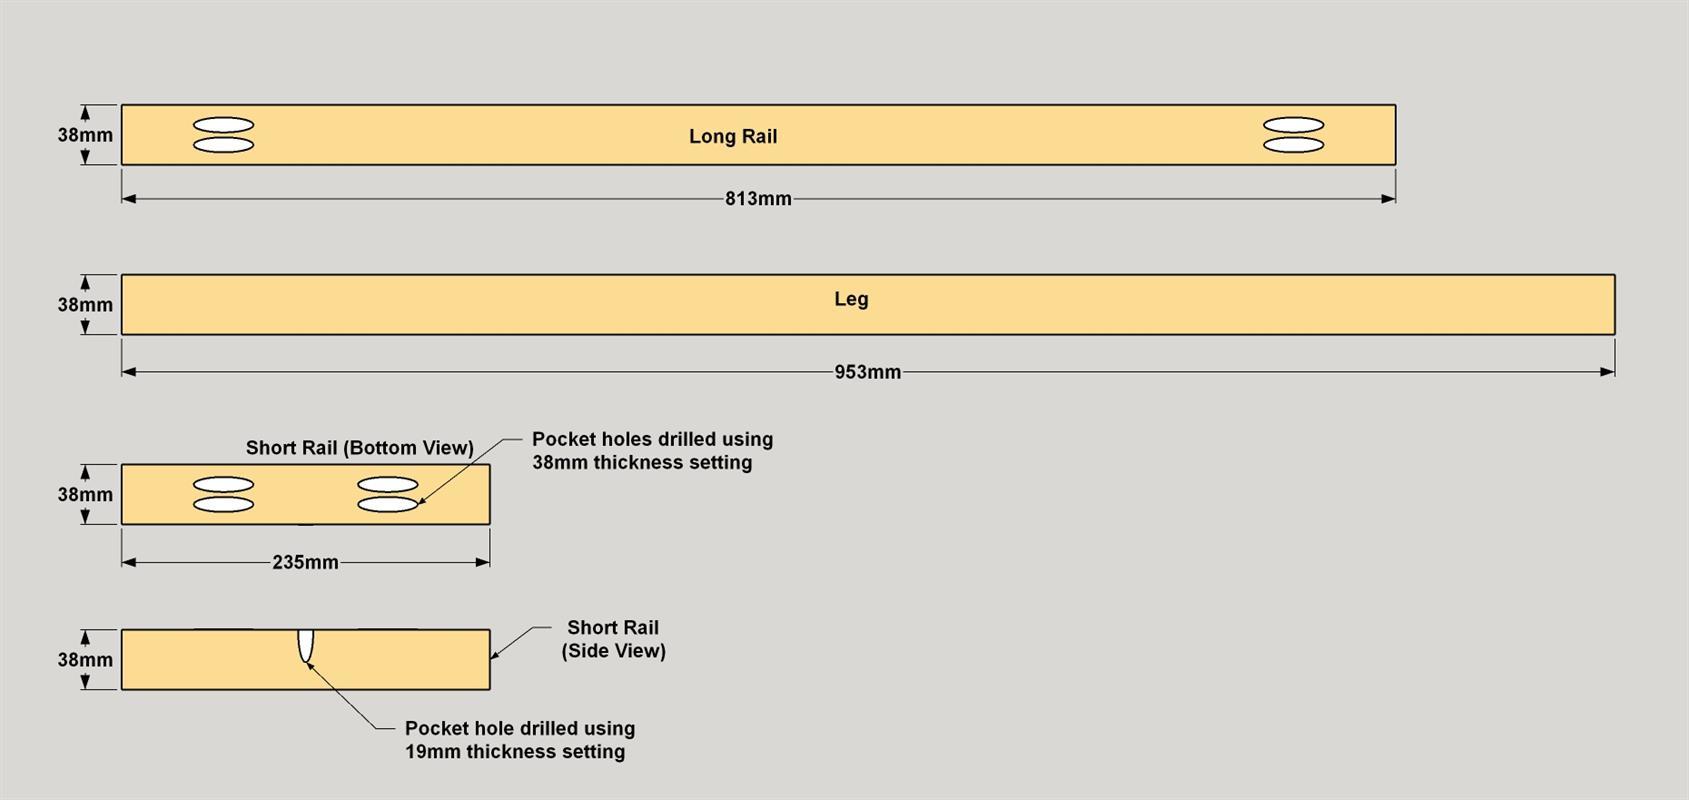
- 4 Leg , 38mm x38mm x 953mm pine
- 4 Long Rail , 38mm x38mm x 813mm pine
- 4 Short Rail , 38mm x 38mm x 235mm pine
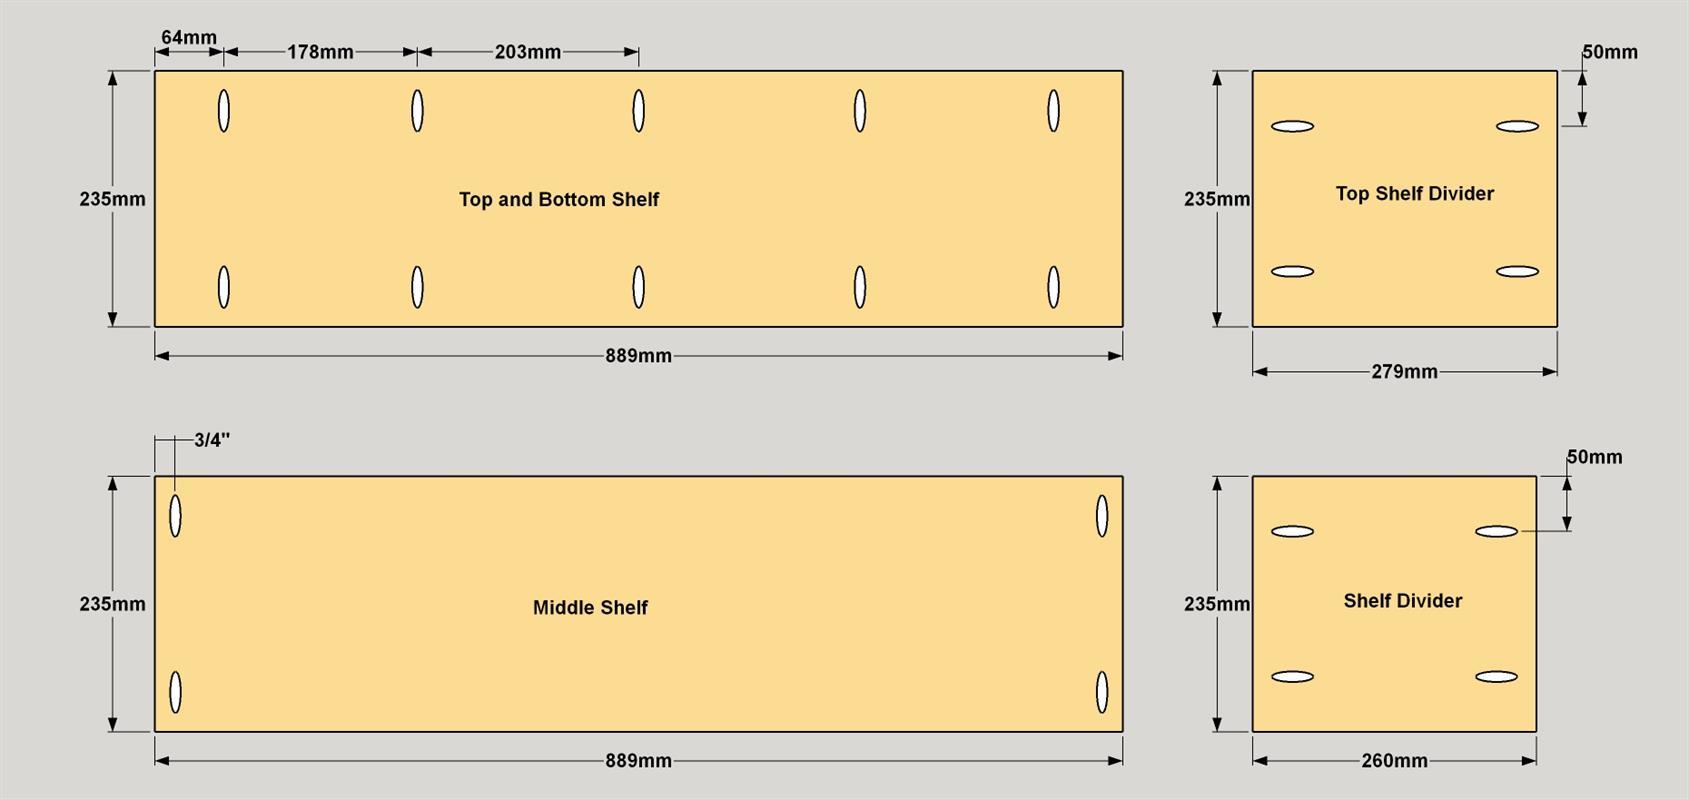
- 2 Top and Bottom Shelf , 19mm x 235mm x 889mm poplar
- 2 Middle Shelf , 19mm x 235mm x 889mm poplar
- 2 Shelf Divider , 19mm x 235mm x 260mm poplar
- 1 Top Shelf Divider , 19mm x 235mm x 279mm poplar
Directions
-
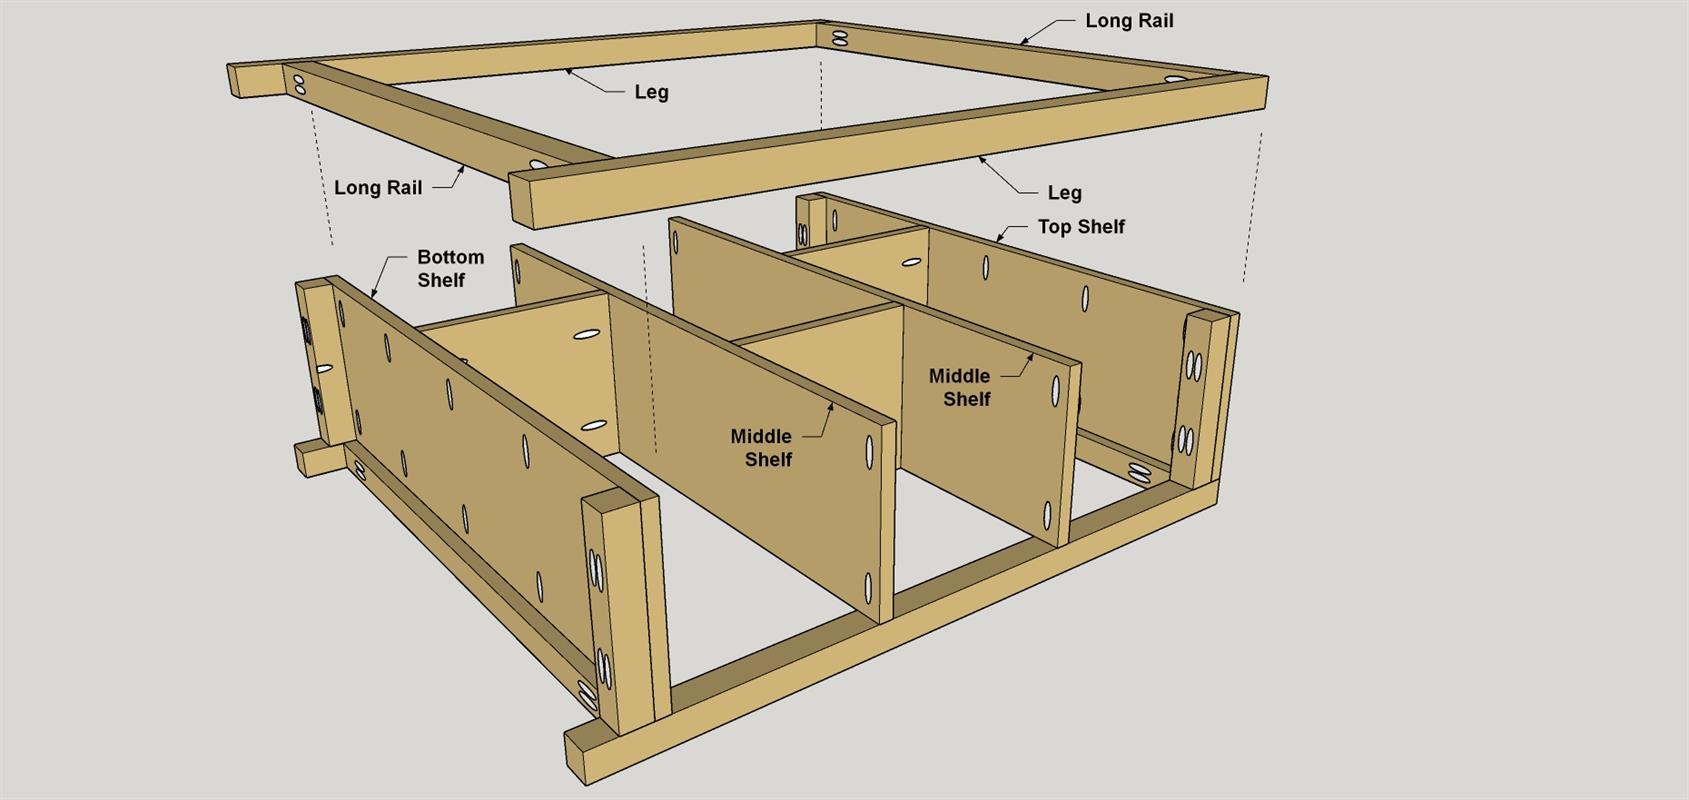
Make the Frame Parts
Cut four Long Rails, four Legs and four Short Rails from 38mm x 38mm pine boards, as shown in the cutting diagram. Set your pocket-hole jig for 38mm-thick material and drill pocket holes at the ends of the Long Rails and Short Rails, as shown. Next, set your pocket-hole jig for 19mm-thick material. Then drill pocket holes centered on one side of each of the Short Rails as shown. These holes will be sued to help attach the shelves later. When you’re done, sand the parts smooth using 120-grit, then 150-grit sandpaper.
-
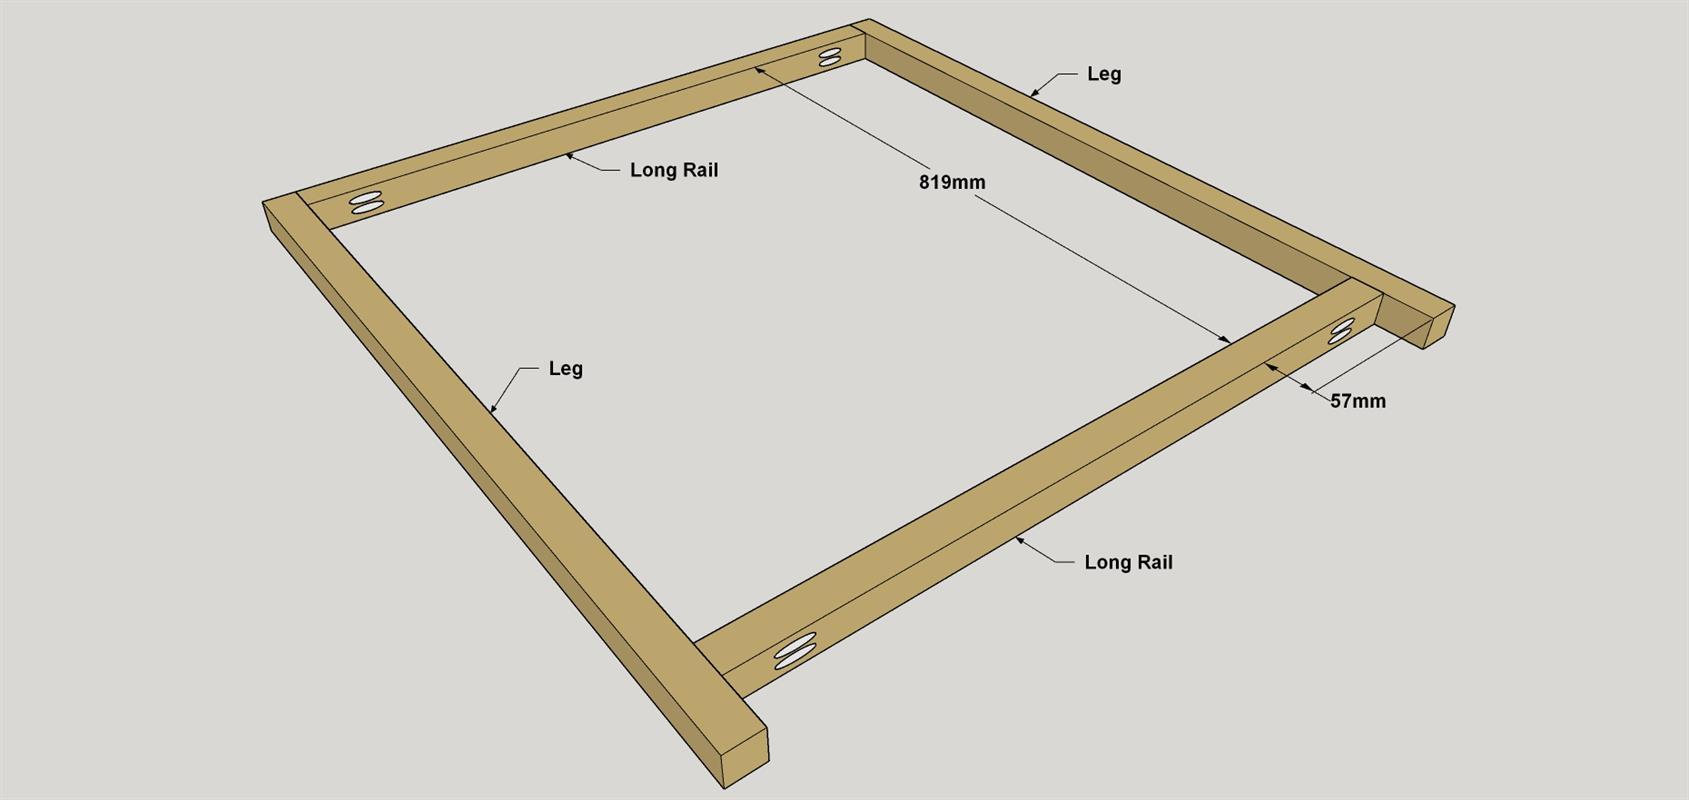
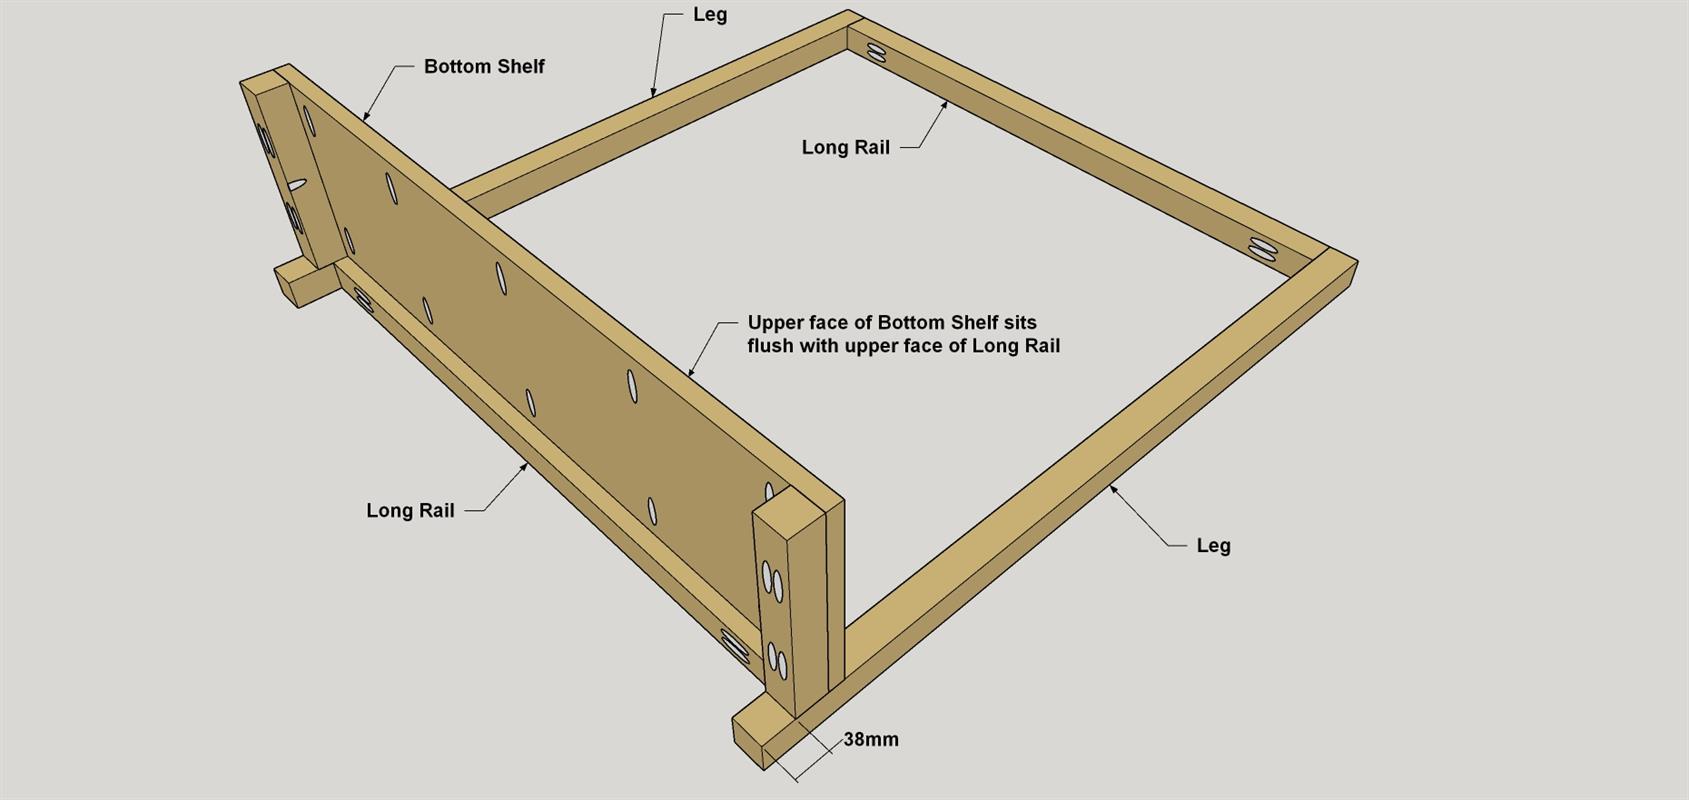
Assemble a Pair of Frames
Position two Long Rails between two Legs, so that the upper Long Rail sits flush with the tops of the Legs, and the other Long Rail is located 57mm up from the bottoms of the Legs, as shown. Now attach the Long Rails using 64mm coarse-thread pocket-hole screws, as shown. Repeat this process to assemble the other frame. If you plan finish your shelves like we did—with clear finish on the frames and paint on the shelves and dividers—this is a good time to apply finish to the frame assemblies and the short dividers.
-
Make the Shelves and Dividers
Cut four Shelves, two Shelf Dividers, and one Top Shelf Divider from 1x10 poplar boards, as shown in the cutting diagram. With your pocket-hole jig set for 19mm-thick material, drill pocket holes where shown in the Top and Bottom shelves, the Middle Shelves, and the three Dividers. When you’re done, sand these parts smooth. If you plan to paint the shelves and dividers, as we did, this is a good time to do it. Yes, it means you’ll have to wait for the paint to dry before moving on with assembly, but you’ll save time in the long runs since painting now is much easier.
-
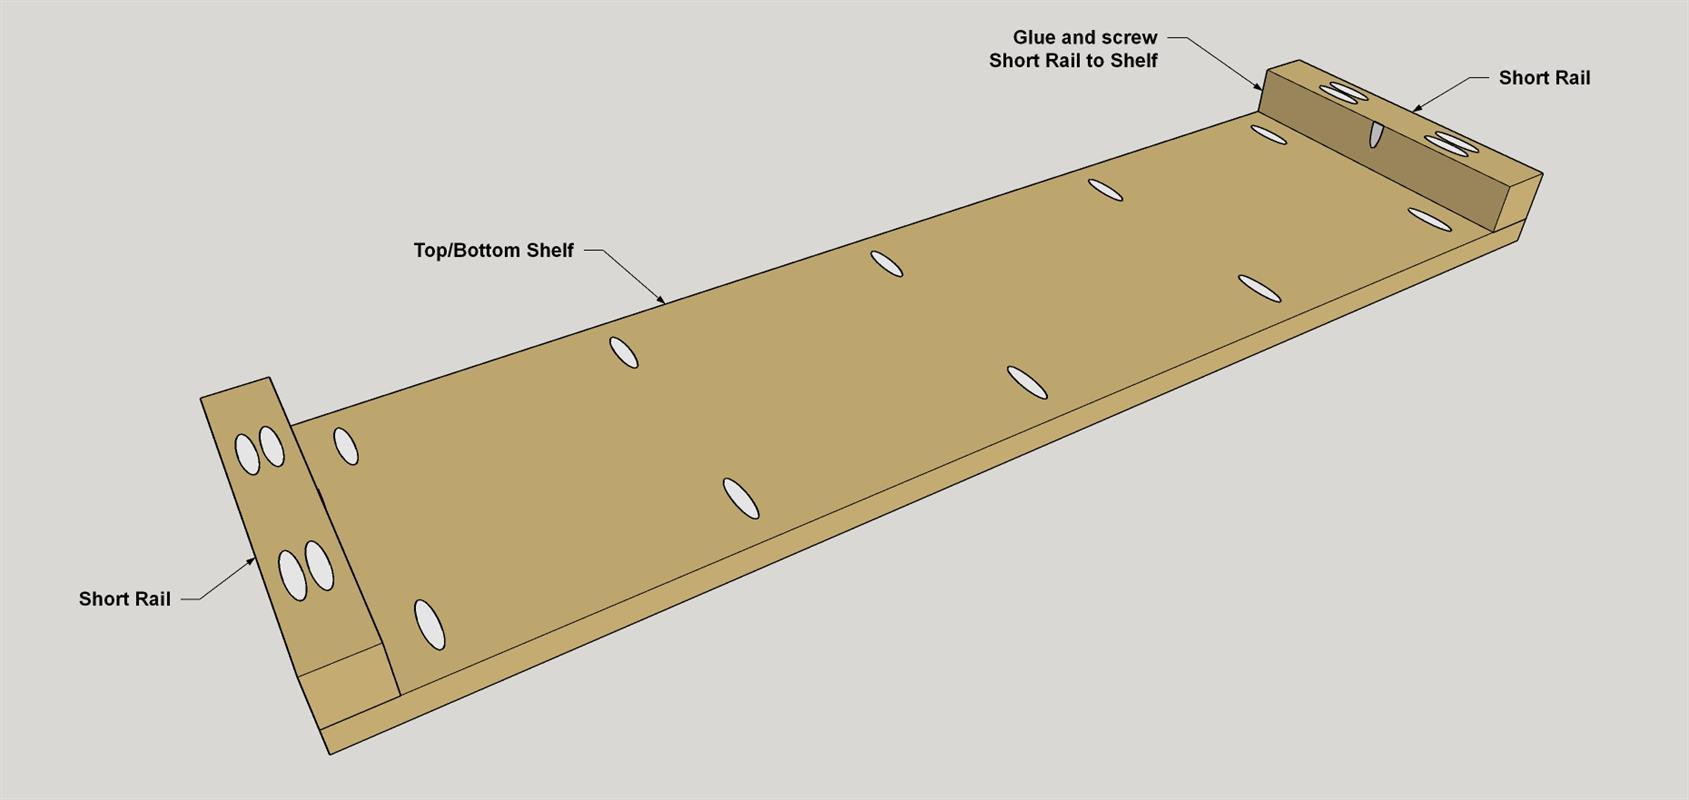
Attach Short Rails to Shelves
Once your paint and finish are dry, you can move on with assembly. Glue and clamp two Short Rails to the Bottom Shelf as shown. Make sure the pocket hole on the side of each Short Rail faces inward. Secure each Short Rail to the Bottom Shelf using one 32mm coarse-thread pocket-hole screw. Repeat the process for Top Shelf.
-
Attach the Bottom Shelf
Now you can position the bottom shelf assembly on one of the frame assemblies, as shown, and attach it. Use 64mm coarse-thread pocket-hole screws to secure the Short Rails to the Legs. Use 32mm coarse-thread pocket-hole screws to attach the Bottom Shelf to the Long Rail.
-
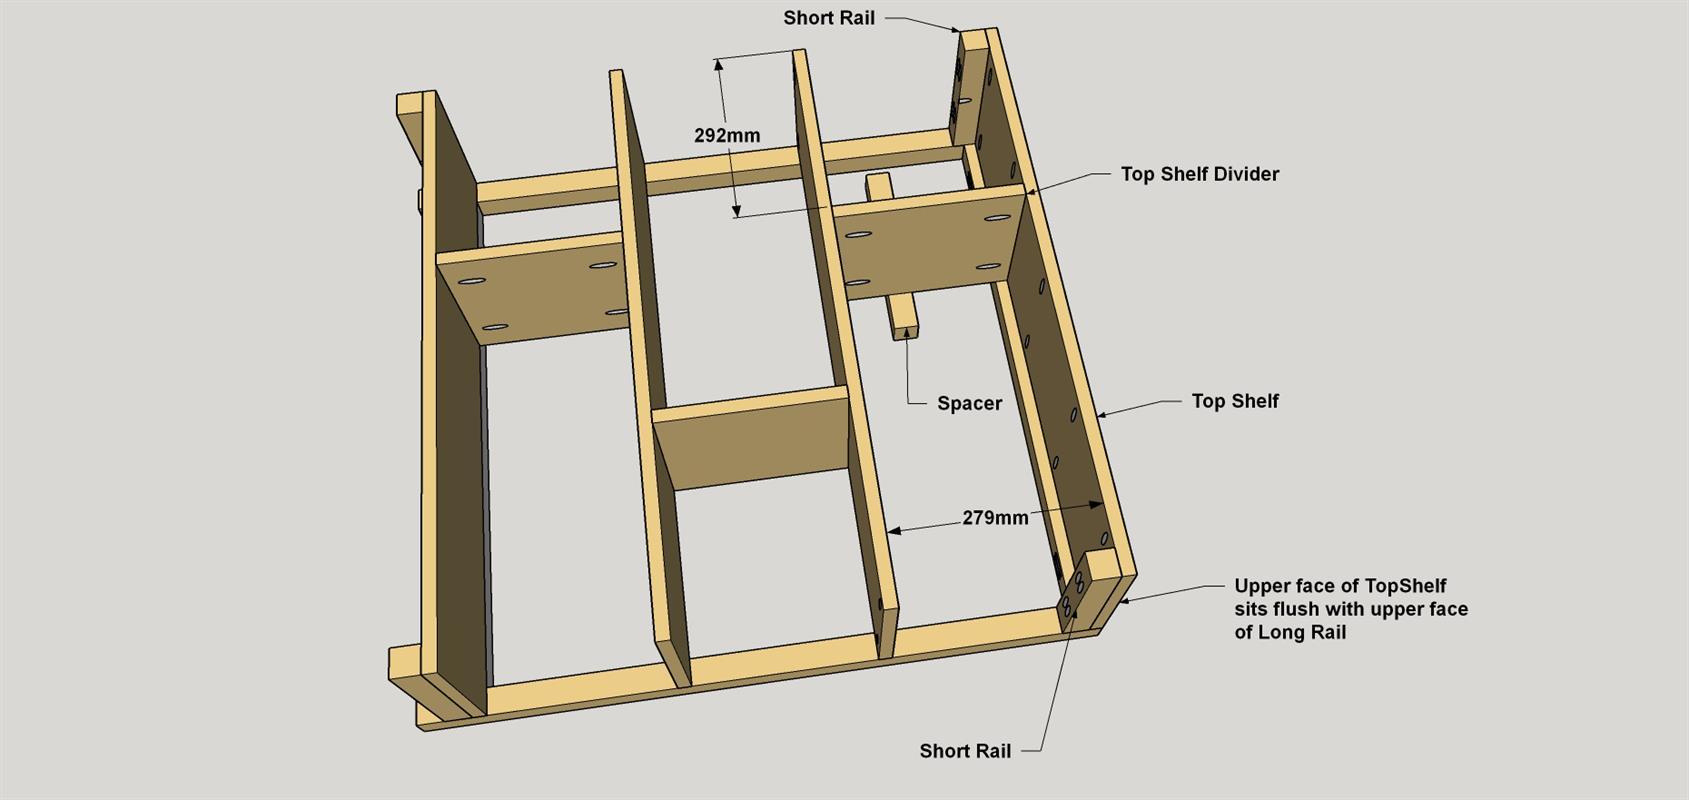
Attach the Middle Shelves and Divid
Cut two 260mm-long spacers from 38mm x 38mm boards. Rest those spacers on the Legs and against the Bottom Shelf, as shown. Position the Middle Shelf so it rests on the Spacers. Secure the Middle Shelf using 32mm coarse-thread pocket-hole screws. Next, position the Divider as shown. Use a square to make sure that the Divider is located accurately, and then attach the shelves using 32mm coarse-thread pocket-hole screws. Depending on your drill, you may not be able to fit the drill and driver bit between the shelves. That’s where aright-angle attachment, like the Kreg 90° Pocket-Hole Driver, can be handy. Repeat this process to attach the second Middle Shelf and Divider, but this time offset the Divider from the opposite end of the shelf.

-
Attach the Top Shelf and Divider
Set the Top Shelf assembly in position on the frame assembly as shown. Use 64mm coarse-thread pocket-hole screws to secure the Short Rails to the Legs. Use 32mm coarse-thread pocket-hole screws to attach the Top Shelf to the Long Rail. Position the Top Shelf Divider, check it with a square, and then attach the Top Divider using 32mm coarse-thread pocket-hole screws. If you want to plug the pocket-holes in the Dividers, go ahead and glue them in, trim the plugs flush, and then paint them.
-
Attach the Second Frame
To finish up, you can attach the second frame assembly. Again, you’ll use 64mm pocket-hole screws to secure the Short Rails to the Legs, and 32mm pocket-hole screws to attach the Shelves to the Long Rails. With that done, you’re ready to move your new bookcase to its location, and load it up