


Whether you’re an average bird watcher or you just want to sharpen your woodworking skills, this DIY Bird Feeder project is custom-made for you. It’s made from pressure-treated Southern Yellow Pine to last for years that will look great the entire time. How-to video in extras!
Tools
Other Tools
-
Miter Saw

-
Rotary Tool
-
Table Saw
-
Tape Measure
-
Clamps
-
Drill (cordless)
-
Glue Gun
-
Hammer
-
Nail Gun
-
Stapler
-
Router
-
Sander
Materials
Wood Products
- 2 Board , 1x6 , 72"
Hardware & Supplies
- 1 Sandpaper or sanding sponges, 150 or 220 grit
- 50 18 gauge nails, 1-1/4″ and 3/4″
- 50 18 gauge staples, 1/2″
- 8 Mending Plates (optional, for joining octagon)
- 8 Miter Clamps (optional)
- 1 Stainable Wood Filler (optional)
- 1 Mesh Screen/Hardware Cloth
- 10 Small pack of exterior grade screws, #8, 1-1/2″ (commonly referred to as ‘deck screws’)
- 1 Wood Glue
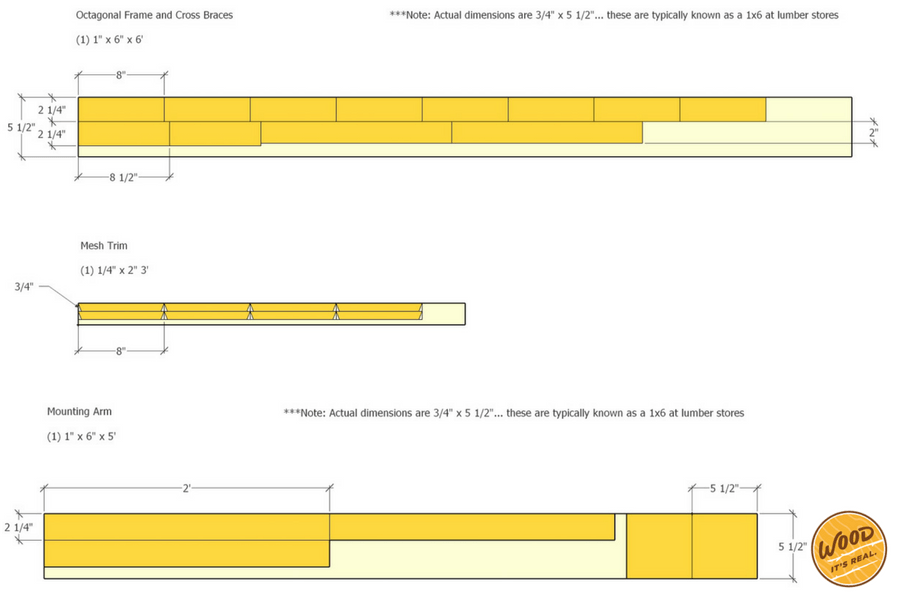
Cut List & Parts
- 2 Pressure Treated Southern Yellow Pine Boards , 1"x6"x72"
Directions
-
Prep Your Treated SYP Boards
Before you begin, you can cut your board into two sections so it’s slightly easier to manage, making two pieces – one at around 4.5 feet long and the other around 5.5′ feet long.
Also, it can be a good idea to cut off the factory edges of your lumber by running it through a table saw for a super smooth edge, just be careful not to take off too much.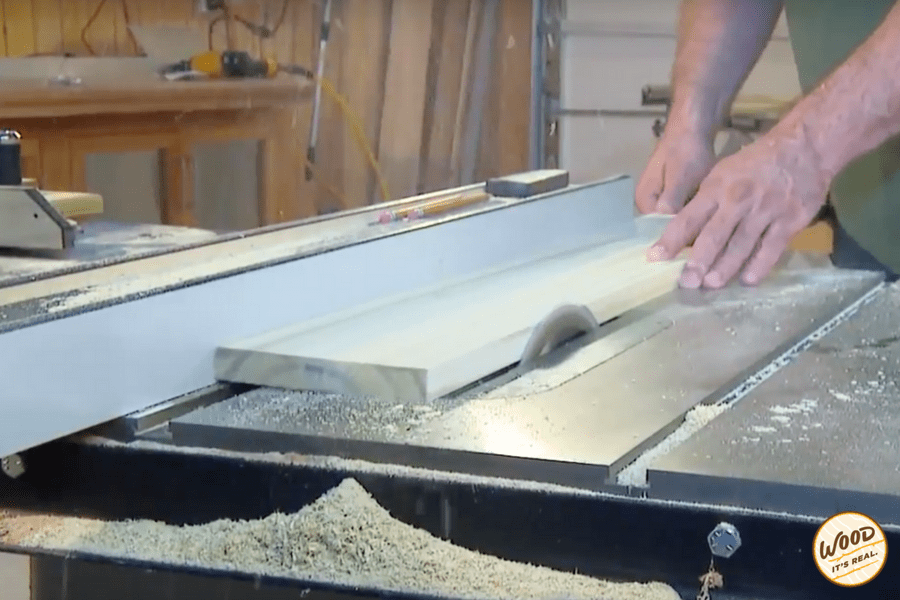
-
Cut Lumber Strips and Angles
1. Rip two 2.25″ inch strips out of the 4.5′ board
2. Each side will need to be bevel cut to 22.5 degrees. To do that: Measure and mark eight inches on the strip you just cut. Next, align the saw blade to the mark and set up a stop to keep each piece uniform. Use a spacer block to help prevent jamming. Then, clamp a piece of scrap to act as a stop for the blade of the saw.
3.Use the spacer block to cut both ends of the first piece, flipping it end for end.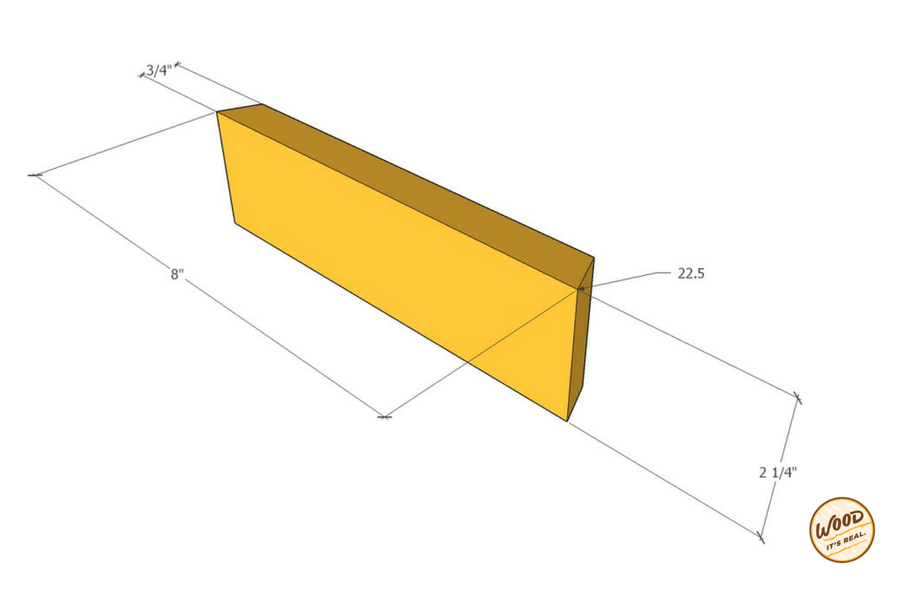
-
Finish Rest of Angled Lumber Strips
1. For the second and subsequent pieces, slide the strip up to the stop for the first cut, then flip it and use the spacer for the second. This way, we’ll keep the grain pattern aligned along the perimeter of the feeder.
2. Once all eight sides have been cut, use a sanding sponge to clean off any rough edges.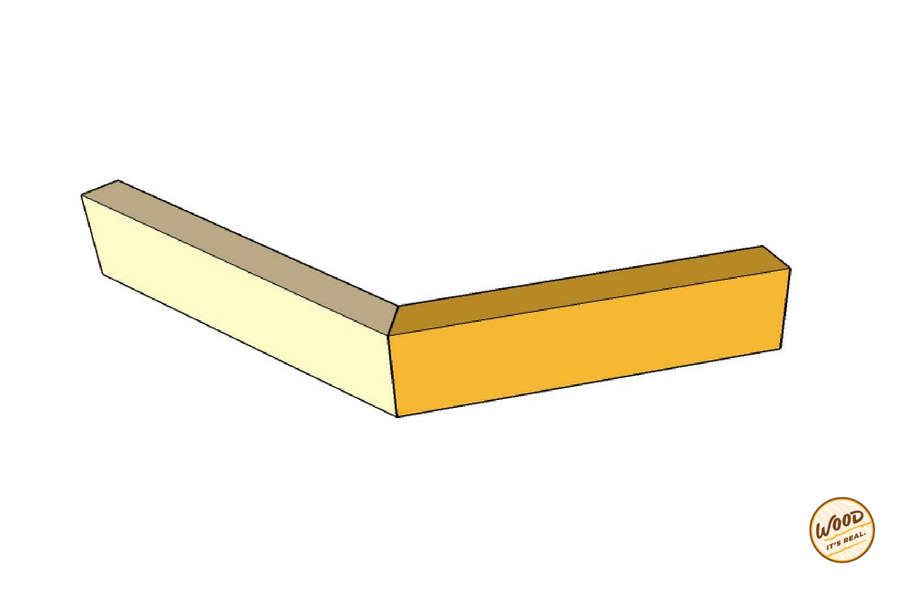
-
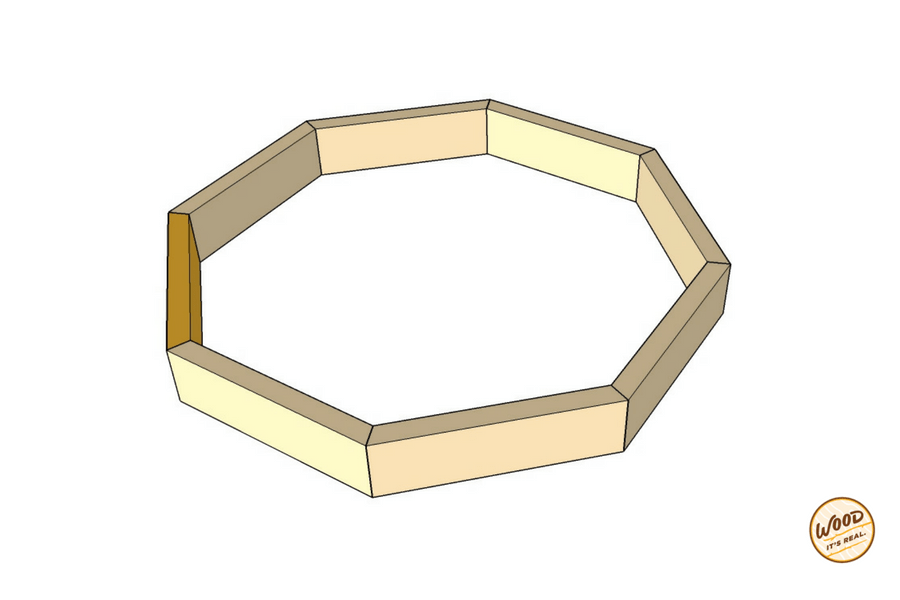
Prepare Octagon Shape
Next, lay on the octagon loosely. Two frame squares clamped to your work surface will act as a guide and help you keep the joints aligned.
-
Attach Cross Brace
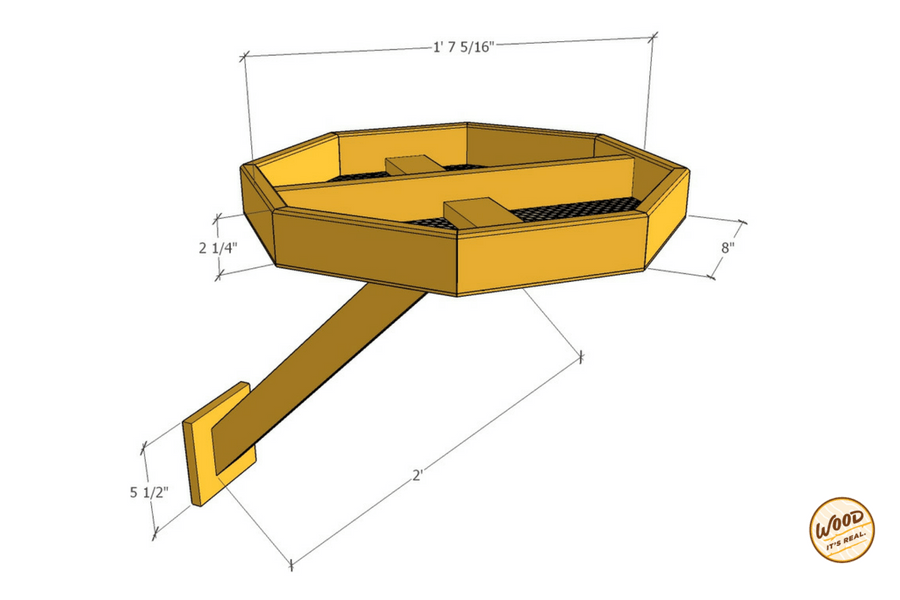
1. Once the sides are snugly in place, measure across the inside of the bird feeder and cut a cross brace to fit.
2. Measure and mark the center of the top and bottom of the feeder then use these marks to align the cross plates. This could be the width of your choosing. We ripped this strip down to two inches just to add some dimension.
3. Apply glue to each end, and then fasten the brace with nails.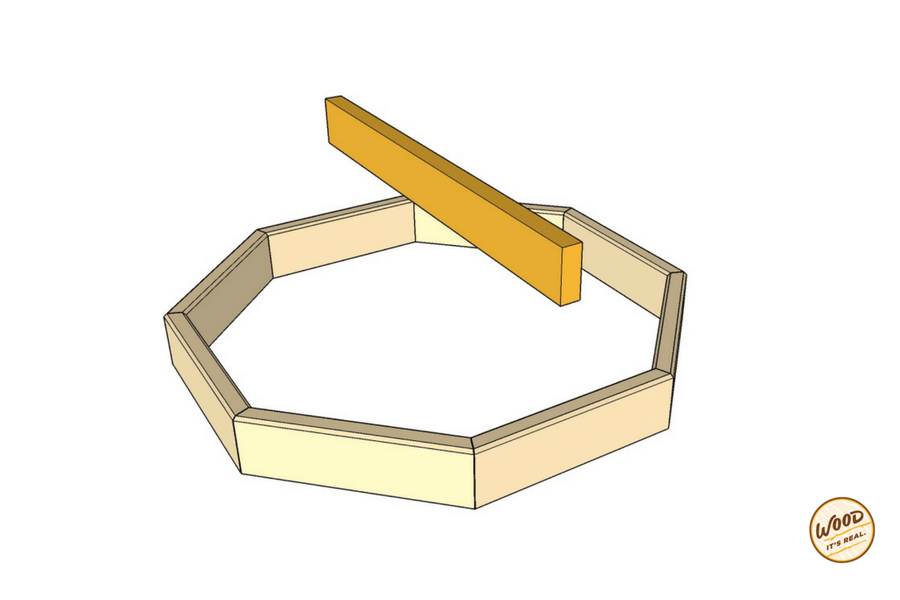
-
Glue Octagon; Attach Lateral Brace
1.After the brace is installed, begin gluing each side of the feeder in place. Take your time, and make sure to check alignment every so often. We’re not using nails in the joints, so we want them to be as tight as possible.
2. Once all the sides are glued, measure and cut lateral cross braces. We laid the cross brace flat again, just for dimension.
3. Glue and nail them into place as well.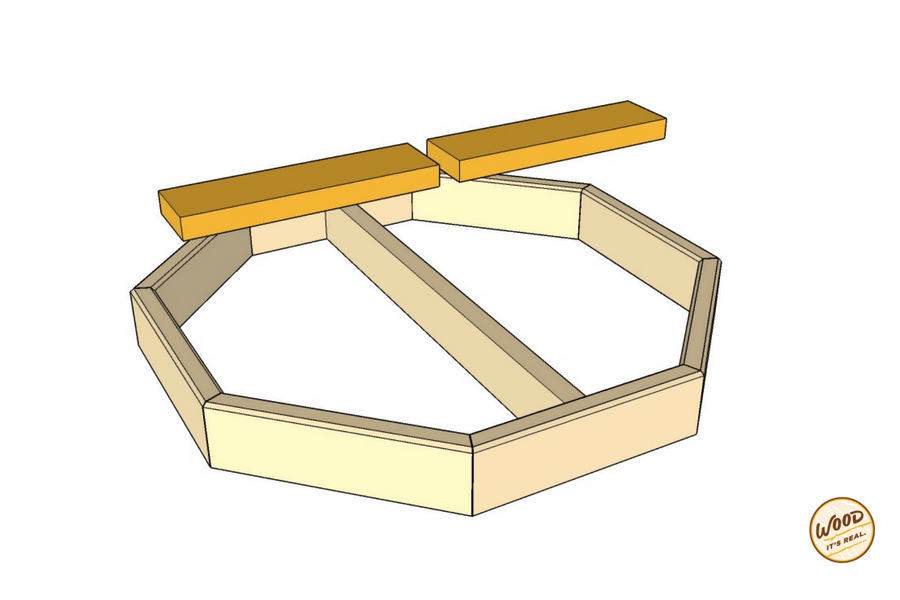
-
BONUS Tips for Perfect Octagon
*Mending Plates:
If you’re looking for an alternative to the glue-only method, just look for small mending plates at your local home improvement store. They’re super affordable and can be easily bent into a 22 and a half degree angle, then fastened to the inside of each joint.
*Miter Clamps:
Miter clamps are handy to keep glued joints tight while they dry.
*Stainable Wood Filler:
If you find imperfections with how your frame lines up at the joints, try using stainable wood filler to fill it out. Put a little on a putty knife, and fill in each of the joints you don’t love. You can also fill in any knot holes or nail holes that you may find around the perimeter of this entire piece. Once the wood filler dries, sand it all smooth.
-
Smooth the Joints, Router the Edges
1. Once the wood putty is dried thoroughly, sand the joints and any rough spots. You can give the joints a slight round over to make a nicer transition from piece to piece.
2. After the filling and sanding are done, use a handheld router tool with a small chamfer bit to round the edges. This is a totally optional step.
3. If you use the router tool, don’t forget your safety glasses. Always use caution and don’t force the tool. Let it cut at its own speed. We found it easier to route the inside edge of the feeder from the top, and the outside edge from the side.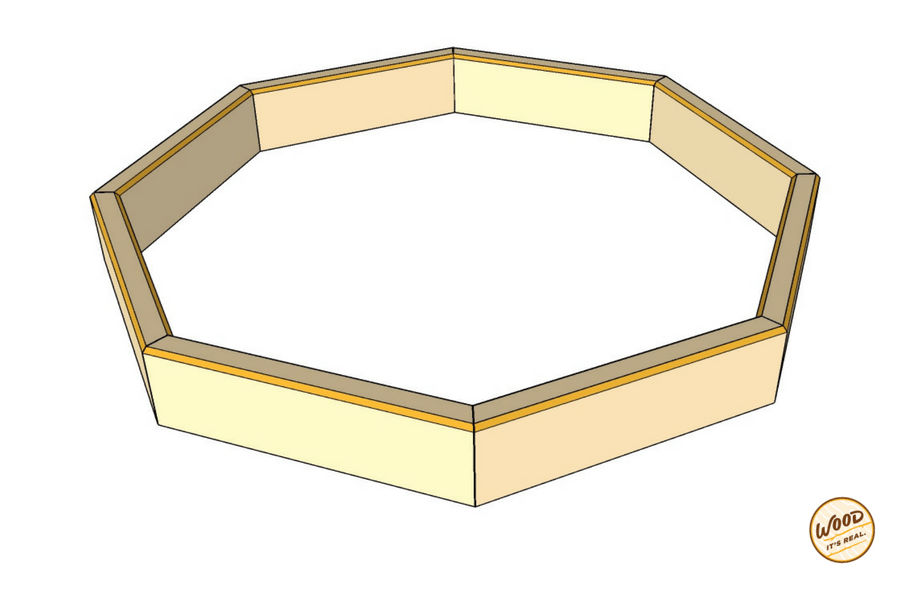
-
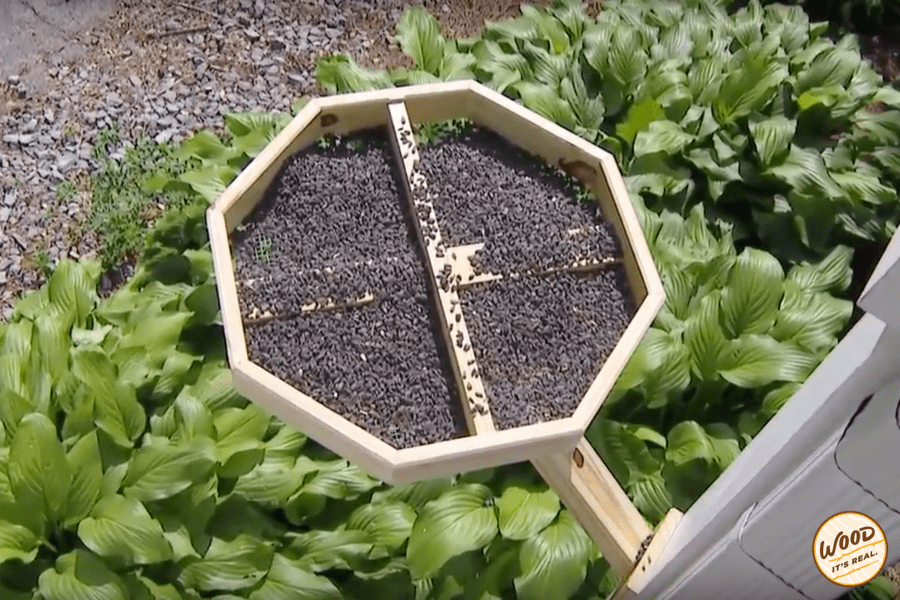
Install Wire Mesh Bottom
NOTE: If you’re painting or staining the bird feeder, do it before installing mesh.
1. With the bird feeder upside down, cut the piece of hardware cloth just a little larger than the bottom. FYI, the mesh is hardware cloth, basically a loose mesh wire screen. It has sharp edges, so if you have sensitive fingers make sure you wear gloves.
2. Staple the hardware cloth starting in the middle working my way out to each edge. You can use a staple gun or a manual stapler. Fasten the hardware cloth every couple of inches for a snug fit.
3. Use diagonal cutters to cut away the excess.
4. If you’d like, you can add some thin wood trim to the bottom to cover any exposed ends of the wire mesh. Miter each end to 22.5 degrees, and glue, tack, or nail.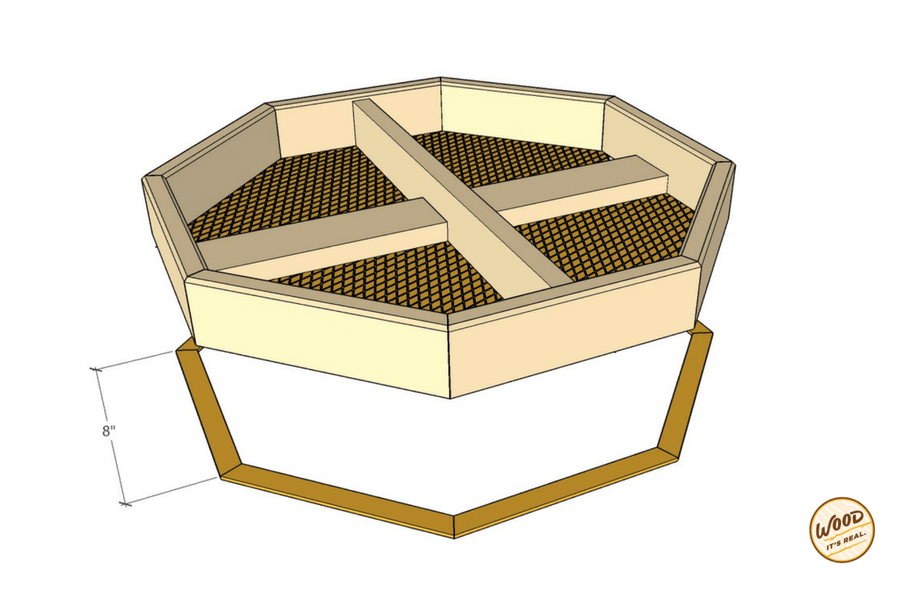
-
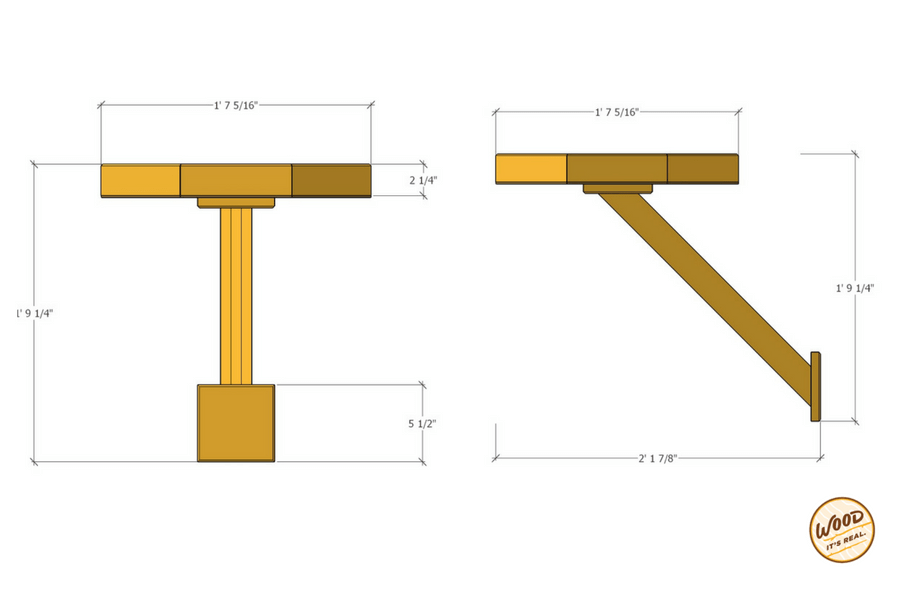
Build Mounting Post
1. Rip three strips to two and a quarter inches wide by 24 inches long.
2. To laminate strips together, spread glue evenly across each piece, and use clamps to hold the setup in place while the glue cures.
3. Once the post is dried, use stainable wood filler to fill any gaps or imperfections. After it dries, sand it smooth.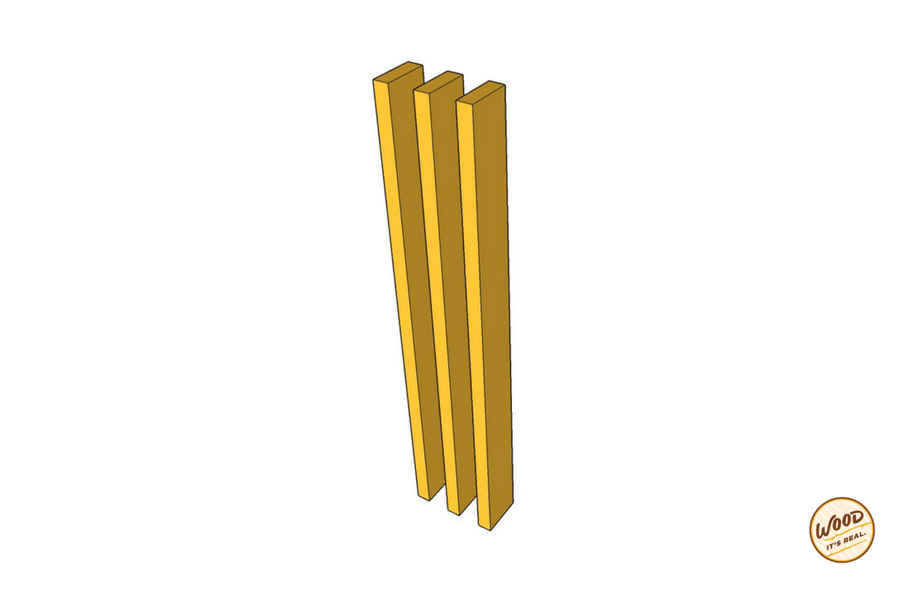
-
Build Mounting Brackets
1. Cut two lengths from the one by six, as long as the board is wide. They should be roughly five and a quarter to five and a half inches square.
2. Use the chamfer a bit to soften the edges if you like.
3. Drill pilot holes about an inch from each corner.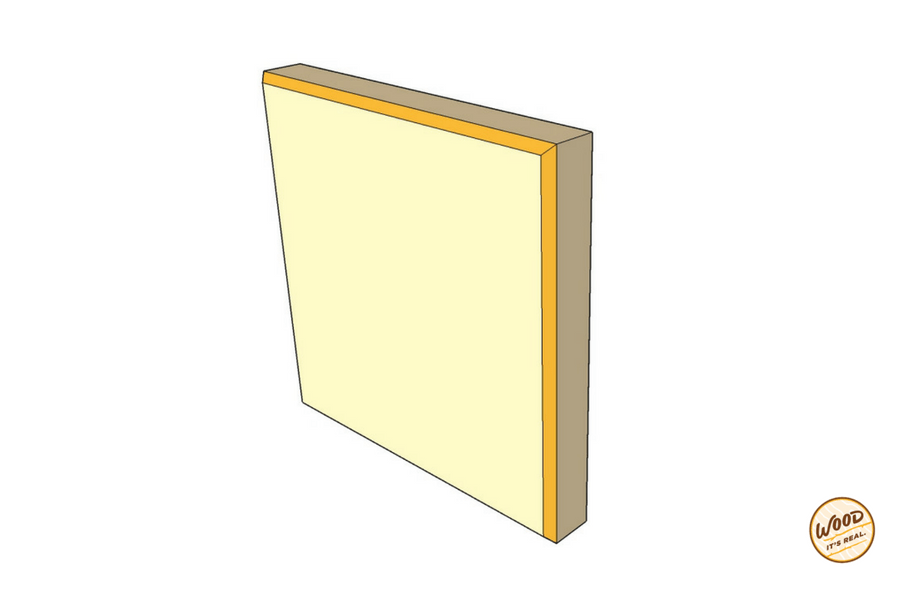
-
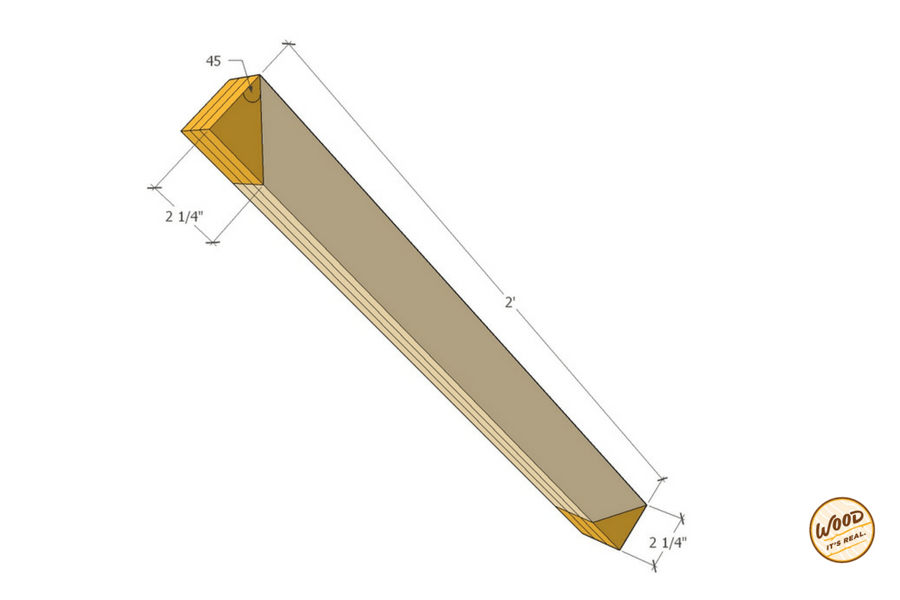
Angle Cut Mounting Post Ends
Cut a 45-degree miter at both ends.
-
Attach Mounting Post to Bracket
1. Measure and drill pilot holes on the opposite side of the mounting brackets to secure them to the post.
2. Apply glue and use exterior grade screws to fasten.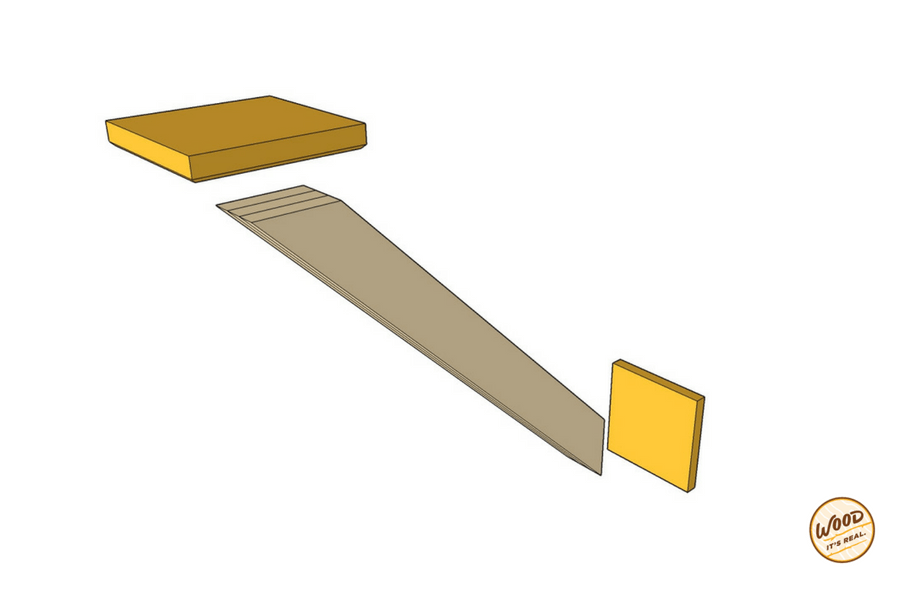
-
Attach Bird Feeder to Mounting Post
1. Position the post assembly onto the bottom of the feeder.
2. Use exterior grade screws to attach it securely.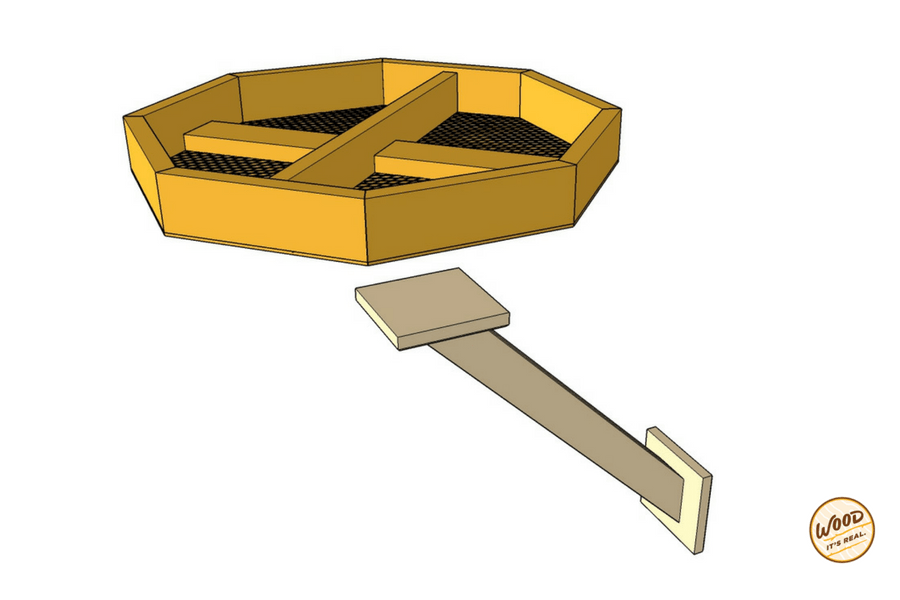
-
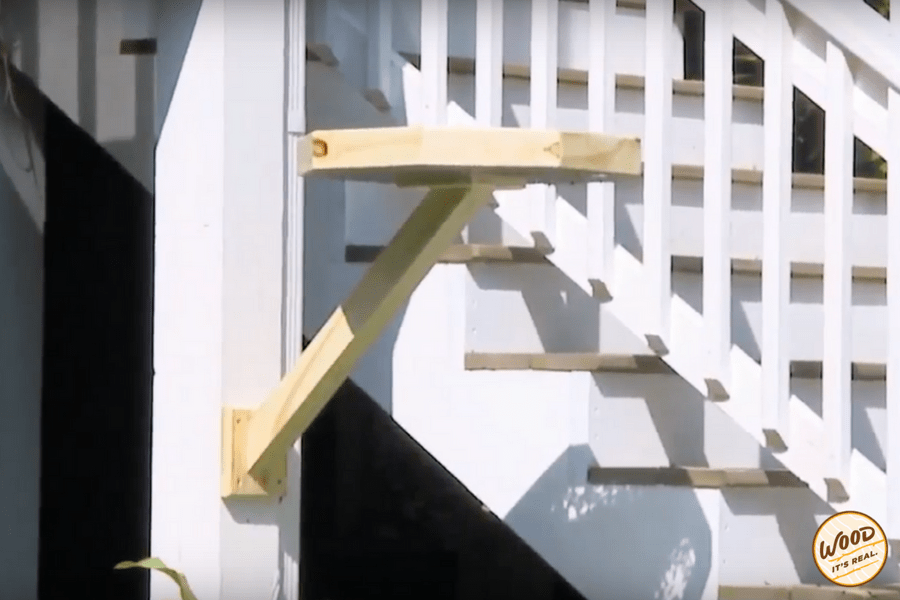
Find a Bird Feeding Spot, Enjoy!
1. Find a great spot to mount your new bird feeder.
2. Attach using exterior grade screws, securely fastening the mounting brackets.
3. Fill it up with lots of bird feed and enjoy bird watching.