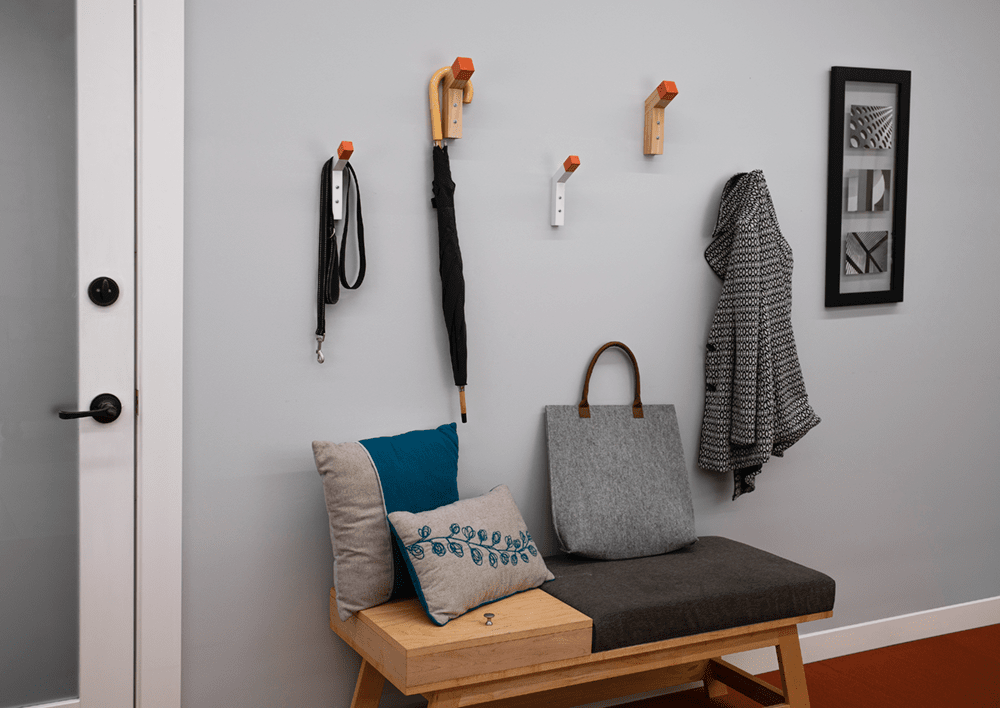


Storage solutions don’t have to be complicated to be effective. These hooks prove it by being simple to make, stylish, and able to go almost anywhere. We’ll show you two kinds—one made from a 2x2 board, and one from a 1" square dowel. Both go together with glue and a single pocket-hole screw.
Tools
Kreg Tools

Other Tools
-
Miter Saw

-
Drill (cordless)
-
Sander
-
Tape Measure
Materials
Wood Products
- 1 Board , 2x2 , 72"
- 1 Square Dowel , 1"x1" , 36"
Hardware & Supplies
- 1 2 1/2" coarse-thread Kreg pocket-hole screws
- 1 1 1/2" coarse-thread Kreg pocket-hole screws
- 1 Wood Glue
- 16 2 1/2" pan-head wood screw (2 per 2x2 hook to secure hook to wall)
- 8 2" pan-head wood screw (2 per 1x1 hook to secure hook to wall)
- 1 Painter's Tape
Cut List & Parts
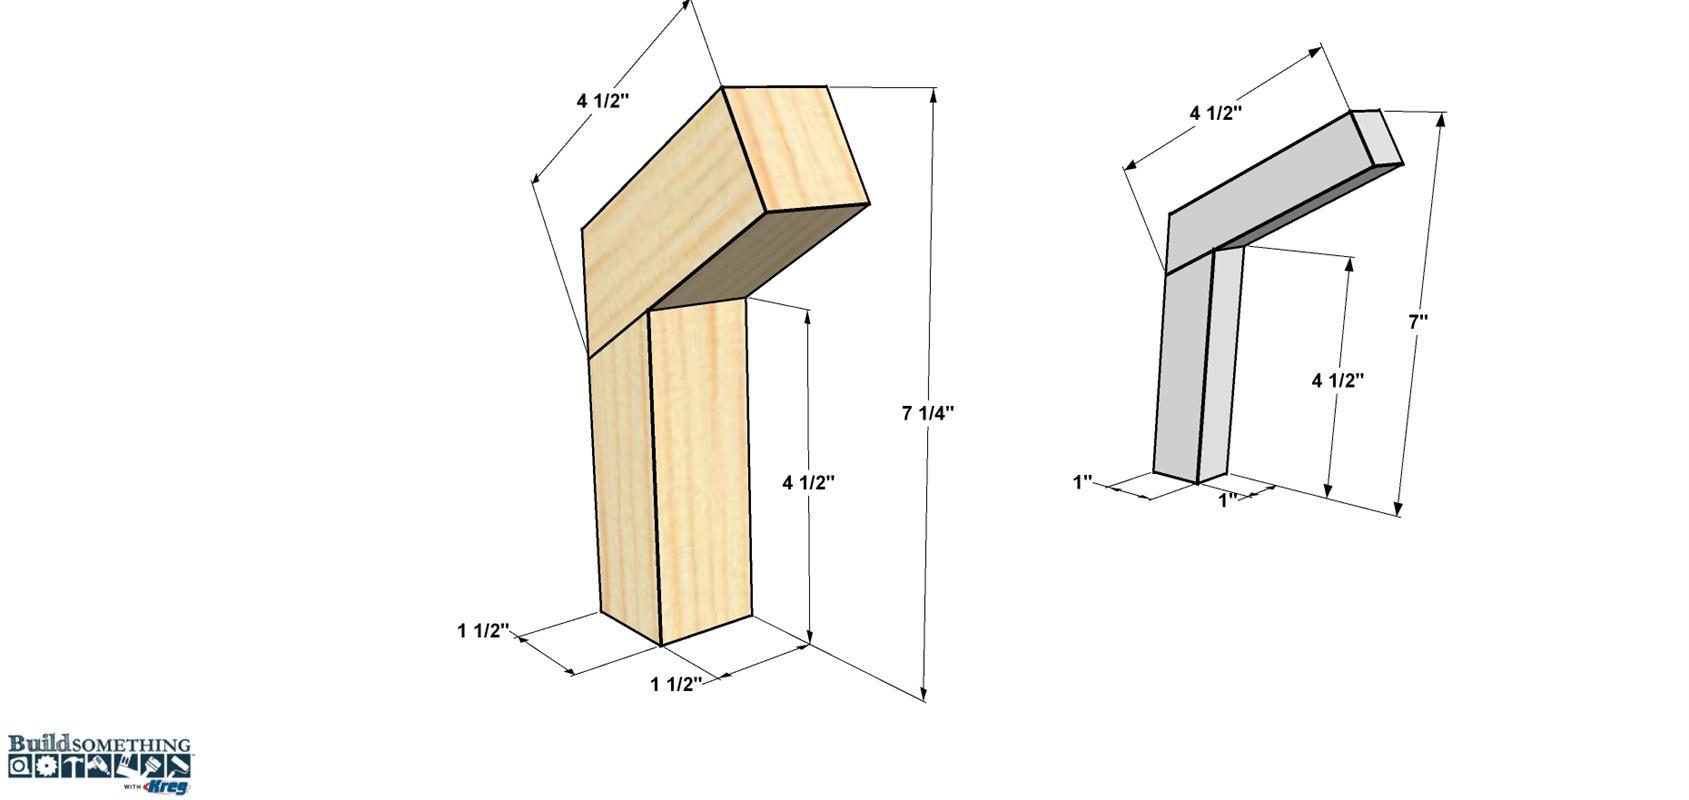
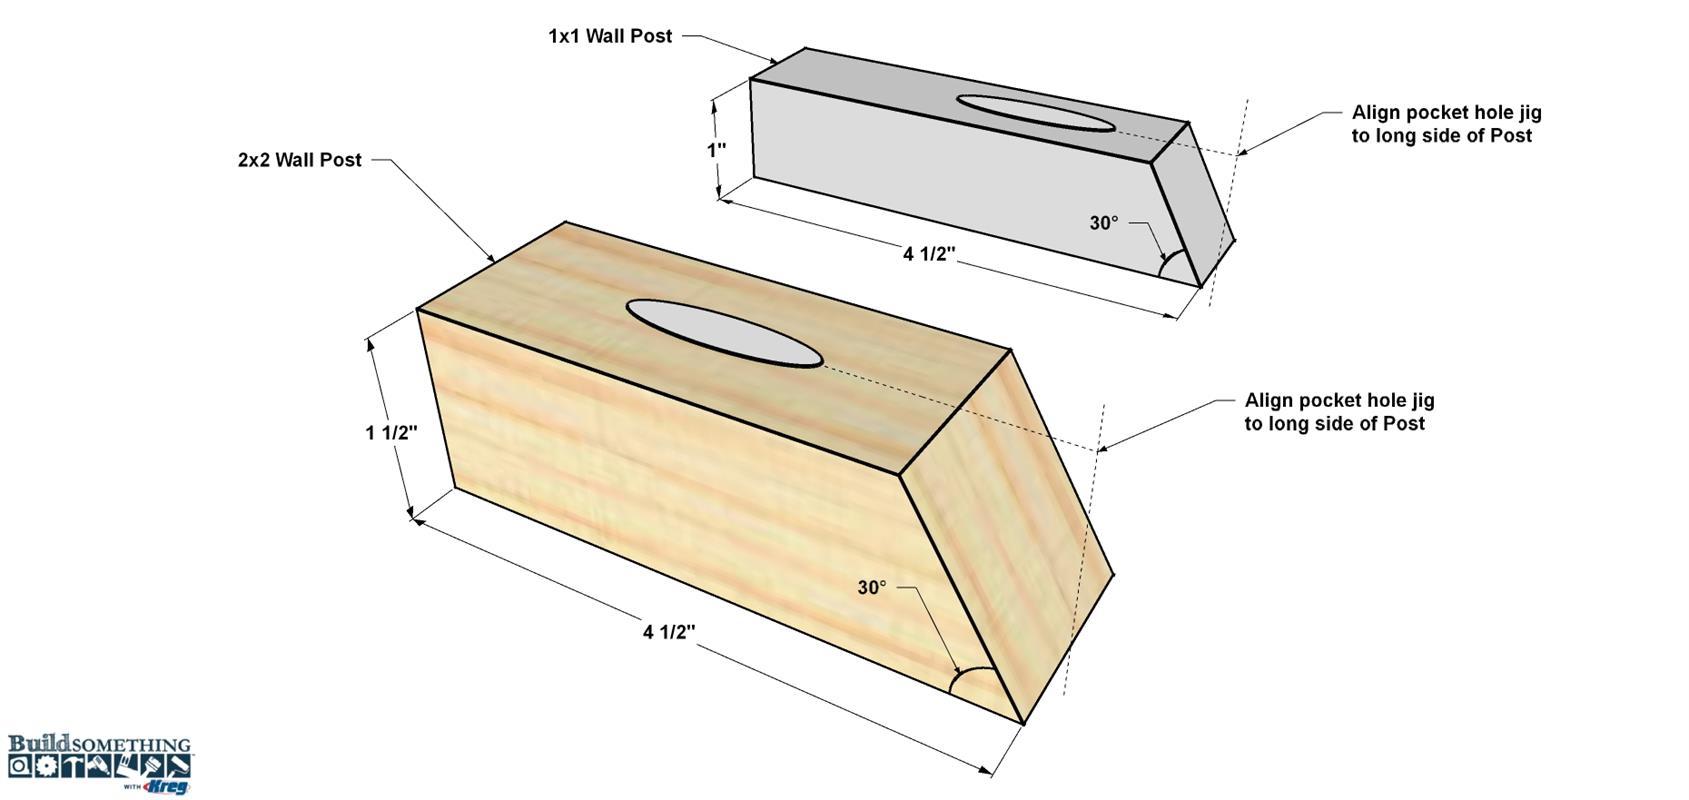
- 8 2x2 Wall Post , 1 1/2" x 1 1/2" x 4 1/2"
- 8 2x2 Arm Post , 1 1/2" x 1 1/2" x 4 1/2"
- 4 1x1 Wall Post , 1" x 1" x 4 1/2"
- 4 1x1 Arm Post , 1" x 1" x 4 1/2"

Directions
-
Cut the Parts
Let’s begin with the 2x2 wall hooks. First, with your miter saw set at 90°, cut eight pieces 8 3/8" long, as shown in the cut diagram. Next, set your miter saw to 30°. The Wall Posts and Arm Posts are the same length, so cut 16 pieces to final length. For the 1x1 wall hooks, set the saw back to 90°. This time cut four pieces to 8 3/4", as shown in the cut diagram. Again, set your miter saw to 30° and cut eight pieces to final length.
-
Drill the Wall Posts
Starting again with the 2x2 Wall Post, set your Kreg Pocket-Hole Jig for 1 1/2"-thick material. If you’re using a benchtop jig, like the K4, position the Wall Post so the short side is against the Drill Guide, as shown. If you’re using a portable jig like the R3, align the short side of the Post to the Drill Guide as well, but visually align the long side to the Positioning Sliders. Drill a single, centered pocket hole. Repeat this for the rest of the 2x2 Wall Posts. For the 1x1 Wall Posts, set your Kreg Pocket-Hole Jig for 1"-thick material, and repeat the process above.
-
Assemble Hooks
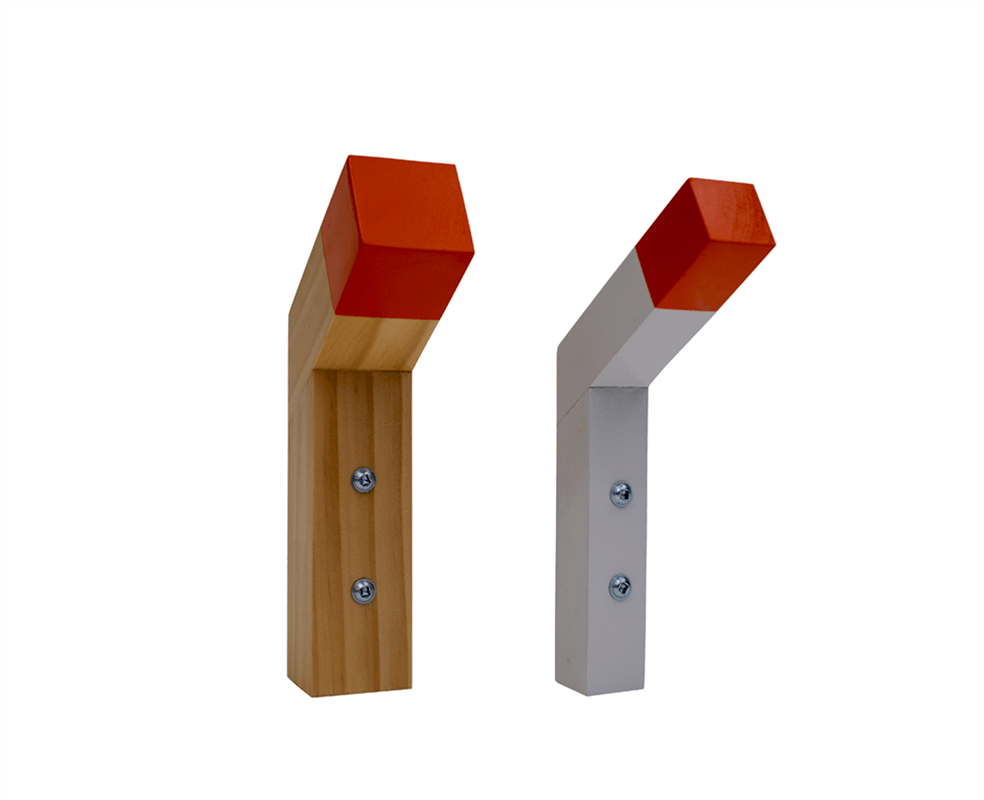
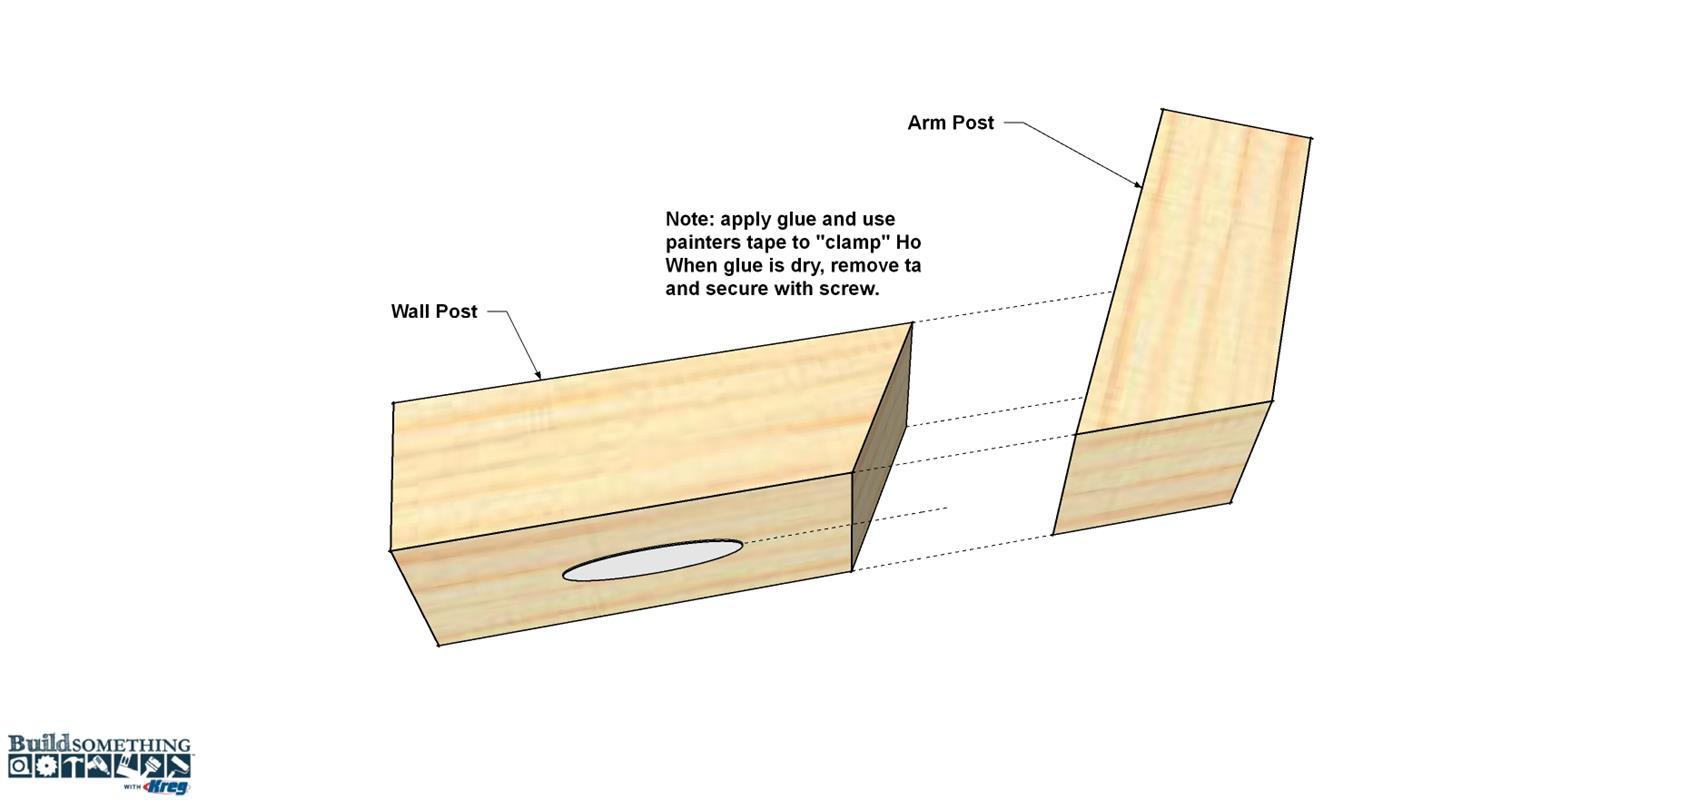
Apply glue to the angled end of one 2x2 Wall Post. Position an Arm Post so the back of the Wall Post and the angled end of the Arm Post line up, as shown. Use painter’s tape to hold the parts in position while the glue dries. Once the glue has dried for 15 minutes or so, you can remove the tape and secure the two parts with a 2 1/2" Kreg screw. Repeat this process for the other 2x2 hooks. Assembly of the 1x1 hooks is the same except for the screw size. For these, secure the 1x1 Wall Post and Arm Post with a 1 1/2" coarse-thread Kreg Screw. Repeat this for the other 1x1 hooks.
-
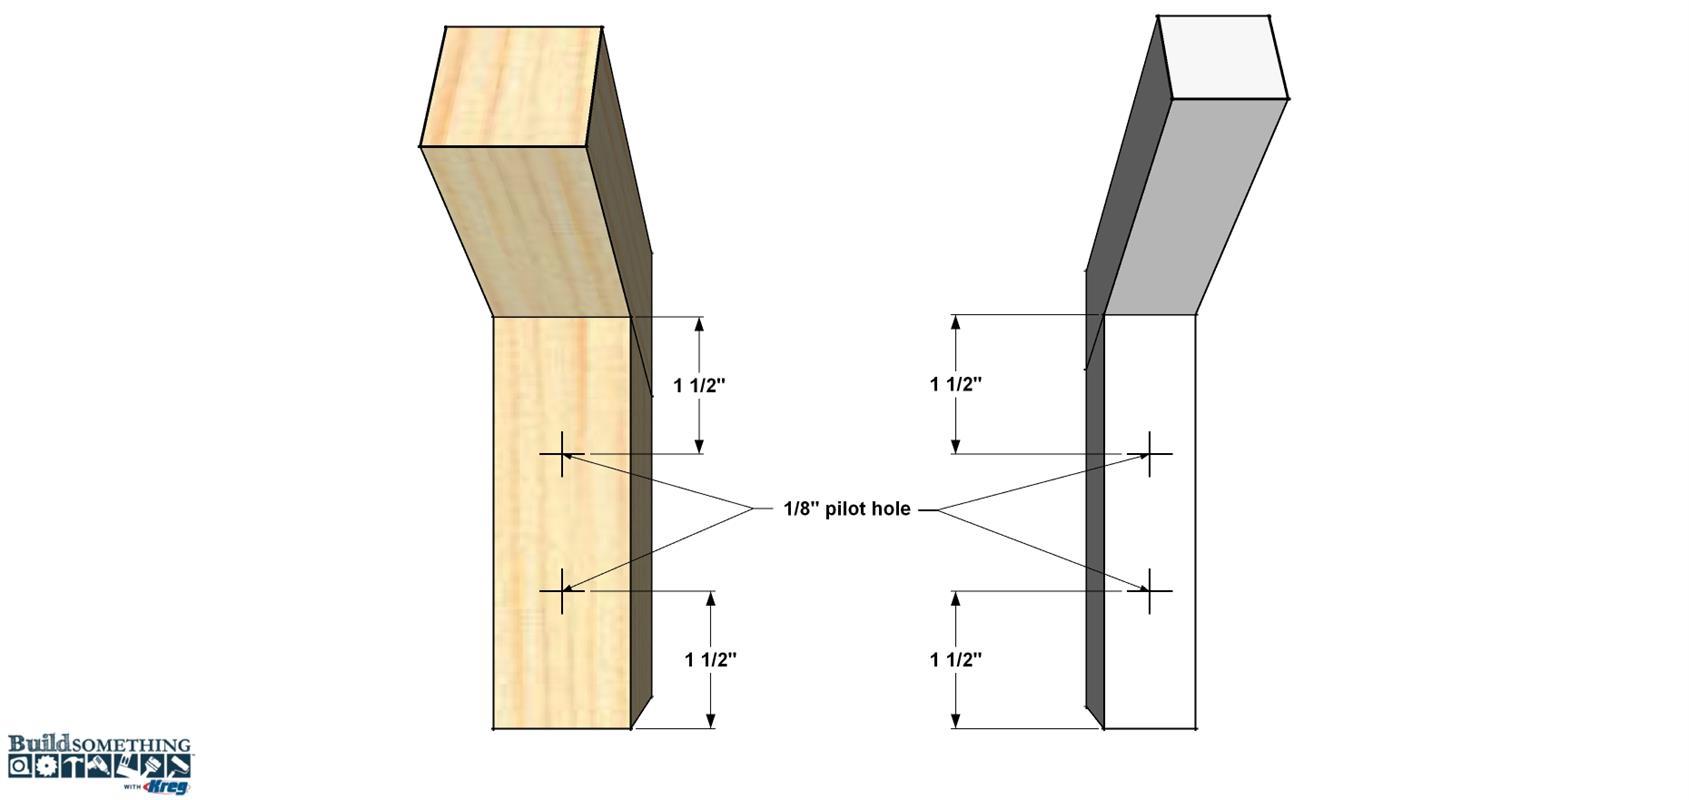
Sand, Finish, and Mount
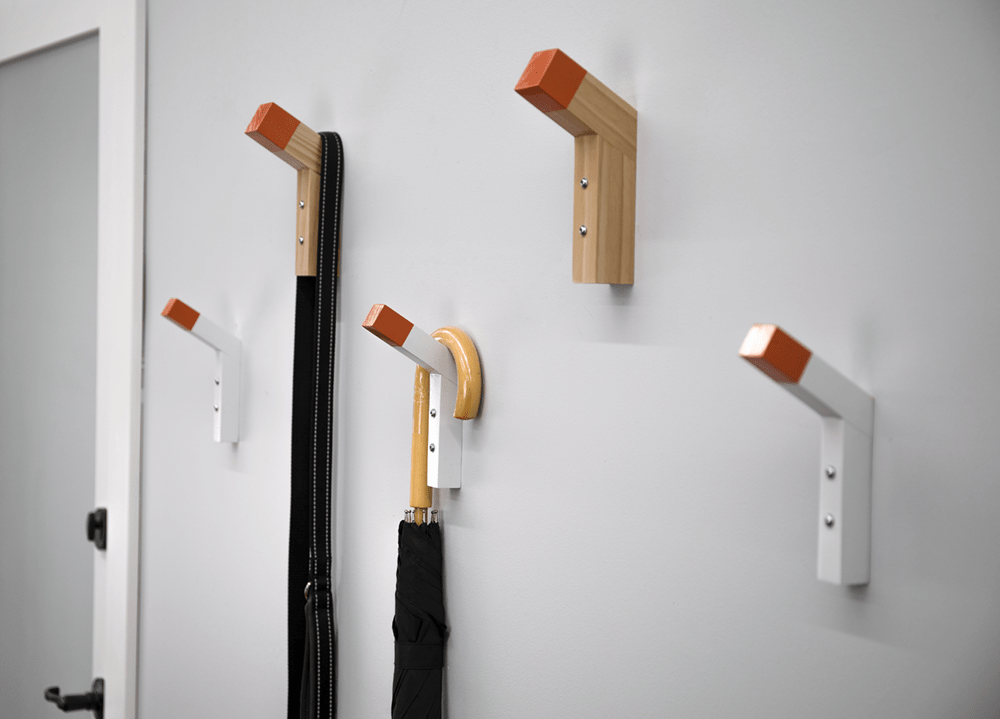
Sand the hooks with a fine-grit sand paper. Wipe them clean and apply the finish of your choice. We selected a satin polyurethane for the 2x2 hooks, and we finished the 1x1 hooks with a crisp white paint. When the finish was completely dry, we masked off each hook and painted the tips the same color orange for contrast. To mount the hooks on the wall we drilled two pilot holes at positions shown. We used long pan-head wood screws to attach the hooks to the wall studs. In places that we couldn’t hit a stud, we used medium-duty wall anchors. Just drive the mounting screws into the drywall, back them out again, and then use the holes created as guides to drill larger holes for the wall anchors. Then reinstall the hooks.