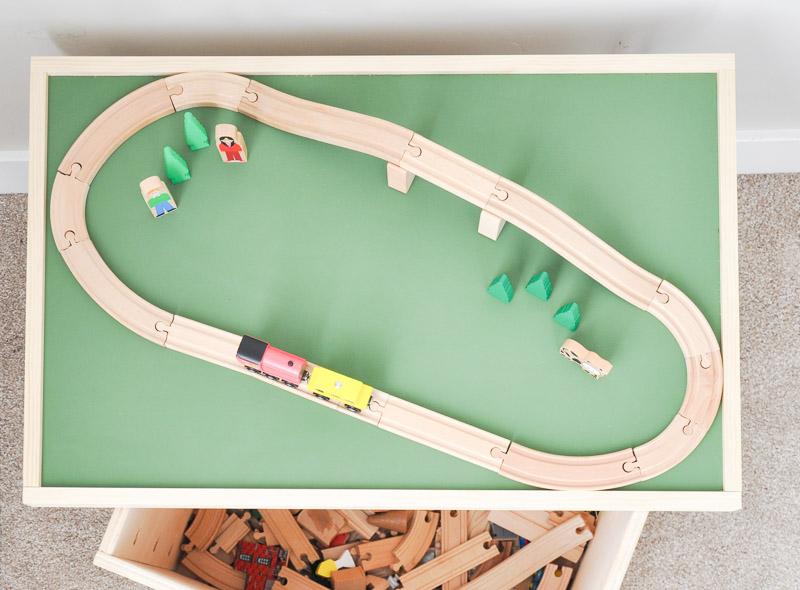


Allow your kids to have the time of their life building train sets without taking up an entire room! This train table is smaller in size and can easily be disassembled and stored under a bed, in a closet, or anywhere else you can squeeze it in!
Tools
Kreg Tools


Other Tools
-
Circular Saw (cordless)

-
Miter Saw
-
Tape Measure
-
Drill (cordless)
-
Sander
Materials
Wood Products
- 1 MDF , 3/4" Thick , Quarter Sheet
- 2 Board , 1x2 , 96"
Hardware & Supplies
- 4 1/2" Floor Flange
- 4 1/2" Pipe Cap
- 4 1/2" x 18" pipe
- 16 5/8" Spax Screws
- 1 Small Box of 1 1/4" Kreg Pocket Hole Screws
Directions
-
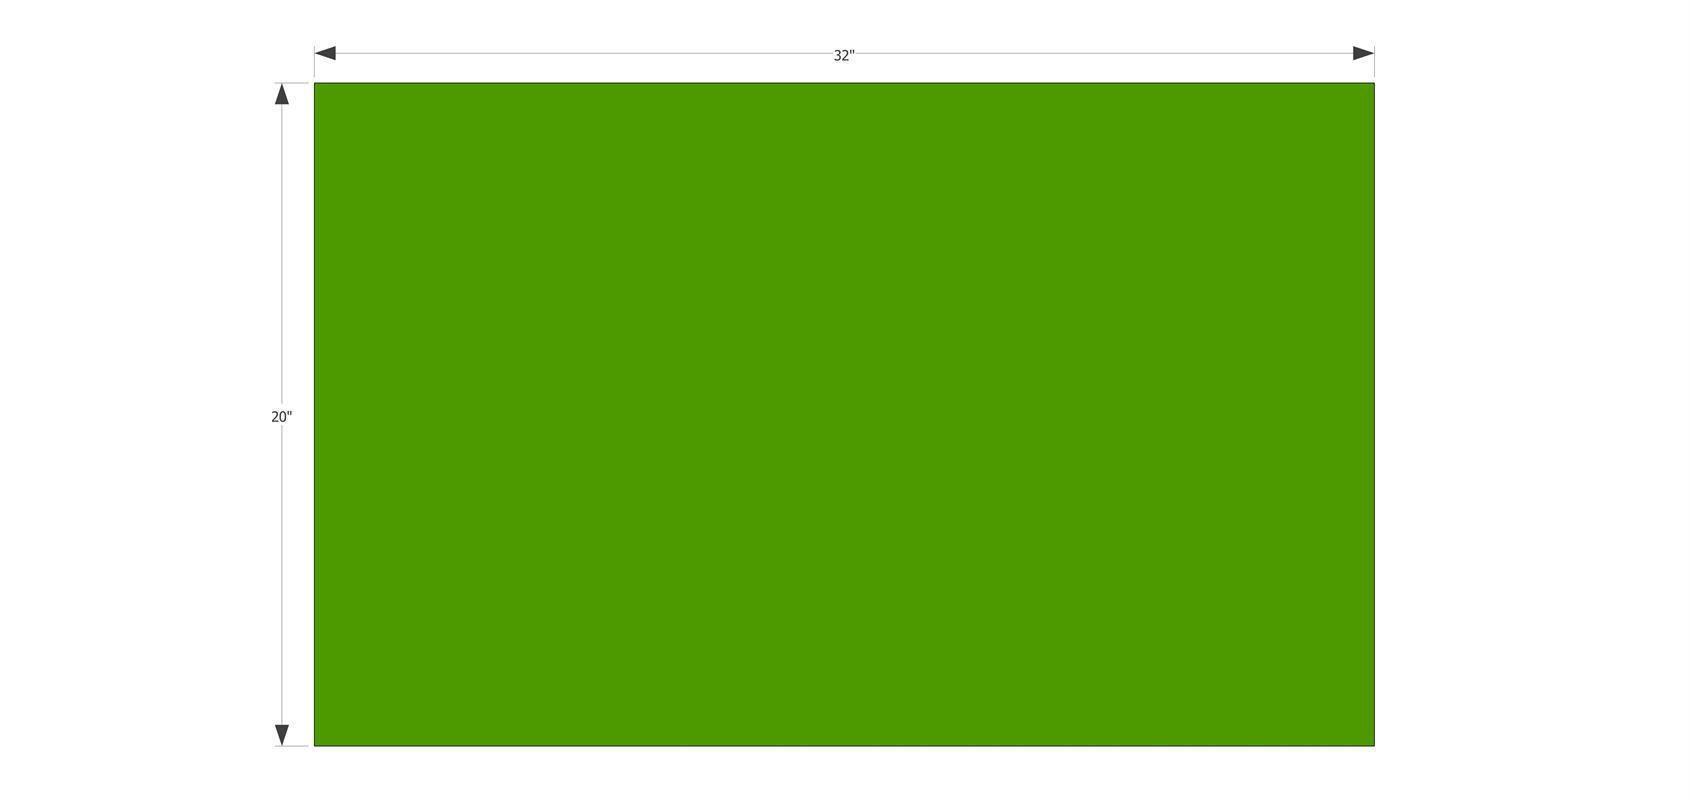
Cut MDF Board
Using an Accu-Cut Circular Saw Guide Track System, cut your MDF quarter sheet down to 20" x 32" to create your Table Top. Then on the bottom side add the Pocket Holes using your Kreg Jig.
I went ahead and painted my board green before attaching the Trim Boards in the next step to avoid getting paint where I didn't want it. You can also leave your board natural if you prefer.
*MDF is not required. You can also use 3/4" plywood.
-
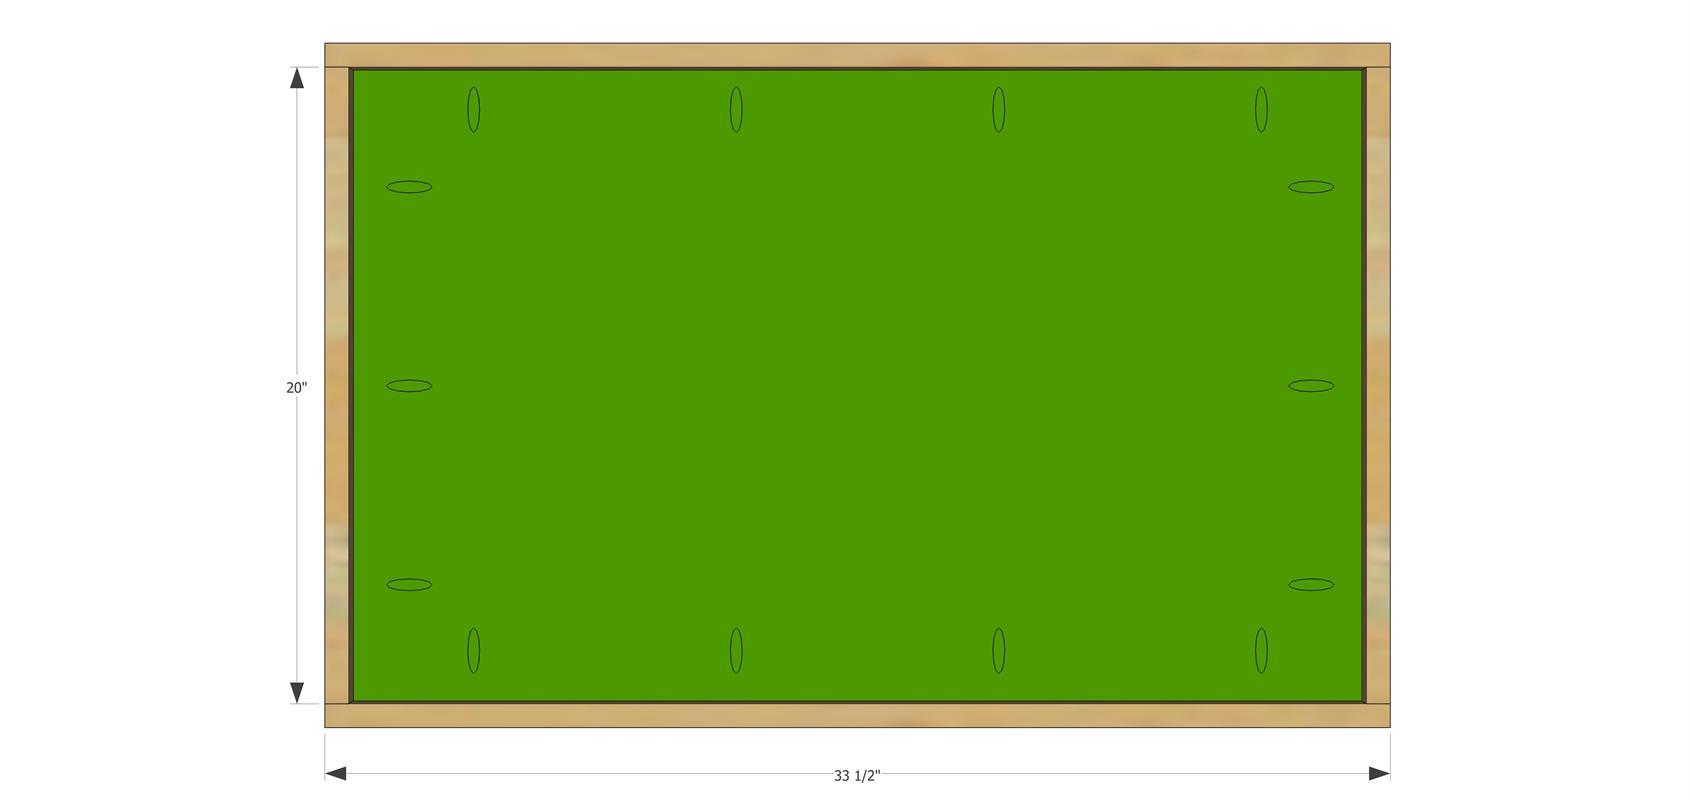
Cut and Attach Trim Boards
Cut the 1x2's to the correct sizes as listed out in the cut list. Attach to the sides of the MDF Table Top using the pre-drilled pocket holes and 1 1/4" Pocket Hole Screws. Be sure to center your 1x2 on the edge of the Table Top leaving a lip on both edges.
-
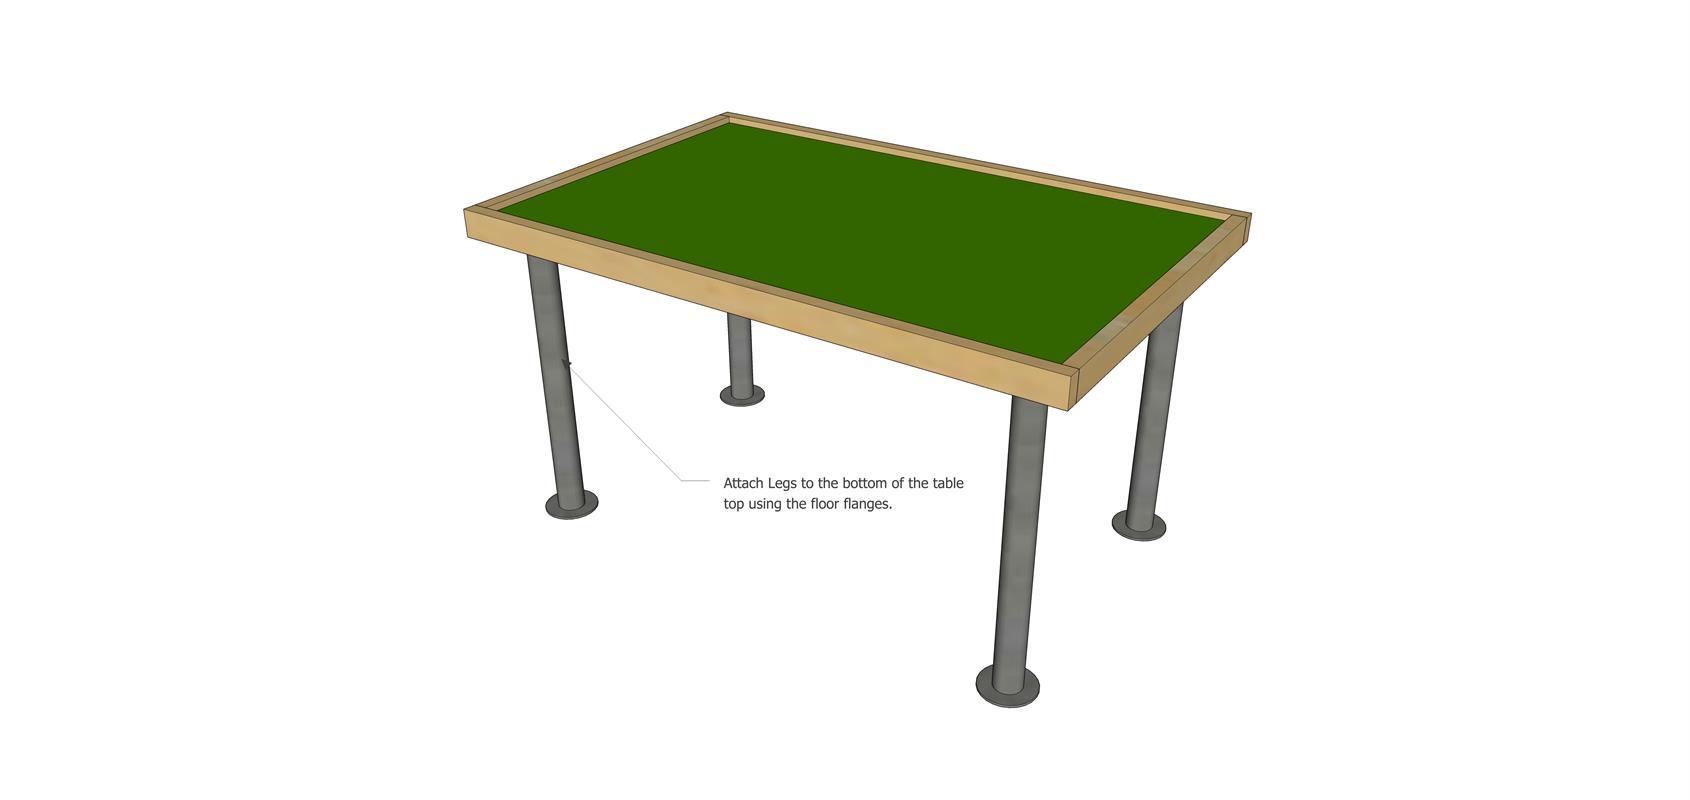
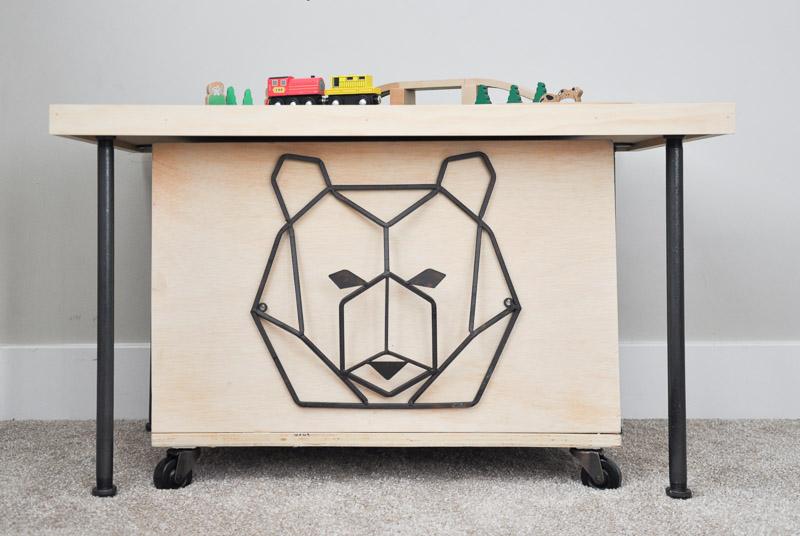
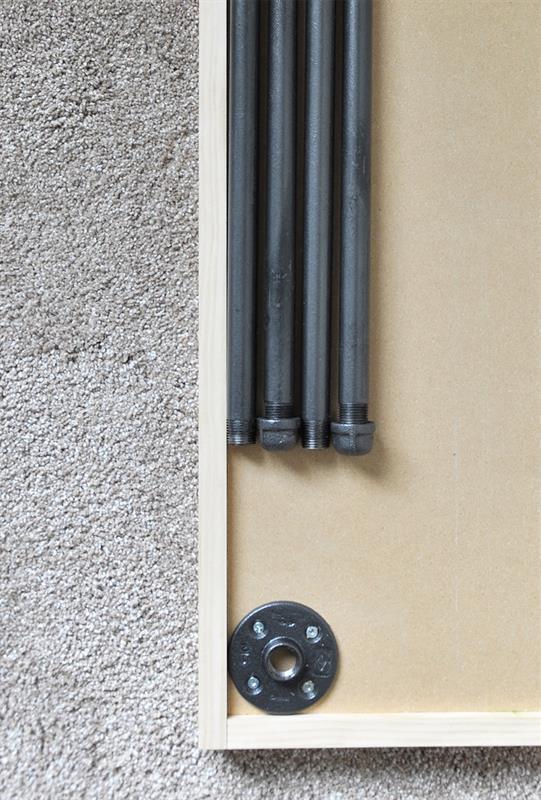
Attach Legs
Attach the 1/2" Floor Flange to the underside of the Table Top, in each corner, using 5/8" Spax Screws. Once the flange is in place, you can attach the 18" metal pipe and pipe caps to create the legs of the table.