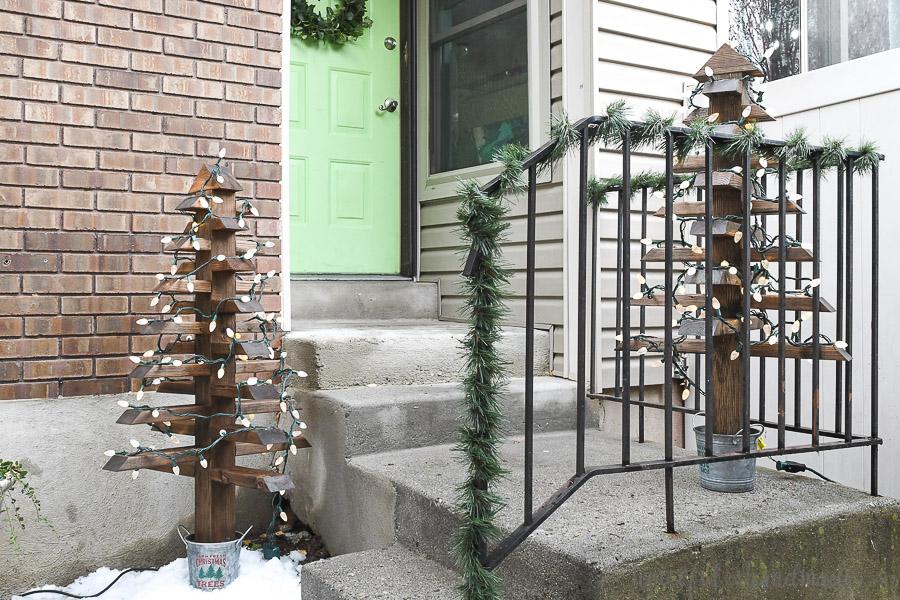
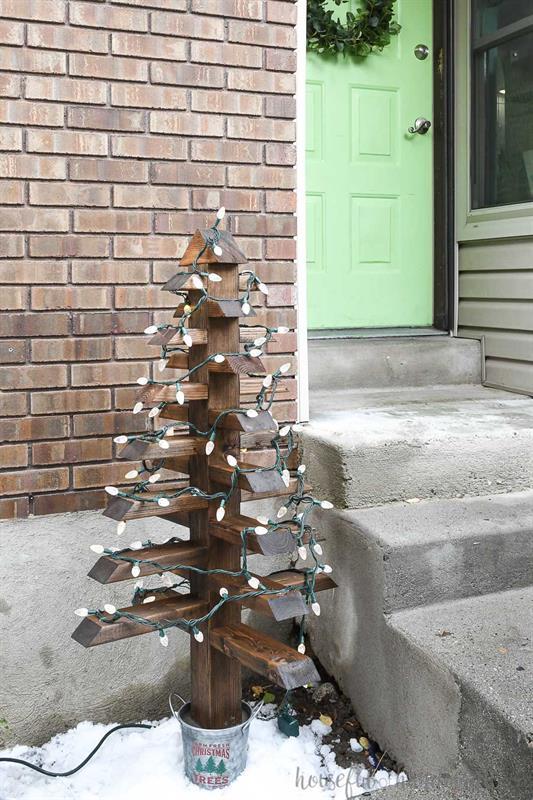
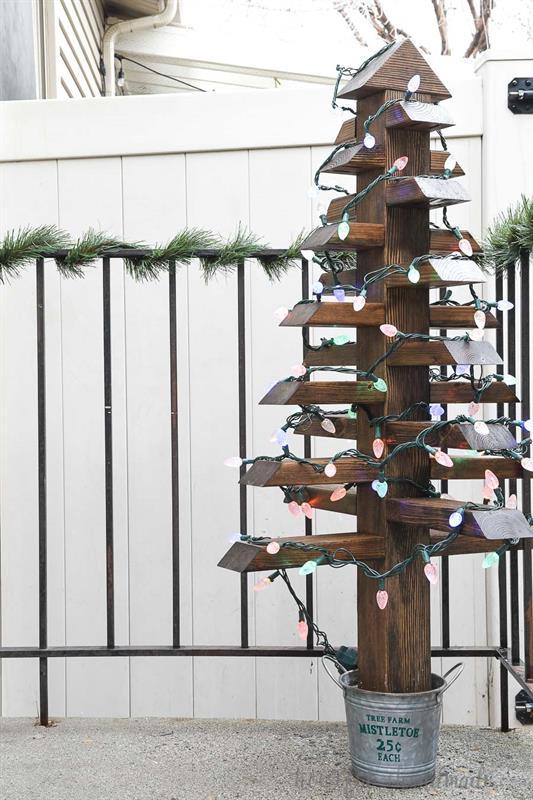
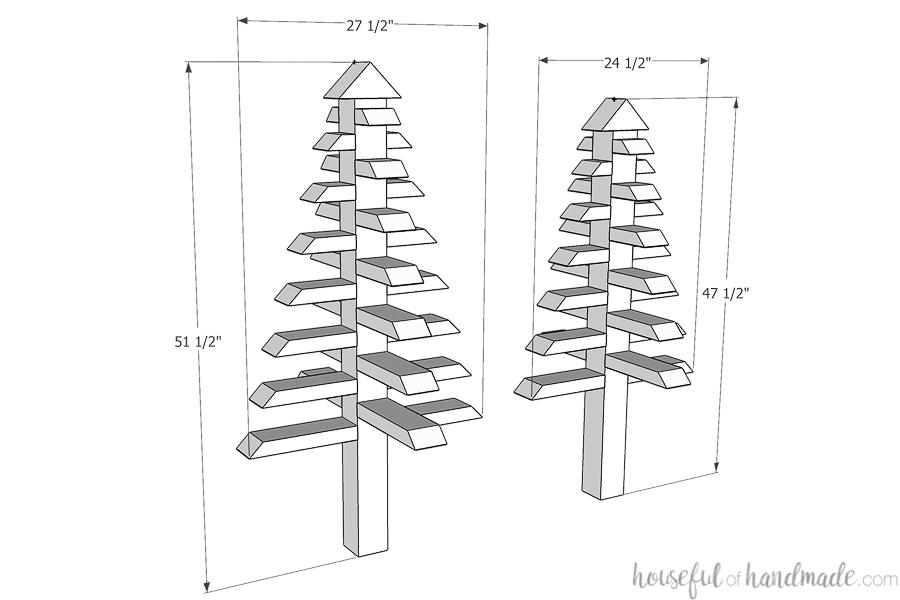
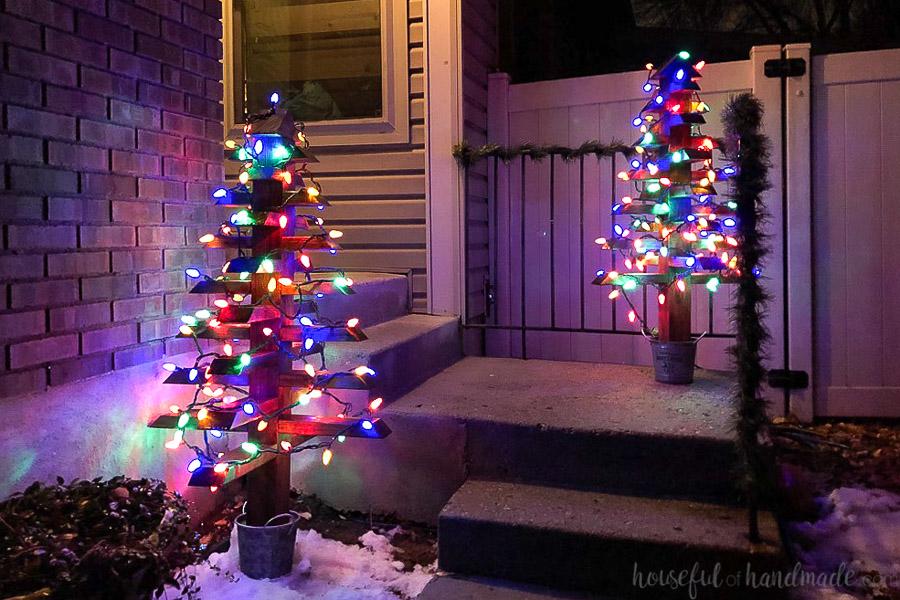


These easy to make wood Christmas trees are made from construction 2x4s and a 4x4. The trees can be left as is, or decorated with lights to add more sparkle to the outside of your home at night! These plans make 2 trees (one smaller and one larger) at the same time.
Tools
Kreg Tools

Other Tools
-
Miter Saw

-
Square
-
Tape Measure
-
Clamps
-
Drill (cordless)
-
Tape Measure
Materials
Wood Products
- 4 Board , 2x4 , 96"
- 1 Board , 4x4 , 120"
Hardware & Supplies
- 104 2 1/2" pocket hole screws
- 2 6" diameter metal buckets
- 1 Wood glue
- 1 Bag concrete mix
- 2 33' long Christmas lights
- 2 3/8" X 2" dowels
Directions
-
Cut the 2x4s
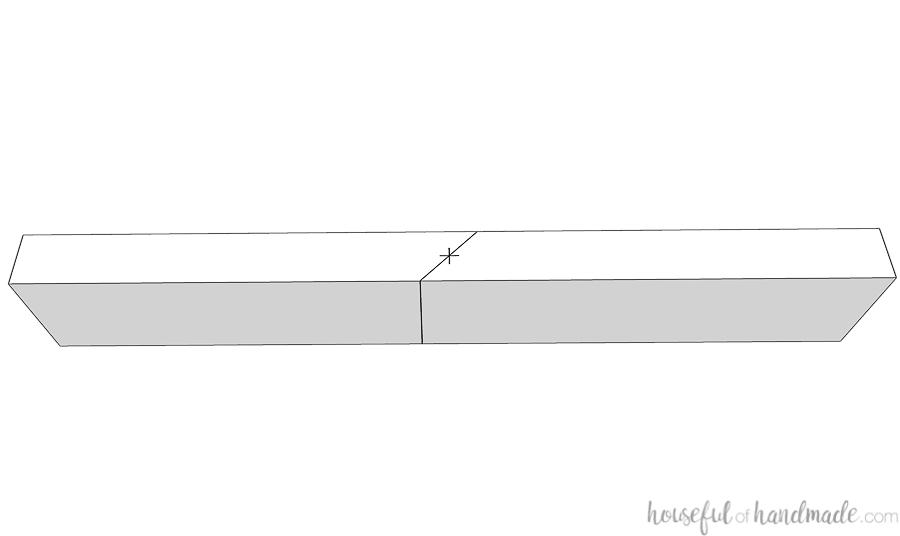
Cut all the 2x4s as noted in the cut list. Then measure & mark the center side of each 2x4. Using a speed square, draw a 45 degree angle through the center mark. Then cut the 2x4 in half along the line. Make sure to center the blade of your saw on the line.
-
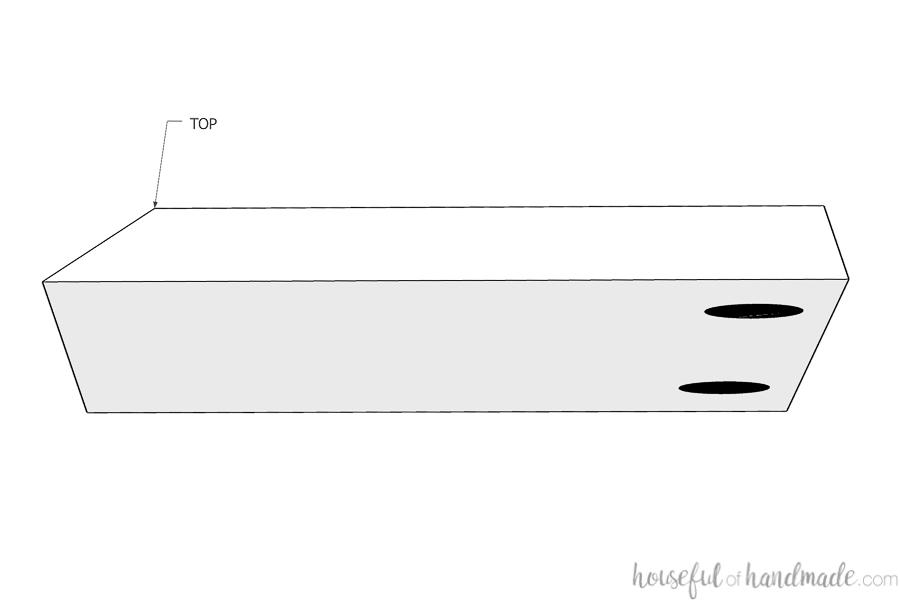
Drill pocket holes
Set your Kreg jig for 1 1/2" thick material. Drill 2 pocket holes on the bottom of each angled branch piece. For the top 2 sizes of branches, move the pocket hole jig for 1 1/4" and 1 " thick material. That way the pocket holes are smaller than the piece so they do not cut into the edge of the branch.
-
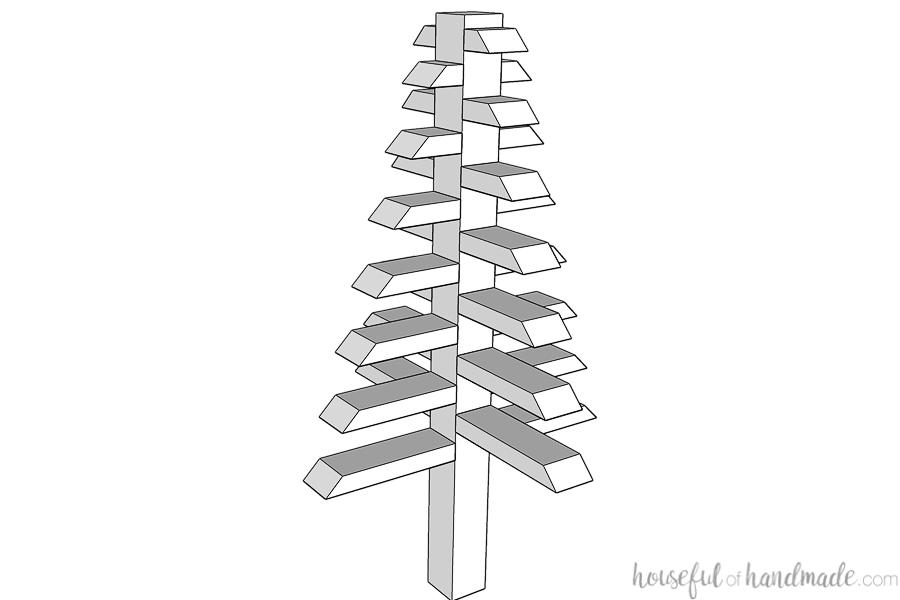
Mark center post
Measure down 1" from the top on one side of the 4x4 center post. Then continue to measure and make a mark every 5". Make 7 marks for the larger tree and 6 for the smaller one. Repeat on the opposite side. For the remains 2 sides, make the first mark 3 1/2" down from the top and then make a mark every 5" from there.

-
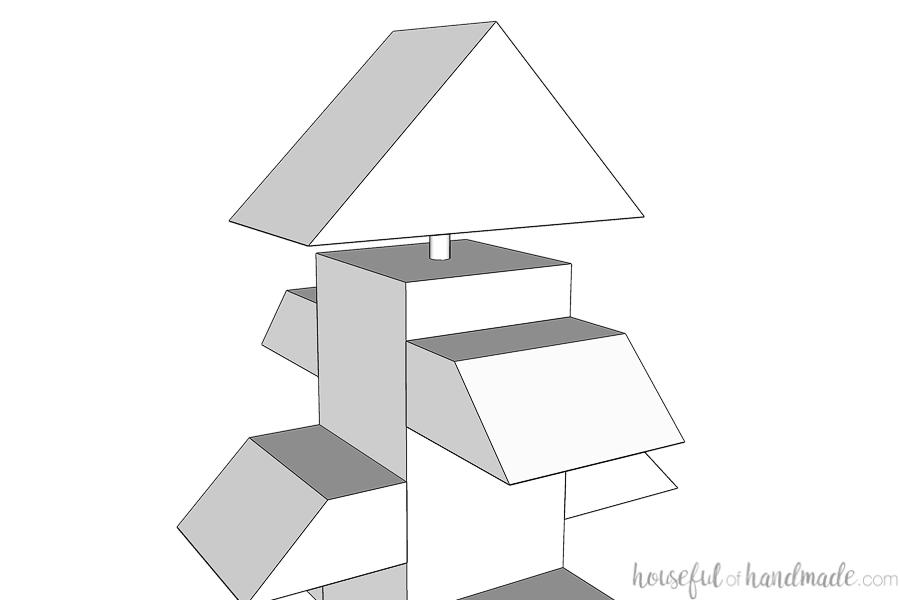
Attach branches
Using wood glue and 2 1/2" pocket hole screws (use Blue-kote if planning to display your trees outside) attach the branches to the post. Line the smallest size branches so they are flush with the top marks. Secure with screws. Then continue down the post, getting larger in branch size as you go. The largest branches will be at the bottom. Secure 6 sizes of branches for the smaller tree and 7 for the larger tree.
-
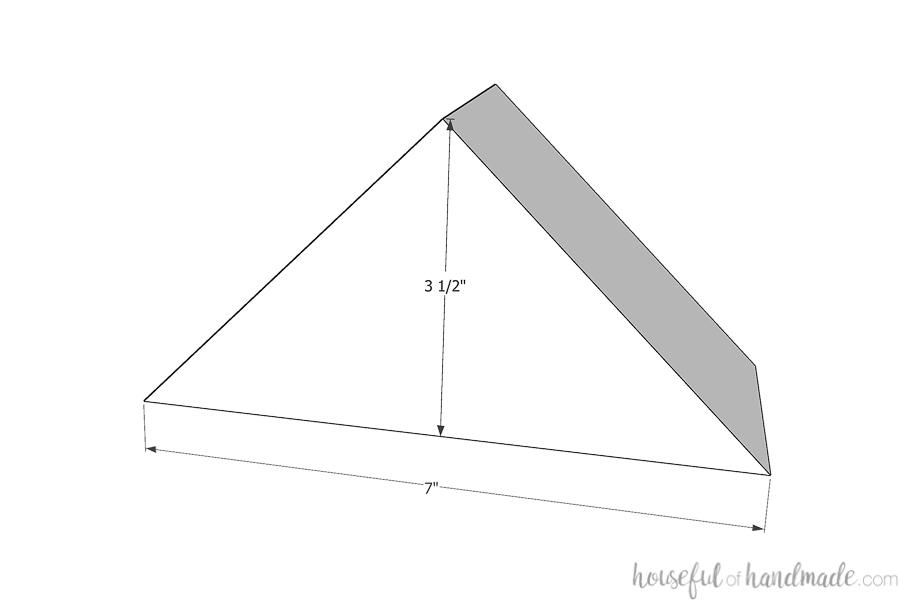
Cut the tree tops
For the top of the tree, cut the 7" pieces of 4x4 so both ends are at a 45 degree angle making a triangle. Drill a 3/8" hole in the bottom center of the tree top 1" deep.
-
Attach the tree tops
Drill a 3/8" wide and 1" deep hole in the center top of the center post. Glue the dowel into the hole. Then add glue to the top of the post and the top of the dowel. Press the tree top onto the post making sure the dowel goes into the hole. Clamp tight until the glue is dry.
-
Secure the tree in the bucket
Place the tree inside the metal bucket (we found these Christmas bucket at Michael's crafts) and center it. Mix up a small amount of concrete. Always start with the water first, then add the concrete mix to it. You want it to be the same consistency as natural peanut butter. Pour (or scoop) it carefully into the bucket around the center post. Fill the bucket to about 1" of the top. Tap the sides of the bucket repeatedly to remove air bubbles then let it cure.
-
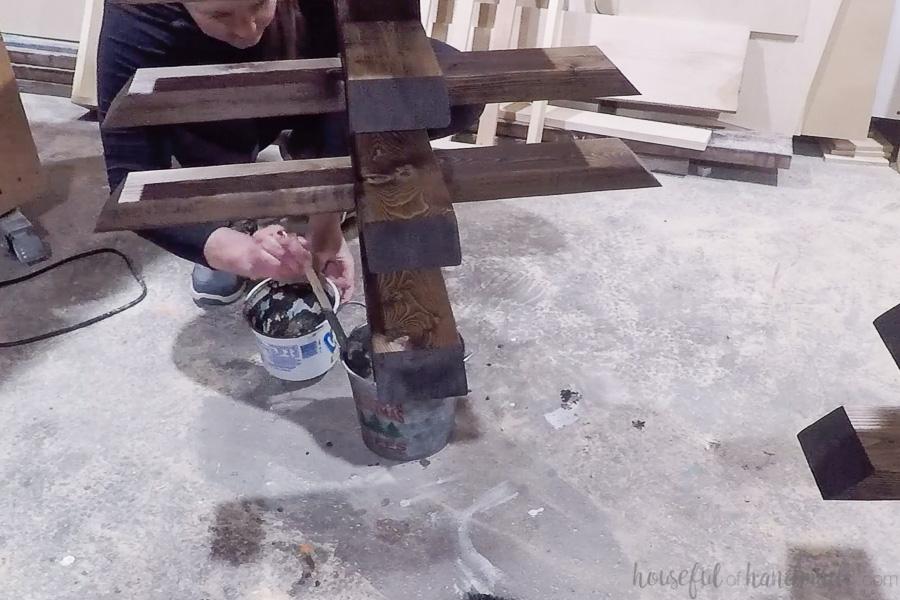
Finish your trees
Sand and paint or stain your Christmas trees. Make sure to use outdoor paints/stains/sealers if you are using your trees outside.
-
Attach Christmas lights
Add Christmas lights to your tree. I hot glued the lights to the top front of each branch to keep them in a spiral up the trees. The 33' long lights we bought were just barely long enough for the larger tree and had a bit of extra on the smaller tree.
-
Enjoy!
For more fun things to build, make sure to come say hi at housefulofhandmade.com!