

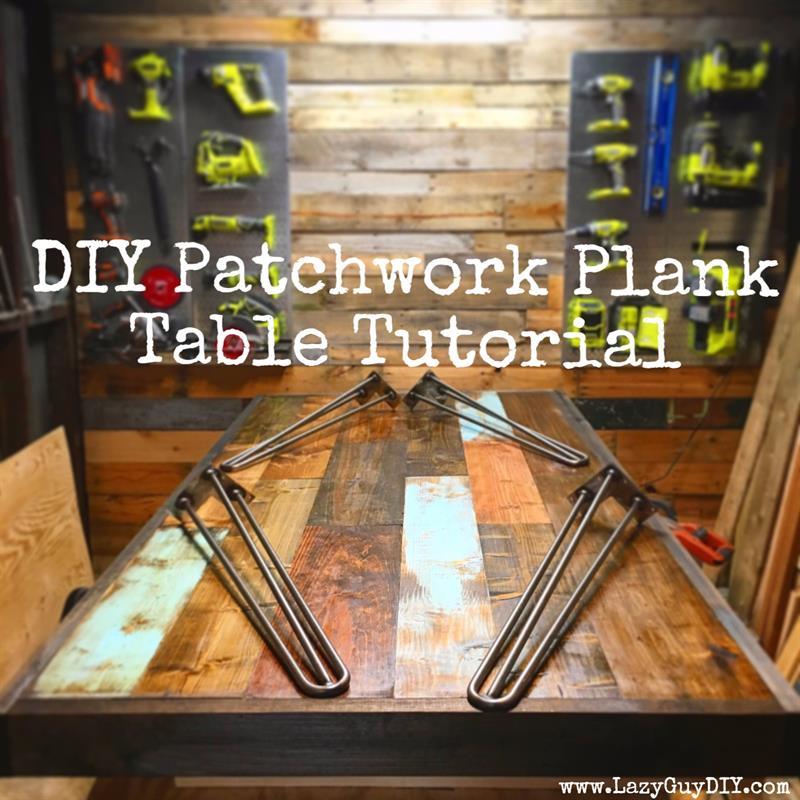
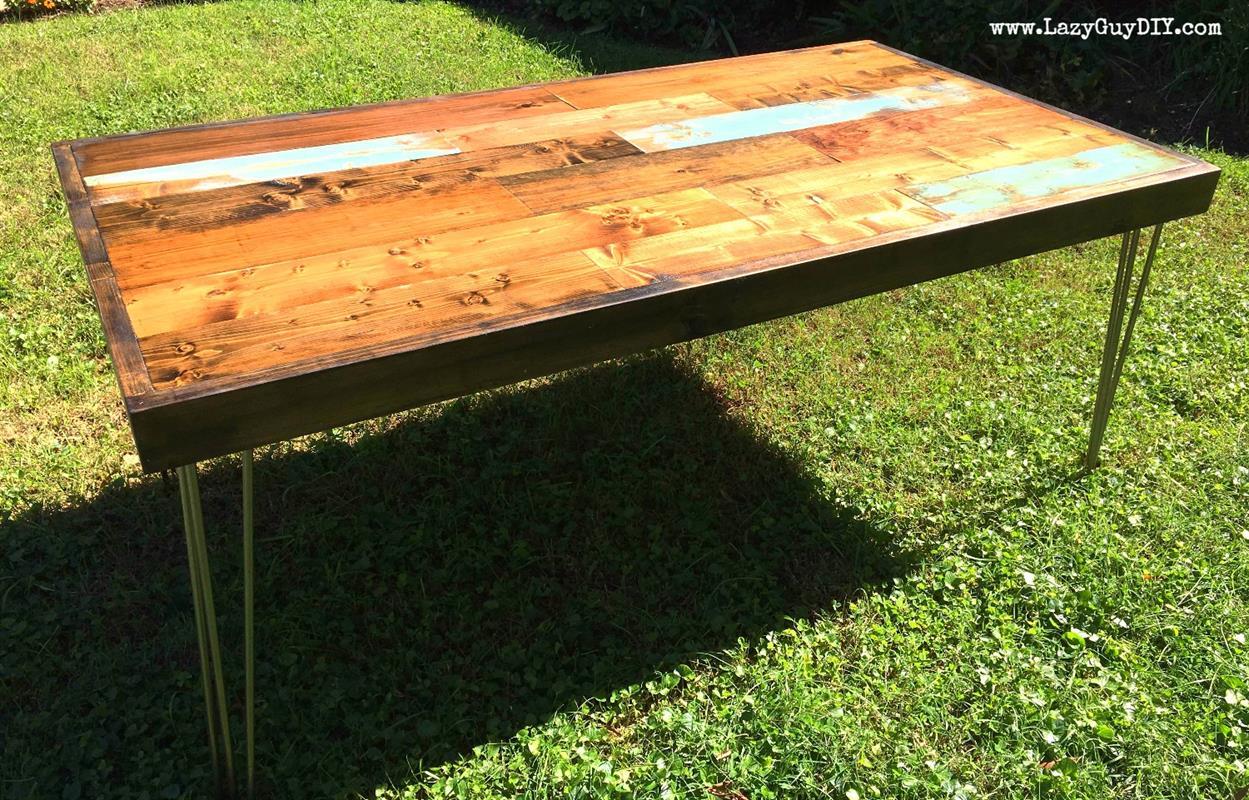


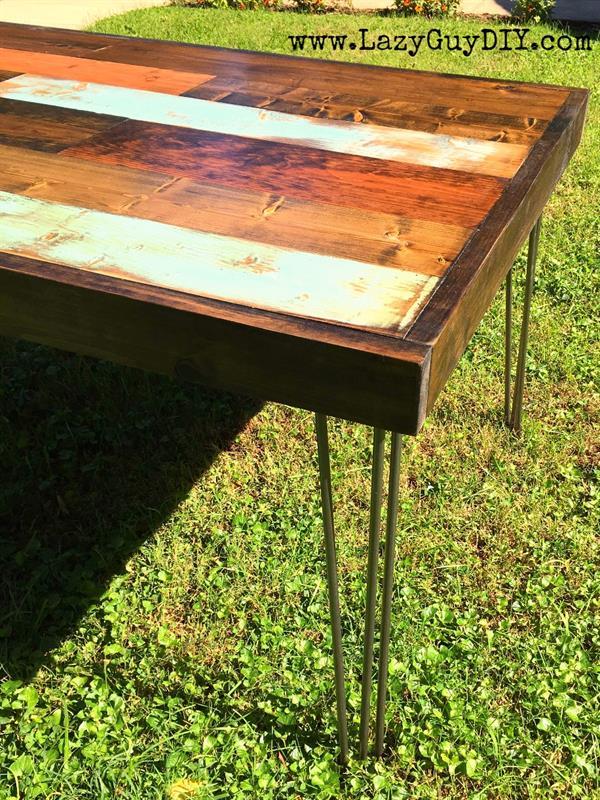
This 75" x 39.50" dining table is an easy build that lets you add a little bit of modern flair to the trendy "farmhouse" style right now. You pick the colors, add the hairpin legs and you have a new focal piece that will last for years to come.
Tools
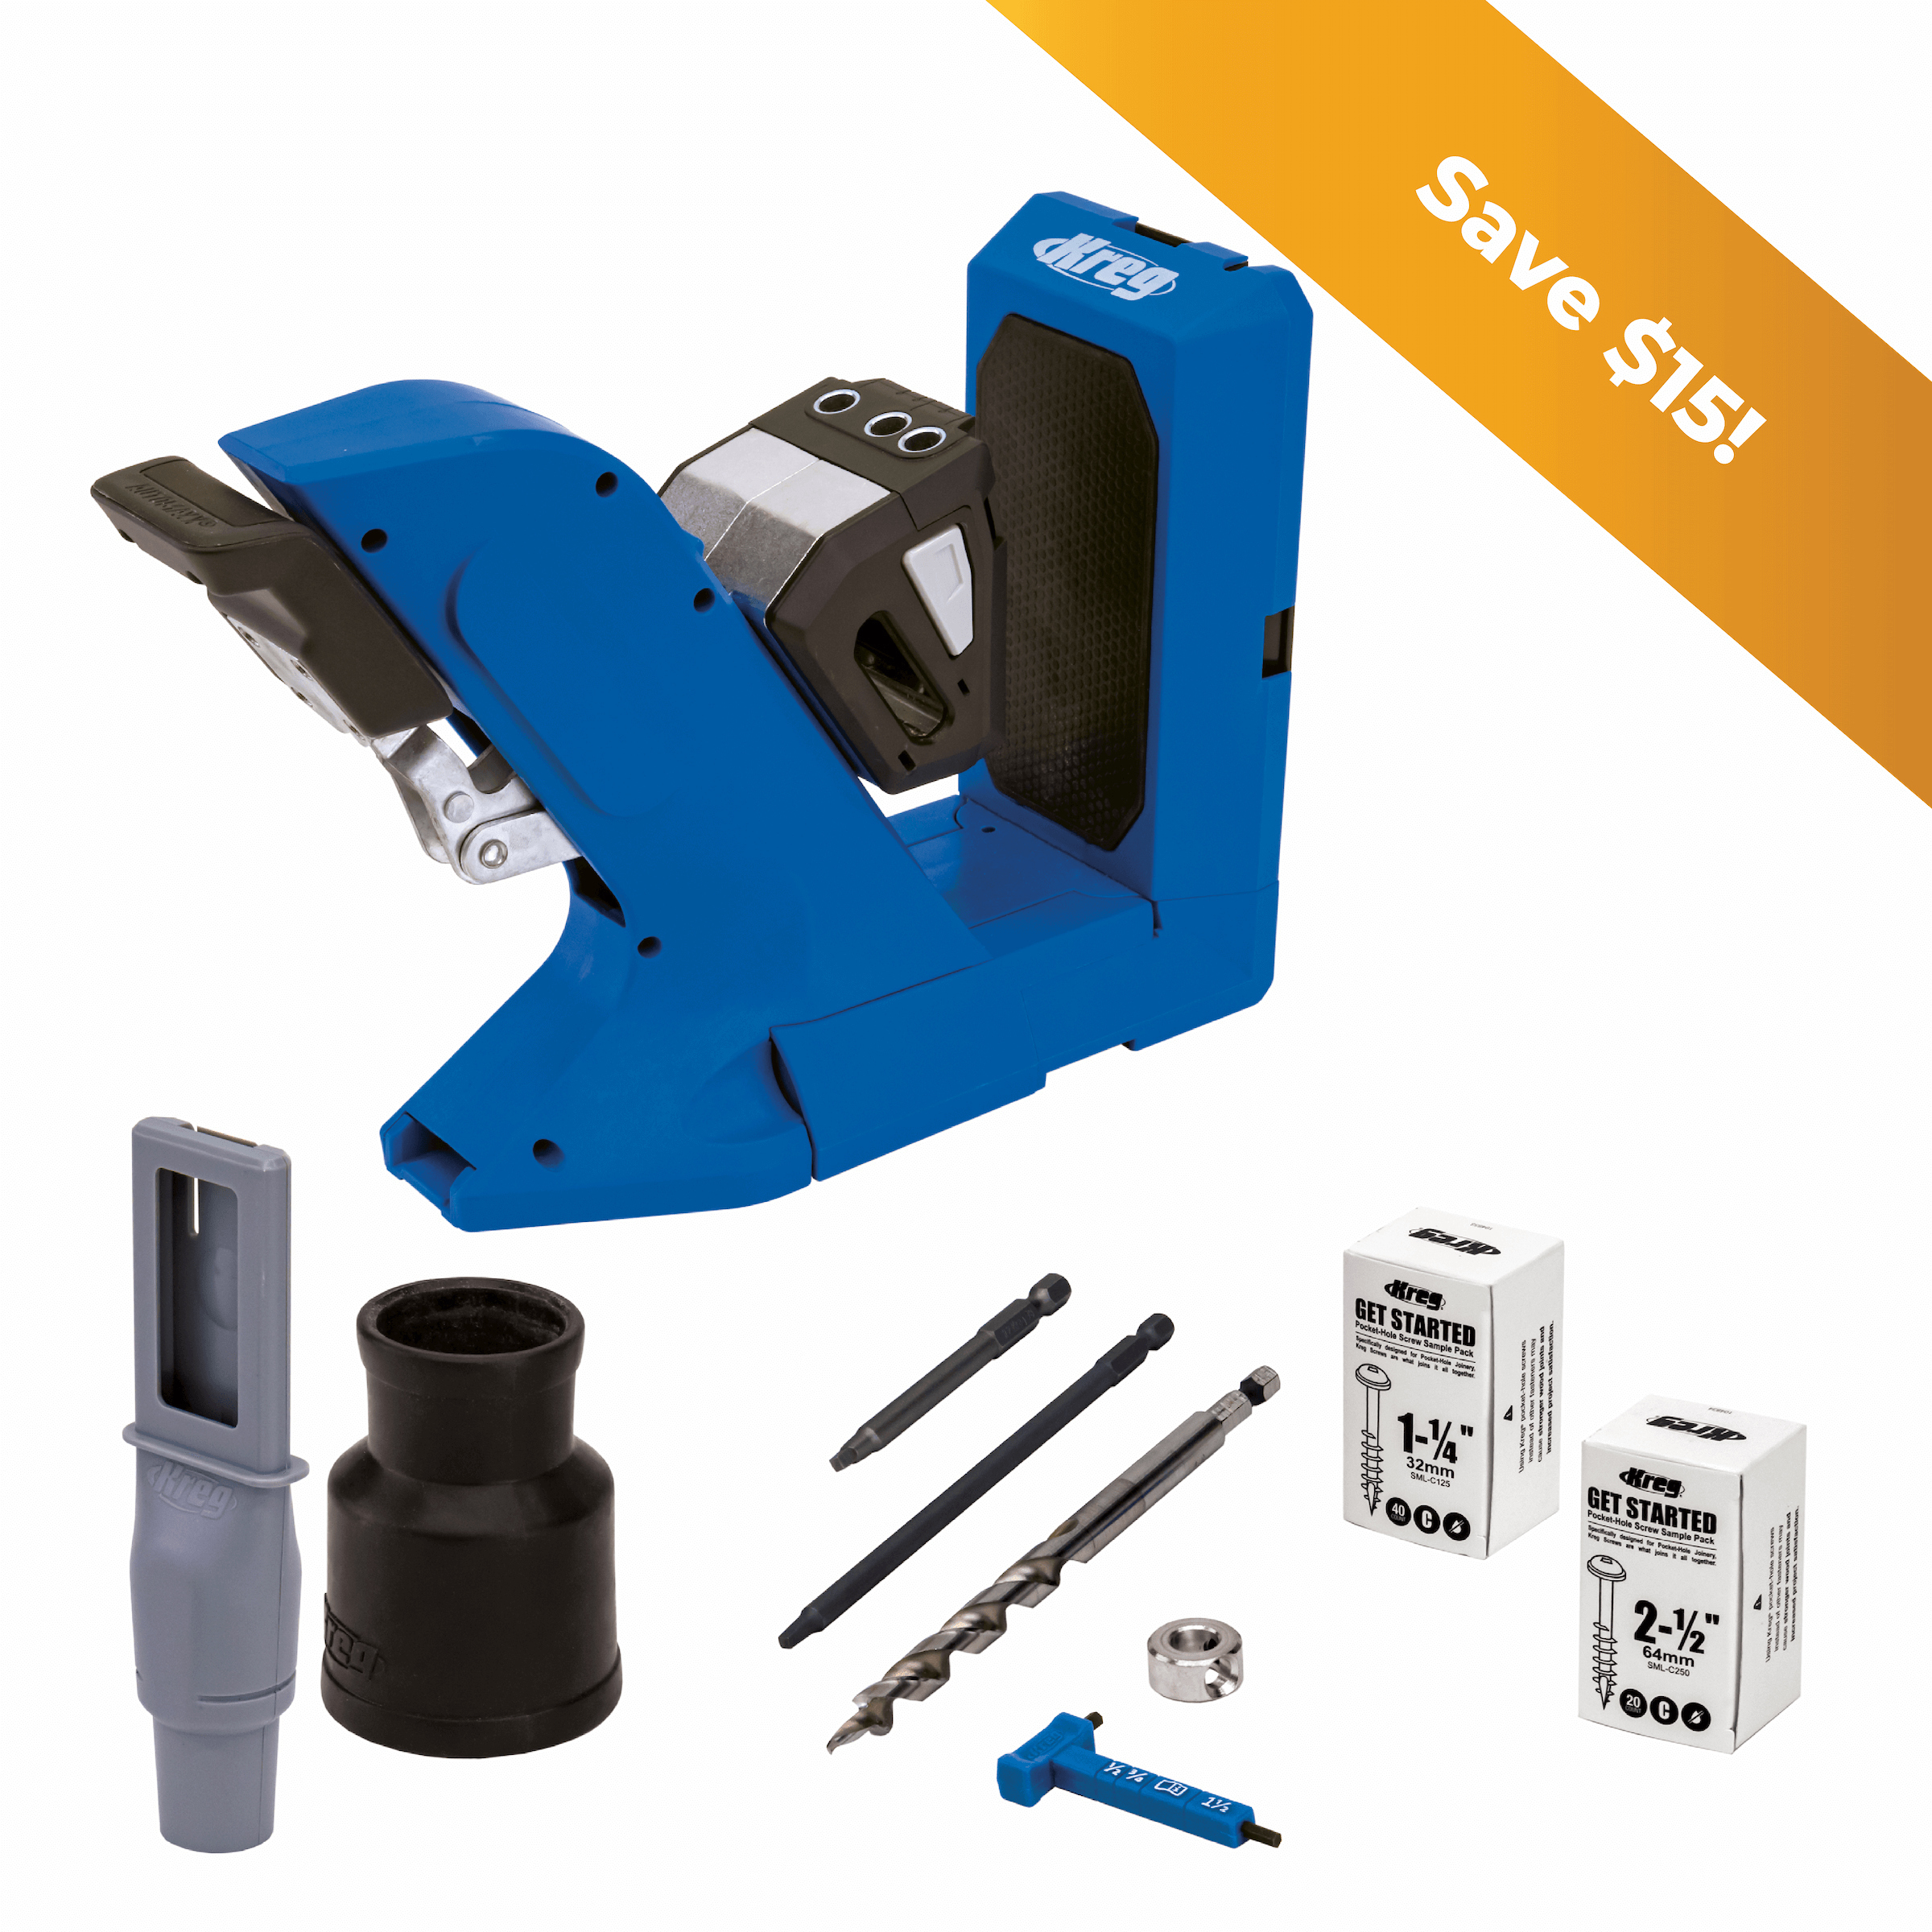
Kreg Tools
Other Tools
-
Miter Saw

-
Square
-
Tape Measure
-
Thickness Planer
-
Clamps
-
Drill (cordless)
-
Impact Driver
-
Router
-
Sander
-
Shop Vacuum
Materials
Wood Products
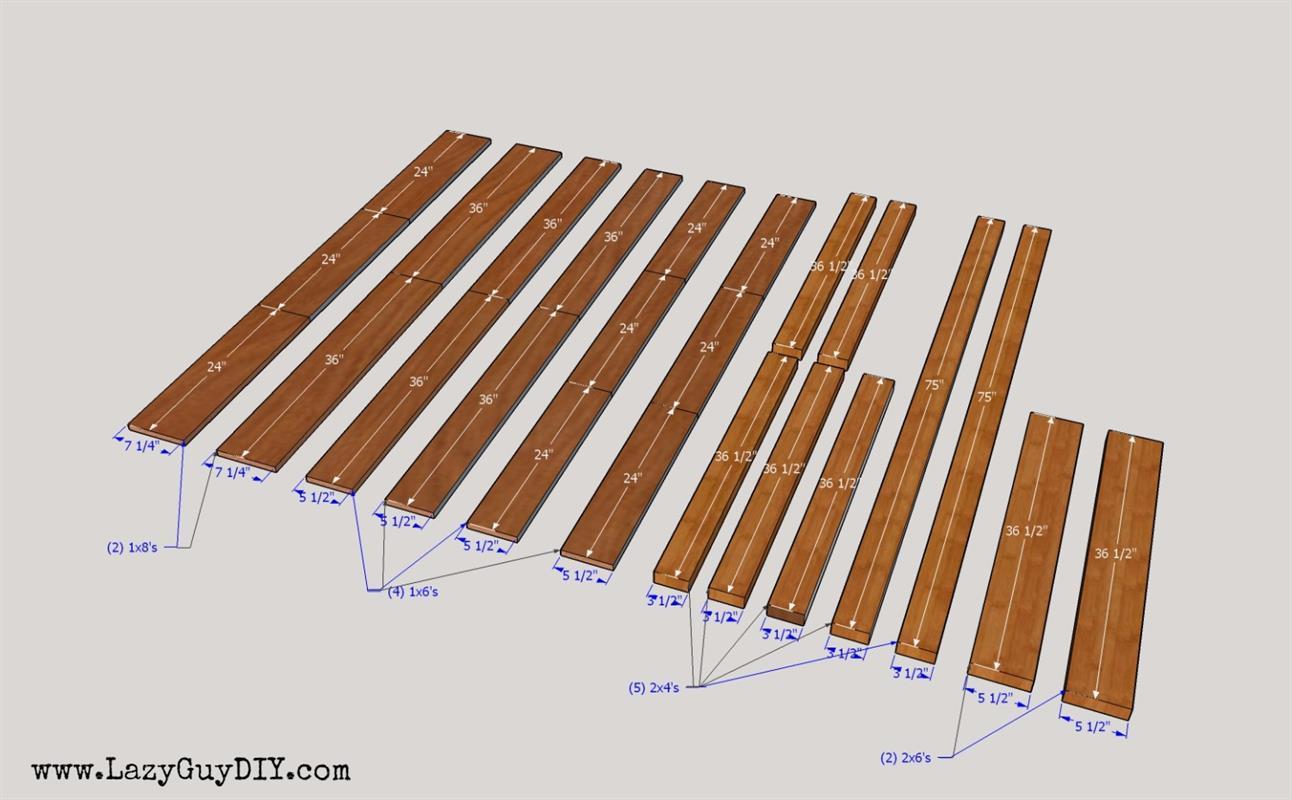
- 2 Board , 1x8 , 72"
- 4 Board , 1x6 , 72"
- 5 Board , 2x4 , 96"
- 1 Board , 2x6 , 96"
Hardware & Supplies
- 4 28" 3 Rod Hairpin Legs
Cut List & Parts
- 1 Box of Kreg Pocket Screws , 1-1/4"
- 1 Box of Kreg Pocket Screws , 2-1/2
Directions
-
Arrange Rows & Cut!
Figure out which sides of your 1x6's and 1x8's are the best looking. From left to right (depending on what side of the table you're standing on) I went 1x6, 1x6, 1x8, 1x6, 1x6, 1x8.
Now start measuring and cutting your planks!
Row 1 (1x6) - 24", 24", 24"
Row 2 (1x6) - 36", 36"
Row 3 (1x8) - 24", 24", 24"
Row 4 (1x6) - 36", 36"
Row 5 (1x6) - 24", 24", 24"
Row 6 (1x8) - 36", 36"*Important Tip Keep your stacks of rows separated. There might be subtle differences in widths from board to board so to avoid future gaps, keep your rows together. But mix up the order within the row so your wood grain does not match.

-
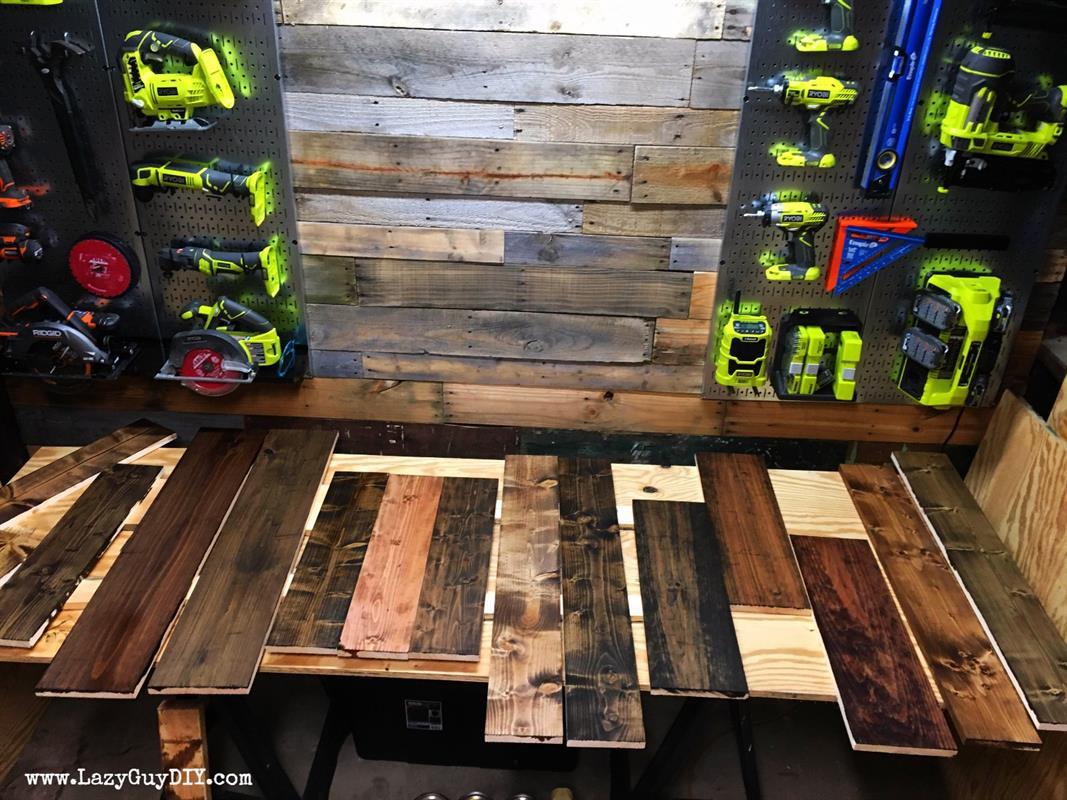
Start Staining Planks
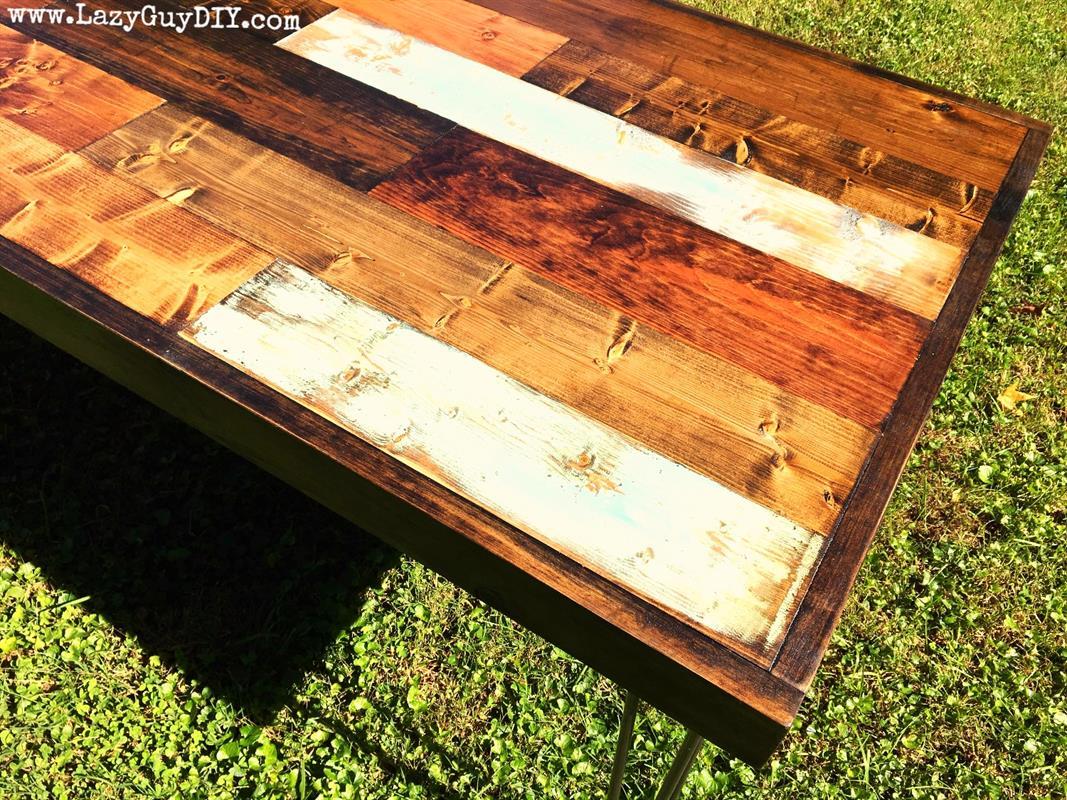
Start staining! This is where layout and planning really becomes important. Set your rows out ahead of time and figure out which stain colors you want to apply throughout the table top. You have 15 different planks to organize. You don't want colors that are too similar next to each other, so try to mix it up as much as possible. I also didn't decide which planks were going to get the aged paint effect added until after the stains had dried. The colors I was less impressed with got the paint wash.
I used the following MinWax Stains: Jacobean, Early American, Red Mahogany, Special Walnut, Espresso, Ebony and Dark Walnut.
-
Prepping the Aprons/Trim
Three of the 2x4's purchased will serve as the apron/trim that goes around the outside edge of the plank top. I used my thickness planer to square off the 2x4's so I could have a flush edge (2x4's are rounded). If you don't have a planer, you can use a palm sander and some hard work to flatten the edges down. If you skip this step, there will be a crease between the trim and the plank tops that will gather crumbs.
Once these 2x4's are prepped, I stained them all with MinWax Jacobean.
-
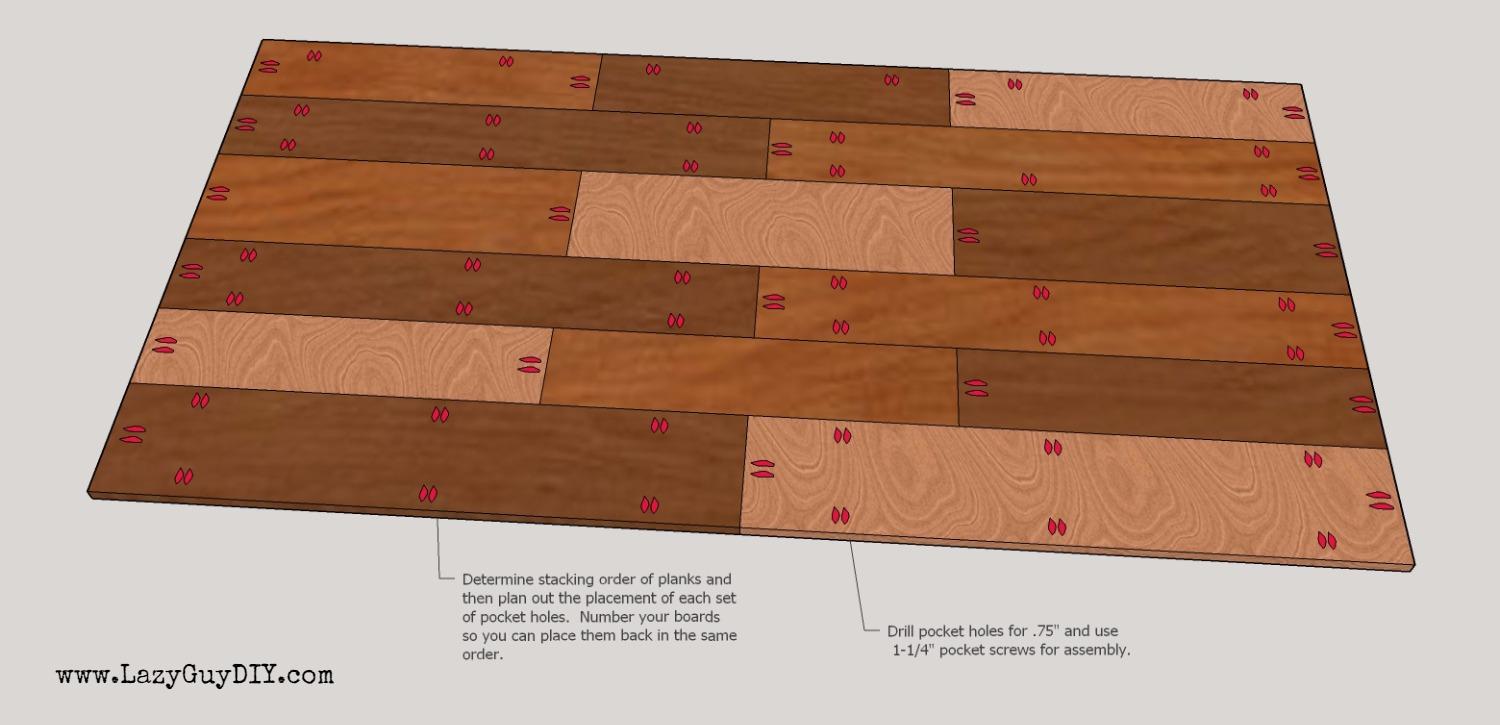
Prepping the Planks
Pay attention to the layout here. You want stability throughout the planks, but you also don't want your pocket holes running into each other. The entire perimeter has sets of pocket holes in addition to at least 2 touch points on each plank. You don't want this thing sagging in the middle. Set your Kreg jig bit and jig to 0.75". Also, make sure you're drilling these into the bottom of your planks. Seems obvious... You should end up with roughly 108 pocket holes. Seems like overkill, it's not.
-
Applying Paint
With the stain set, for the planks that had less impressive colors, I added a paint color (random latex flat paint) to the individual board with a dry brush technique. I made sure one end was fully covered, while I pulled paint to the other end. You don't want total coverage, but patches. When the paint is dry, take a palm sander and rough up the paint surface for a weathered look. The idea is to remove thin layers of paint, not the stain underneath. If you sand too far, you can always add an additional layer of stain over top to fill in the exposed wood. It will darken your paint color, but add to the weathered look.
-
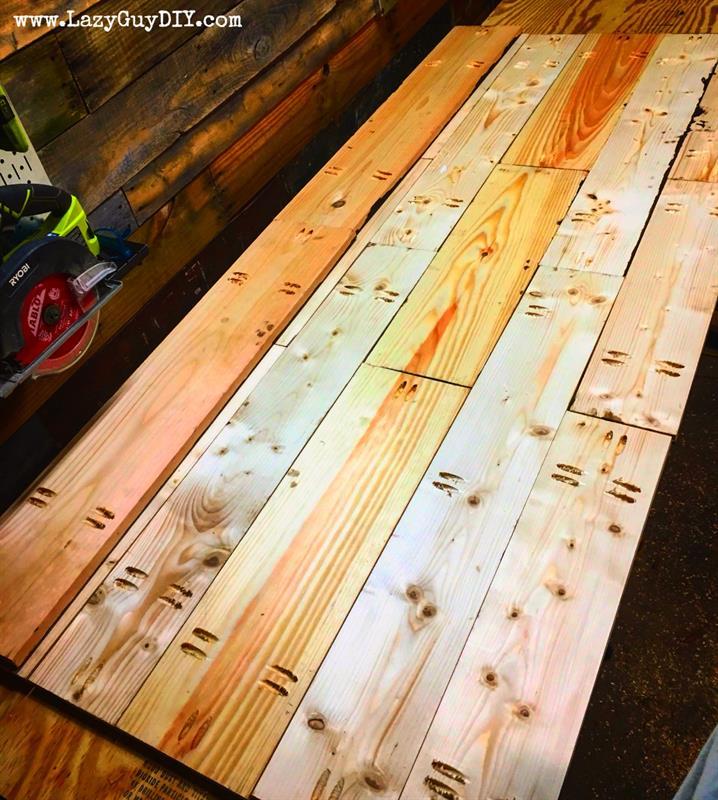
Assemble the Plank Top
This is where all of that planning and placement of pocket holes really pays off. Start with the first board of row 1 and connect it to the first board of row 2 (don't forget to glue the jointed edges) and attach with your 1-1/4" pocket screws. Makes sure the outer edge is flush and that you're connecting the pieces on a flat surface. You don't want to flip the table over and have your table top having varying levels. It's going to happen to an extent, but do your best to keep your pieces flat at assembly. Work your way down the first boards in each row and then start at the top again with the second set of boards in each row. At this point, pull out your bar clamps and start clamping each new section.
-
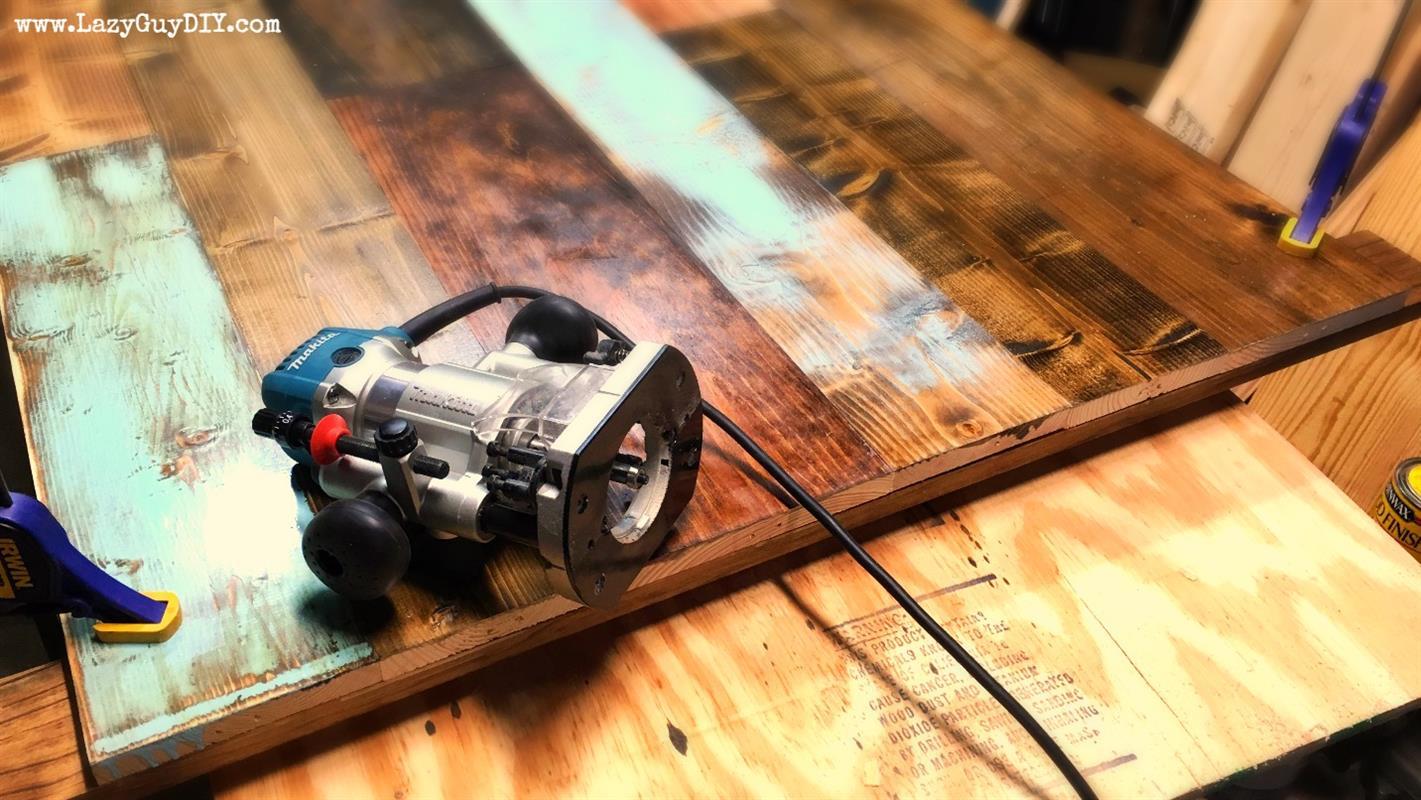
Finishing the Edge
Chances are if you're like me, the far end of your table top will have slightly uneven edges (this is if you listened to me and started with a flush edge on the other side). You can either cut them flush with a circular saw, sand them down, or if you have a router with a flush cut bit, you attach a straight edge for a guide and route off the excess.
-
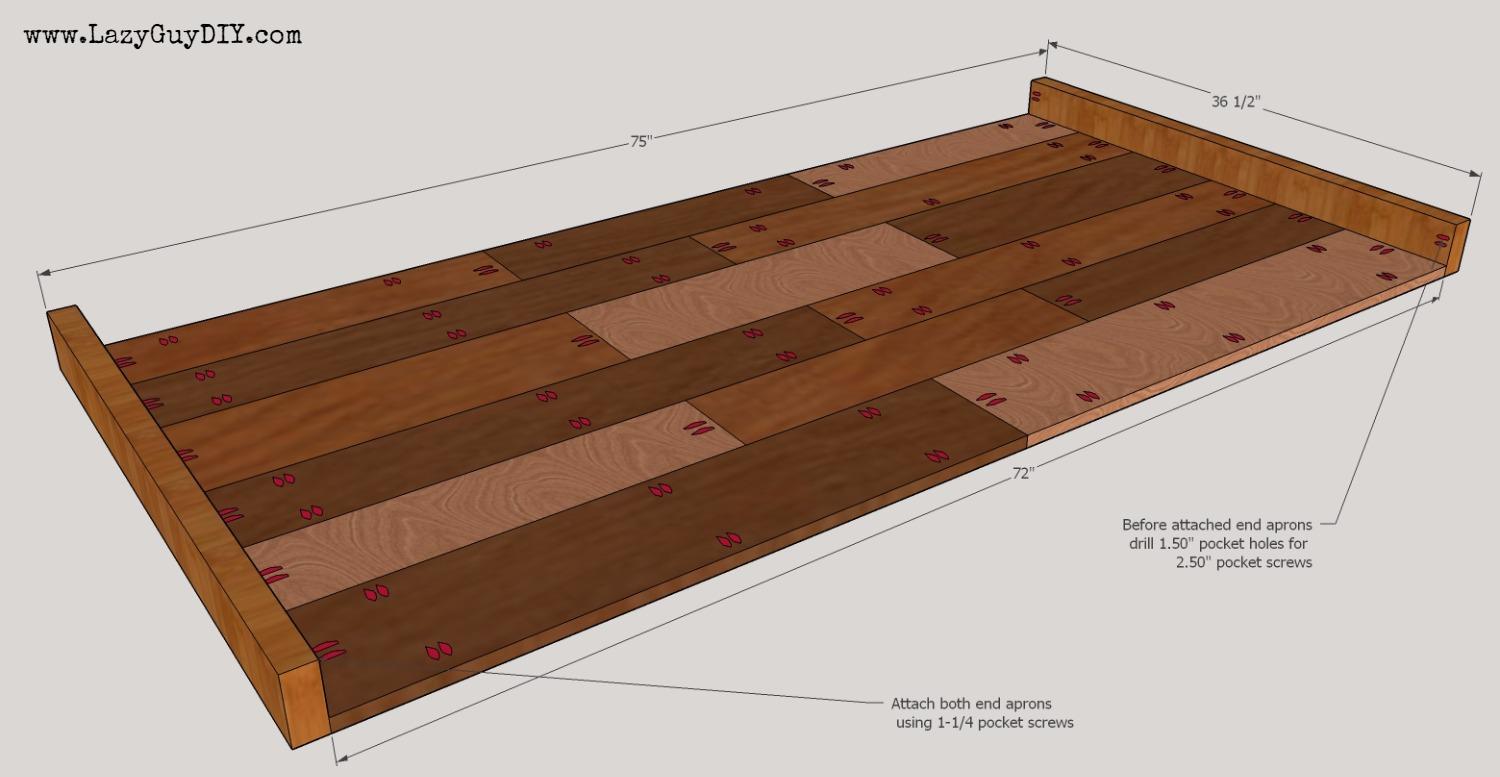
Trim Out the Top (End Trim)
With your planky table top all assembled it's time to start finishing this project up by trimming out the sides. Cut your end aprons to what should be 36.50" or whatever width (short end) your table top ended up. Slightly offset, you want to put pocket holes on the ends of both of those pieces at 1.50" on your Kreg Jig for 2-1/2 pocket screws. Glue and screw both end aprons to the table top using the pre-drilled .75" pocket holes you put on the ends of each plank. Use 1-1/4" pocket screws. Make sure your table top and aprons are flat when attaching. You want want a flush edge when you flip it over for your grand reveal.
-
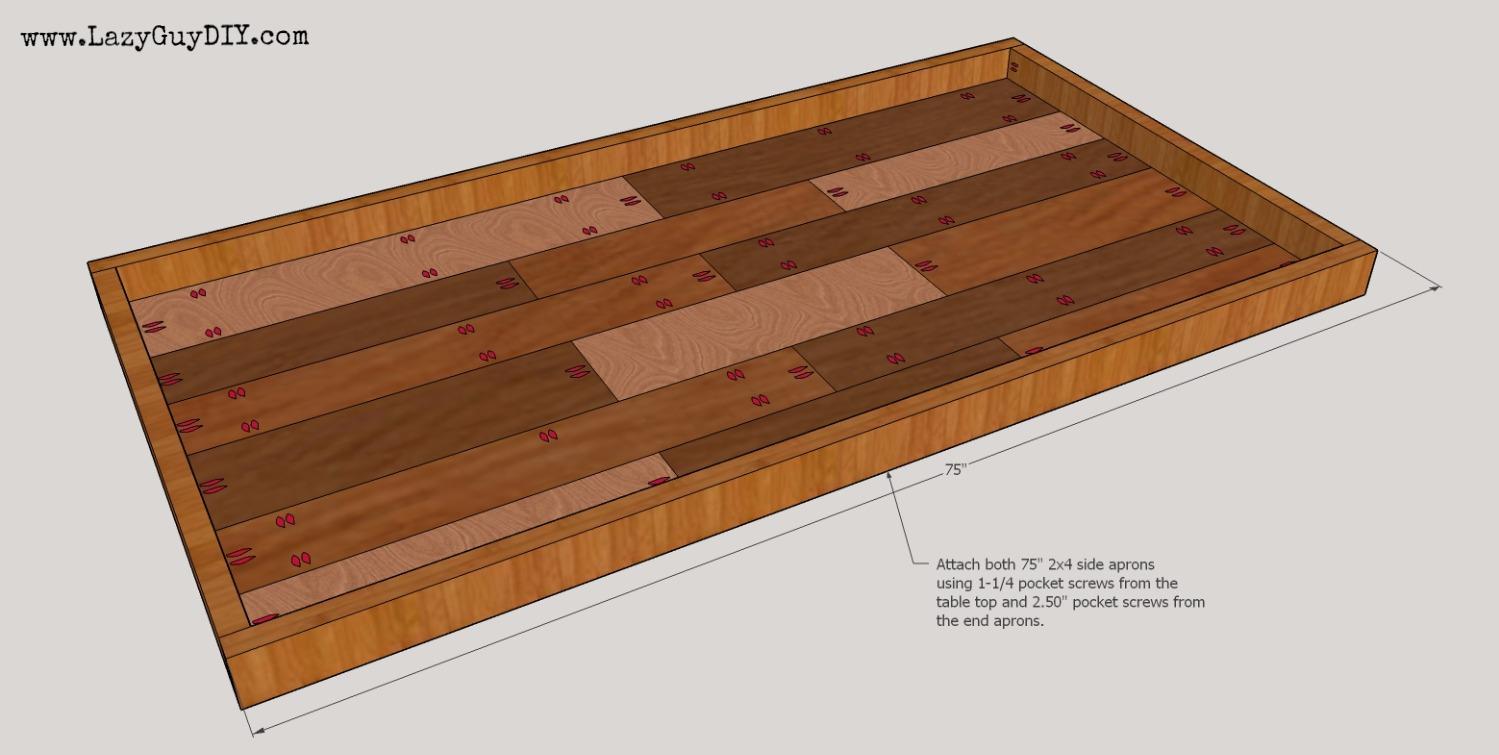
Trim Out the Top (Side Trim)
Measure the distance from end apron to end apron and hopefully you get 75". Okay, time to see how patient you are... glue the edges and attach the side aprons ONLY TO THE END APRONS using the pre-drilled pockets holes with 2-1/2" pocket screws. Do not attach the planks yet.
-
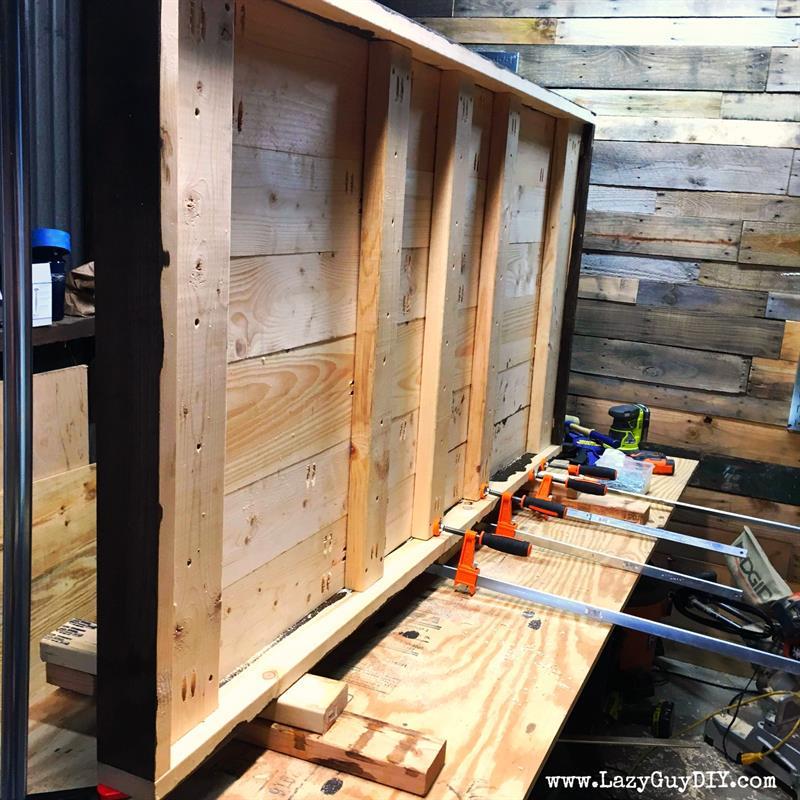
Trim Out the Top (Side Trim Con't)
In order to get the best flush edge with the aprons and the table top, you're going to need to make a handful of adjustments before each set of pocket screws. I ended up setting the entire table up on it's side and then applying clamps to each tiny section by pushing or pulling the material to get the truest edge before attaching them.
*Important Tip When you're setting your clamps to even out the table surface, make sure you use a scrap piece of wood as a spacer. Not only will this help even out the space between the apron and the table top, but it will also keep your table top from getting marred from your clamps.
-
Installing Supports
Install those supports made out of 2x4's and 2x6's you've been sitting on. Do a quick measurement check of the width between your side aprons. It should still be around 36.50". Cut your two 2x6's and three 2x4's to length and dry fit them. Add pocket holes in each end before you attach them. Use the 1.50" setting on your jig for 2-1/2" pocket screws. Put a little wood glue under each support and attach them to the side aprons. The 2x6's need to be on the ends to accommodate the base of the hairpin legs to be attached in the next step. I also pre-drilled and added wood screws across the length of each support to attach to each individual row of planks. Make sure you use a wood screw that won't go through the table top.

-
Attach the Legs
Attach your legs! I purchased the legs for this build from the website www.DIYHairpinLegs.com. We went with the three rod legs for a sturdier feel for the thicker table top. People have a tendency to use the traditional two rod hairpin legs, but anything over bench height really should go with the three rod legs. They have just about every length of Hairpin legs you could possibly need with several variations in color in thickness. The kits they send include the screws and wax to keep the metal from oxidizing. Be sure to pre-drill your holes though so you don't split your supports.
-
Finishing the Surface
To complete the build I applied MinWax semi-gloss poly to seal the surfaces. Apply the first coat to all surfaces and let it dry. Go back with 350+ sandpaper and sand the surfaces down by hand. DO NOT USE A POWER TOOL! You're sanding by hand to remove the texture that the first layer of poly picked up. After a once over, rub your hand over the surface and work any areas that feel rough. Do not sand through the stain. Clean off the dusty surface with a damp cloth and then reapply the poly. Repeat for a minimum of 3 coats. Four would be better
