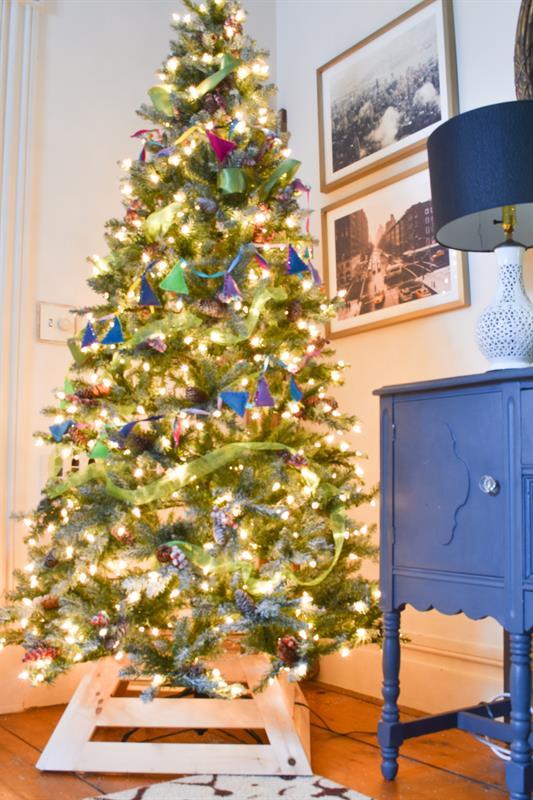

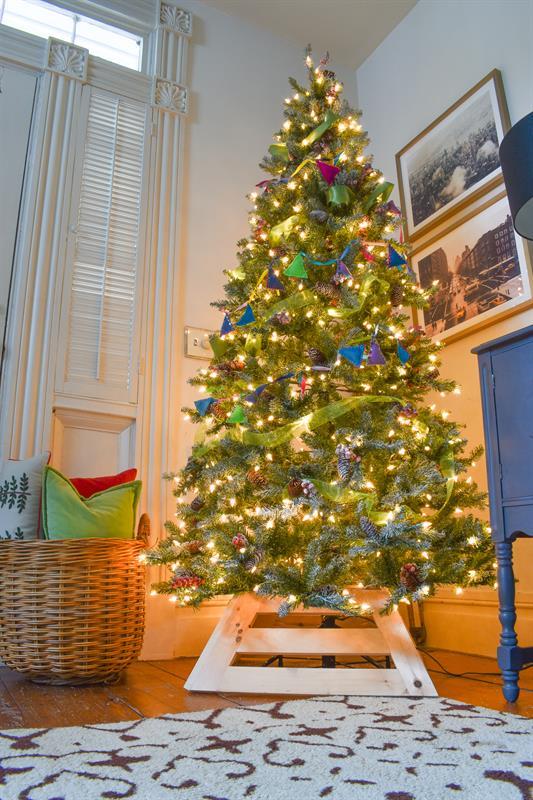
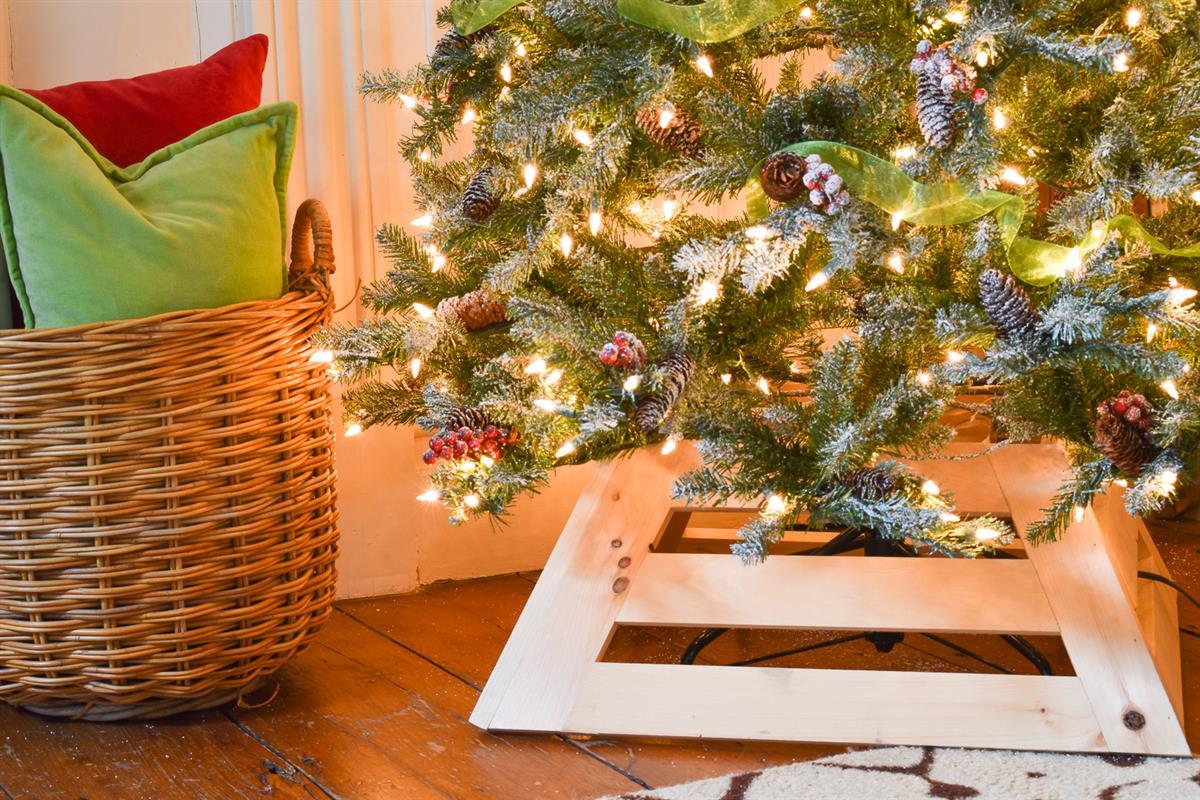


Using basic 1x4s, make this simple but chic Christmas tree skirt to add a hand-made wooden vibe to your holiday decor. The angled sides means this won't overwhelm your tree. Customize it to fit any sized tree stand! Add color or stain to personalize even further.
Tools
Kreg Tools

Other Tools
-
Miter Saw

-
Tape Measure
-
Drill (cordless)
-
Nail Gun
-
Air Compressor
Materials
Wood Products
- 3 Board , 1x3 , 96"
Hardware & Supplies
- 48 1 1/4" Kreg Pocket Hole Screws
Directions
-
Measure
Measure the dimensions of your Christmas tree stand. The bottom edge of the tree collar will need to accommodate your tree stand. Each side of the tree collar is assembled separately.
When determining the length of each cut, factor in the width of the two boards framing the slats. I.e. if the bottom dimension is 20 inches, each slat will be 15 inches.
-
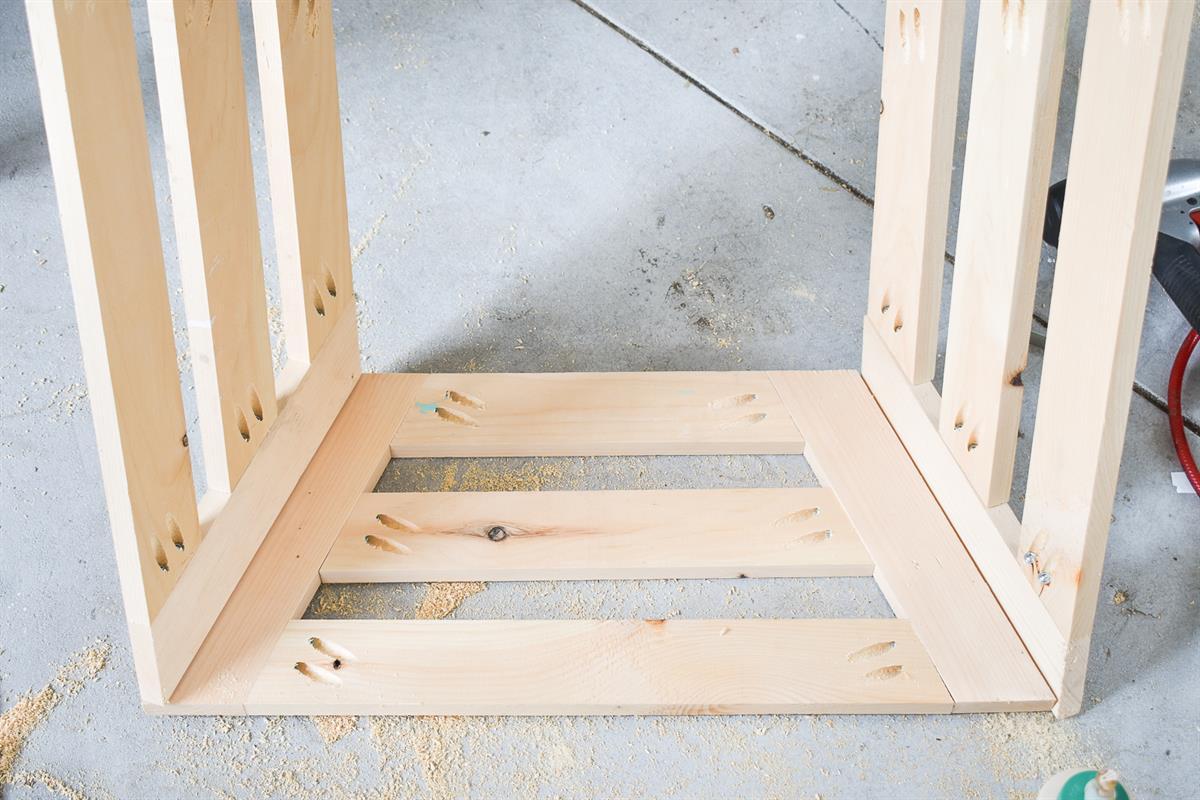
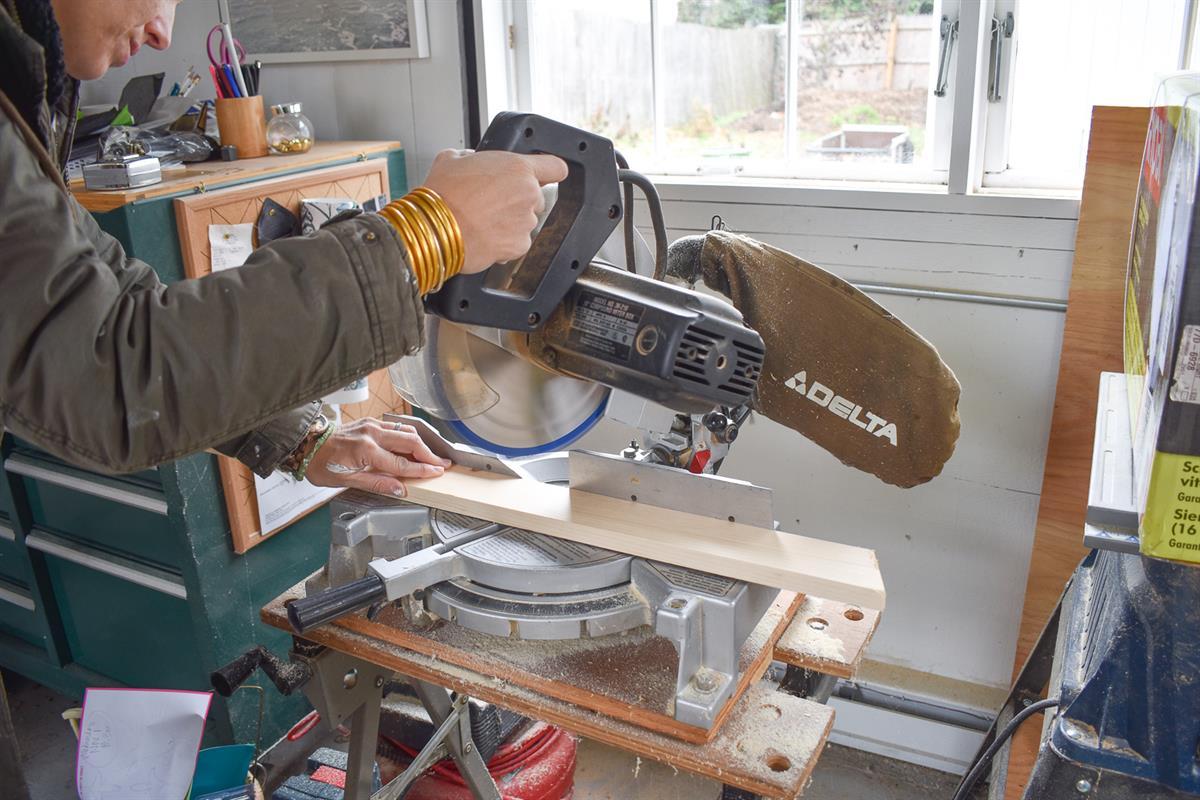
Cut First Slat
Set the miter saw to 22 1/2 inches and make offset cuts on either end of the first slat.
-
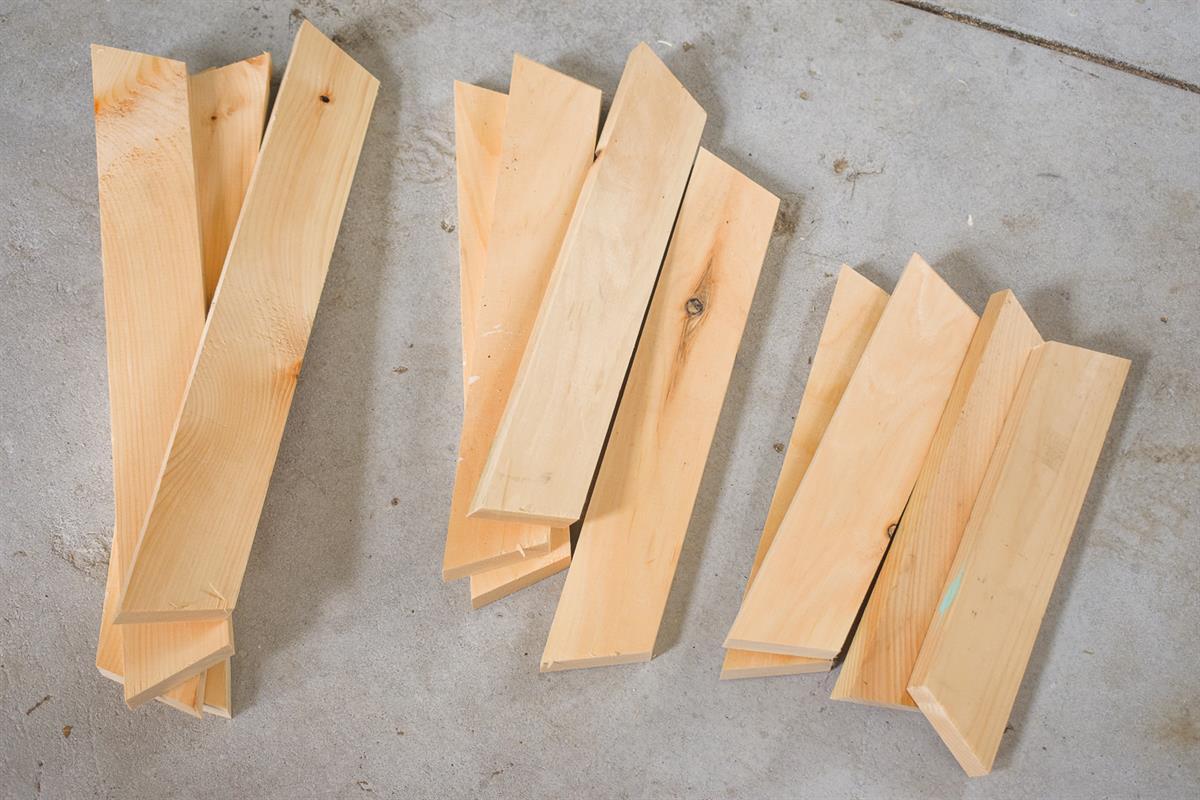
Cut Second and Third Slats
Use a spacer to determine the length of the second and third slats. Make certain the mitered edges are alined.
-
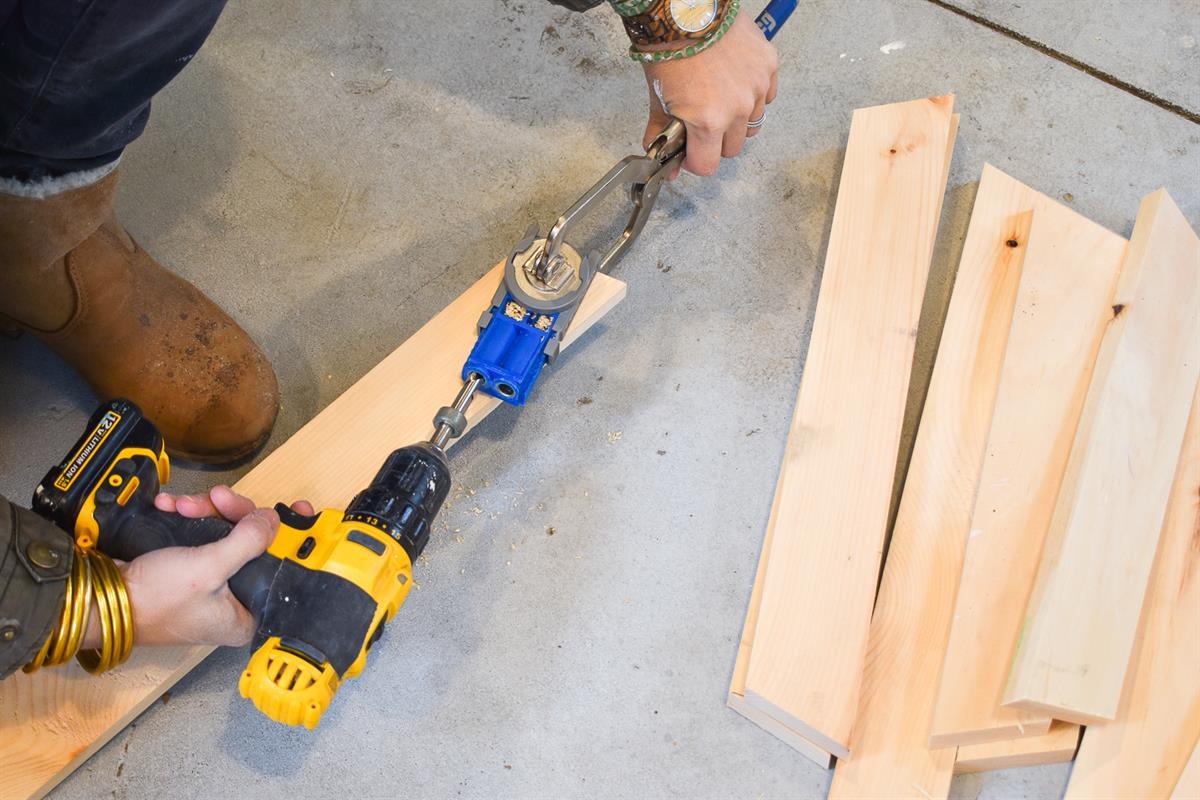
Drill Pocket Holes
Using the Kreg Jig, drill a pair of pocket holes at the end of every single slat.
-
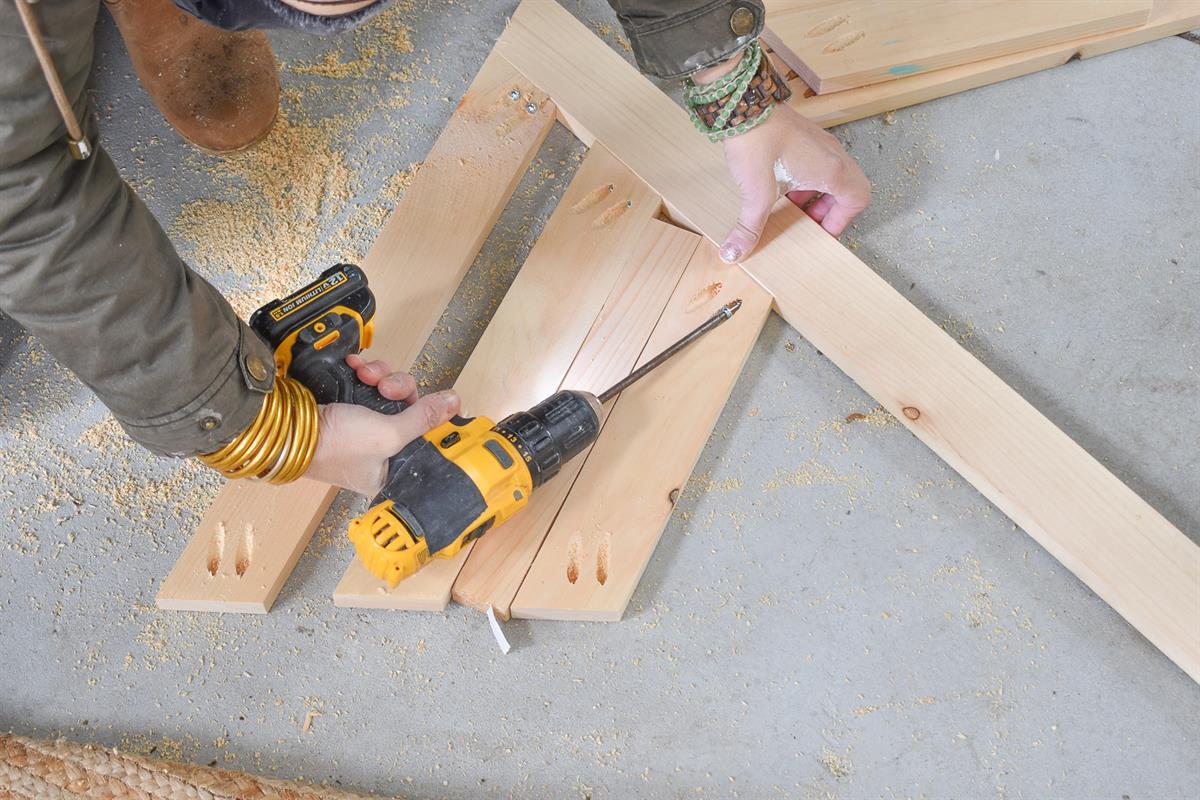
Cut and Attach Slats
Cut a piece of 1x3 with a 22 1/2 inch mitered edge and aline with the bottom slat. Attach slat with pocket holes.
Using the same spacer, line up second slat, and attach with pocket holes. Repeat for the third slat.
Once the third slat has been screwed in place, mark the length of the frame pieces, and cut with a parallel 22 1/2 degree miter cut.
-
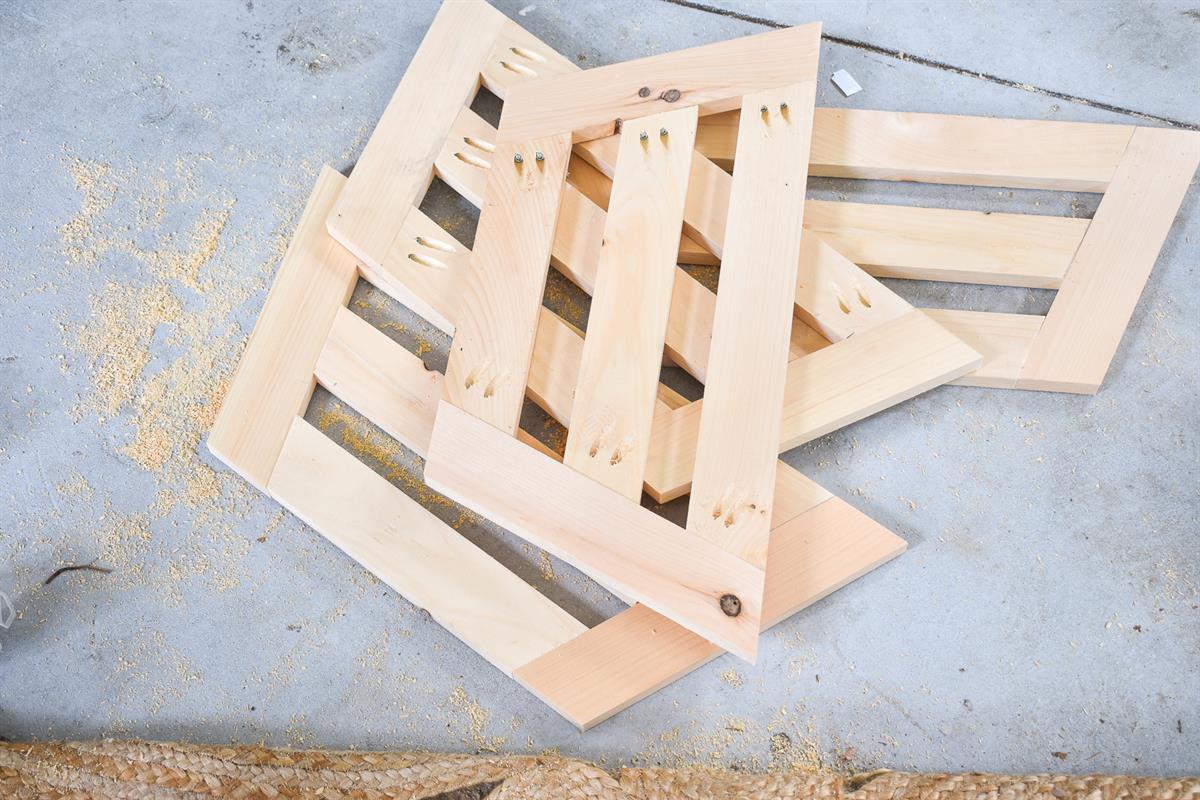
Repeat 3 More Times
Repeat Step 5 three more times until you have 4 trapezoid-shaped sides to the tree collar.
-
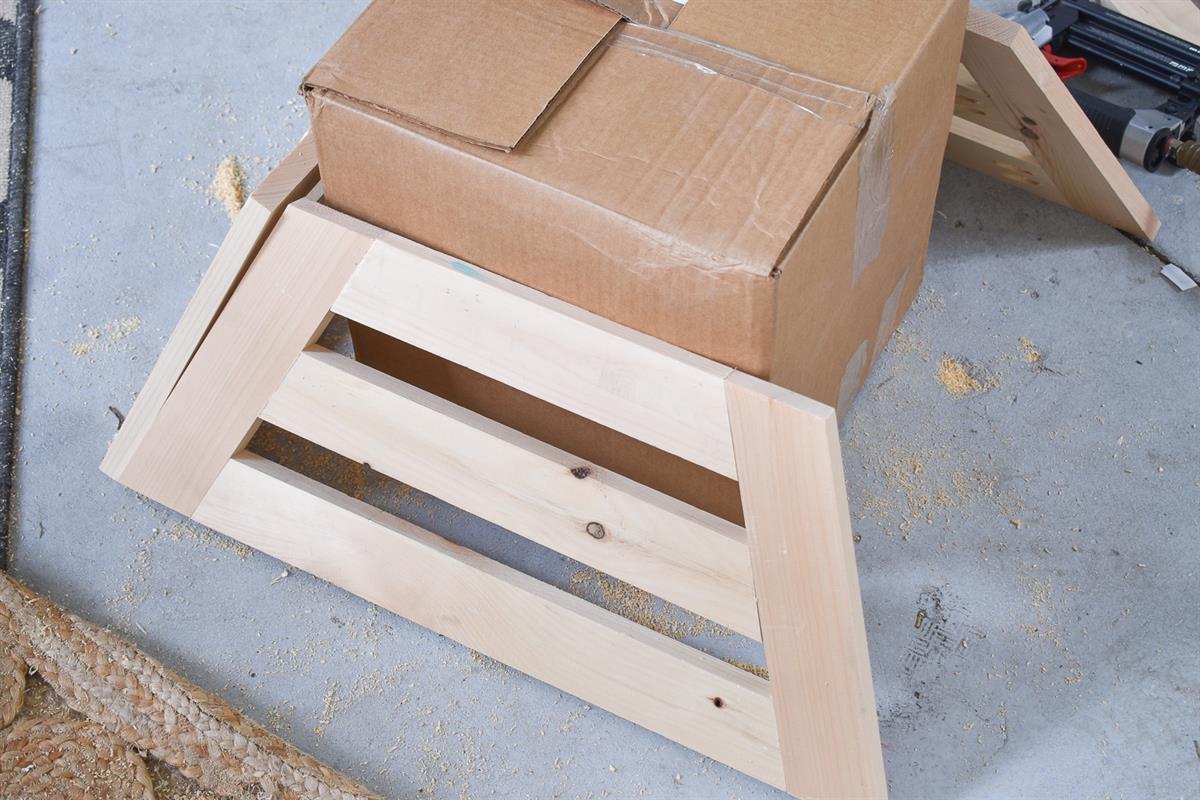
Assemble Tree Collar
Because of the angles involved, the four sides of the tree collar won't sit perfectly flush to each other AND fit together into a perfect square, but the come fairly close.
Use a large box or some other 90 degree angle as a guide. Hold two sides together and use a nail gun and brad nails to secure
-
Add Fill
Use caulk or wood glue mixed with sawdust to fill in the slight gap that will be left between each side after assembly. Because this is purely a decorative piece, this gap doesn't affect the overall build whatsoever.