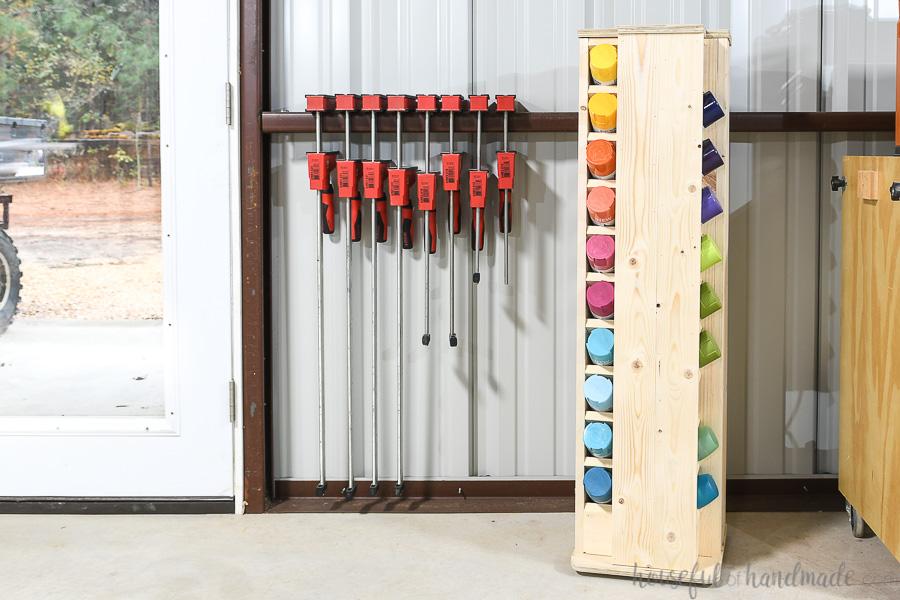
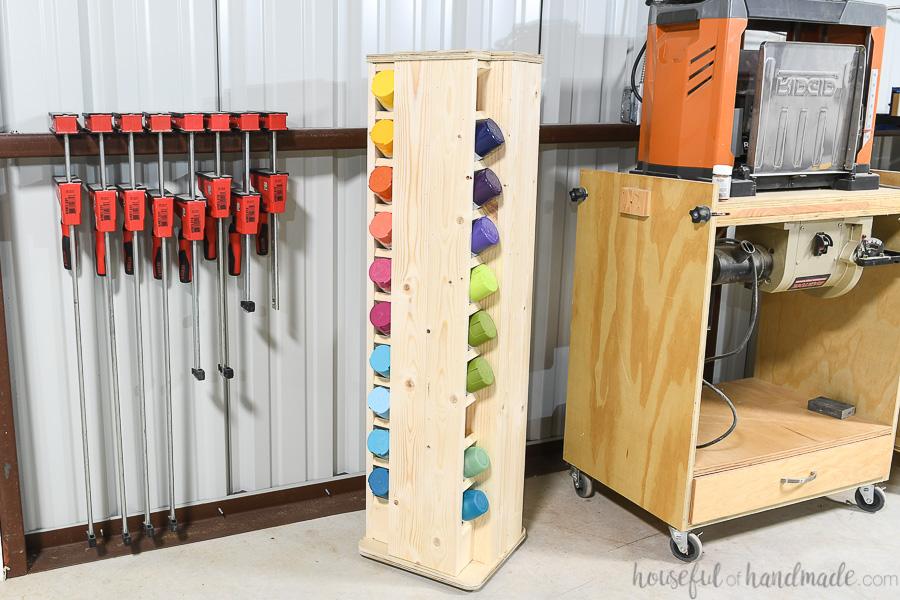


Build a rotating cabinet to organize and store all your spray paint cans. This simple to assemble cabinet stores 40 standard spray paint cans (2 1/2" around). The small cabinet easily fits in a corner, but is mounted on a lazy Susan to allow access to the paint on all sides.
Tools
Kreg Tools

Other Tools
-
Miter Saw

-
Table Saw
-
Tape Measure
-
Drill (cordless)
-
Impact Driver
-
Nail Gun
Materials
Wood Products
- 4 Board , 1x8 , 96"
- 4 Board , 1x4 , 96"
- 1 Plywood , 3/4" Thick , 13" x 26"
Hardware & Supplies
- 120 1 1/4" pocket hole screws
- 150 1 1/4" finish nails
- 1 Wood glue
- 1 Heavy duty lazy Susan hardware
- 4 Small metal spacers
- 4 Wood screws to attach lazy Susan
Directions
-
Assemble the center
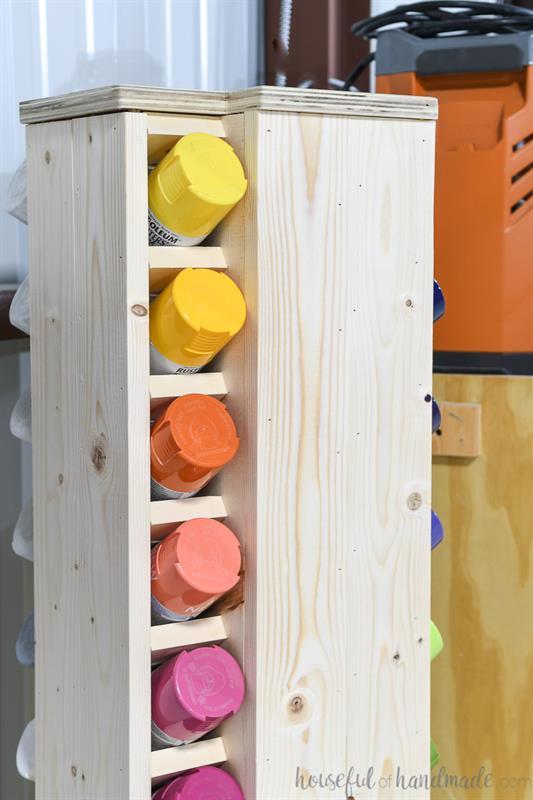
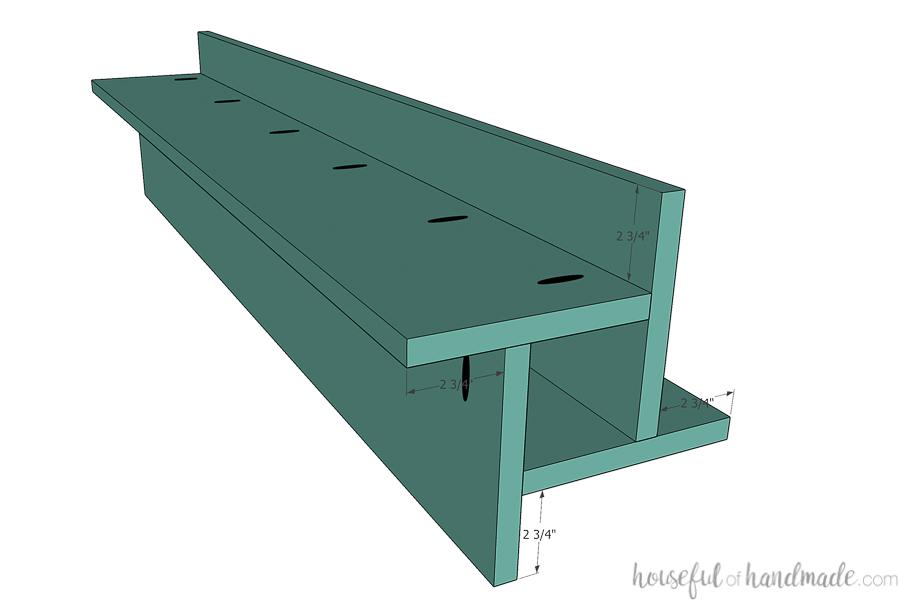
Cut the inner side pieces from the 1x8 boards according to the cut list. Drill 6 pockets holes down one side of each of the boards. When attaching the boards together, it can get a little tricky so pay attention (I had to undo and repeat 3 times to get them all attached correctly). On the side of the board without the pocket holes, measure and draw a line 2 3/4" away from the edge of the board that doesn't have the pocket holes in it. Attach one board to the other so the side with the pocket holes is facing the front where you have the 2 3/4" line drawn. Repeat on the next boards until you end up creating a square in the middle with four 2 3/4" deep ledges around the outside.
-
Cut the shelf boards
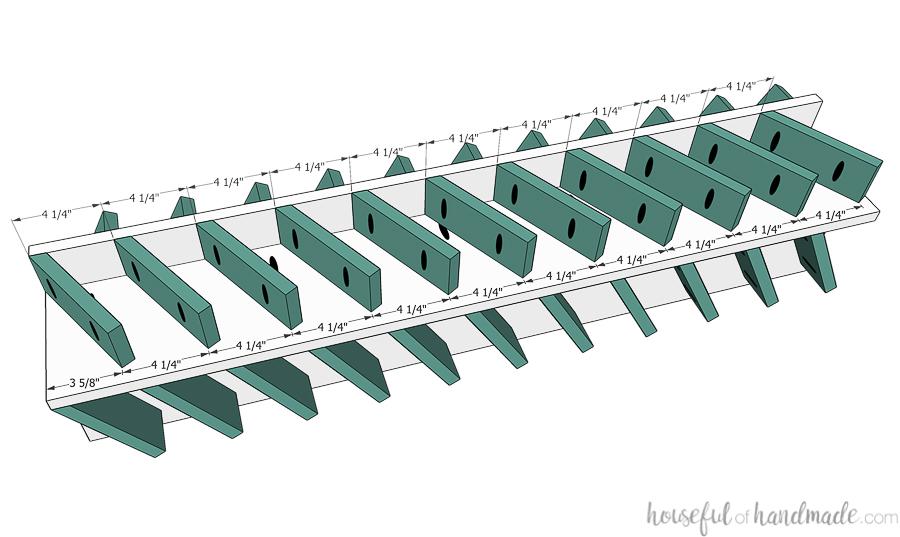
Cut the all the 2 3/4" wide shelf pieces from the 1x8 boards. Cut one end all the shelves at a 30 degree angle. Place the shelf board so it is in place on the assembled center. Note which side of the board is up against the center boards. Drill 2 pocket holes (set for 3/4" thick material) on the long edge of the each shelf board on the side that goes up against the center boards.
-
Attach the shelves
Measure and mark every 4 1/4" along the inside of the center ledge, then mark 3 5/8" up and 1" in from the bottom outer edge, then repeat every 4 1/4" up from there. Attach each shelf with two 1 1/4" pocket hole screws so the bottom corners line up with your marks. Repeat for all 4 sides.
-
Attach bottom caps
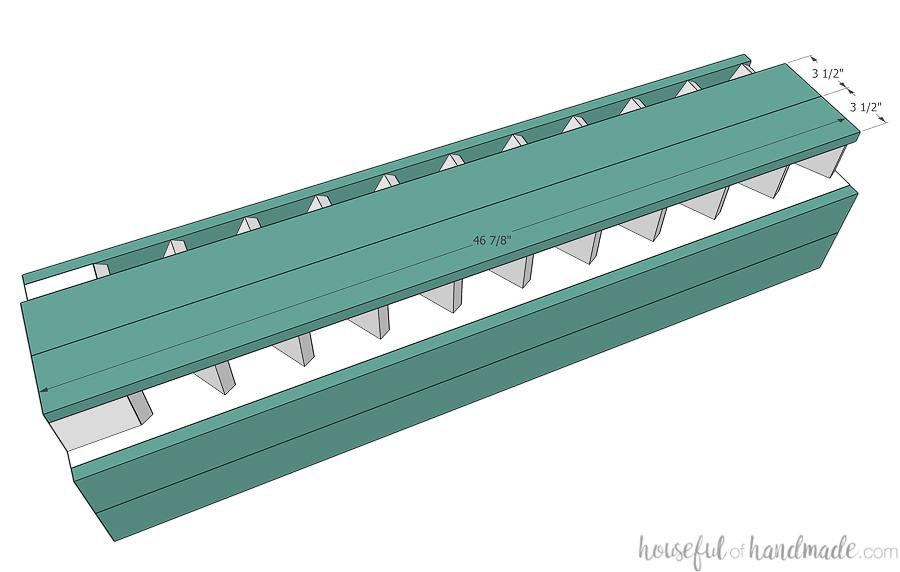
Cut another 2 3/4" strip from the 1x8 board, then cut it to 3 5/8" long with a 30 degree angle on one end. Cut 4 of these. Drill 1 pocket hole (set for 3/4" thick material) in the inside (short edge) of the bottom cap so it will go into the center boards. Attach it under the lowest shelves so it is 1" away from the front edge of the center boards. Use a couple finish nails to attach the top of the bottom cap to the lowest shelf board.

-
Attach the outer sides
Cut the outer side boards from the 1x4 boards. Attach 2 outer sides to the outside of each side so they are flush with the edge of the center board and cover the edges of the shelves (a tiny corner at the top of the shelves may still show). Secure with wood glue and 1 1/4" finish nails. Repeat for all four sides.
-
Attach top/bottom to cabinet
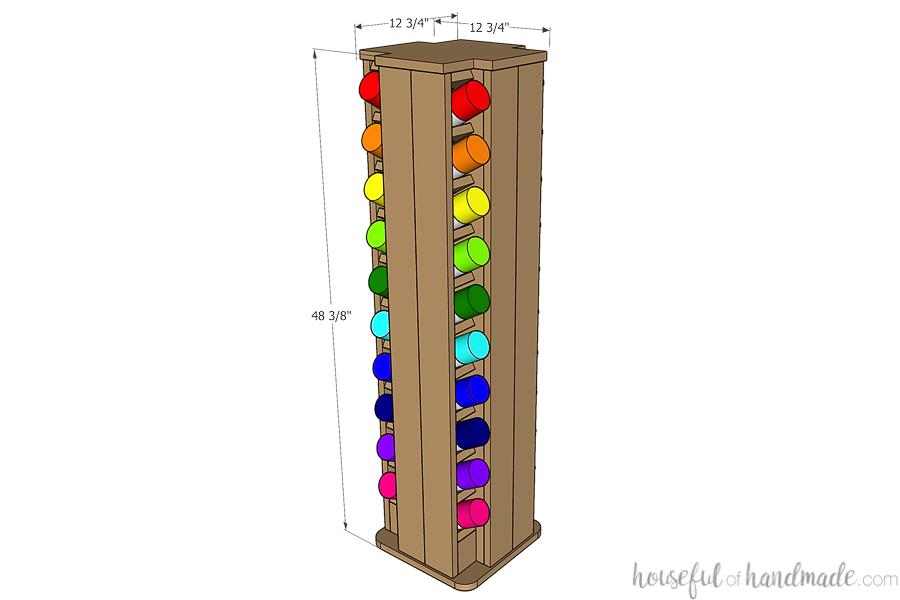
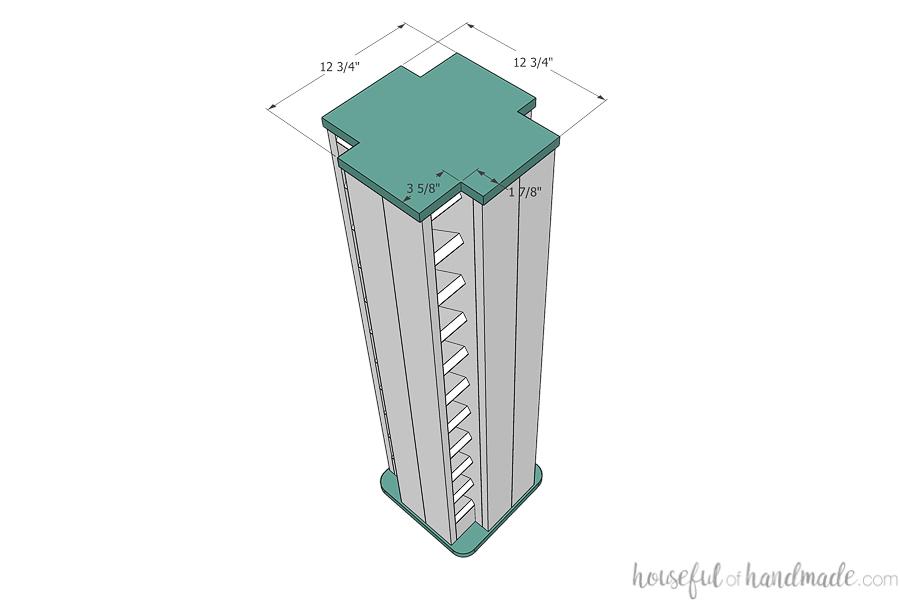
Cut two 12 3/4" x 12 3/4" pieces from 3/4" plywood. Add a 1 1/2" curve to the corners of one of them if you want. For the other one, cut 1 7/8" x 3 5/8" notches in the corners. I found it easier to attach the top piece first then cut out the notches so I could keep them in the right direction. Attach them to the top and bottom of the cabinet so they are centered (there should be 1/4" overhang on all 4 sides). Secure with wood glue and 1 1/4" finish nails.
-
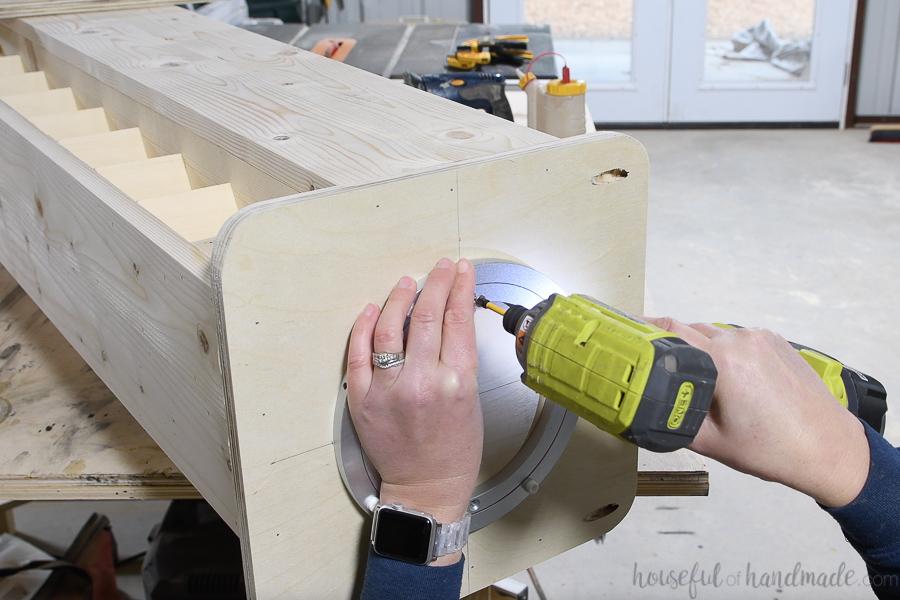
Attach lazy Susan hardware
Attach the heavy duty lazy Susan according the instructions. I include a link to the one I purchased in blog post on HousefulofHandmade.com. I had to remove the plastic spacers then attach to the center bottom with 4 wood screws and 4 small metal spacers. Without the spacers the lazy Susan wouldn't turn very well because the metal was too tight against the wood.
-
Finish and enjoy!
You can sand and finish your spray paint cabinet any way you want. I chose to leave it raw wood since it is going to live in my shop. Then load it up with all your paint cans and enjoy the how beautifully organized they are now. Then make sure to visit HousefulofHandmade.com for more fun things to DIY.