Modular Miter Station – Phase 3 – Assembly Cart
By The Awesome Orange

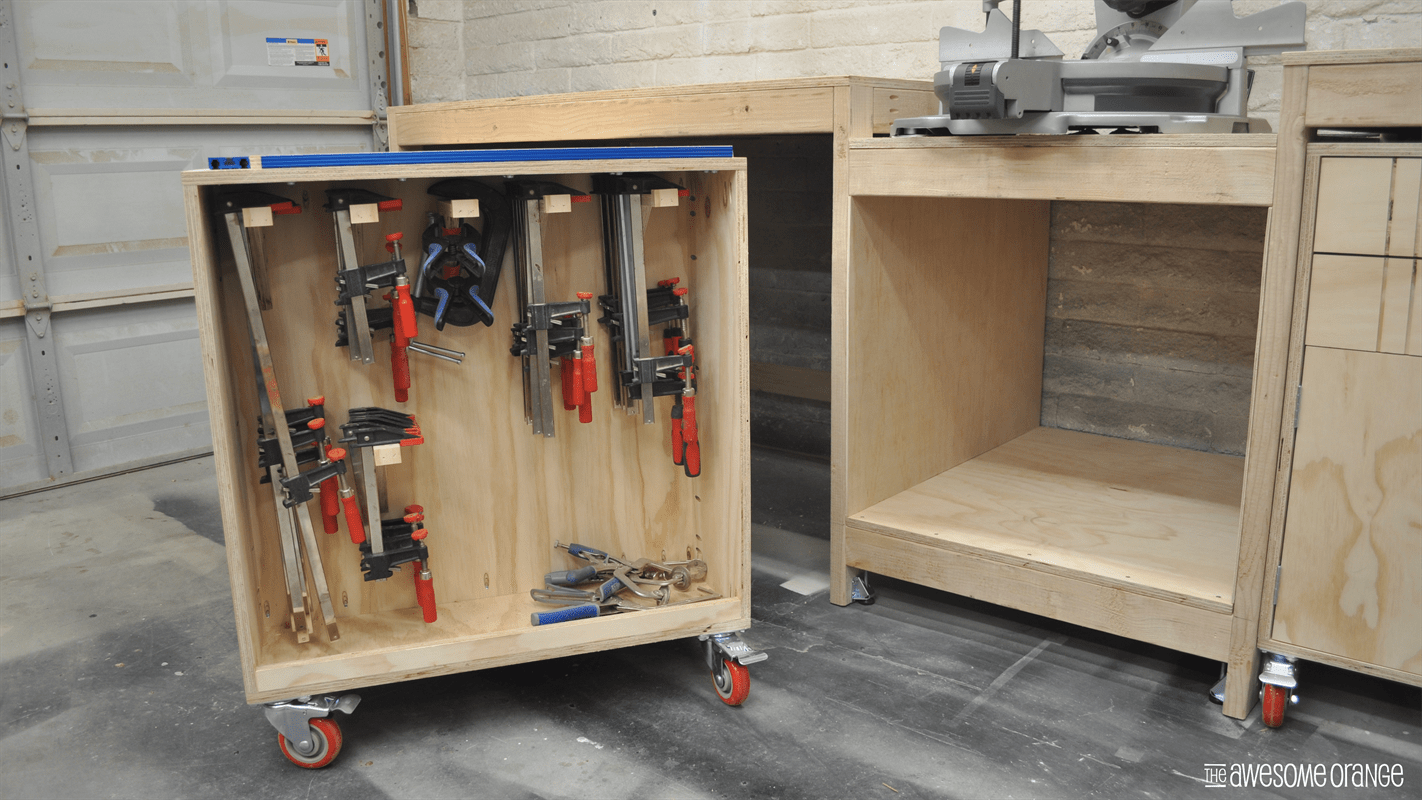
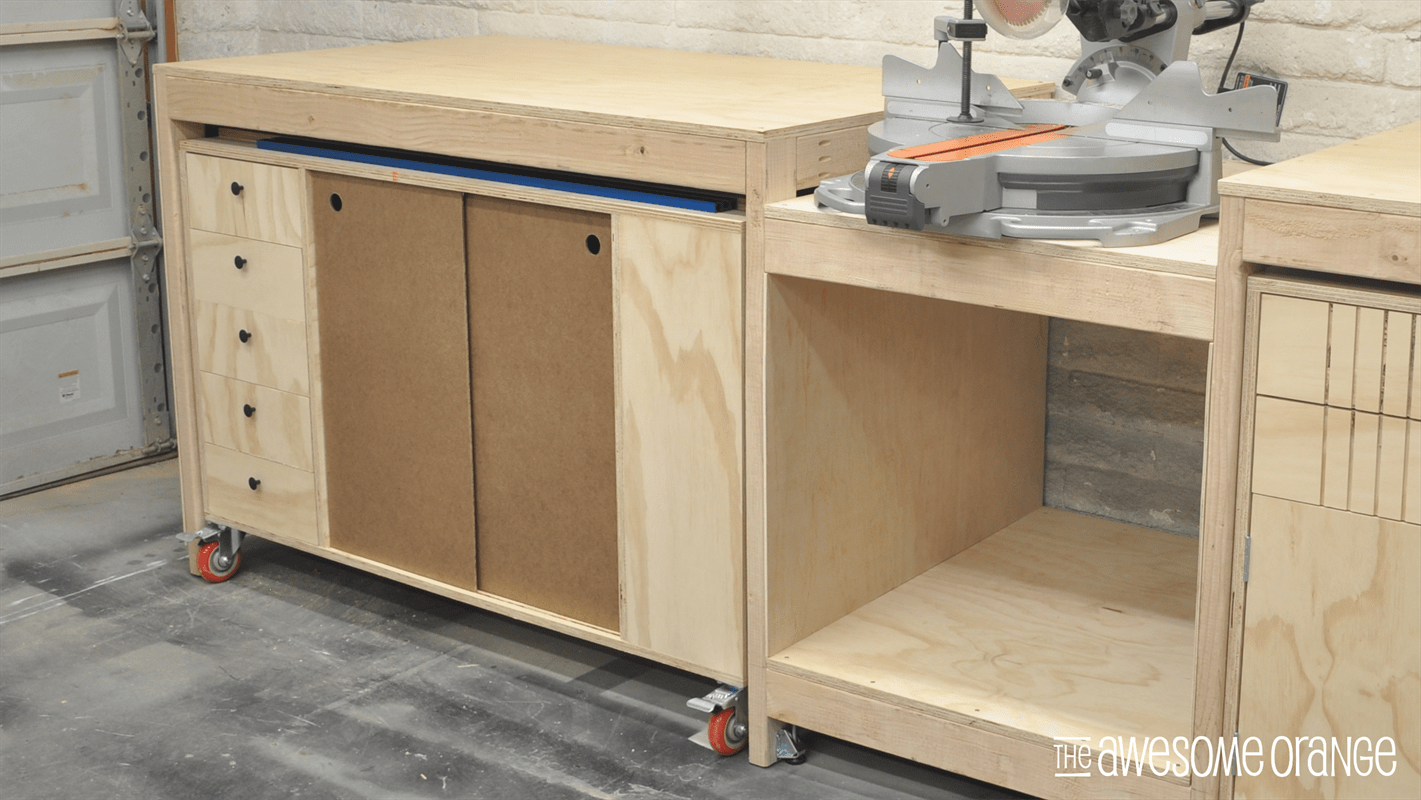


The ultimate assembly cart! Tons of storage… shelves, drawers, clamp racks. It also has a built-in clamp track to help in all your clamping situations. It is mobile, can be used for a table saw outfeed table, and then be tucked back under the Modular Miter Station foundation when you are done.
Tools
Kreg Tools


Other Tools
-
Circular Saw (corded)

-
Circular Saw Edge Guide
-
Miter Saw
-
Square
-
Table Saw
-
Tape Measure
-
Drill (cordless)
-
Router
Materials
Wood Products
- 3 Plywood , 3/4" Thick , Full Sheet
- 1 Plywood , 1/4" Thick , Full Sheet
Hardware & Supplies
- 4 4" Casters
- 1 Box 1 1/4" Coarse Pocket Holes Screws
- 1 Box 1 1/4" Wood Screws
- 16 1" Wood Lag Screws
- 16 Washers
- 1 Kreg Universal Clamp Track Kit - Optional
- 1 Box 1 1/4" 18 Ga Brad Nails
Cut List & Parts
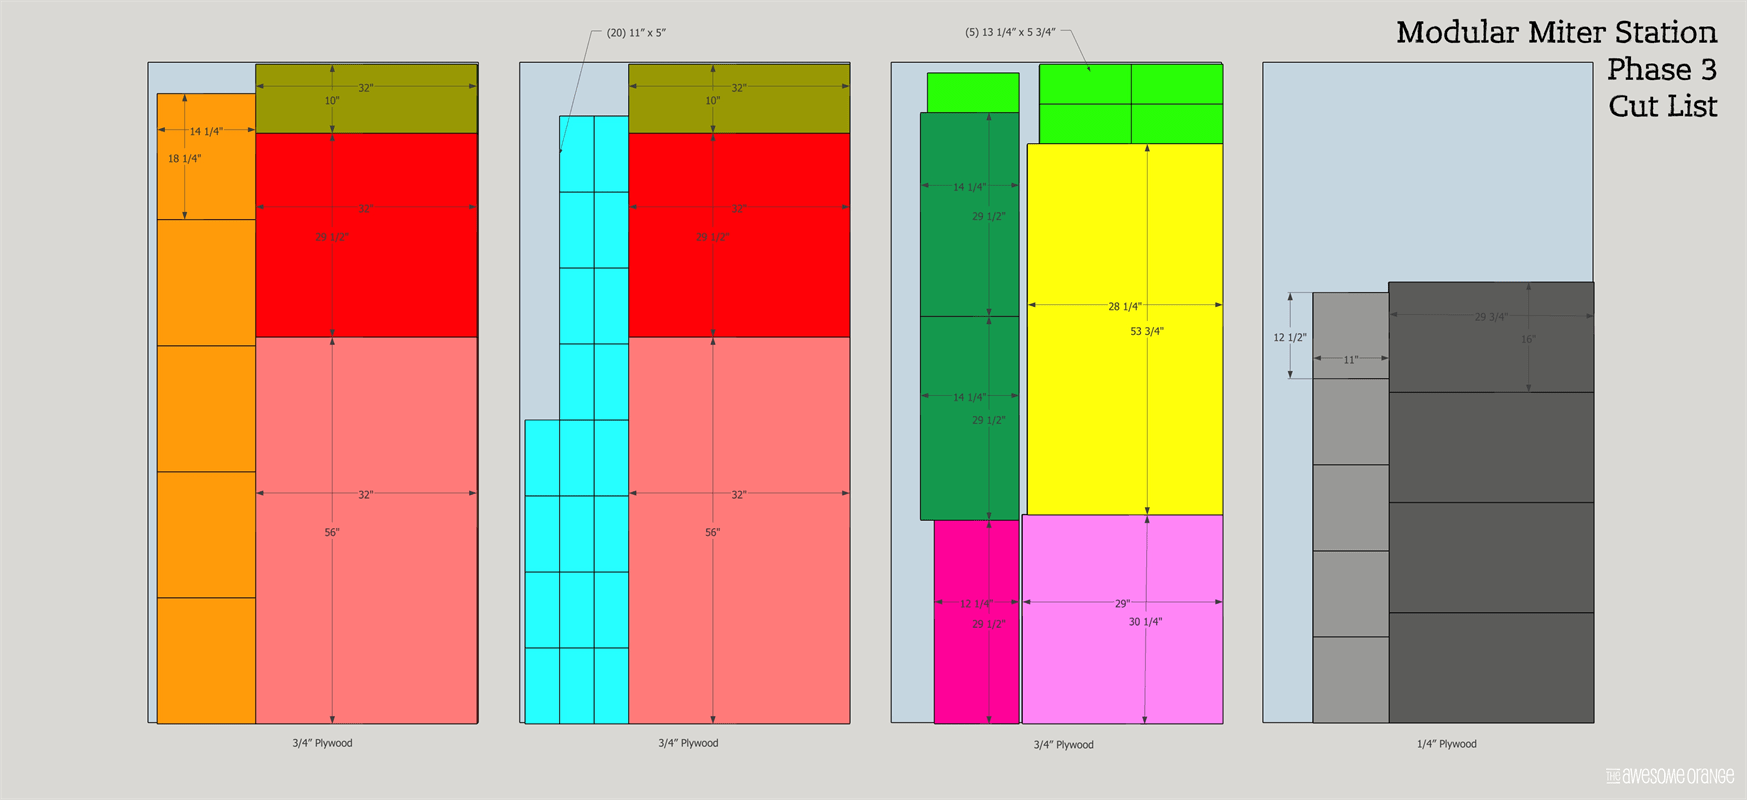
- 2 Top & Bottom , 3/4" x 56" x 32"
- 2 Clamp End Uprights , 3/4" x 29 1/2" x 10
- 2 Shelf End Uprights , 3/4" x 29 1/2" x 14 1/4"
- 1 Drawer Side Upright , 3/4" x 29 1/2 x 12 1/4"
- 2 Middle Section Uprights , 3/4" x 29 1/2" x 32"
- 5 Shelves , 3/4" x 14 1/4" x 18 1/4"
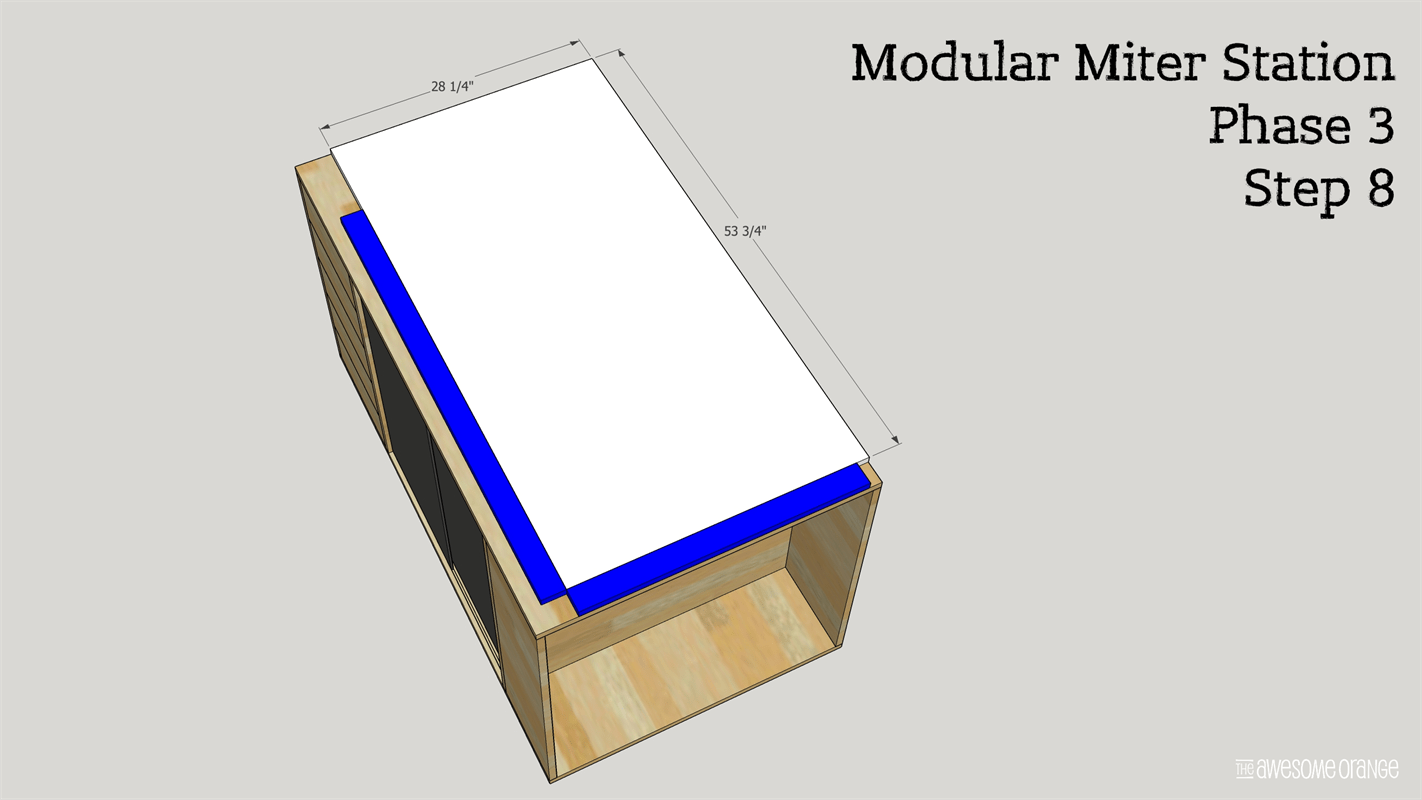
- 1 Second Top , 3/4" x 53 3/4" x 28 1/4"
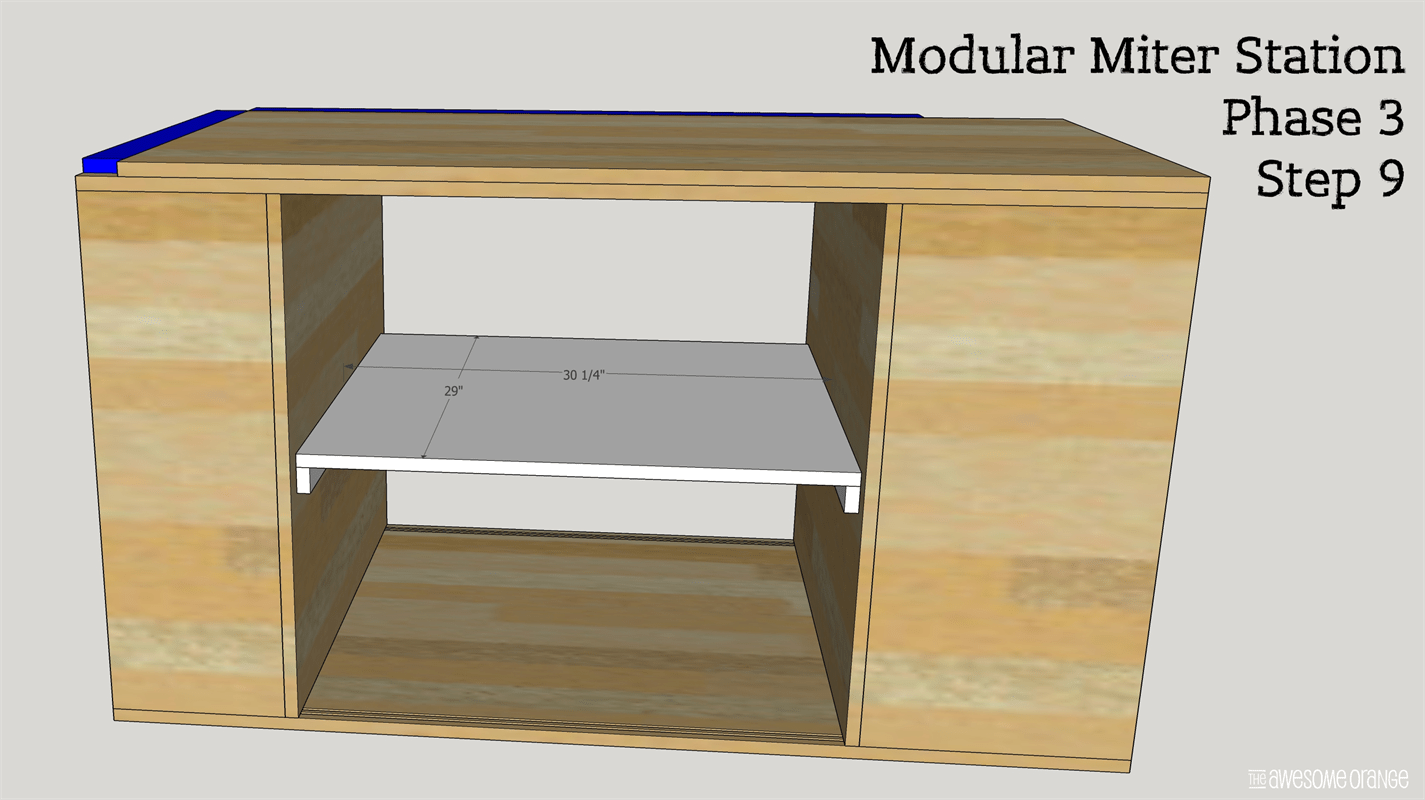
- 1 Middle Section Shelf , 3/4" x 30 1/4" x 29"
- 20 Drawer Box Sides , 3/4" x 11" x 5"
- 5 Drawer Fronts , 3/4" x 13 1/4" x 5 3/4"
- 4 Sliding Doors , 1/4" x 29 3/4" x 16"
- 5 Drawer Bottoms , 1/4" x 12 1/2" x 11"
- 10 Drawer Slides , 3/4" x 3/4" x 11"
- 2 Shelf Cleat , 3/4" x 1 1/2" x 29"
Directions
-
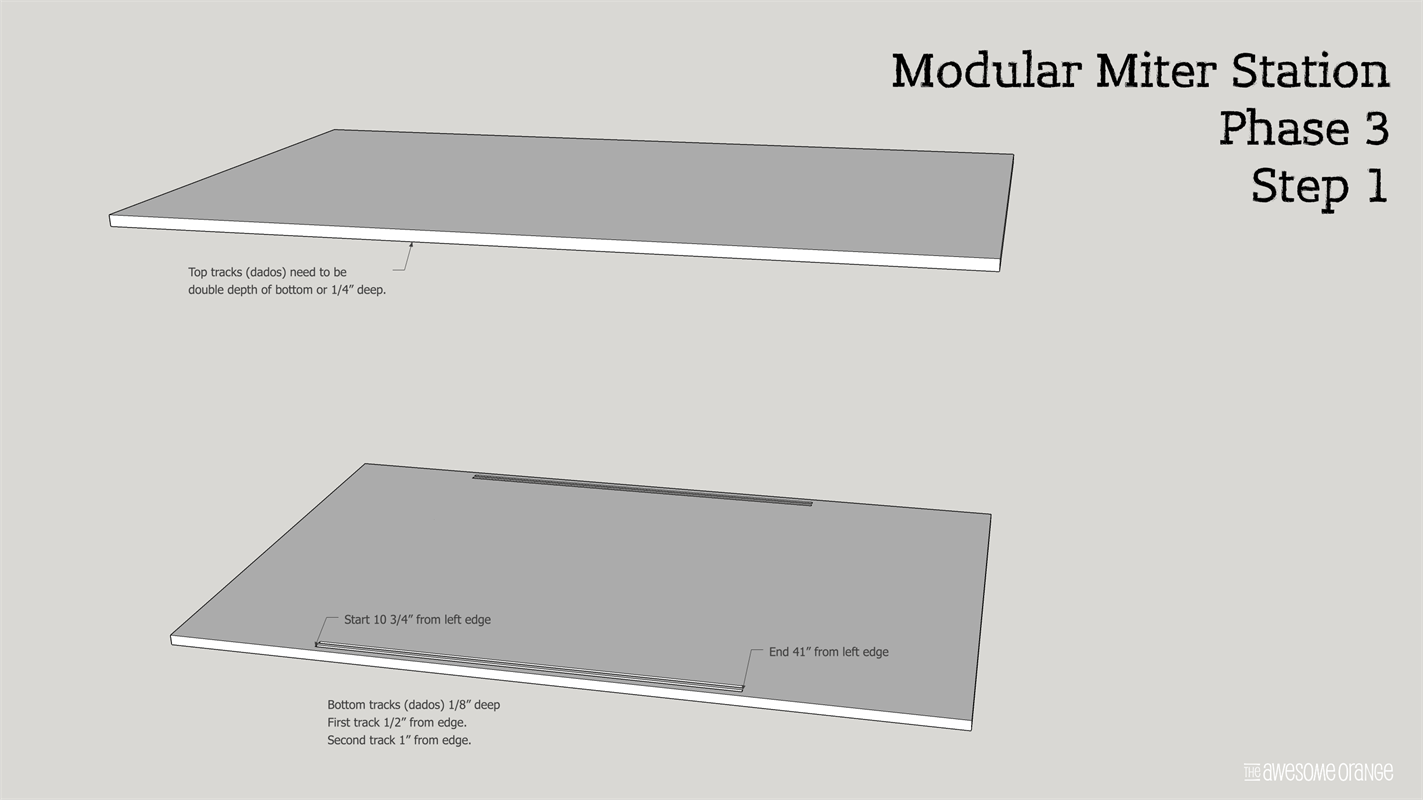
Route Sliding Door Tracks
On the bottom and top pieces route in tracks for sliding doors using a 1/4" straight bit. On the bottom cart panel the grooves (dados) need to be 1/8" deep. On the top cart panel the grooves (dados) need to be double that or 1/4" deep. Tracks will only be on the middle section of the cart, so grooves will start at 10 3/4" and end at about 41" (see picture). There needs to be two tracks, first one starting 1/2" from edge and second one 1" from edge.
-
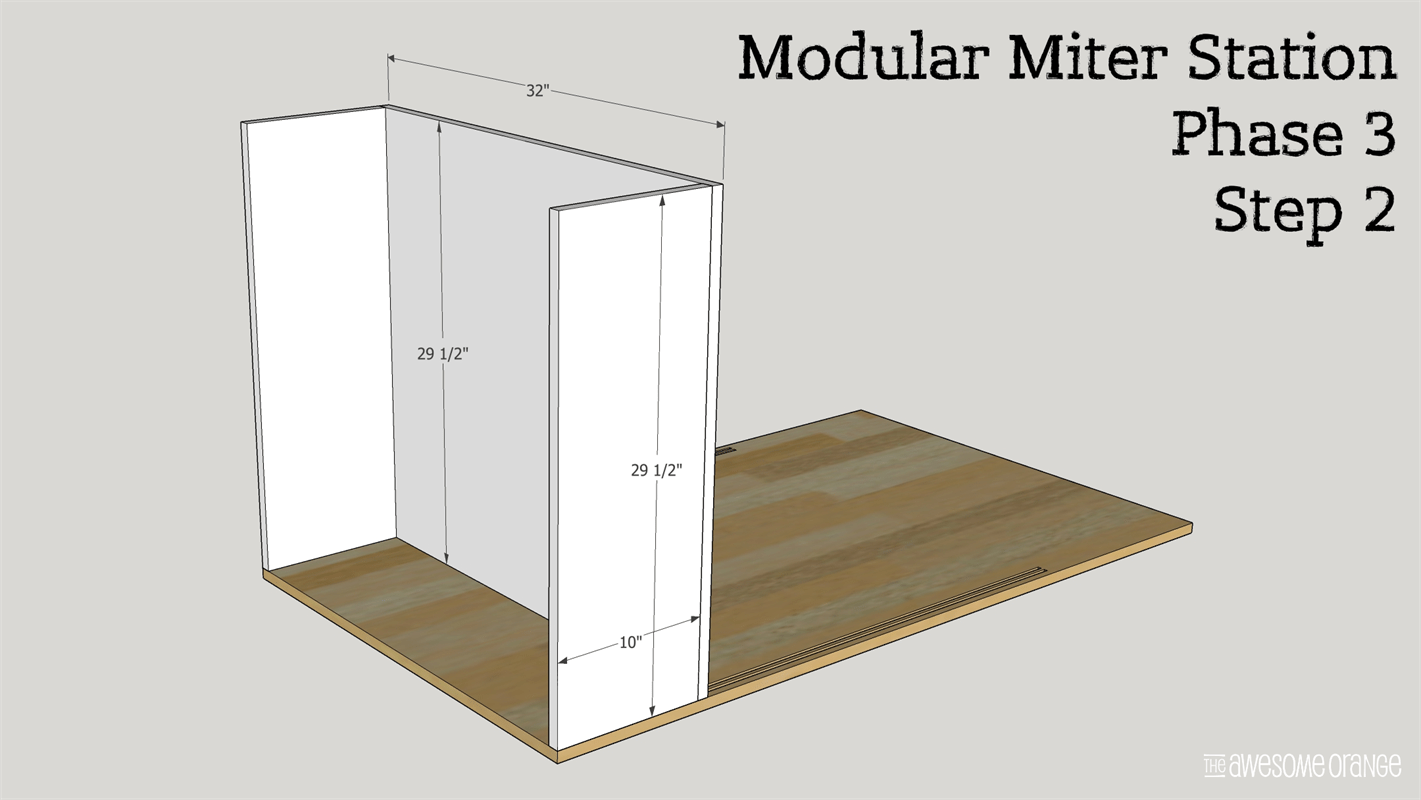
Assemble Clamp Section
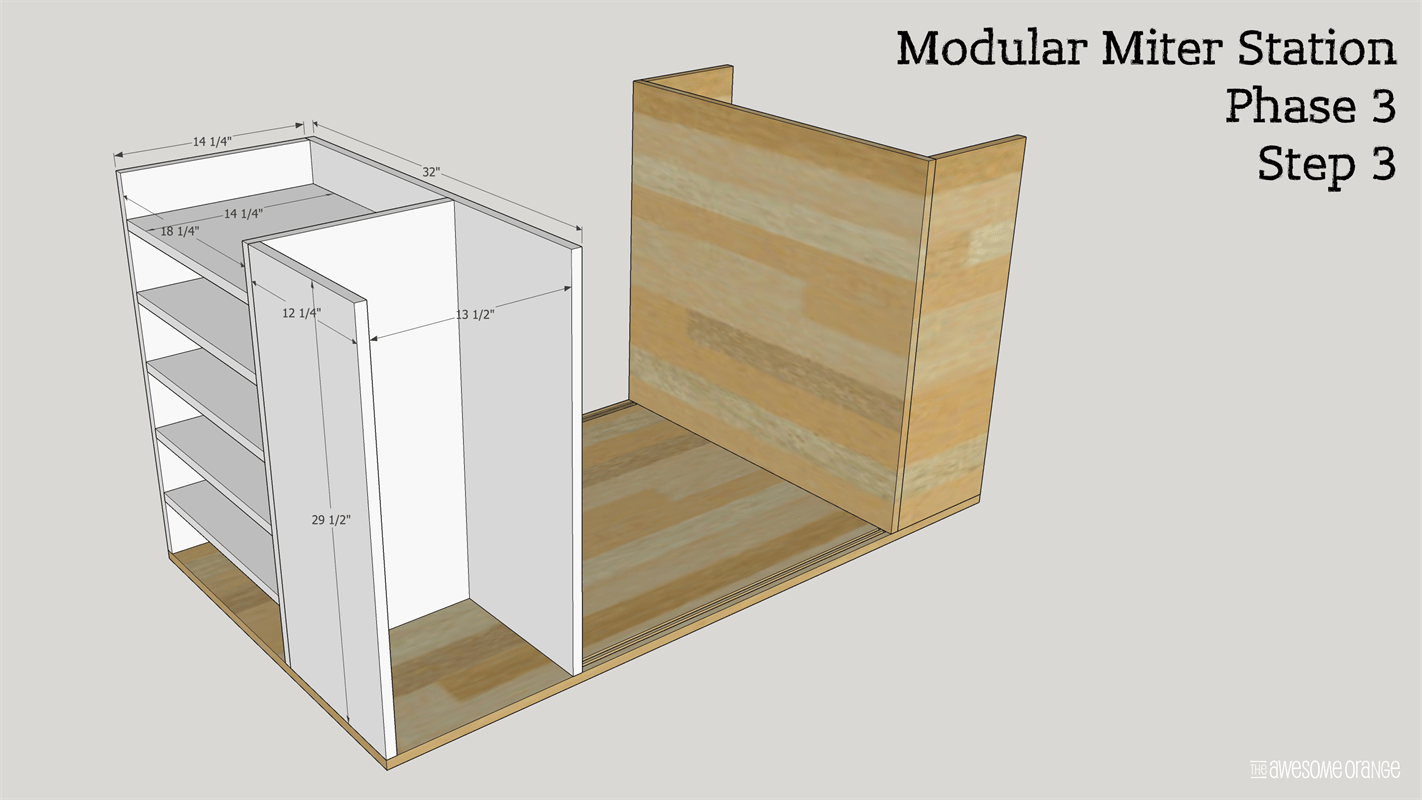
Assemble clamp section uprights with one of the middle section uprights using 3/4" pocket holes with 1 1/4" coarse pocket hole screws. Then attach to base using 3/4" pocket holes w/ 1 1/4" coarse pocket hole screws.
-
Assemble Shelf Section
Attach shelf section upright to second middle section upright using 3/4" pocket holes with 1 1/4" coarse pocket hole screws. Then attach shelves to 14 1/4" upright using 3/4" pocket holes with 1 1/4" coarse pocket hole screws. I suggest using spacer blocks (4 1/2") to get the proper spacing on the shelves. Then attach the second shelf section upright (14 1/4"W) to the other side of the shelves using 3/4" pocket holes with 1 1/4" coarse pocket hole screws. It will be a tight fit to get drill inside cabinet so you can always attach with 1 1/4" wood screws from the other side. The attach finally upright 12 1/4" to complete section using 3/4" pocket holes with 1 1/4" coarse pocket holes screws. Then attach to base the same way.
-
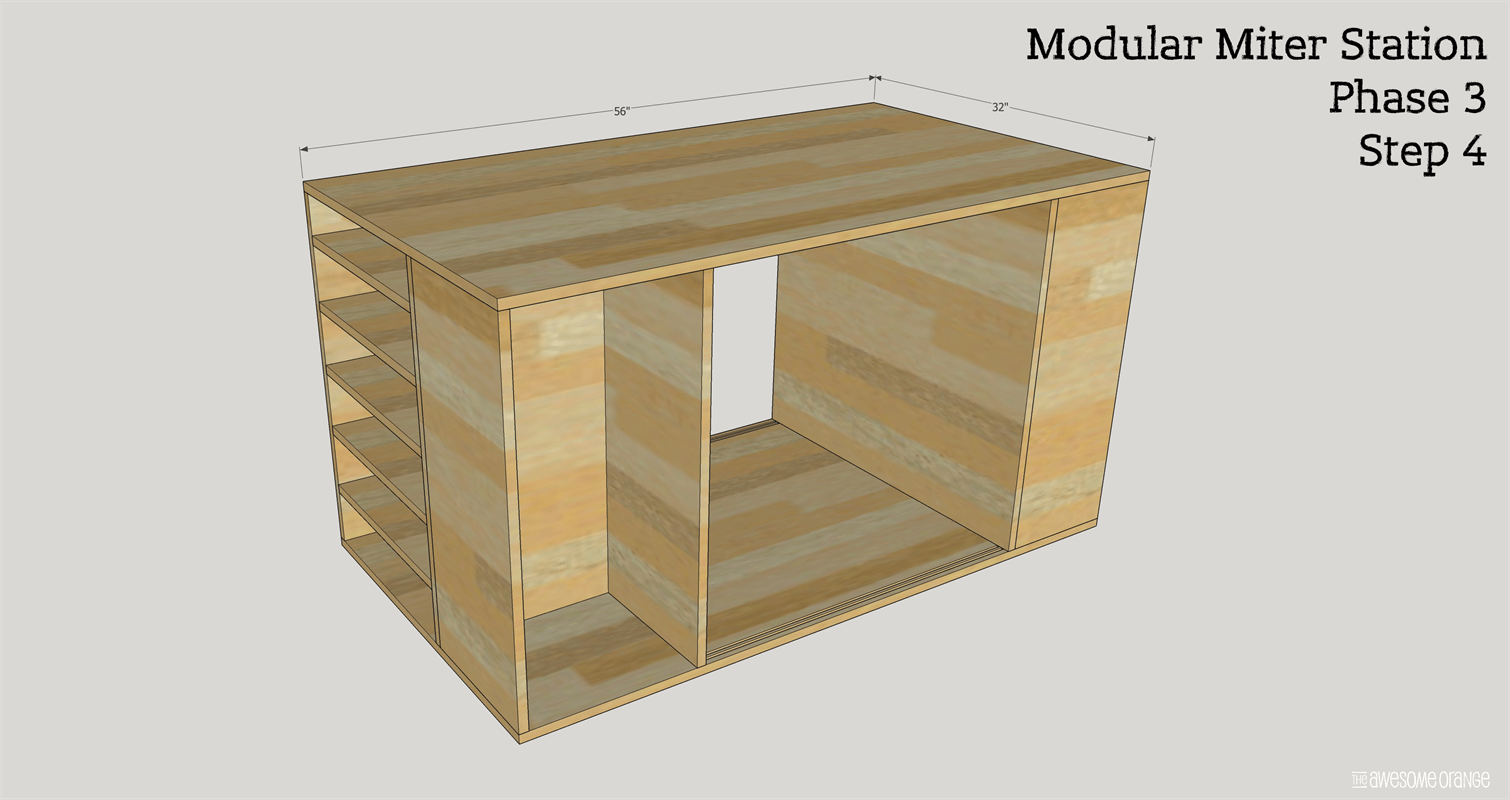
Attach Top
Using 3/4" pocket holes and 1 1/4" coarse pocket hole screws attach top to completed bottom assembly. Be sure to check for square thru-out the process.
-
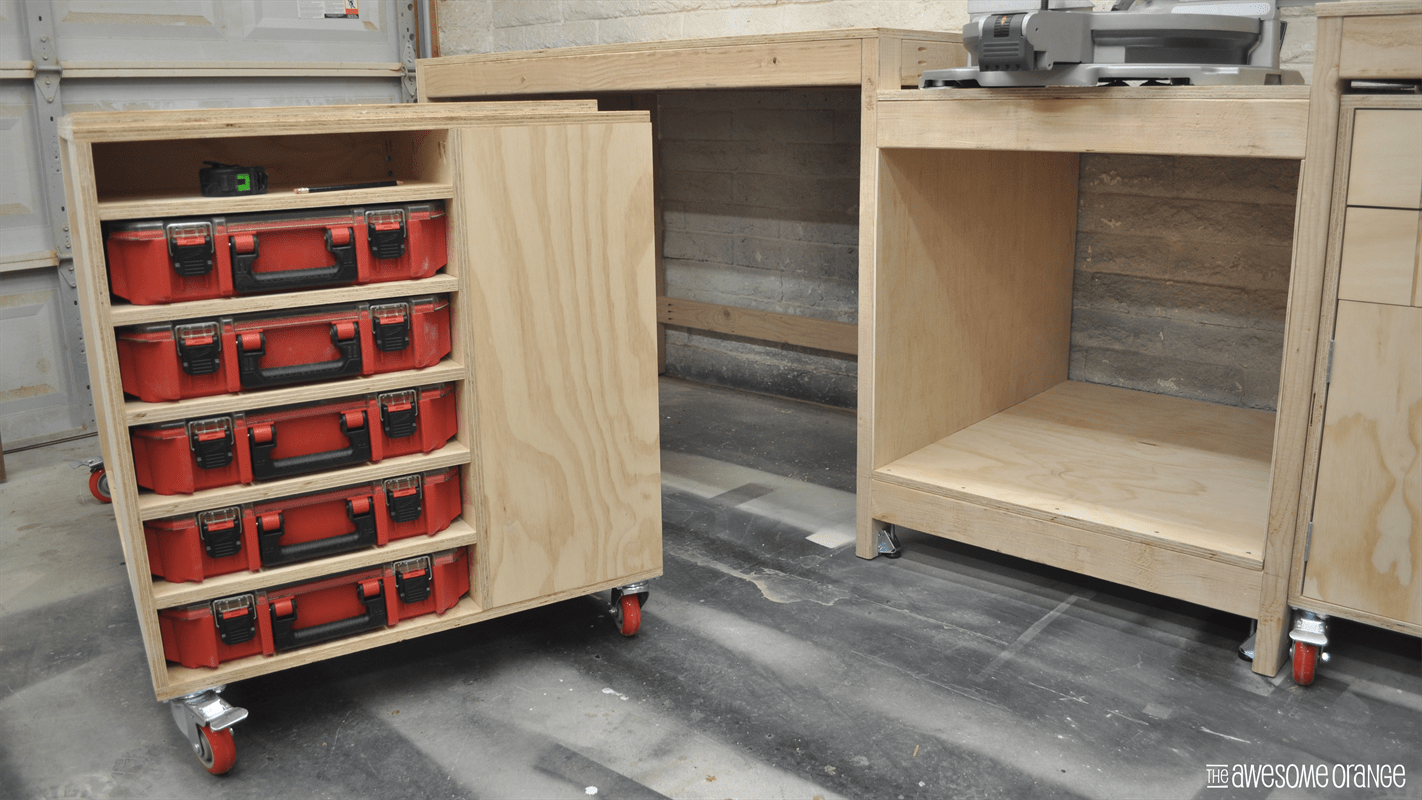
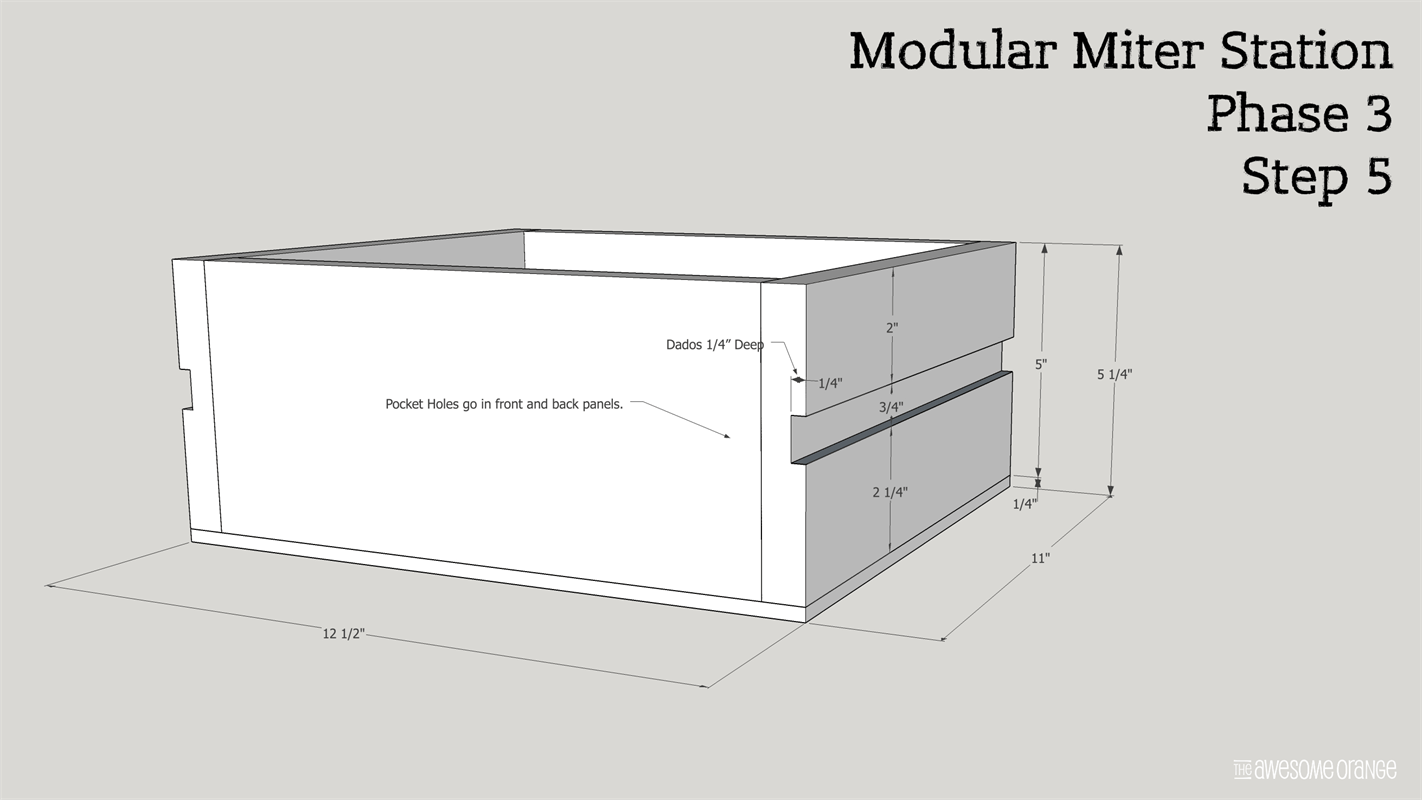
Assemble Drawer Boxes
Drill 3/4" pocket holes in the front and back panels of the drawer boxes, 10 of them. On the other 10 side panels rip a 3/4" dado 1/4" deep down 2" from the top. Assemble drawers sides using 1 1/4" coarse pocket holes screws and wood glue. Then attach bottom using wood glue and 1 1/4" 18 ga brad nails.
-
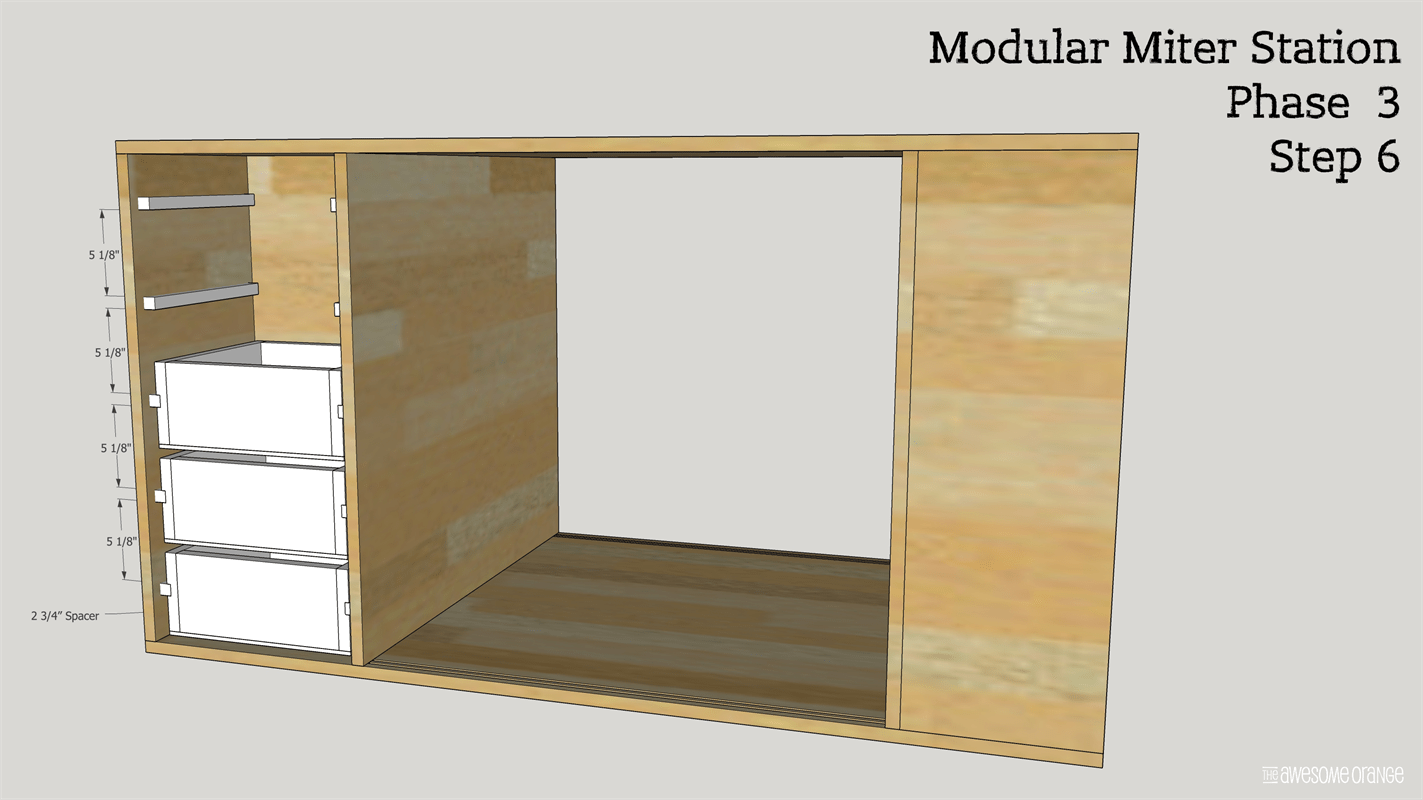
Install Drawers
Install wooden drawer slides starting from the bottom. Put 2 3/4" spacer blocks on the bottom and then install wooden drawer slide on top using wood glue and 1 1/4" 18 ga brad nails. Then after first drawer slides use 5 1/8" spacer blocks to install remaining drawers slides. Install drawers. NOTE: Slides should be slightly less than 3/4" so that drawer glide freely. Waxing slides will also help in drawers sliding freely.
-
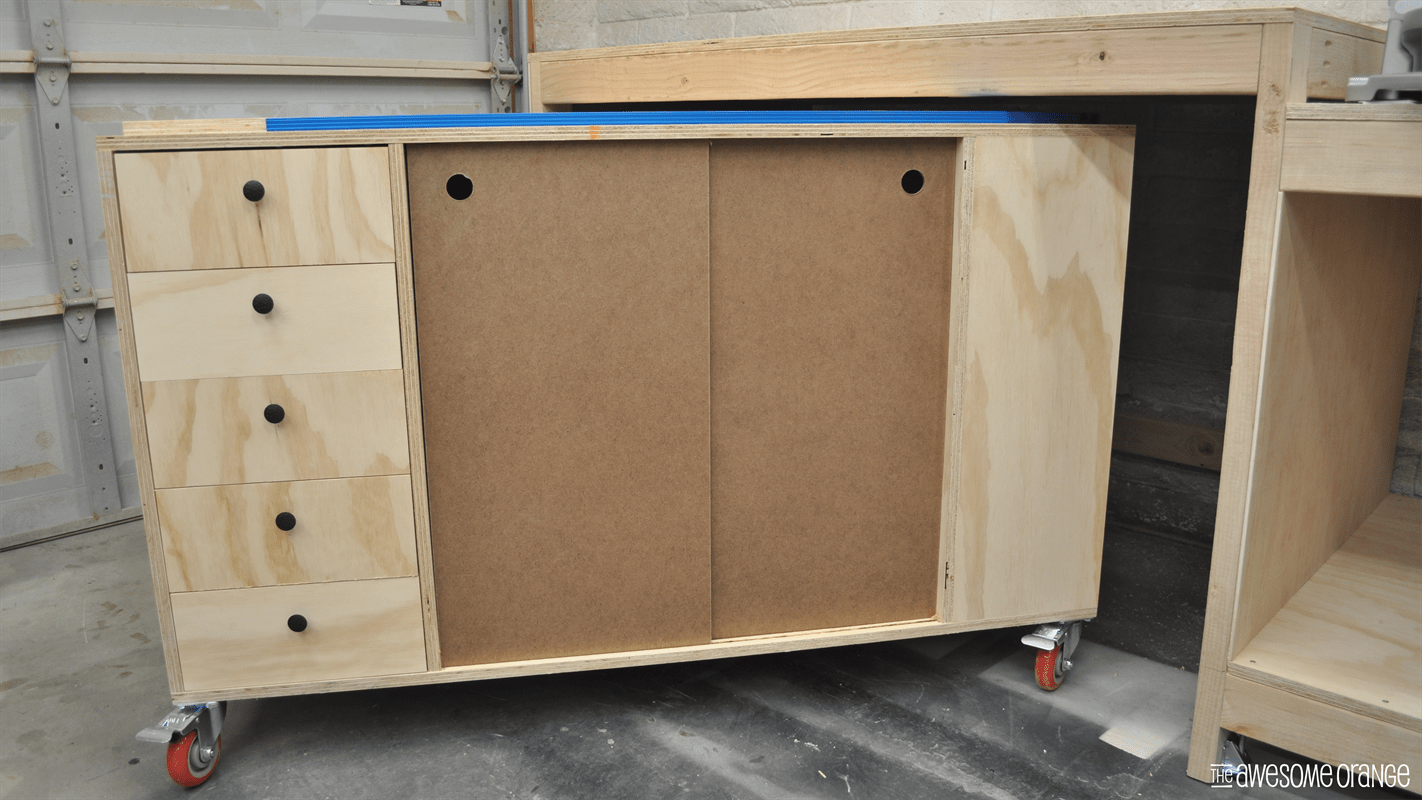
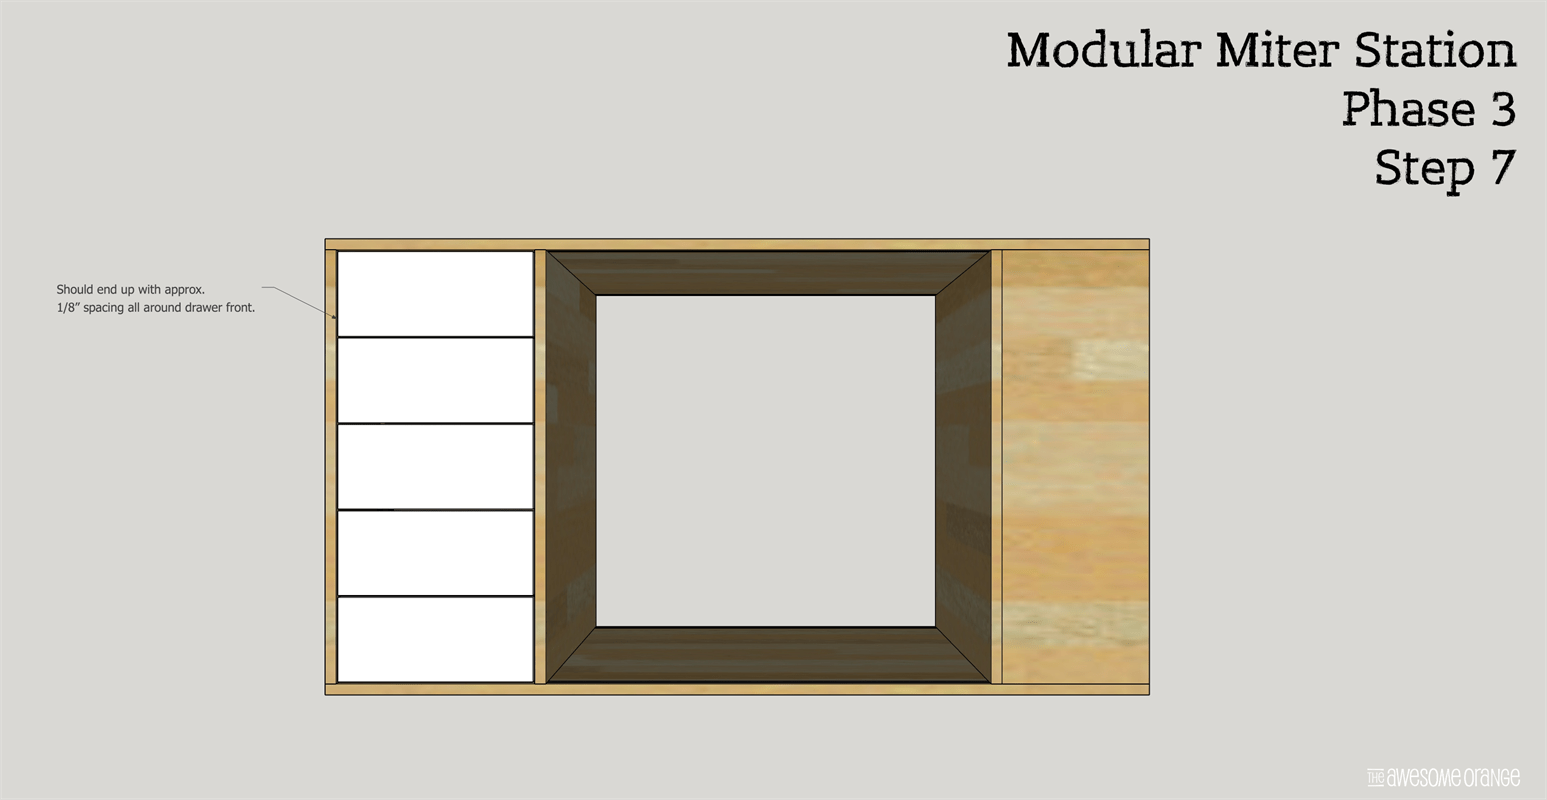
Install Drawer Fronts
Drill hole(s) for desired drawer hardware. Then line up bottom drawer front with drawer, using playing cards or business cards as spacers. Once at desired location, screw a screw thru hardware hole in drawer from into drawer box. Once that is secure pull out drawer and attached four screw from inside drawer into drawer front. Then remove screw from hardware hole and install hardware. If you need more detailed information on how to do this, I put a link in the Extras section to a detailed description.
-
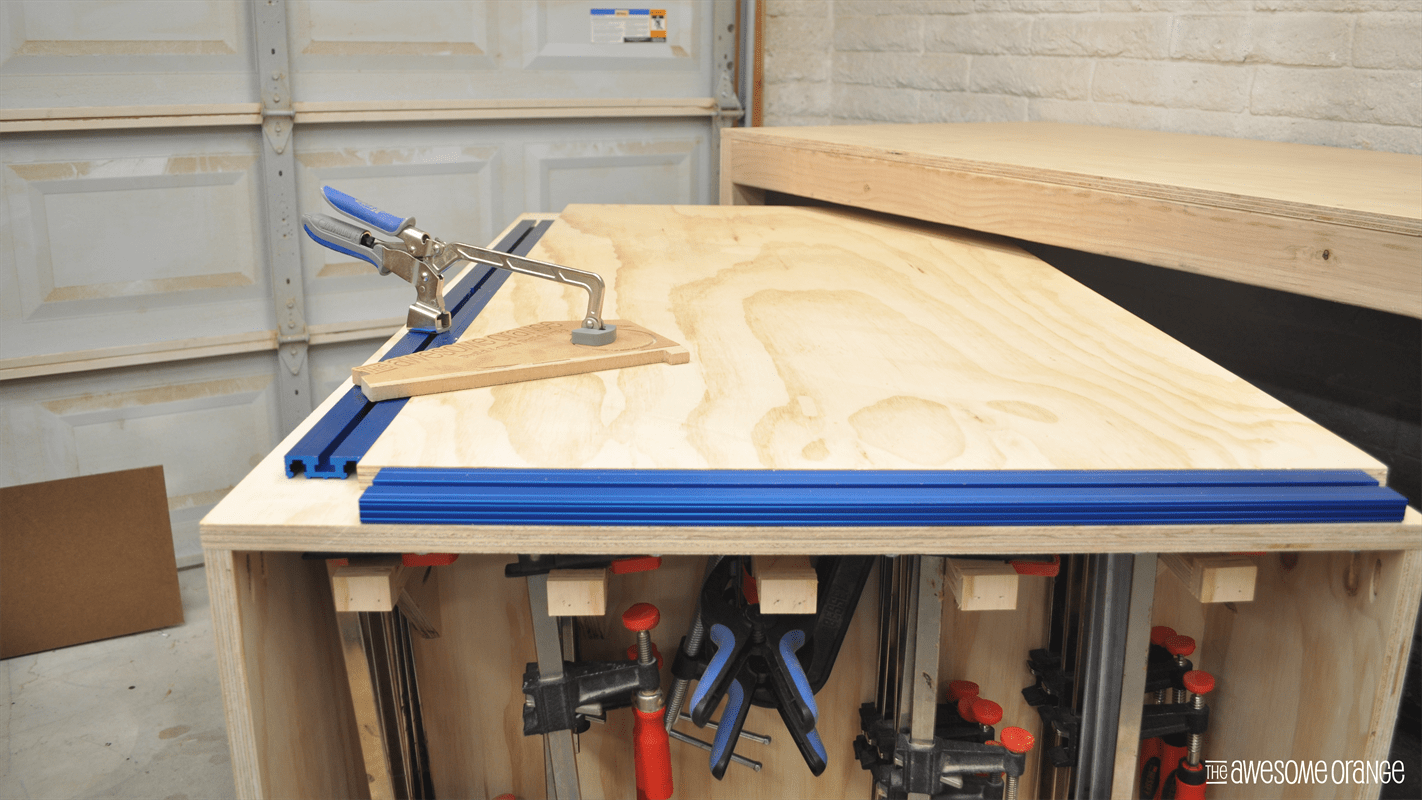
Install 2nd Top & Clamp Trak
Install Kreg Universal Clamp Trak per manufacture recommendation, except on the long side you will need to insight the track 1 1/2" farther than instructions so that installation bolts don't interfere with sliding doors. Then install second top using 1 1/4" wood screws from the underside of the top.
-
Install Middle Section Shelf
Install 1 1/2" cleat at desired height on both sides of middle section using wood screws. then install shelf on top. You can secure with wood screws if desired. I don't recommend using brad nails or glue on this step so that you can easily modify the shelving based on your needs.
-
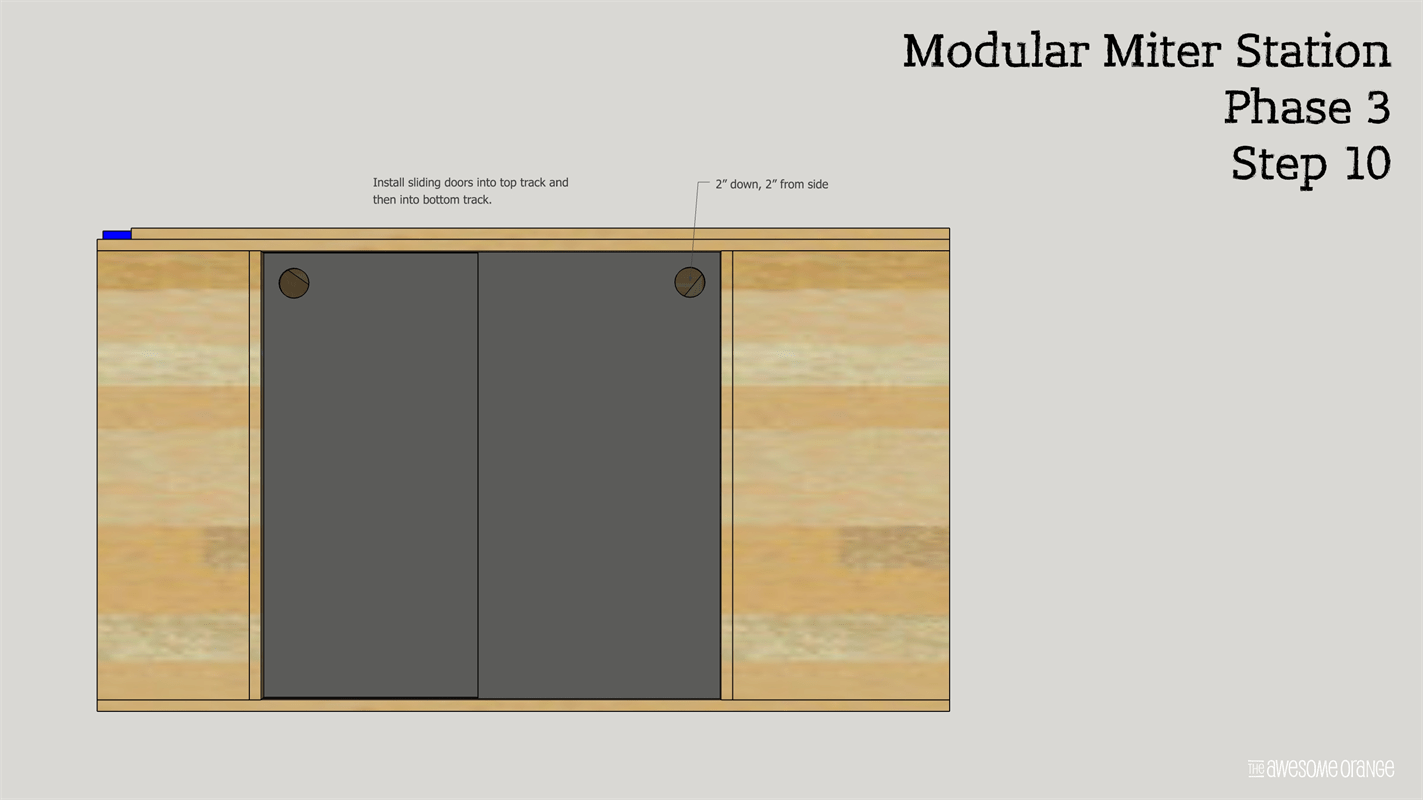
Install Sliding Doors
Drill a 1" finger full in each of the sliding doors at desired location. Then install by putting door in upper track and then bottom track. Wax tracks for a smooth travel.
-
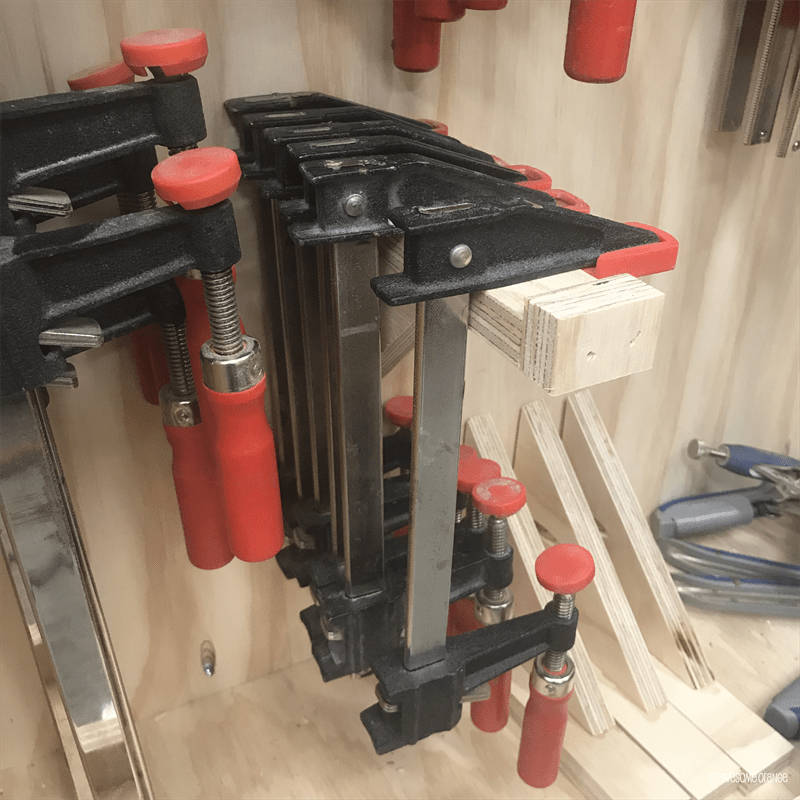
Attach Casters & Clamp Hooks
Attach casters using 1" wood lag screws and washers. Depending on your clamps, make wooden clamp hooks to add clamps. A triangle with with a flat top and pocket holes into the cart were plenty strong enough to hold all my clamps.
-
Visit theAwesomeOrange.com
Visit www.theAwesomeOrange.com to see more pics of this build and all four phases of the Modular Miter Station. Happy Building and have an AWESOME day!