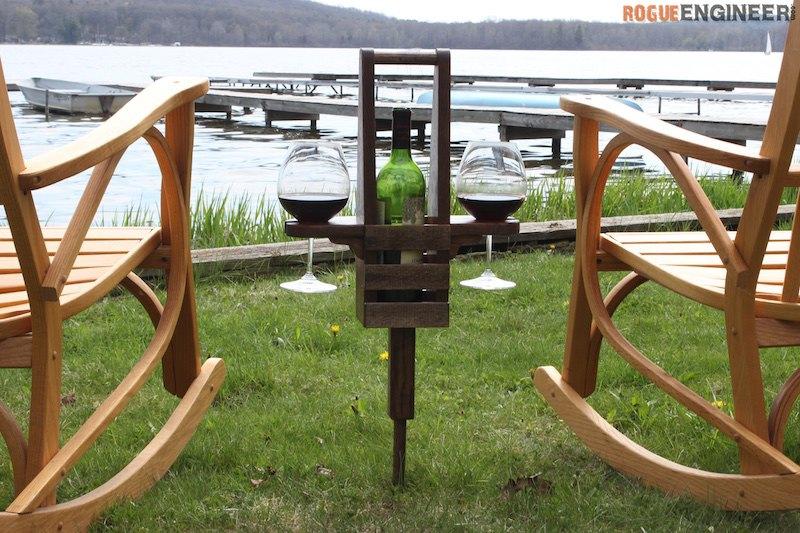

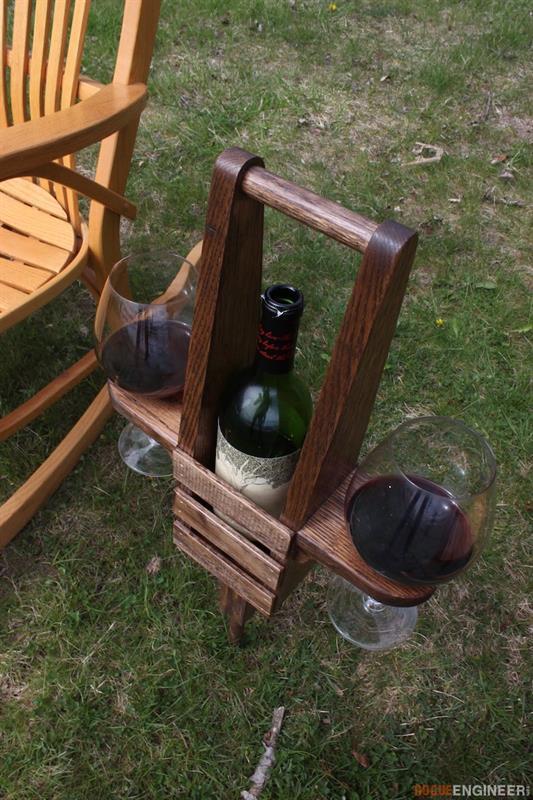


With Mother's Day coming up I wanted to build something nice for the mother of my children. Knowing how much of a sucker she can be for a view and a good glass of wine, I decided on this outdoor wine caddy. It not only looks great but it is very functional and will definitely keep your wine safe!
Tools
Kreg Tools

Other Tools
-
Band Saw

-
Drill (cordless)
-
Nail Gun
-
Sander
Materials
Wood Products
- 1 Board , 1x4 , 48"
- 1 Dowel , 3/4" Thick , 24"
- 1 Board , 1/4"x1-1/2" , 48"
- 1 Board , 2x2 , 12"
Hardware & Supplies
- 8 1-1/4" Kreg Screws (Fine)
- 50 1-1/4" Brad Nails
- 1 Wood Glue
Directions
-
Applying the Templates
The templates can be found under the "Extras" tab. Make sure to uncheck "fit to page" or "scale to fit" when printing as this could scale the templates making them incorrect.
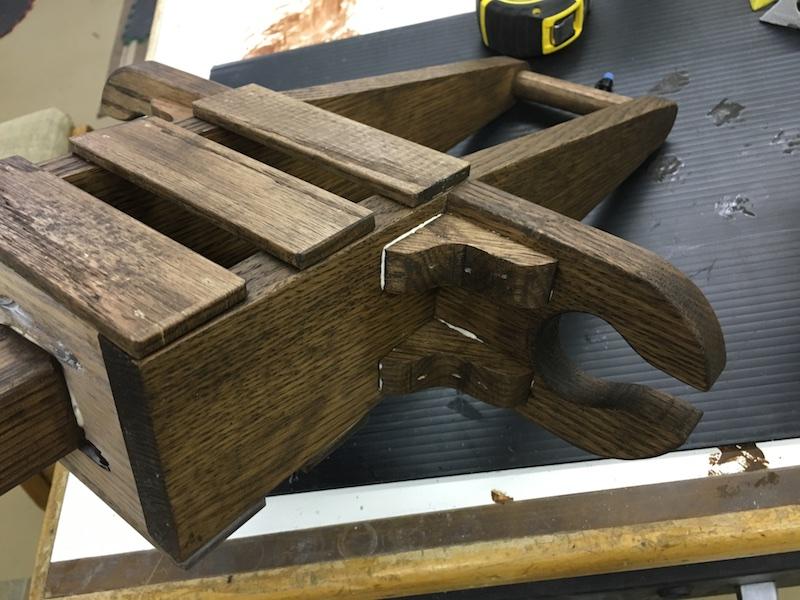
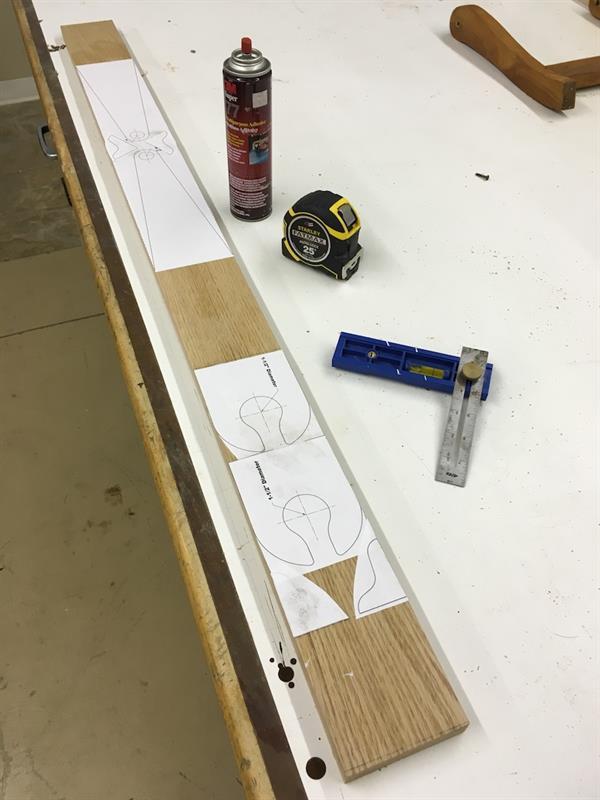
Cut out and attach the supplied templates to the 1x4 board using spray adhesive. Make sure that you make room for the entire 16-1/2" long sides (not all shown on the template) as well as the 3-1/2" bottom board.
Note: It is possible to get all of your cuts from a single 4' long board. Take a close look at this photo to see how I laid mine out.
-
Cutting the Pieces
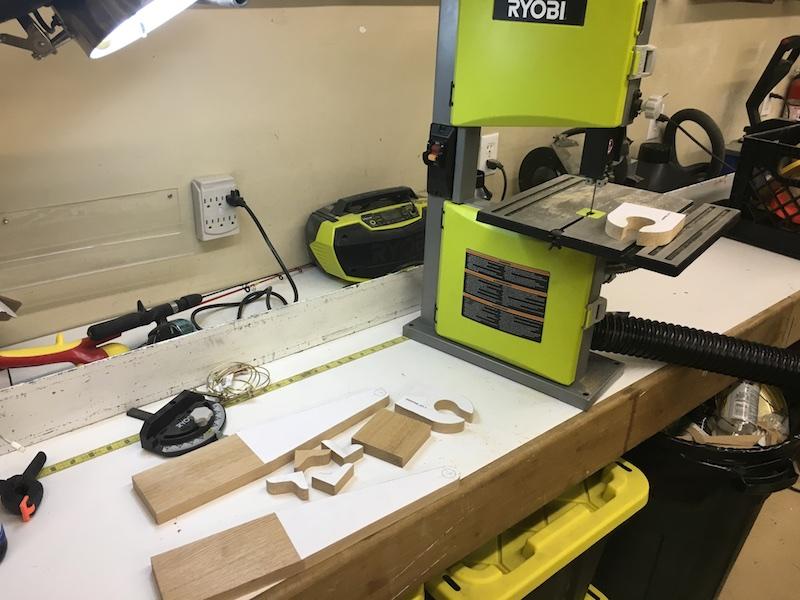
Use a bandsaw to cut all of the pieces for the wine caddy per the cut list and supplied templates.
-
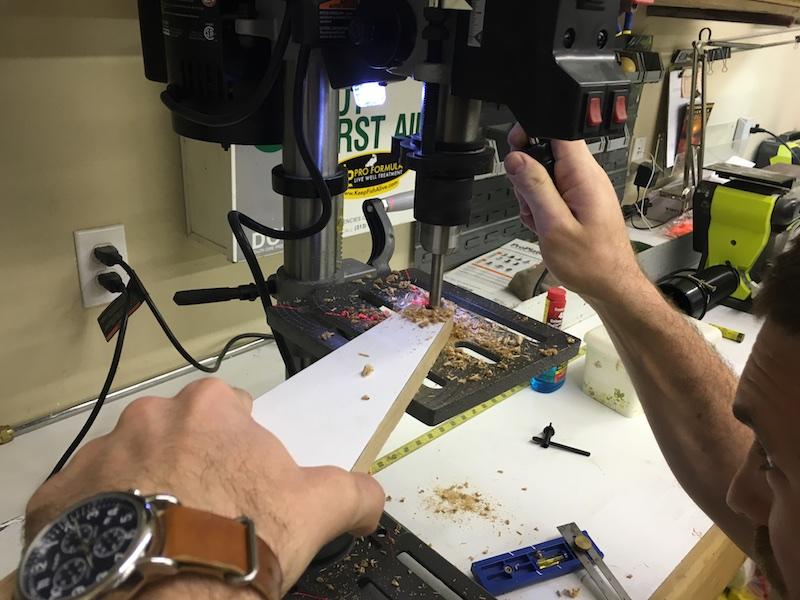
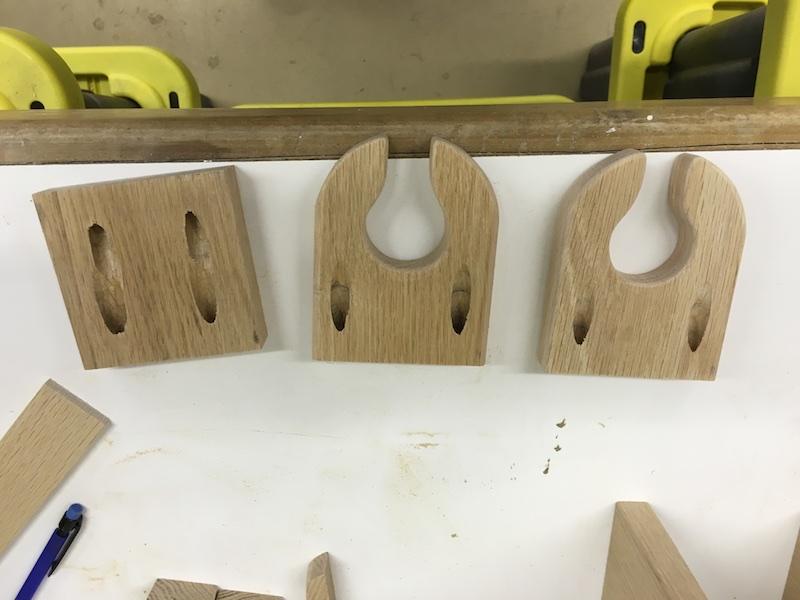
Counterbore Holes
Using a drill press and 3/4" forstner bit, counterbore a hole 1/2" deep on each side as denoted by the template. Also, counterbore a hole in the center of the 2x2 end that will receive the spike.
-
Sanding
Sand each piece down to 180 grit making sure to knock down all the non-mating edges for a softer edge.
-
Pocket Holes
Drill appropriate pocket holes in the bottom and wings as shown. Take note of the location of the pocket holes in the wings.
-
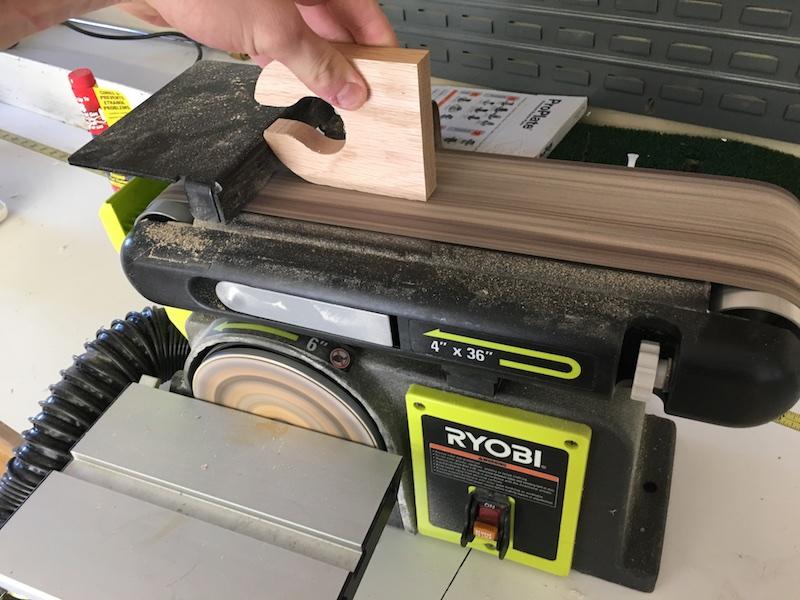
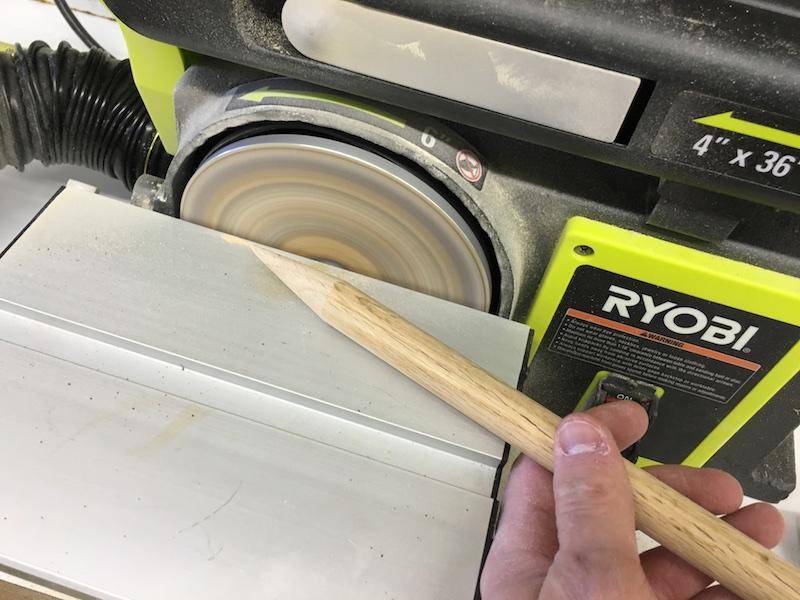
Sharpen the Spike
Start by cutting the 3/4" oak dowel into a point using a band saw. Then head to the sander and sharpen the point to a nice even spike
-
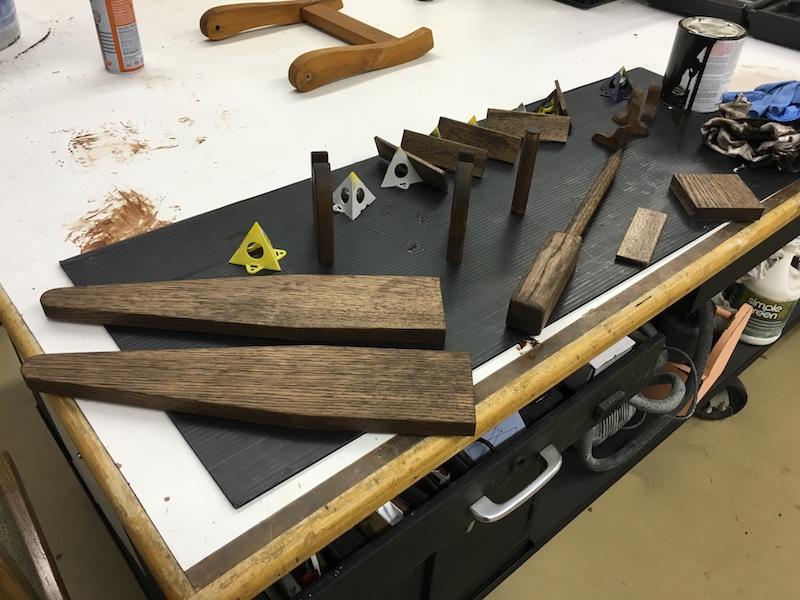
Finishing
Now is the best time to stain and seal our project. I used a Kona wood stain by Varathane and a gloss lacquer.
-
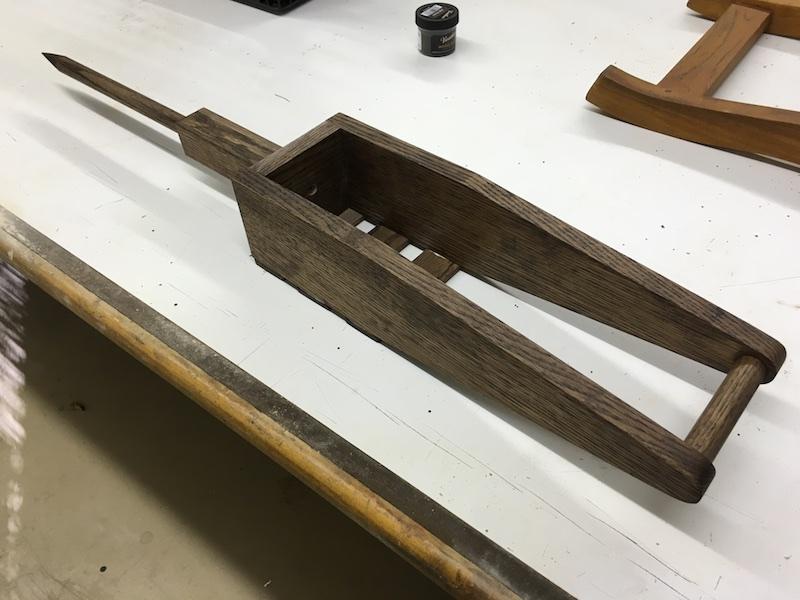
Assemble the Caddy
Now would be the best time to pre-drill a hole in the center of the bottom board. Then attach the sides to the bottom with wood glue and 1-1/4" pocket screws. Also attach the 3/4" x 4-1/4" long dowel handle using wood glue and a firm tap into the counterbored holes.

-
Attach the Spike
Assemble the spike and counterbored 2x2 using wood glue. Then attach the 2x2 to the caddy using wood glue and a 1-1/4" wood screw through the pre-drilled hole.
-
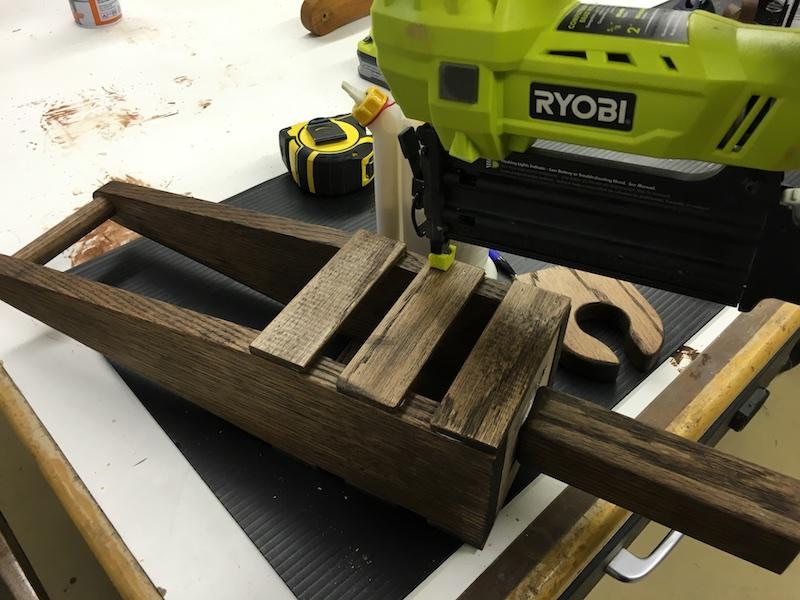
Attach the Slats
Attach the 1/4" x 5" slats using wood glue and brad nails. Do so such that the bottom slat is flush with the bottom of the caddy and the top of the upper slat is 6" from the bottom. This should leave 3/4" spacing between each slat.
-
Attach the Wings
Attach the wings using wood glue and 1-1/4" pocket screws such that the top of the wing is flush with the top of the upper slat.
-
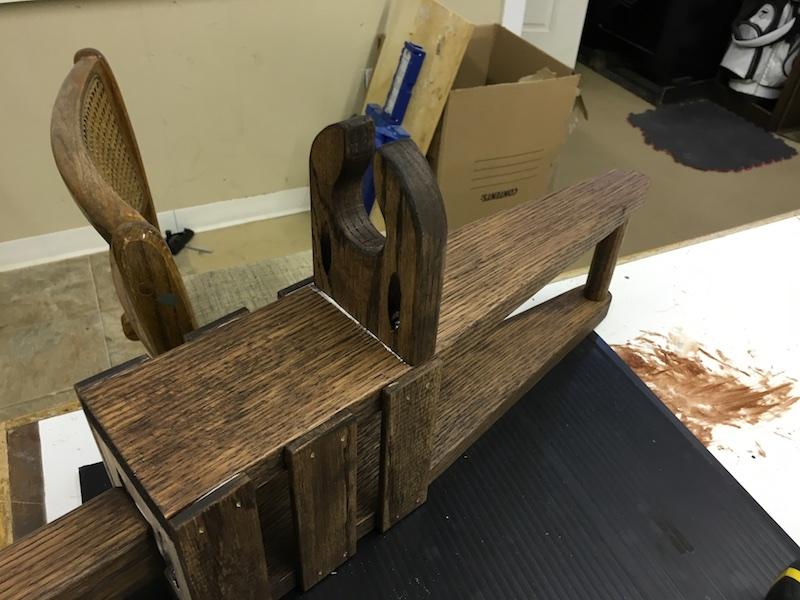
Attach the Corbels
Using wood glue and 1-1/4" brad nail, attach the corbels inset approximately 1/2" from the sides as to hide the pocket holes on the bottom of the wings.