


Build the ultimate lumber storage cart for your shop!
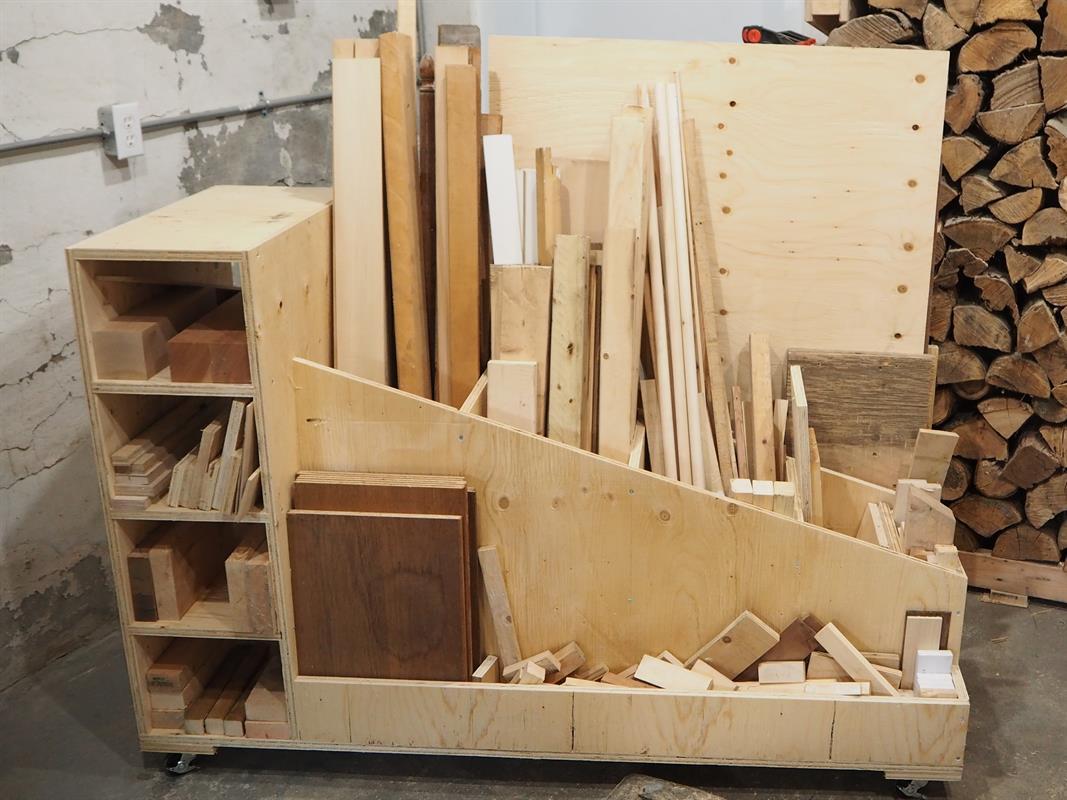
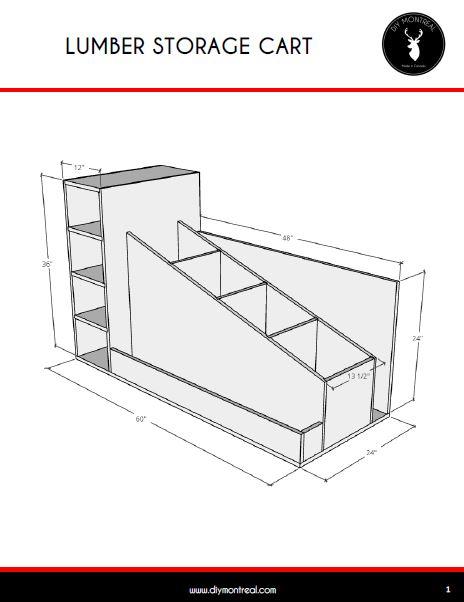
This mobile storage cart is so versatile. It has both vertical and horizontal storage for wood boards, a slot in the back for plywood and sheet goods, and my favorite part, a nook in the front that can be used for small off-cuts.
Tools
Kreg Tools

Other Tools
-
Circular Saw (corded)

-
Circular Saw Edge Guide
-
Miter Saw
-
Square
-
Table Saw
-
Tape Measure
-
Drill (cordless)
-
Impact Driver
-
Router
Materials
Wood Products
- 2 Plywood , 3/4" Thick , Full Sheet
Hardware & Supplies
- 50 1-1/4 inch pocket hole screws
- 40 1-1/4 inch wood screws
- 16 #12 1-inch pan head screws
- 4 2-inch caster wheels (2 with brakes)
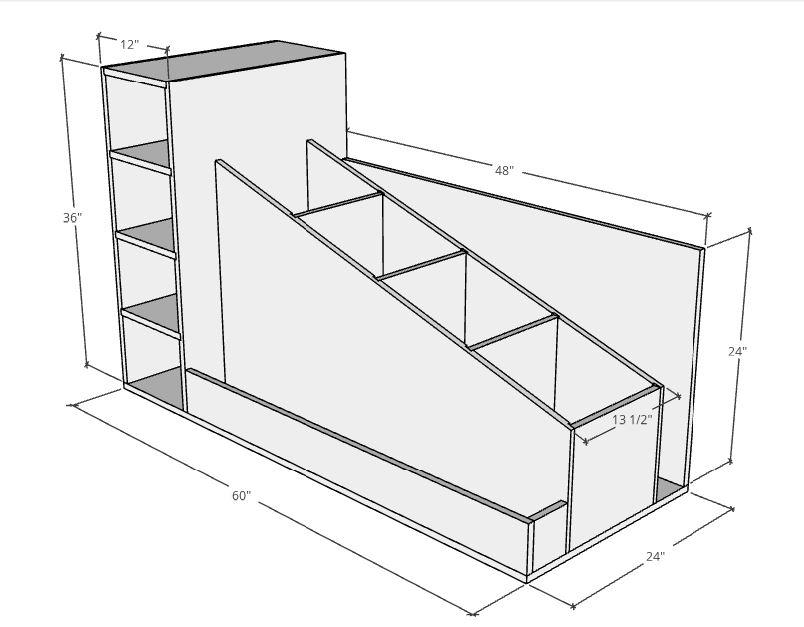
Cut List & Parts
- 2 Side panels , 24" x 36"
- 4 Shelves , 11" x 24"
- 1 Center compartment panel , 39" x 48"
- 1 Divider 1 , 12" x 12-1/2"
- 1 Divider 2 , 15-3/4" x 12-1/2"
- 1 Divider 3 , 19-1/2" x 12-1/2"
- 1 Divider 4 , 23-1/4" x 12-1/2"
- 1 Back panel , 48" x 24"
- 1 Base , 60" x 24"
- 1 Front slot A , 48" x 5"
- 1 Front slot B , 4-1/2" x 5"
Directions
-
Cut the plywood
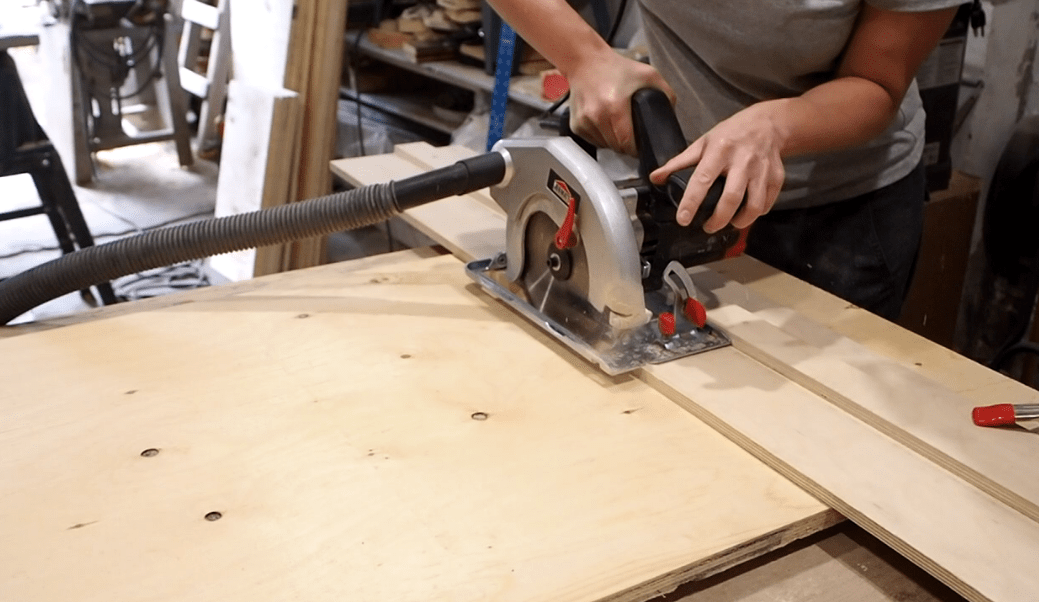
The first step is to cut down your plywood sheet into the 16 pieces you’ll need for this mobile lumber storage cart. I don’t know about you, but my SUV won’t fit a full 4x8 sheet of plywood, so I had them cut into more manageable pieces at the hardware store.
Once home, I used various cutting methods to get the pieces down to size. I followed my cutting diagram, starting with my circular saw and homemade track saw guide for the larger pieces, and eventually moved over to my table saw and miter saw for the smaller cuts.
-
Build the Side Shelves
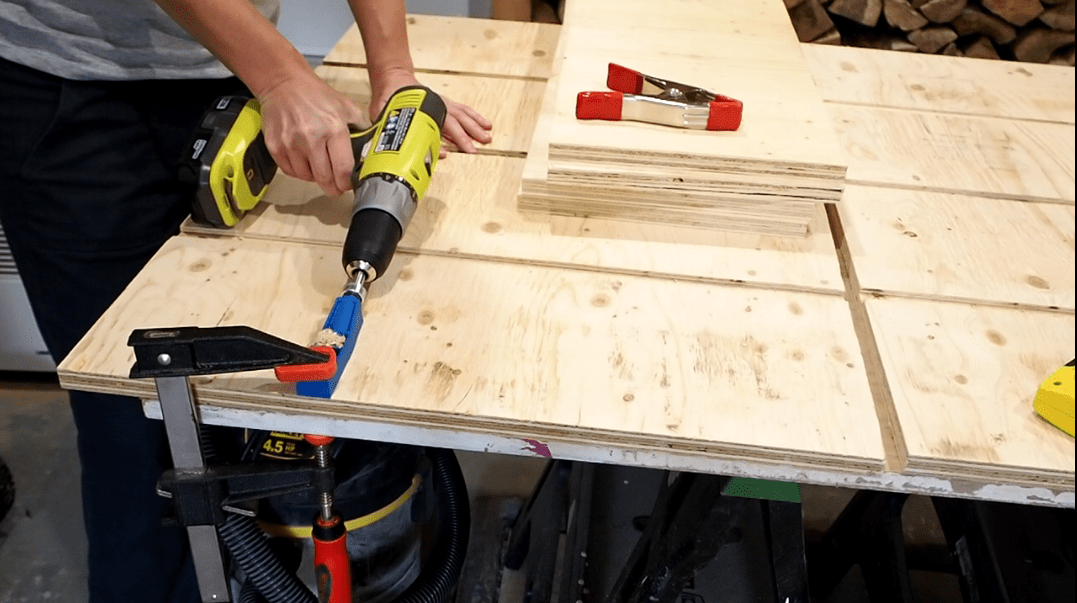
I used dadoes to attach the side shelves to make things easier. This allowed me to easily line up the pieces when assembling. I marked evenly spaced lines with the help of a T-square, then cut 1/4 inch deep dadoes with multiple passes using my palm router and a 3/4 inch straight bit.
Before assembling the shelves, I used my mini Kreg Jig to make some pocket holes along the bottom of both side panels. This will allow me to later attach the shelves to the base.
I then applied some glue and attached the shelves with some 1-1/4 inch screws. I started by attaching all the shelves to the left side first, then did the right.
Tip: trace a line along the backside of the dado grooves so you can easily see where to put in the screws.
-
Assemble the base
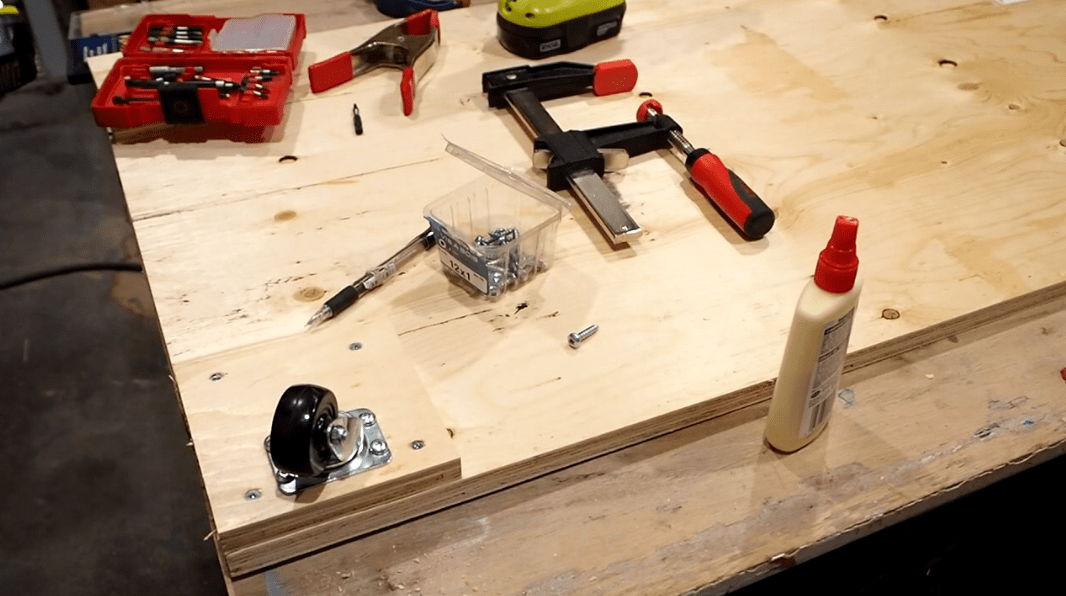
While I wasn’t certain it was necessary, I felt the urge to use some plywood cut-offs to strengthen the corners of the plywood base before attaching the casters.
I decided to attach the caster wheels at this time rather than at the end, after the cart was fully assembled. I knew it would be a challenge if I waited until the end to flip it over and attach the casters. I drilled some pilot holes, then used 1-inch #12 pan head screws.
Note: I used 2-inch casters rated at 90 lbs a piece. I considered going bigger given the load, but I really don’t plan on wheeling this thing around. I just want to be able to pull it out slightly if I need to get out a sheet of plywood from the back side.
-
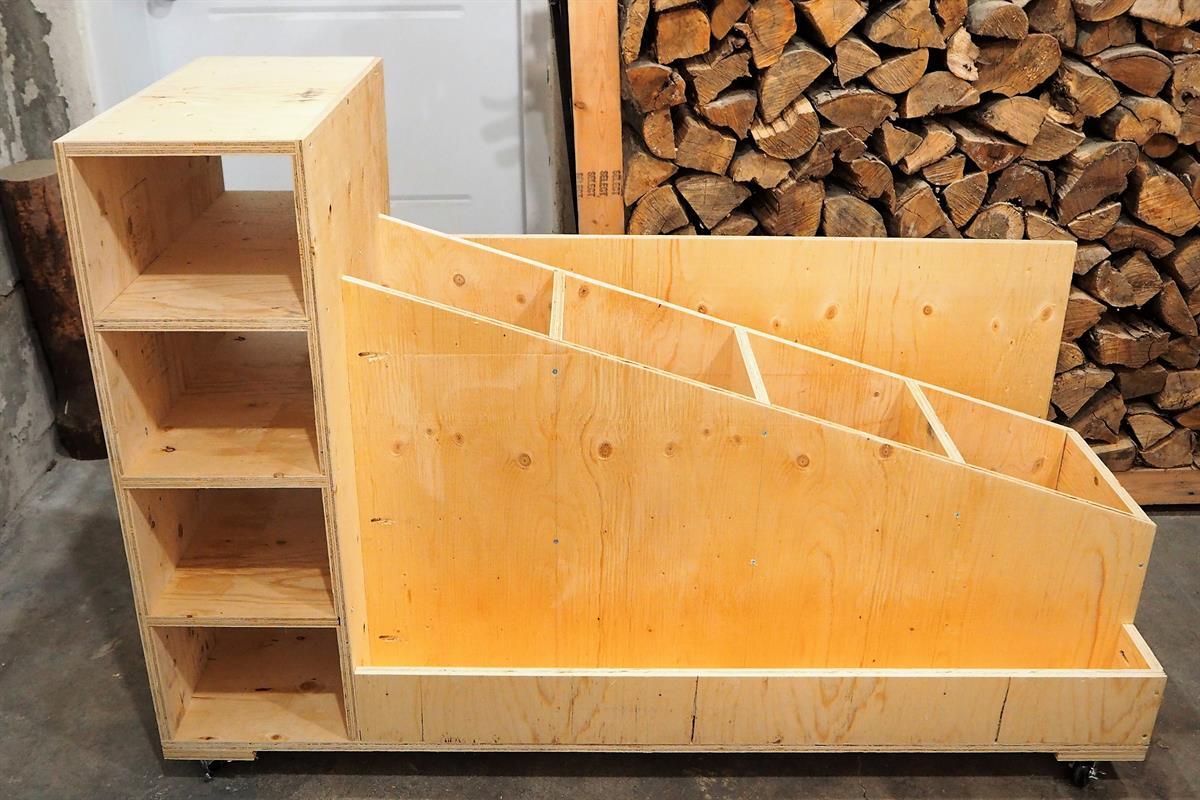
Putting It All Together
I prepped the back and front panels by making pocket holes along the sides and bottom so I could easily attach them to the base.
I laid my base wheels-down on the floor and started started by attaching the side shelving by applying some glue and screwing it to the base with pocket screws.The space was a bit tight but the pocket screws were a cinch with my new Ridgid palm impact driver.
Next I did the same for the center compartment, attaching it to both the base and the shelving on the left side. I lastly finished off with the front and back panels.
****Don't forget to check the Extras section for FREE PLANS and the YouTube video!****
-
Get the plans
Before strating this project, I highly recommend dowloading the FREE PLANS and watching the build VIDEO. Both are available in the Extras section, or through the links below. || FREE PLANS including CUT LIST and PLYWOOD CUTTING DIAGRAM --> http://www.diymontreal.com/ultimate-lumber-storage-cart/ || Build video --> https://youtu.be/rRL5KEqTteE
-
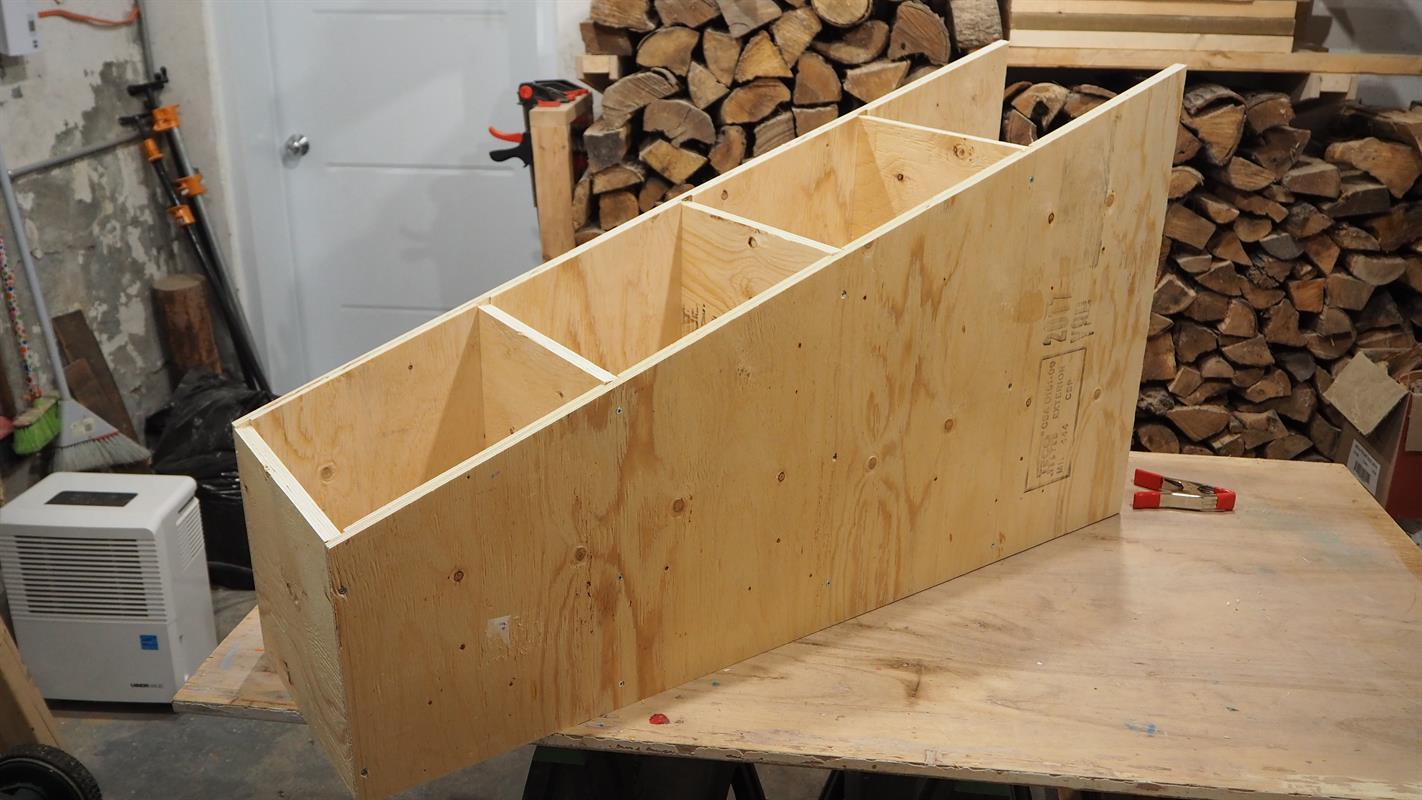
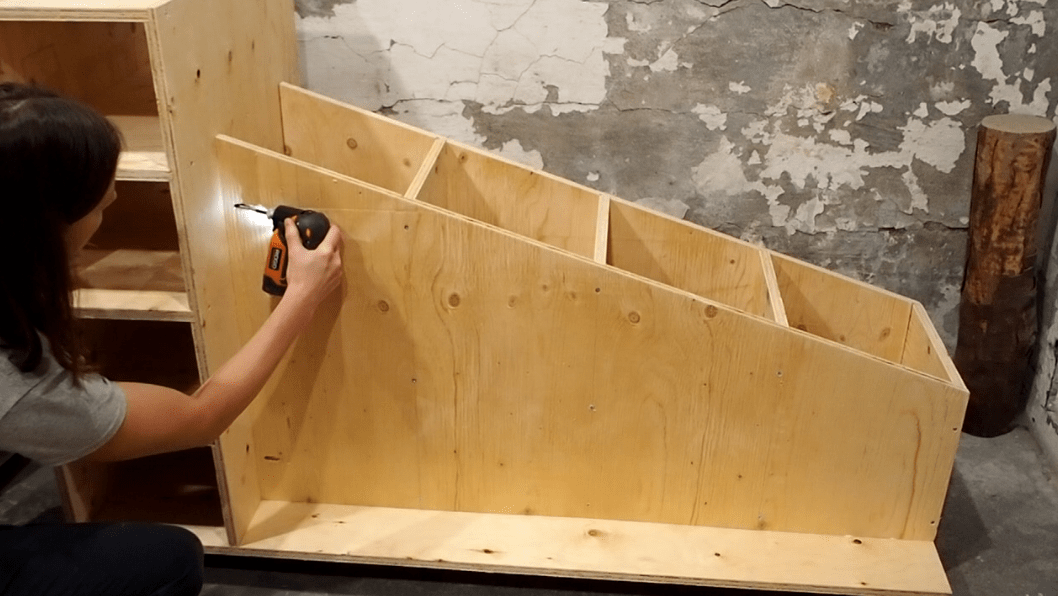
Build the Center Compartment
I repeated the same process to assemble the center compartment and dividers, starting with dadoes, then assembling with glue and screws. Don’t forget to pre-drill the pocket holes along the bottom and the open side so you’ll be able to attach the compartment to the base and side shelves later.