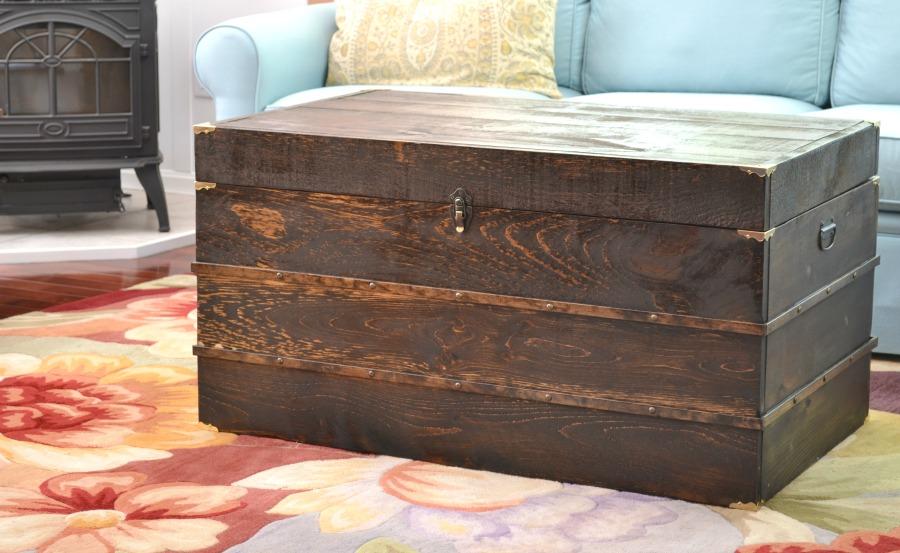
Finding a spot for all the extra blankets and board games that can clutter a living room, can be challenging. This 40 1/2 x 24 x 20 1/4 trunk coffee table gives you form and function, providing something lovely to look at while adding some much needed storage space.
Tools
Kreg Tools

Other Tools
-
Miter Saw

-
Square
-
Tape Measure
-
Drill (cordless)
-
Sander
-
Air Compressor
Materials
Wood Products
- 9 Board , 1x6 , 96"
- 2 Board , 1x4 , 96"
- 1 Trim , 1/4" x 3/4" , 22 feet
Hardware & Supplies
- 100 Kreg 1 1/4" Pocket Hole Screws
- 1 Chest Latch 2 3/4"x 1 1/2"
- 2 Chest Handles 2"x3 1/4"
- 3 Universal Lid Supports
- 12 Decorative Corners
- 2 Hinges
- 32 Decorative Nail Heads
- 1 Quart Wood Stain or Paint
- 1 Quart Polyurethane if using stain
- 28 3/4" Brad Nails for nail compressor
Directions
-
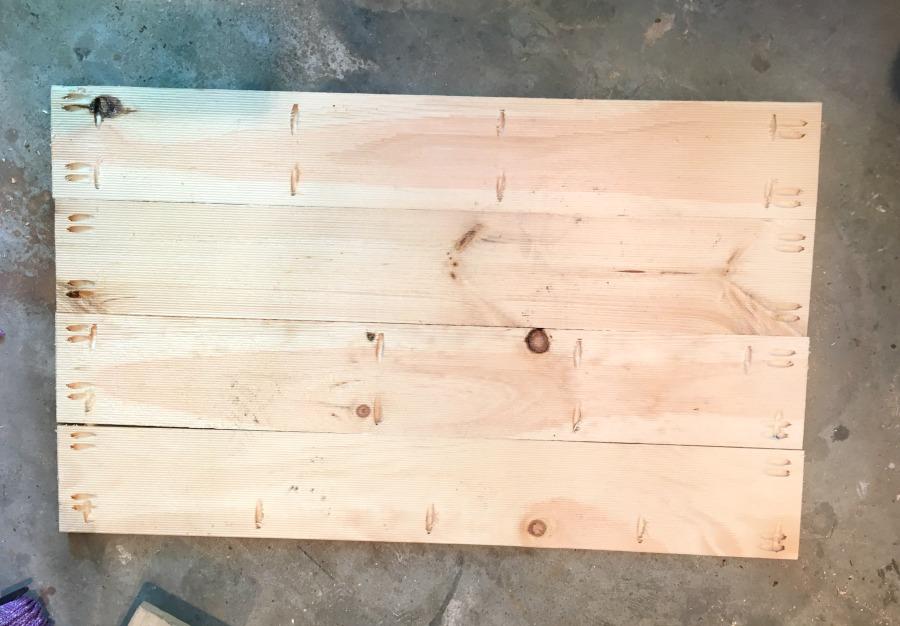
Step 1
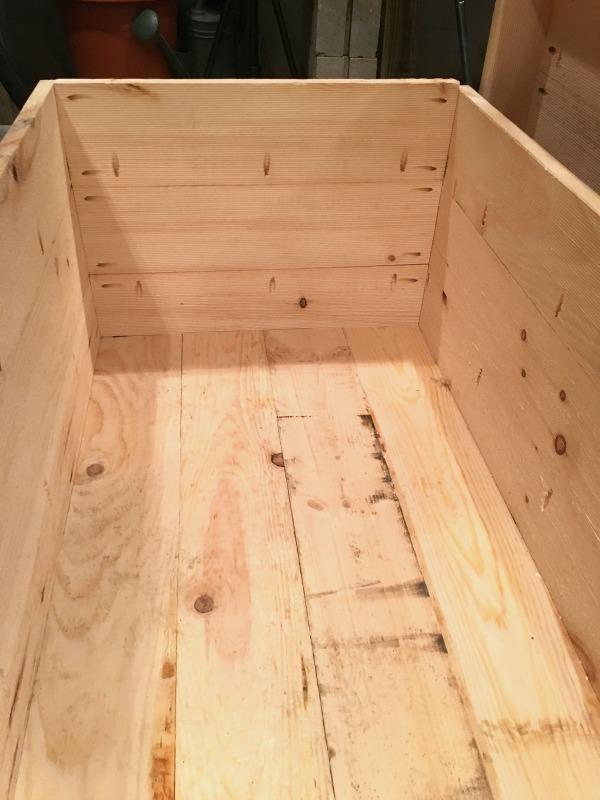
Build the front and back of the trunk by attaching 3- 40" pieces per side with glue and pocket holes.
-
Step 2:
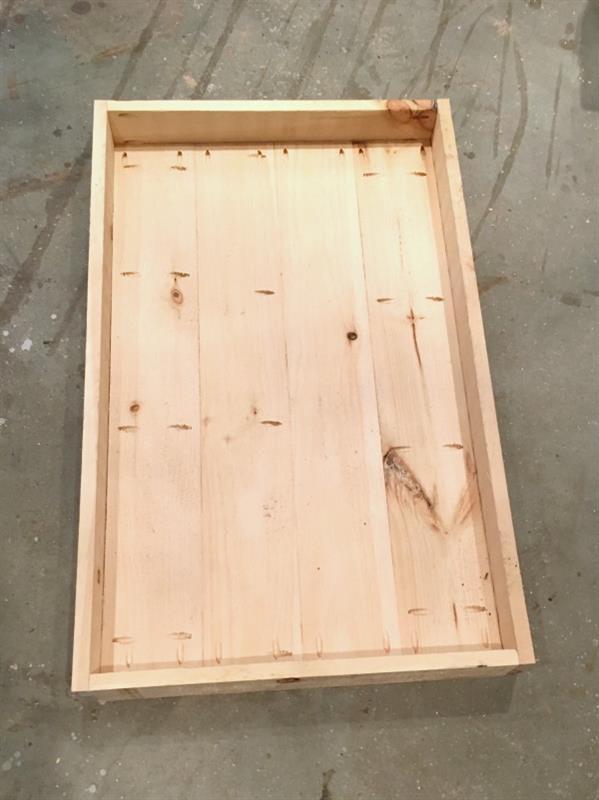
Build the bottom by attaching 4- 38 1/2" pieces to each other using glue and pocket holes. Be sure to drill pocket holes on the ends to attach the bottom to the sides.
-
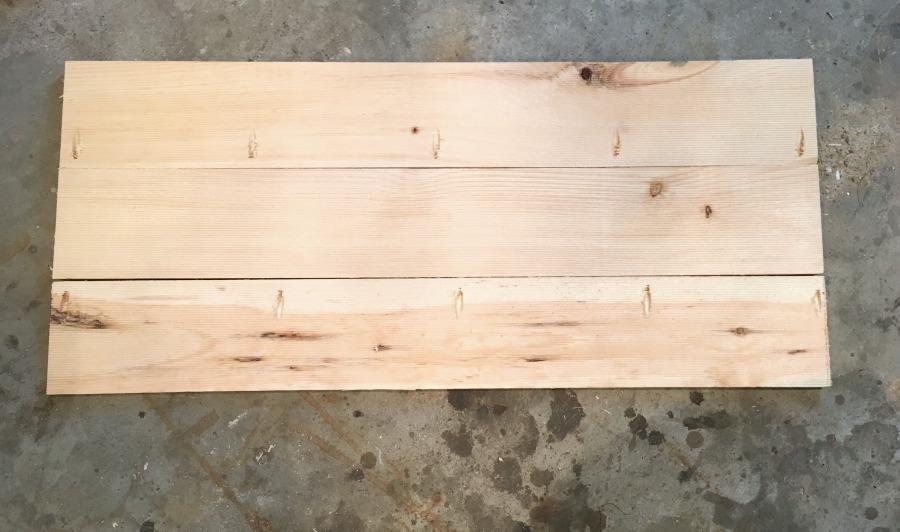
Step 3
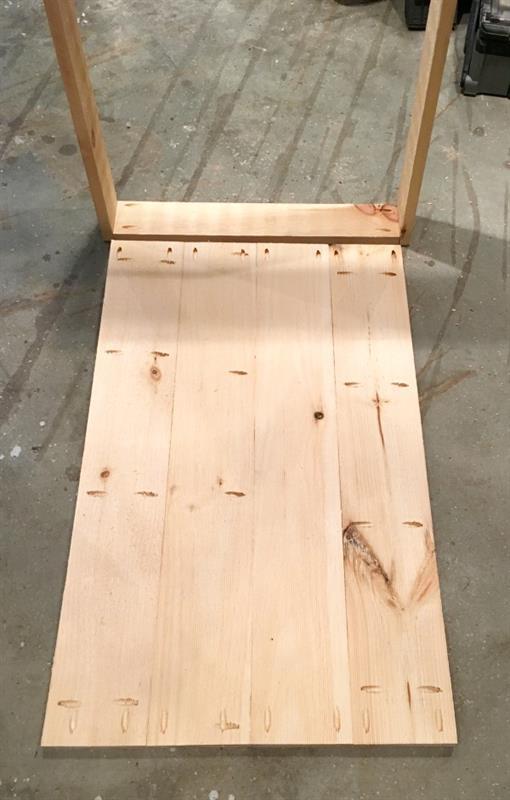
Build the short sides using 3- 1x6x22 per side. Attach the boards using pocket holes and glue. You will want 3 pocket holes to join them to the next board and 2 on each side to join the finished piece to the front and back.
-
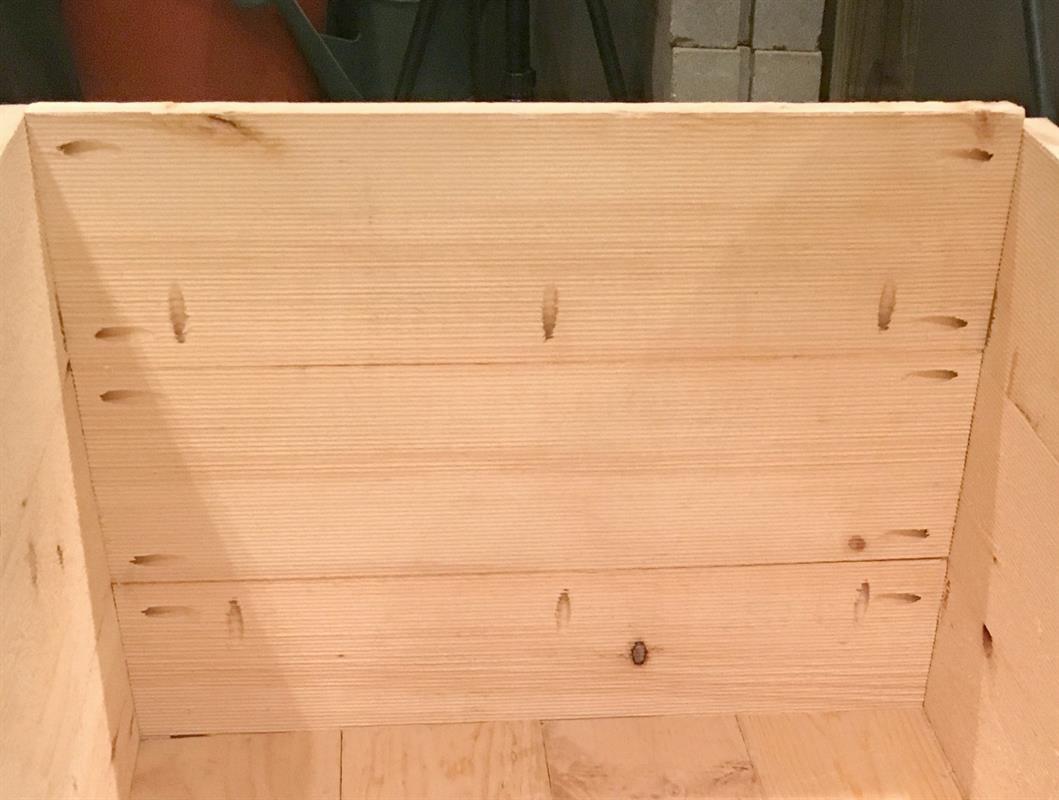
Step 4
Create the main body of the trunk by gluing and screwing the sides to the front and back utilizing your pocket holes.
-
Step 5
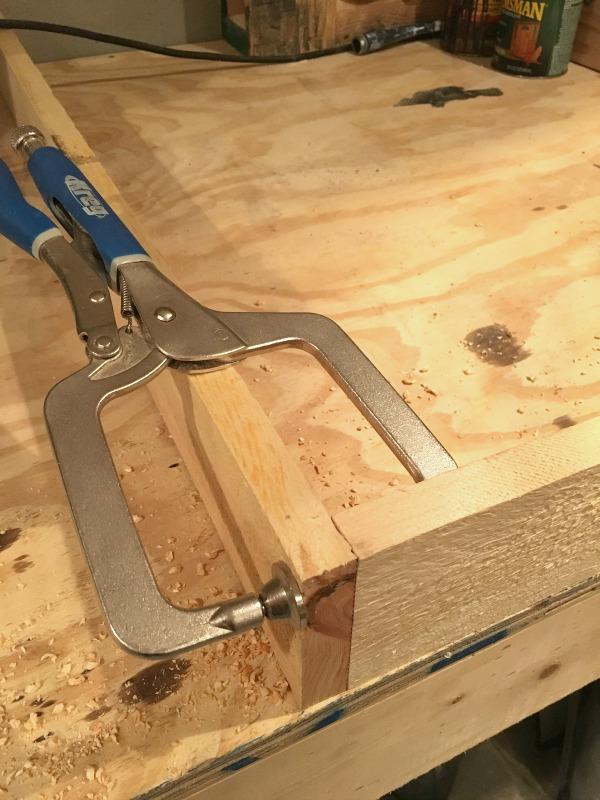
Attach the bottom to the body of the trunk. Using a 90 degree clamp is very helpful with this step. It will keep the bottom in place while you screw it to the sides.
I doubled the pocket holes on the ends to make sure it is super secure. This trunk will endure years of being slid across the rug and moved around the room, not to mention the weight of whatever it ends up storing.
-
Step 6
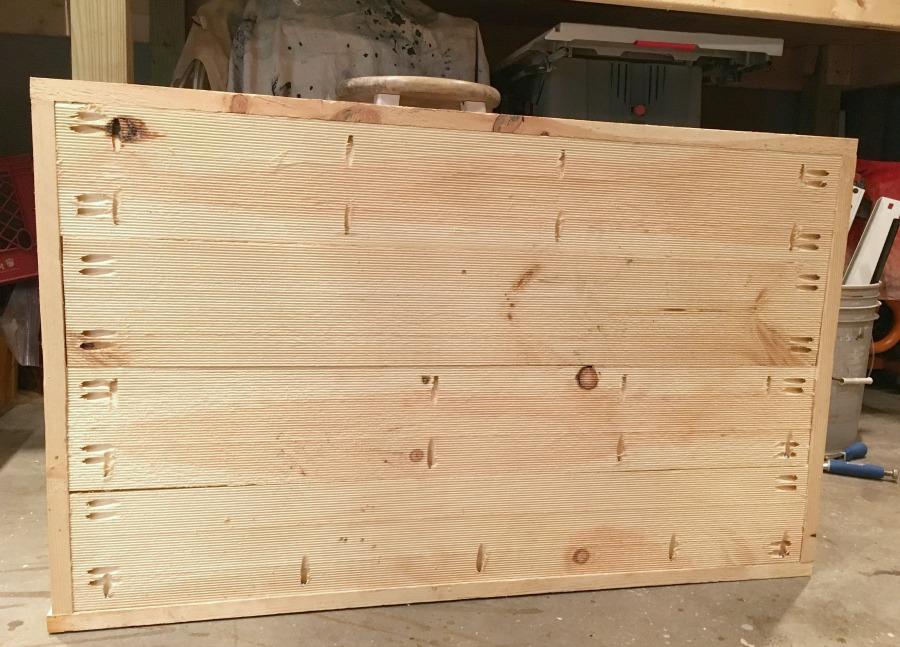
Now that the main portion of the trunk is built, it is time for the top. Using the 1x4 cuts, attach the 22" boards to the 40" boards using pocket holes. Again, use your 90 degree clamp to keep your joints even while attaching.
-
Step 7
Join remaining (4) 1x6x38 1/2" boards to create the top of the trunk.
-
Step 8
Attach the top to the 1x4 box, flush with the top edge of the 1x4s to create the lid of the box.
-
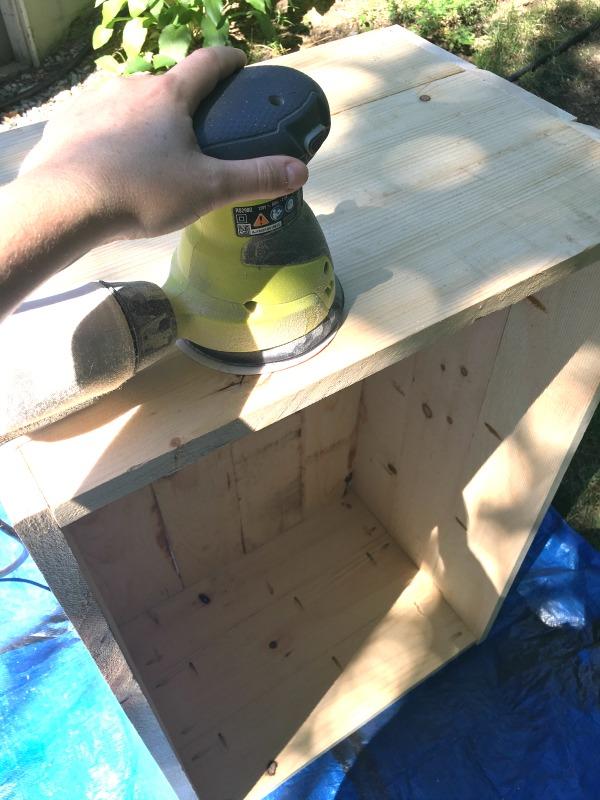
Step 9
Sand all surfaces to your desired texture. I chose rough cut pine for this project so that it would emulate reclaimed wood, so a ton of sanding isn't necessary.
-
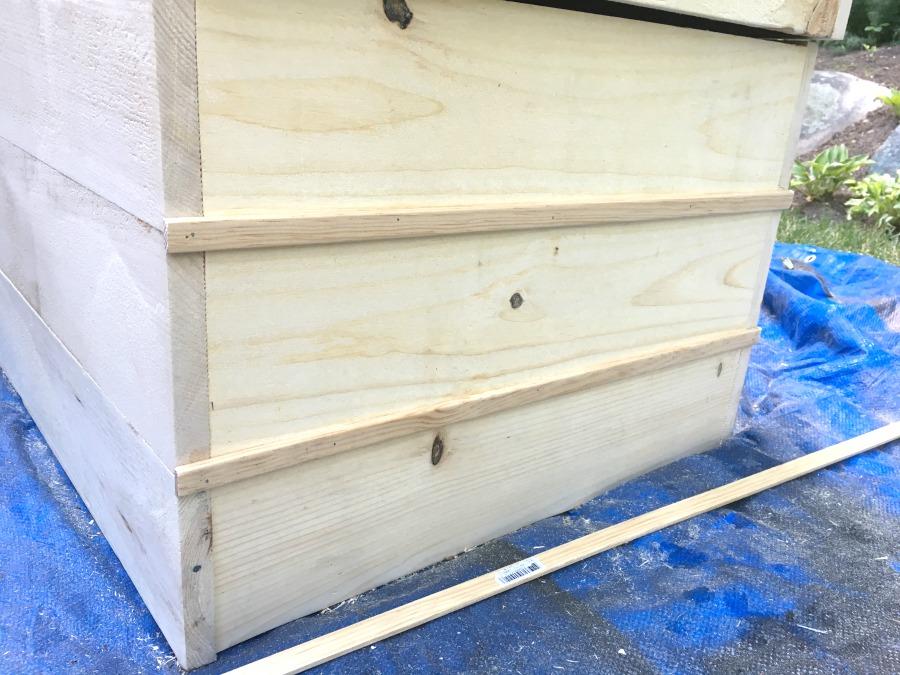
Step 10
Attach the 1/4 x 3/4" trim at the joints of each side with 3/4" brad nails and a compressor. Use a level to keep them straight.
-
Step 11
Stain and polyurethane your piece. Once it is dry, attach the lid with the hinges.

-
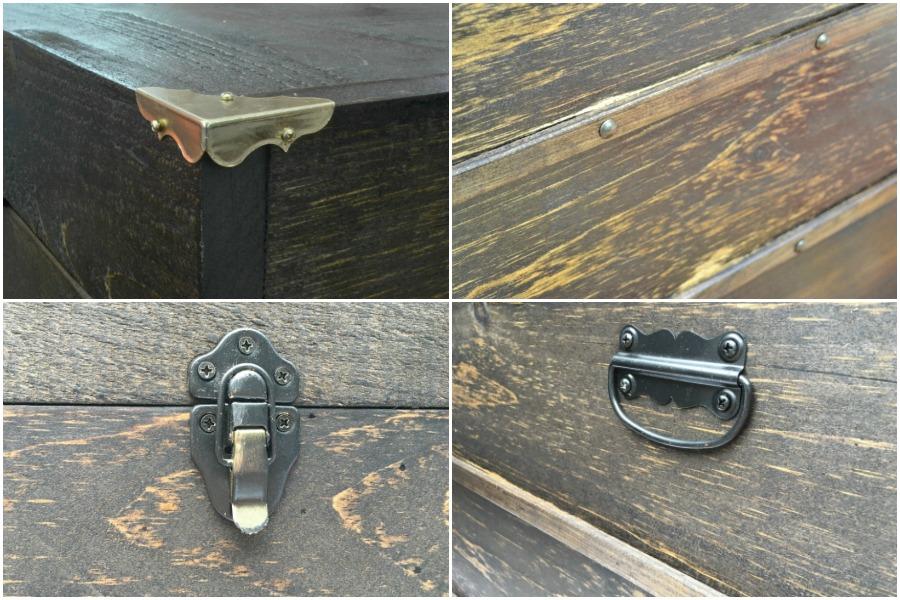
Step 12
Attach the latch, handles, decorative corners and decorative nail heads. I chose to spray paint my latch and handles to match the nail heads, but I left the corner brackets their original brass color. Play around with your hardware and see which way you like it.
-
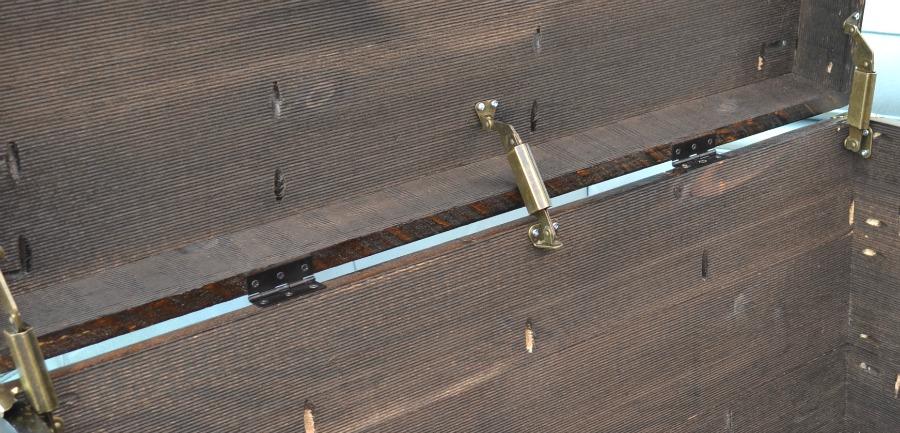
Step 13
Finally, you will want to add 3 lid supports. These will not only keep your lid from opening too far, but certain types may prevent the lid from slamming closed and injuring your fingers.
-
Finally
Store some of your favorite items and sit back to enjoy your new coffee table.