

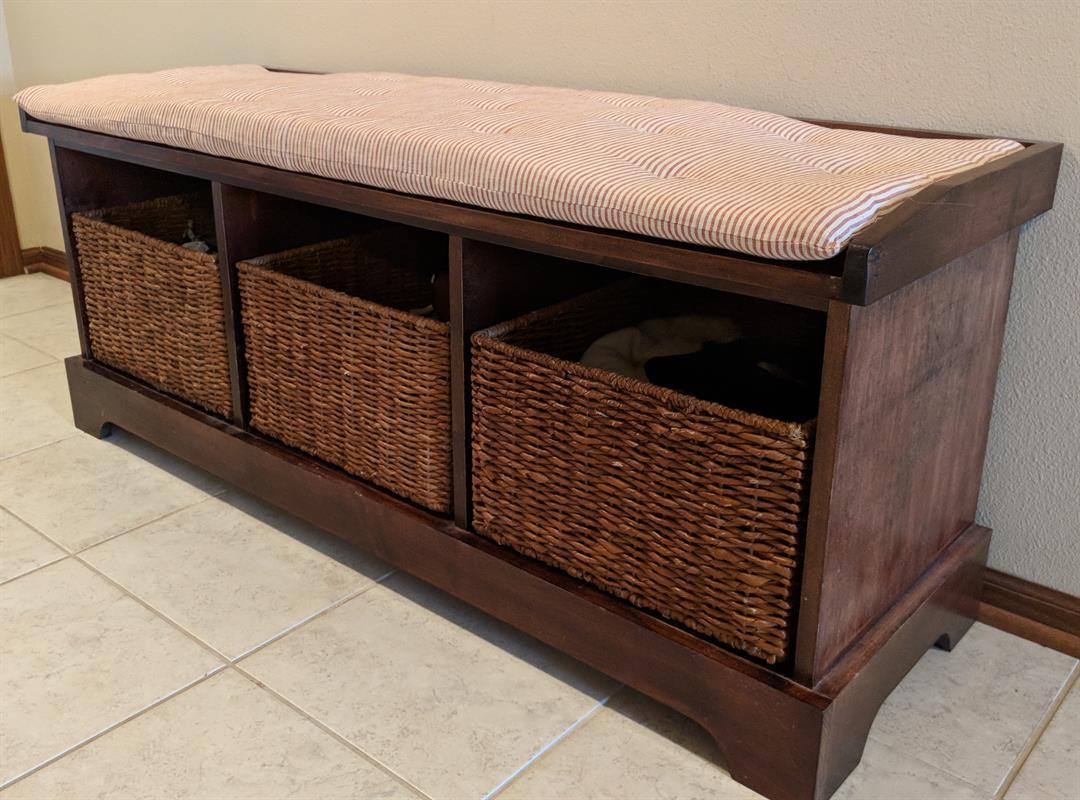

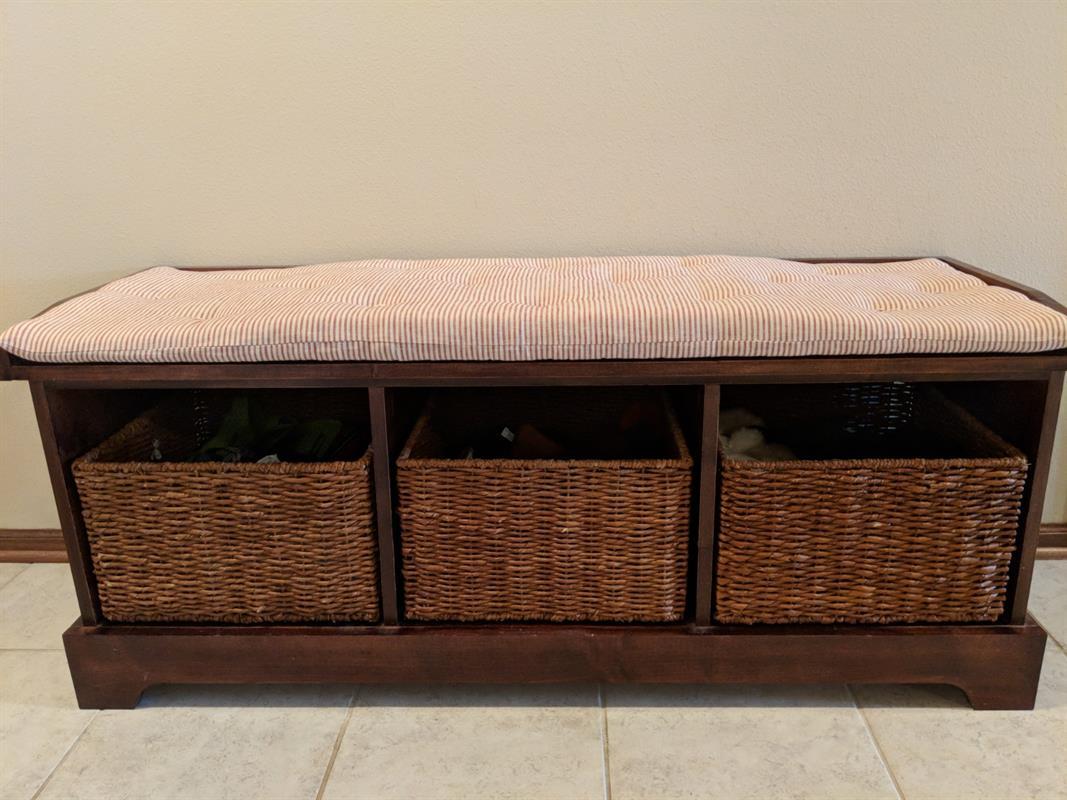


This entryway bench provides a stylish and functional place to sit and put on your shoes with storage underneath. Seat pad and baskets enhance the experience and use of this bench.
Tools
Kreg Tools

Other Tools
-
Circular Saw (corded)

-
Jigsaw
-
Square
-
Table Saw
-
Tape Measure
-
Clamps
-
Drill (cordless)
-
Iron
-
Router
-
Sander
-
Double Sided Edge Trimmer
Materials
Wood Products
- 1 Board , 1x6 , 96"
- 1 Board , 1x3 , 96"
- 1 Plywood , 3/4" Thick , Full Sheet
Hardware & Supplies
- 1 Kreg 100 Count #8 x 1.25-in Round Washer-Head Zinc-Plated Self-Tapping Square-Drive Interior Screws
- 1 Gorilla Wood Glue
- 1 32oz Stain
- 1 32oz Polyurethane
- 1 Maple Glue-on 0.75-in x 6-in x 25-ft Veneer
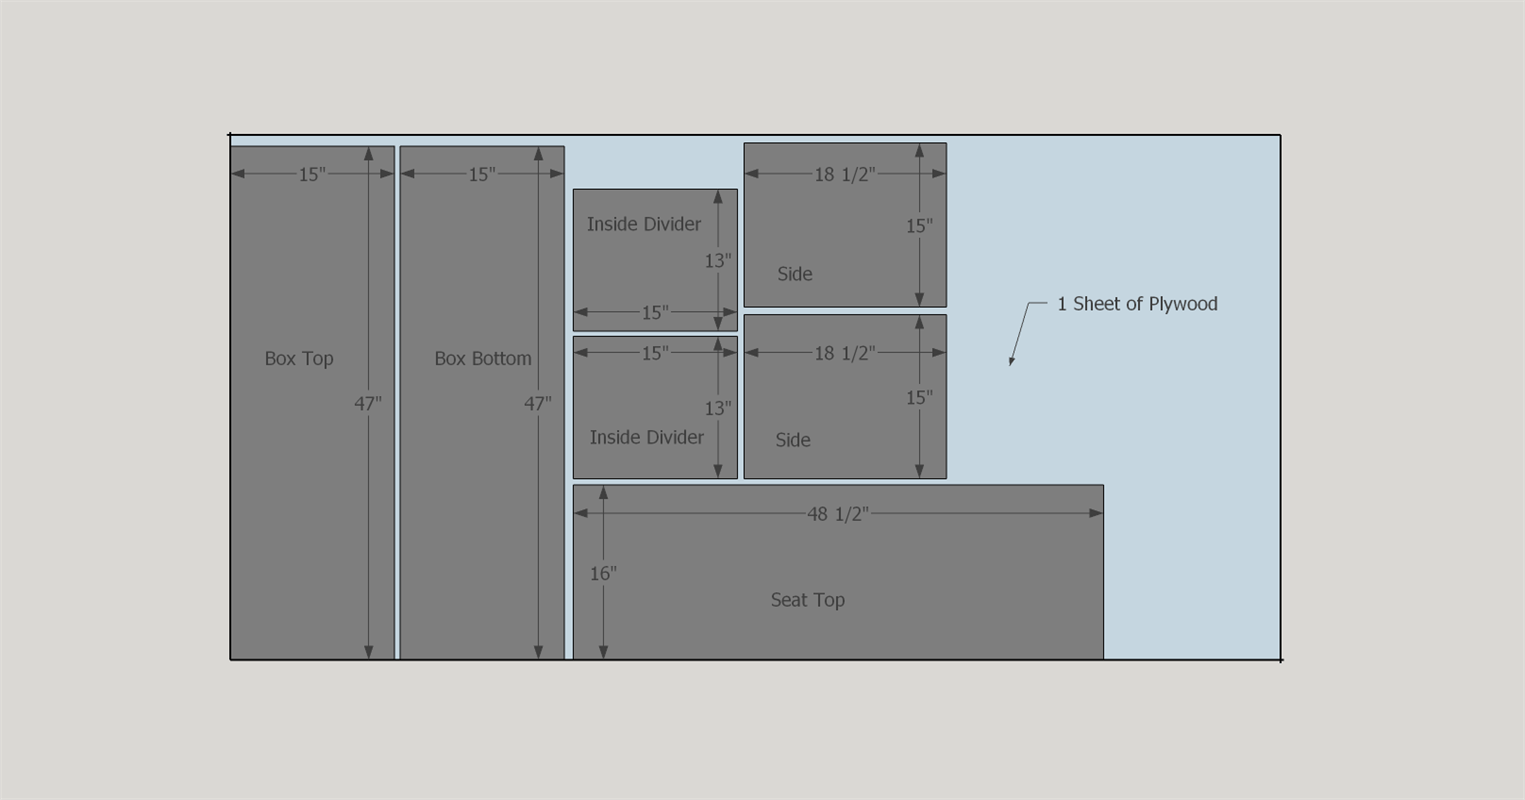
Cut List & Parts
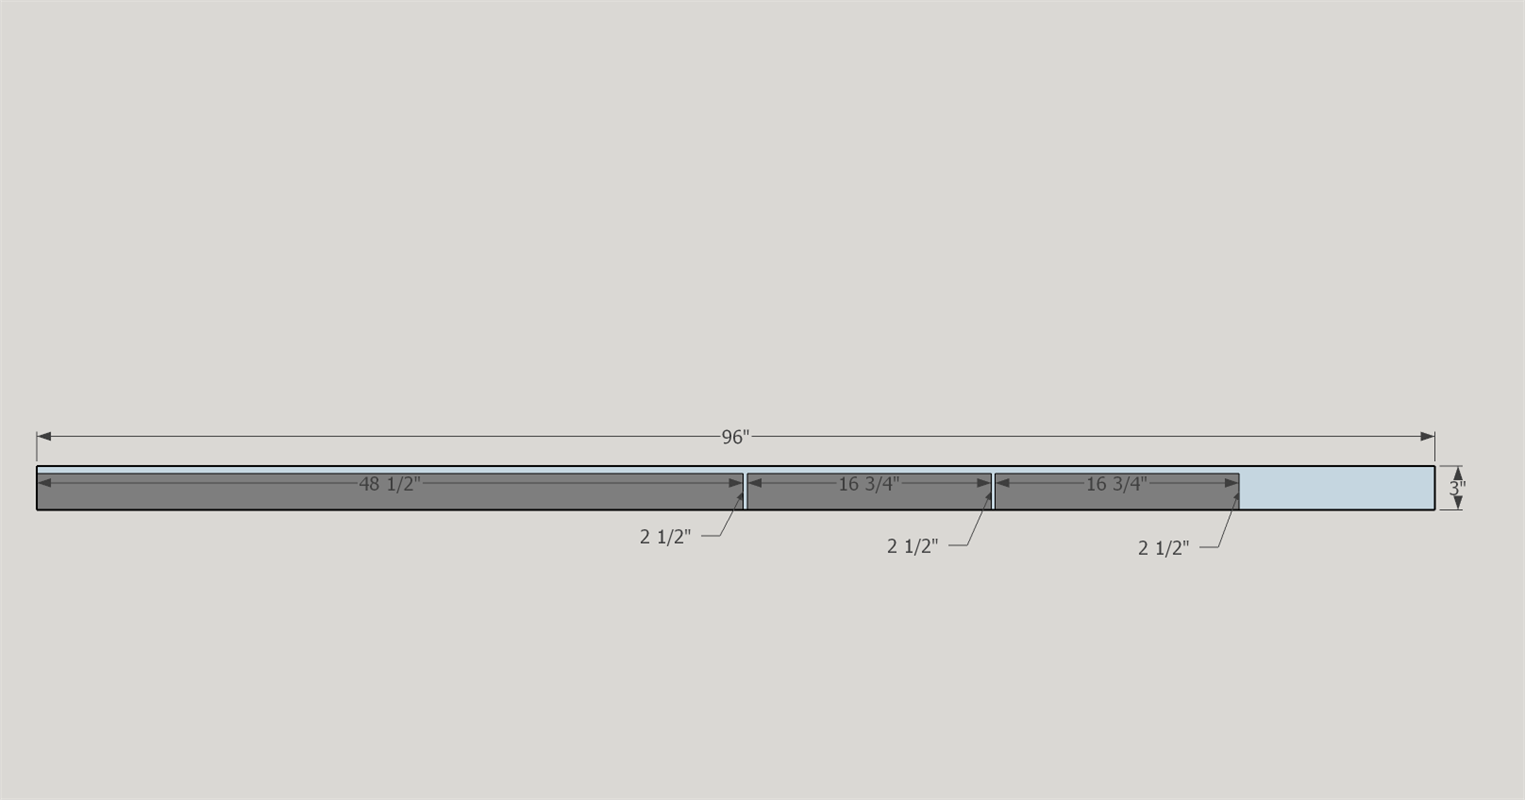
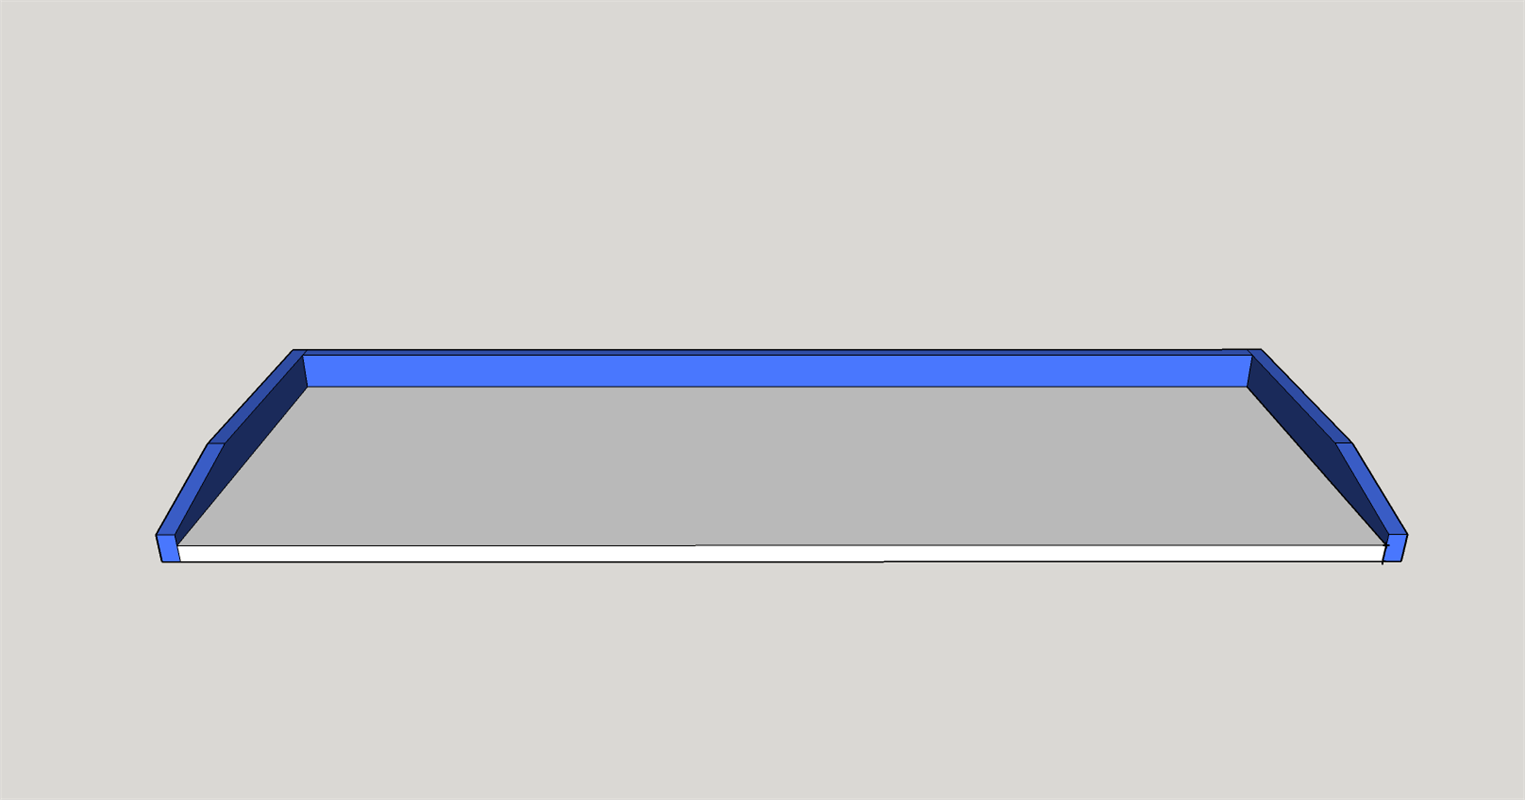
- 1 Back Seat Trim , 1" x 48 1/2" x 3"
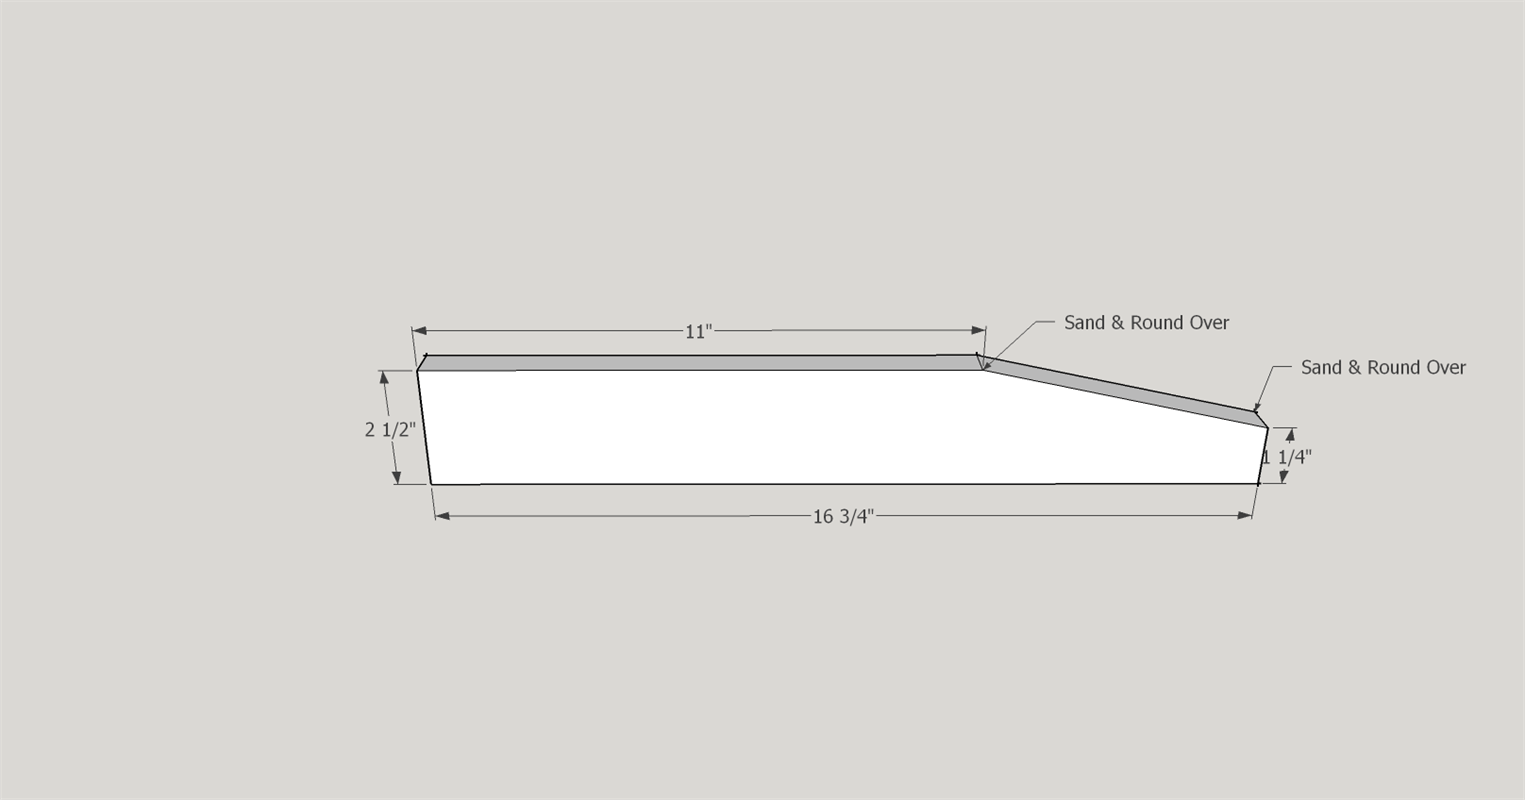
- 2 Side Seat Trim , 1" x 16 3/4" x 3"
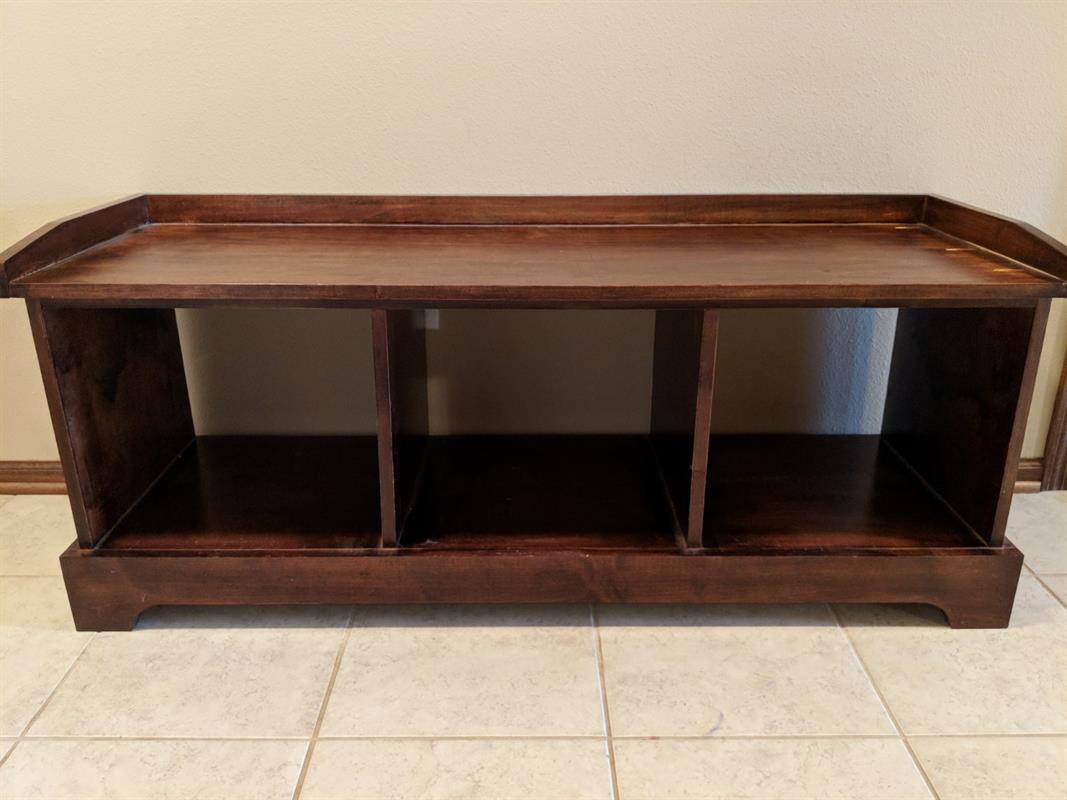
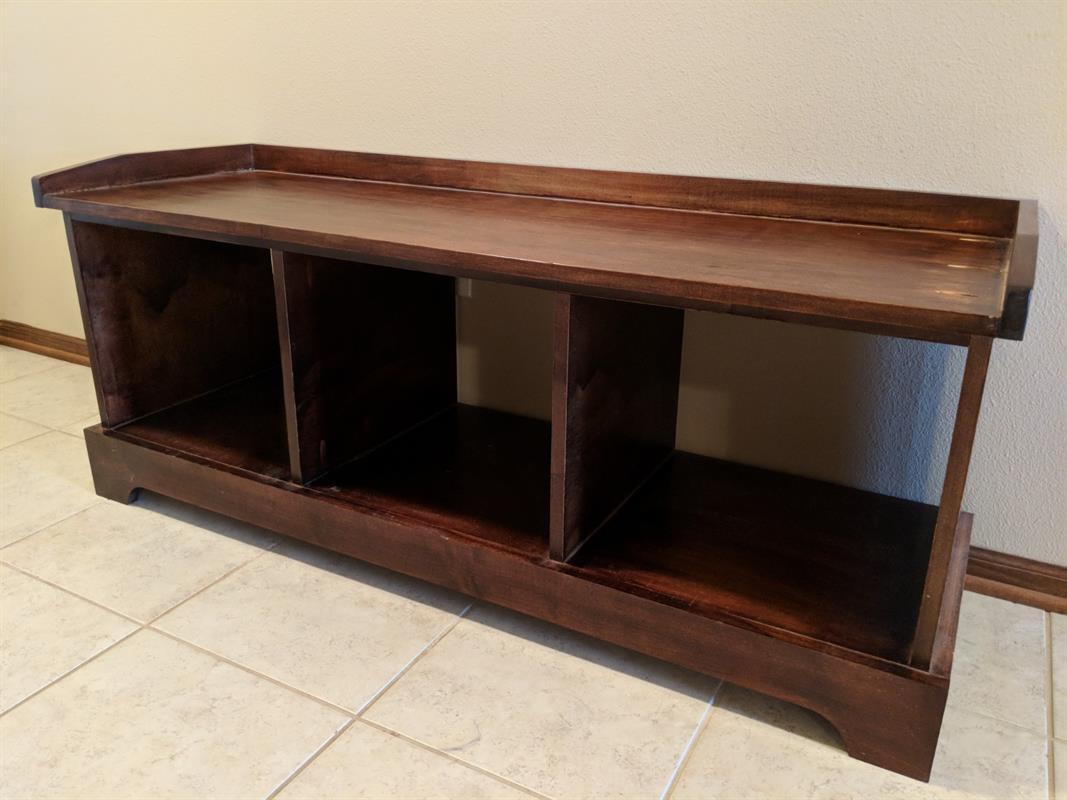
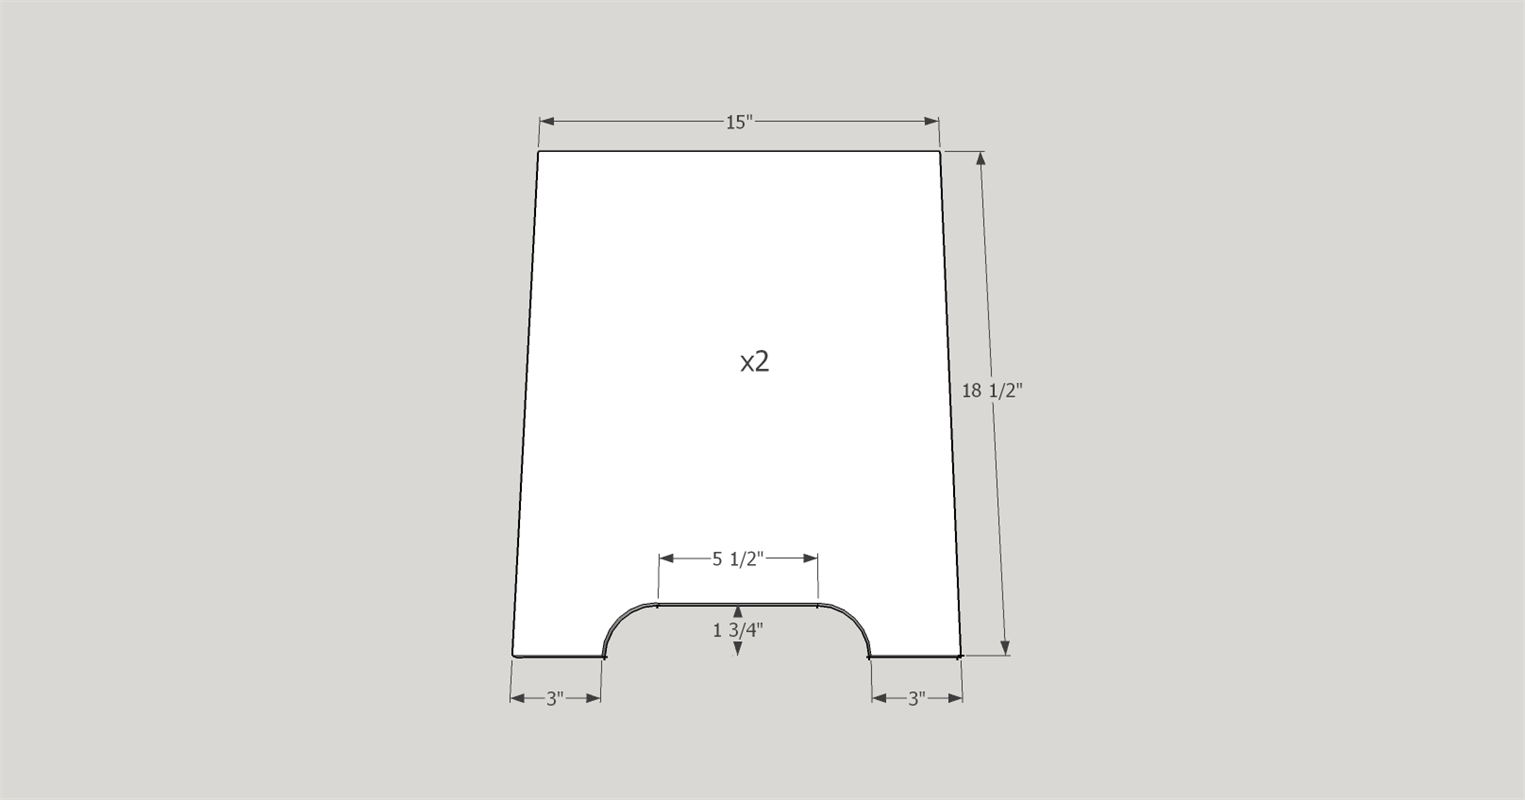
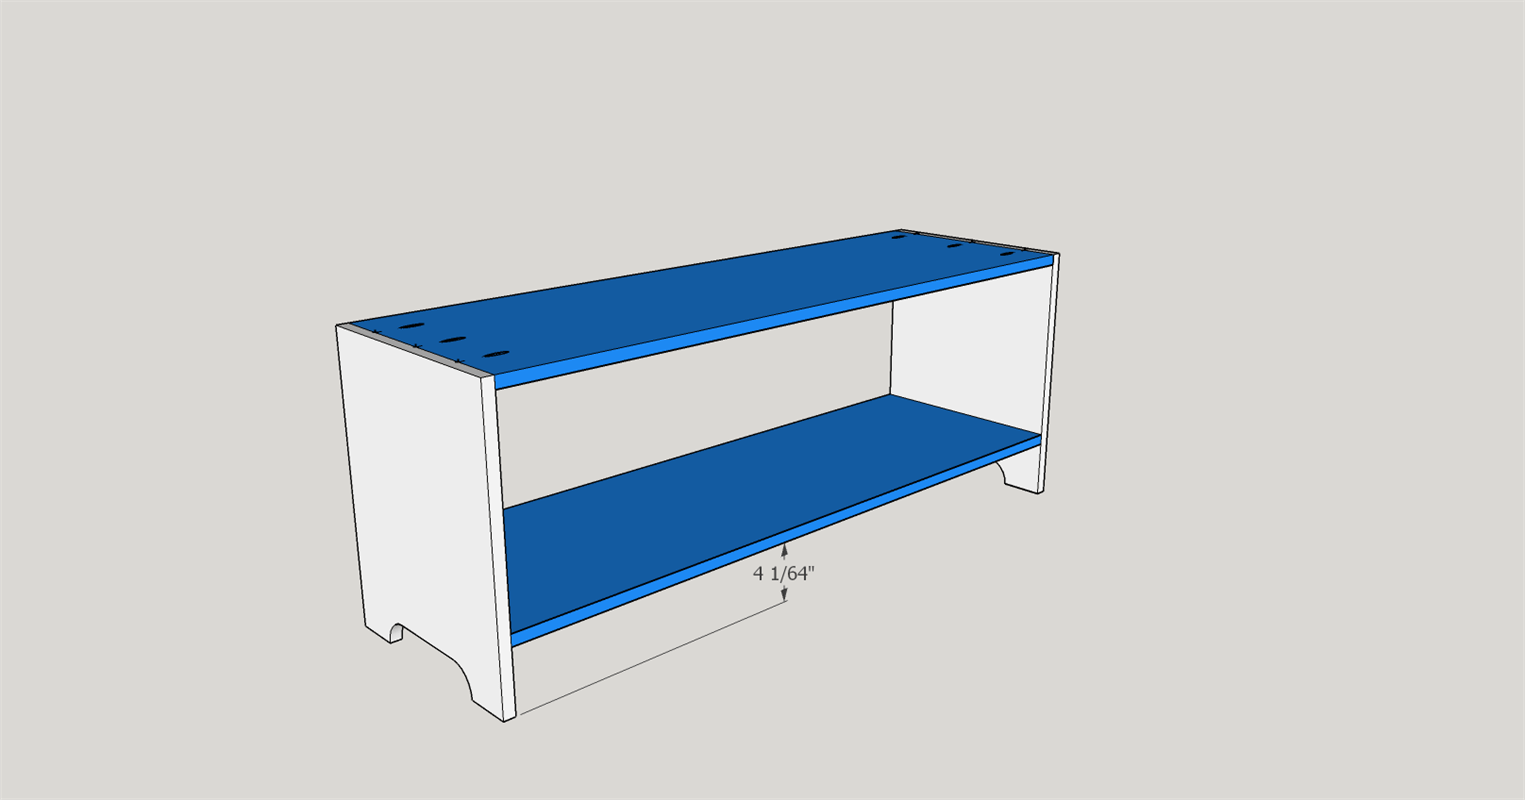
- 2 Sides , 3/4" x 15" x 18 1/2"
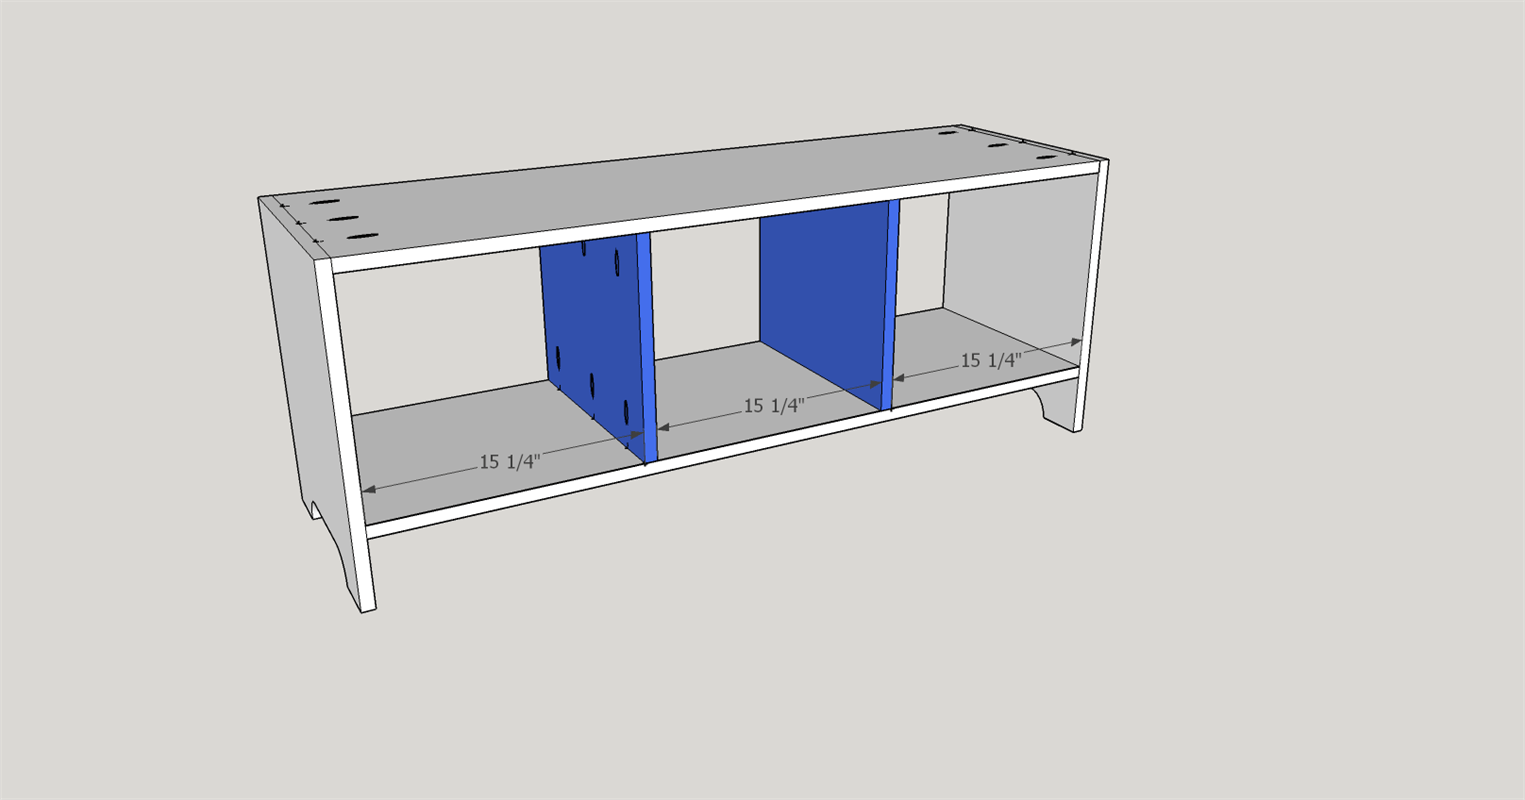
- 2 Cubby Divider , 3/4" x 15" x 13"
- 1 Cubby Top , 3/4" x 47" x 15"
- 1 Seat , 3/4" x 48 1/2" x 16"
- 1 Front Bottom Trim , 1" x 50" x 5"
- 2 Side Bottom Trim , 1" x 15" x 5"

Directions
-
Make Your Cuts
Use the cut lists to cut each piece to size. Make sure to double-check the area you want to place the bench to make sure it will fit.
-
Cut Side Opening
Use a jigsaw to roughly cut out the areas that will be open for the trim pieces along the bottom of the sides. These do not need to be exact since the trim pieces will cover any imperfections you may have. Try to get the opening close, but slightly larger, than what the trim piece will have. Do this to both sides.
-
Attach Sides
Drill pocket holes on the top side of the top piece as well as the bottom side of the bottom piece bottom. Add a small amount of wood glue to the ends of the top and bottom pieces where they meet against the sides prior to attaching with Kreg 1 1/4" pocket hole screws. Attach the top and bottom to the sides.
-
Attach Dividers
Drill 3 pocket holes on both the top and bottom of the dividers. Put a small amount of wood glue on the edges that will attach to the top and bottom. Insert each divider 15 1/4" in from the sides. Attach each divider with Kreg 1-1/4" pocket screws. (Make sure each divider is square to the top and bottom).
-
Attach Seat Trim
Attach seat trim pieces using wood glue on back and sides edges of seat that come in contact with the trim. Using 1-1/4" Kreg screws to attach from bottom side of seat.
-
Attach Seat to Base
Attach seat to cubby top with screws from the underside of the cubby top into the seat. Inside edge of seat trim should be flush with side pieces. Back trim should have the inside edge flush with cubby top edge.
(Note: Using glue in this step will make it difficult to remove seat from base if you need access to pocket hole screws that hold the seat trim)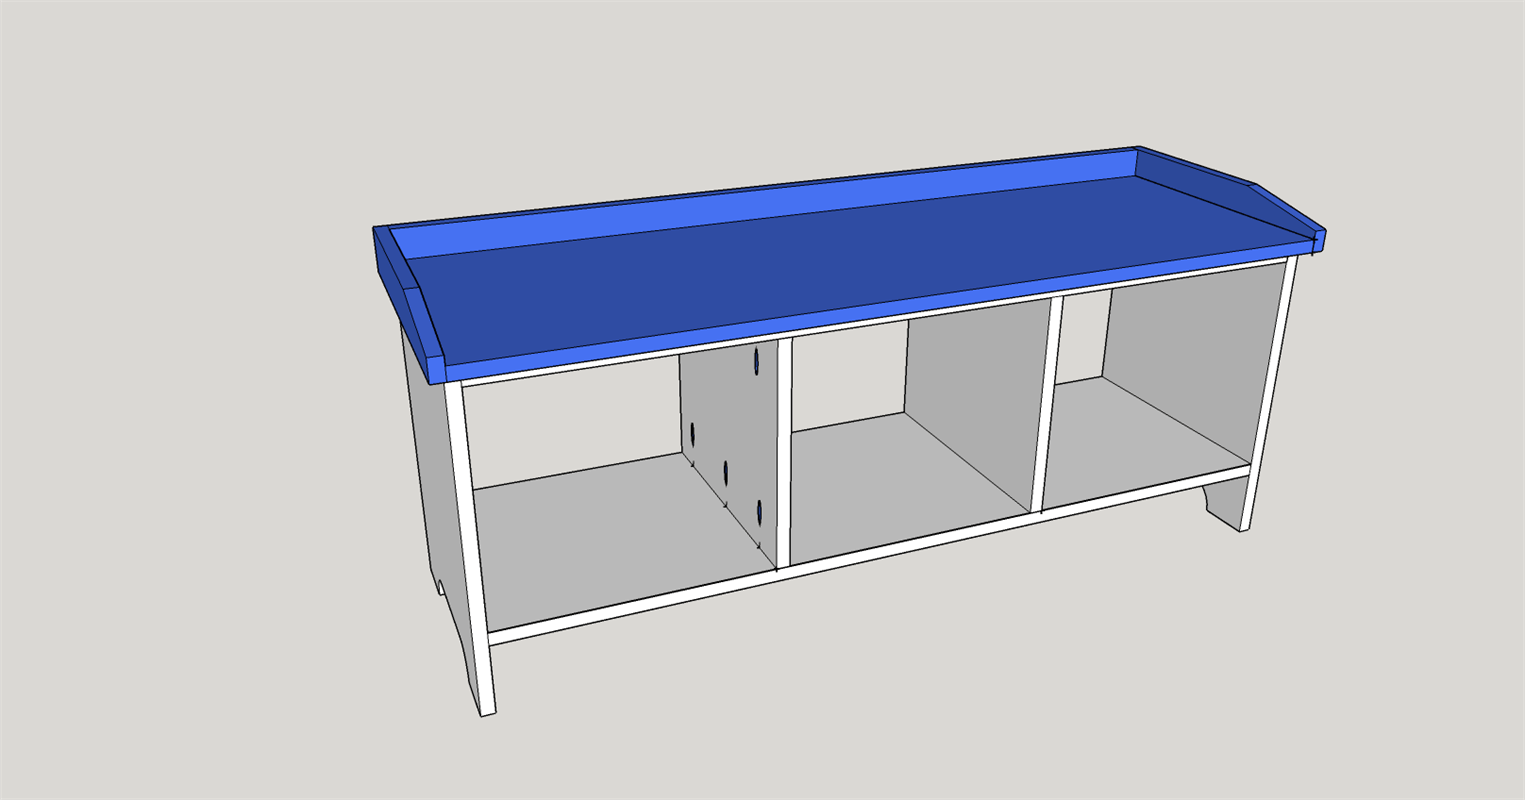
-
Cut Base Trim Openings
After you have cut the trim pieces to length based on the cutting diagram, measure to the center and then up 1-3/4" and place a mark. Then measure half the distance of the straight edge shown (side trim: 2-3/4"; front trim: ), place a mark for each. Draw a straight line between the two marks to create the straight line 5-1/2" in length.
Measure 3" from outside edges as shown in image and place a mark. Use a compass to draw the arch.
Use a jigsaw to cut out the opening of the trim pieces. Sand the rounded and straight edges.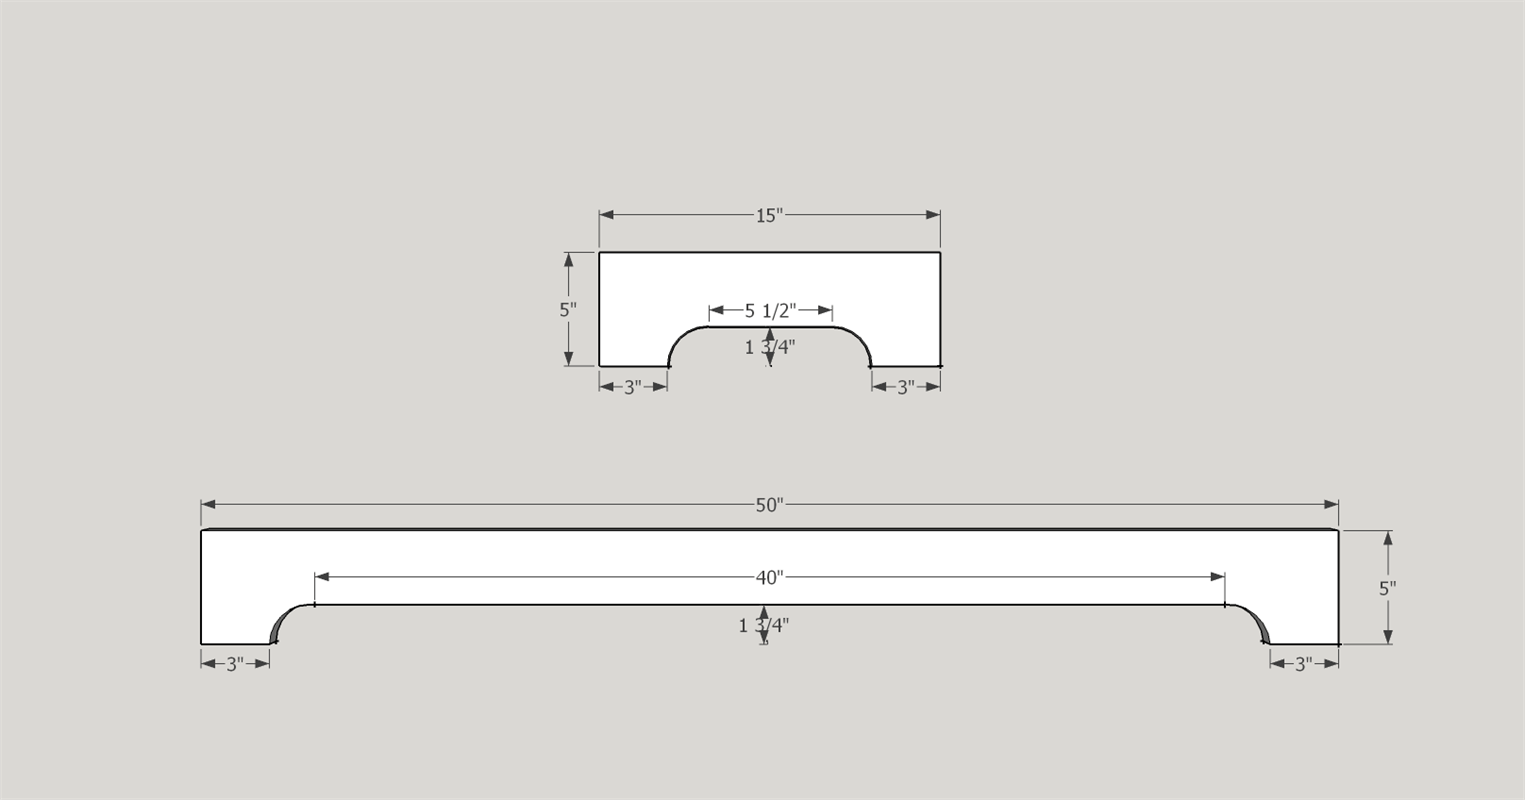
-
Attach Base Trim
Attach the front and side base trim pieces. Place glue on the backside of the side trim pieces and place against sides, using a clamp to make tight contact (make sure openings are lining up first). Use screws to secure from the inside of the side piece.
Attach the front trim piece by placing a bead of glue along front edge of cubby base and side front edge. Secure using pocket hole screws.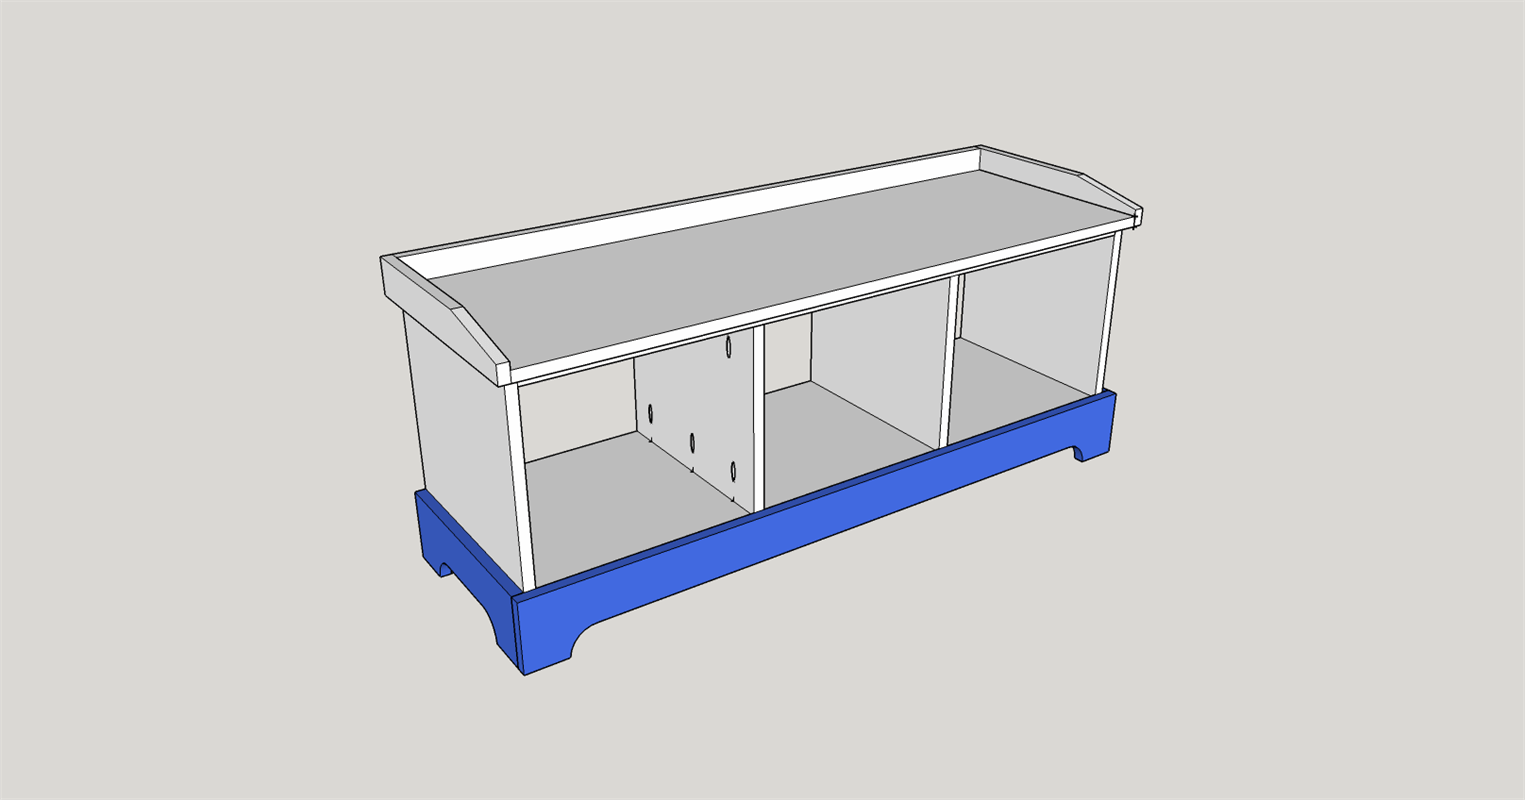
-
Sand and Finish
Sand all pieces with a fine grit sandpaper. Stain the bench with stain color of your choosing (you can also paint) Once stain has dried and you have put on the appropriate amount of coats, finish with polyurethane.
**Optional: Fill in pocket holes with pocket hole plugs.
-
Veneer
Glue-on veneer will need to be placed on the front edges of the sides, front edge of the seat, front edge of cubby top, and front edges of the dividers. Unroll glue-on veneer and cut slightly longer than edges. Use a hot iron to iron on the veneer. After it cools, cut excess veneer off. Sand where needed.
-
Seat Side Trim
On the side seat trim pieces, measure 1 1/4" from the bottom up on the front. Measure 11" from the back towards the front on the top. Draw a line connecting these two marks. Cut the angle cut along this line. Sand the cut and round the edges.
Alternative: Leave the edge pieces rectangular and just lightly sand the edges.
-
Optional Back
This plan does not have a back on it. You can choose to put a back on it. You could use beadboard or something similar. The dimensions for the back would be 48 1/2" x 14 1/2".