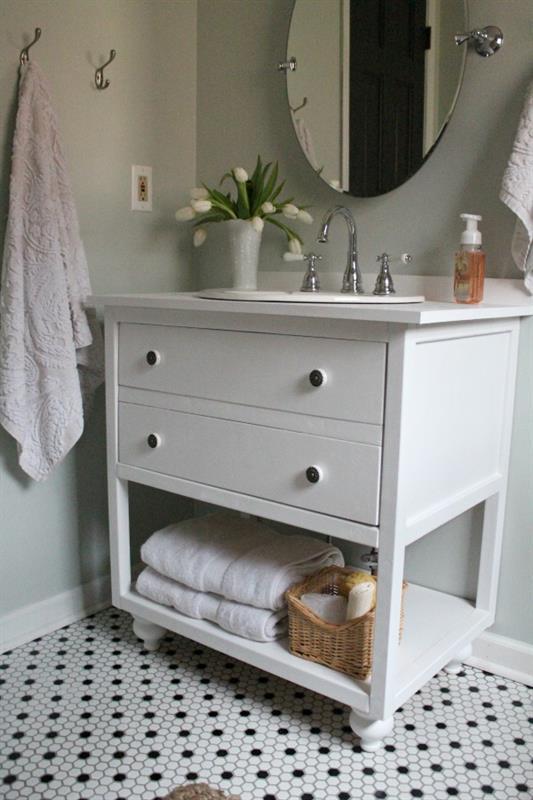
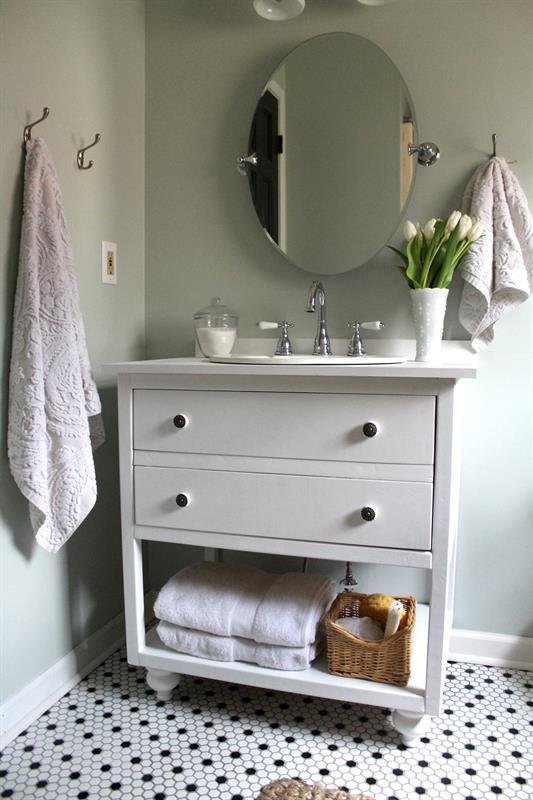

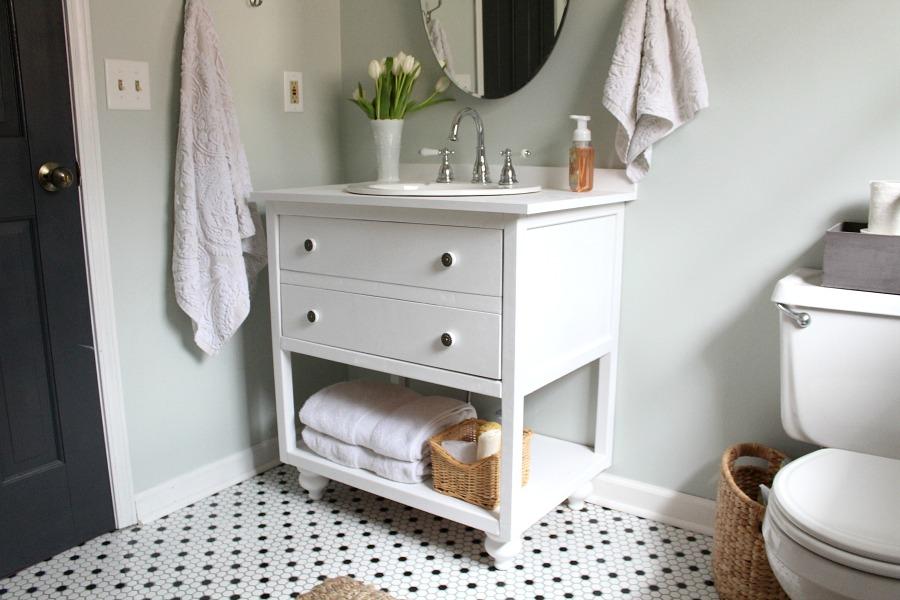


Vintage style bath vanity with two faux drawers as a cabinet door. Lower shelf for towel storage or other bath essentials. Vanity measures 30" across x 20 1/2" deep x 33" tall before counter top.
Tools
Kreg Tools


Other Tools
-
Circular Saw (corded)

-
Jigsaw
-
Miter Saw
-
Tape Measure
-
Drill (cordless)
-
Nail Gun
-
Sander
-
Air Compressor
Materials
Wood Products
- 3 Board , 2x2 , 96"
- 1 Board , 1x6 , 72"
- 1 Board , 1x2 , 48"
- 1 Plywood , 1/2" Thick , Half Sheet
- 1 Board , 1x4 , 36"
- 1 Board , 3/4" Thick , Pine Project Board or Desired Top
Hardware & Supplies
- 1 Box 1 1/4" Kreg Screws
- 1 Box 2" Kreg Screws
- 2 Hidden Cabinet Hinges
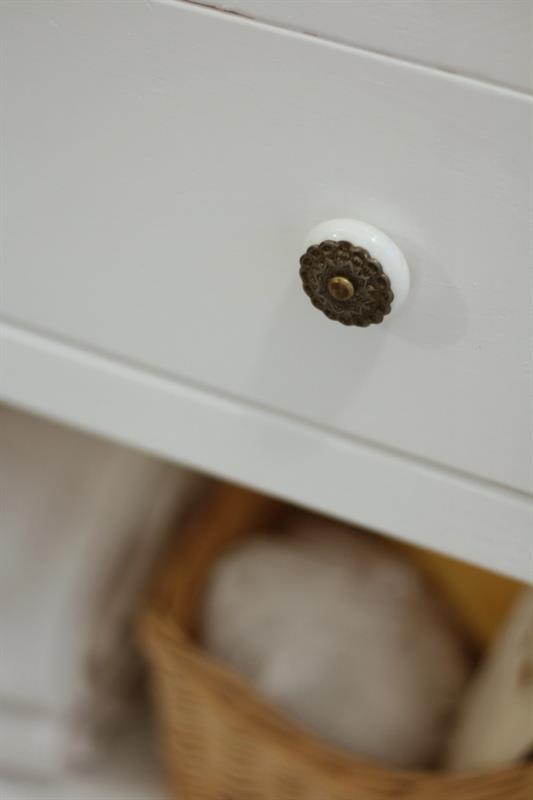
- 4 Cabinet Pulls of Choice
- 1 Wood Glue
- 4 Small Furniture Feet of Choice
- 4 Furniture Feet Attachment Plates
- 1 Paint or Stain of Choice
- 1 Polyacrylic or Polyurethane
Directions
-
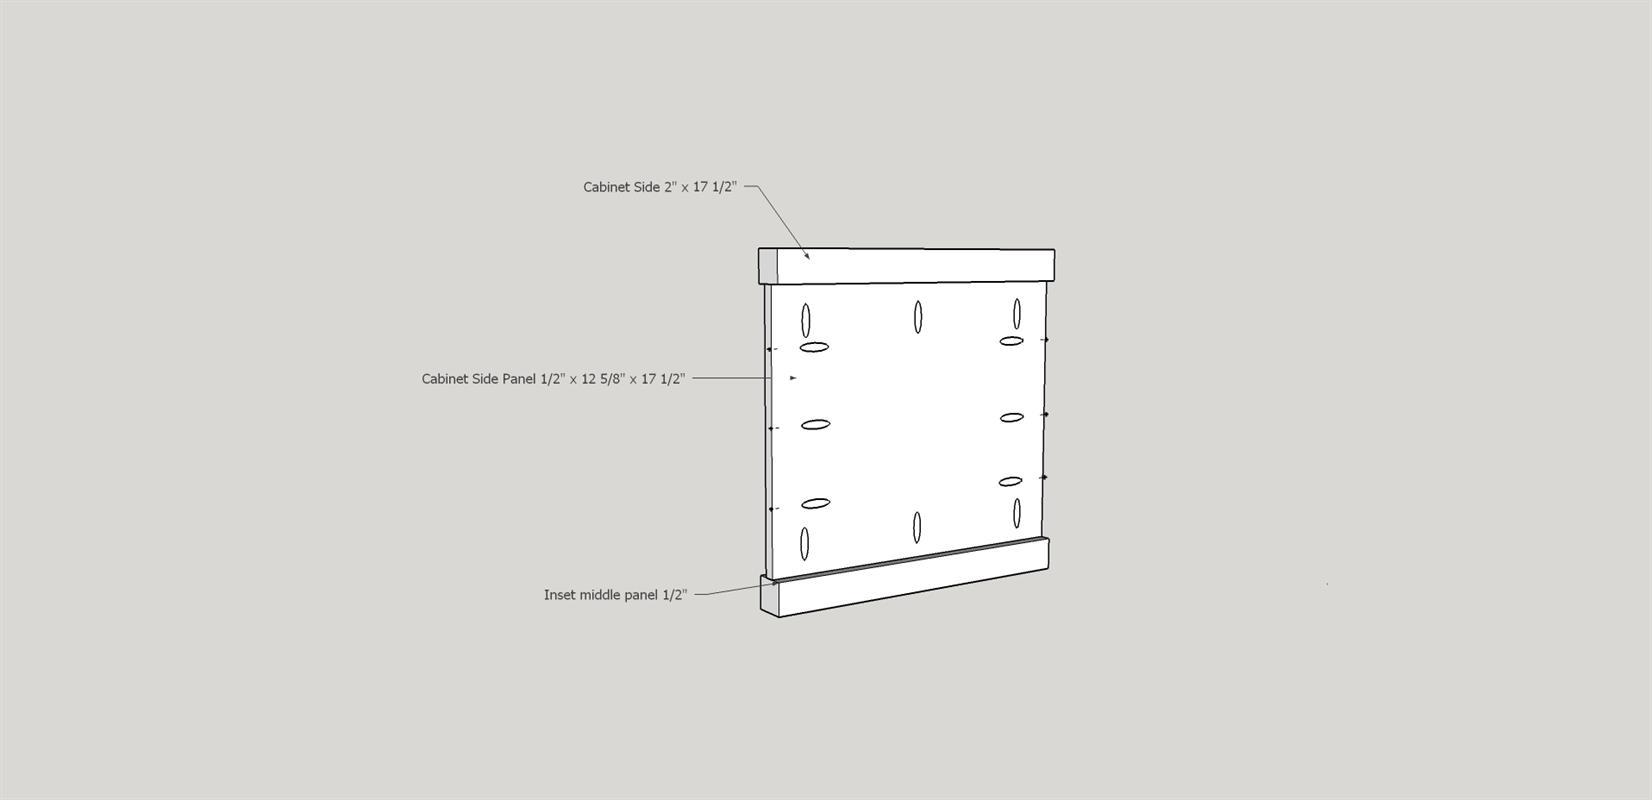
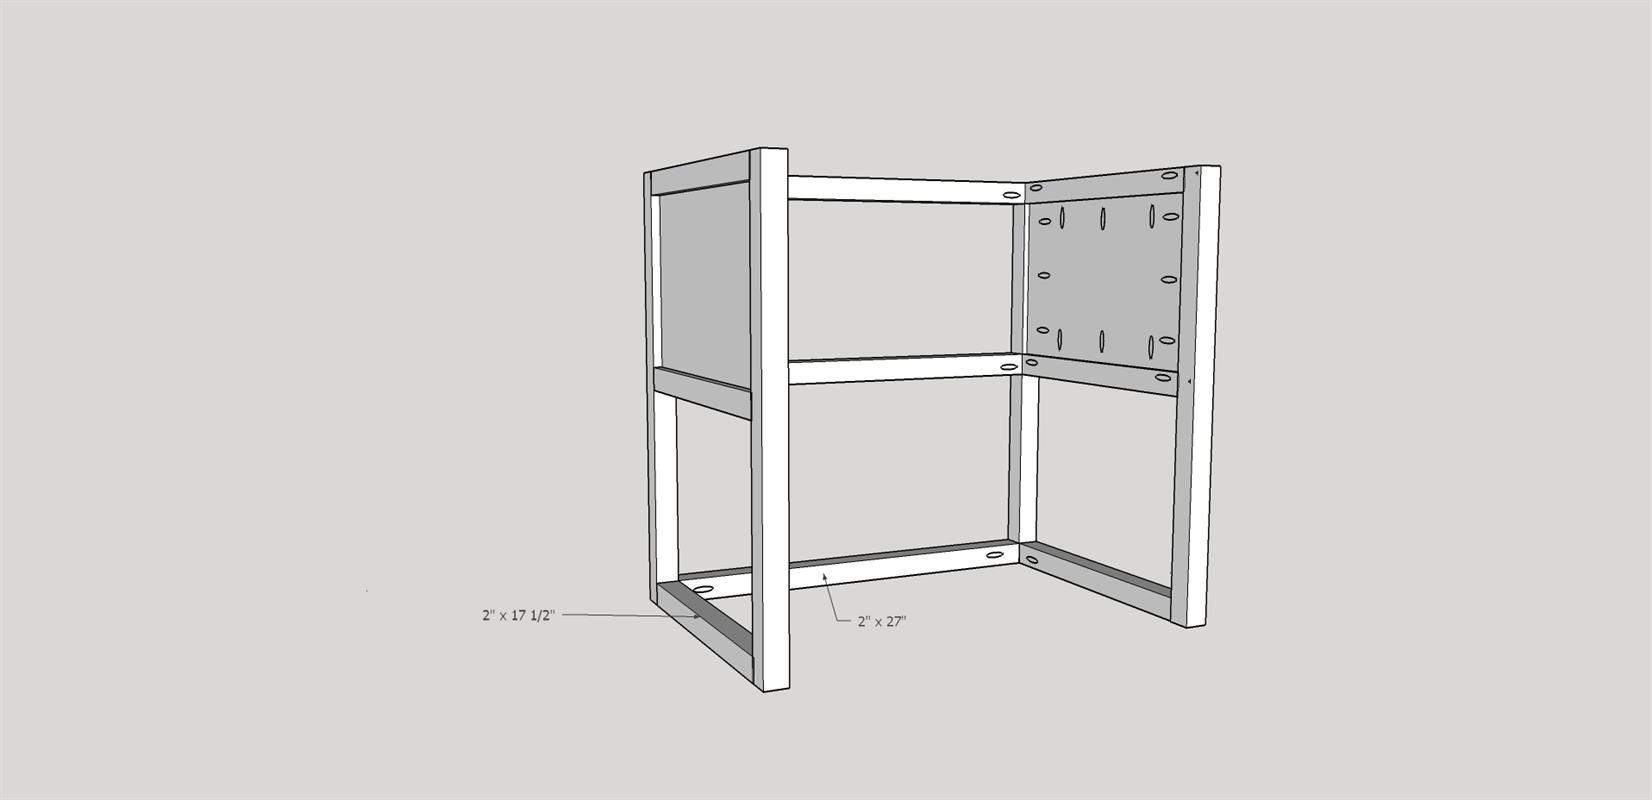
Assemble Cabinet Sides
Assemble the two cabinet sides using 1 1/4" Pocket hole screws. Inset the cabinet panels in by 1/2".
-
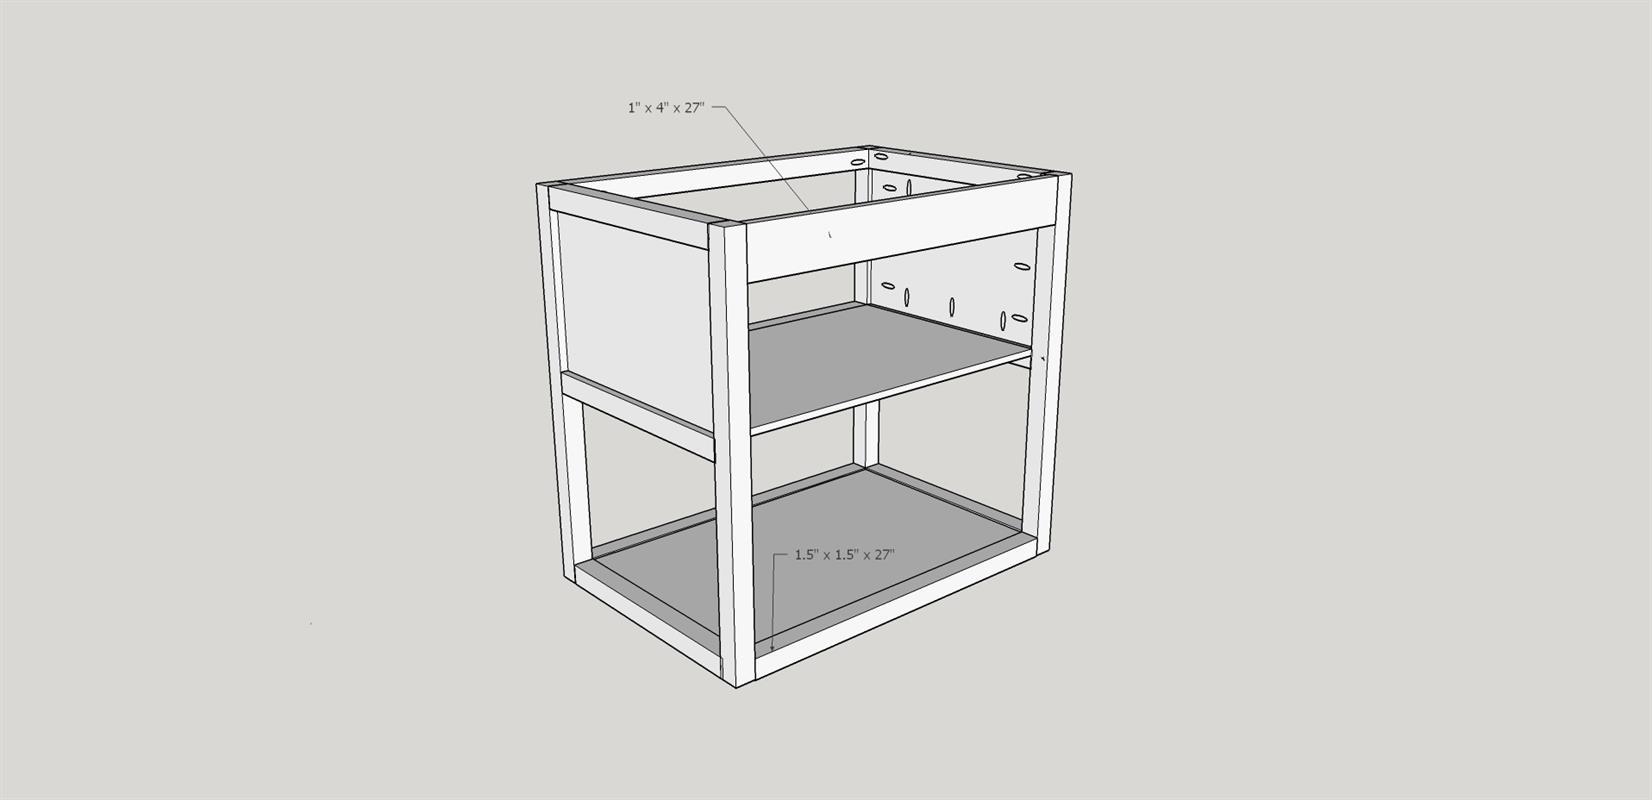
Assemble the Face Frame
Assemble the face frame using 2" Kreg screws. There should be a 12 5/8" gap between the two cabinet supports.

-
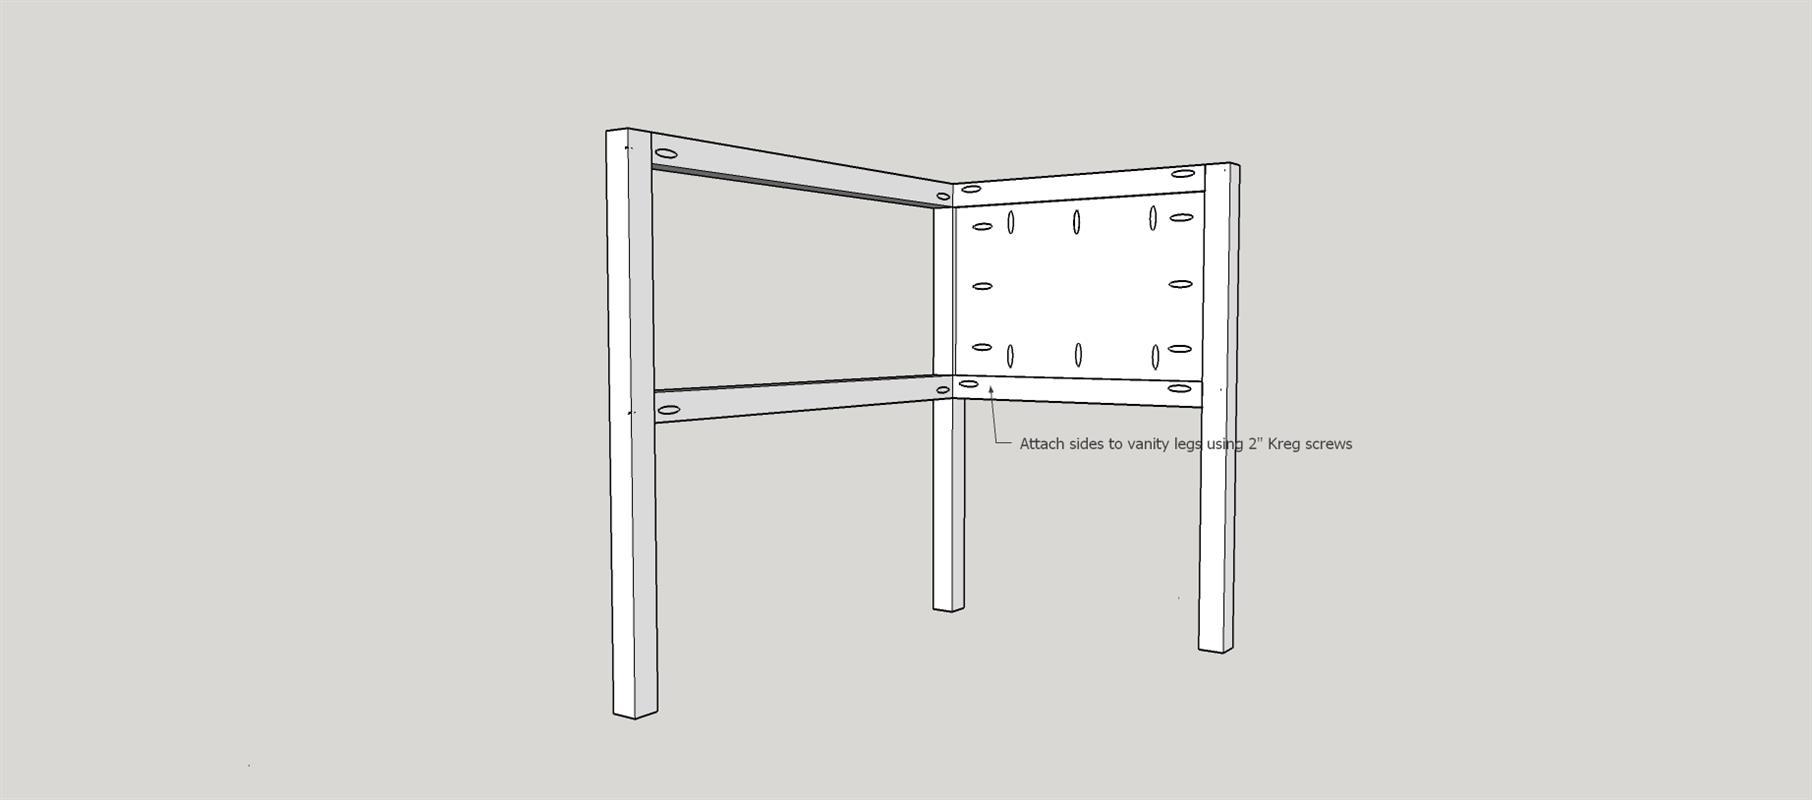
Attach the Sides
Attach the sides to the face frame using 2" and 1 1/4" Kreg screws. Make sure to keep the sides and the face frame flush on the top.
-
Adding the Shelf Supports
Add the bottom shelf supports so that they're flush with the bottom of the vanity legs using 2" Kreg screws.
-
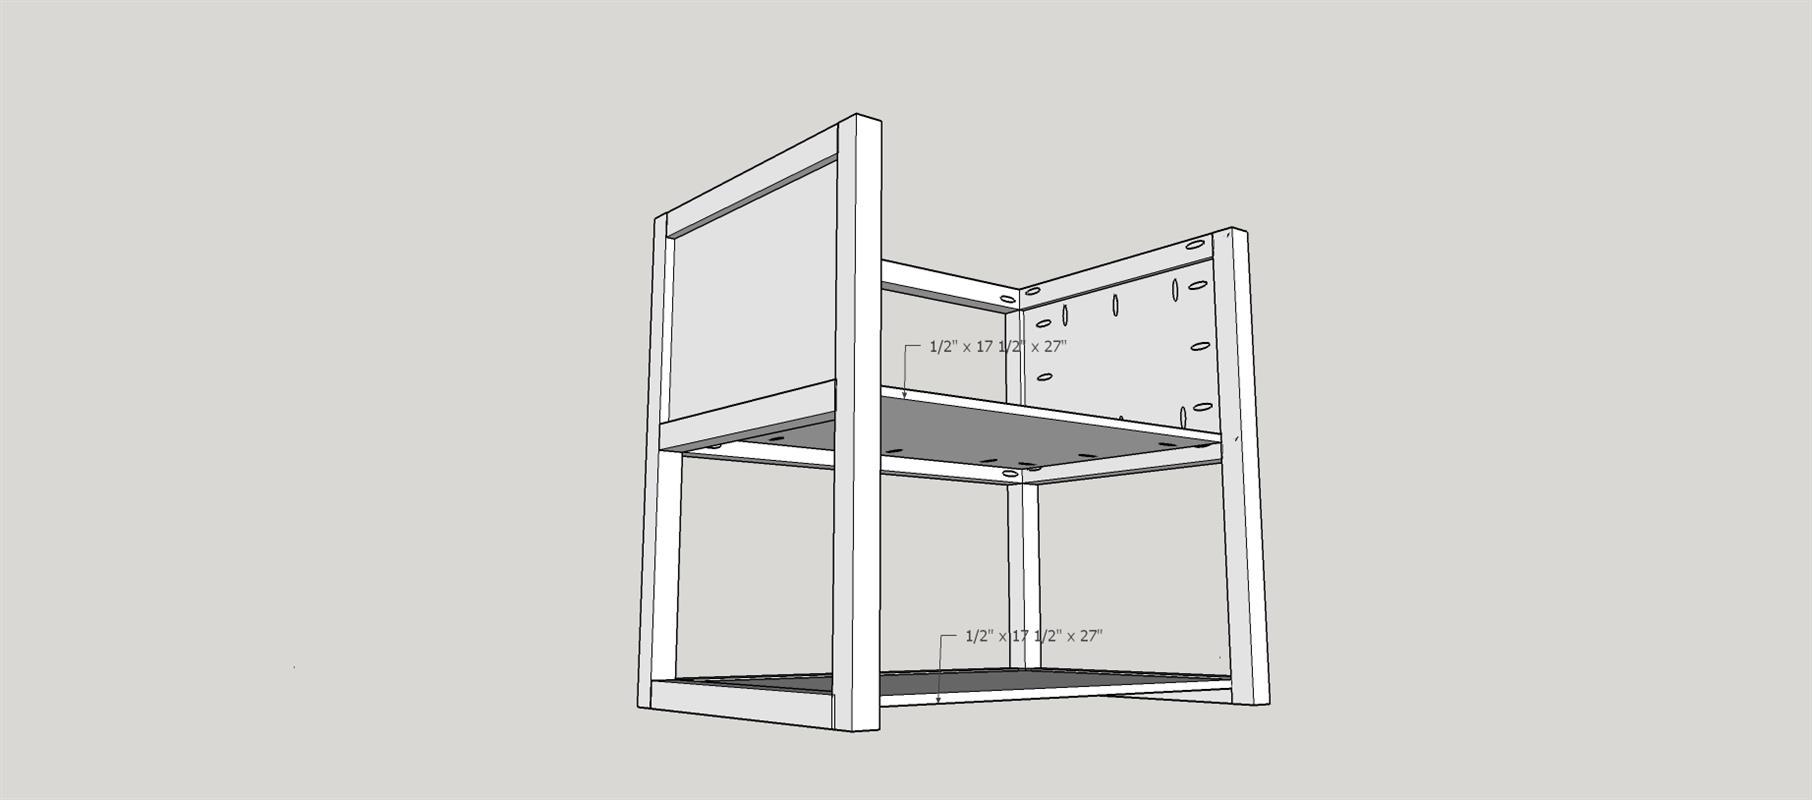
Adding the Shelves
Add the plywood shelves using 1 1/4" Kreg screws and the Kreg clamp to hold it tight while you attach them. Make sure the shelves are flush with the 2x2's so that you are unable to see the rough plywood edge.
-
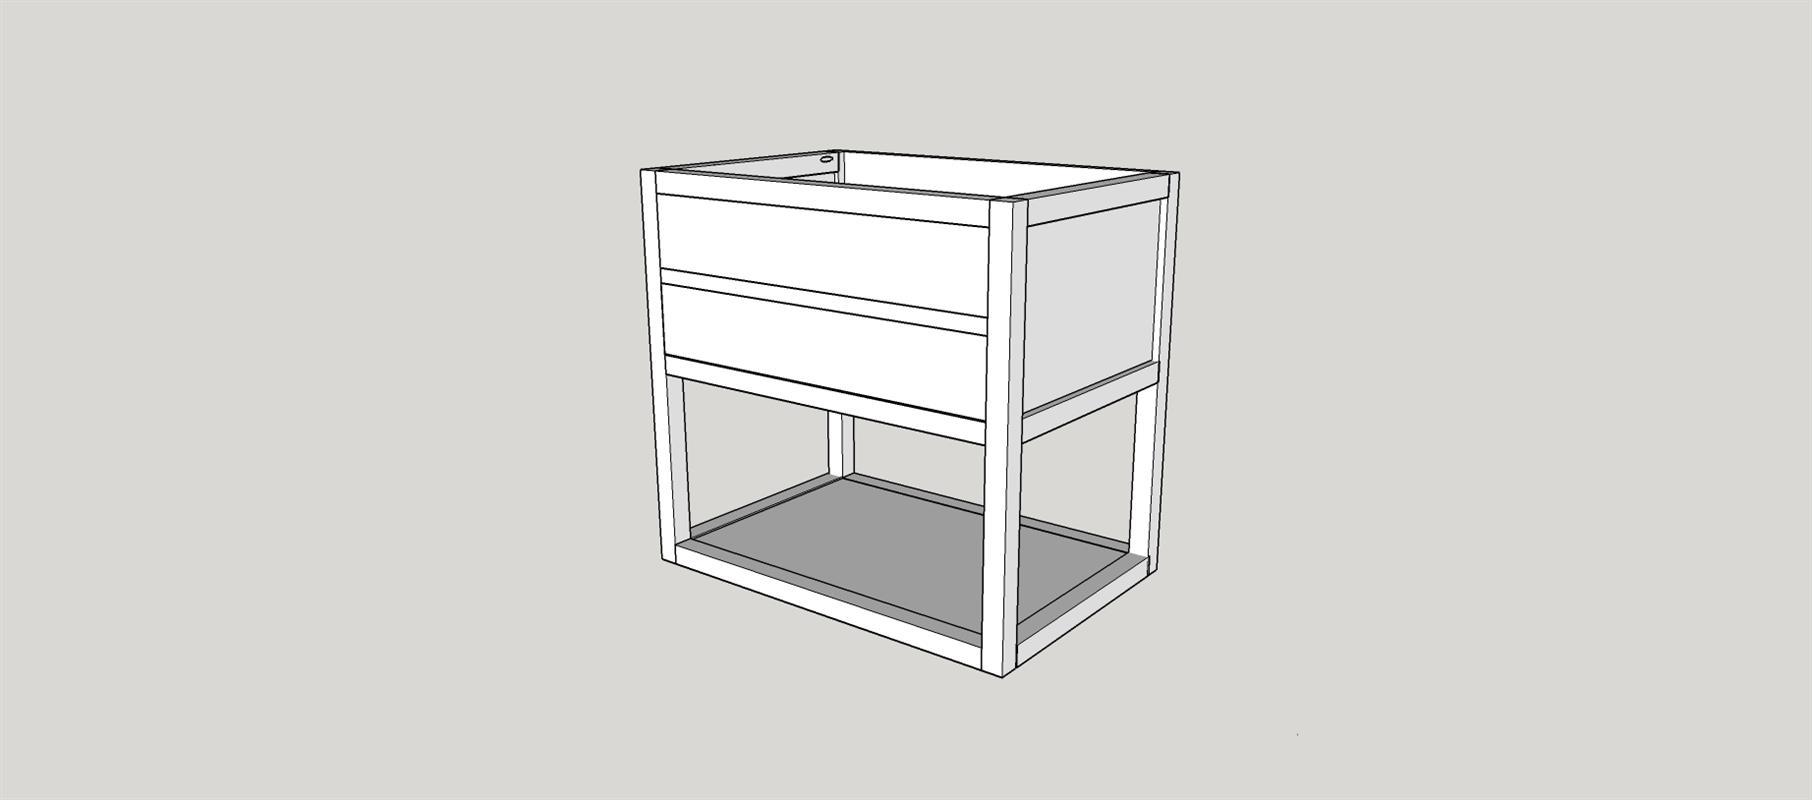
Attaching the Door
Install the cabinet door using the hidden hinges leaving an 1/8" gap on all sides.
-
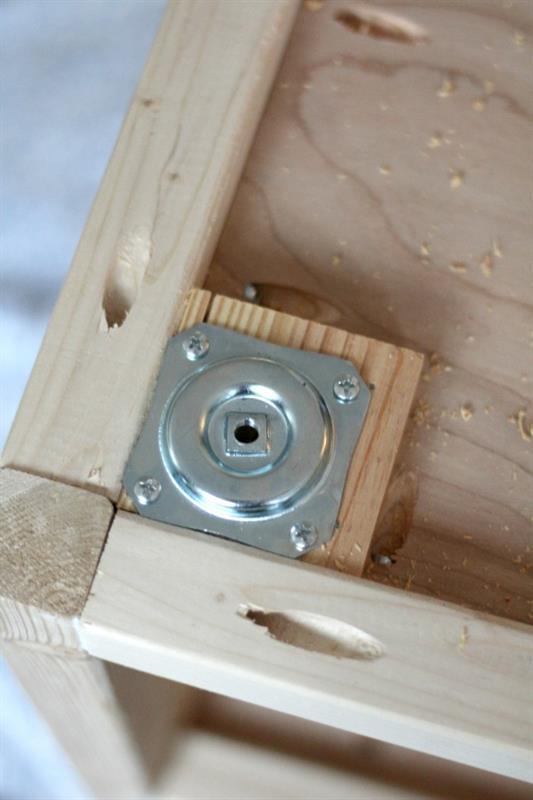
Adding the Feet
Glue and nail the square blocks in place in each corner of the bottom of the cabinet. Pre-drill your holes for the feet attachment plates to prevent splitting. Once the attachment plates are in place, screw in the feet.
-
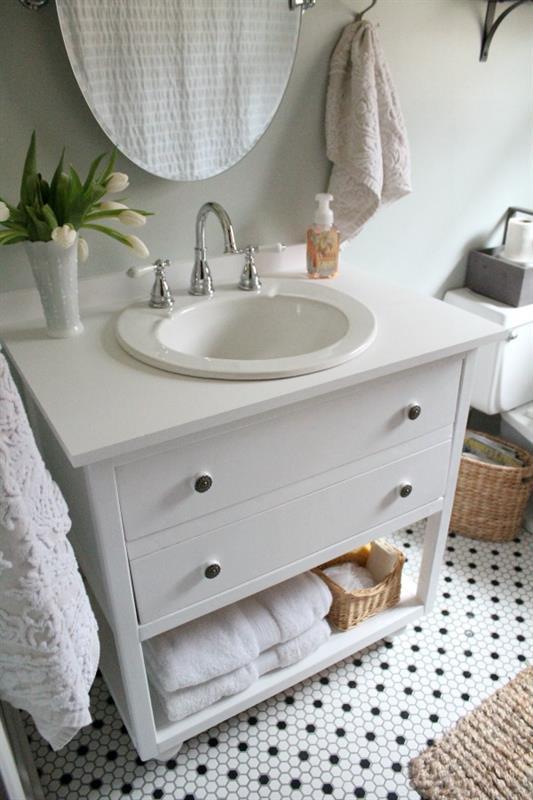
Installing a Countertop
Install your counter top of choice. We just used a pine project board that we purchased. We left an 1" over hang on the front and sides. We just a jig saw to make the whole for the sink. This will vary in size, depending on the sink you purchase. We attached the counter top to the vanity by drilling through the top 2"x2" cabinet supports with wood screws.
-
Paint & Seal
Sand your vanity with medium grit sandpaper and clean with a damp cloth. Once cleaned you can paint or stain.
We used a white furniture paint called Decorators White by Benjamin Moore and sealed it with poly-acrylic to prevent moisture damage.
Add the pulls of your choice. I installed the pulls 5" from the outside edge on each one.
-
Attaching the Back Cabinet Support
Attach the back cabinet support/anchor flush with back legs using 1 1/4" Kreg screws. Attach the 2x2" bottom shelf support using 2" Kreg screws.
-
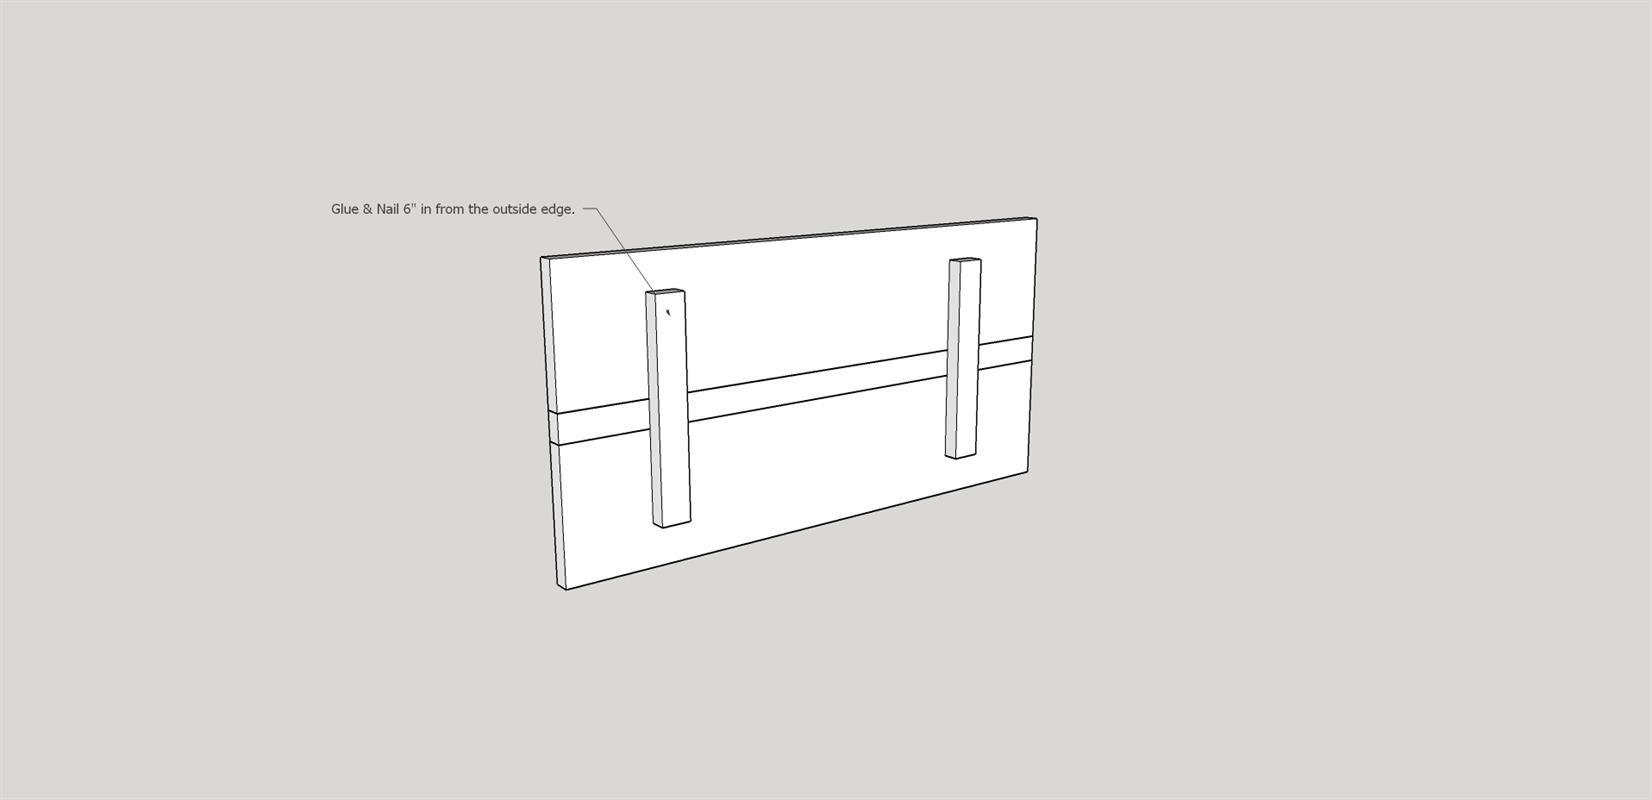
Assembling Cabinet Door
Assemble the cabinet door by gluing and nailing the back braces unto the drawer fronts and divider. Make sure boards all stay flush with one another.
-
Visit The Tale of an Ugly House
Visit me at TheTaleofanUglyHouse.com