

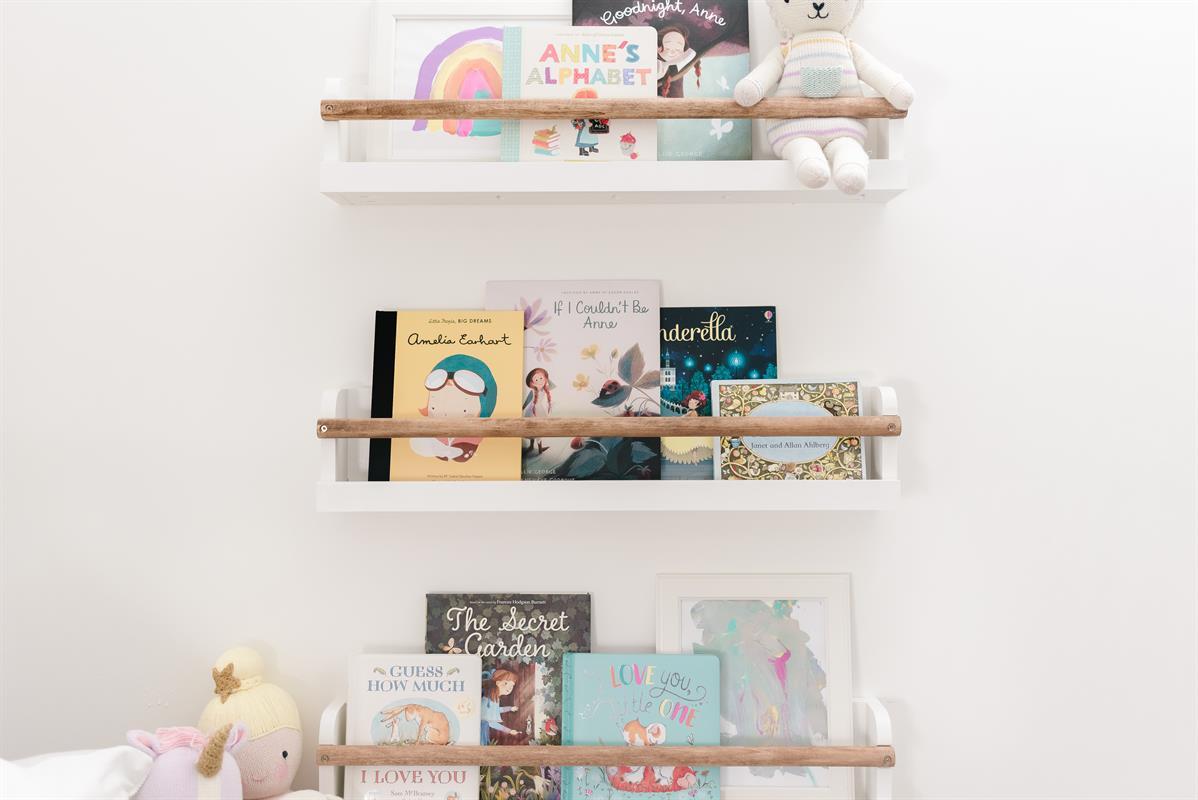


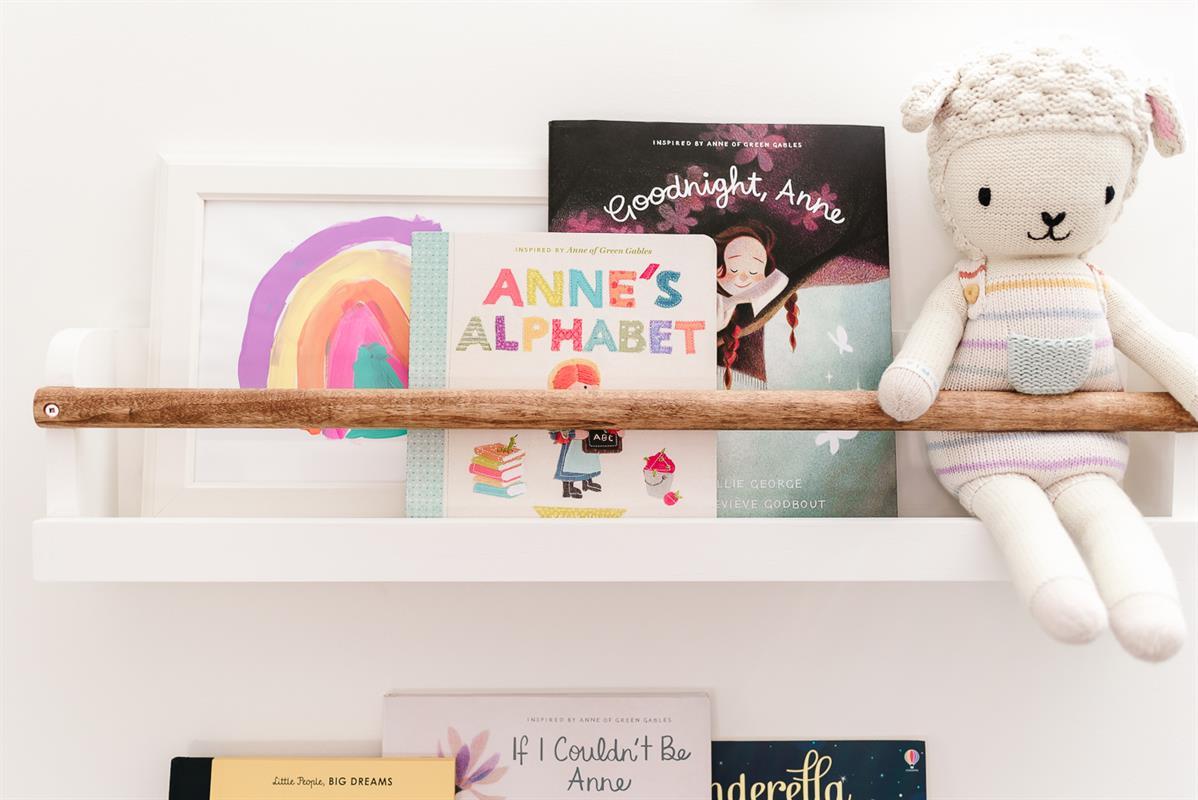


These simple wall shelves will add some vertical storage to display your child’s favorite books, photos and keepsakes. It’s perfect for a playroom, bedroom, beside a window bench, or anywhere your kids (or you) may enjoy a good book! Use it to proudly display their artwork and crafts!
Tools
Kreg Tools

Other Tools
-
Jigsaw

-
Miter Saw
-
Square
-
Tape Measure
-
Drill (cordless)
-
Nail Gun
-
Sander
-
Shop Vacuum
Materials
Wood Products
- 1 Board , 1x6 , 96"
- 1 Board , 1x2 , 96"
- 2 Board , 1x4 , 96"
- 3 Wooden Dowels , 1" Diameter , 36"
Hardware & Supplies
- 54 1-1/4" Kreg Pocket Hole Screws
- 6 1-1/4" Brad Nails
- 1 Wood Glue
- 1 120 Grit Sandpaper
- 1 220 Grit Sandpaper
- 6 2" Wood, Construction or Brass Screws
- 6 3" Wood, Construction or Brass Screws (for mounting)
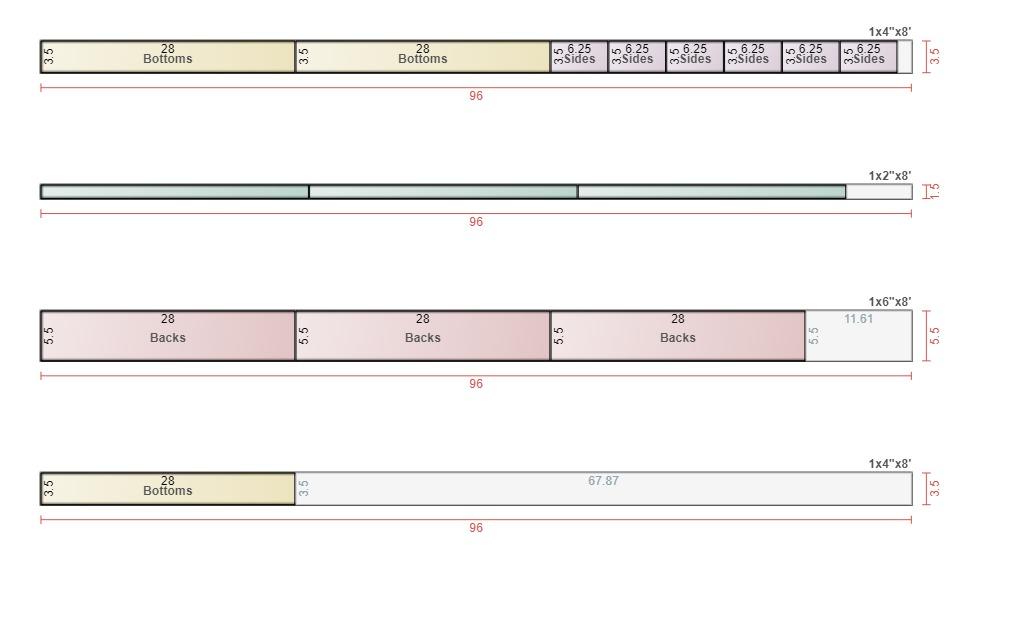
Cut List & Parts
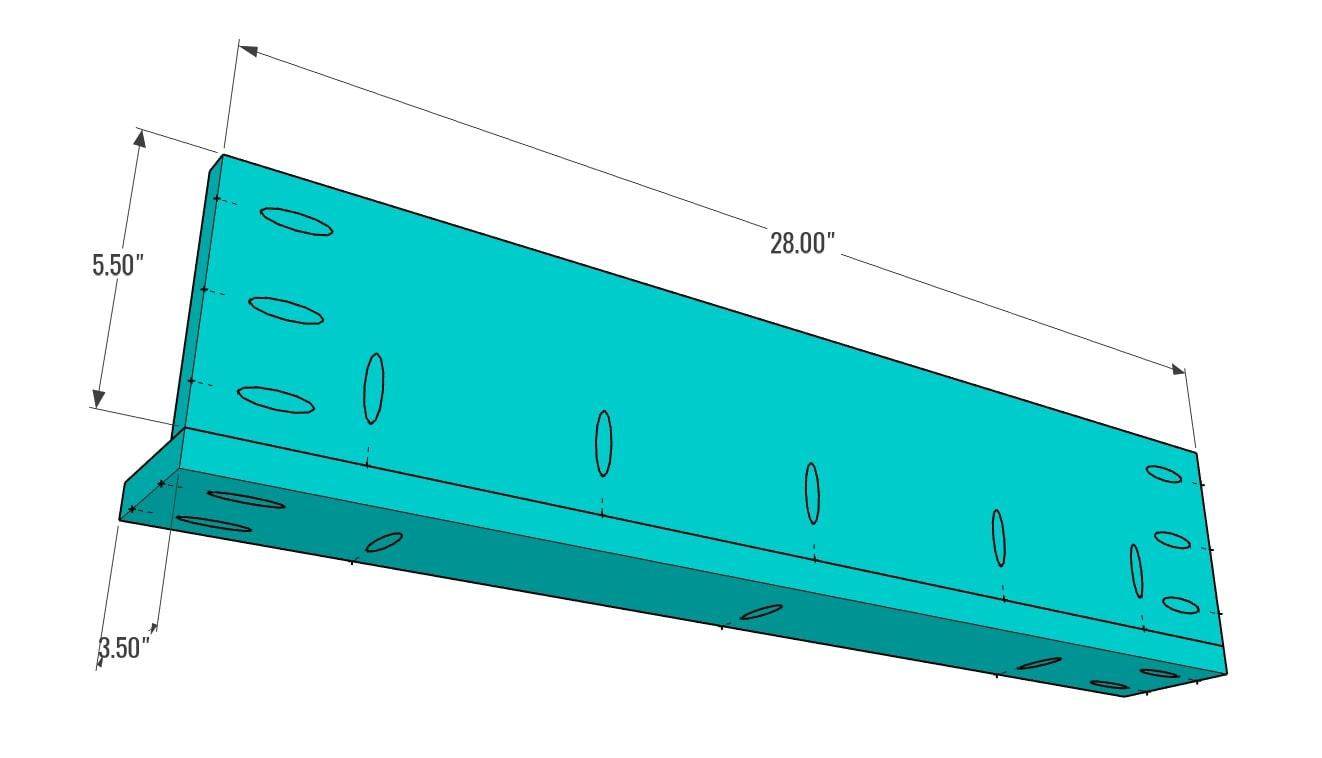
- 3 Backs , 3/4" x 5-1/2" x 28"
- 3 Bottoms , 3/4" x 3-1/2" x 28"
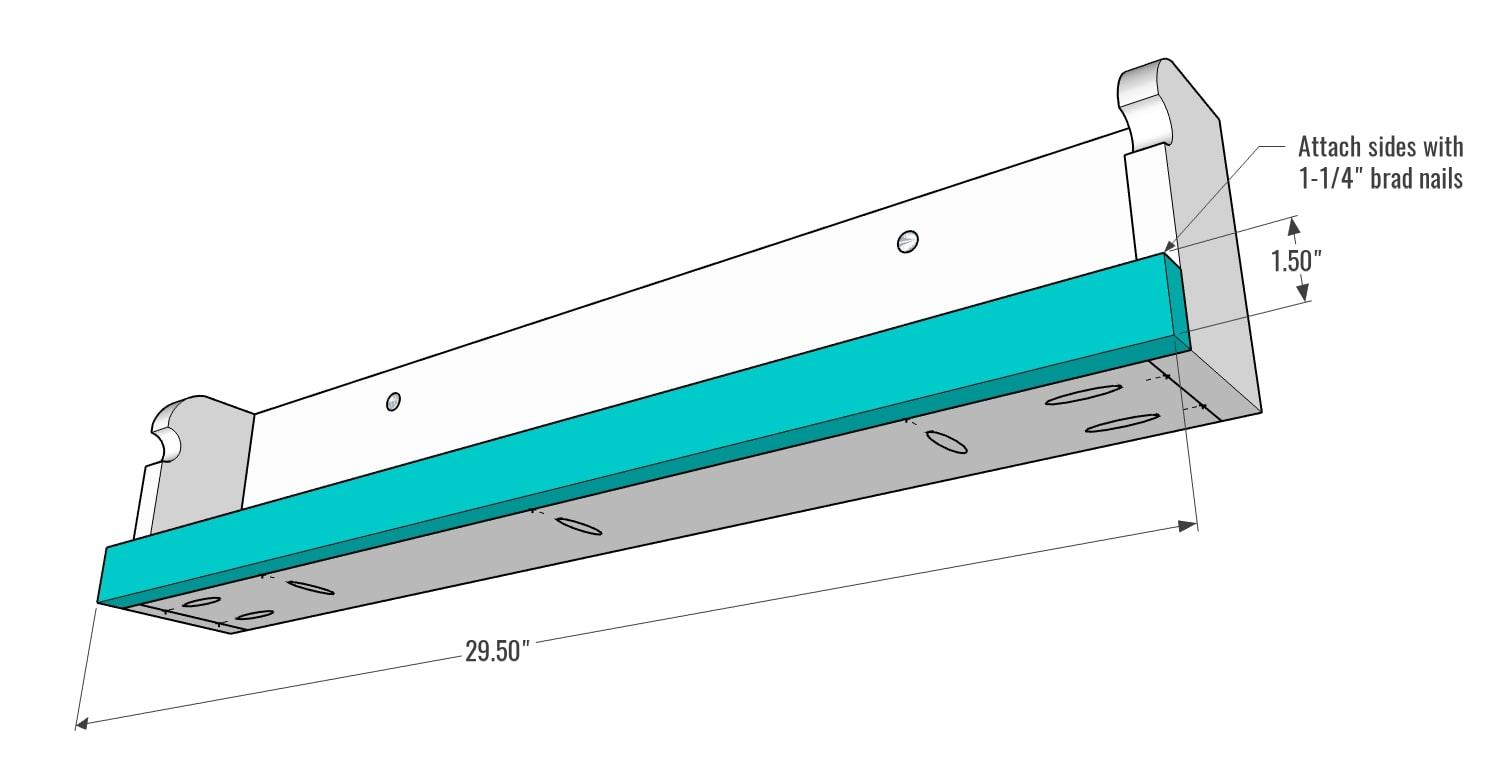
- 3 Front Trims , 3/4" x 1-1/2" x 29-1/2"
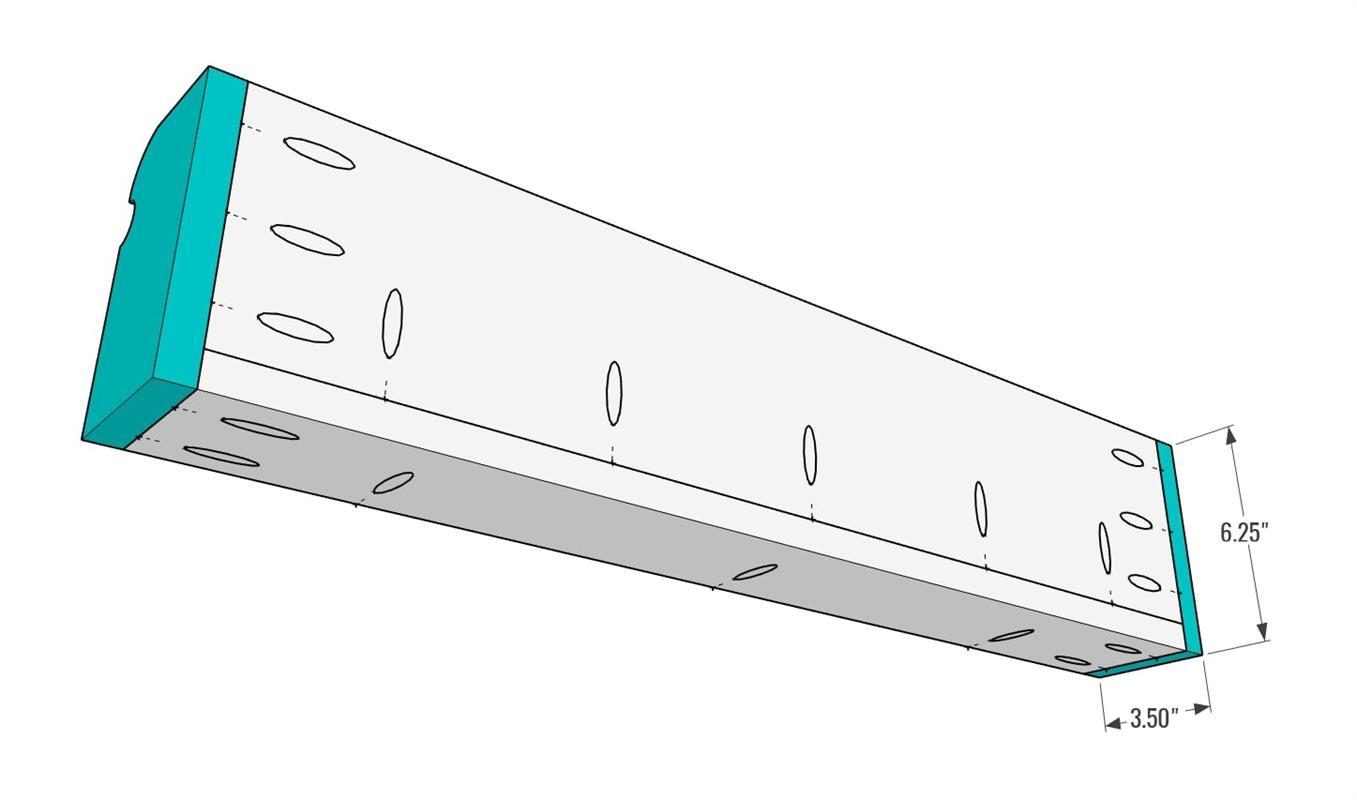
- 6 Sides , 3/4" x 3-1/2" x 6-1/4"
- 3 Dowels , 1" x 29-1/2"
Directions
-
This Plan Makes Three (3) Shelves
These materials and supplies listed for this project will be enough to build three shelves. You will need to repeat each step below for each of the three shelves.
-
Drill Pocket Holes
Drill pocket holes in the approximate locations shown on the BACK's and BOTTOM's.

-
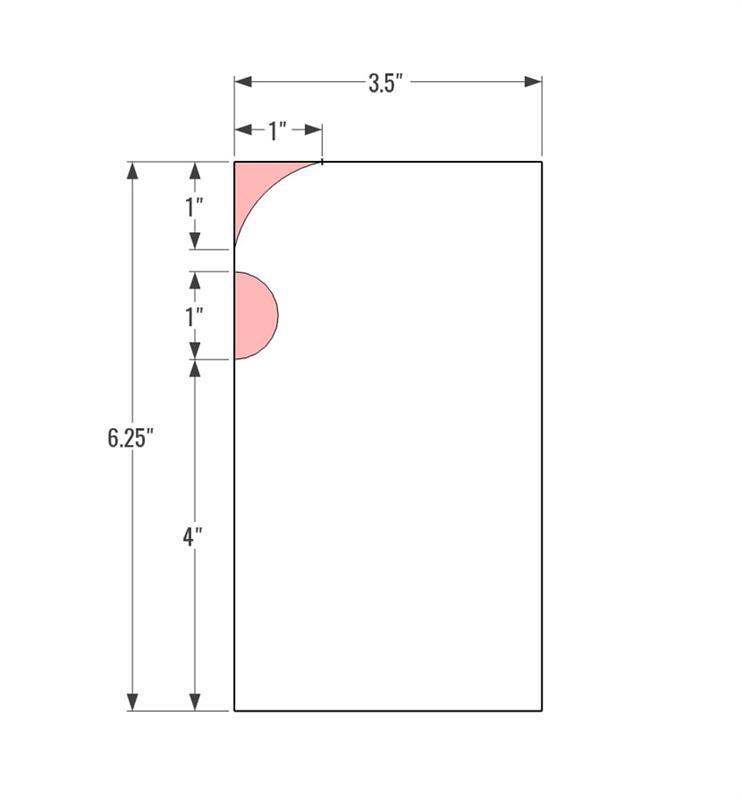
Cut Pattern into Sides with Jigsaw
Following the diagram, mark 1" on the top and front edge of each SIDE piece. Create an arc between the two points using a small round object like the bottom of a pop can, or spray paint can. Then, mark 4" from the bottom of the SIDE. Cut a small piece off the end of a scrap piece of one of the 1" dowels and line it up with your 4" mark, centered so that half of the dowel is on the board and half off. Trace the side that is on the board. Carefully cut both areas that are shaded red on the diagram with a jigsaw.
-
Assemble Back and Bottom
Assemble the BACK pieces to the BOTTOM pieces for each shelf. Ensure that the pocket holes on the BOTTOM are facing out since they will attach to the front trim later. Use wood glue and (5) 1-1/4" pocket hole screws on each shelf unit.
-
Attach Sides
Attach SIDES to each shelf unit using wood glue and (10) 1-1/4" pocket hole screws. Ensuring that the pattern you created using your jigsaw is facing the front.
-
Attach Front Trim
Attach the FRONT TRIM. Use wood glue and one brad nail into each side to hold it into place. Then secure with (3) 1-1/4" pocket hole screws on the bottom on each shelf unit.
-
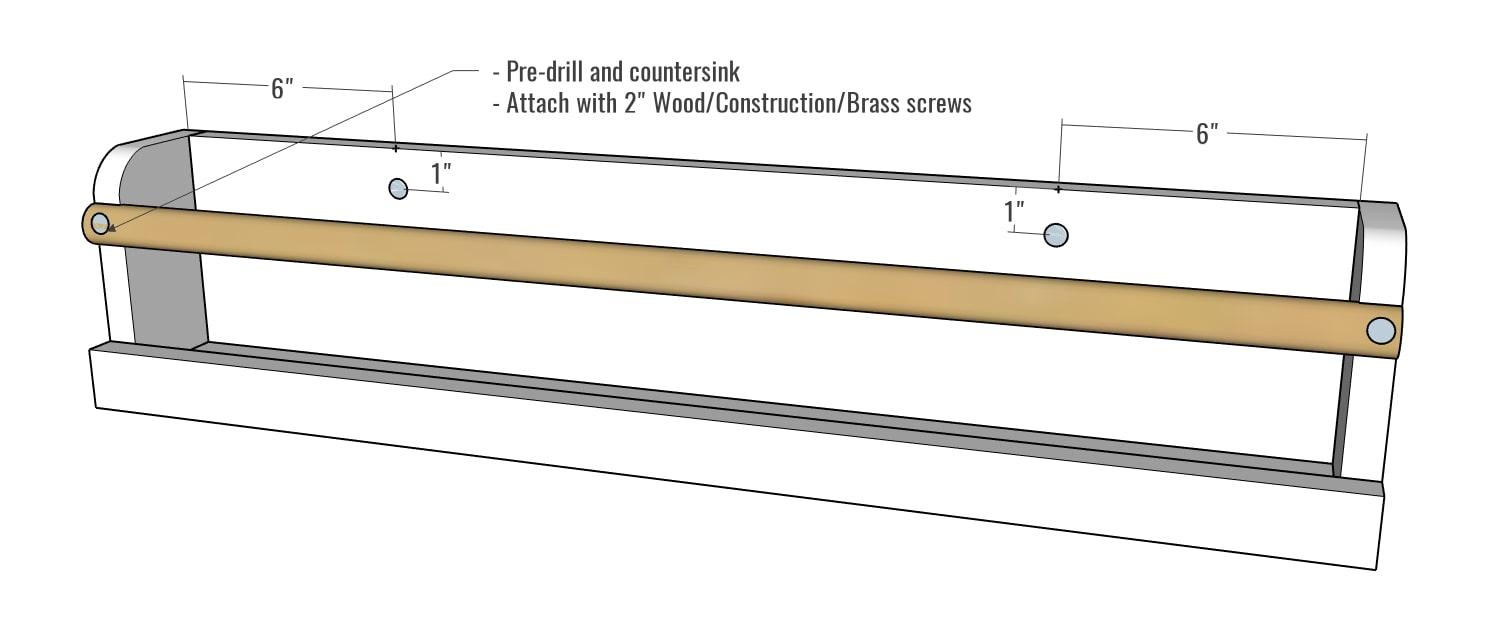
Pre-Drill Back & Attach Dowel
Pre-drill and use a small countersink in the locations shown on the BACK piece. Note that these are spaced 16" apart, but if your studs are not in these locations please adjust or use wall plugs when attaching to your wall. Pre-drill and countersink both sides of the DOWEL. Use a small amount of glue and secure in place with 2" wood, construction or brass screws.
-
Attach to Wall
Attach to the wall, either directly to studs or using wall anchors. Spacing between the three shelves can be based on your needs/preference.
-
Sand all Pieces
At this point, sand all pieces with 120 grit sandpaper, followed by 220 grit. It is easier to do this prior to assembly.
-
Finishing
Paint, stain or do a combination of the two on your shelves! If you are going to stain the dowel, as we did, then paint the main part of the shelf and stain the dowel separately prior to attaching.