

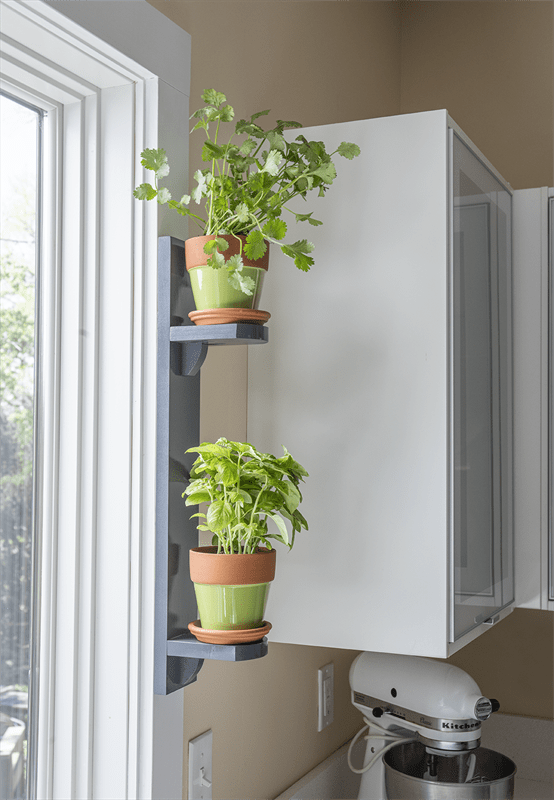
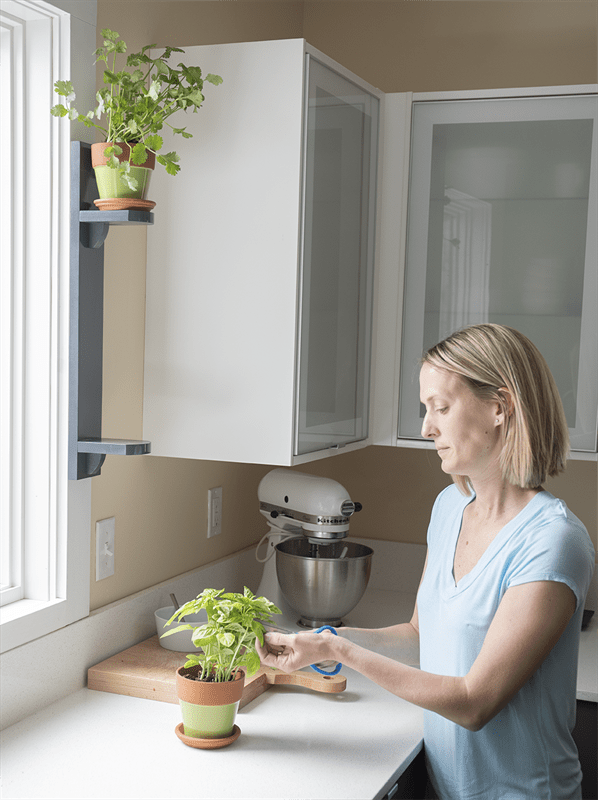
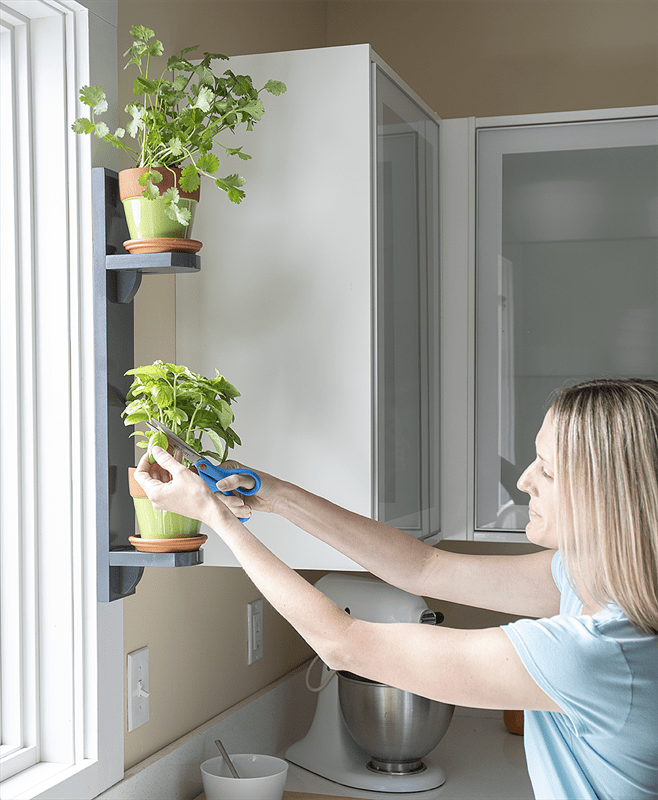
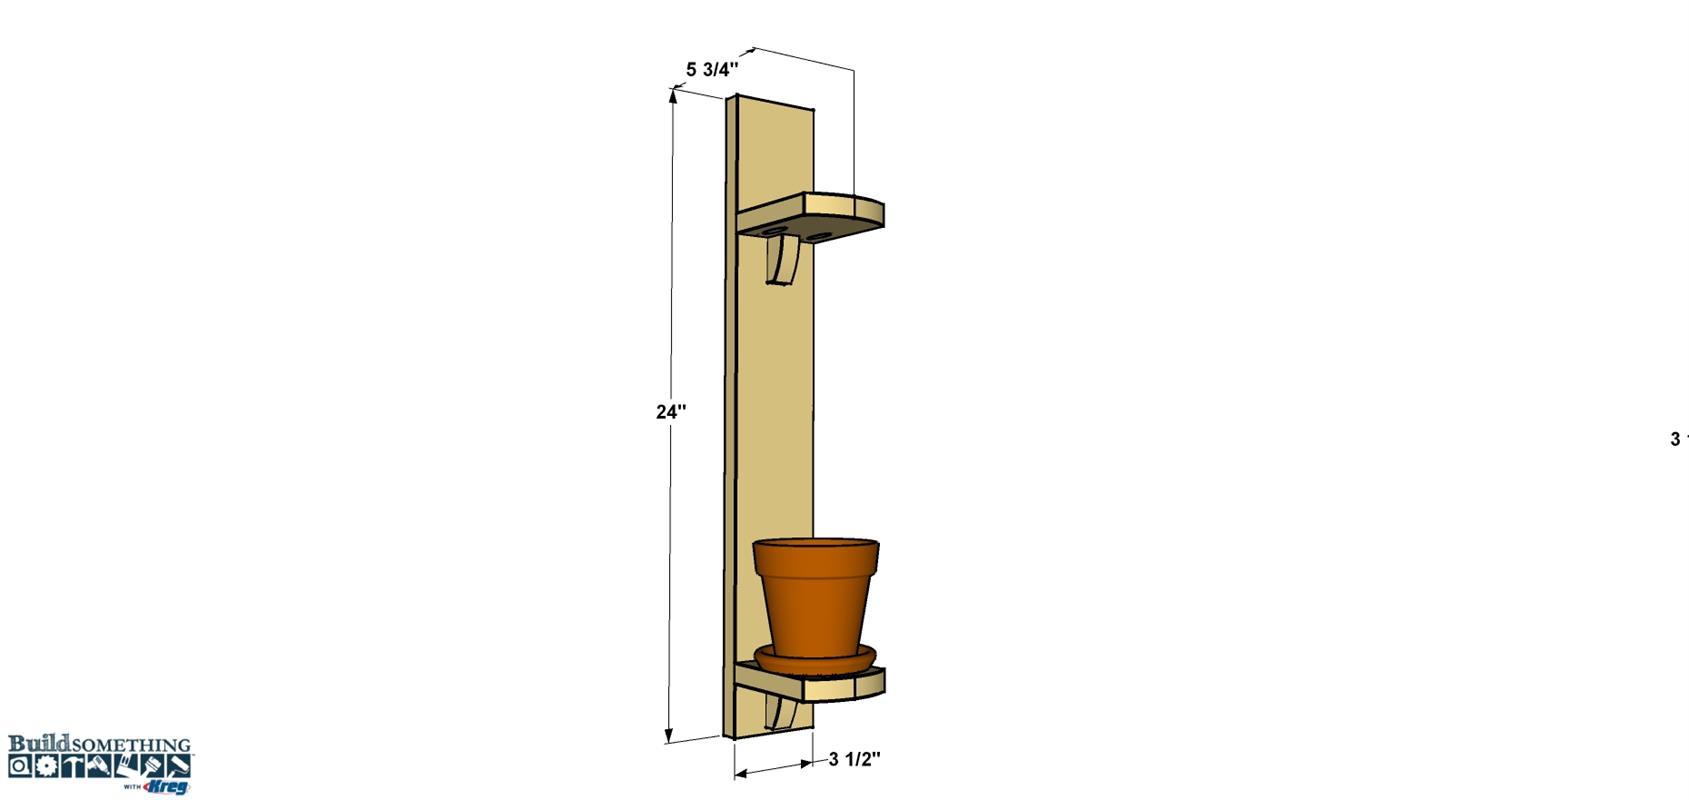


Growing your own herbs is lots of fun. They’re compact, easy to grow, fragrant, and colorful. With this compact shelf made from just one 1x4 board, you can place an herb garden just about anywhere—like in a kitchen window where you can enjoy the plants and easily cut them when you want fresh herbs.
Tools
Kreg Tools

Other Tools
-
Miter Saw

-
Square
-
Tape Measure
-
Clamps
-
Drill (cordless)
-
Sander
Materials
Wood Products
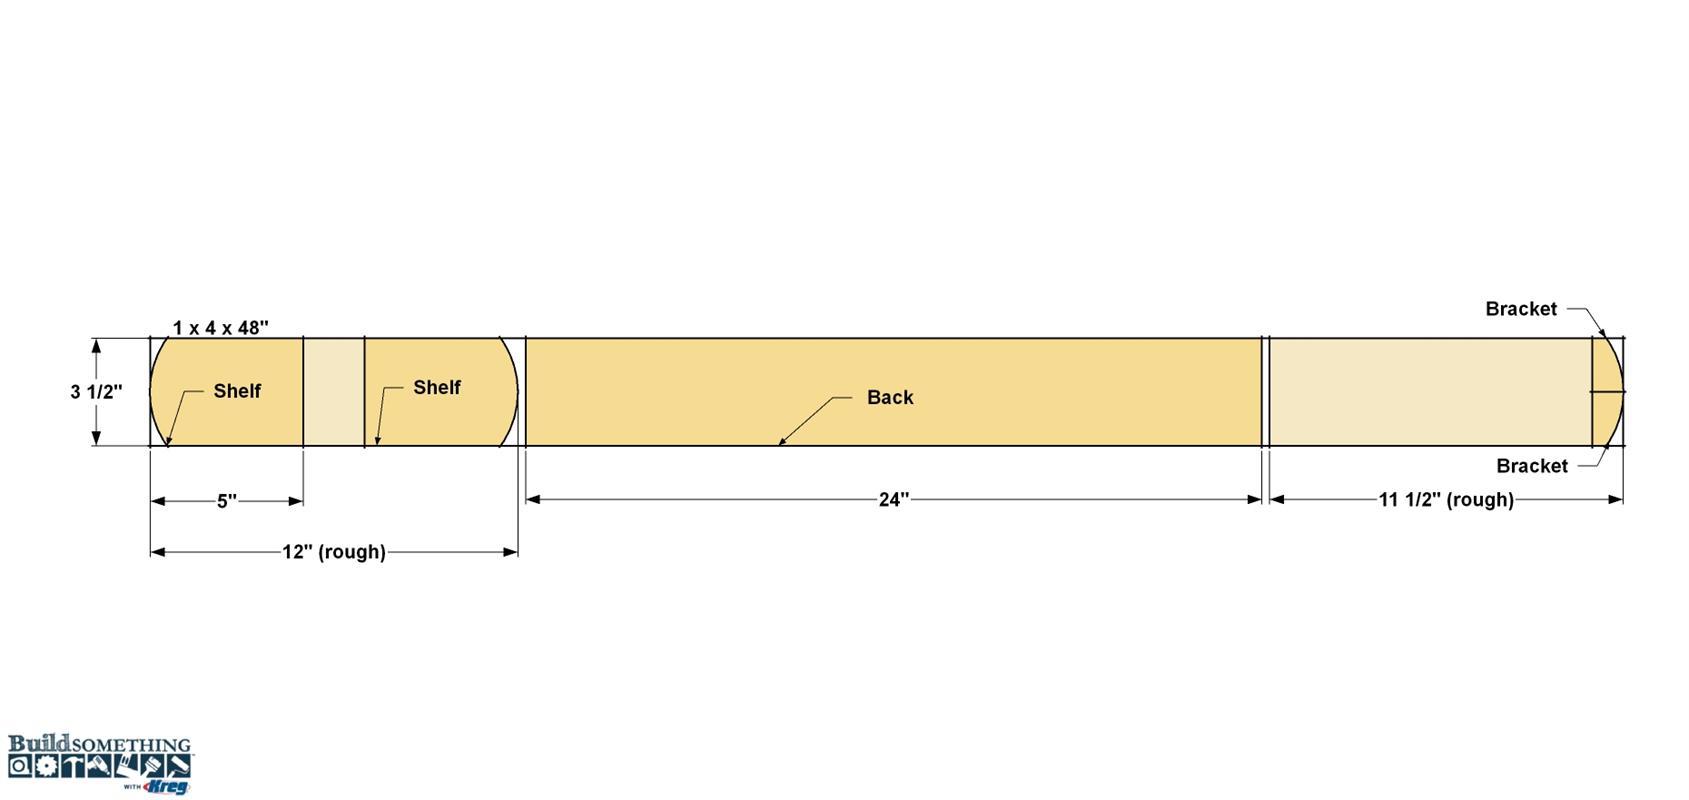
- 1 Board , 1x4 , 48"
Hardware & Supplies
- 1 1 1/4" coarse-thread Kreg Pocket-Hole Screws
- 2 4 1/2" terra cotta pot
- 2 4" terra cotta saucer
- 1 Keyhole hanger
- 1 High-gloss grey spray paint
- 1 Wood glue
Cut List & Parts
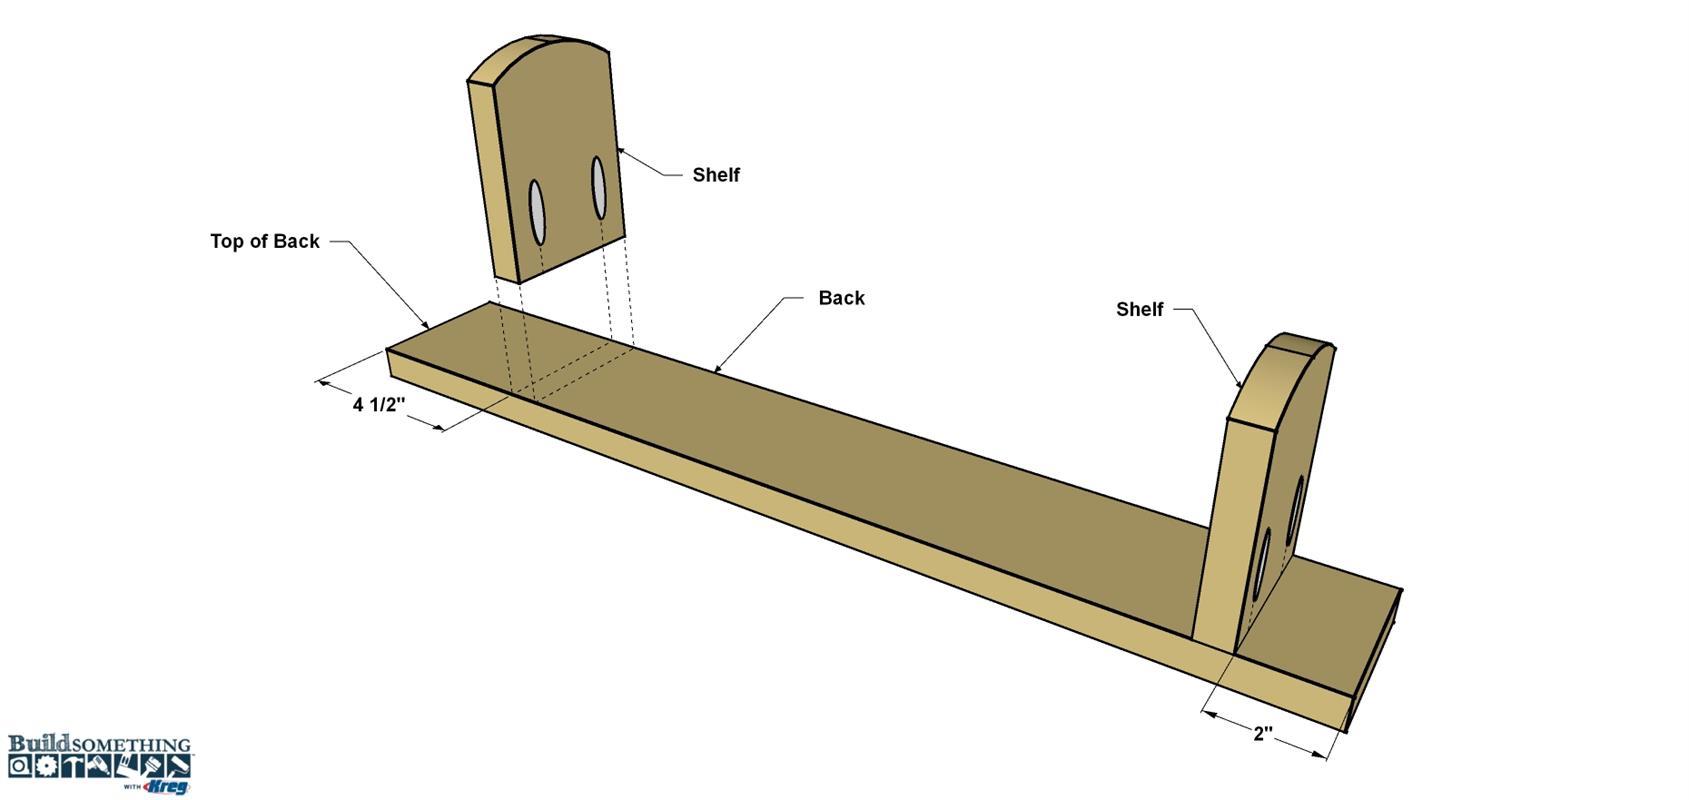
- 1 Back , 3/4" x 3 1/2" x 24" poplar
- 2 Shelf , 3/4" x 3 1/2" x 5" poplar
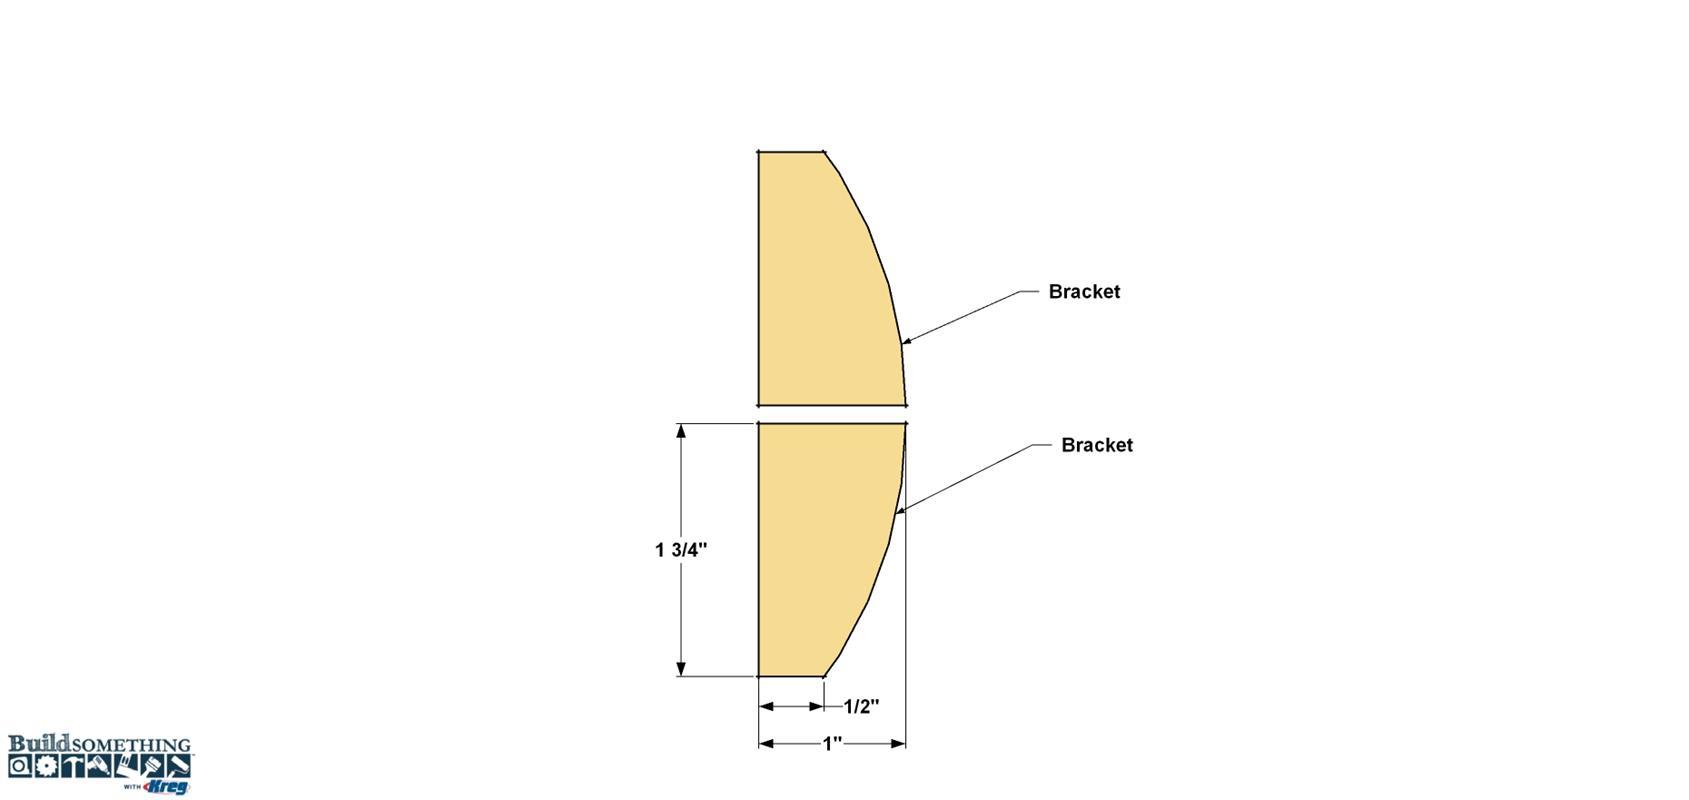
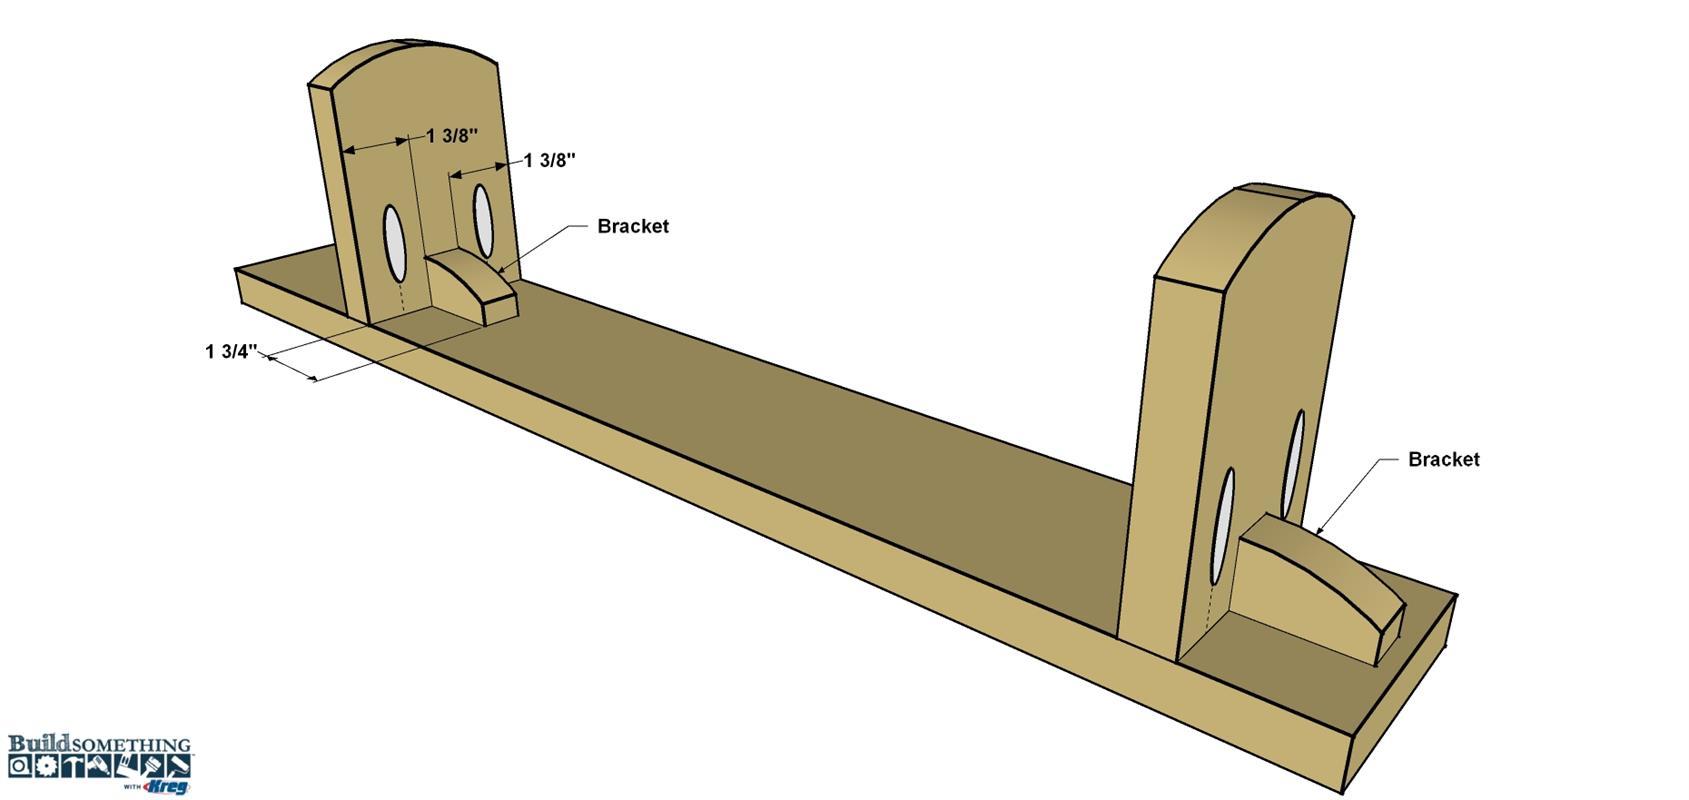
- 2 Bracket , 3/4" x 1" x 1 3/4" poplar
Directions
-
Make the Shelves
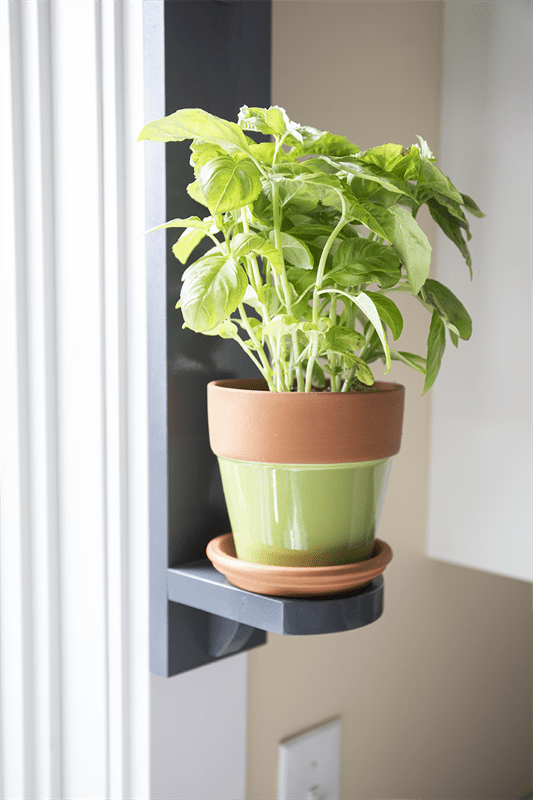
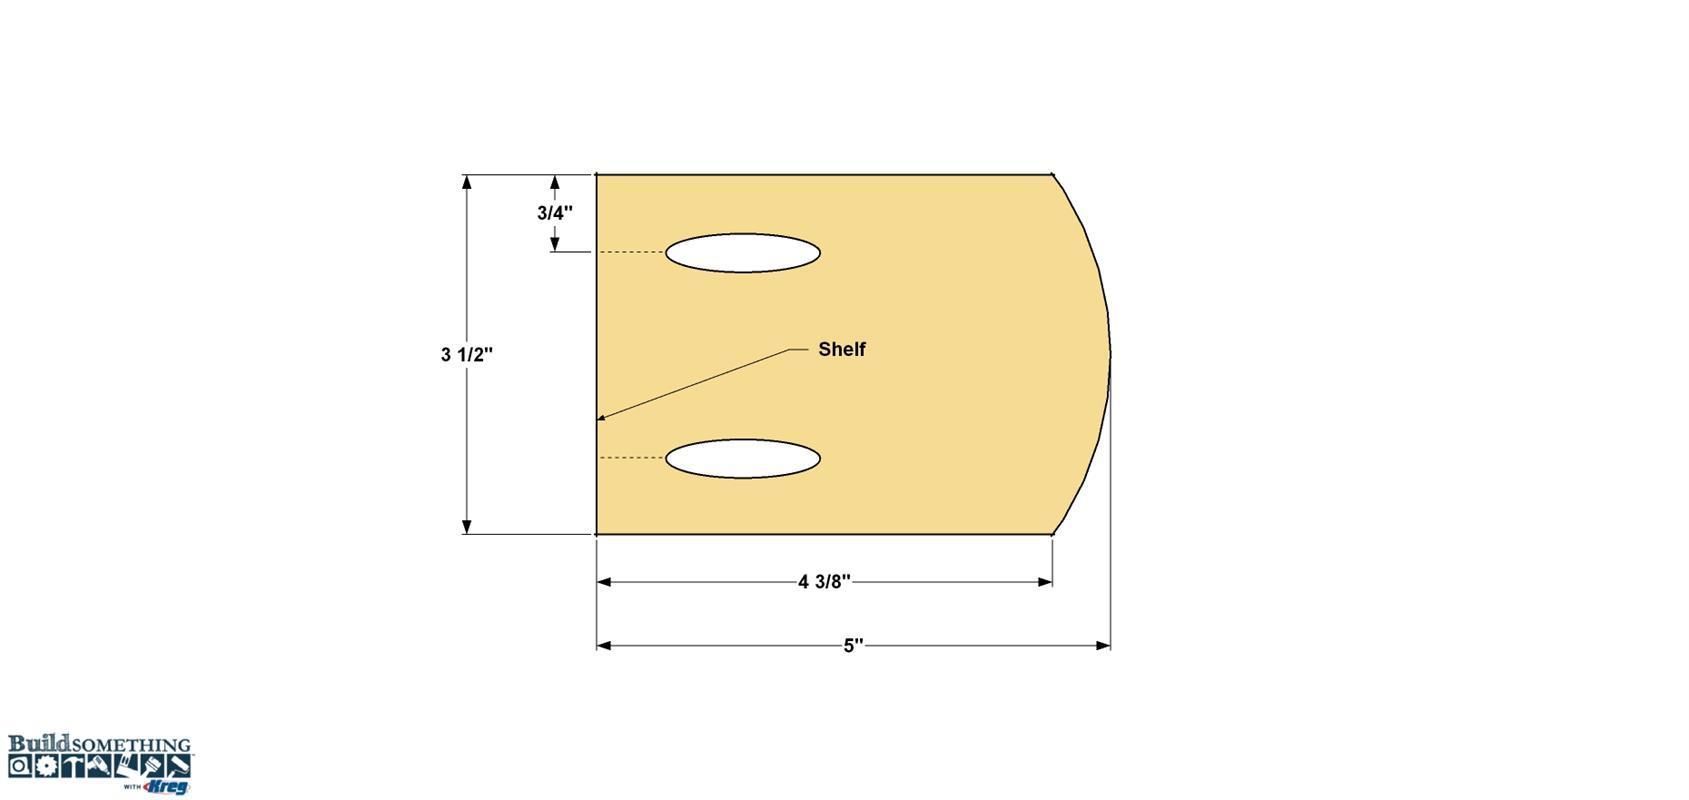
Start by cutting a board to roughly 12" long from a 1x4 board, as shown in the cutting diagram. Lay out the shelf curve on each end of the board, as shown. Clamp the board to a sturdy work surface and cut out the curves using a jigsaw. Sand the curves smooth. Next, cut two Shelves to finished length on the miter saw. Finally, set your Kreg Pocket-Hole Jig for 3/4"-thick material, and then drill pocket holes at the locations shown. Sand the Shelves smooth.
-
Cut the Back
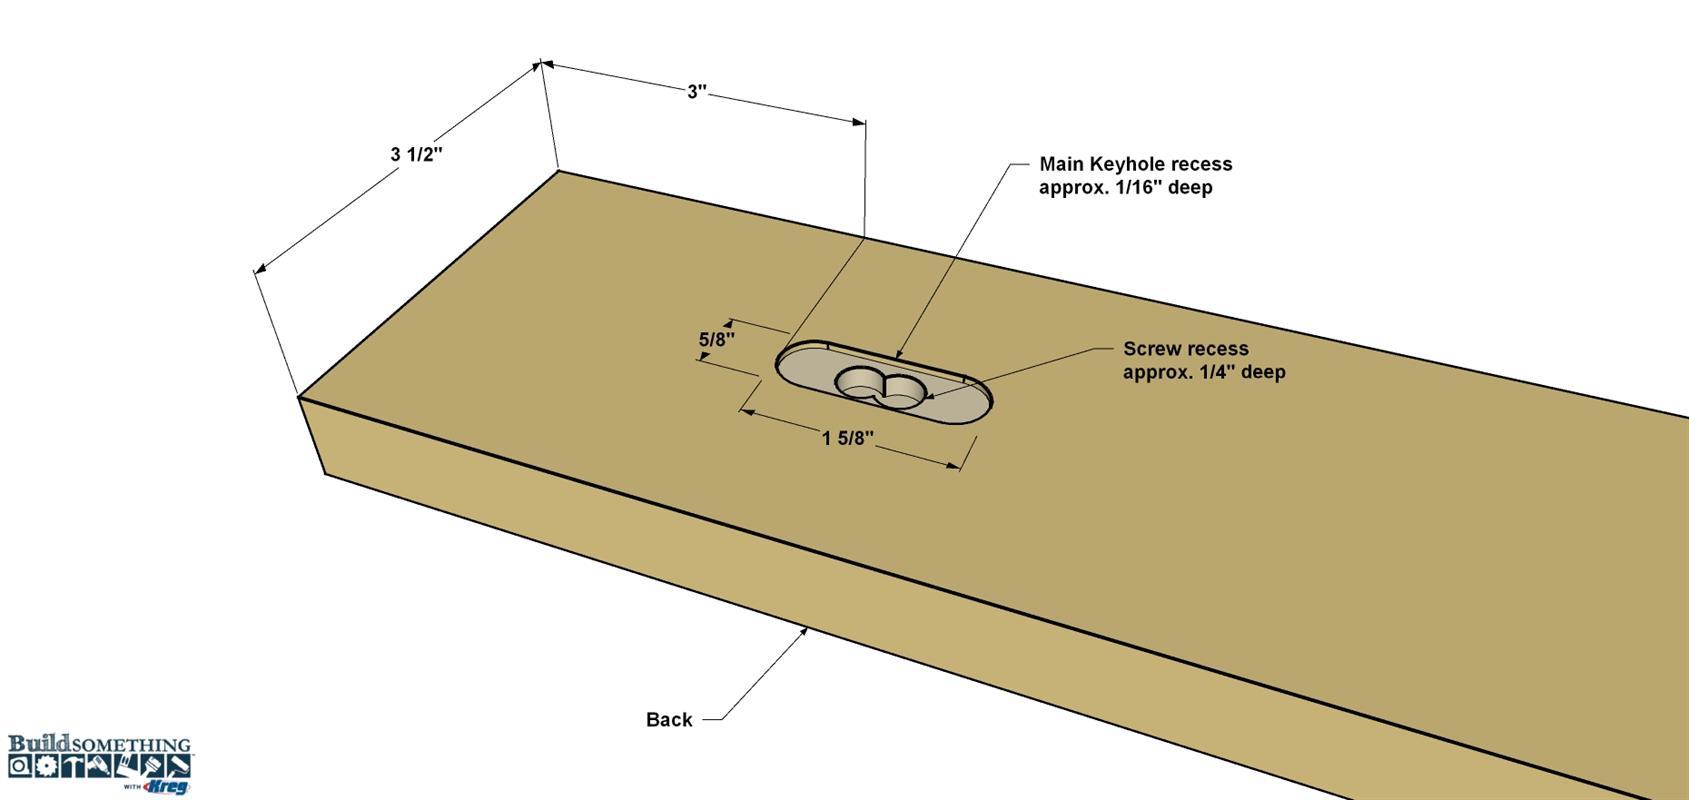
Cut a Back to size from a 1x4 board, as shown in the cut diagram. On one face, lay out the location for the keyhole bracket and trace around it. Now you can create a recess, so the bracket will sit flush with the rear face of the Back. To do that, drill a few shallow, overlapping holes the width of the keyhole bracket (5/8" in our case). Use a utility knife to trim within the outline. Place the bracket into the recess. Mark the mounting-screw locations, as well as the keyhole shape. Drill a few overlapping 3/8" holes, 1/4" deep where the keyhole shape is. This will allow clearance for the screw head when you mount your herb shelf. Sand the edges and faces of the Back, and then secure the keyhole bracket with the screws provided.
-
Attach the Shelves
Add a small amount of glue to the rear (flat) edge of the first Shelf and position at the location shown. Once you have the Shelf positioned, attach it to the Back using glue and 1 1/4" coarse-thread Kreg Pocket-Hole Screws. Repeat this process for the second shelf.
-
Make the Bracket
With the remaining piece of wood, lay out and cut the same curved edge as you used for the Shelf edge. Using a Jig saw, cut the curved end off the board, as shown. Then make a perpendicular cut slightly deeper than the Brackets to create two pieces. Finally, cut the two Brackets free from the board. Place a flat piece of sand paper on a flat surface and sand the brackets smooth and flat.
-
Add the Bracket
The Brackets are mostly decorative in this application, so they can just get glued in place. Apply a small amount of glue on the rear and upper edges of each Bracket, and then position it under the shelf, as shown. You can clamp the Brackets in place, or use painter’s tape, to hold the Brackets until the glue dries.
-
Sand and Finish
Do any touch-up sanding that’s needed, and then wipe away all dust on the herb shelf assembly. Then you can stain or paint your herb shelf. We chose gloss grey paint, and applied it with a spray can. To get the smoothest finish, spray on a first coat, and then allow it to dry according to the manufacturer’s recommendations. Once the paint is dry, lightly sand the surfaces to remove any dust caught in the paint, wipe away dust, and then apply a second coat. Repeat this process until you reach your desired finish.
-
Hang the Shelf
Determine where you’d like to mount your herb garden, then figure out where the mounting screw needs to go that the keyhole bracket will slip over. We mounted our shelf into solid-wood window trim, so we could just drive the screw into the wood. If you’re mounting to a wall, you’ll want to use a medium-duty drywall anchor. Set a small screw (usually provided with the keyhole bracket) where you’d like to hang the shelf. Set the keyhole bracket over the screw and adjust the shelf for plumb. Set your pots and enjoy your garden.