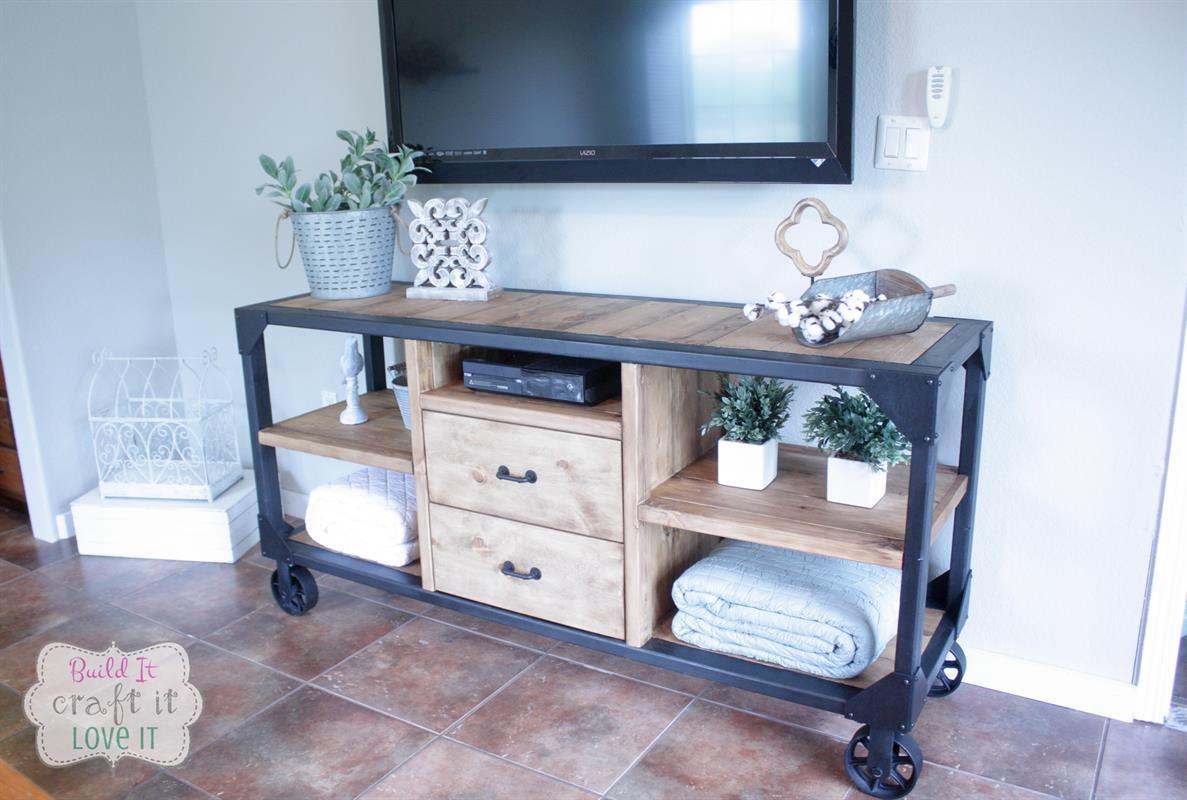
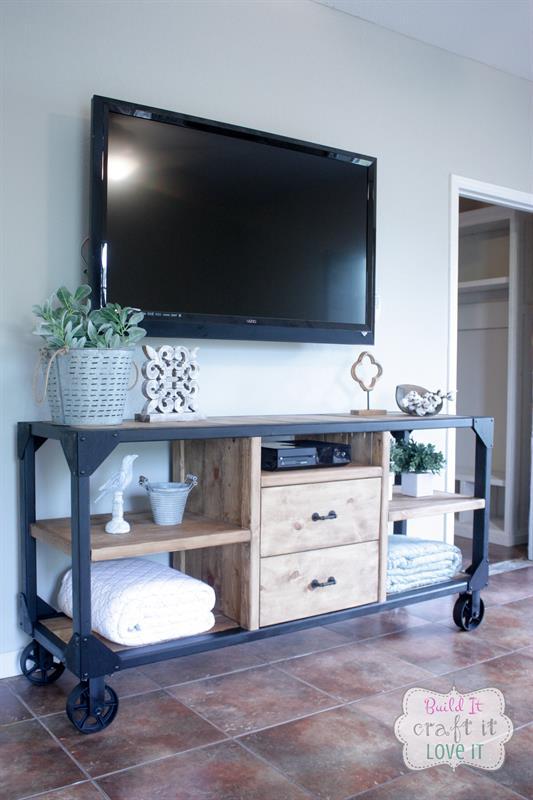
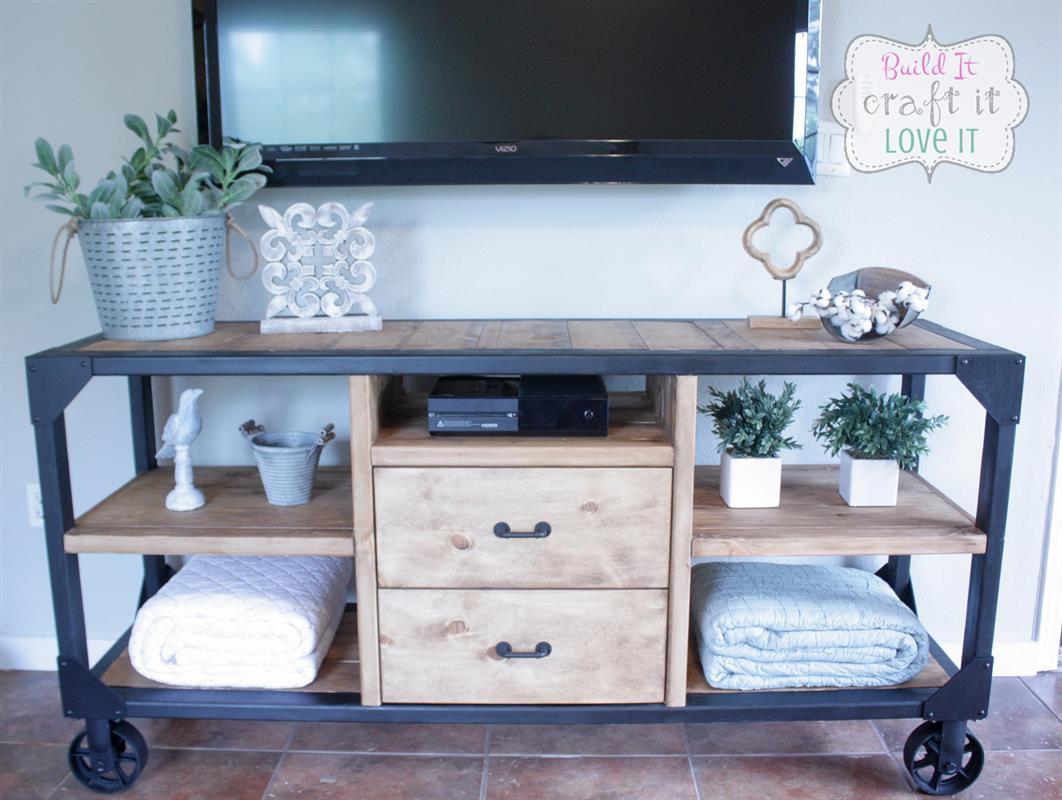


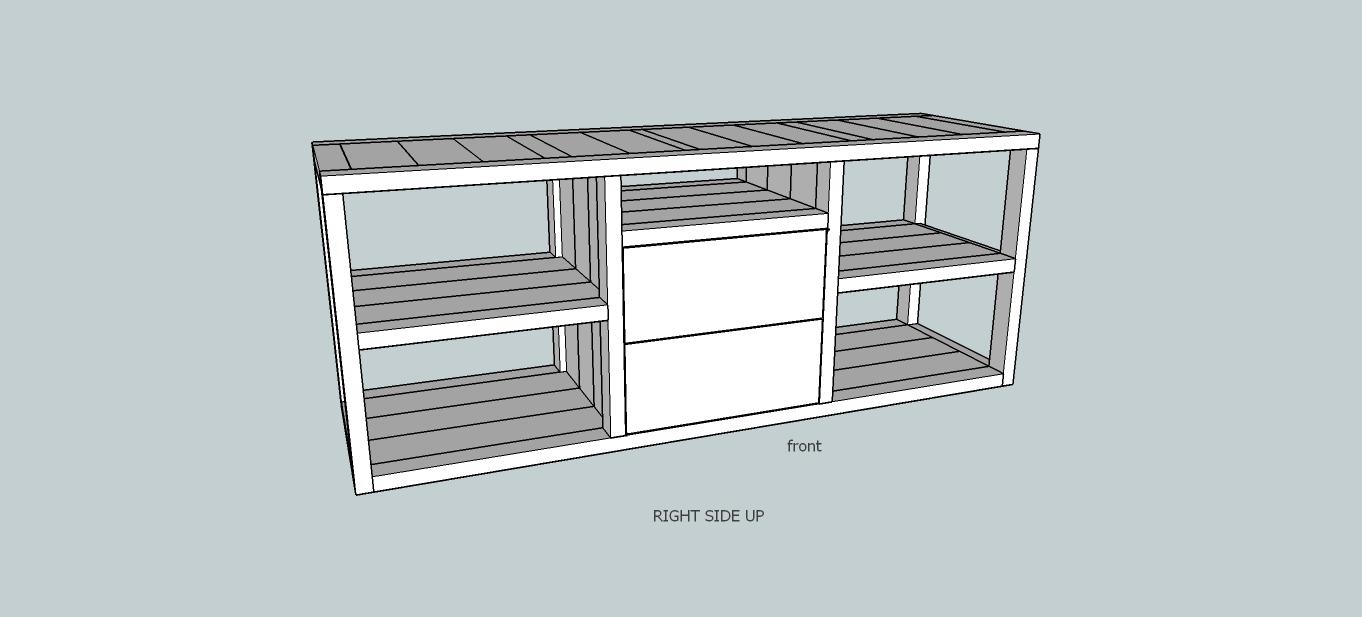
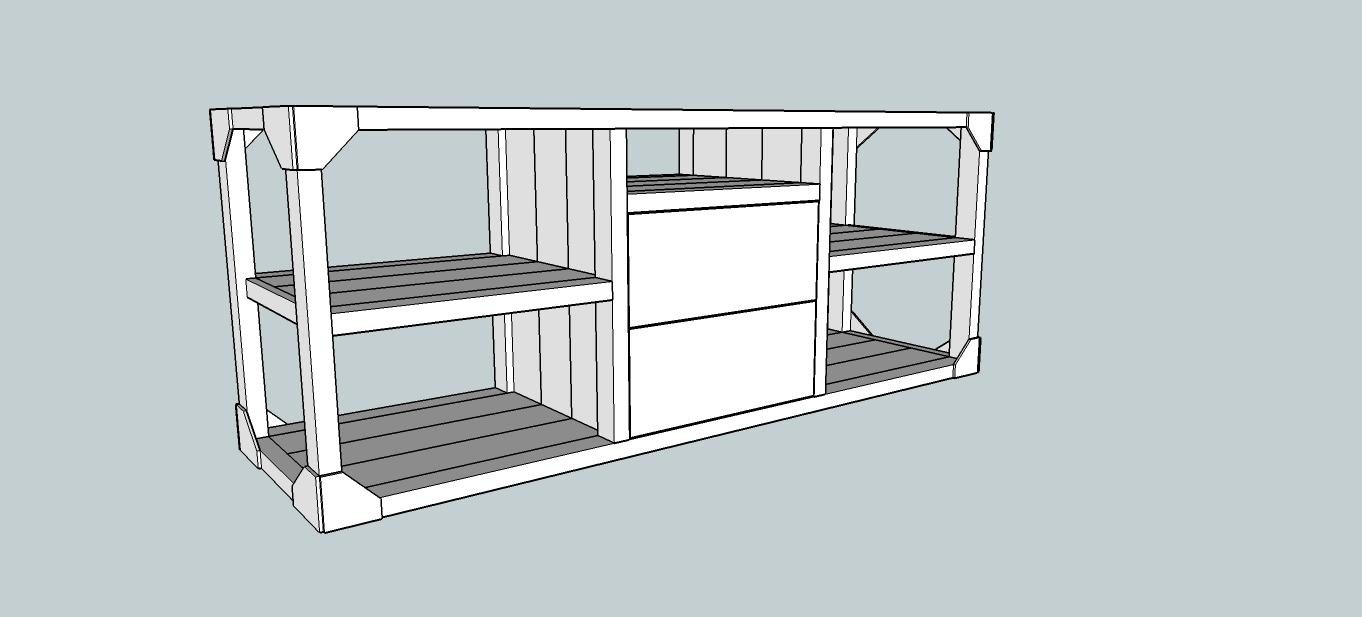
Staring at the t.v. never looked so good!! This media console is not only gorgeous but just as easy to build! All the 'metal' parts are actually wood...so no special skills or metal working abilities needed!!
Tools
Kreg Tools

Other Tools
-
Miter Saw

-
Tape Measure
-
Clamps
-
Drill (cordless)
-
Stapler
-
Sander
Materials
Wood Products
- 8 Board , 2x3 , 96"
- 9 Board , 1x6 , 96"
- 2 Board , 1x8 , 96"
- 1 Board , 1x10 , 96"
- 1 Board , 2x2 , 96"
- 1 Board , 1x2 , 96"
- 1 Plywood , 1/4" Thick , Quarter Sheet
Hardware & Supplies
- 2 Sets of drawer slides
- 200 Pocket hole screws
- 4 6 in. wheels
- 16 Large Hex Bolts
Directions
-
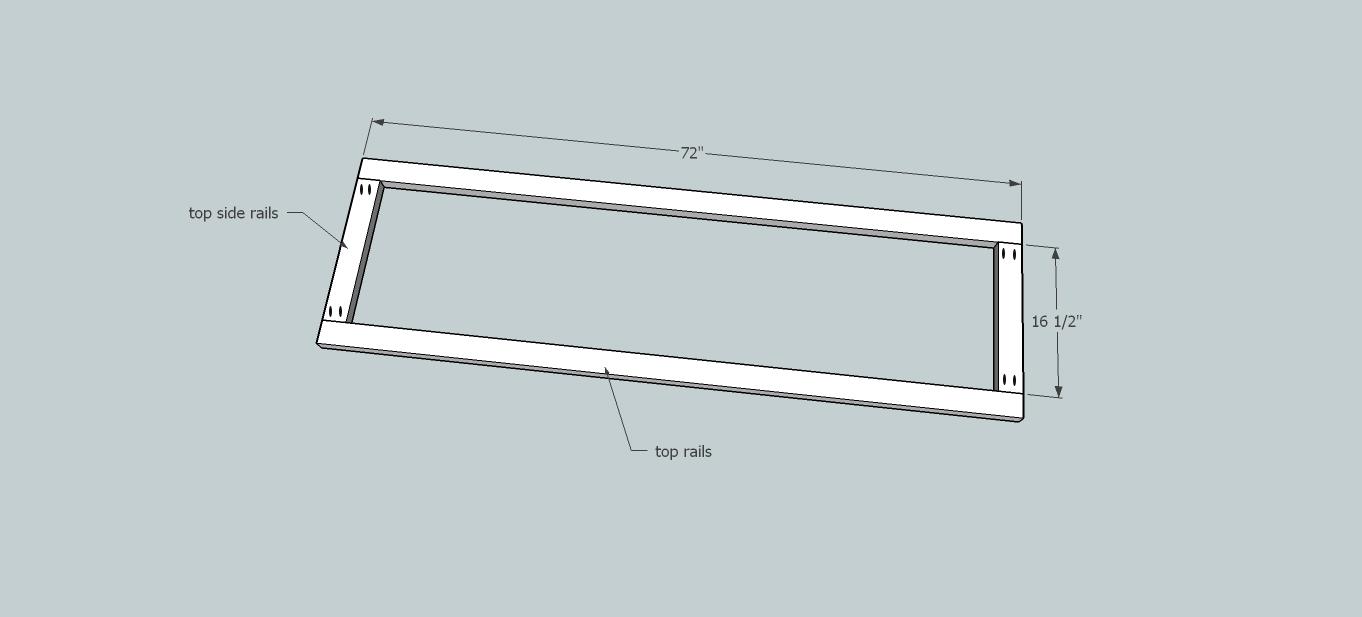
Step 1
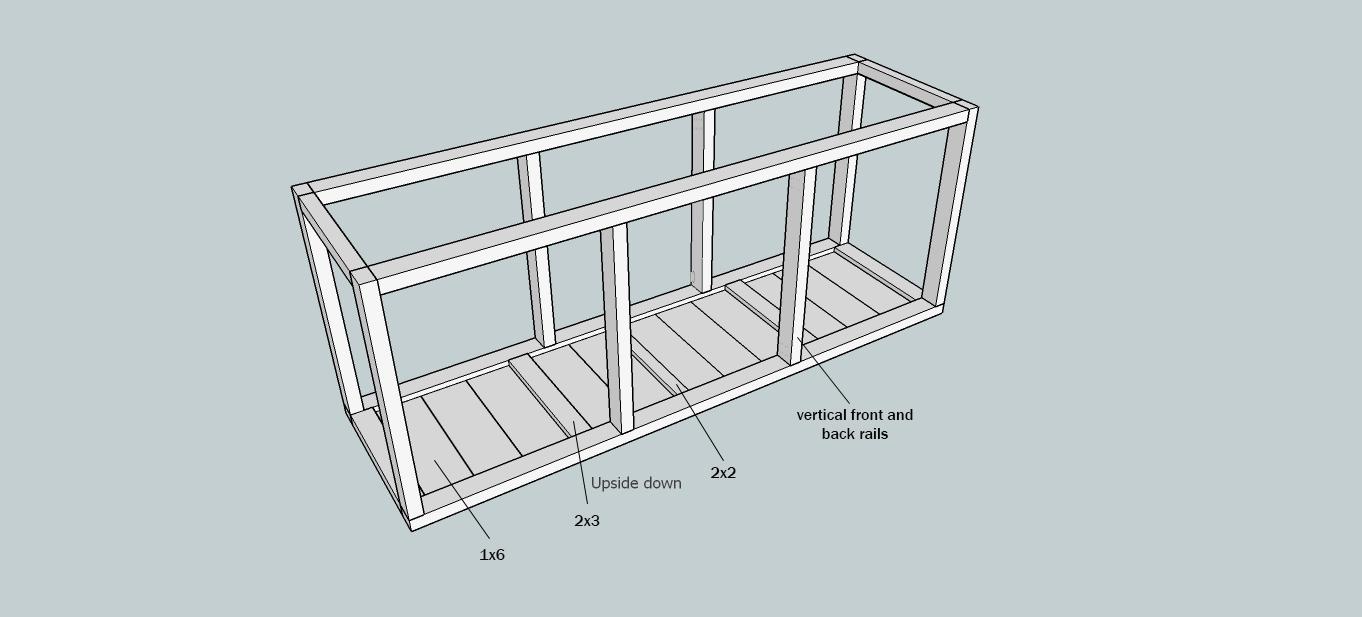
NOTE: All of the 2x3s in this plan will be joined using 1 1/2" pocket holes (since the actual dimension of a 2x is 1 1/2") And 2 1/2" pocket hole screws! The black ovals denote placement of pocket holes! Make sure and glue all joints in addition to the screws!!
Start by joining the top rails to the top side rails!
-
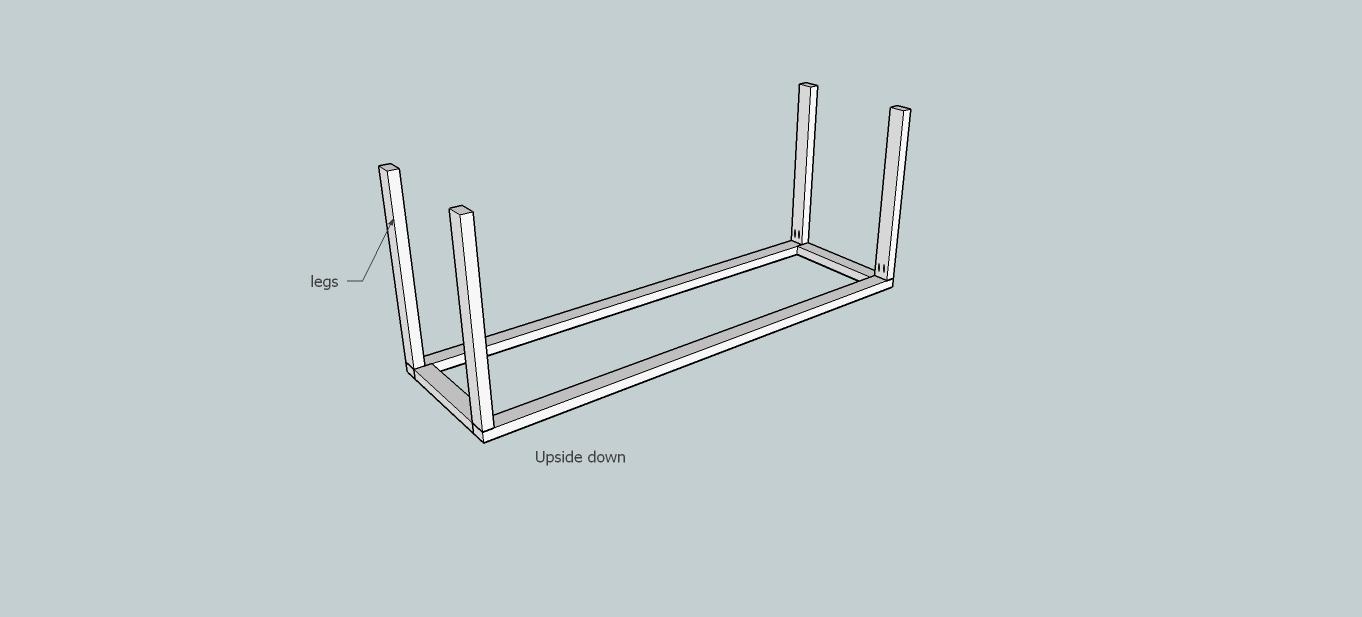
Step 2
Connect the legs to the top rails!
-
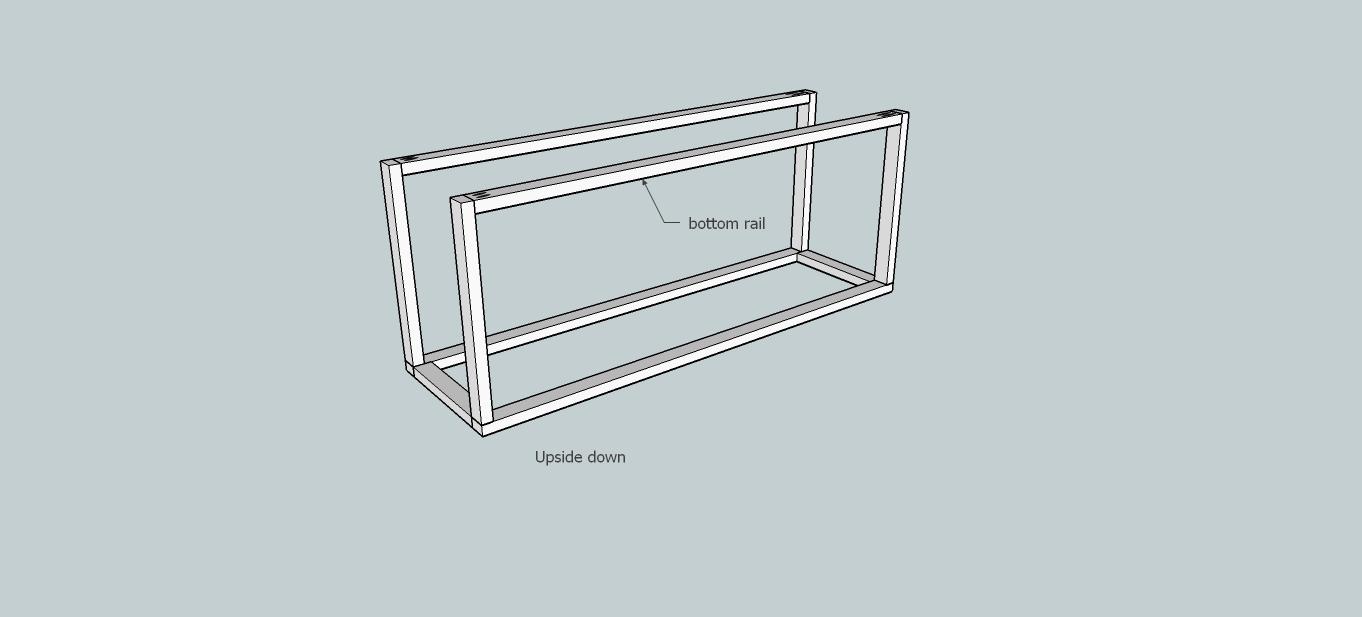
Step 3
Add the bottom rails to the legs!
NOTE: I built the whole thing, minus the drawers while having it turned upside down, this just makes it easier to screw everything together!
-
Step 4
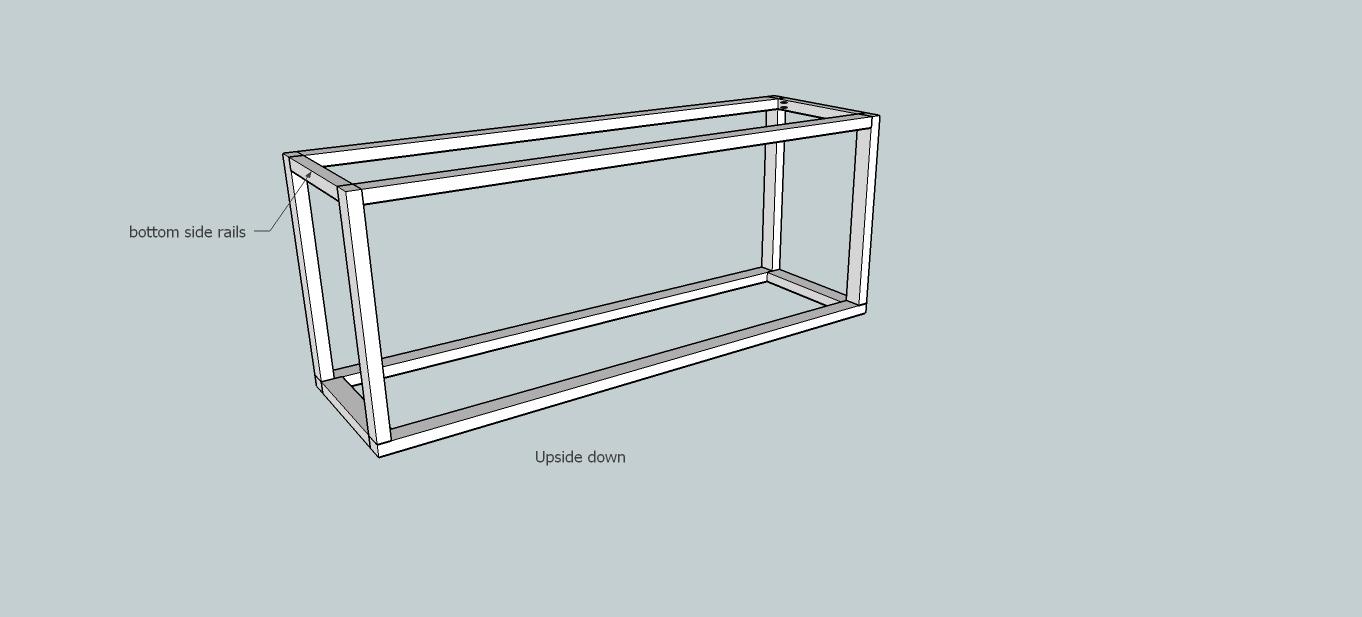
Attach the bottom side rails!
-
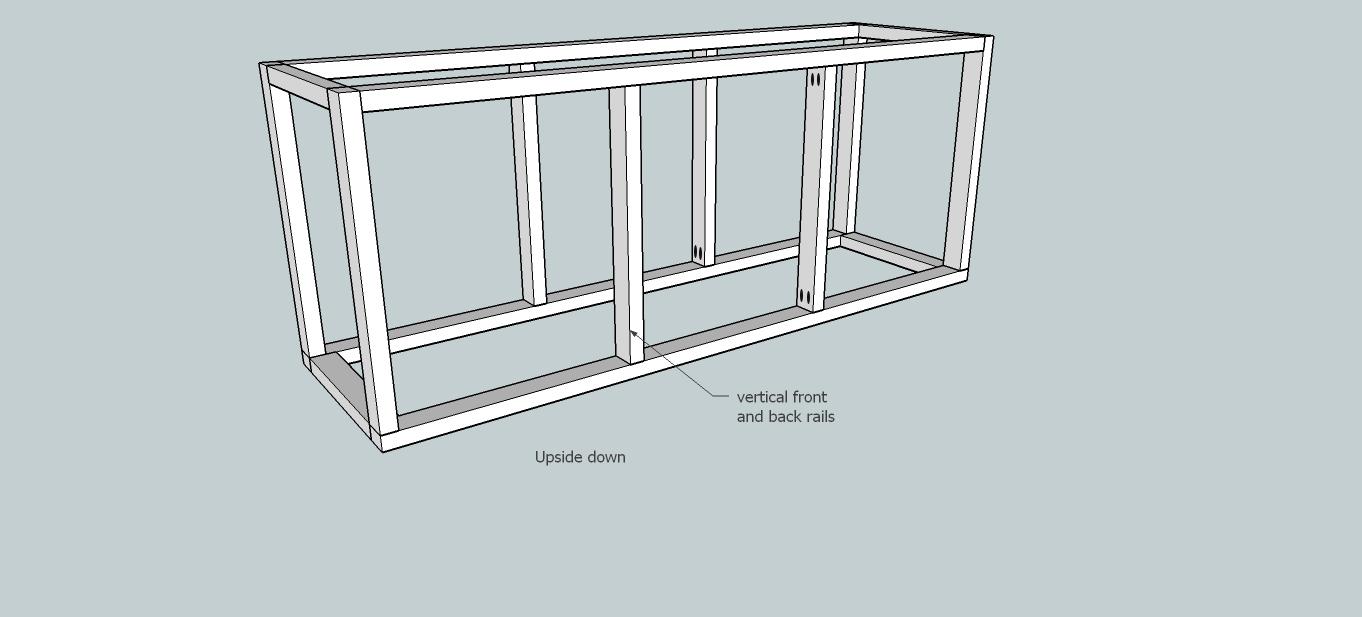
Step 5
Attach the vertical front and back rails! They are spaced 22 1/2" from each side, leaving 21 1/2" in the middle!
-
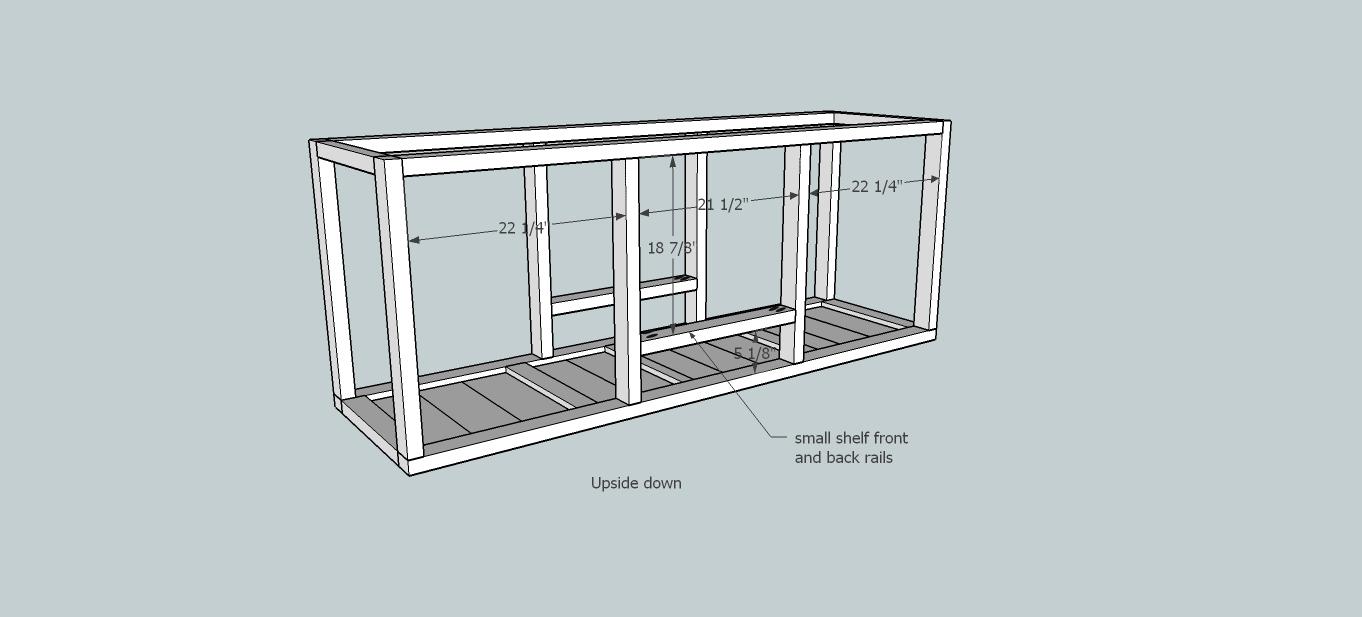
Step 7
Attach the small shelf front and back rails!
Note: I cut two small 5 1/8" boards to put under the boards so I didn't have to try and hold the board in place...it could just rest it on the scrap boards and it was right where I needed it when I screwed it in! I also did this with the other shelves as well!
-
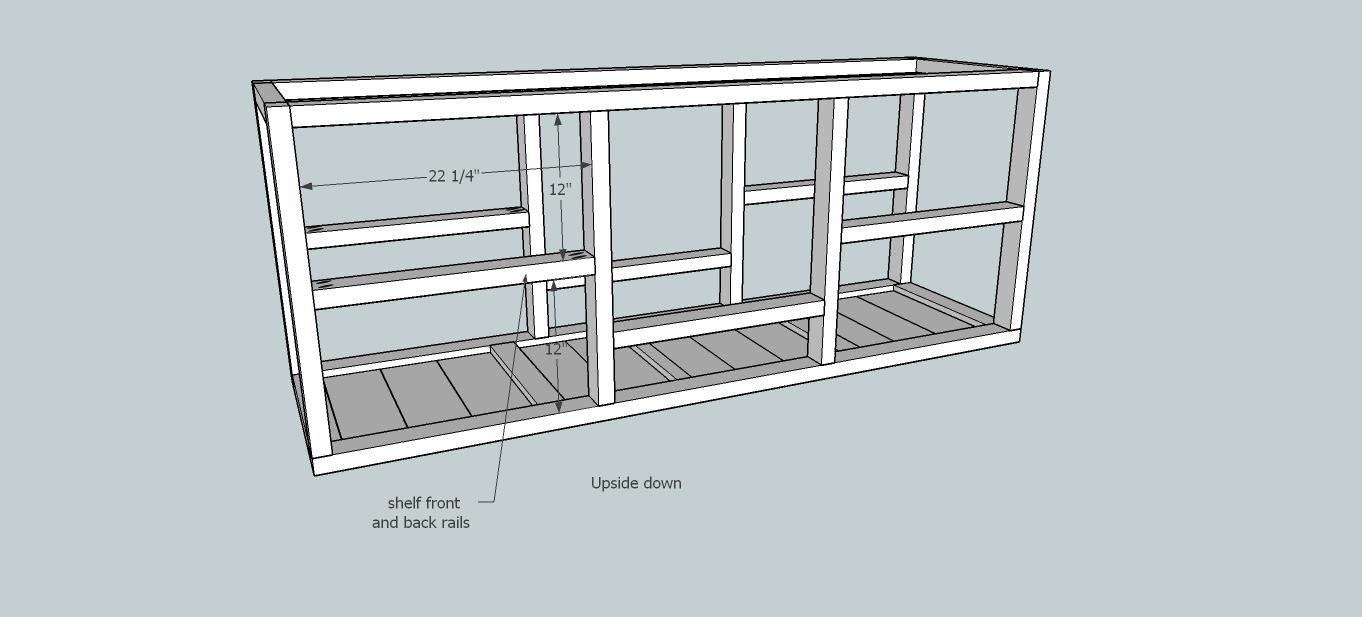
Step 8
Attach the shelf front and back rails on both sides!
-
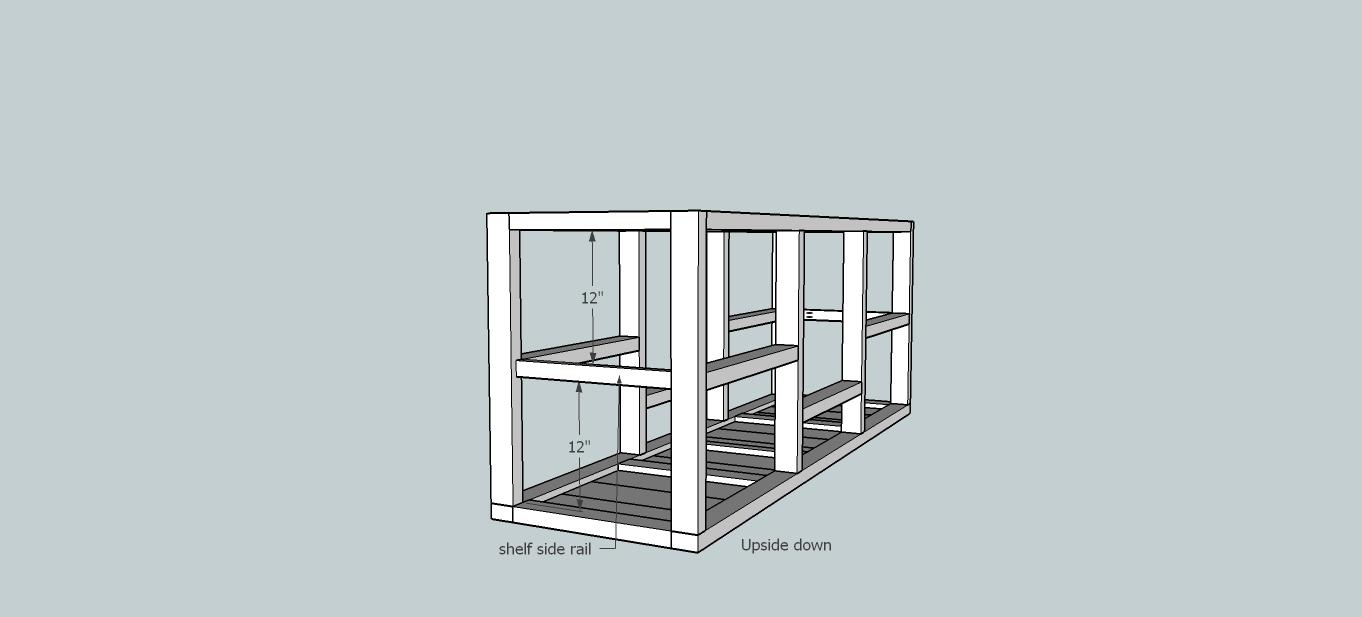
Step 9
Attach shelf side rails!
-
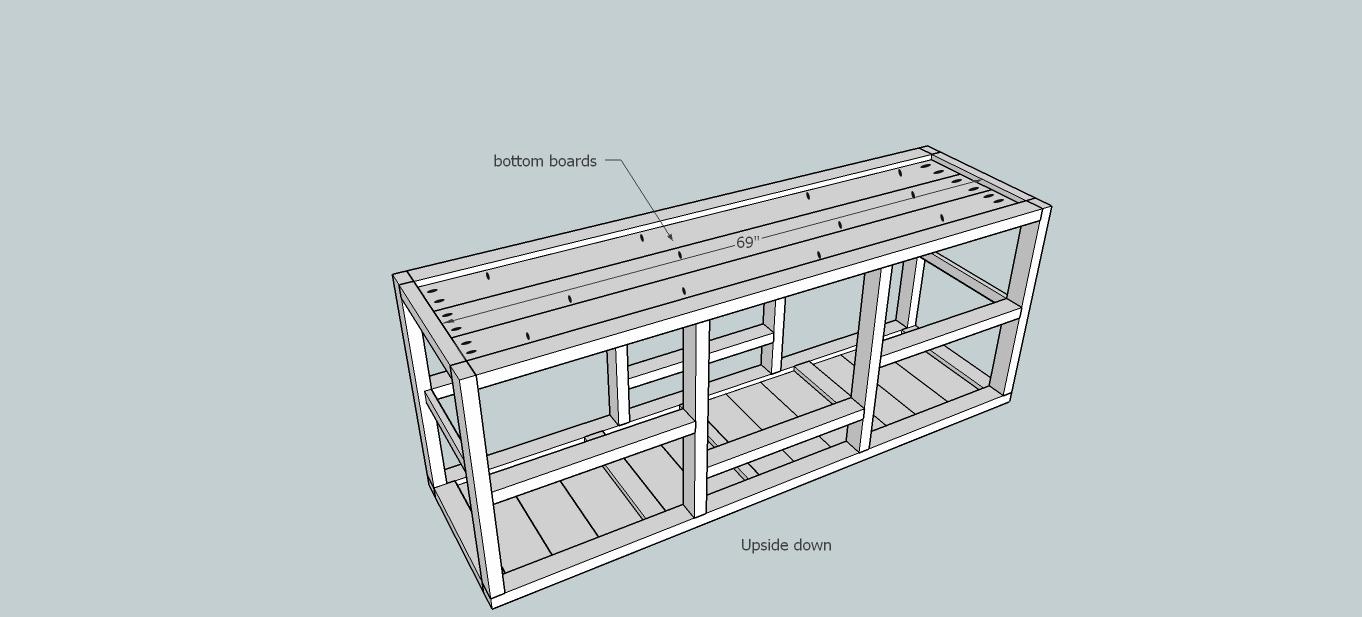
Step 10
Attach bottom boards! I not only used pocket holes going into the 2x3 frame but also sideways into each other just to help keep them all lined up and resist bowing!
-
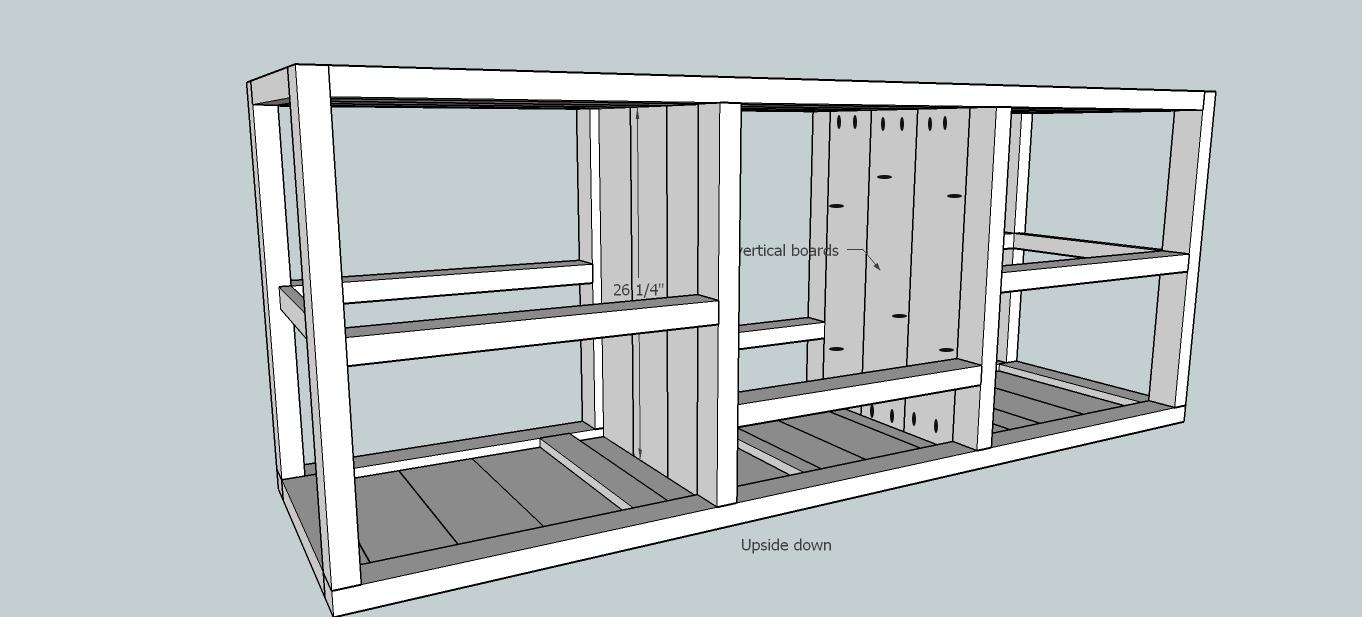
Step 11
Attach the vertical boards! I did the same thing here with the pocket holes going into the frame and the other 1x6 boards to make sure I had a flush surface for my drawer slides!
-
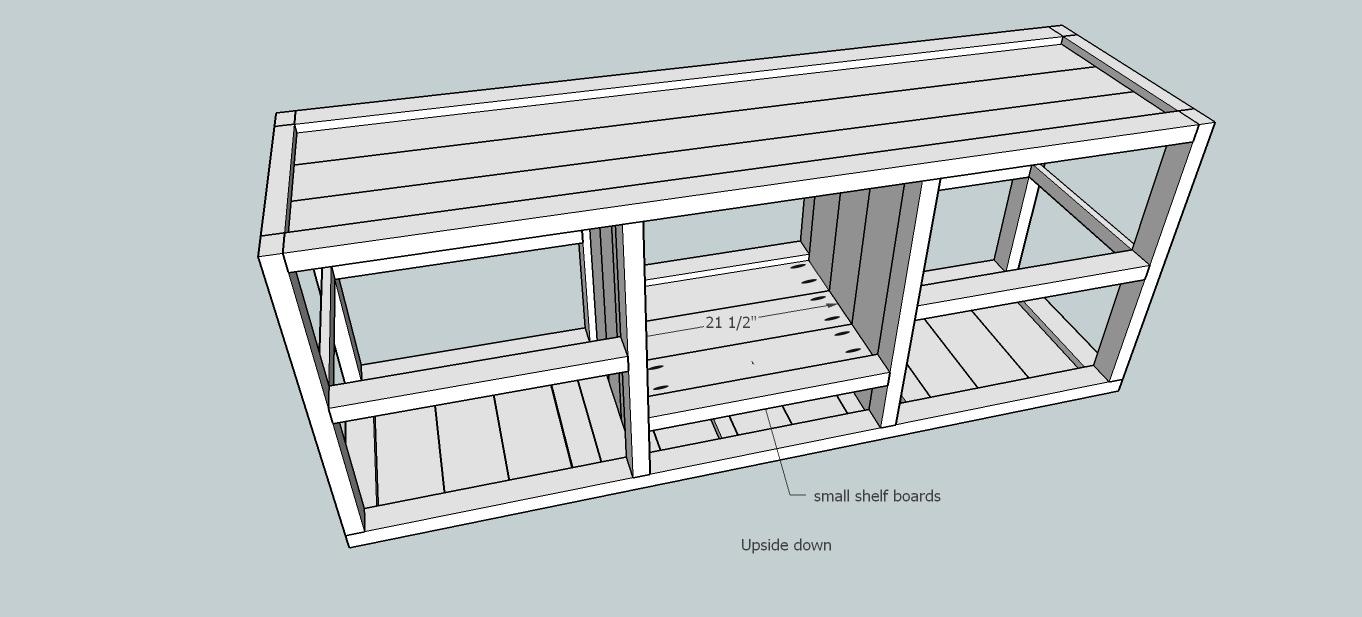
Step 12
Attach small shelf boards!
NOTE: You will want to sand these boards before screwing them into place because a sander will not fit in the small space...I know this because I didn't and had to hand sand it as best I could!! Lol!!
-
Step 13
Attach shelf boards!

-
Step 6
NOTE: All 1x6 boards will have pocket holes drilled at 3/4" (since this is the actual dimensions of 1x boards) and attached with 1 1/4" pocket hole screws!
I am not sure why but I forgot to place the black ovals on this picture...all boards will be pocket holed on the ends...making sure 1x boards are drilled at 3/4" and 2x boards are drilled at 1 1/2"!
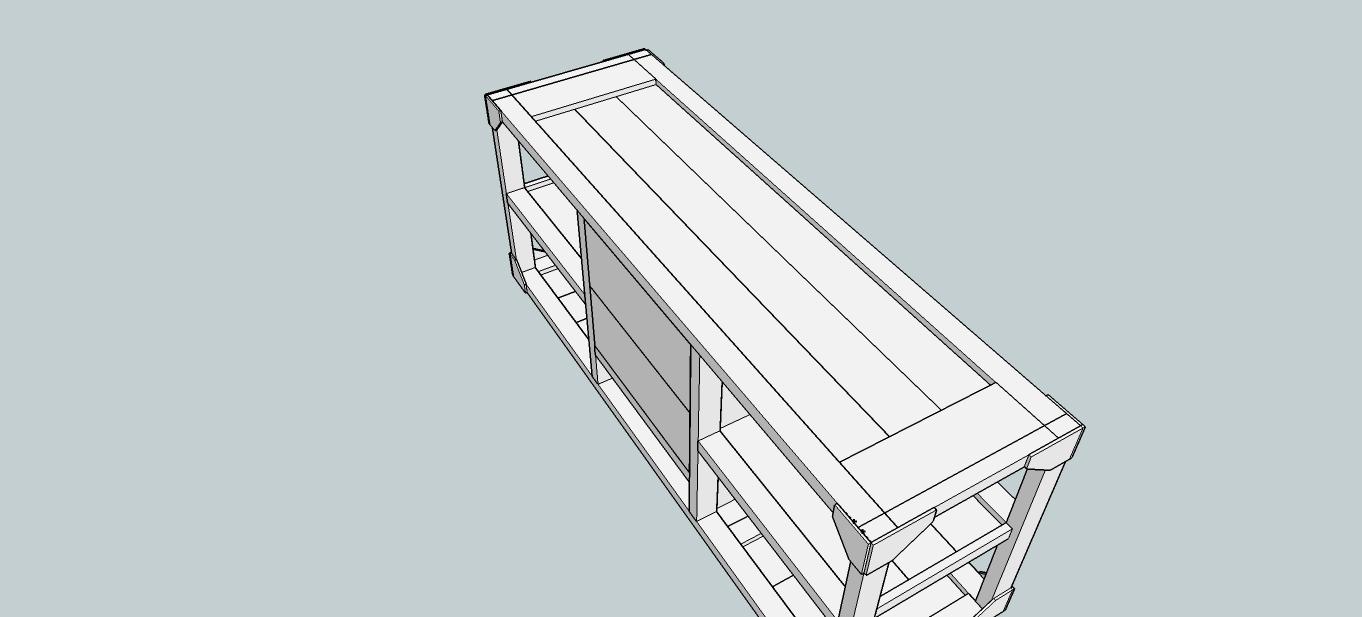
I attached the top at this time to make sure I didn't have any boards in my way while I was screwing all the boards in...I chose to go with a bunch of short boards rather than doing them long ways just to give it a different look!
-
Step 15
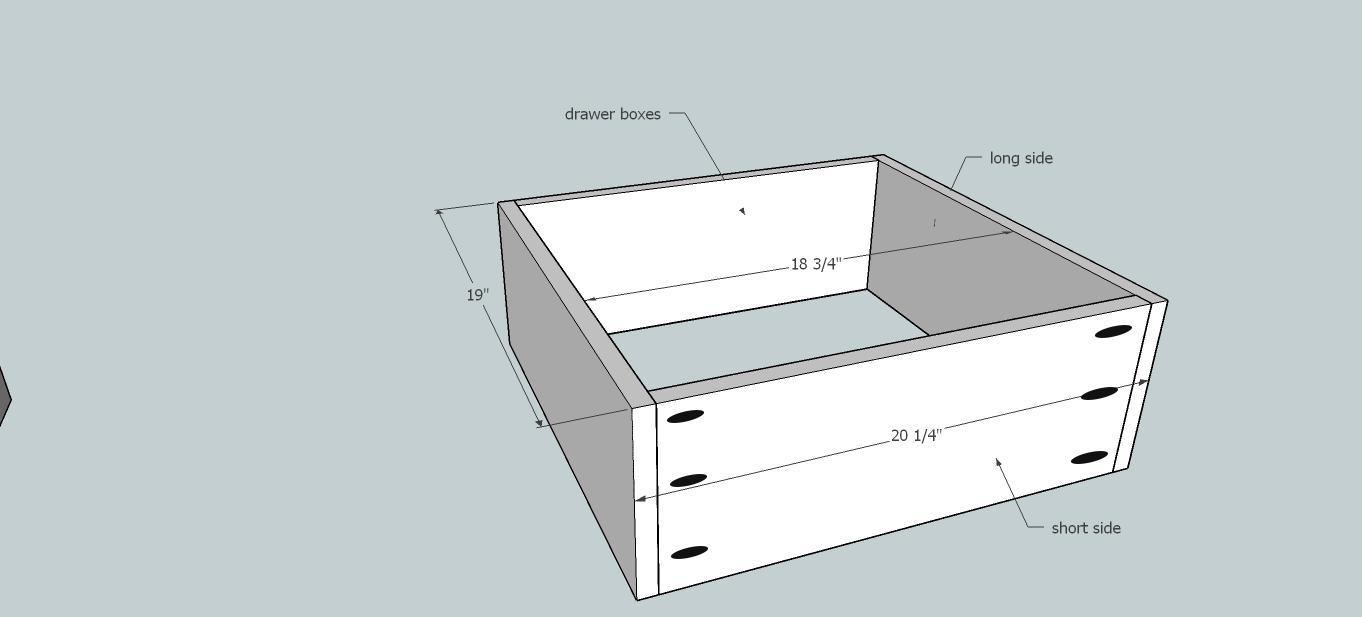
Build the drawer boxes! Place the long drawer sides parallel to each other and the short drawer sides parallel to each other with the short sides inside the long sides! Does that make sense?
NOTE: Before you construct your drawer boxes make sure and measure your opening with the drawer slides as best you can because all slides are slightly different sizes...and depending on even the slightest measurement that may become off while building the frame can create smaller or larger measurements!
Make sure your drawer is square!!
Also I place the pocket holes on the outside of the drawer as the drawer face will cover them and you wont have to see them inside the drawer!
-
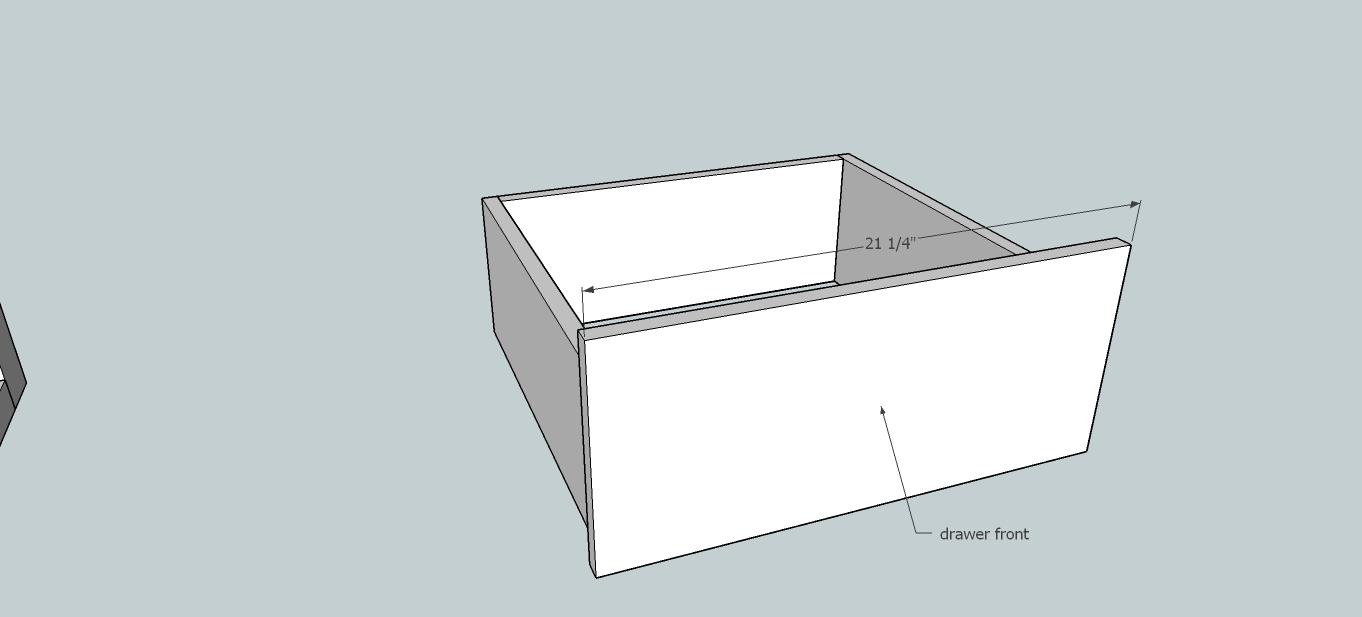
Step 16
Attach the drawer faces to the drawer!! Center it and using glue and a staple gun or brad nailer, shoot staples/nails through from the inside, not using larger than 1 1/4" staples/nails!
-
Step 17
Attach drawer slides and insert drawers! (If only it was as quick and easy as typing it just was! Lol!)
-
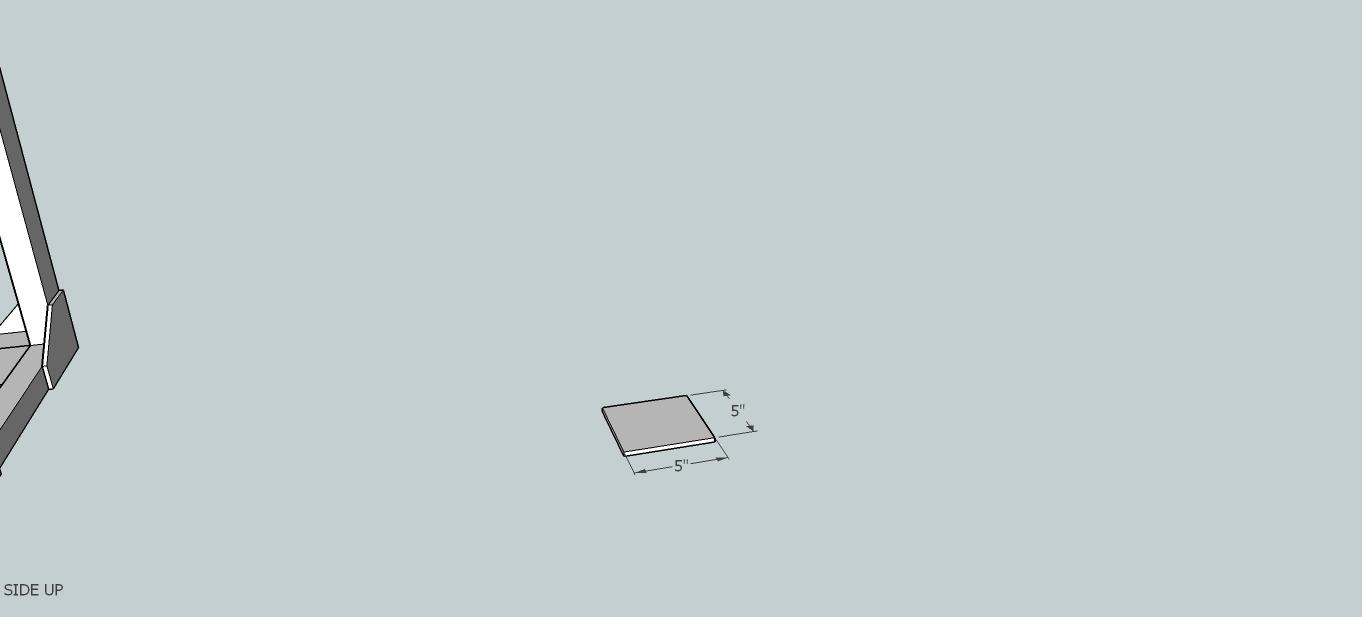
Step 18
Make corner decorative pieces by cutting 5" squares out of scrap 1/4" plywood!
-
Step 19
Now cut at 45 degrees off square 1 1/2" down from each corner!

-
Step 20
Using upholstery tacks, hammer the corner decorative pieces onto the console lining them up flush with the outside corners and top or bottom!
-
Step 21
Make sure and sand everything and then choose your finish! Turn it over once it's dry and attach the wheels! Make sure and pre-drill for your large hex bolts!
NOTE: I used Early American stain by Minwax and rubbed it in very lightly with a cloth, for the metal I used Rustoleum Flat Black from a can so it would match the spray paint perfectly that I used on the wheels, which was Rustoleum Flat Black spray paint!
It is complete!!! Woohoo!! Now stand back and marvel at your amazing work!!
P.S. Don't laugh at those fancy wheels I created in Sketchup!! Haha!!

-
Step 14
Add the wheel leveling boards! I just glued them and screwed them in with 1 1/4" screws making sure the screws are sunk a hair!
(I know the picture shows doing them after everything else is attached but it's easier to do them before adding drawers and turning it over...so I would do them now, but it can wait until right before you attach the wheels!