

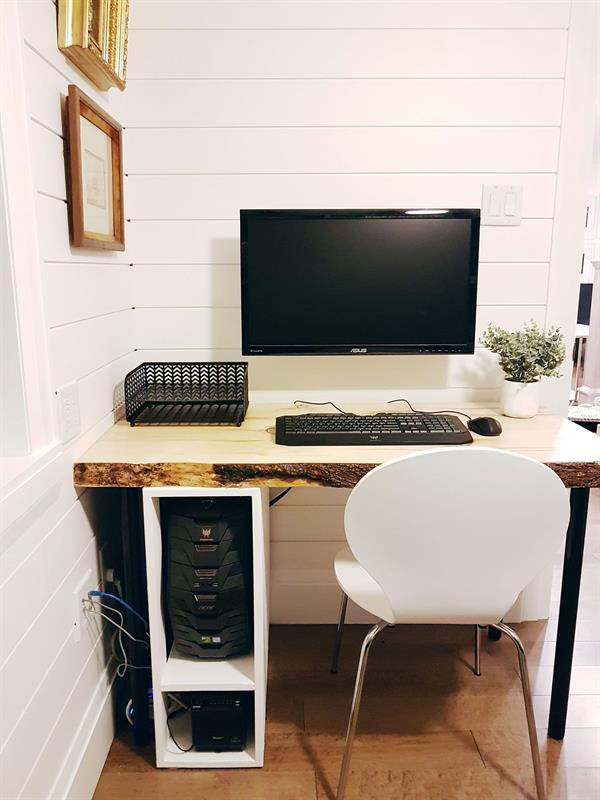
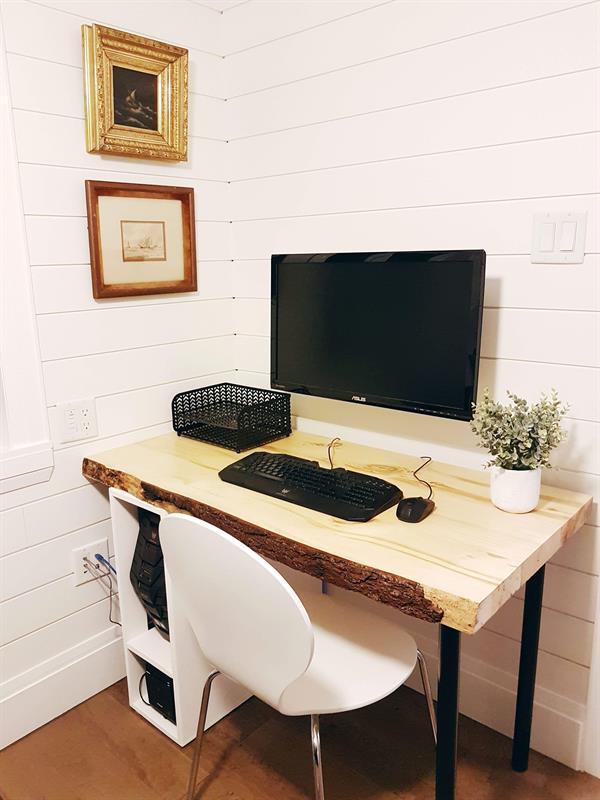


We all want a clutter-free office! We created a simple build plan for a cabinet to hide away those big ugly computers and other components such as modems, routers and cables. This design can be easily customized to fit your desk and computer with minor modifications.
Tools
Kreg Tools

Other Tools
-
Circular Saw (corded)

-
Clamps
-
Drill (cordless)
-
Nail Gun
-
Sander
-
Sawhorse
Materials
Wood Products
- 1 Sanded plywood , 3/4" Thick , Half Sheet
Hardware & Supplies
- 8 Kreg Jig Pocket Hole Screw - 1 1/4"
- 8 Kreg Jig Pocket Hole Plugs
- 1 Wood Glue
- 30 18 Gauge Brad Nails - 2 1/2"
- 1 120 Grit Sanding Disc
Directions
-
Dimensions
Measure and write down the dimensions of your computer and any additional components you are looking to hide in the box. Of primary concern when deciding on dimensions you will use is that computers have many fans on them. Typically there are intakes on the front and left side and exhausts on the rear. Air circulation is essential to ensuring your computer does not overheat. We had two primary components for this project which were the computer (17" height) and a small data storage device (7" height). We decided to use 3/4" sanded spruce plywood as I knew the Kreg Jig would work well. Home Depot has many types of sanded plywood which are great for any work such as this project.
-
Planning - Final
Decide on the final dimensions of your box. We decided on a depth of 24", a width of 10" and a total height of 27 1/4" (full height available under the new desk). When cutting the pieces, be sure to adjust for the width of the plywood.
-
Cut your pieces
As we do not have a table saw, we decided to use the Kreg Rip-cut tool (link) which allows you to do precise cuts using a skill saw. The skill saw is clamped into this tool which allows you to follow the edge of the board very accurately. You can cut between 1" and 24" width boards using this tool. Follow the instructions included with the tool to attach and do a test cut to make sure you installed it correctly. I would say it is not as accurate as a quality table saw but we had no problems cutting within an margin of error less than 1/32". This slight difference was easily sanded out for this project.

-
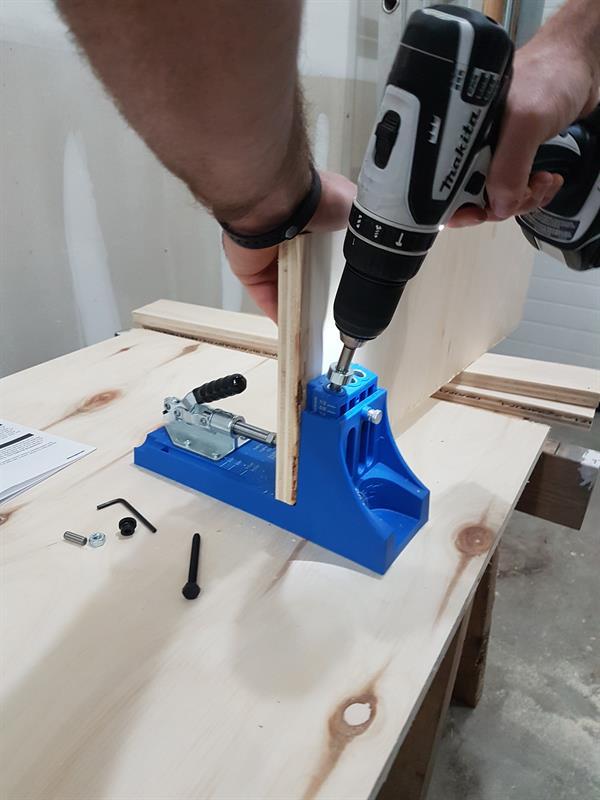
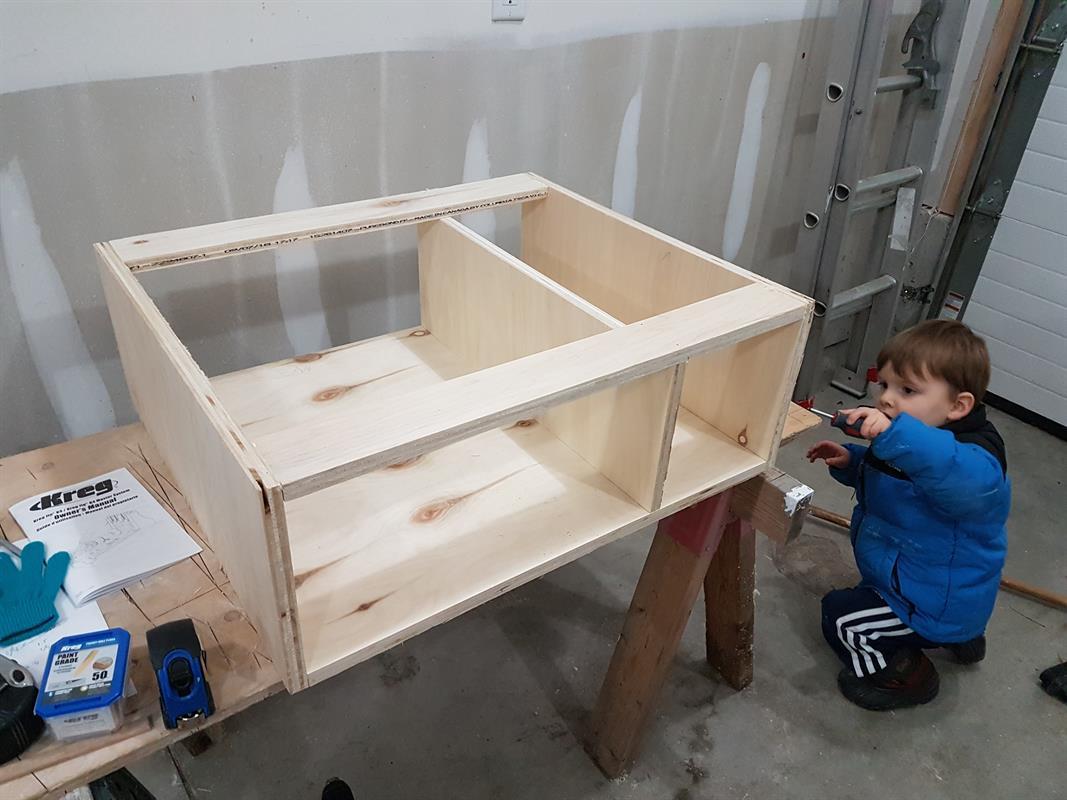
Attach middle shelf to right panel
The middle shelf is where we decided to test the benefit of the Kreg Jig. Because we wanted to store the computer on the shelf, it needed to be strong enough to support the weight. We decided to use the kreg screws in four spots, front and back, left and right. The first thing to do is to follow the instructions for configuring the Kreg Jig for the width of your plywood. This is essential to ensuring that the holes are drilled to the right depth. They make it very easy and once you have done this once, you will remember it forever. Once you have the jig configured and the special drill bit configured you can drill the holes in the plywood. There are two type of screws so be sure to select the correct length and type for the wood.
-
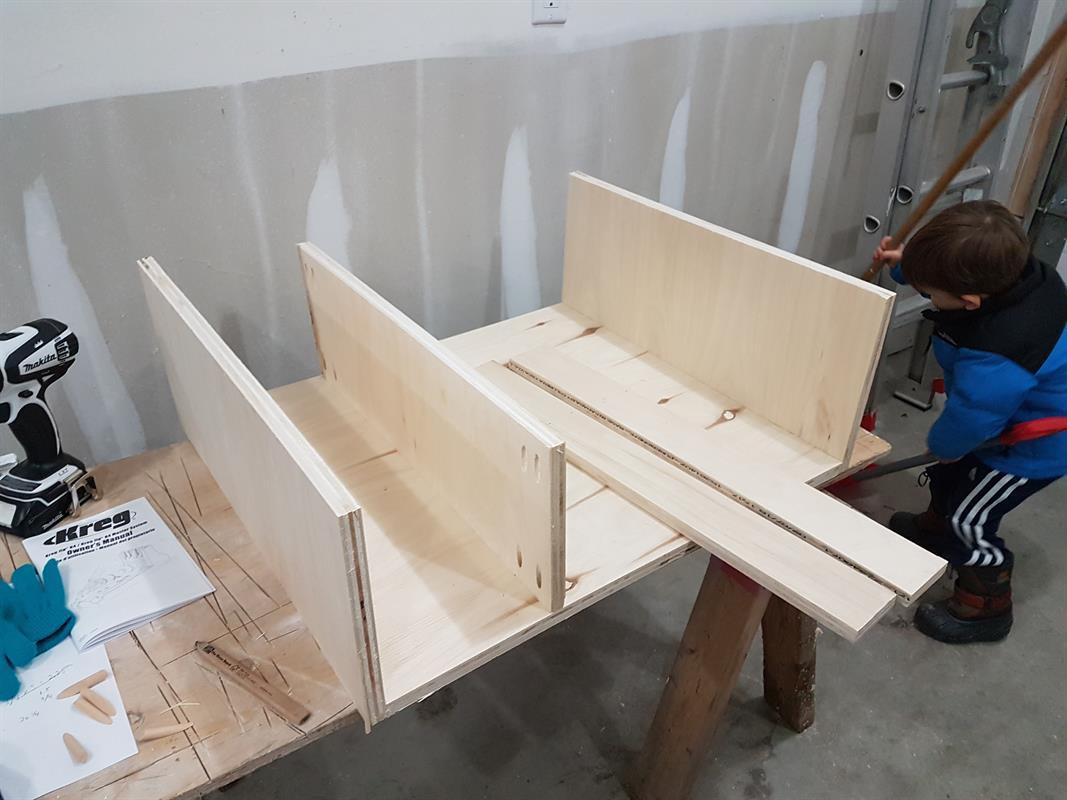
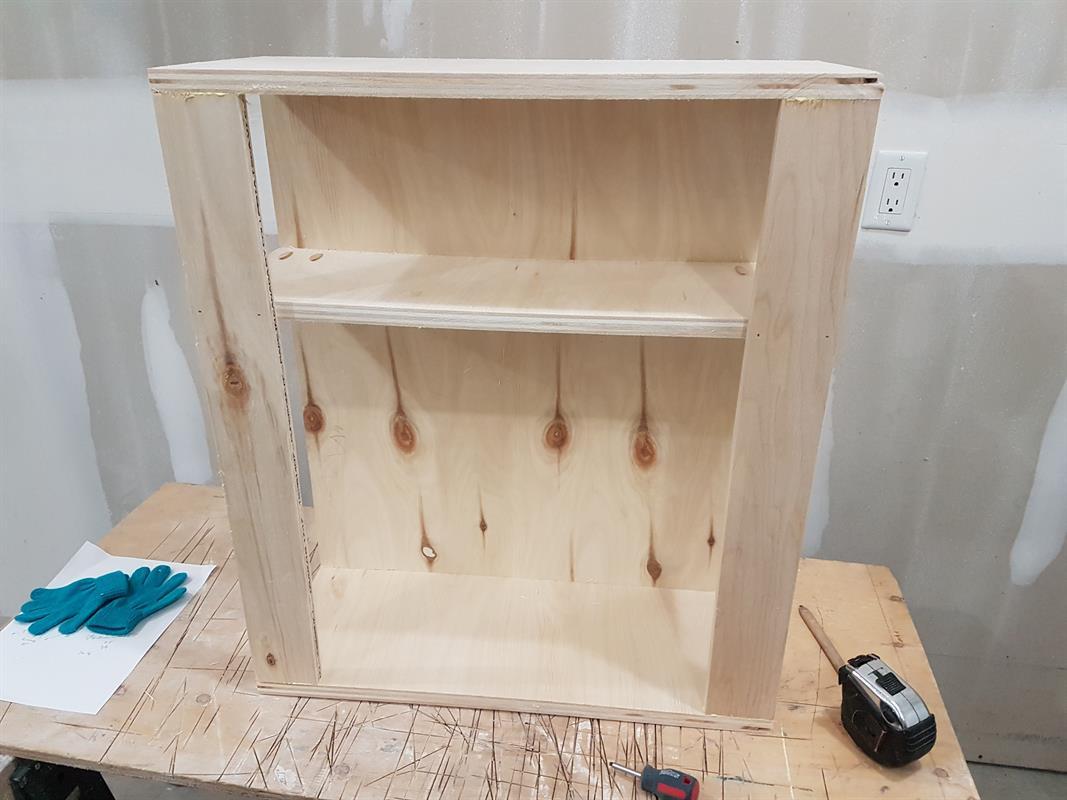
Attach the top and bottom panels
We decided to use a nail gun and wood glue as the design meant there was no weight on either the top or bottom. I could have used the Kreg Jig further but limited it a bit as this was the first time I had used this tool.
-
Attach the two left panels
We attached the top and bottom again using a nail gun and wood glue, and Kreg screws for the middle shelf through the Kreg Jig piloted holes. I had to use a screw driver for this as I did not have sufficient space for the drill. Note: I would recommend using the Kreg brand screws. There are 2 different kinds of screws depending on what material you are screwing in too. The length of the screw depends on the width of the board you are using so check the table provided in the Kreg Jig manual to see what length of screw you need. For this project, the recommend a 1 1/4" screw for 3/4" plywood.
(Note our little helper!)
-
Insert Kreg Jig plugs and Sand
Kreg Jig has plugs which fit nicely into the holes created by the tool after you have put the screws in. They can be sanded and painted and create a clean finished surface with the strength of this sort of attachment. Very nice. We put a bit of wood glue in the hole, stick the plug in, let it dry and then sand the box. We also used a bit of wood filler to fill the holes of the nail gun and smooth out the front edges of the box before sanding.
-
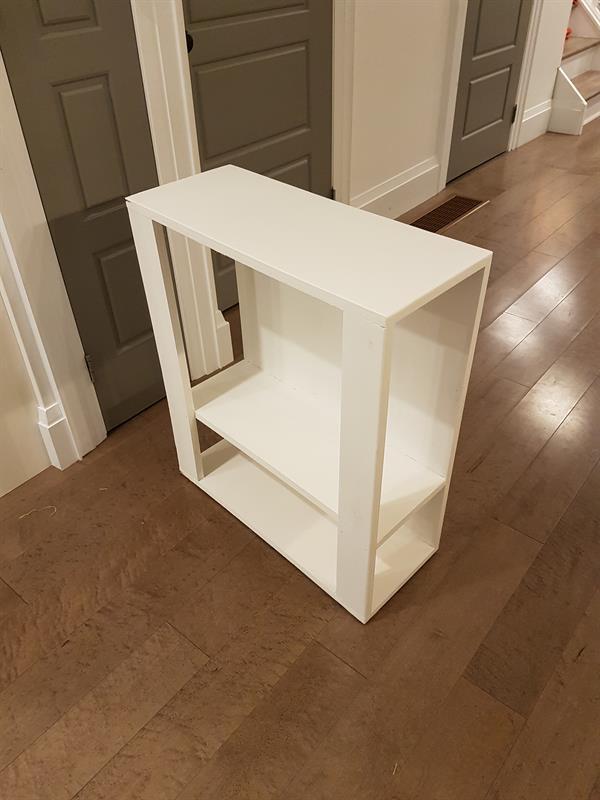
Paint
Pretty straight forward as we decided to paint it white. If you go for a wood finish, you may want to consider the iron on wood finish that you can get to clean up the plywood front edge. Home depot has it in different kinds of wood and you can literally iron it on, trim the edge flush and stain.
-
Install
We stuck some felt pads on the bottom of the cabinet, and then it was just a matter of sliding it into place and popping in all the components. It worked like a charm. No more jumble of cords, no more black box sitting on the ground, and just generally a cleaner, neater office. This was a super easy project to make with the Kreg Jig and Rip Cut. I think they are officially Dan's new fave tools!
