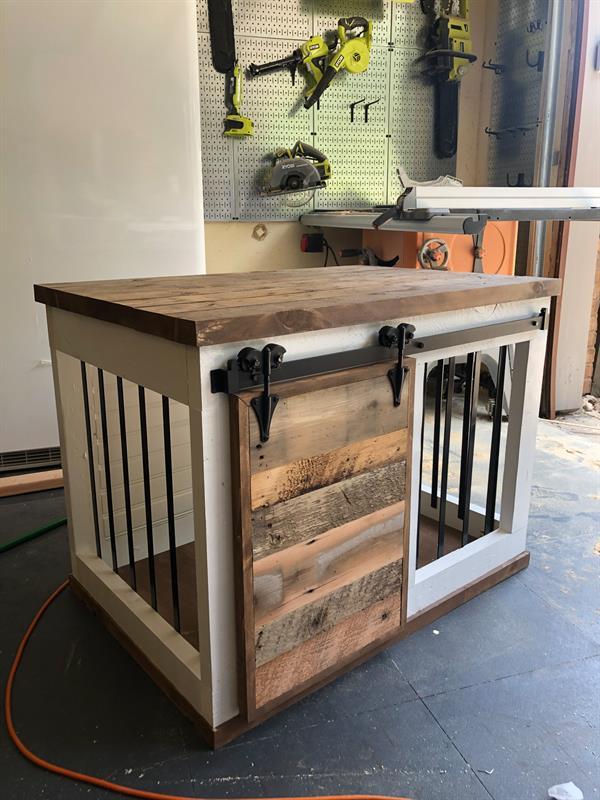


DIY Barn Door Dog Crate - Sized to fit up to a medium sized dog!
Tools
Kreg Tools


Other Tools
-
Jigsaw

-
Miter Saw
-
Table Saw
-
Tape Measure
-
Drill (cordless)
-
Nail Gun
Materials
Wood Products
- 6 Board , 2x6 , 96"
- 4 Board , 2x4 , 96"
- 1 Board , 1x2 , 96"
- 1 Plywood , 3/4" Thick , 48"
- 1 Plywood , 1x2 , 24"
Hardware & Supplies
- 1 Barn Door Hardware
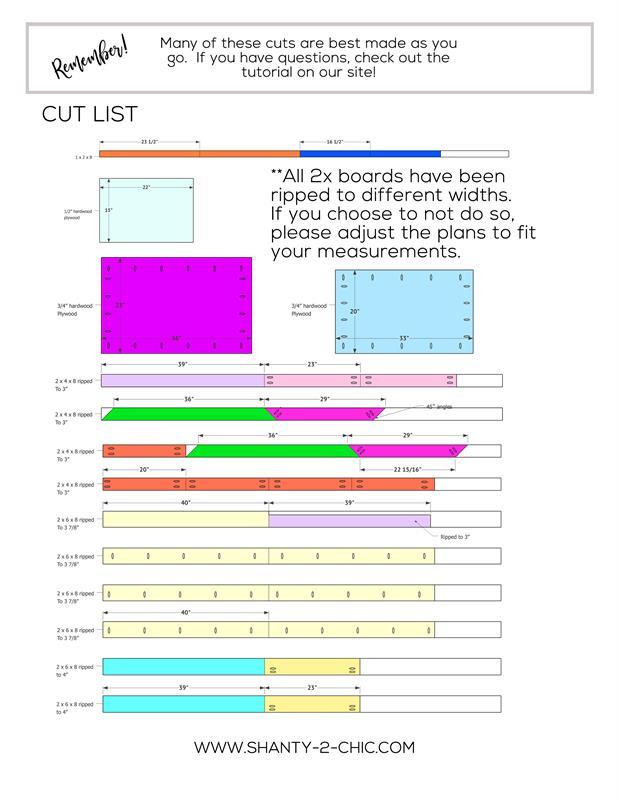
Cut List & Parts
- 1 Refer to cut list , 1
Directions
-
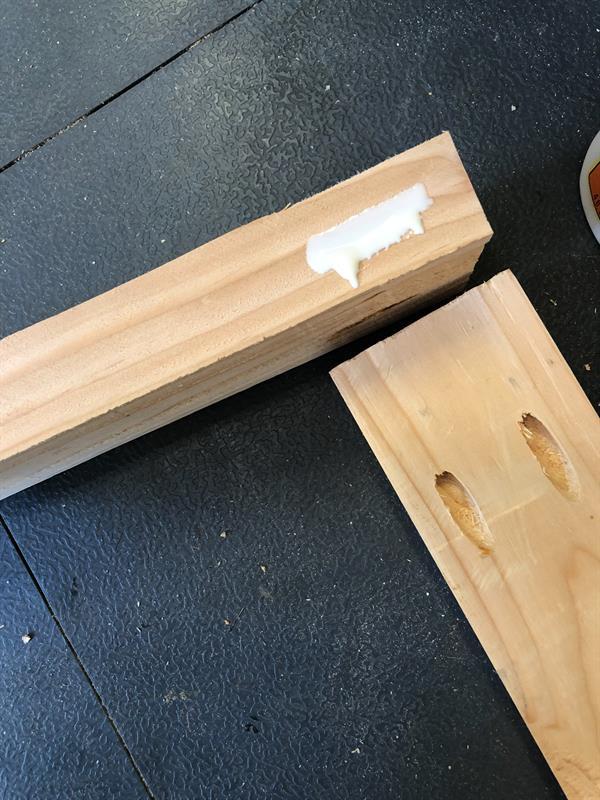
Step 1 - Construct the base of the dog crate
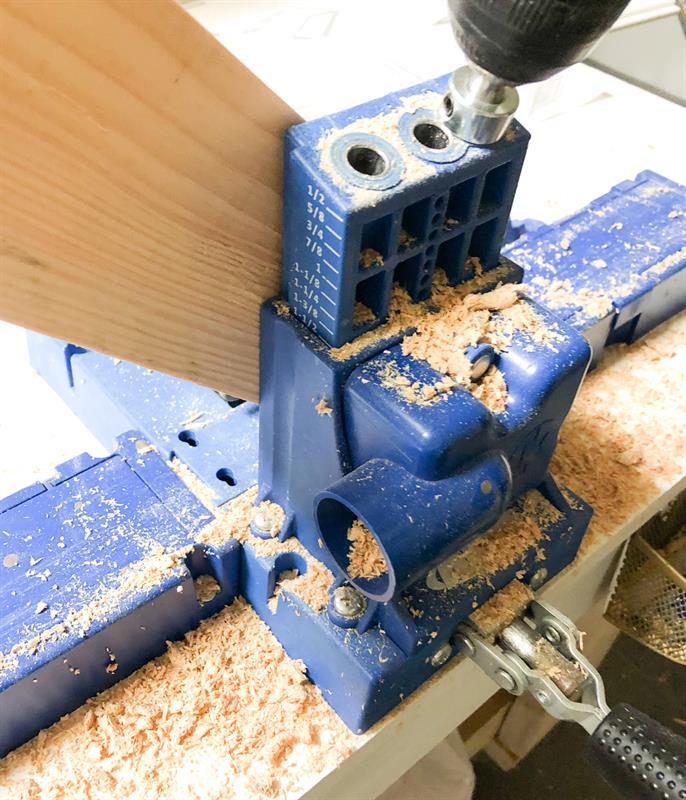
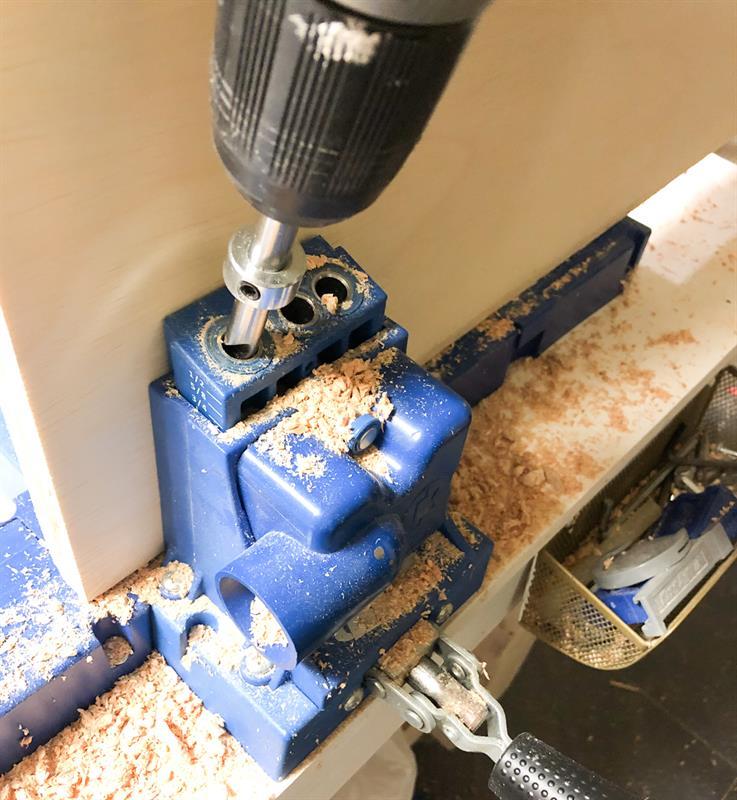
** FOR A LINK TO THE PRINTABLE PLANS CLICK THE "EXTRA" TAB AND FOLLOW THE LINK. The first step is to create the base of the crate. The outside pieces are 2x4 that we ripped to 3" wide each. Cut each of these to size with the ends being cut at 45˚ angles. Add two 1.5" pocket holes to the end of the two shorter pieces.
-
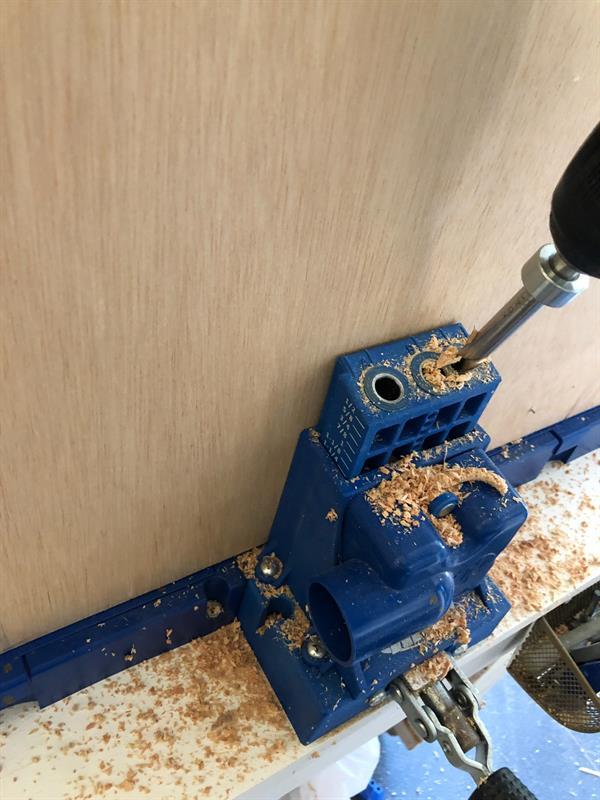
Step 2 - Cut the base plywood to size and add pocket holes
Next, cut the base plywood piece to size and add 3/4" pocket holes around all sides.
-
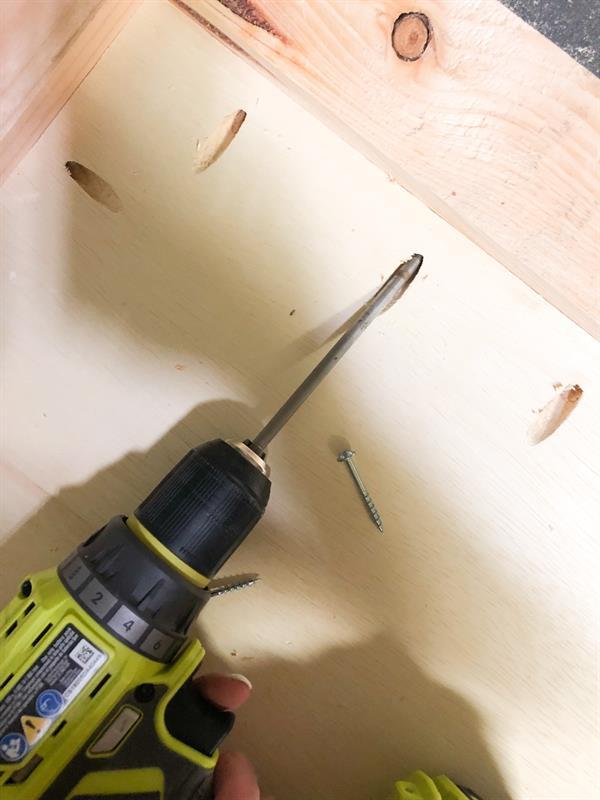
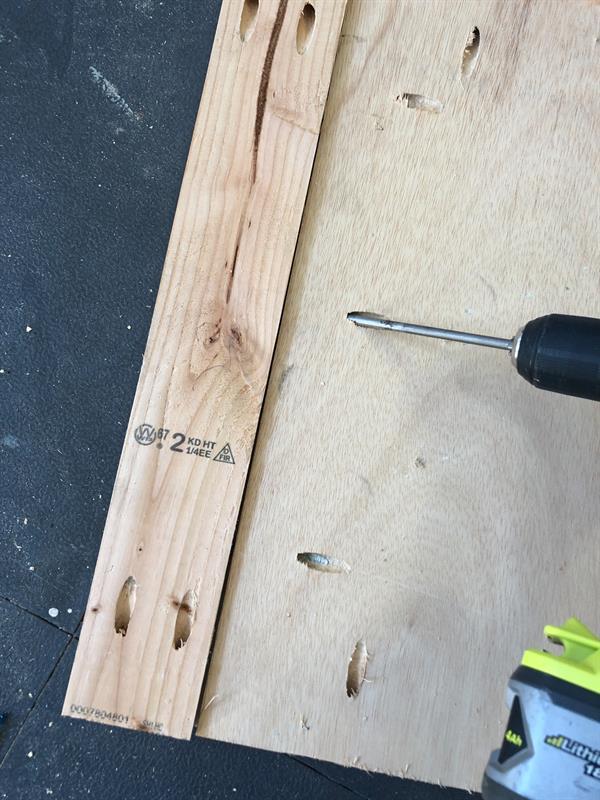
Step 3 - Attach shorter sides to the plywood
Attach the shorter sides to the plywood piece first. Add a line of wood glue and attach the sides through the pocket holes and into the frame using 1.25" pocket hole screws. Next, attach the longer sides also using wood glue and 1.25" pocket hole screws to create the frame around the plywood. You want the top of the plywood to be flush with the top of your frame.
-
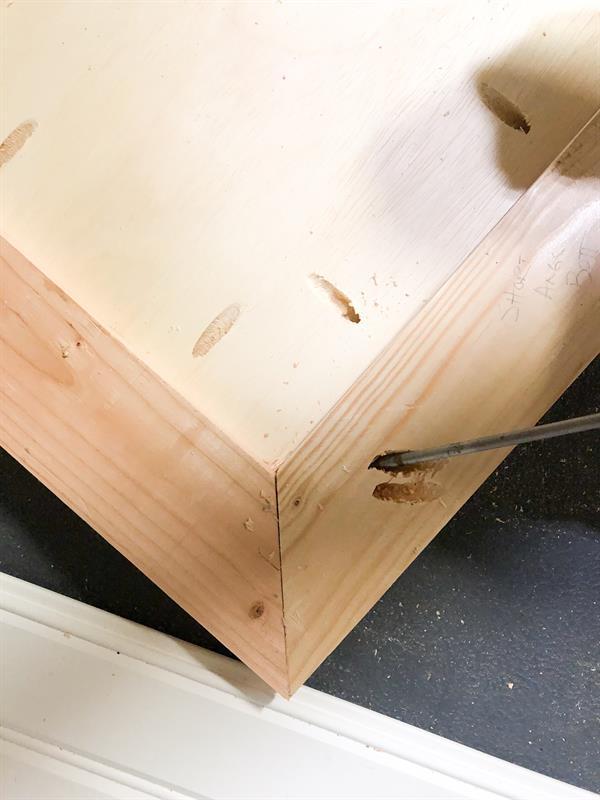
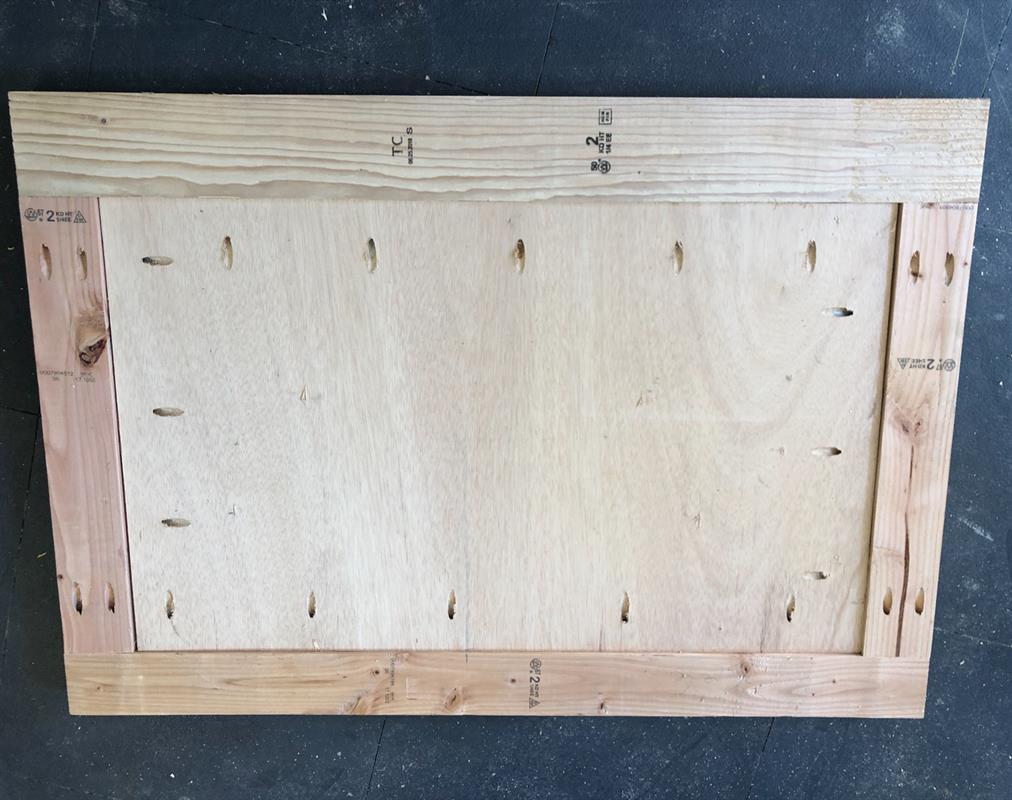
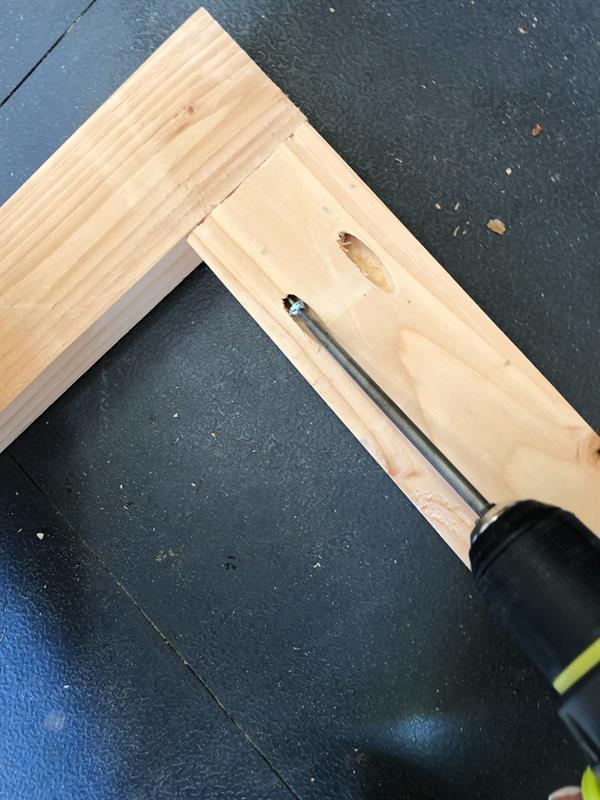
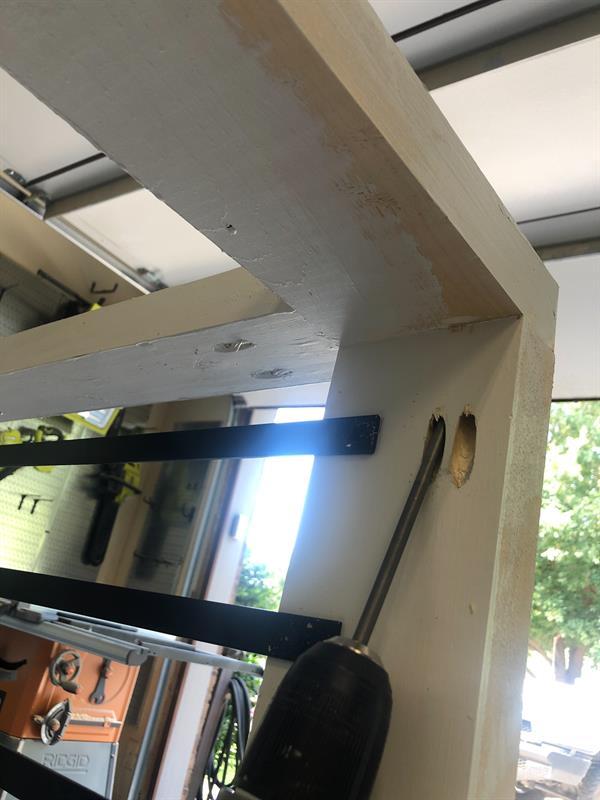
Step 4 - Connect corners using pocket hole screws
Attach the corners together now. Use 2" pocket hole screws through the angled pocket holes and into the adjoining corners.
-
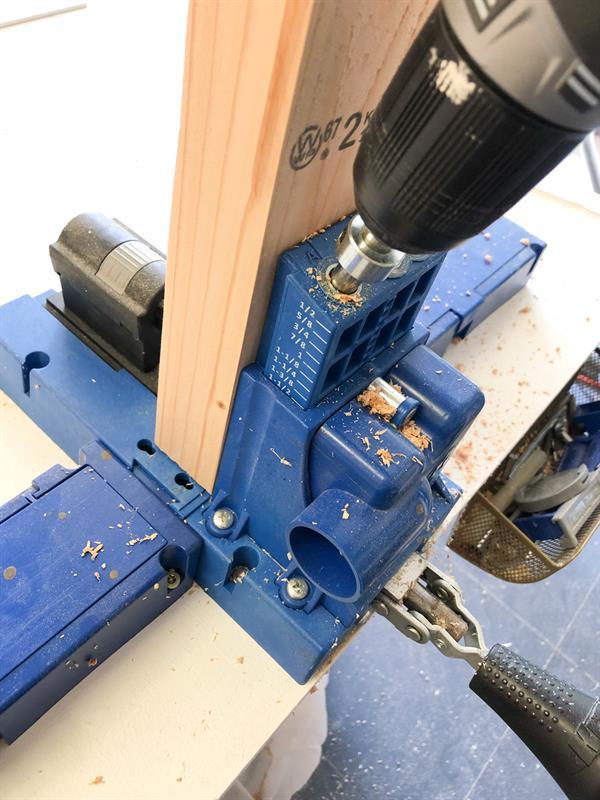
Step 5 - Build the back frame using 2x4 and 2x6 boards
Set the base to the side and begin building the frames of the crate next. Build the back frame first. The base and side pieces of this frame are 2x4" that we ripped to 3". The top board of the frame is a 2x6 board that we ripped to 4". Cut these to size and add 1.5" pocket holes to each end of both of your vertical pieces.
-
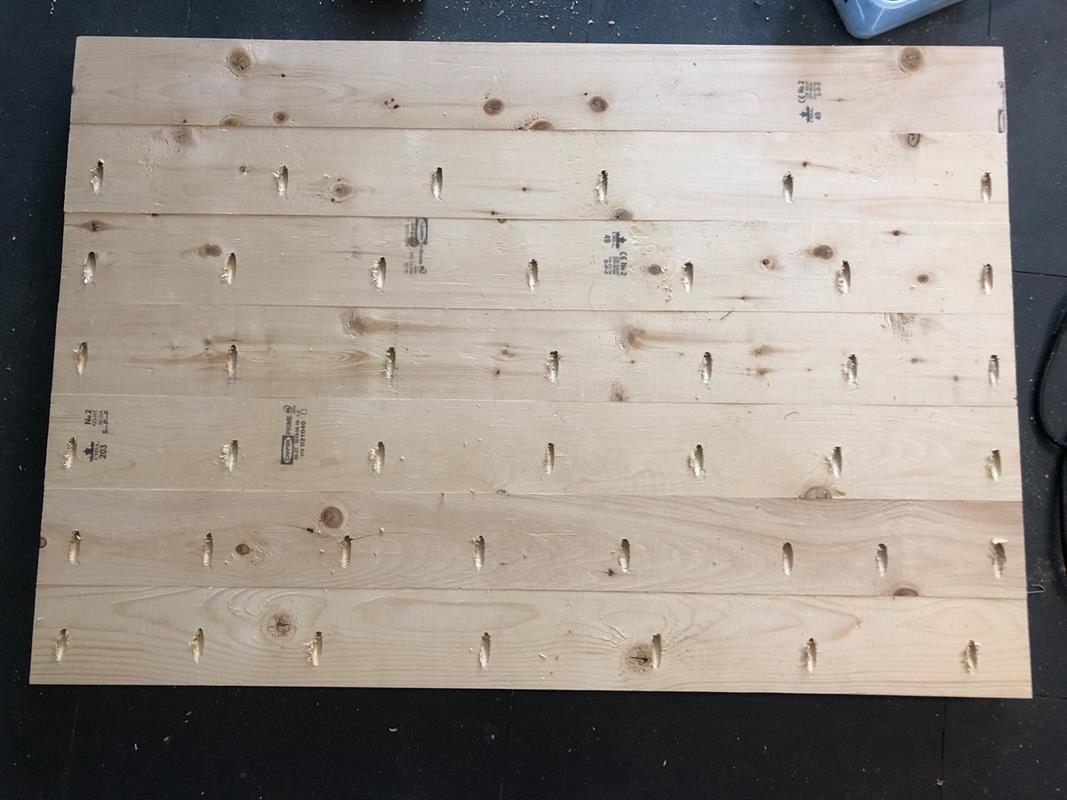
Step 6 - Cut back plywood to size and add pocket holes
Cut the back plywood piece to size, and add 3/4" pocket holes around every edge.
-
Step 7 - Attach vertical frame boards to plywood
Attach the smaller vertical frame boards to the plywood first. Add a line of wood glue to the end of your plywood and attach these boards through the pocket holes in the plywood and into each board using 1.25" pocket hole screws.
-
Step 8 - Attach top and bottom pieces
Next attach the top and bottom pieces the same way using a line of wood glue in between the plywood and frame pieces and 1.25" pocket hole screws. Once those are attached, add 2.5" pocket hole screws through the vertical frame pieces and into the top and bottom frame pieces.
-
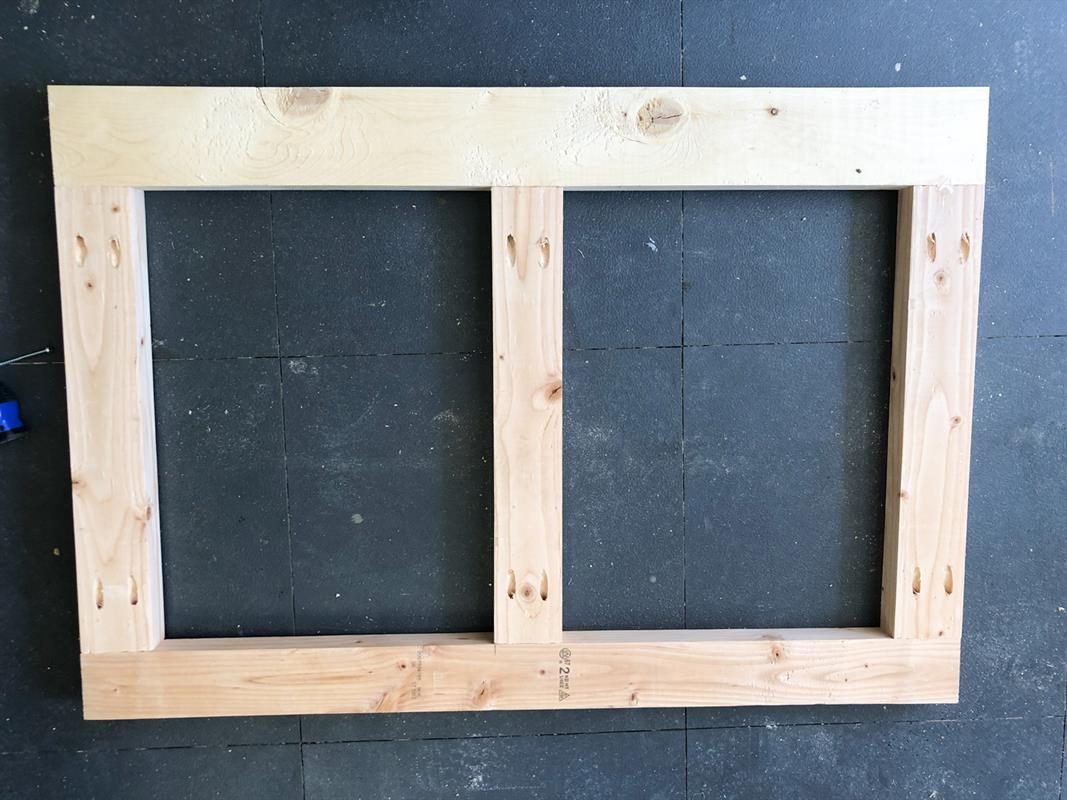
Step 9 - Build the front frame using 2x4 and 2x6 boards
Now build the front frame. The bottom and vertical boards of this frame are also 2x4 boards ripped to 3", and the top board is a 2x6 ripped to 4" Add 1.5" pocket holes to each end of all 3 vertical boards. Add glue to each end.
-
Step 10 - Attach vertical boards to the bottom frame
Attach the vertical boards to the bottom frame board using 2.5" pocket hole screws. These boards should line up flush with the ends of each horizontal board. The middle board will line up in the center of both sides.
-
Step 11 - Attach top horizontal board
Now attach the top horizontal board using 2.5" pocket hole screws and wood glue through the vertical pieces and into the 4" wide board.
-
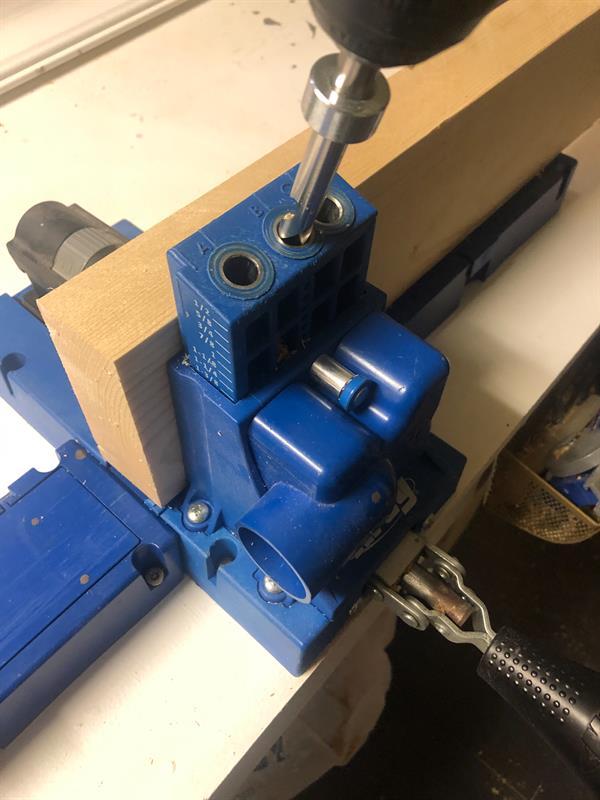
Step 12 - Cut side pieces, add pocket holes
Cut the side pieces to 23". You will have 4 of these pieces, but they won't attach to anything until a later step. Add 1.5" pocket holes to the very top of the 4" wide boards and add 1.5" pocket hole screws to the very bottom of the 3" boards.
-
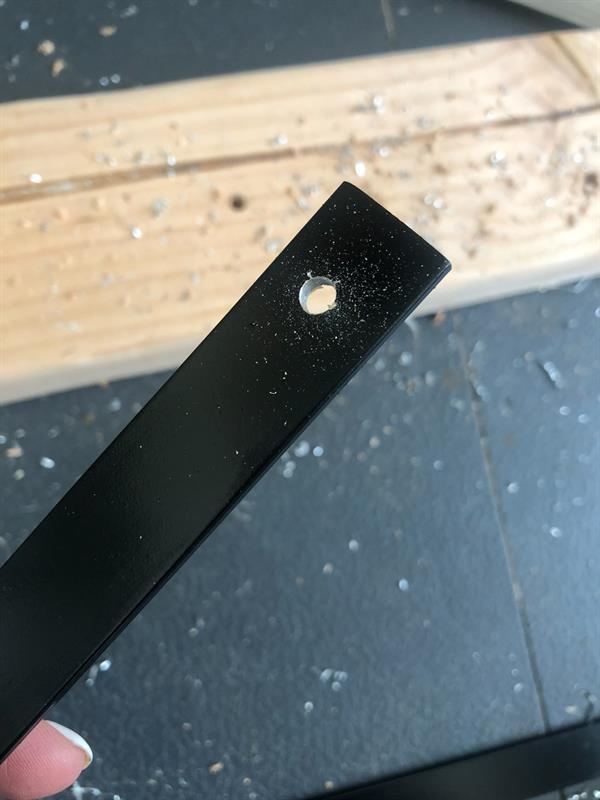
Step 13 - Paint or stain wood assemblies
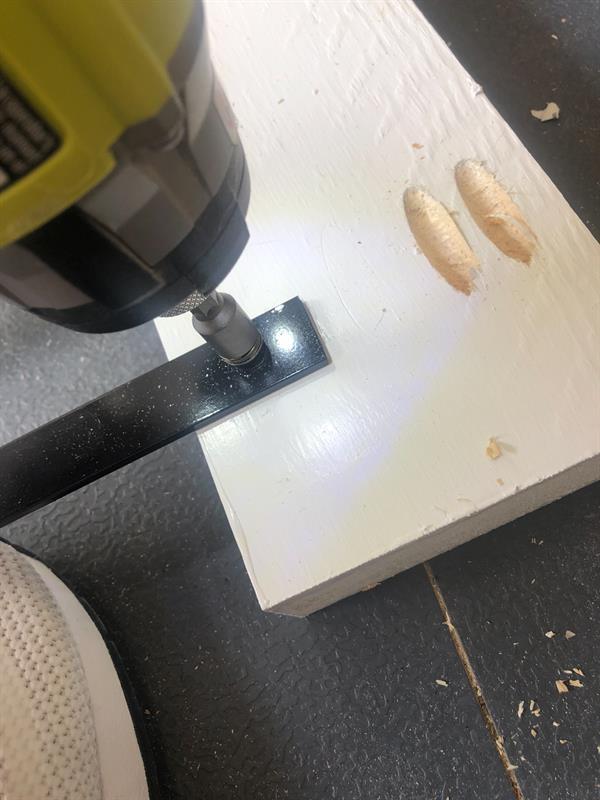
At this point, you need to paint or stain your wood assemblies. This will also include the 23" cuts you will use to create the sides of the crate. While that is drying, you can begin working on the metal bars that you will attach next. I used aluminum flat bar on this part. These came in 3/4" x 48" pieces. I used my jig saw with a metal blade to cut 14 bars at 23" long each. This bar cuts smoothly and quickly. I sprayed these bars with black satin spray paint before adding the holes in both ends of each bar. Use a cobalt drill bit to make these holes the fastest.
-
Step 14 - Attach metal bars to wood pieces
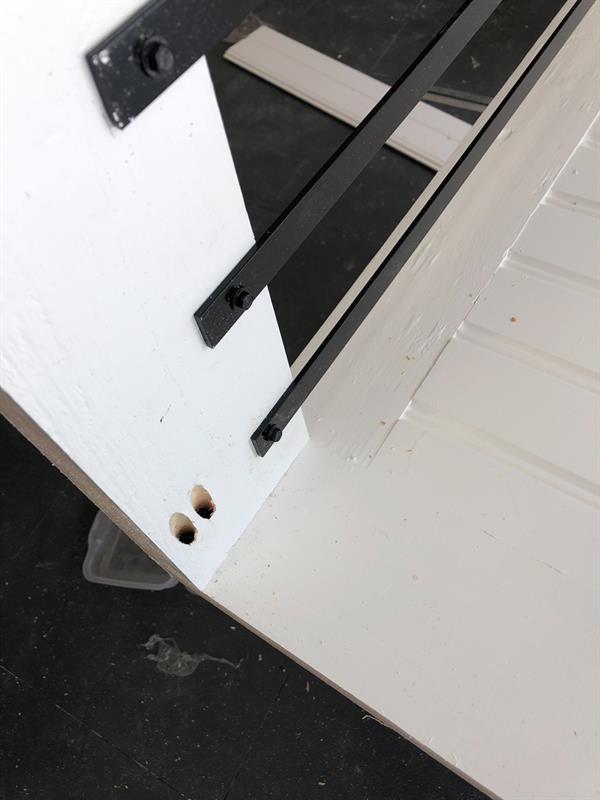
Once all of your wood pieces are dry, create the side pieces. I attached my bars to the wood pieces using 1" self tapping black screws.
-
Step 15 - Space metal bars 3" apart
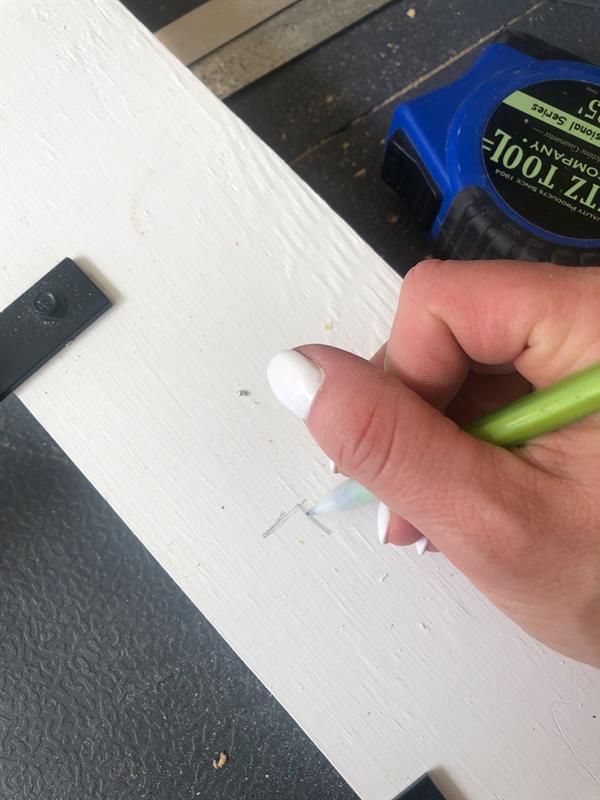
I spaced the metal bars for the sides of the crate each 3" apart, starting 1.75" from the ends of each board. If you have a smaller dog, you can adjust the bar spacing to fit your needs!
-
Step 16 - Attach side assemblies to the back
Once both side assemblies are built, attach them to the back of the crate using wood glue and 2.5" pocket hole screws. Everything should line up flush both on the sides and tops and bottoms.
-
Step 17 - Add flat bars to the front assembly
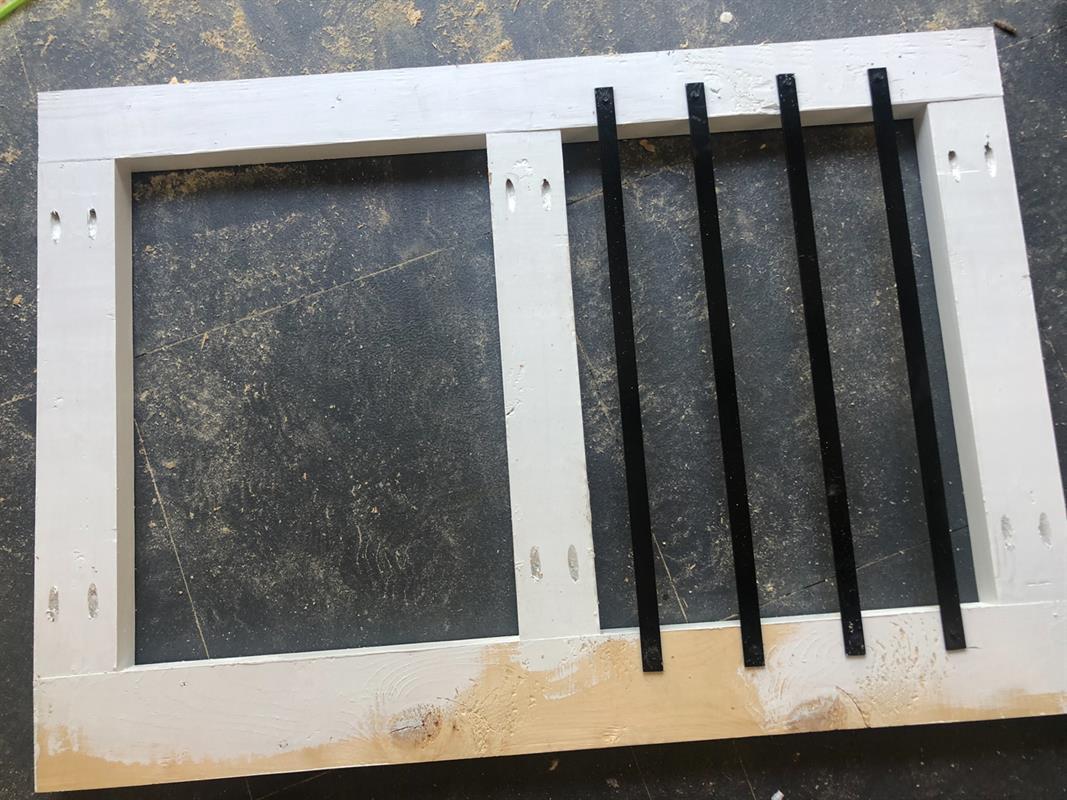
Add the flat bars to front crate assembly next. These will attach to only one half of the front. I spaced these 3" apart and placed the outside bars 1.5" from the edges of the inside of the wood frame.
-
Step 18 - Attach the front assembly to the dog crate
Attach the front assembly to the rest of the crate using wood glue and 2.5" pocket hole screws through the pocket holes in the side assemblies and into the front.
-
Step 19 - Attach the upside-down base to the crate assembly
Now it's time for the base! flip the crate assembly upside-down. Run a line of wood glue around the crate assembly and place the base upside-down on top of it. Attach them by using 2.5" wood screws through the base and into the crate assembly all around.
-
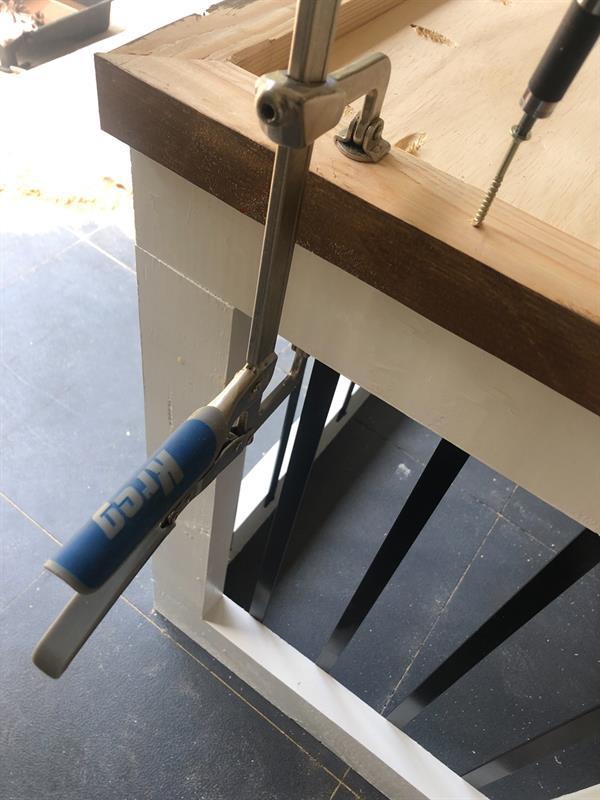
Step 20 - Create top planks from 2x6 boards
The planks for the top of the crate are 2x6 boards we ripped to 3 7/8" wide. Cut these to size and add 1.5" pocket holes down one side of 6 of the 7 boards. Place them side to side and attach using 2.5" pocket hole screws. This is a good time to stain or paint your top before attaching it.
-
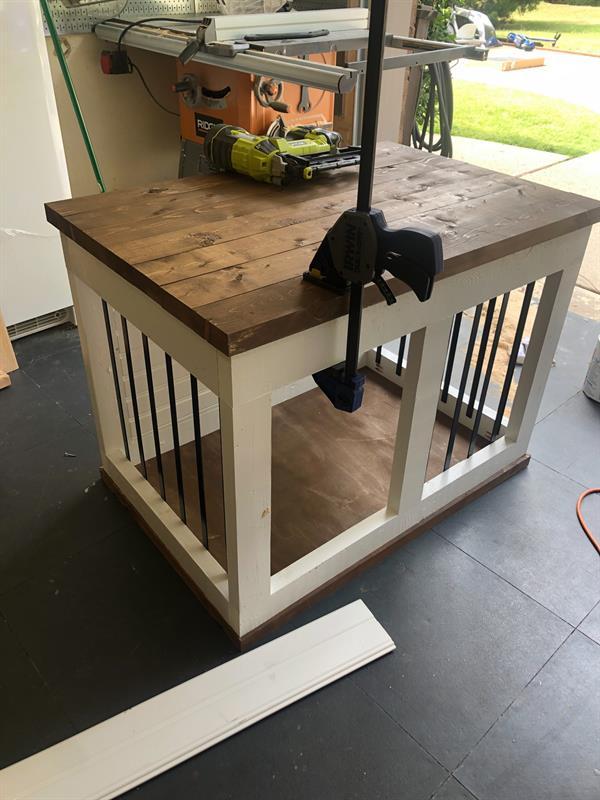
Step 21 - Glue and nail the top to the crate assembly
To attach the top, add glue to the top of the crate assembly and place the top on top of it. Make sure its equal all-around and nail it in place using 2" finish nails.
-
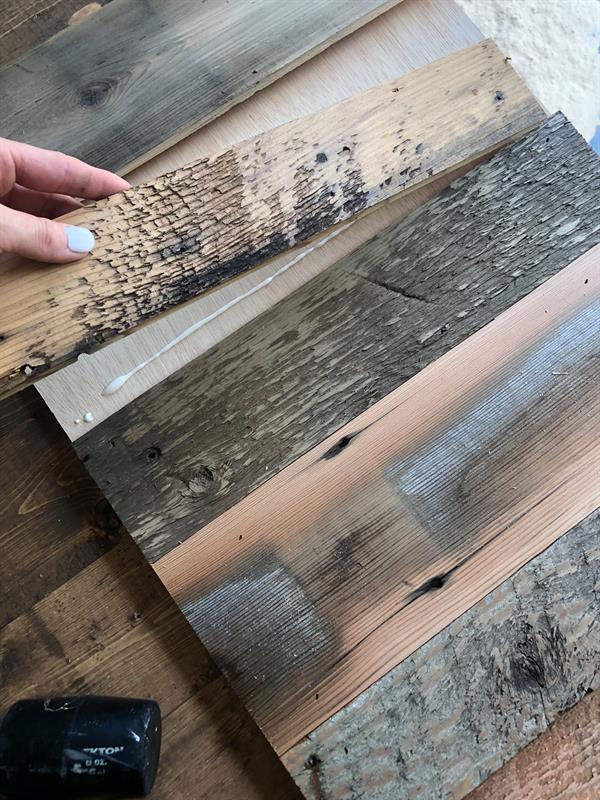
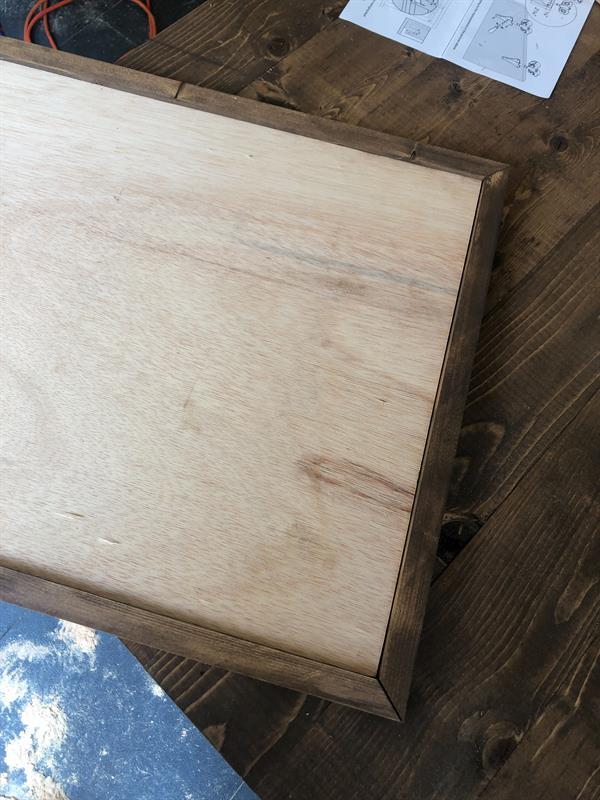
Step 22 - Create and attach the door using 1/2" plywood
The final step is creating and attaching the door. I used a piece of 1/2" plywood cut to 15" x 22". You can have fun with this part! I used some barn wood left over from an old project I did and glued and nailed the planks to cover the plywood. You can also add decorative trim or whatever style you like... Just make sure you keep the door flush on front to accommodate the hardware.
-
Step 23 - Attach barn door hardware to the door
I ripped 1x2 boards to 1" thick each. This barn door hardware will work with doors up to 1 1/8". I mitered the edges to 45˚ and attached them with wood glue and 1.25" brad nails. Make sure the front of the planked door is flush with the front of the 1x2 boards.
-
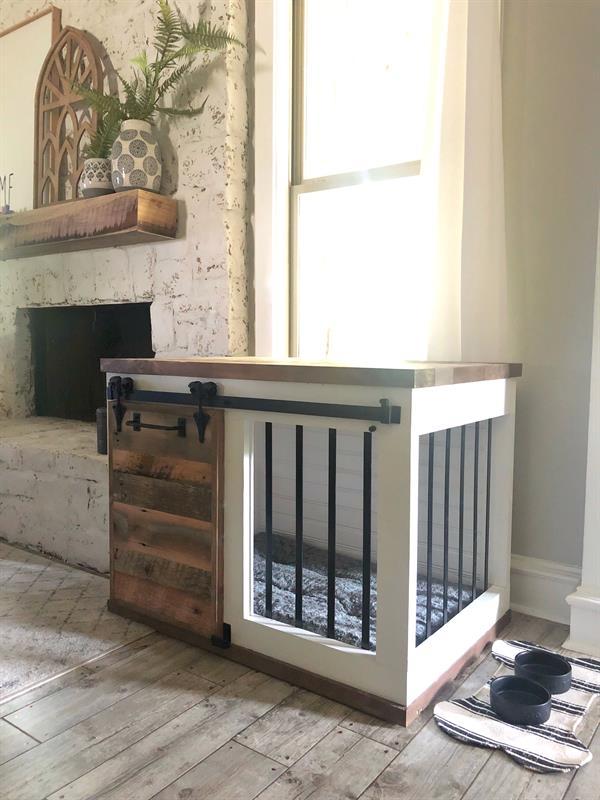
Step 24 - Complete the dog crate with additional features
Here it is all finished! You can check our website www.shanty-2-chic.com for more info on the hardware! This set was only $35 and it really makes this crate. I also added a guide to the bottom and a lock for when my little fur baby starts using this. I linked to all of this as well as the universal pillow for the inside on our site, so be sure to check it out!