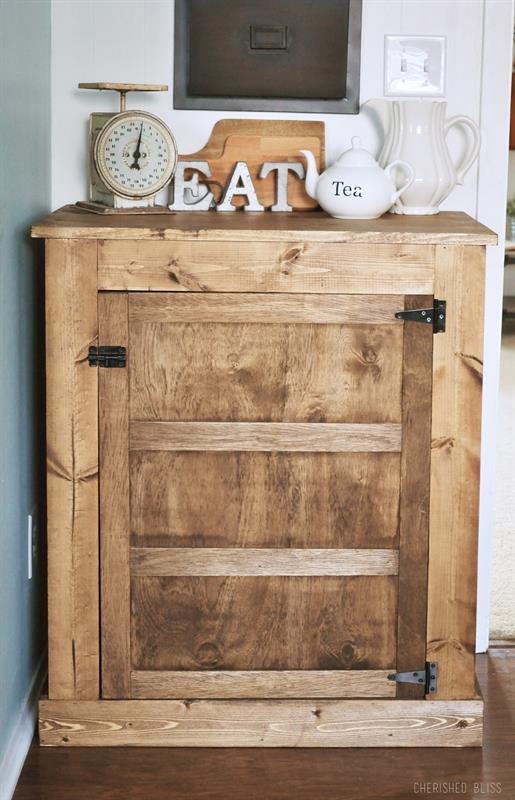
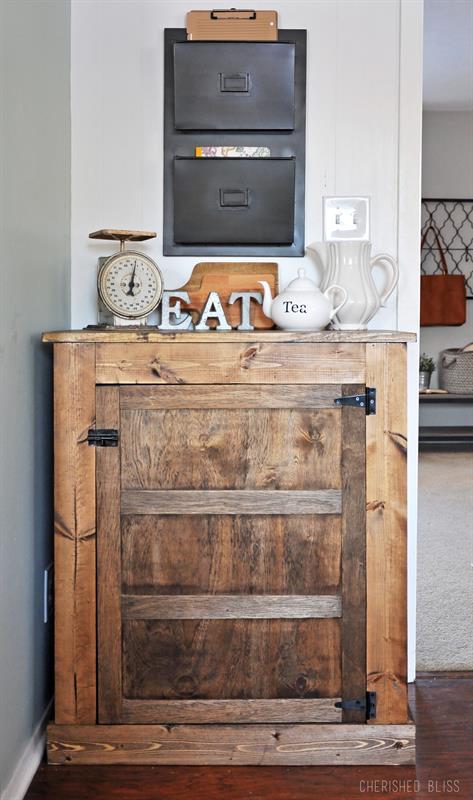


This simple and easy to build Small Kitchen Buffet is the perfect way to add storage without taking up a lot of room. It can easily be customized to fit any style but is shown here with an industrial farmhouse finish.
Tools
Kreg Tools


Other Tools
-
Circular Saw (cordless)

-
Miter Saw
-
Square
-
Table Saw
-
Tape Measure
-
Drill (cordless)
-
Nail Gun
-
Sander
Materials
Wood Products
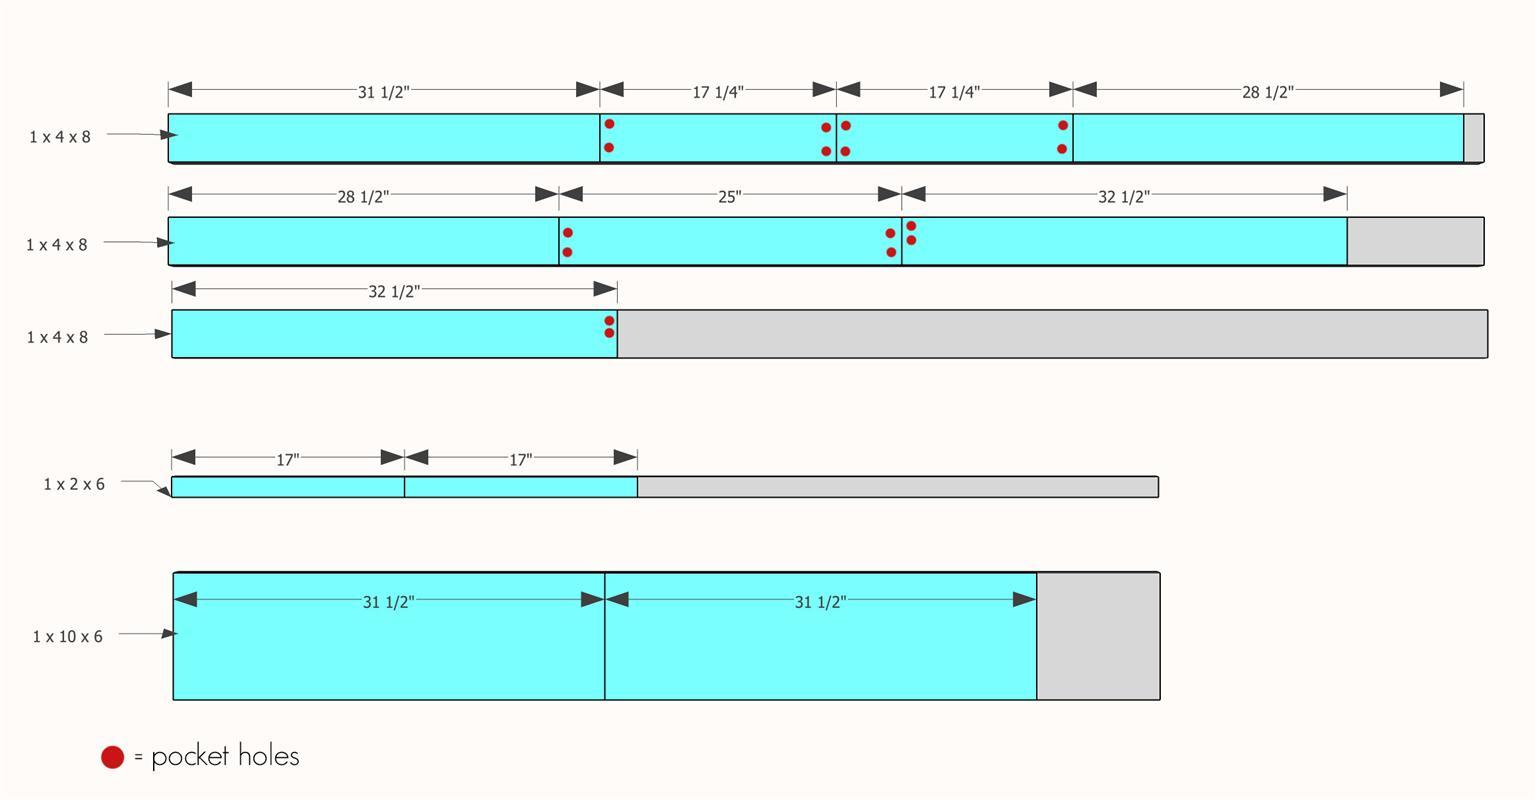
- 3 Board , 1x4 , 96"
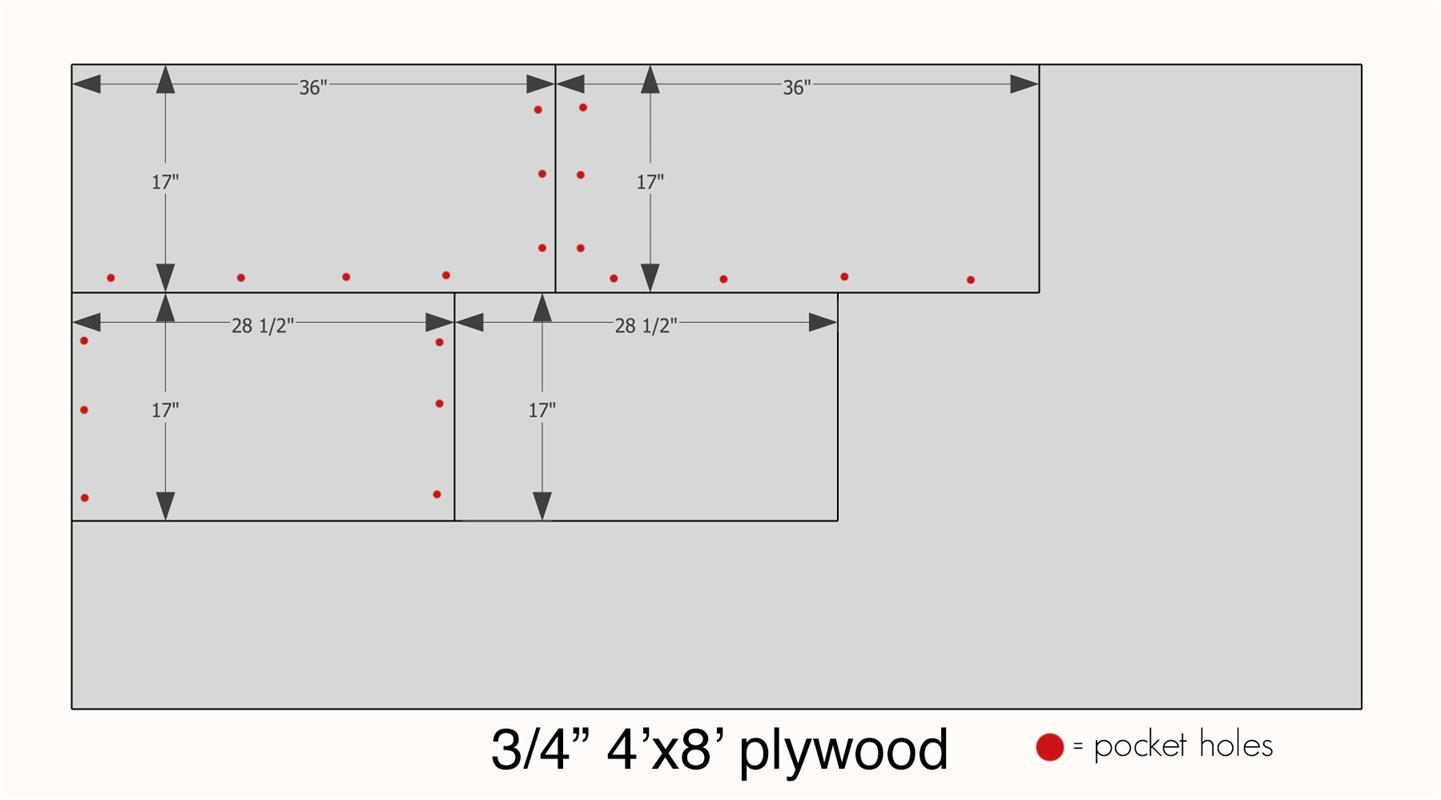
- 1 Plywood , 3/4" Thick , Full Sheet
- 1 Plywood , 1/2" Thick , Half Sheet
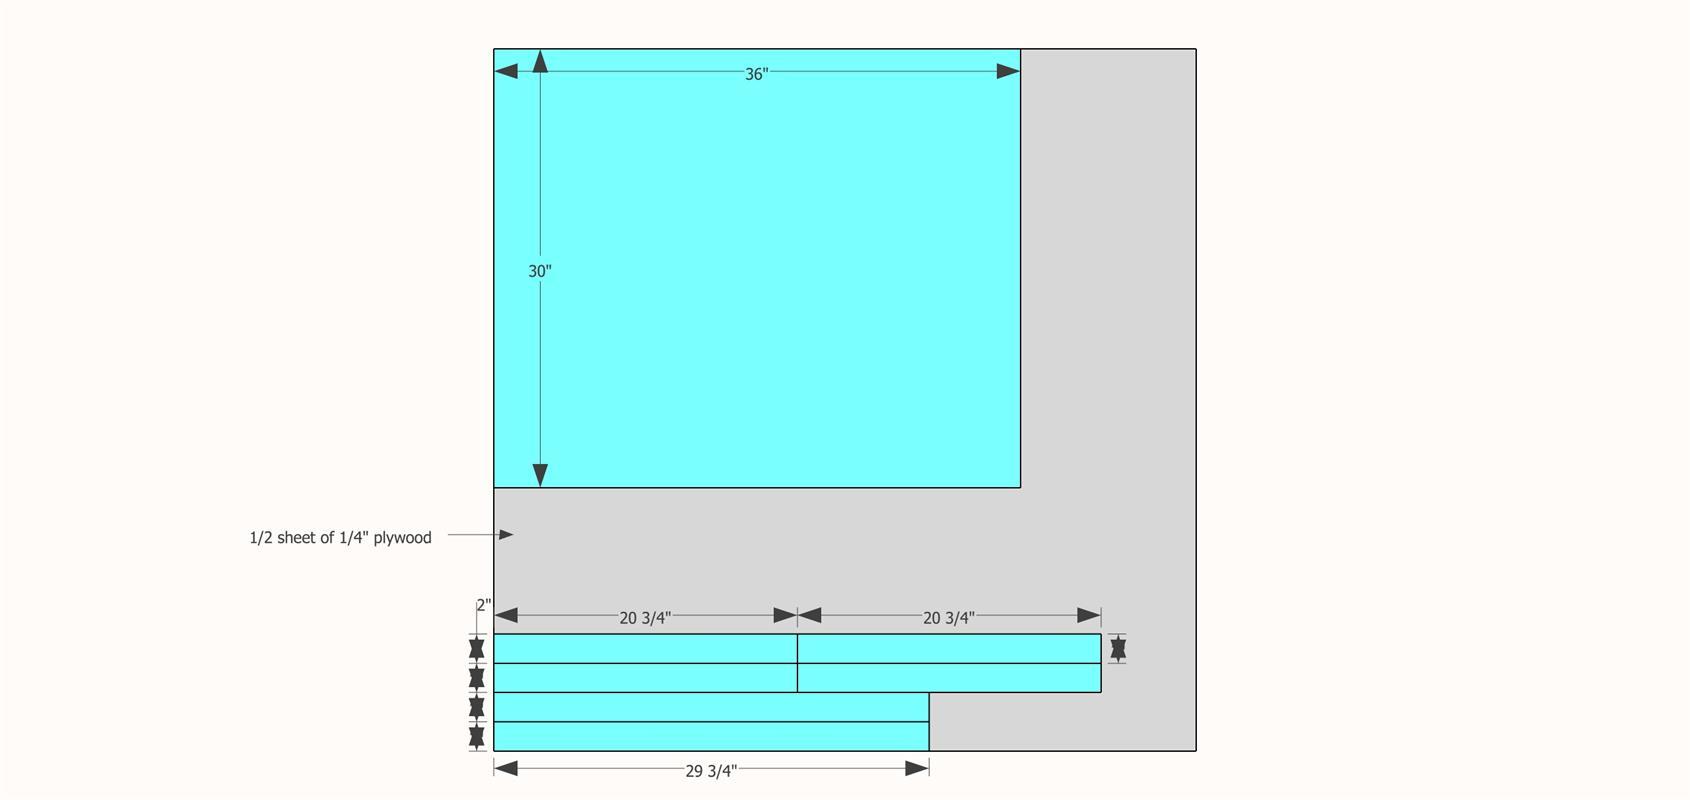
- 1 Plywood , 1/4" Thick , Half Sheet
- 1 Board , 1x2 , 72"
- 1 Board , 1x10 , 72"
Hardware & Supplies
- 2 Hinges
- 1 Black Barrel Bolt
- 40 1 1/4" Fine Kreg Jig Screws
- 150 1 1/4" Finish Nails
- 20 1/2" Finish Nails
- 1 Wood Glue
Cut List & Parts
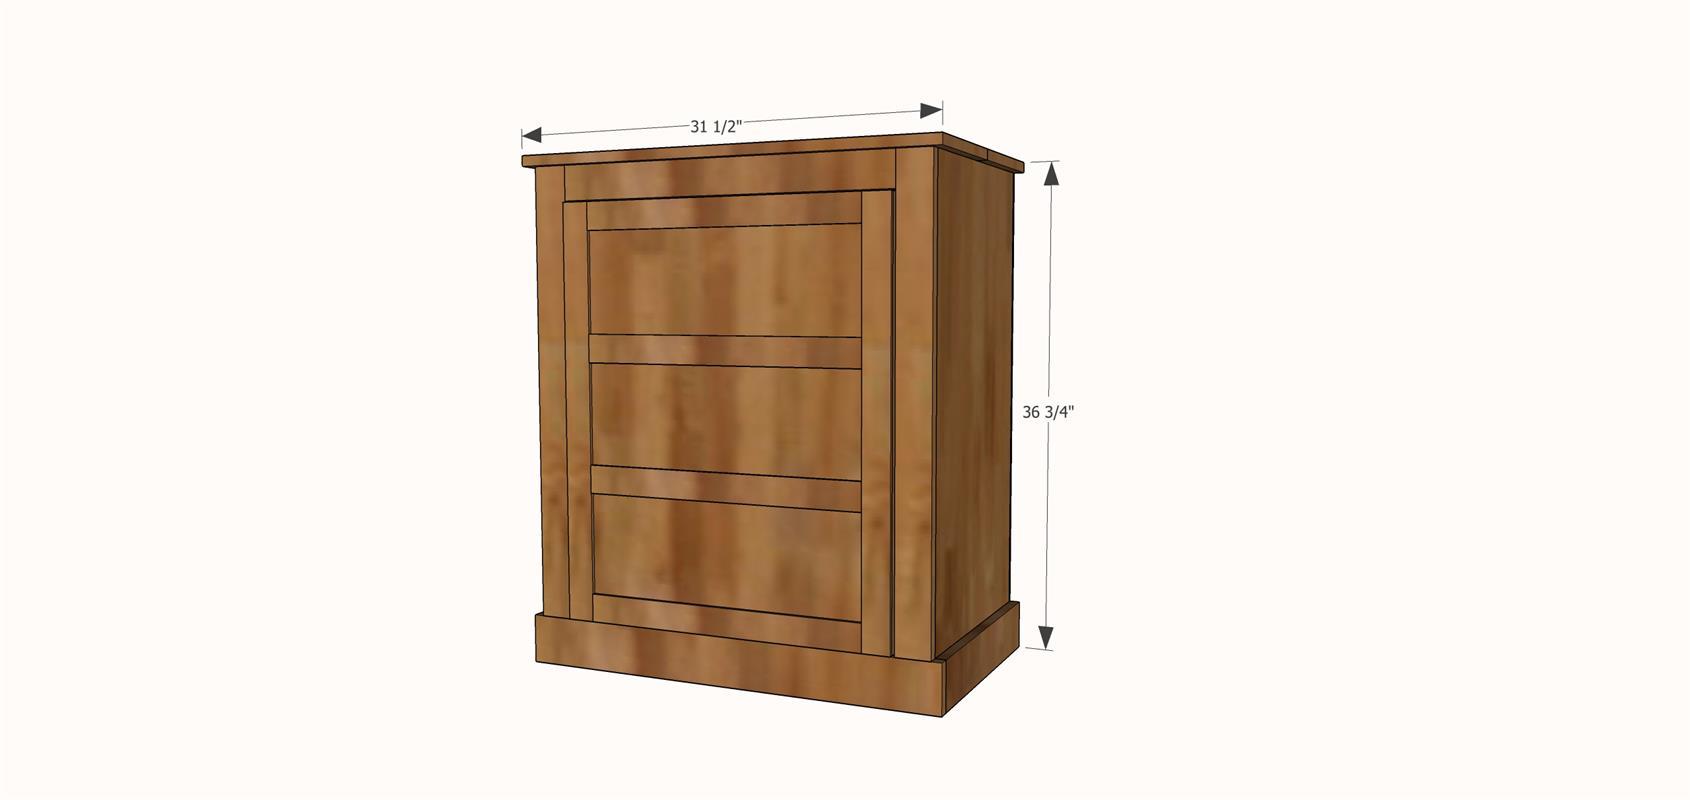
- 2 Side Panels , 3/4" x 17" x 36"
- 2 Shelves , 3/4" x 17" x 28 1/2"
- 2 Top Support Boards , 1" x 4" x 28 1/2"
- 2 Bottom Trim Pieces , 1" x 4" x 17 1/4"
- 1 Bottom Trim Piece , 1" x 4" x 31 1/2"
- 2 Shelf Cleats , 1" x 2" x 17"
- 2 Facing - Side Pieces , 1" x 4" x 32 1/2"
- 1 Facing - Top Piece , 1" x 4" x 25"
- 1 Back Panel , 1/4" x 30" x 36"
- 2 Top Boards , 1" x 10" x 31 1/2"
- 2 Door Side Trim Pieces , 1/4" x 2" x 29 3/4"
- 4 Door Trim Pieces , 1/4" x 2" x 20 3/4"
- 1 Door , 1/2" x 24 3/4" x 29 3/4"
Directions
-
Step 1: Cuts and Pocket Holes
Make Cuts and create pocket holes where indicated by the red dots in the provided cut list. However, I do suggest cutting as you go in order to keep the project square.
-
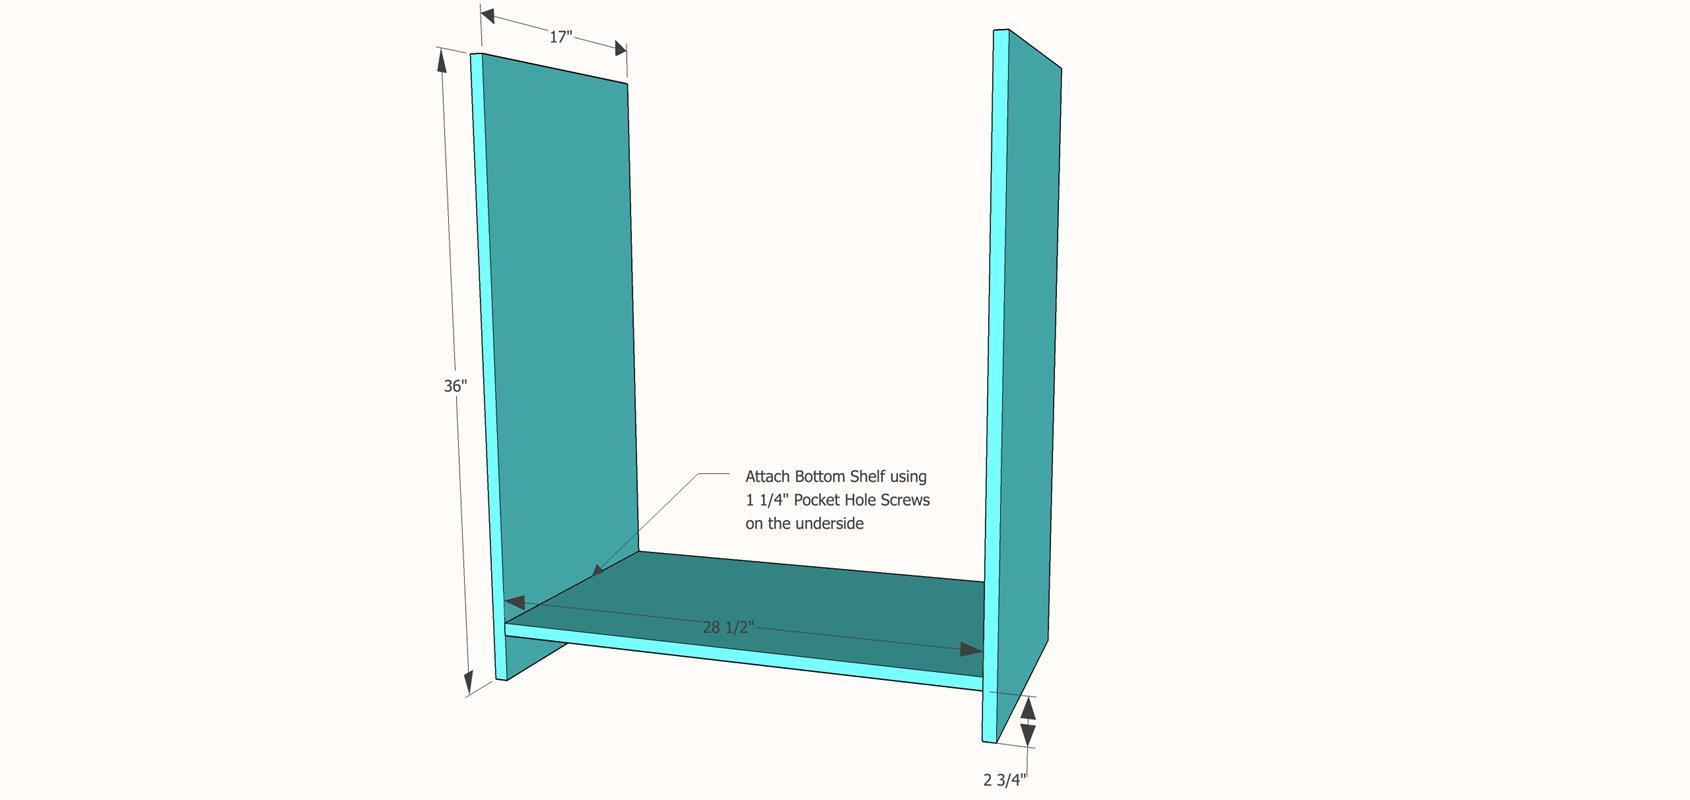
Step 2: Form Box
Using the 2 side panels and 1 shelf, attach the bottom shelf to the side panels with 1 1/4" pocket hole screws and wood glue.
-
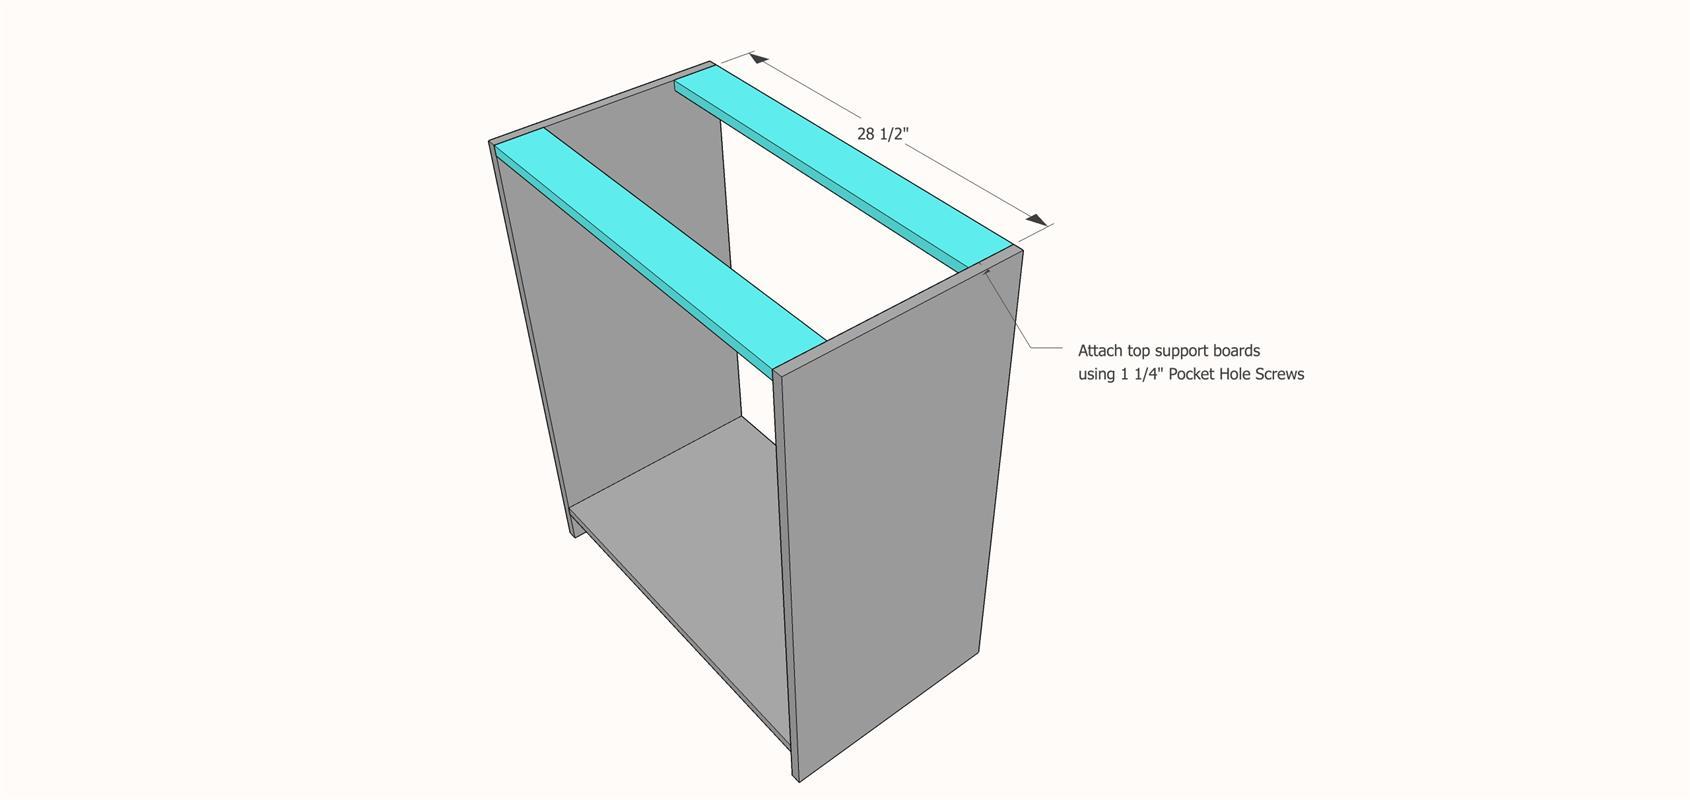
Step 3: Attach Top Supports
Attach top support boards to side panels using 1 1/4" Pocket Hole Screws.
-
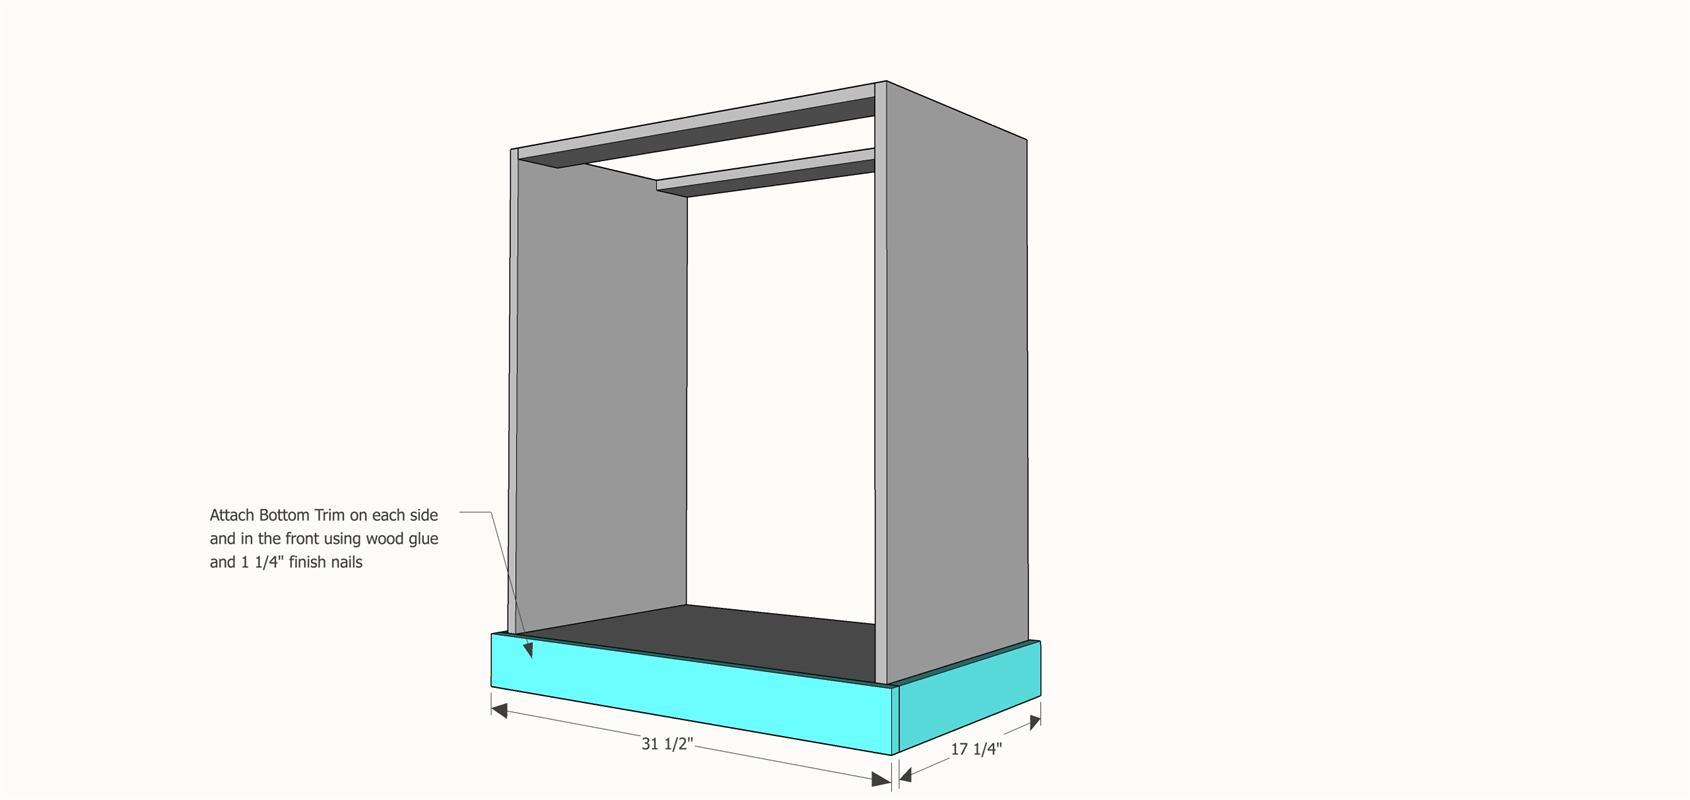
Step 4: Add Bottom Trim
Add the bottom trim to the bottom, flush with the side panels using wood glue and 1 1/4" finish nails.
-
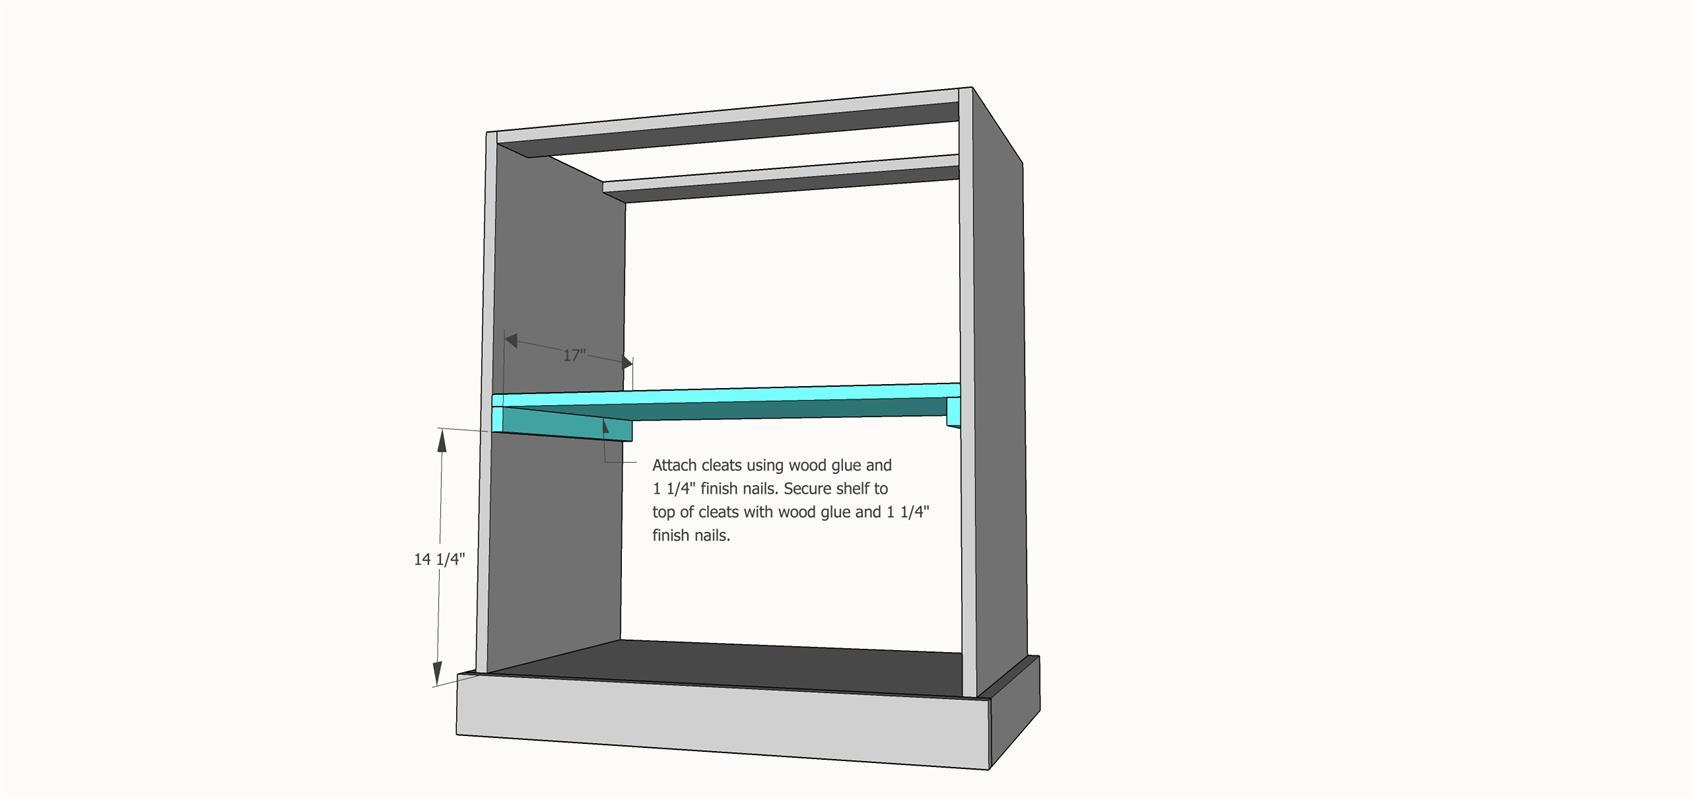
Step 5: Add Shelf
Attach cleats using wood glue and 1 1/4" finish nails. Secure shelf to top of cleats with wood glue and 1 1/4" finish nails.
-
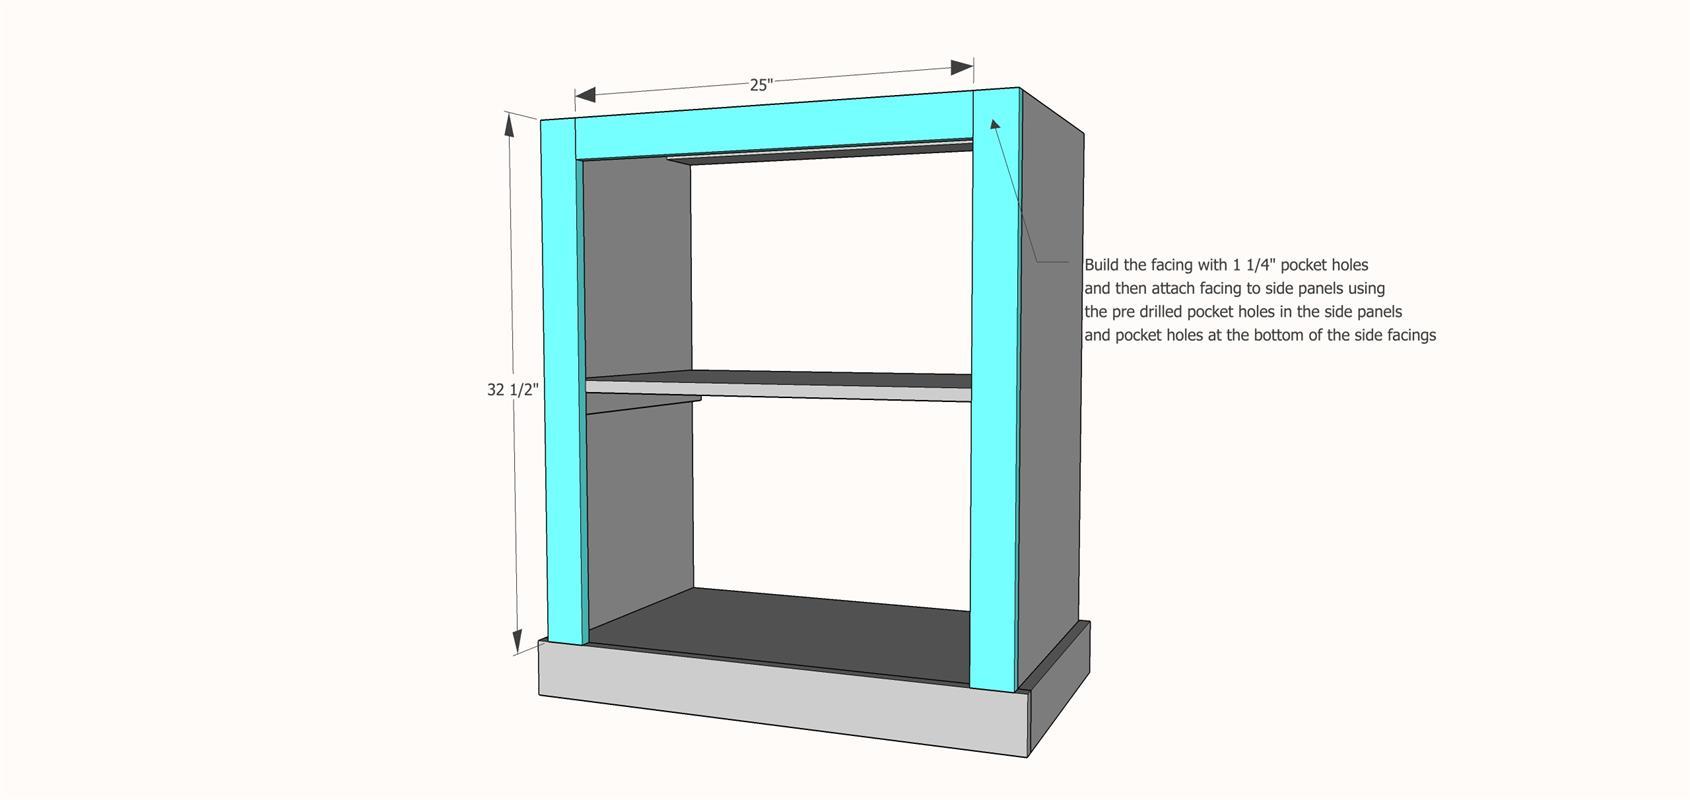
Step 6: Attach Facing
Build the facing with 1 1/4" pocket holes and then attach facing to side panels using the pre drilled pocket holes in the side panels and pocket holes at the bottom of the side facings.
-
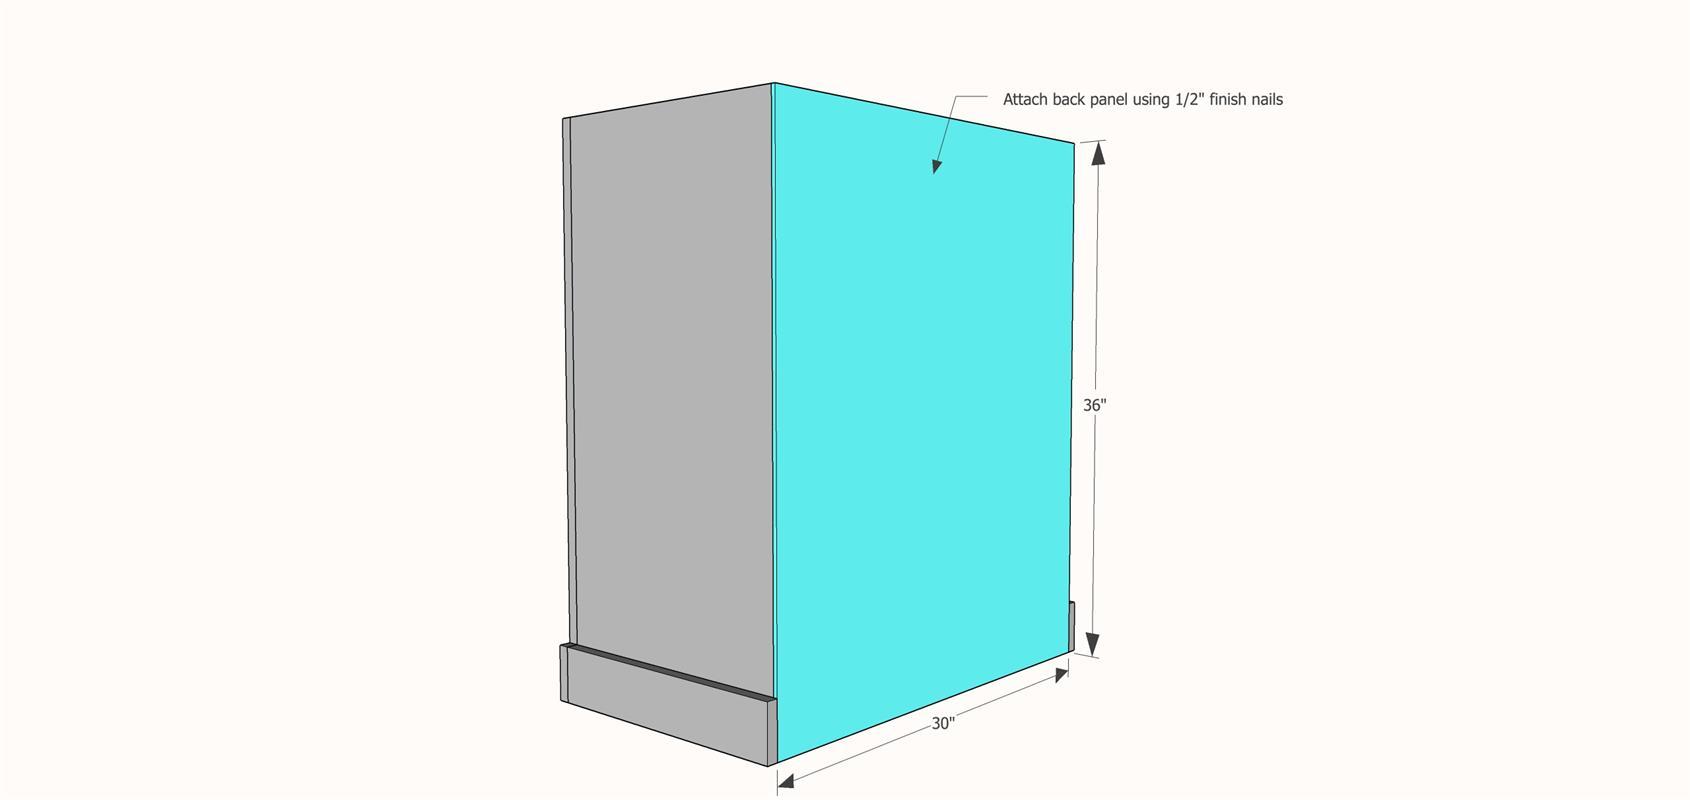
Step 7: Attach Back Panel
Attach Back Panel with 1/2" finish nails.
-
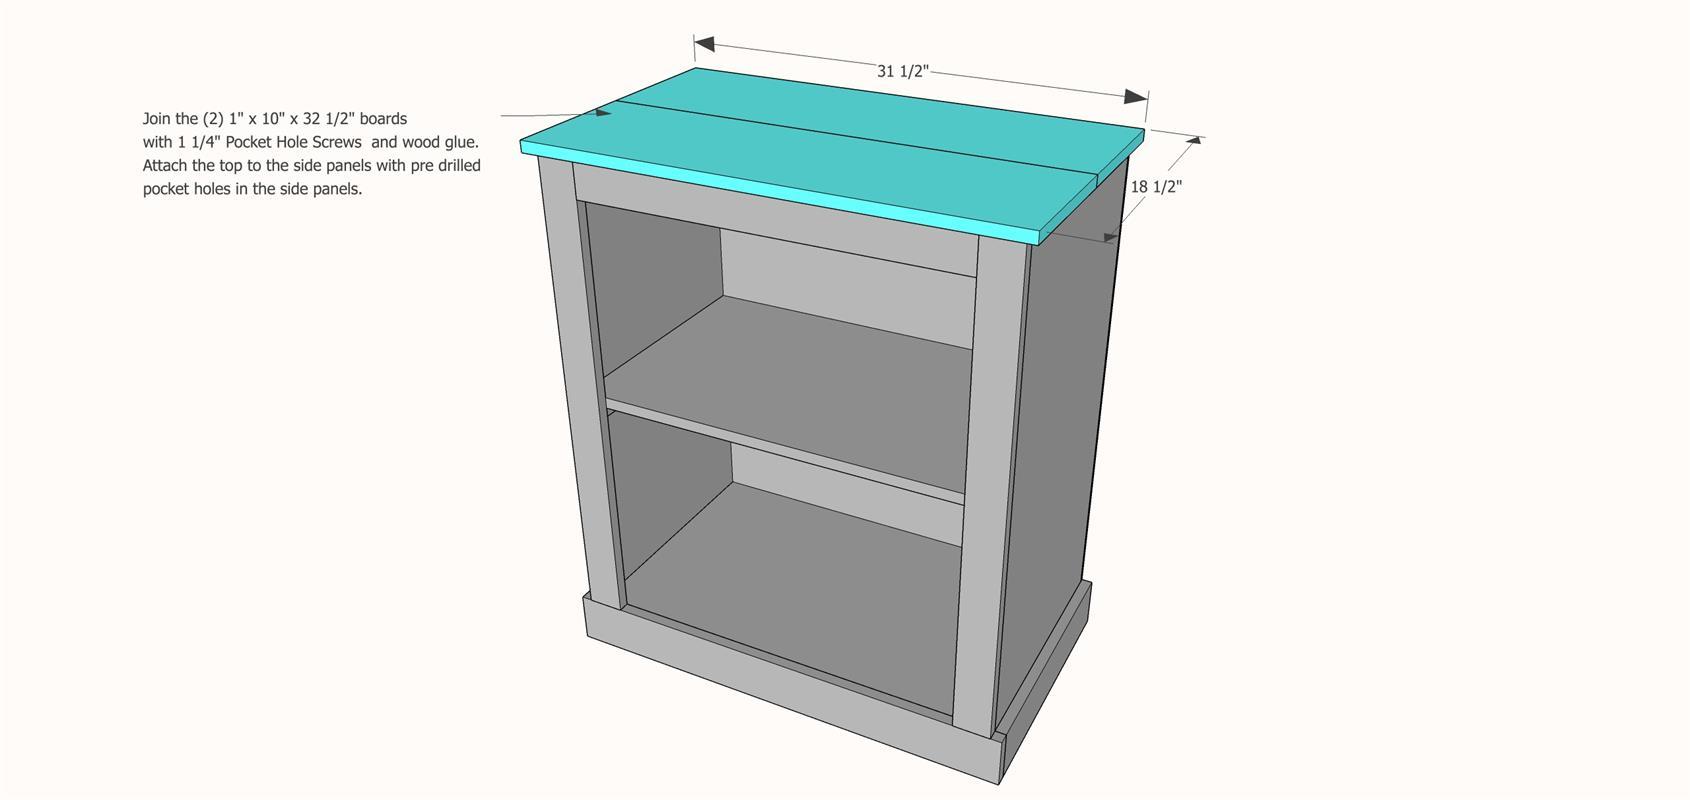
Step 8: Attach top
Join the (2) 1" x 10" x 32 1/2" boards with 1 1/4" Pocket Hole Screws and wood glue. Attach the top to the side panels with pre drilled pocket holes in the side panels.
-
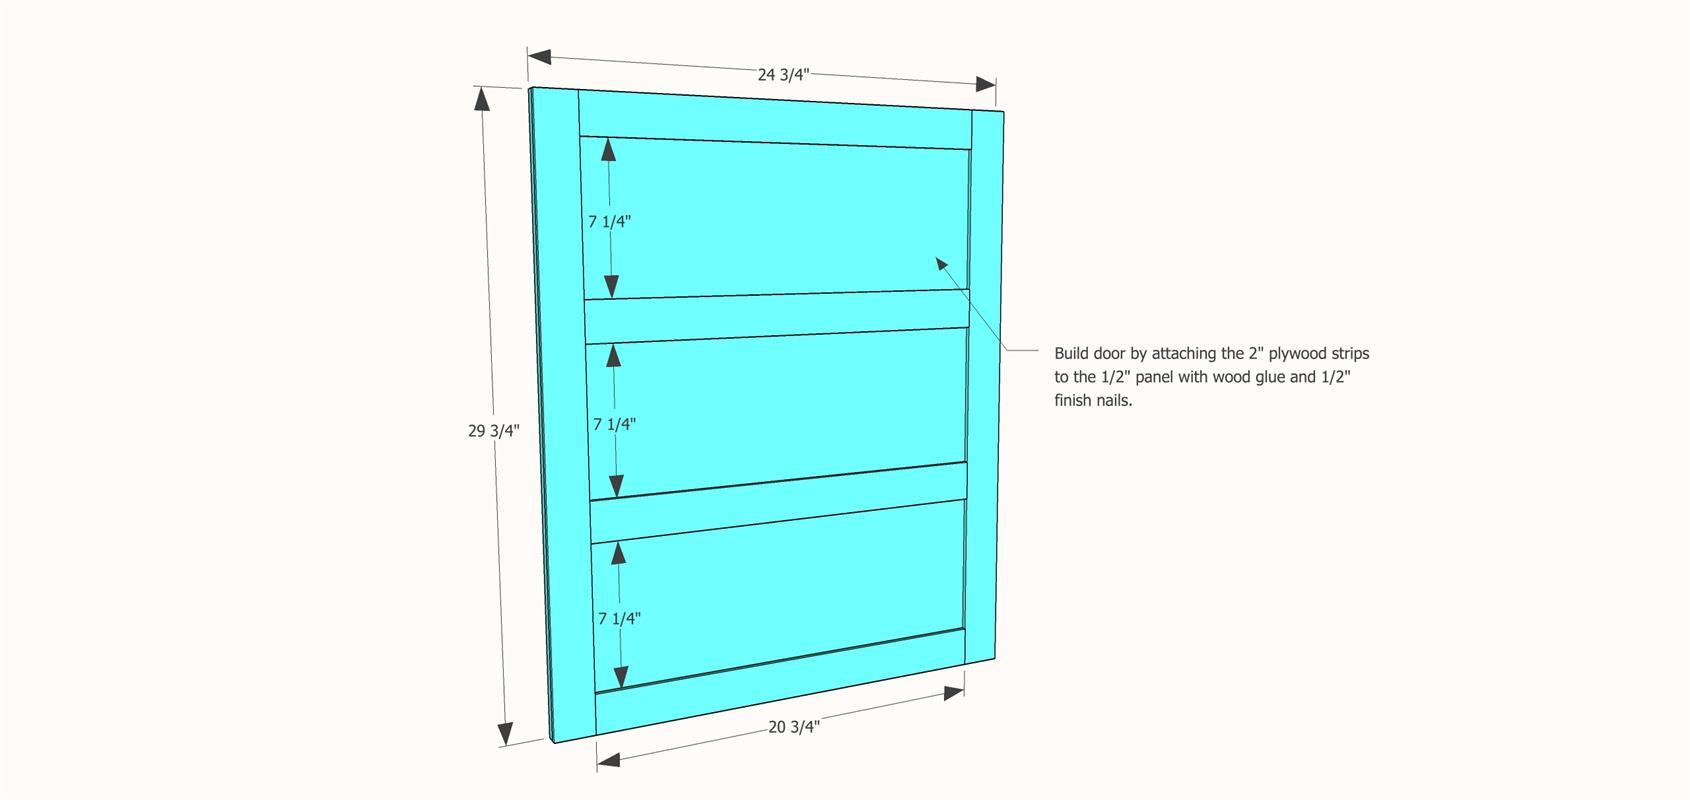
Step 9: Build Door
Build door by attaching the 2" plywood strips to the 1/2" panel with wood glue and 1/2" finish nails.
-
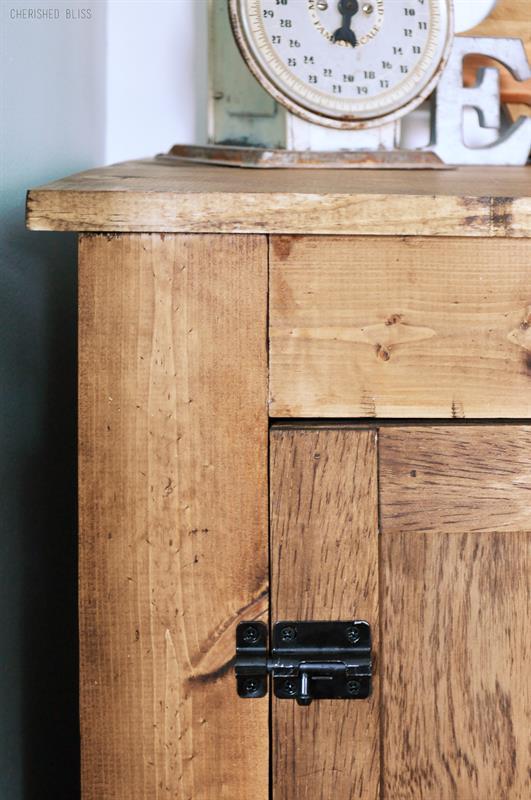
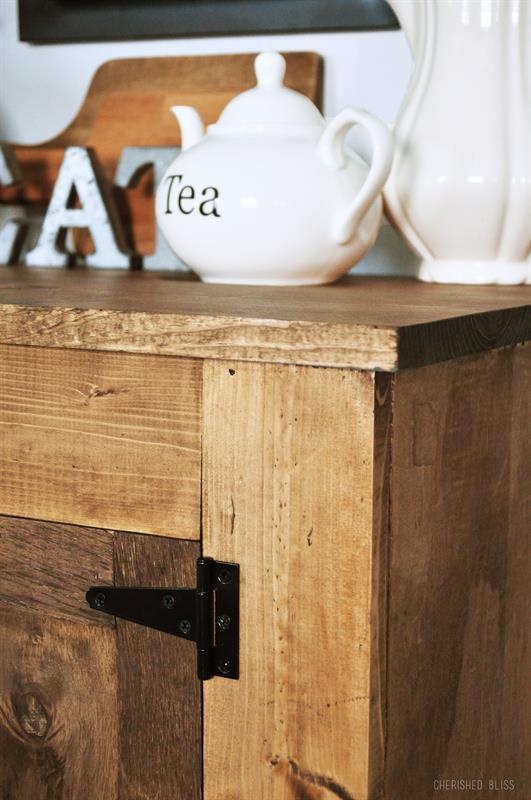
Step 10: Add Hardware
Attach the door with your T hinges leaving an 1/8" gap around the perimeter of the door. Then attach the sliding barrel bolt to the door. Finish with your desired style and enjoy!