

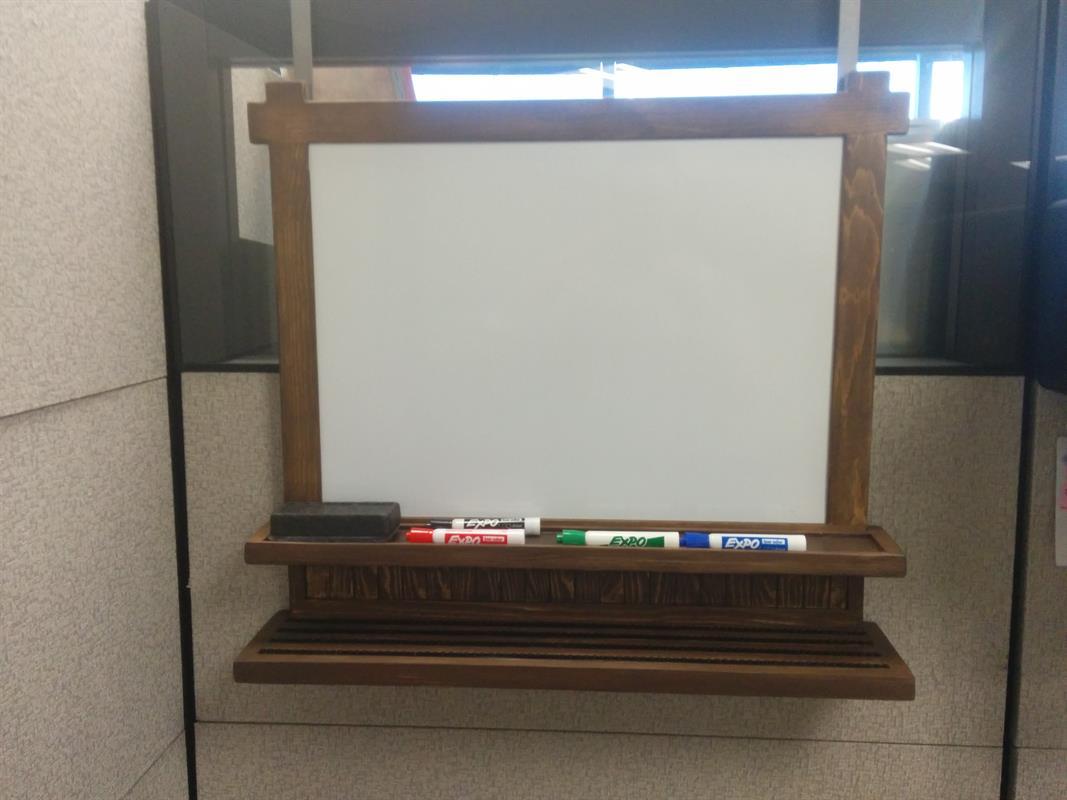


This is a project for my cubicle at work that gives me a magnetic whiteboard to track my professional progress, hang various unprofessional print-outs (usually memes) and display my collection of Lego Simpsons minifigs in a way that they aren’t disturbed by the cleaning crew or handsy coworkers.
Tools
Kreg Tools

Other Tools
-
Jigsaw

-
Table Saw
-
Tape Measure
-
Clamps
-
Drill (cordless)
-
Impact Driver
-
Router
-
Router Table
-
Sander
-
Shop Vacuum
-
Sawhorse
-
Workbench
Materials
Wood Products
- 2 Board , 1x6 , 72"
Hardware & Supplies
- 6 Small Screws
- 10 Pocket Hole Screws
- 1 Wood Glue
- 100 Lego Plates 1x10
- 1 Epoxy for Plastic/Wood
- 3 Aluminum Bars 3/4 x 1/8 x 48
- 1 Magnetic Whiteboard
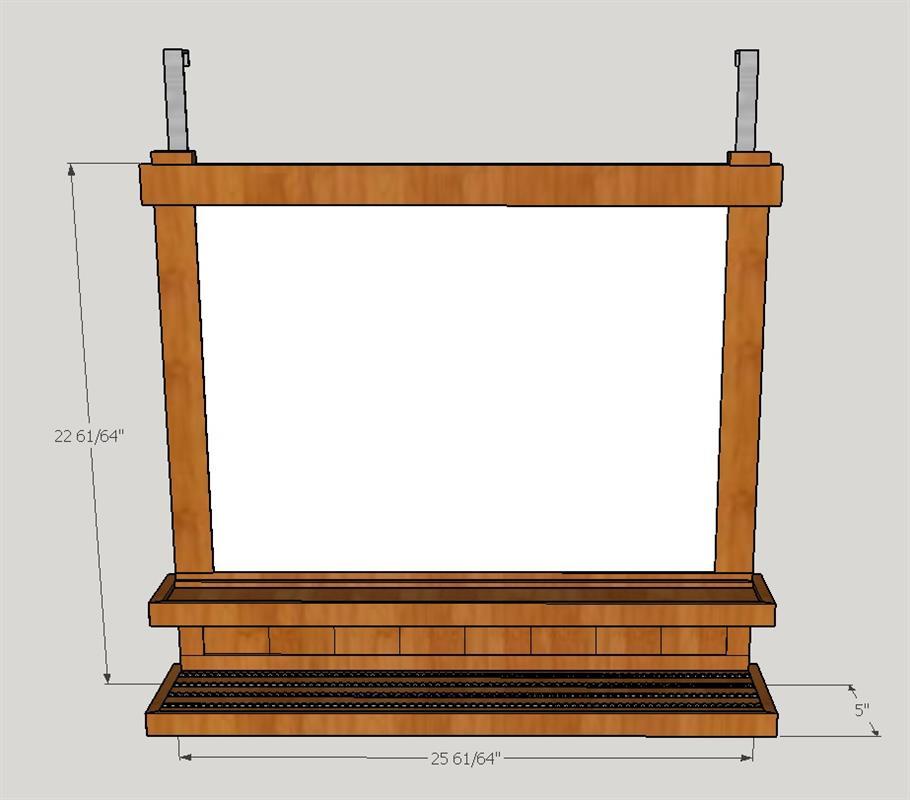
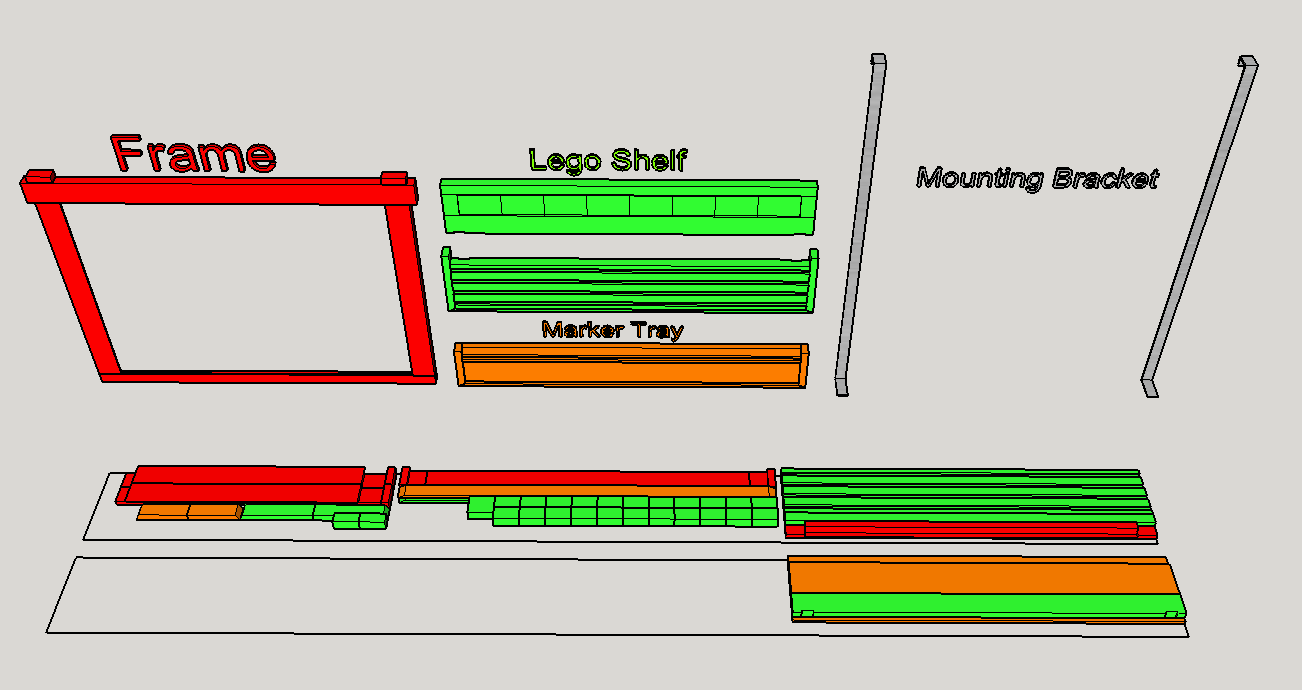
Cut List & Parts
- 1 Frame Top Rail , 3/4" x 25 61/64" x 1 5/8"
- 2 Frame Stile , 3/4" x 18 47/64" x 1 5/8"
- 1 Frame Bottom Rail , 3/4" x 53/64" x 24 61/64"
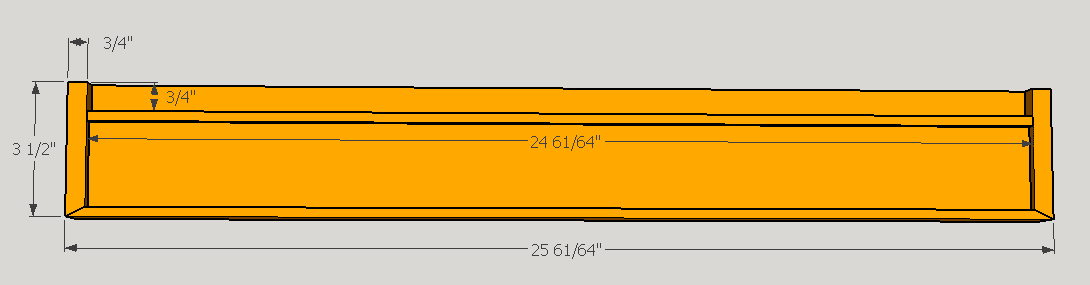
- 1 Marker Tray Boarder Front , 3/4" x 25 61/64" x 1/4"
- 2 Marker Tray Boarder Sides , 3/4" x 3/4" x 3 1/2"
- 1 Marker Tray , 3/4" x 3 1/4" x 24 61/64"
- 1 Marker Keeper , 1/4" x 1/4" x 24 61/64"
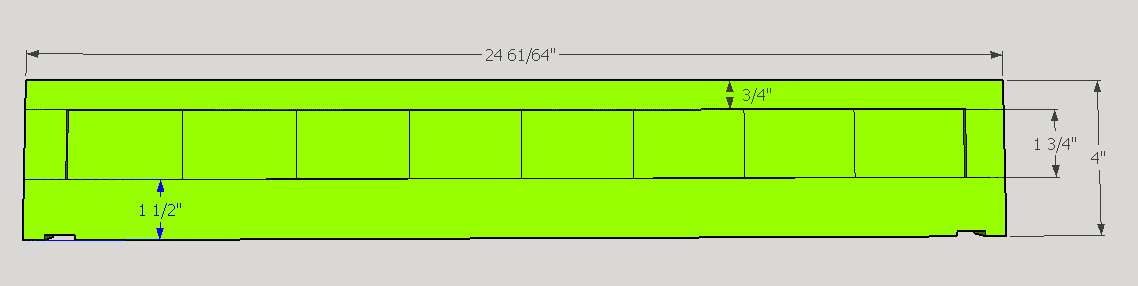
- 1 Backdrop Frame Top Rail , 3/4" x 3/4" x 24 61/64"
- 1 Backdrop Frame Bottom Rail , 3/4" x 1 1/2" x 24 61/64"
- 2 Backdrop Frame Stiles , 3/4" x 1 3/4" x 3/4"
- 22 Backdrop Filler Strips , 1/2" x 1" x 1 3/4"
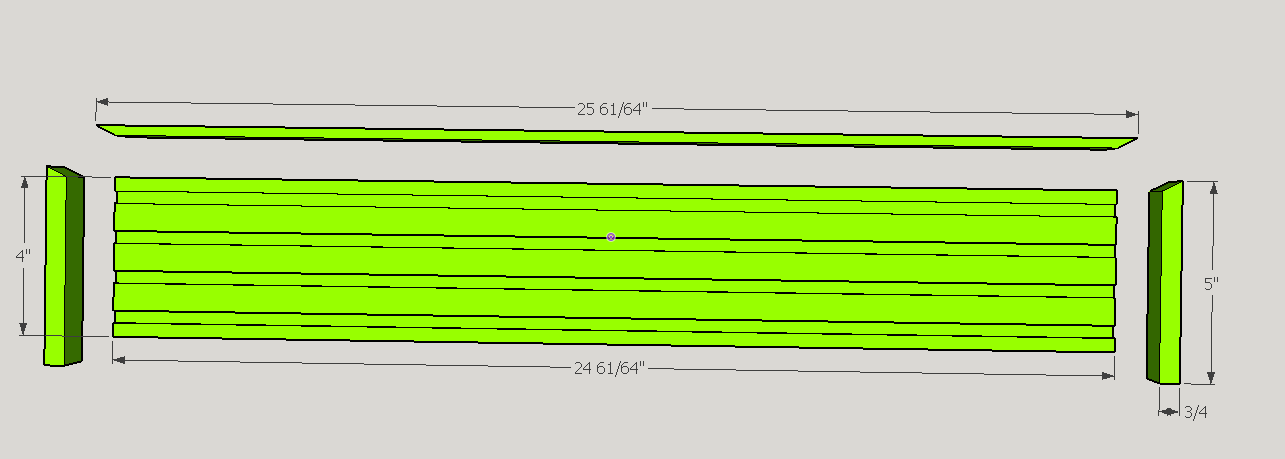
- 1 Lego Shelf , 3/4" x 4" x 24 61/64"
- 1 Lego Shelf Boarder Front , 3/4" x 1/4" x 25 61/64"
- 2 Lego Shelf Boarder Sides , 3/4" x 3/4" x 4"

Directions
-
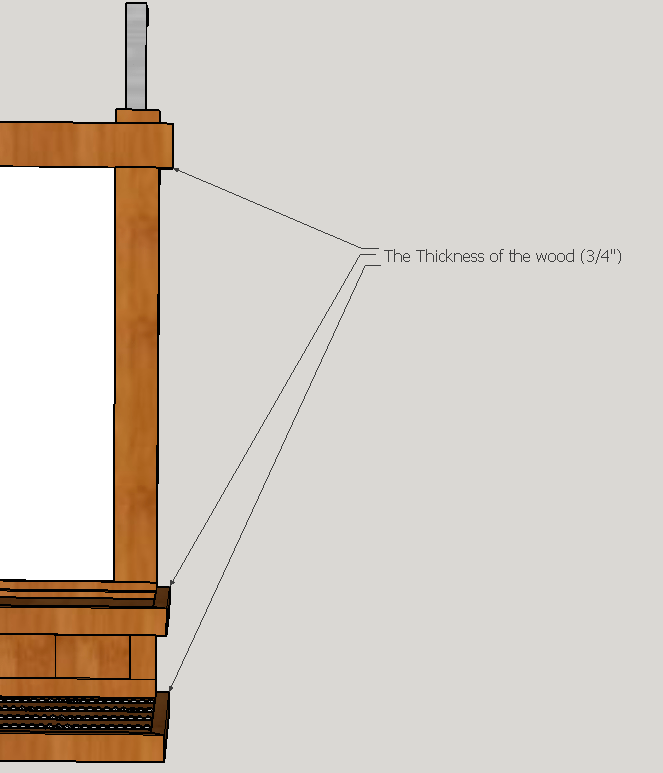
On Measuring
The plans I put together to plan for this project have overly precise measurement because of the static dimensions of the whiteboard and the Legos. All of the places that stick out are 3/4", the thickness of the wood I used.
-
Overview
I wanted a magnetic whiteboard to track my progress at work and hang things with magnets. I also have a collection of Simpsons Lego minifigs displayed on a shelf that are hard to keep organized.
I decided to make a custom frame for a magnetic whiteboard with a shelf dedicated to my Legos. I also wanted the whiteboard to be able to lift off the shelf so I can write easily.
After reading several negative reviews on affordable whiteboard paint and seeing the price of quality options, I found it easier to buy a magnetic whiteboard from a craft store with a coupon and frame around it. I don't have a way to cut the metal on the store-bought whiteboard so this is one of the two measurements I have to work around, the other being the Lego plates. -
Measure and cut basic shapes
I used pieces of the cheap 1x6x72 "common board" from Home Depot.
-
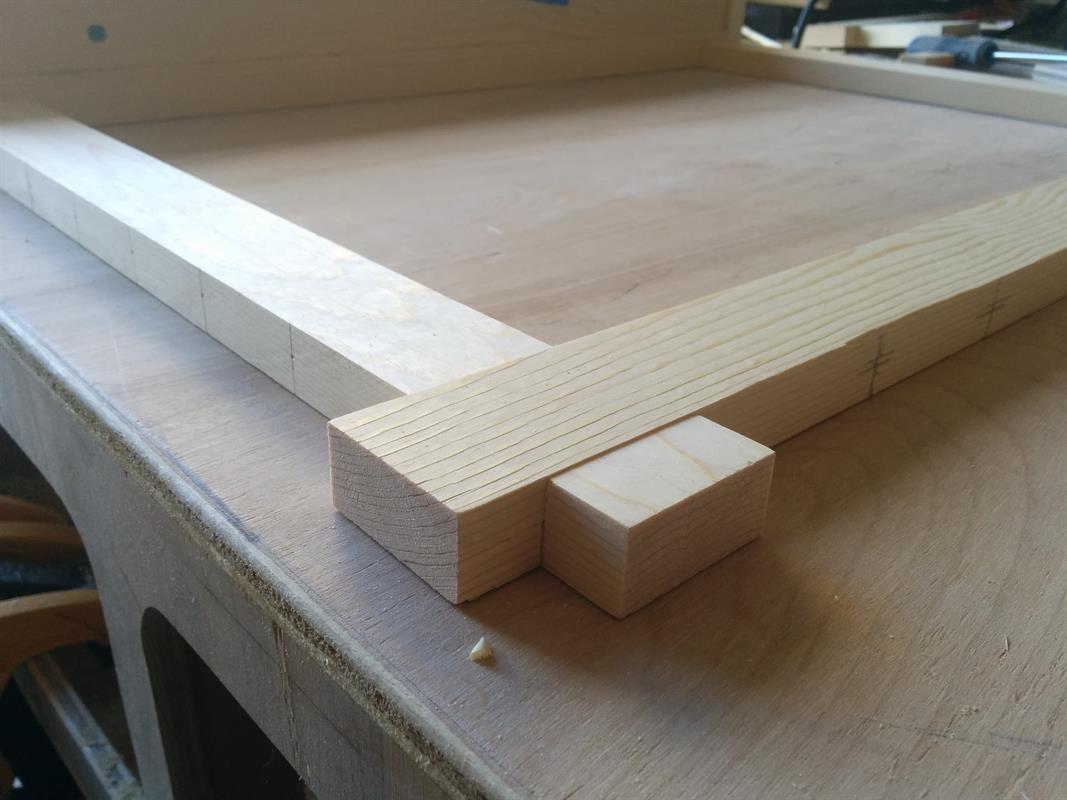
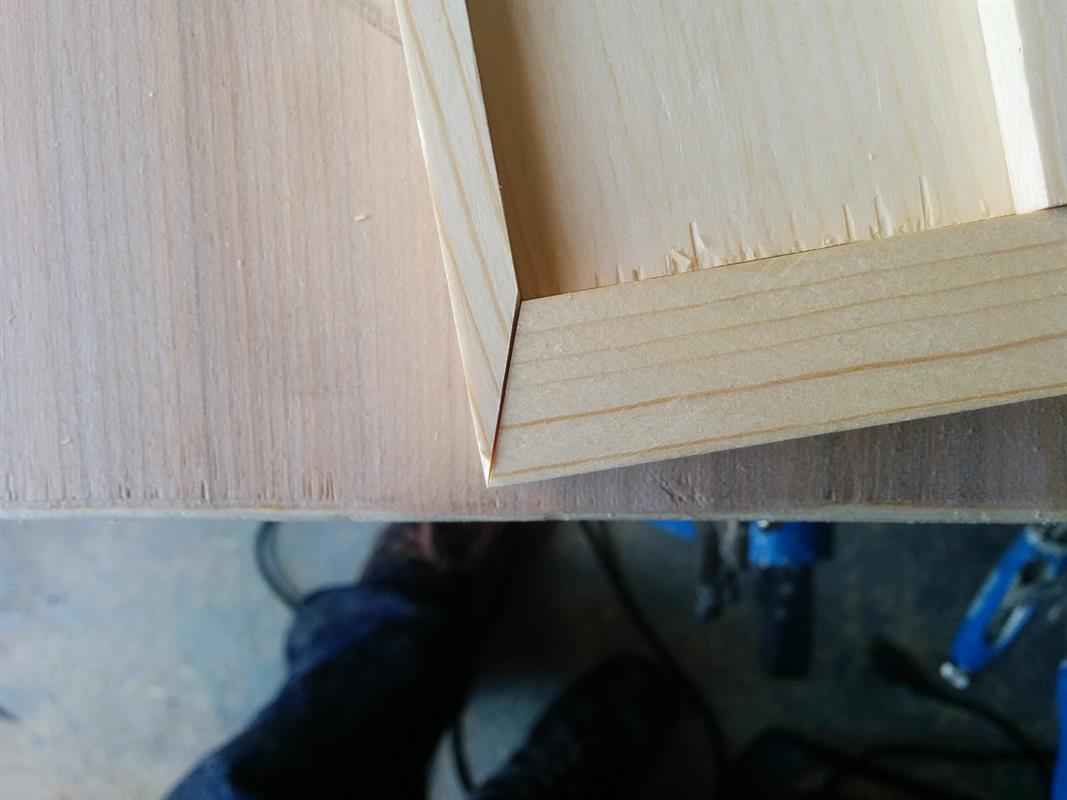
Cut the half lap joints
Using the table saw with a table saw sled was the easiest way I found to make these. Practice on scrap wood to sneak up on a tight, square joint. Remember you can sand it smooth later.
-
Cut the Lego dados
Like the half lap joints, use the table saw and practice on scrap to get a good blade depth and sneak up on the width slowly. Take your time.
-
Cut the crazy angles for the edges
This took some time to figure out. I used an angle finder and referenced off of my table saw sled.
-
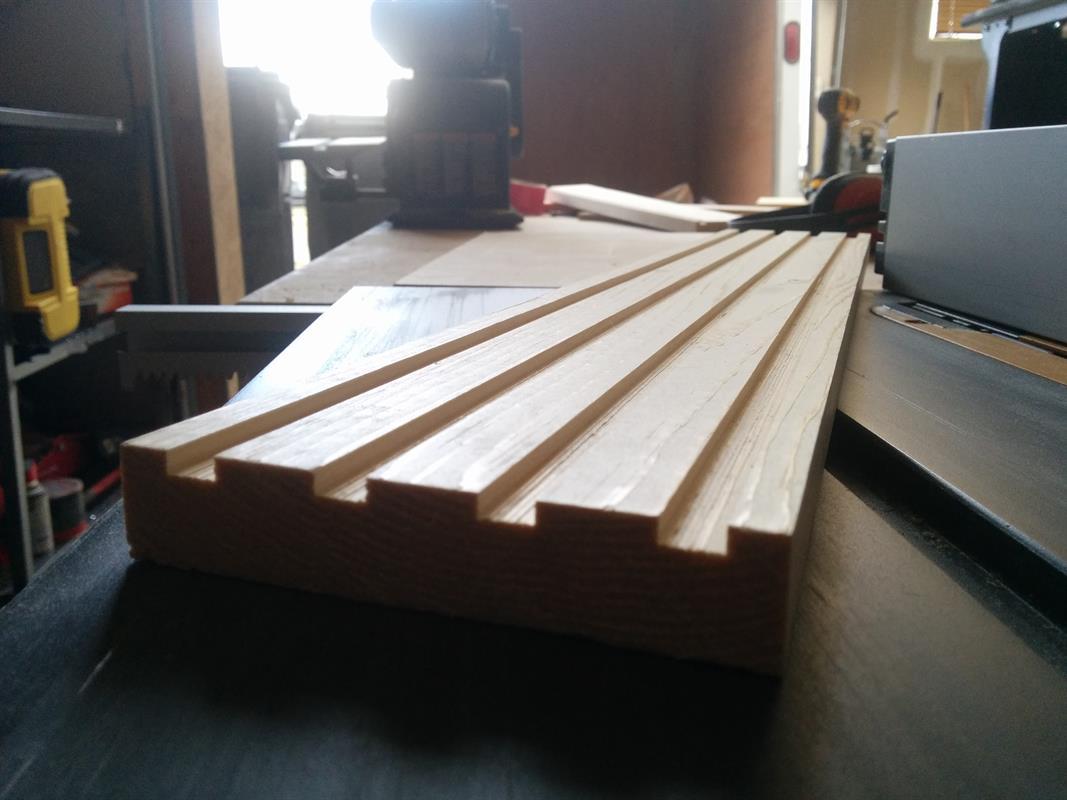
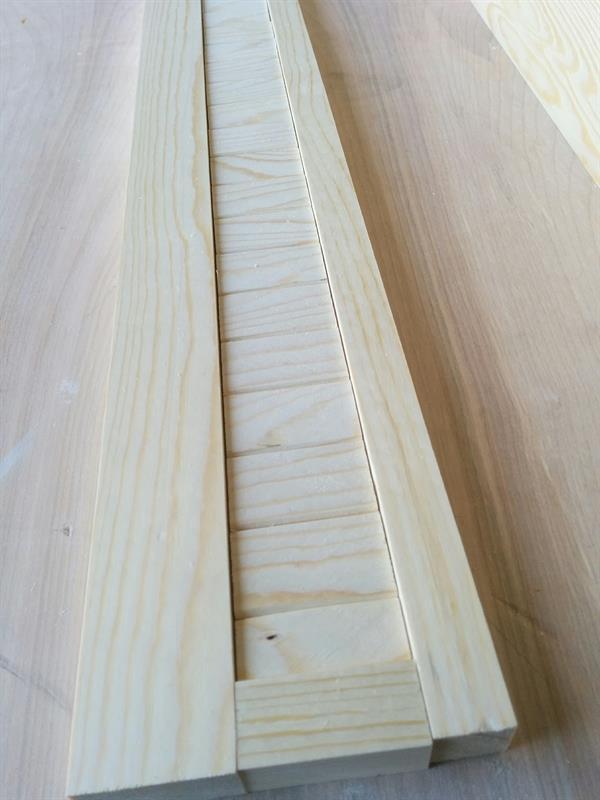
The backdrop
The individual slats in the backdrop section were cut into 2 long strips, rounded with a 1/8 round over bit and the thickness was shaved down by 1/8" so it sits back a little bit from its frame before the pieces were cut on the table saw sled.
-
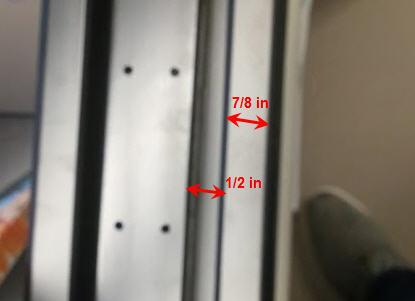
Mounting Bracket
I measured the thickness of the cubicle and planned around that. Using the aluminum strips from Home Depot, I bent them on the vice at the measurements. I also cut a dado on the bottom of the Lego shelf with a chisel to have it sit flush.
-
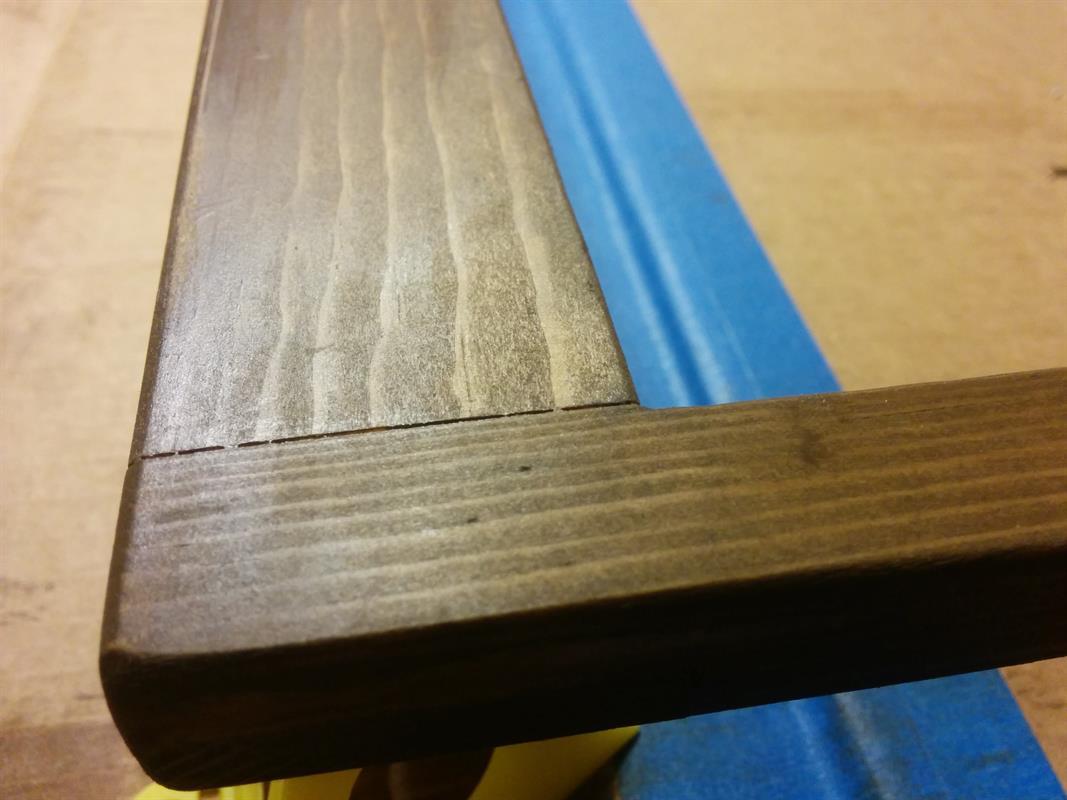
Sanding and finishing
It's easier to sand and apply stain before assembly. Wear a mask when you sand and make sure you follow the instructions on the stain properly. I accidentally used the recommendations for Oil-Based Stain when applying Water-Based stain. This required me to sand it down and restain.
-
Assembly
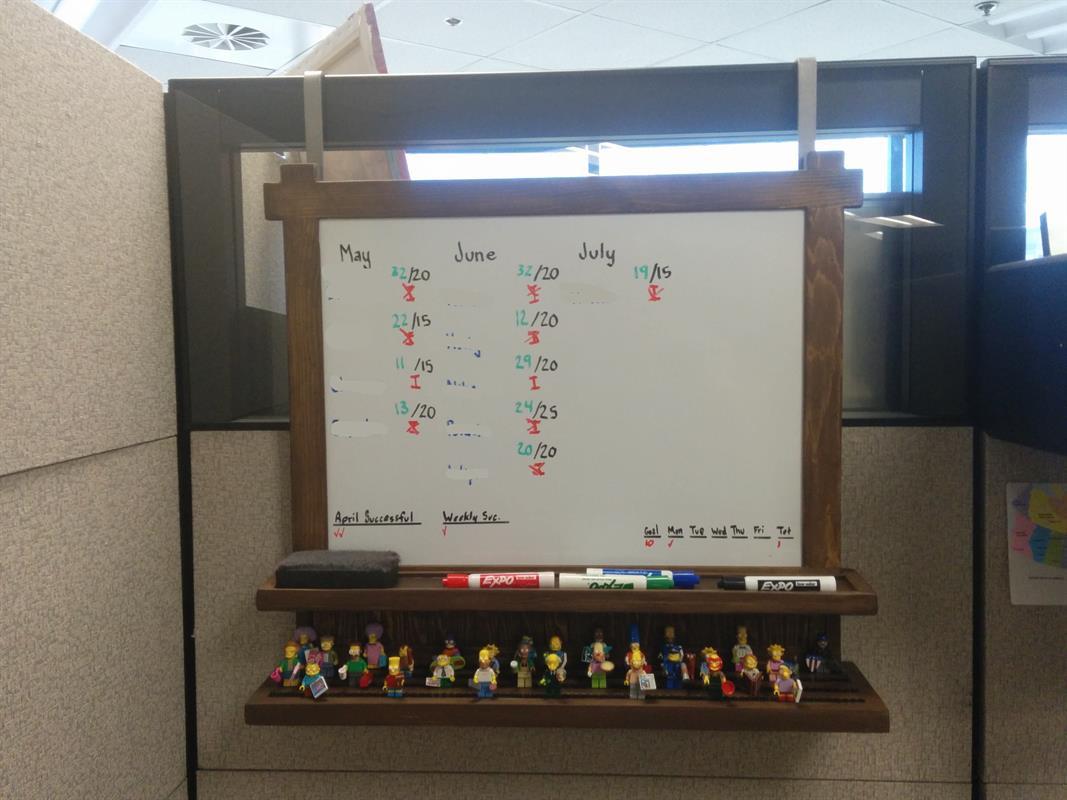
I set some magnets in the mounting bracket and the top 2 corners of the frame to keep it from falling over while it is hanging. Pre-drill the hole and use epoxy to hold them in place.
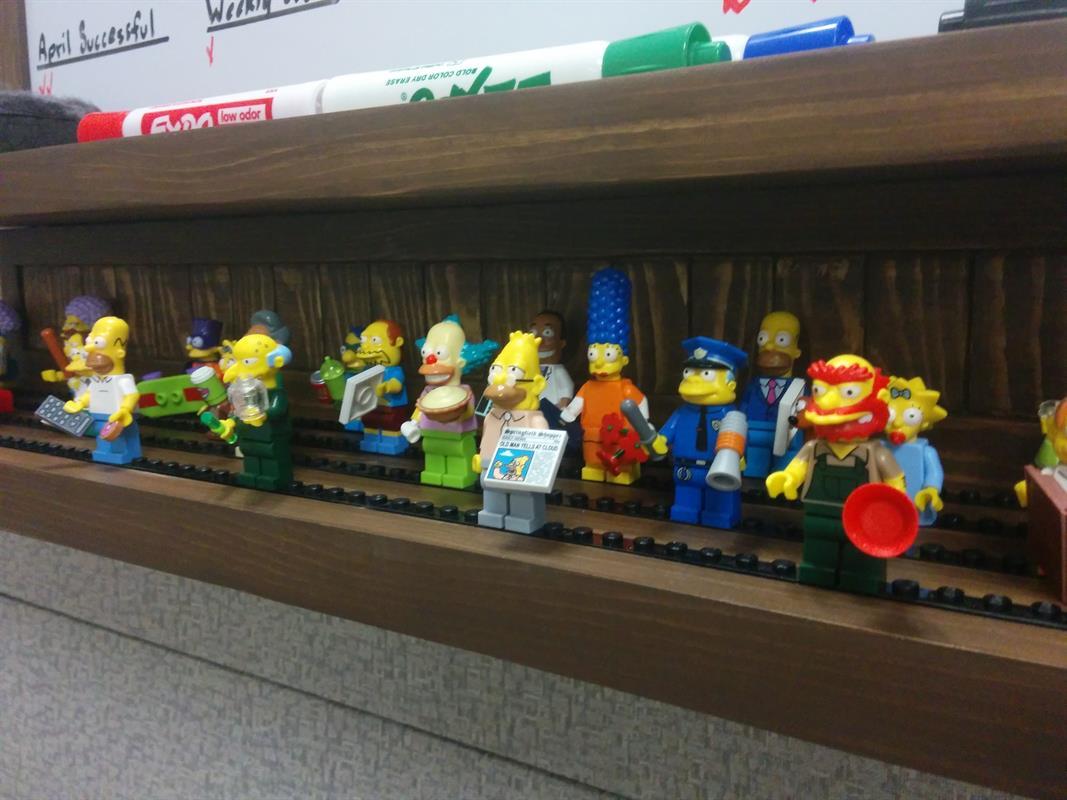
While the epoxy is out, you can set the Legos in their dados. This was the most frustrating part of the project for me.