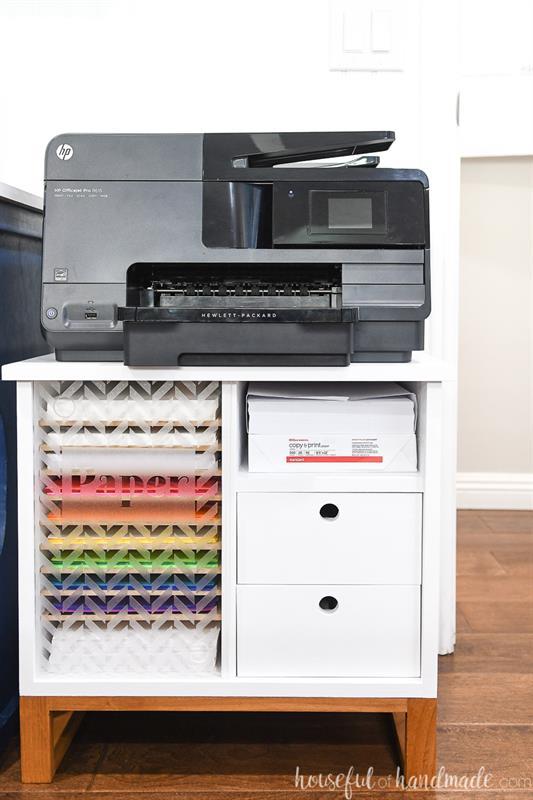


This beautiful printer cart is small but has lots of organization. The small cart is great for a small office, but pretty enough for storing a printer in any room. The sliding plexiglass door can cover up areas that are not needed.
Tools
Kreg Tools


Other Tools
-
Circular Saw (corded)

-
Square
-
Tape Measure
-
Drill (cordless)
-
Impact Driver
-
Nail Gun
-
Router
-
Sander
-
Tape Measure
Materials
Wood Products
- 1 Plywood , 3/4" Thick , Half Sheet
- 1 Plywood , 1/2" Thick , Quarter Sheet
- 1 Plywood , 1/4" Thick , Quarter Sheet
- 2 Board , 1x2 , 96"
- 1 MDF , 1/4" Thick , Half Sheet
Hardware & Supplies
- 50 1 1/4" pocket hole screws
- 20 1" pocket hole screws
- 15 1 1/4" finish nails
- 1 Wood glue
- 1 15 1/2" x 9 3/4" plexiglass sheet
- 2 14" drawer slides
- 4 1 1/4" wood screws
- 20 5/8" brad nails
- 40 5mm shelf pins
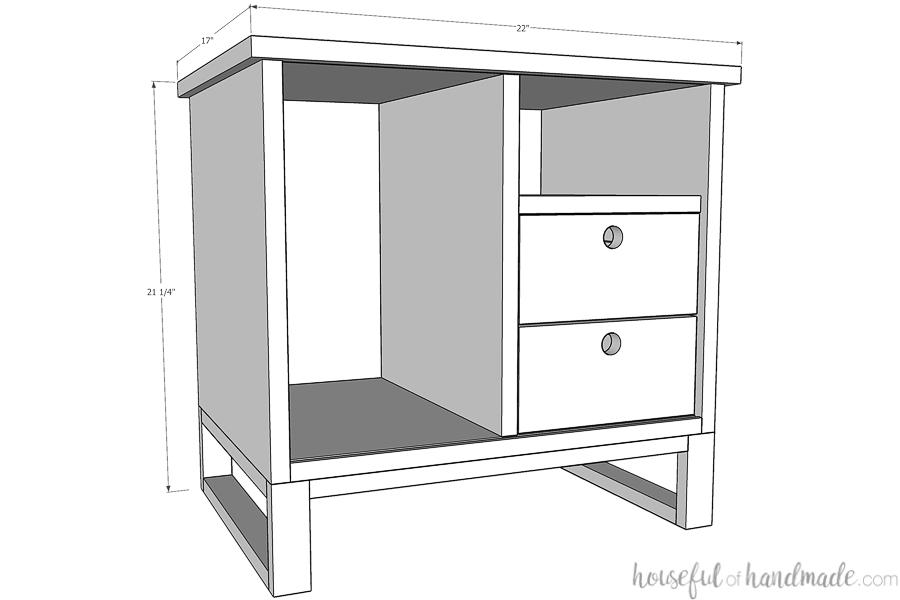
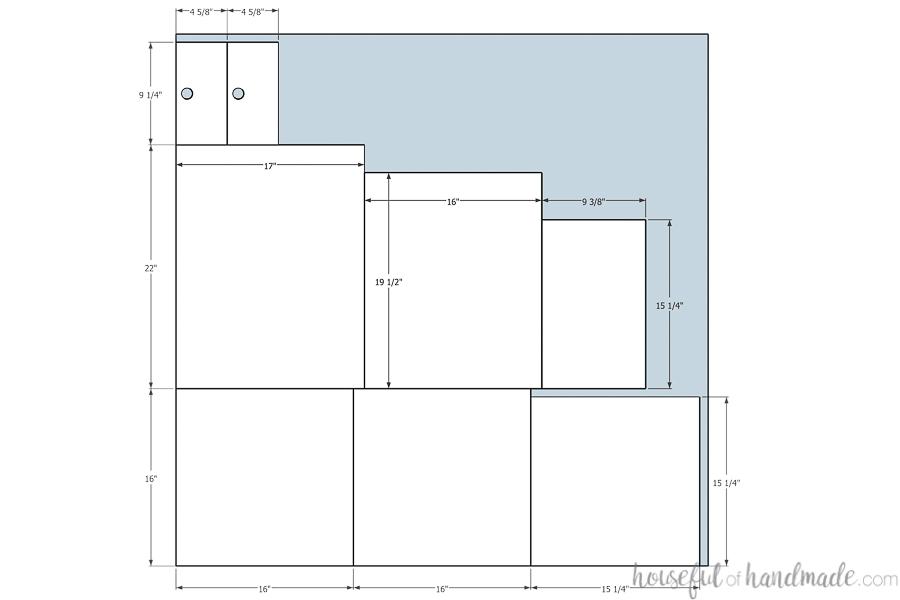
Cut List & Parts
- 2 Side , 3/4" x 16" x 16"
- 1 Center , 3/4" x 15 1/4" x 15 1/4"
- 1 Bottom , 3/4" x 19 1/2" x 16"
- 1 Top , 3/4" x 22" x 17"
- 1 Shelf , 3/4" x 15 1/4" x 9 3/8"
- 2 Drawer front , 3/4" x 9 1/4" x 4 5/8"
- 4 Base front/back , 3/4" x 1 1/2" x 4 1/2"
- 4 Base top/bottom , 3/4" x 1 1/2" x 14 1/2"
- 2 Base center support , 3/4" x 1 1/2" x 18"
- 4 Drawer box side , 1/2" x 14" x 3"
- 4 Drawer box front/back , 1/2" x 7 3/8" x 3"
- 2 Drawer box bottom , 1/4" x 13 1/2" x 7 7/8"
- 1 Cabinet back , 1/4" x 20 1/4" x 15 5/8"
- 9 Paper shelves , 1/4" x 14 1/2" x 9 1/4"
Directions
-
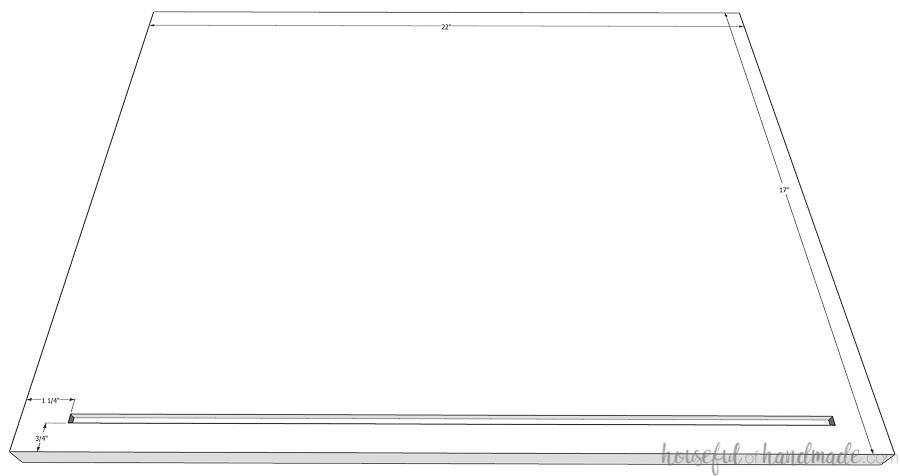
Router groove in bottom board
Router a 1/8" deep groove in the bottom board. Set the groove 1/4" back from the front of the bottom board. Router the groove from edge to edge on the bottom board.
-
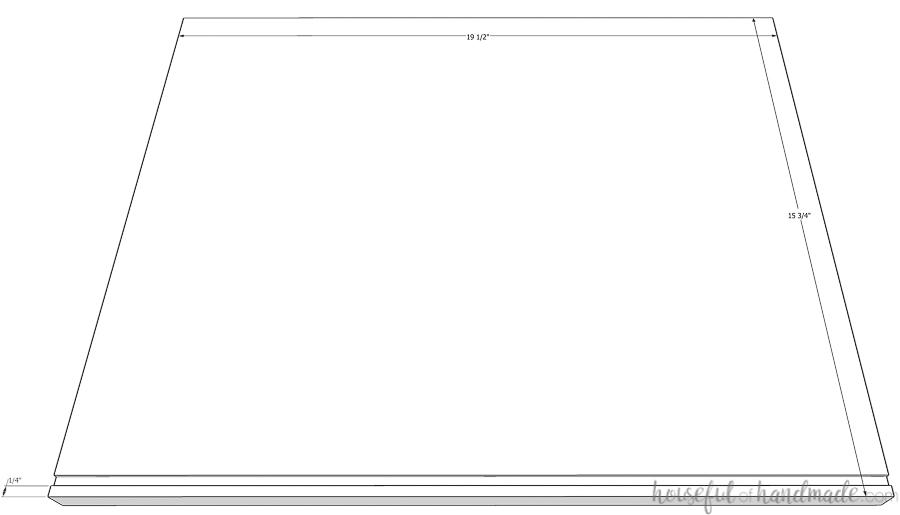
Router groove in top board
To allow the plexiglass door to slide, router a 1/4" deep groove in the top board. Router the groove so it is 3/4" in from the front of the board. Stop the groove 1"-1 1/4" from each edge of top board so that it does not show on the assembled printer cart.
-
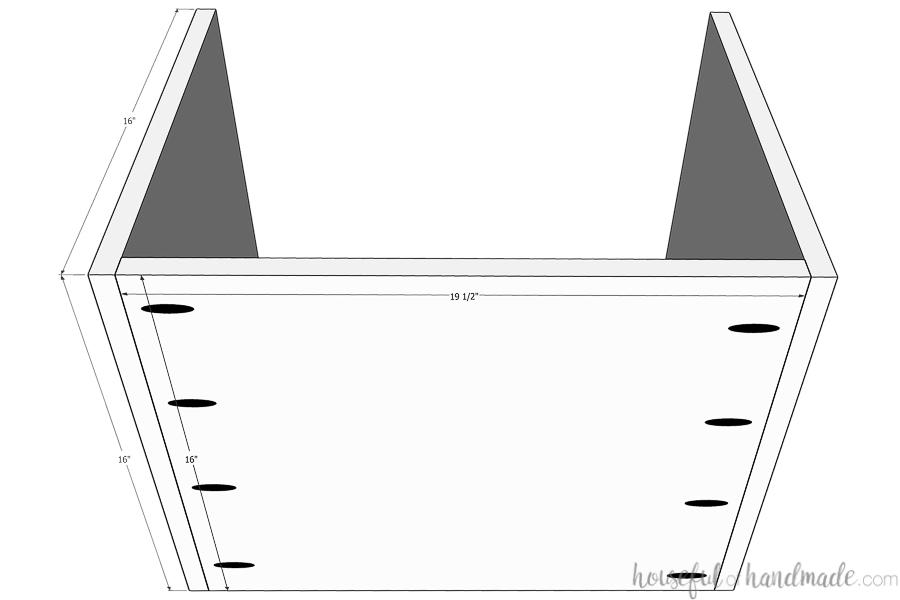
Start assembling the cabinet
Drill pocket holes screws set for 3/4" material in each side of the bottom board. Make sure to stay back enough not to interfere with the groove. Attach the bottom between the two side boards with 1 1/4" pocket hole screws and wood glue.
-
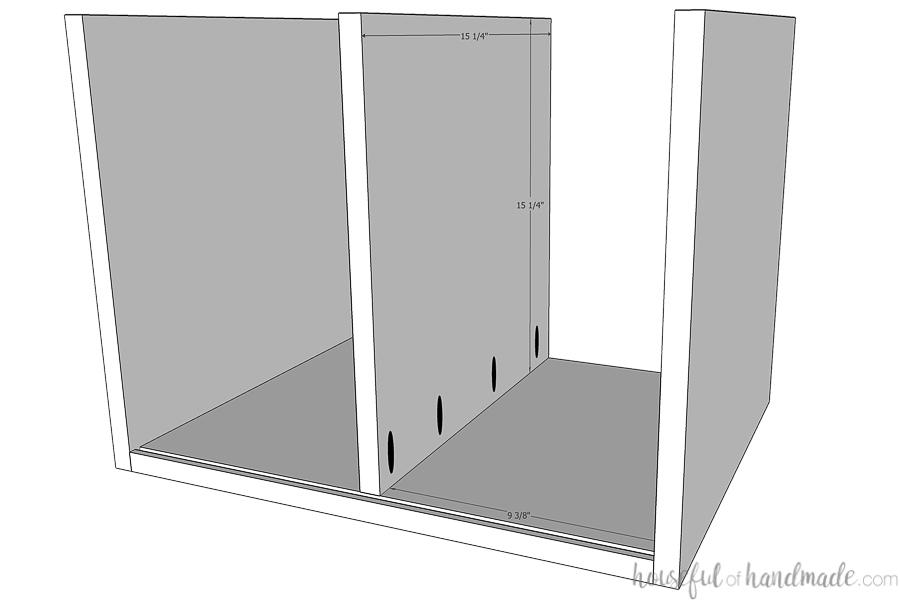
Add center divider
Drill pocket holes set for 3/4" material in the bottom only of the center board. Attach it to the center of the printer cart (it should be 9 3/8" in from each side) with 1 1/4" pocket hole screws and wood glue. Make sure the front is flush with the back of the groove and the back is 1/4" set in from the back of the cart.
-
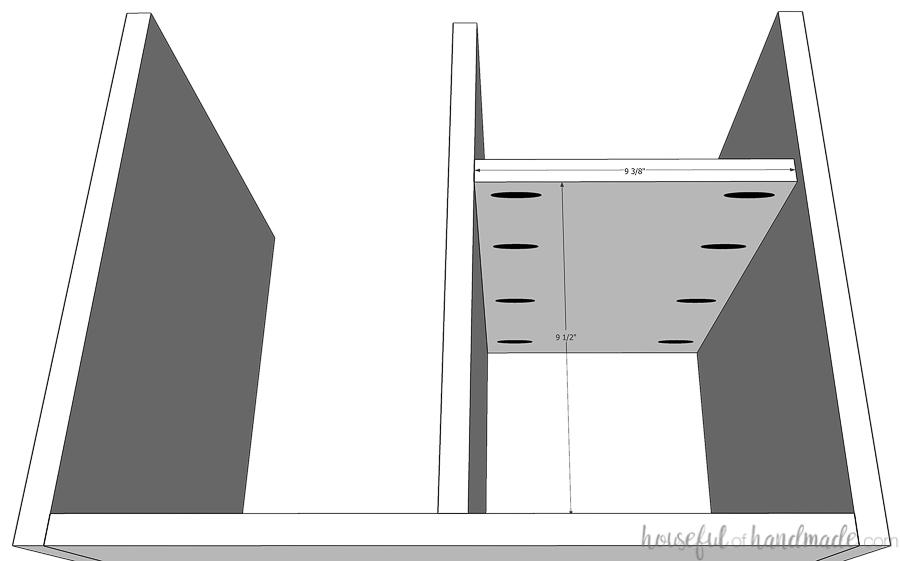
Add shelf
Drill pocket holes set for 3/4" material in each side of the shelf board. Attach it to the printer cart so it is 9 1/2" up from the bottom of the cart and the shelf is flush with the center post on the inside. Ensure it is squared up when attaching.
-
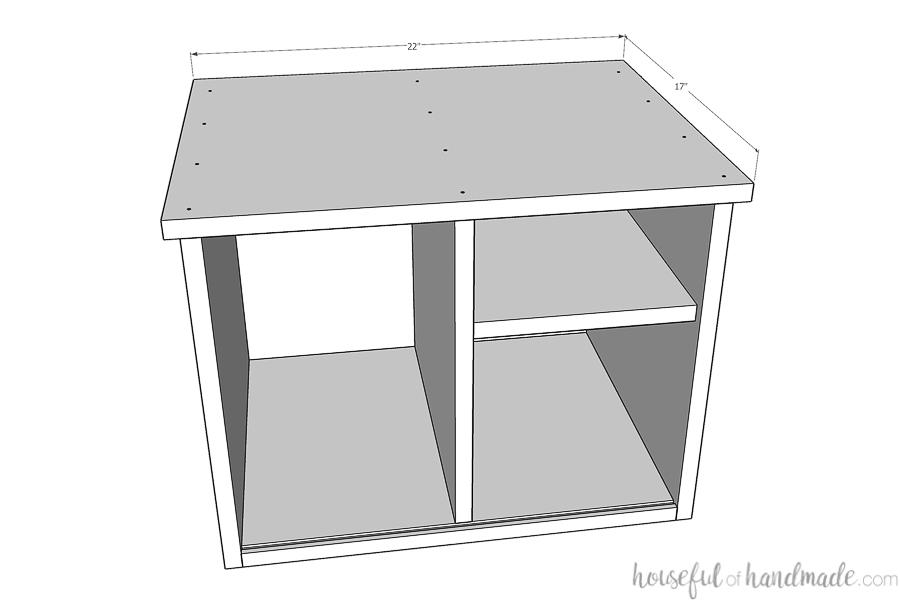
Attach the top
Before attaching the top, router a 3/8" wide x 1/4" deep groove around the back for the back panel to set inside. Center the top board on the printer cart. The top should have a 1/2" overhang on all edges. Also, the center board should line up with the back of the router groove. Attach with wood glue and 1 1/4" finishing nails through the top into the side and center boards.
-
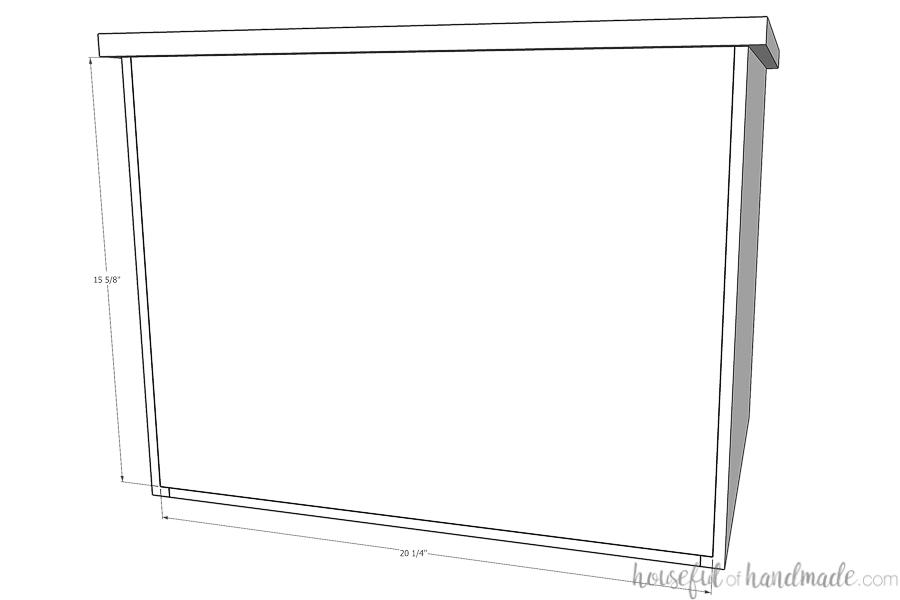
Attach the back
Double check the measurements for the back panel and cut to fit (it could be different depending on your router bit and plywood thickness). Set it inside the router groove and secure with 5/8" brad nails.
-
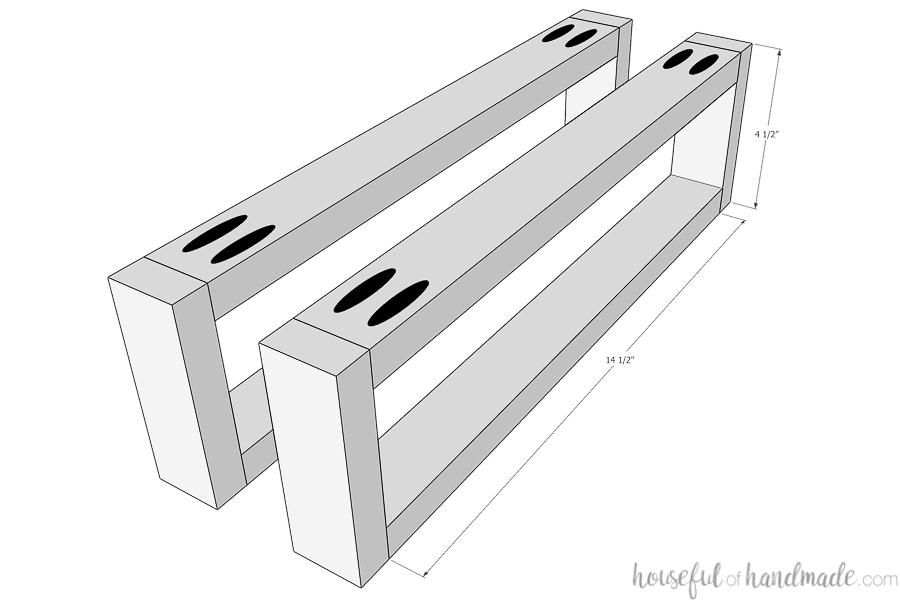
Build the base sides
Drill pocket holes set for 3/4" material in each side of the base top/bottom pieces. Attach them to the base front/back pieces with 1 1/4" pocket hole screws and wood glue. Make sure the pocket holes are facing the outside of the base pieces so they will not be visible when assembled.
-
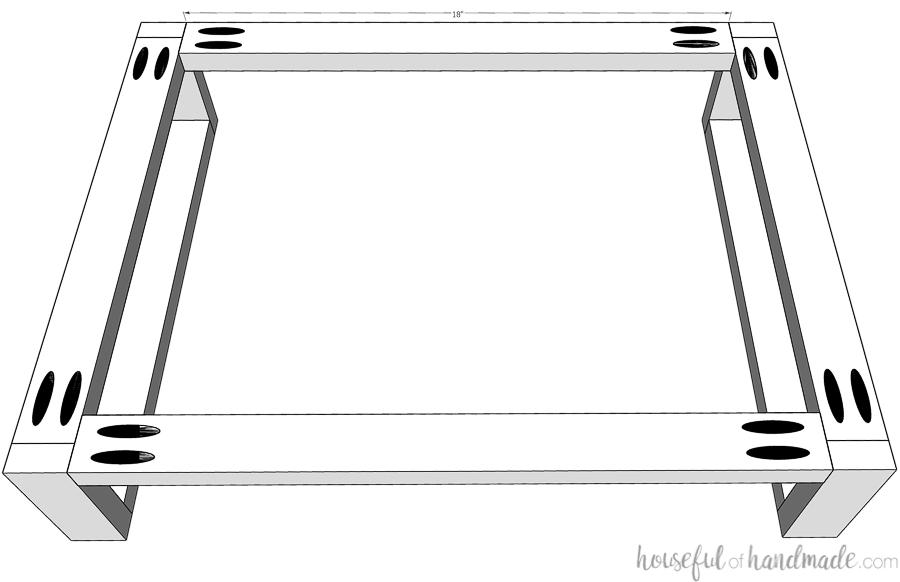
Finish building the base
Drill pocket holes set for 1 1/4" material on each side of the center base support pieces. Attach the base center support in between the assembled base sides with 1 1/4" pocket hole screws and wood glue. Make sure the pocket holes are facing upwards so they are hidden when the printer cart is assembled.
-
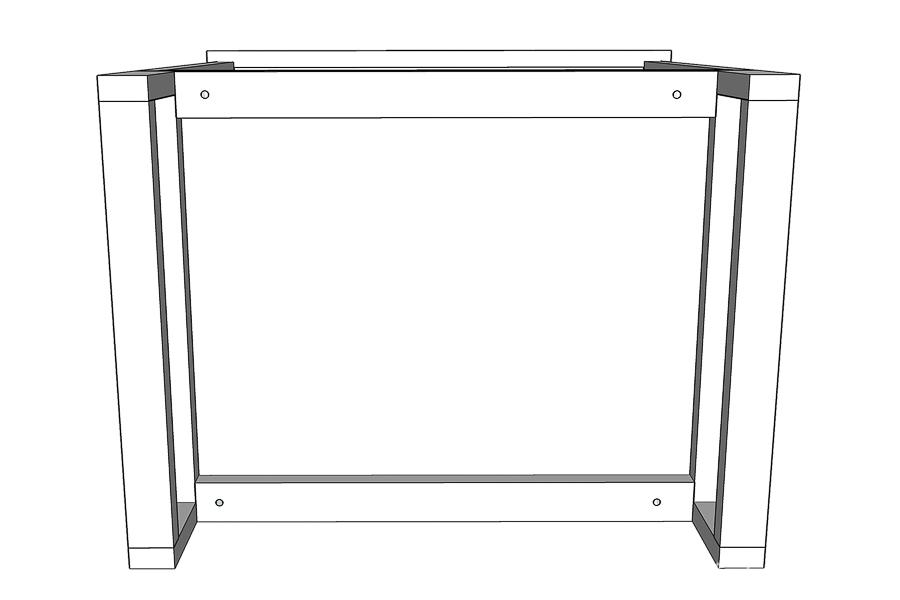
Attach the base to the cart
If you want to finish the base different from the cart, do that before attaching. To attach the base to the cart, carefully line it up so it is flush with the outside of the cart. Secure with 1 1/4" wood screws so the heads of the screws are countersunk and invisible.
-
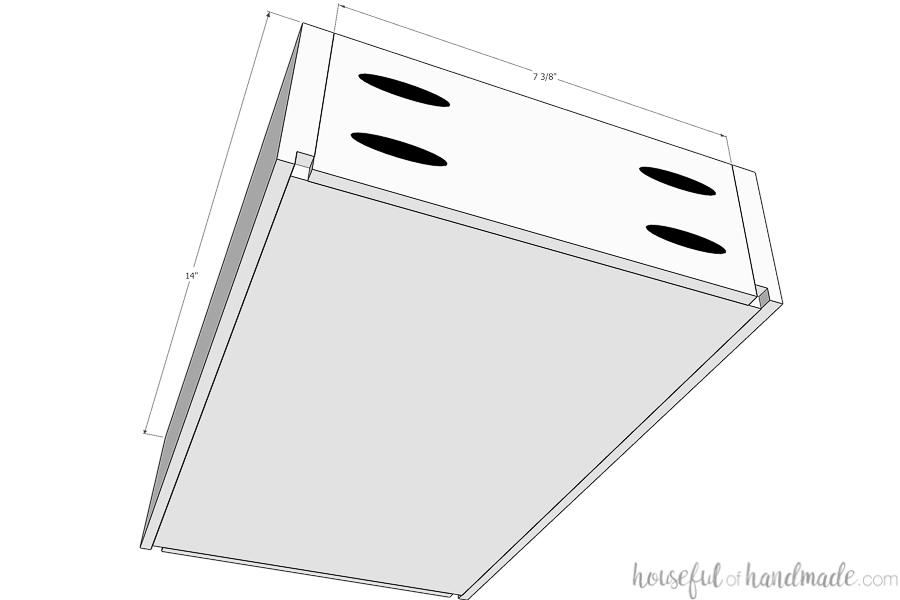
Build the drawer boxes
Double check the measurement for your drawer box. Adjust measurements as needed for drawer slides or different sized plywood. Router a 1/4" x 1/4" groove on the inside of the drawer box front/back and side boards. Drill pocket holes set for 1/2" material in the sides of the front/back boards. Attach the front/back boards to the side boards with 1" pocket holes screws and wood glue so the grooves are all facing inward. Ensure the box is square. Secure the box bottom in the groove with 5/8" brad nails.
-
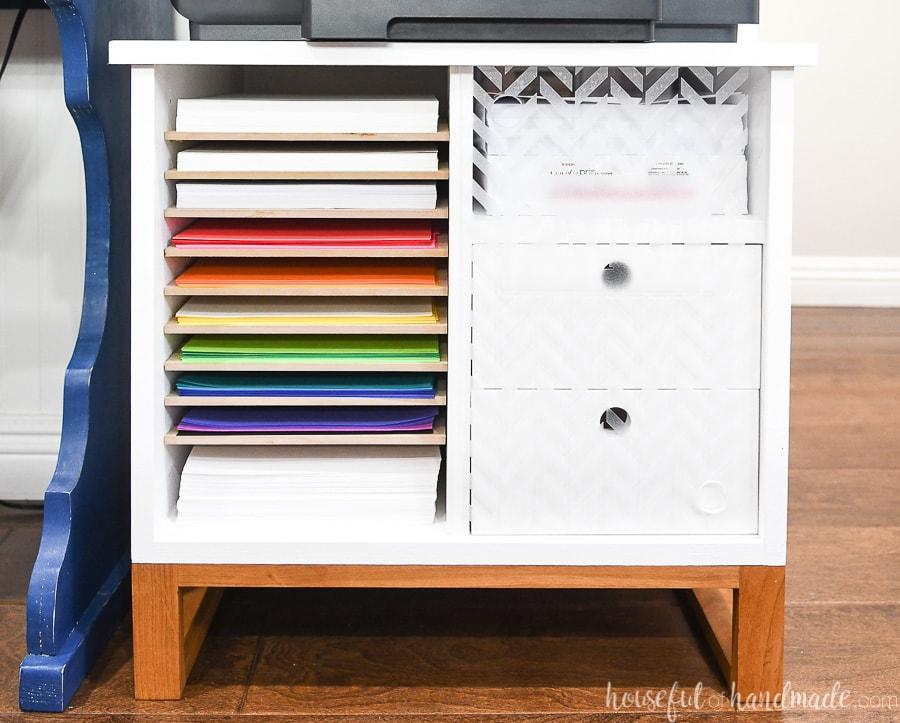
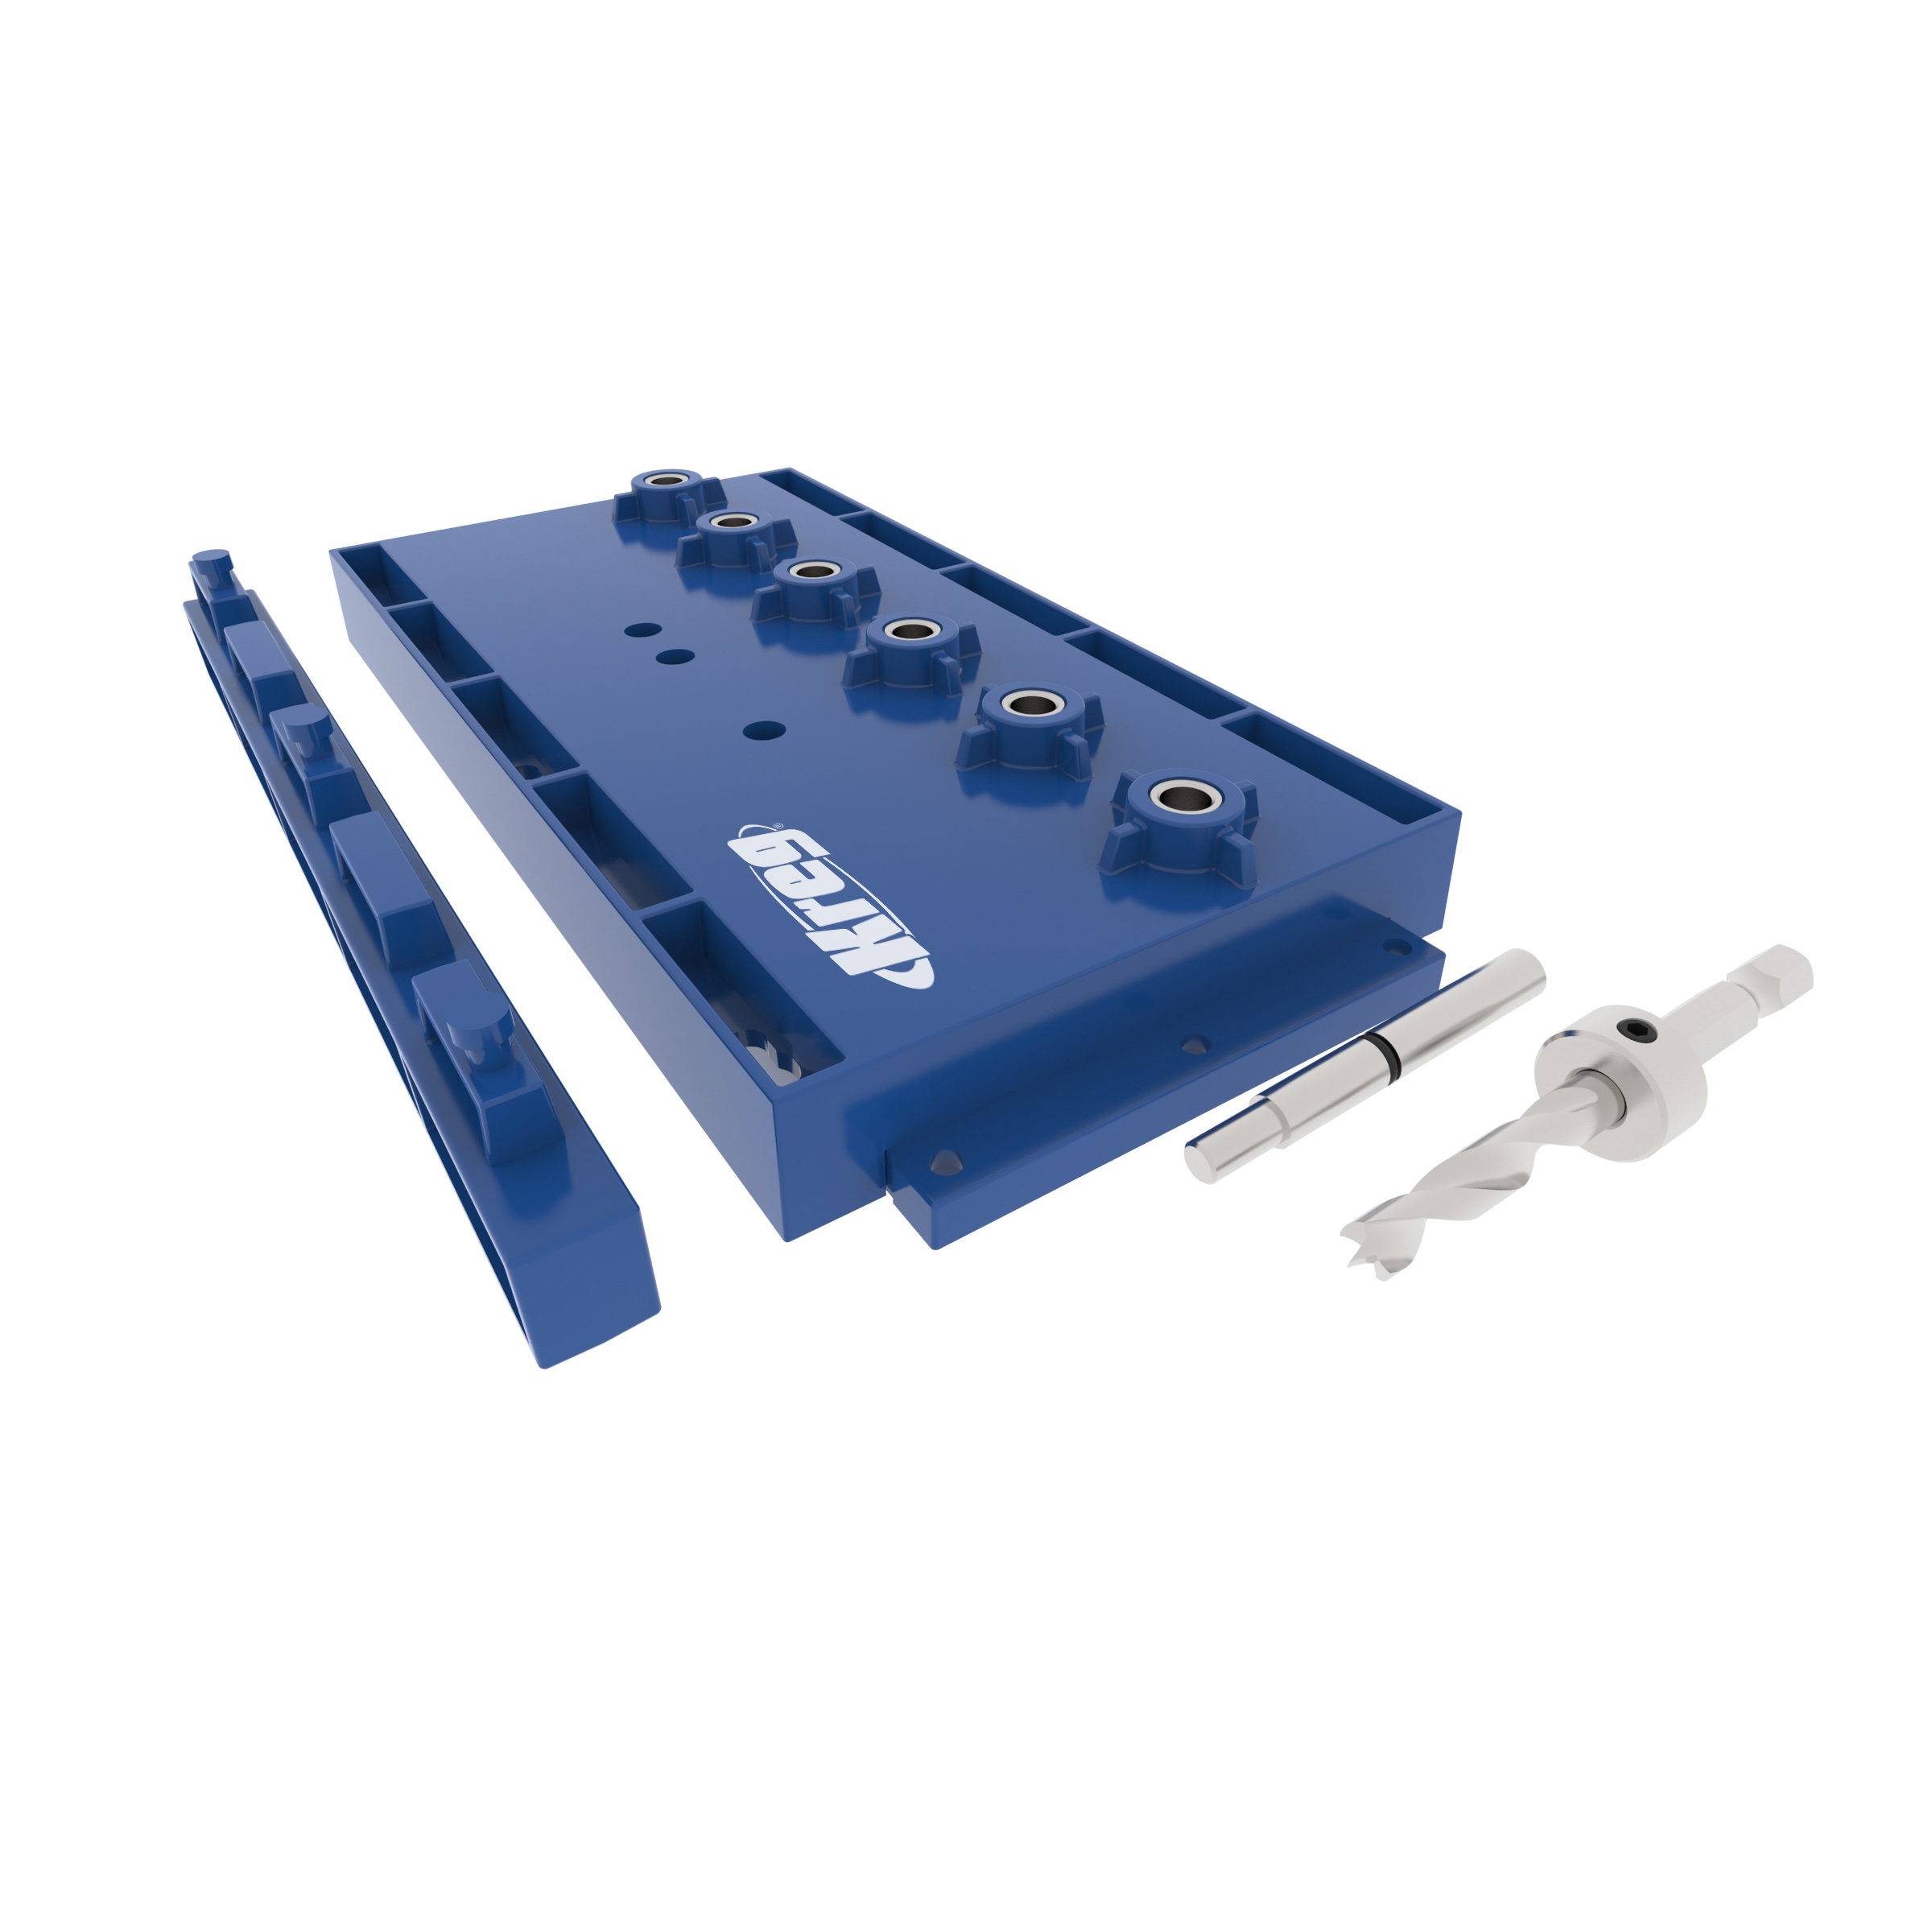
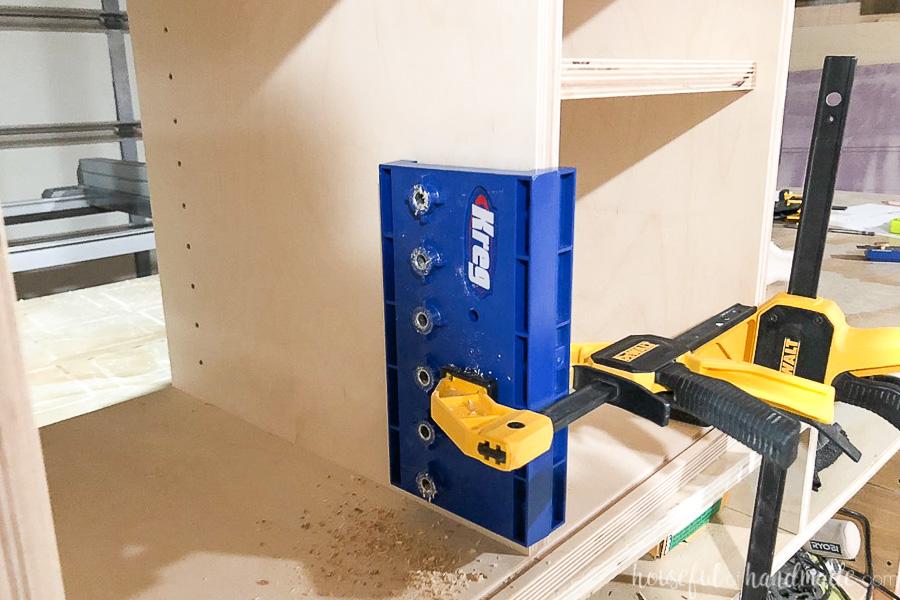
Drill shelf pin holes
Using the shelf pin jig, drill holes for the paper shelves on the left side of the printer cart. Make sure the shelf pin holes are set further back on the side board to accommodate for the plexiglass door slider.
-
Drill holes in drawer fronts
Drill 1" holes in the center of the drawer front boards so they are 1/2" down from the top of the board to use as a drawer pull.
-
Finish printer cart
Sand, paint and/or stain the printer cart. Don't forget to finish the base, drawer boxes, and drawer fronts.
-
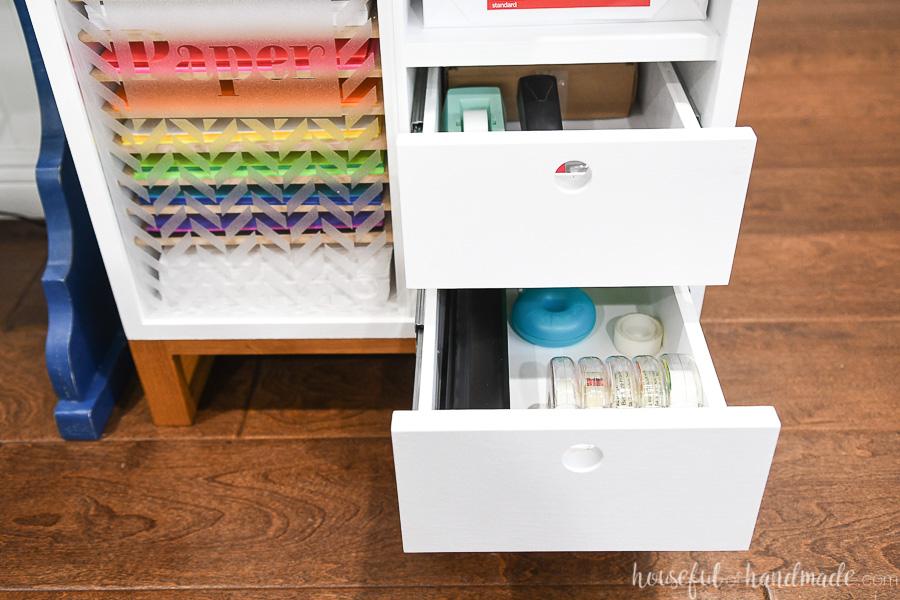
Assemble
Attach the drawer slides and drawer fronts. The drawer boxes are made to use with drawer slides that require 1/2" space on either side of the drawer boxes. Secure the drawer fronts with 1" screws from the inside of the drawer into the drawer front. The upper groove for the plexiglass is deeper so you can slide the sliding door into the upper groove then drop it into the lower groove.
-
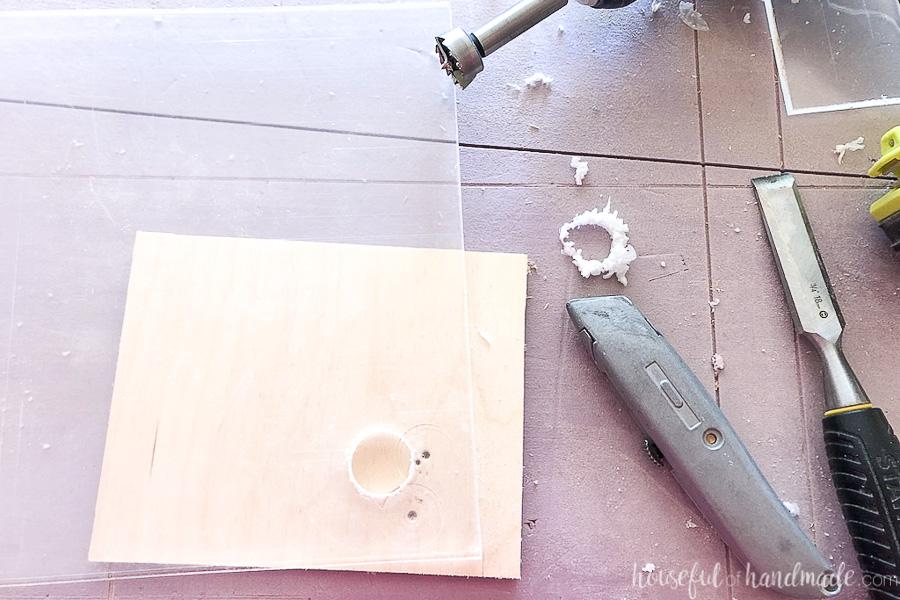
Cut plexiglass
Cut the plexiglass to fit into the grooves. Drill 1" holes in two corners of the plexiglass to use as a handle to slide. I found the easiest way to drill in the plastic was to use a 1" Forstner bit. Drill about 1/2 way through and then quickly remove the melted material with a sharp straight edge and knife (for the inner parts of the circle). Then finish drilling the hole and quickly removing the melted material. Sand smooth. Decorate if desired with frosted vinyl.
-
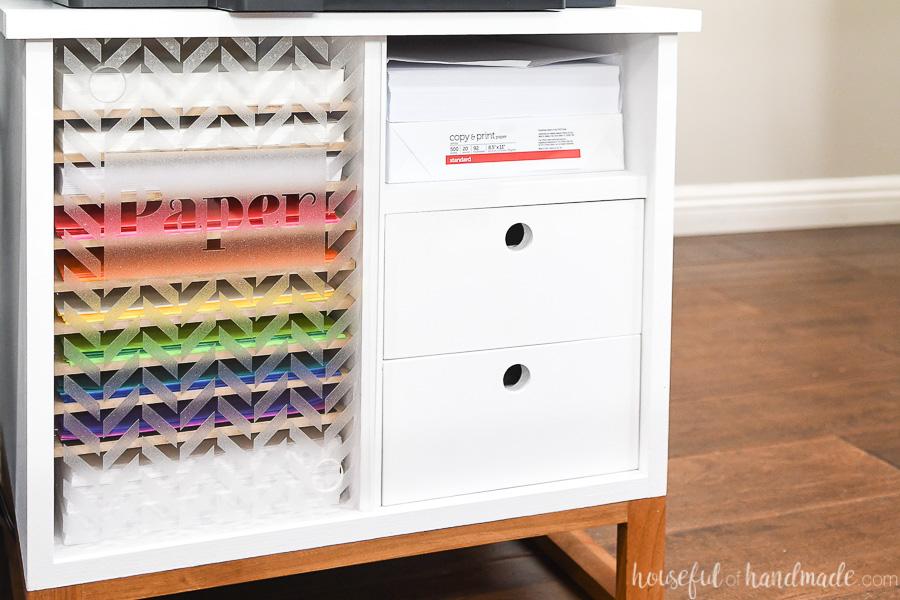
Load up your new printer cart
I used 1/4" MDF to cut lots of shelves to organize the colored paper and cardstock on my printer cart. The drawers are great for holding printer cartridges and other office supplies. The small cart is great for organizing my office supplies without taking up too much space. And it looks great too! Make sure to come say hi at Housefulofhandmade.com for more DIYs for the home.