

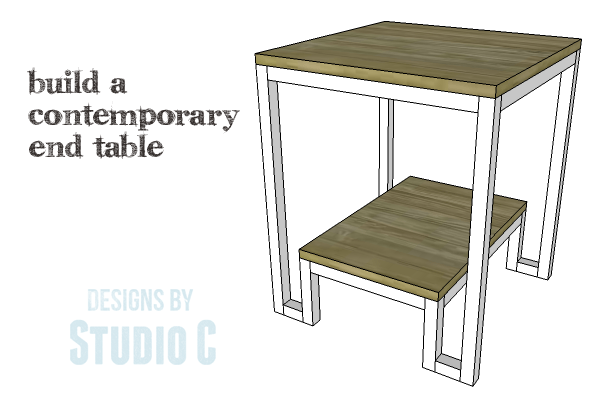


An easy plan to build an end table using plywood and square dowels. Perfect for those new to woodworking!
Tools
Kreg Tools

Other Tools
-
Miter Saw

-
Square
-
Table Saw
-
Tape Measure
-
Drill (cordless)
-
Nail Gun
-
Sander
-
Air Compressor
Materials
Wood Products
- 1 Plywood , 3/4" Thick , Quarter Sheet
- 7 Pine, Oak or Poplar , 1" square dowels , 48"
Hardware & Supplies
- 16 1-1/2" pocket hole screws
- 8 2-1/2" Wood Screws
- 16 1-1/2" Brad Nails
- 1 Wood Glue
- 1 Edge Banding
- 1 Primer & Paint, or Stain & Sealer
- 1 Sandpaper - 80, 100, 220 grits
Directions
-
Step One
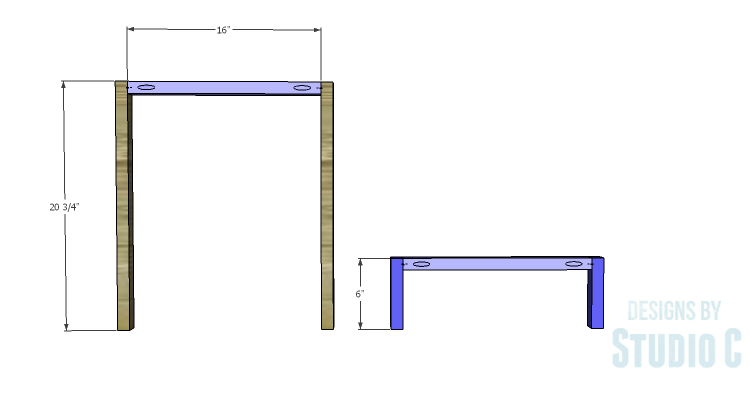
Cut the pieces for the leg assemblies. With the pocket hole jig set for 1" material, drill a pocket hole in each end of the 16" pieces. Secure the 16" pieces to the legs using glue and 1-1/2" pocket hole screws.
-
Step Two
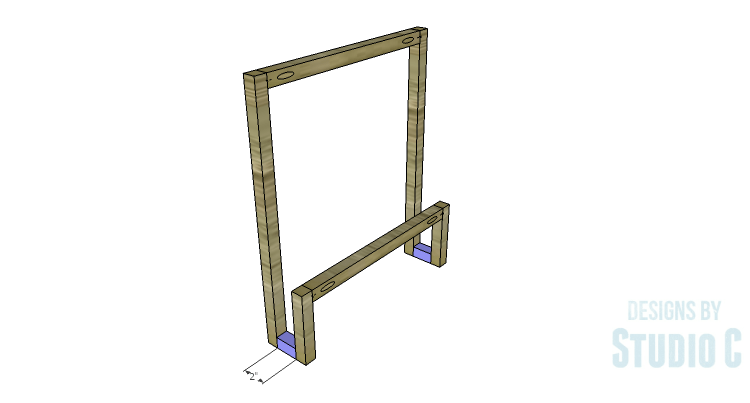
Cut the pieces for the leg connectors. Drill a countersunk hole in the lower end of each leg and secure the connectors using glue and 2-1/2" screws.
-
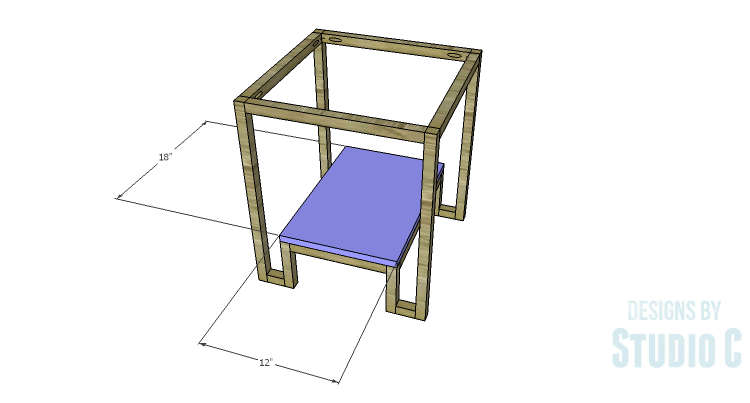
Step Three
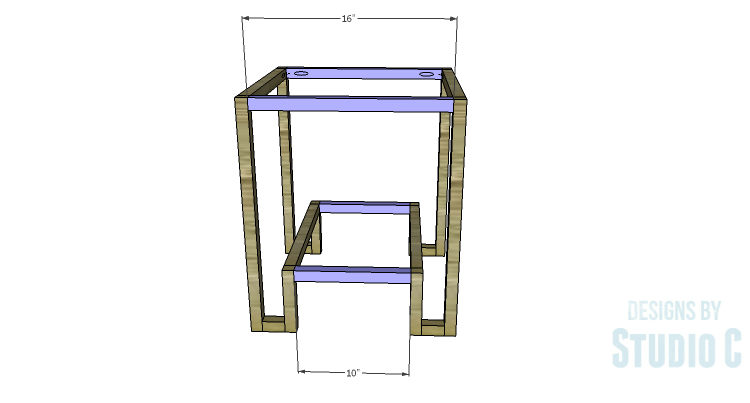
Cut the pieces for the stretchers and drill a pocket hole in each end of each piece. Secure the stretchers to the legs as shown using glue and 1-1/2" pocket hole screws.
-
Step Four
Cut the piece for the shelf. If using plywood and edge banding, the banding will be applied to the exposed edges of the plywood prior to assembly. Secure the shelf to the shelf platform area (all sides will be flush) using glue and 1-1/2" brad nails.
-
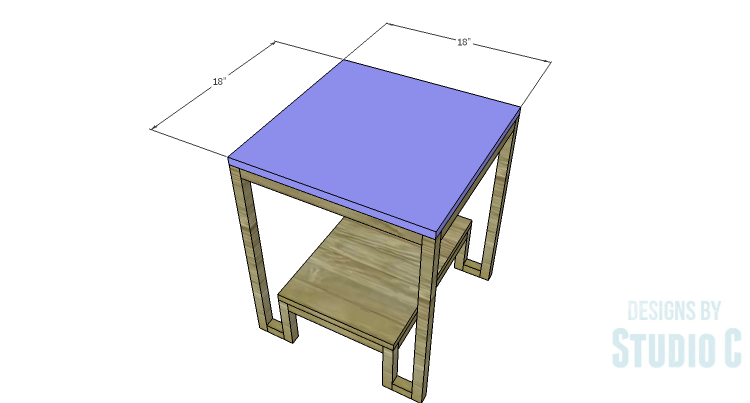
Step Five
Cut the piece for the top. Again, if using plywood and edge banding, the banding will be applied to the exposed edges prior to assembly. Secure the top using glue and 1-1/2" brad nails.
-
Finishing
Thoroughly sand the pieces (I like to do this before assembly) using a sander and 80 grit, 100, grit, and 220 grit sandpapers. Once the table is assembled, fill the pocket holes and countersunk holes, if desired. Stain and seal or prime and paint as desired. Once the top and shelf have a finish on them, use a wax filler pencil to fill the brad nails holes.