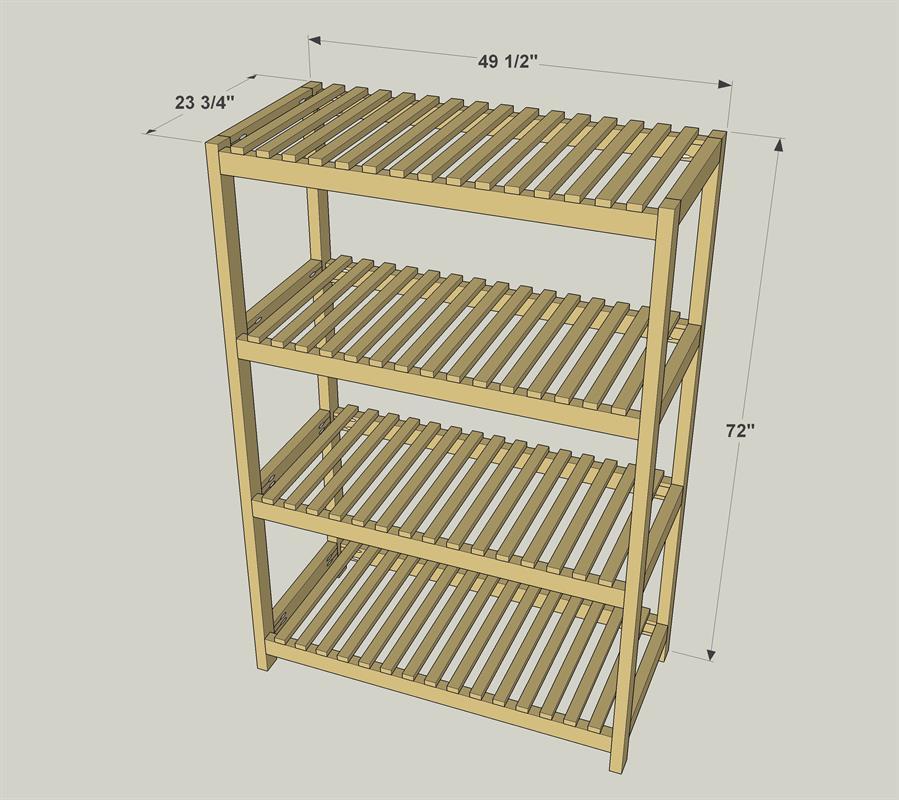


These Shelves are built to offer strong storage. They’re built a lot like the “Garage Storage Shelves” that I also posted. These have slats instead of plywood shelves, though, which makes them perfect for storing gardening supplies, potting soil, etc.
Tools
Kreg Tools

Other Tools
-
Miter Saw

-
Square
-
Tape Measure
-
Clamps
-
Drill (cordless)
-
Nail Gun
-
Air Compressor
Materials
Wood Products
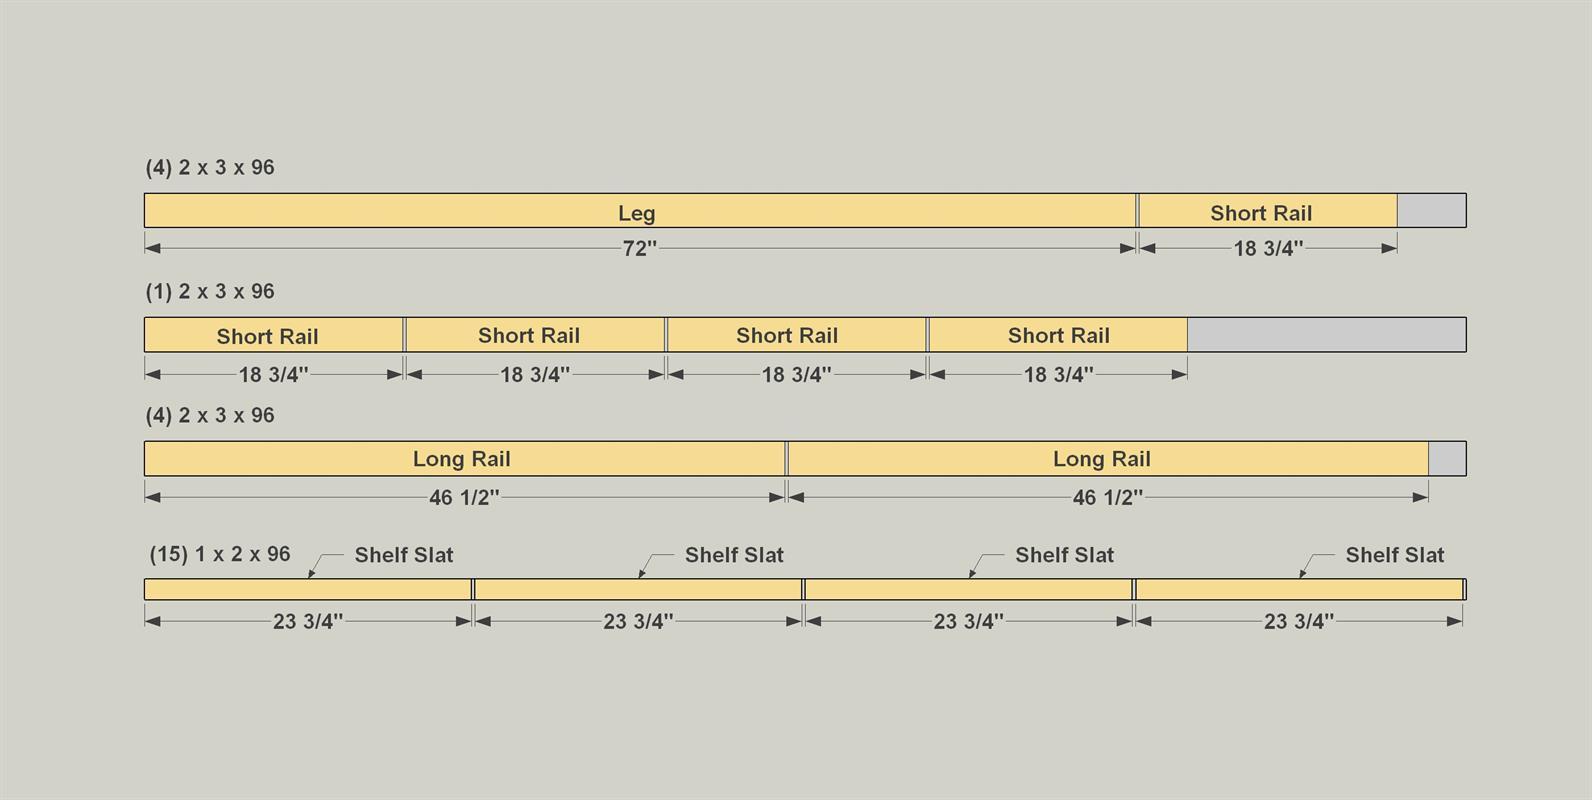
- 9 Board , 2x3 , 96"
- 15 Board , 1x2 , 96"
Hardware & Supplies
- 64 2 1/2" coarse thread pocket screws
- 120 1 1/4" 18-gauge brads
Cut List & Parts
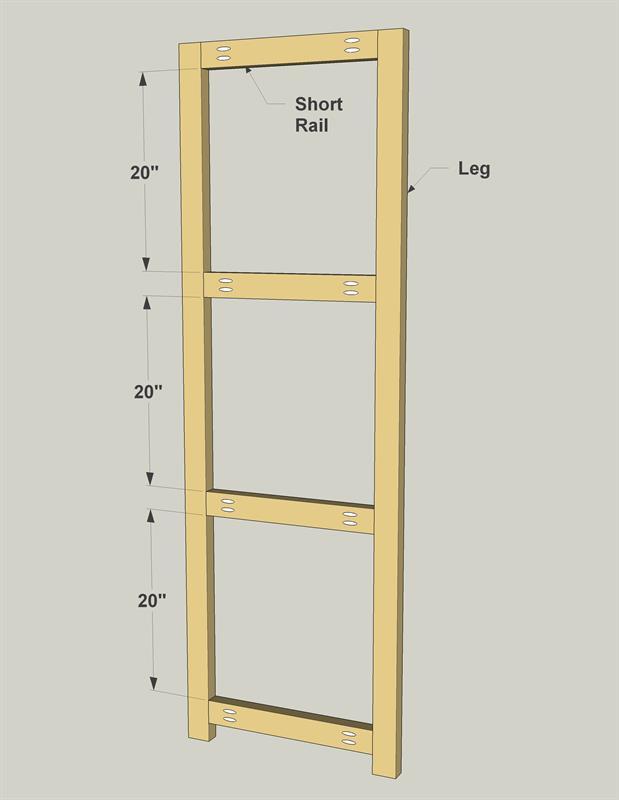
- 4 Legs , 1 1/2" x 2 1/2" x 72"
- 8 Short Rails , 1 1/2" x 2 1/2" x 18 3/4"
- 8 Long Rails , 1 1/2" x 2 1/2" x 46 1/2"
- 60 Shelf Slats , 3/4" x 1 1/2" x 23 3/4"
Directions
-
Cut the Parts
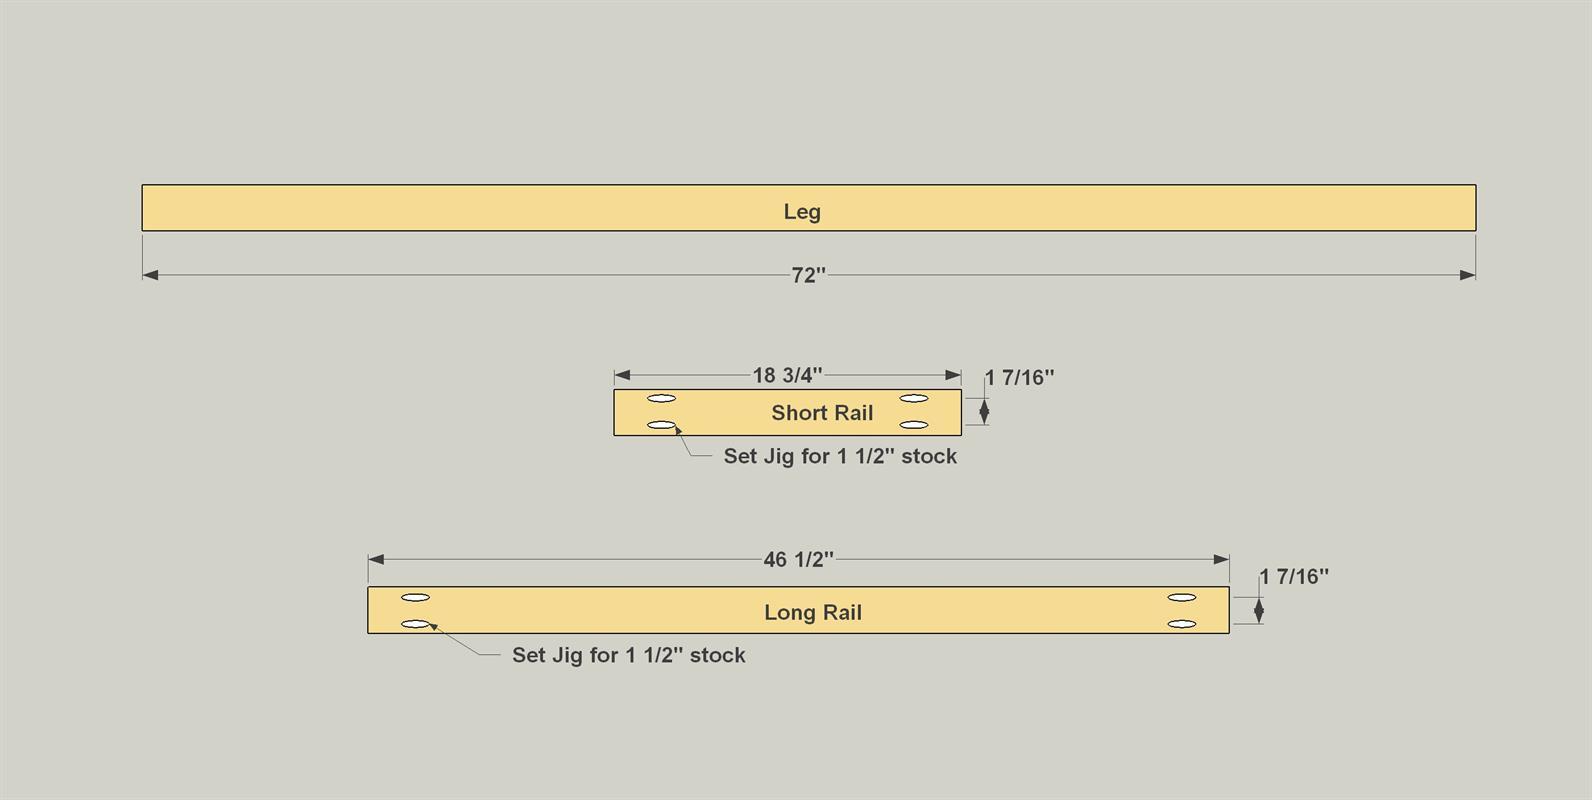
Cut 4 legs, 8 long rails, and 8 short rails from 2x3s, like the cut diagram shows. Then you can drill the pocket holes in all the rails. Make sure you're set up for 1 1/2" thick boards when you drill. Then you can cut all of the slats. You'll want a miter saw, and a stop block is really handy. That way, you can just get one slat right, set up the stop, and then butt your boards against that and cut the rest of the slats without measuring.
-
Assemble the Ends
Now you can put together the ends by screwing the short rails to the legs. Use 2 1/2" pocket screws for this, and make sure that the rails are aligned on each end--I put one together with it laying on the floor, then put the parts for the other end right on top of it so I could easily line everything up.
-
Add the Long Rails
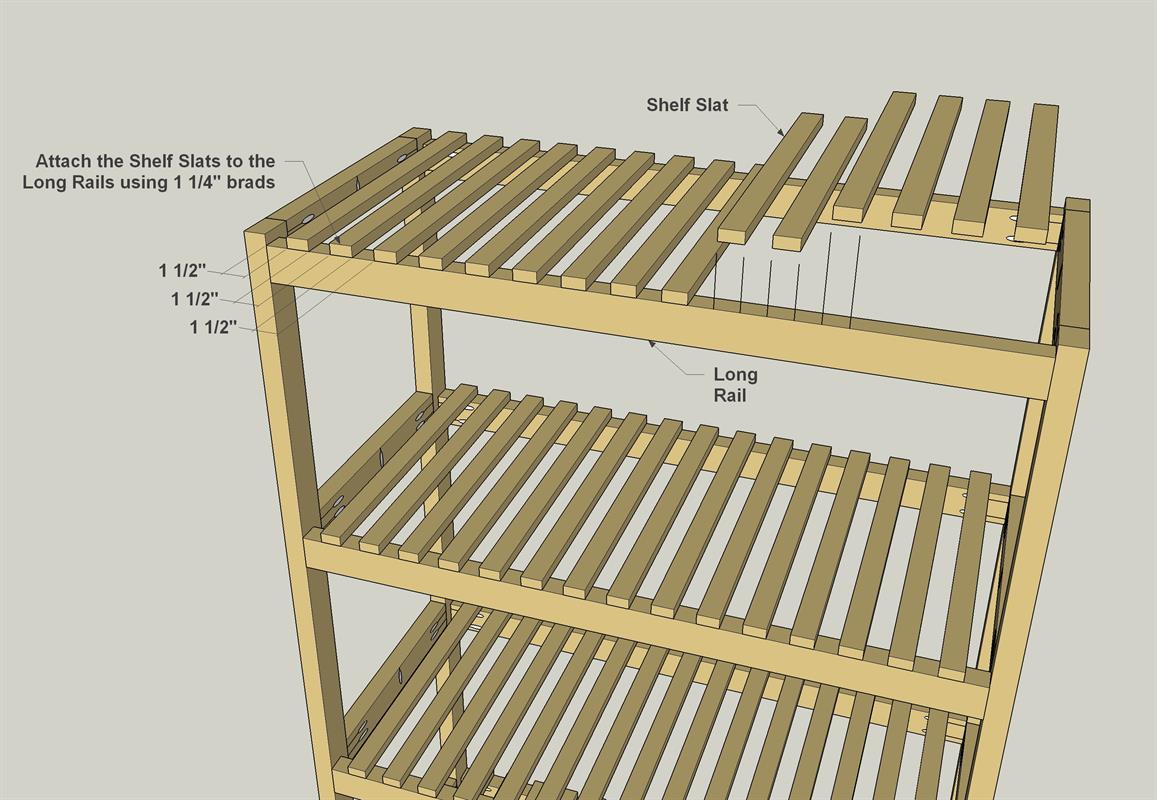
Attach the long rails next, using the 2 1/2" screws again. Make sure that the long rails are positioned 3/4" below the top edge of the short rails. That way, when you attach the slats next, the short rails will be aligned.

-
Add the Slats
Now it's time to attach the slats. I jut dabbed a little glue on each one, set it in place, and then attached them all using a brad nailer. You could use a hammer and nails, but that's a lot of hammering. Just use this as your excuse to go buy a nail gun and a compressor. They don't cost much these days.