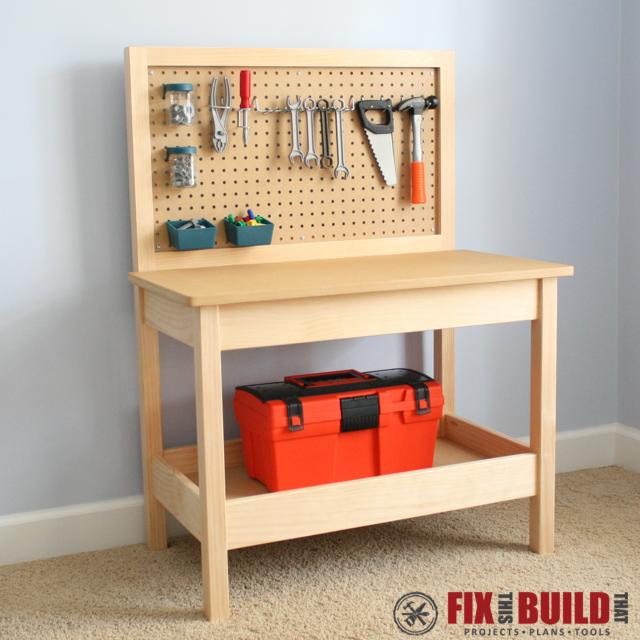


This Kids Workbench is perfect for your little future woodworkers and DIYers. It is a fully functional workbench that can be put the in shop to let your little tikes build along with you. Or set it up inside for the ultimate play workbench!
Tools
Kreg Tools


Other Tools
-
Jigsaw

-
Miter Saw
-
Tape Measure
-
Drill (cordless)
-
Router
Materials
Wood Products
- 1 MDF , 3/4" Thick , Quarter Sheet
- 1 MDF , 1/2" Thick , Quarter Sheet
- 1 Pegboard , 1/4" Thick , Quarter Sheet
- 2 Board , 2x2 , 96"
- 2 Board , 1x4 , 96"
- 2 Board , 1x1 , 96"
Hardware & Supplies
- 100 1-1/4" Pocket Hole Screws
- 50 2" Pocket Hole Screws
- 50 3/4" Pocket Hole Screws
Directions
-
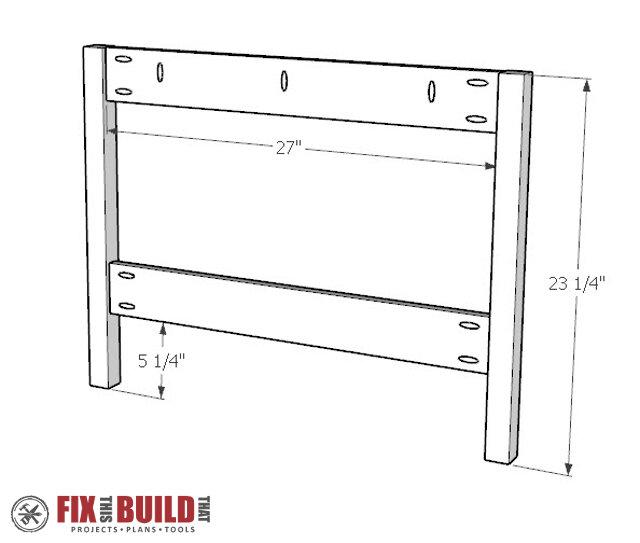
Assemble Back
Cut back legs, pegboard stretchers, pegboard cleats, and back shelf stretcher. Attach 2x2 pegboard stretchers with to the back legs with 2" pocket screws to form a 15"x27" opening for the pegboard. Attach the 1x4 back shelf stretcher 5-1/4" up from the bottom with 1-1/4" pocket screws. Center the stretcher on the width of the leg.

-
Assemble Front
Build front assembly with 2 front legs and the top and shelf stretchers. Center stretchers on the width of the legs. Top stretcher should get vertical pocket holes to attach the top. Attach stretchers with 1-1/4" pocket screws.
-
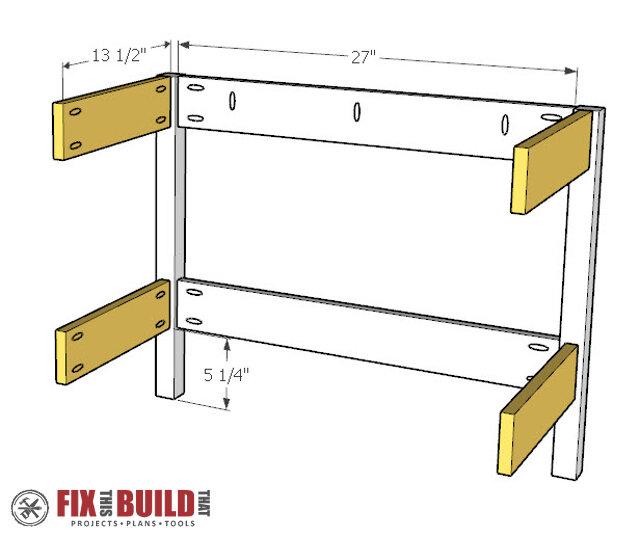
Attach Side Rails
Attach side rails to the front assembly with 1-1/4" pocket screws. Center rails on the width of the legs.
-
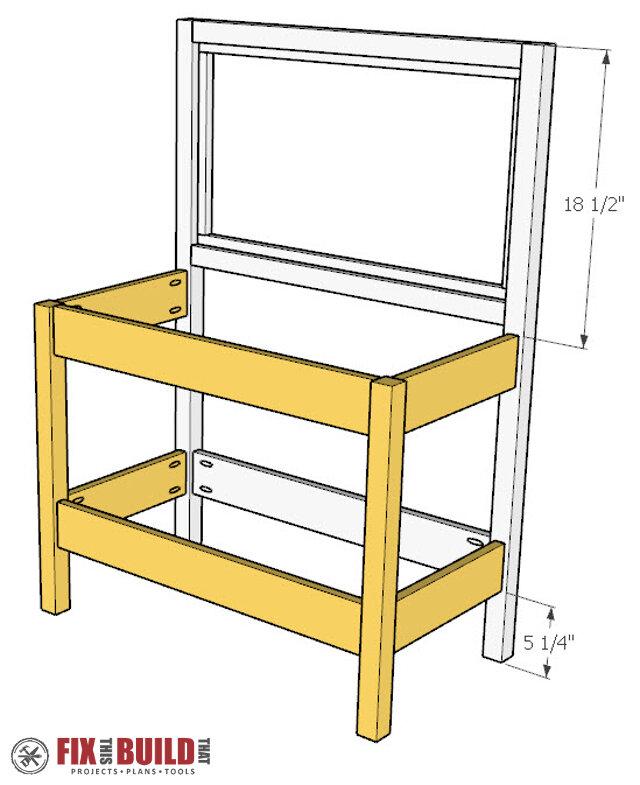
Connect Front and Back Assemblies
Connect front and back assemblies with 1-1/4" pocket screws through the side rails into the back legs.
-
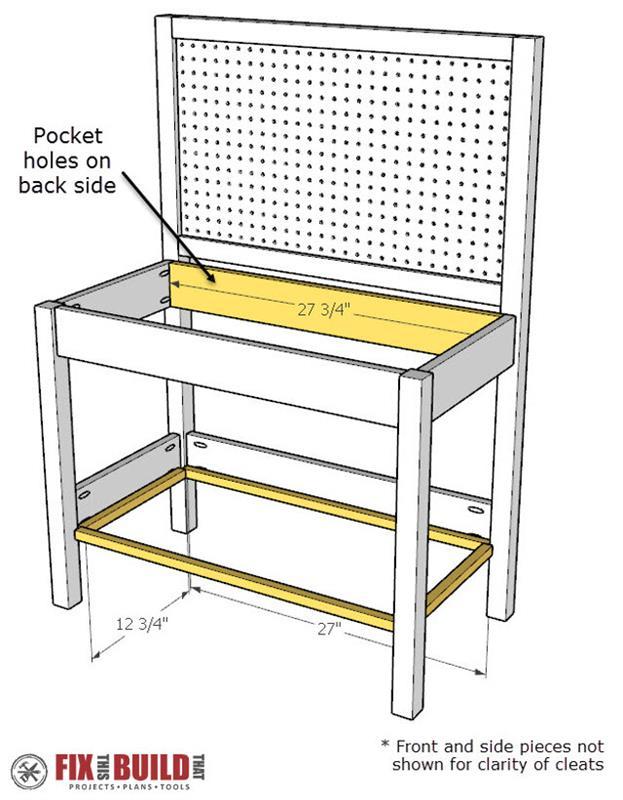
Add Top Stretcher, Cleats, Pegboard
Add back top stretcher. It should register on the back legs and be attached with 1-1/4" pocket screws to the side rails. Add vertical pocket holes to attach the top.
Add shelf cleats to the lower stretchers and rails to support the shelf.
Attach pegboard with 3/4" pocket screws through pegboard holes and into cleats.
-
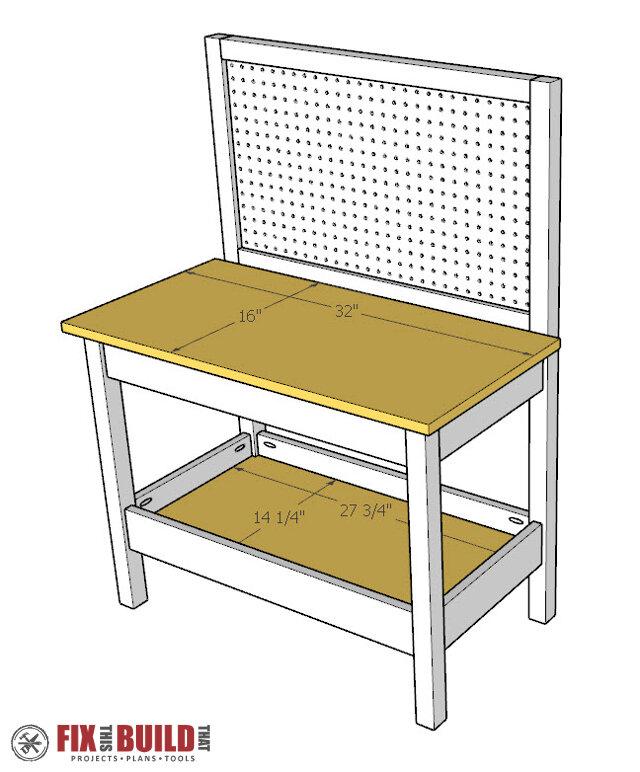
Add Top and Shelf
Cut the top from 3/4" MDF and roundover the corners and edges. Attach with 1-1/4" pocket screws through the vertical pocket holes in the top stretchers and top side rails.
Notch 3/8" square cutouts into the corners of the 1/2" MDF shelf. Drop shelf into opening and secure with brad nails if desired.
Fill visible pocket holes in shelf rails and stretchers with wood plugs, cut flush and sand.
Finish as desired. I used waterbased Polycrilic to avoid VOCs.
-
Visit FixThisBuildThat.com
Visit FixThisBuildThat.com for more great projects, plans and tools.