

A mobile workbench that stores your air compressor, all your pneumatic tools, hose reel and more! Part 2 of the Modular Miter Station series.
Tools
Kreg Tools


Other Tools
-
Circular Saw (corded)

-
Miter Saw
-
Square
-
Table Saw
-
Tape Measure
-
Drill (cordless)
-
Nail Gun
-
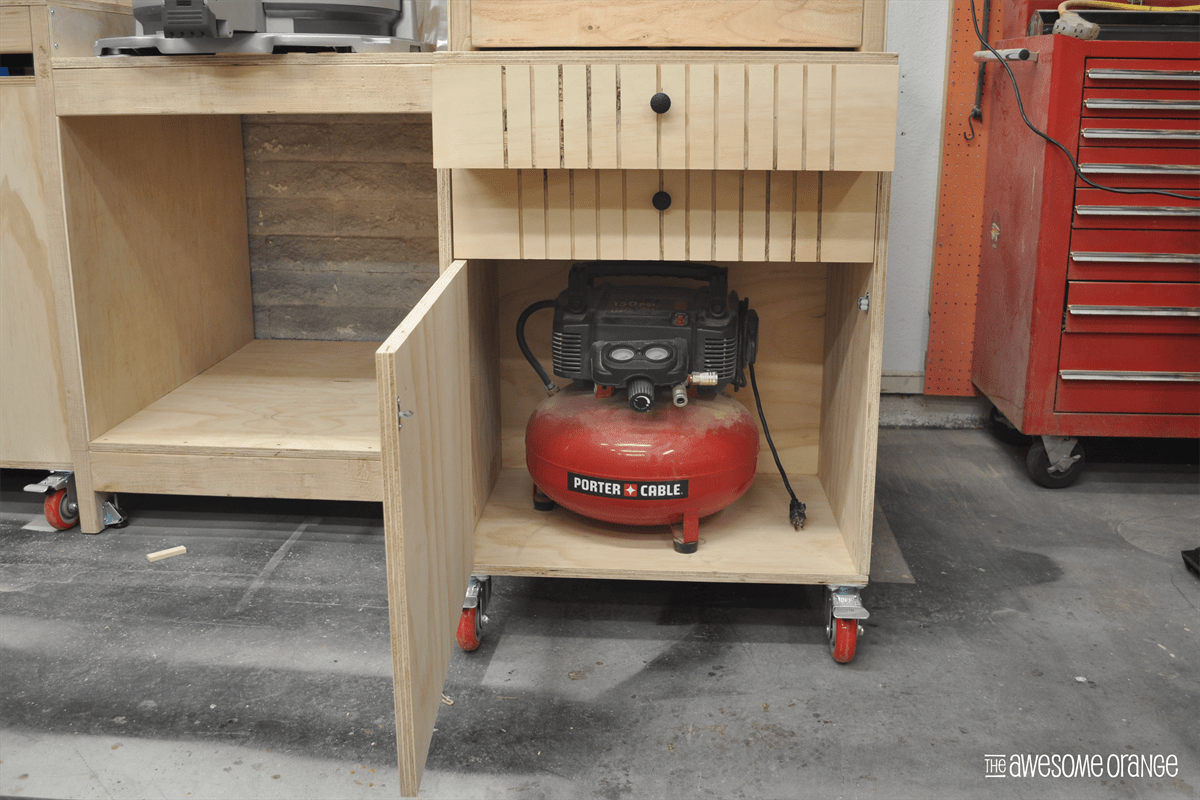
Air Compressor
Materials
Wood Products
- 2 Plywood , 3/4" Thick , Full Sheet
- 1 Plywood , 1/4" Thick , Half Sheet
Hardware & Supplies
- 3 Pulls/Knobs
- 16 1" Lag Wood Screws
- 16 Washers
- 4 4" Casters
- 1 Set Hinges
- 1 Box 1 1/4" Coarse Pocket Holes Screws
- 1 18 ga Brad Nails
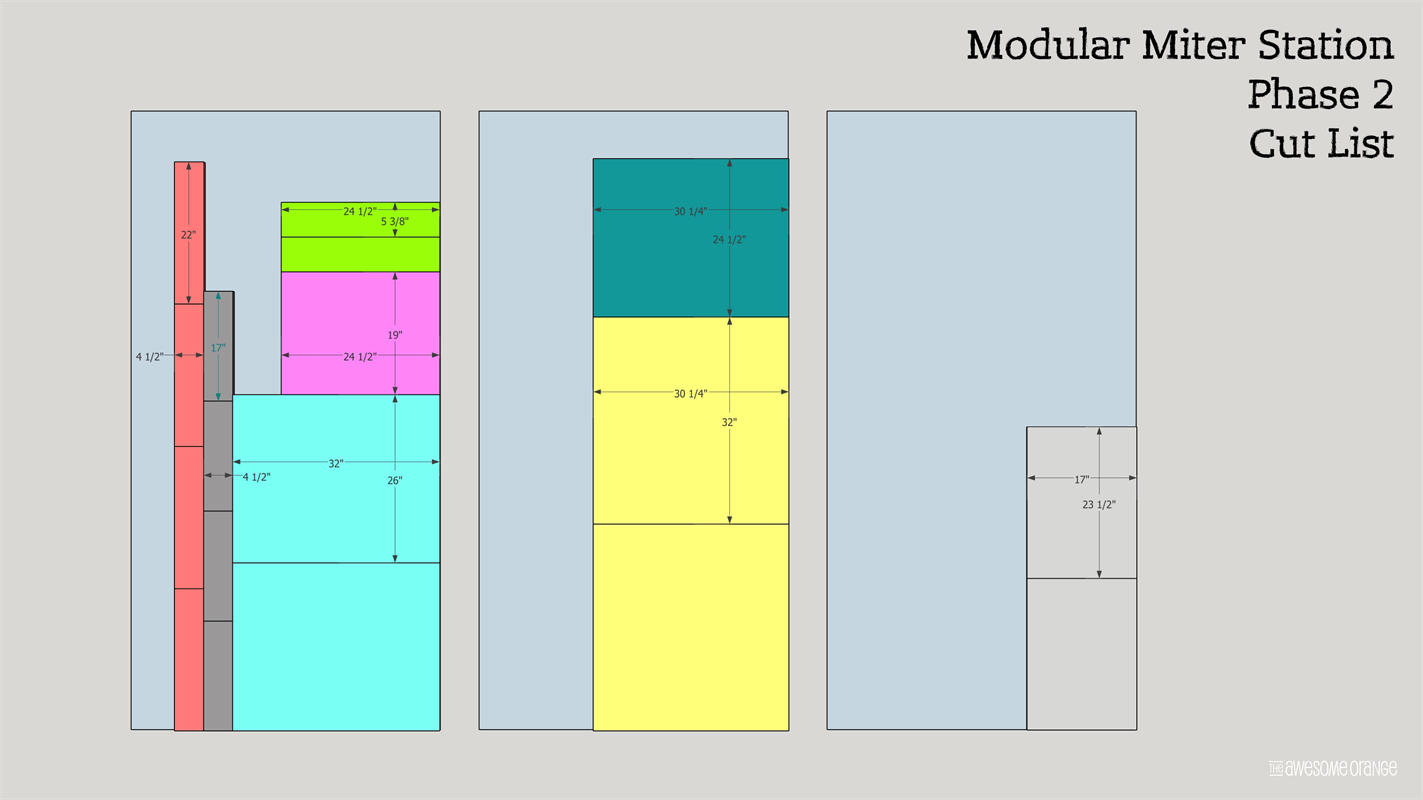
Cut List & Parts
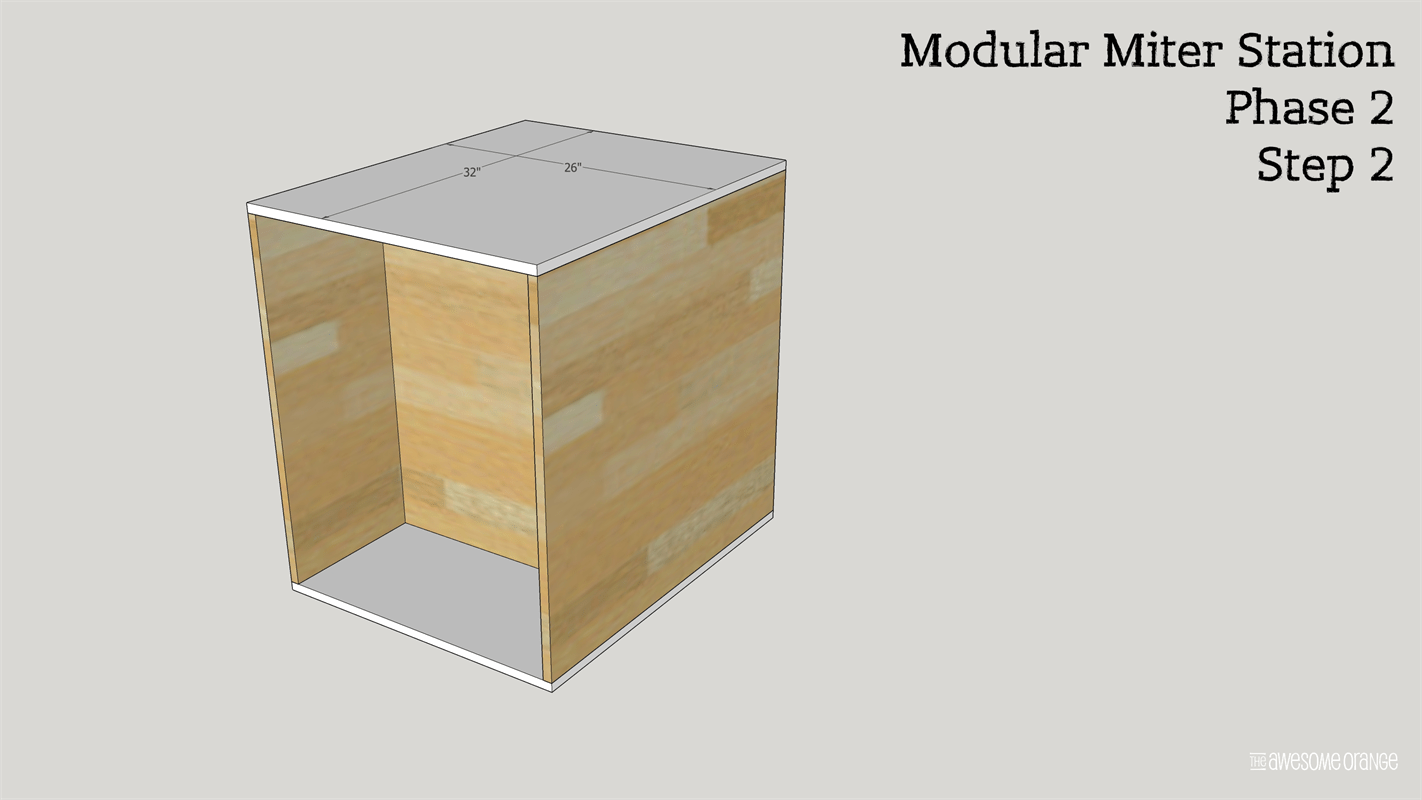
- 2 Top and Bottom , 3/4" 32" x 26"
- 2 Sides/Uprights , 3/4" x 32" x 30 1/4"
- 1 Middle Divider/Upright , 3/4" x 30 1/4" x 24 1/2"
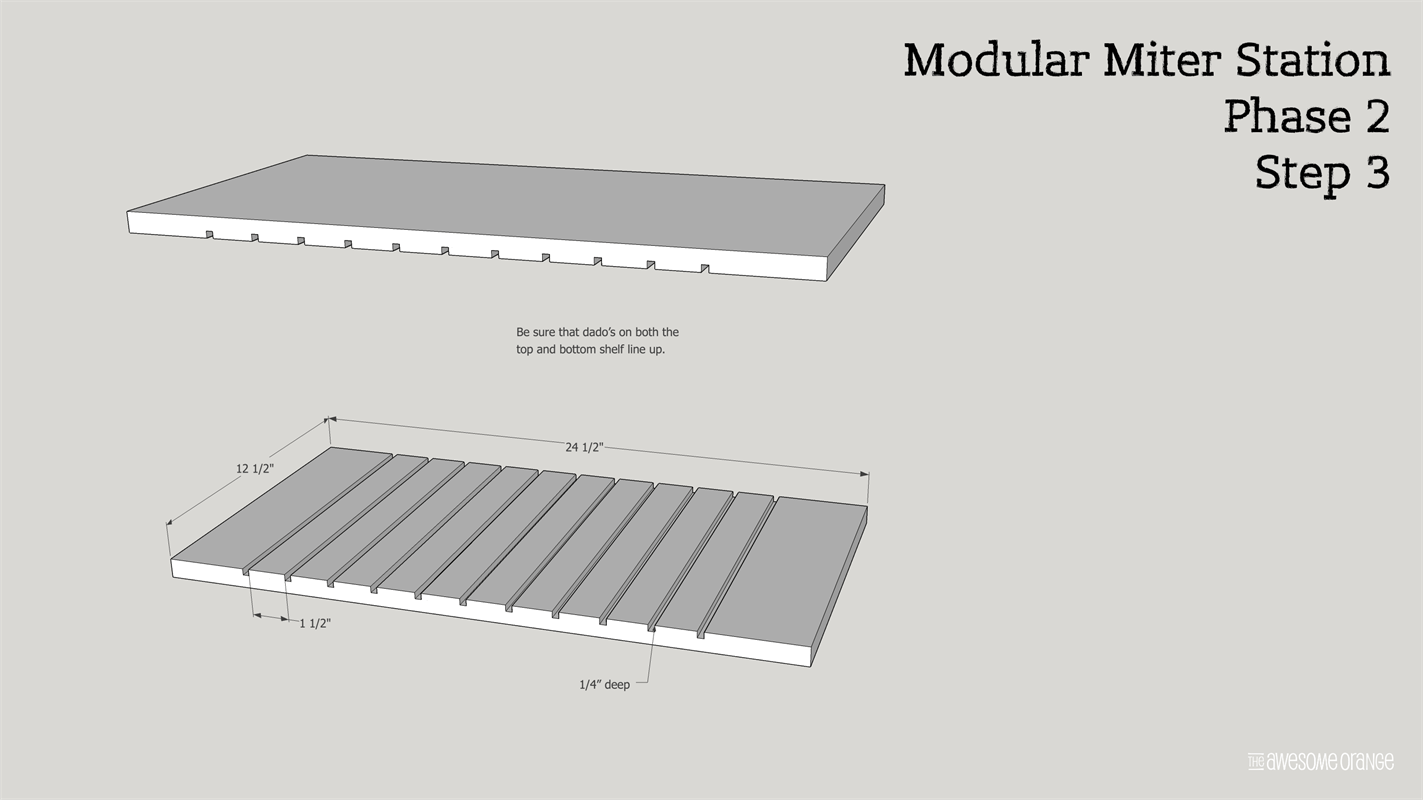
- 2 Shelves , 3/4" x 24 1/2" x 12 1/2"
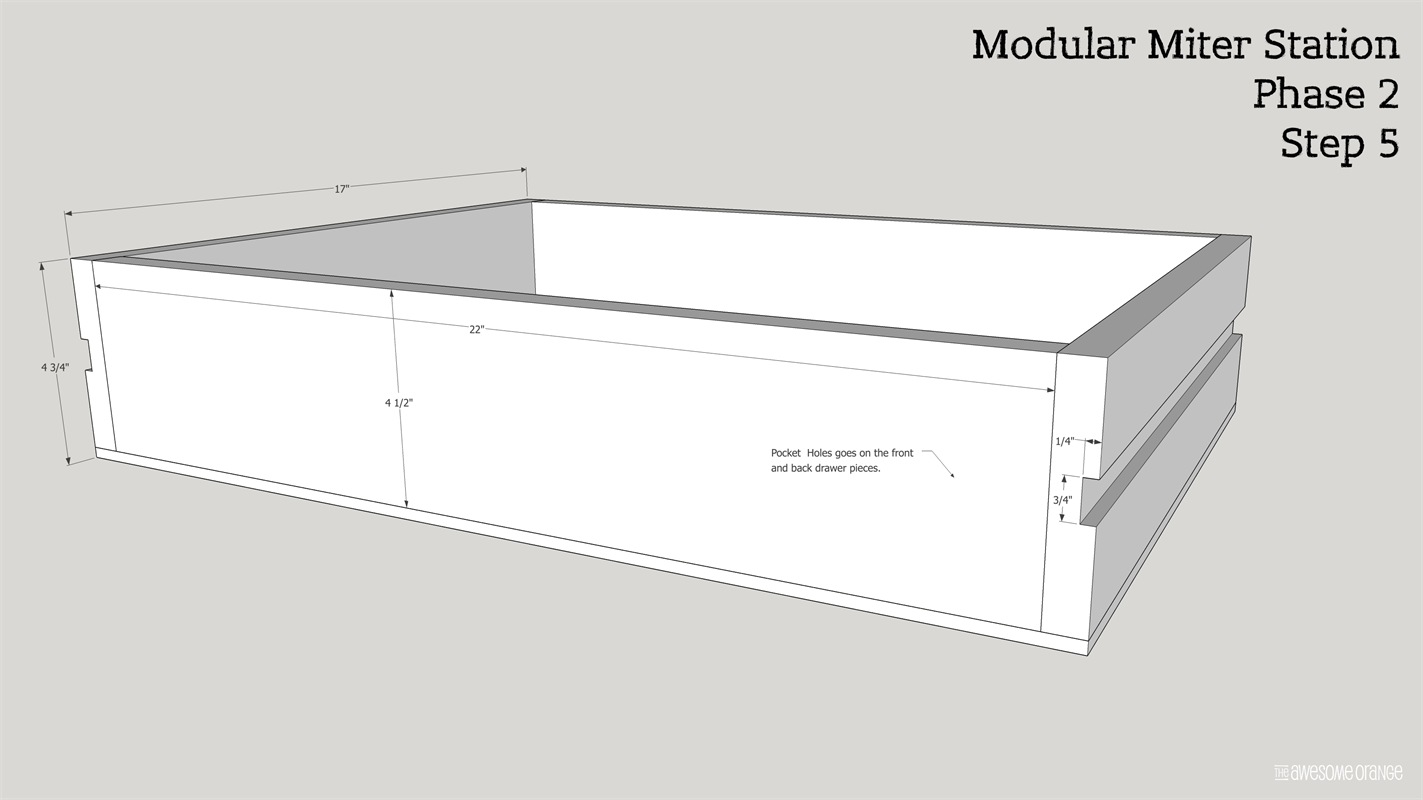
- 4 Drawer Sides , 3/4" x 4 1/2" x 17
- 4 Drawer Box Front & Back , 3/4" x 4 1/2" x 22"
- 2 Drawer Bottoms , 1/4" x 17" x 23 1/2"
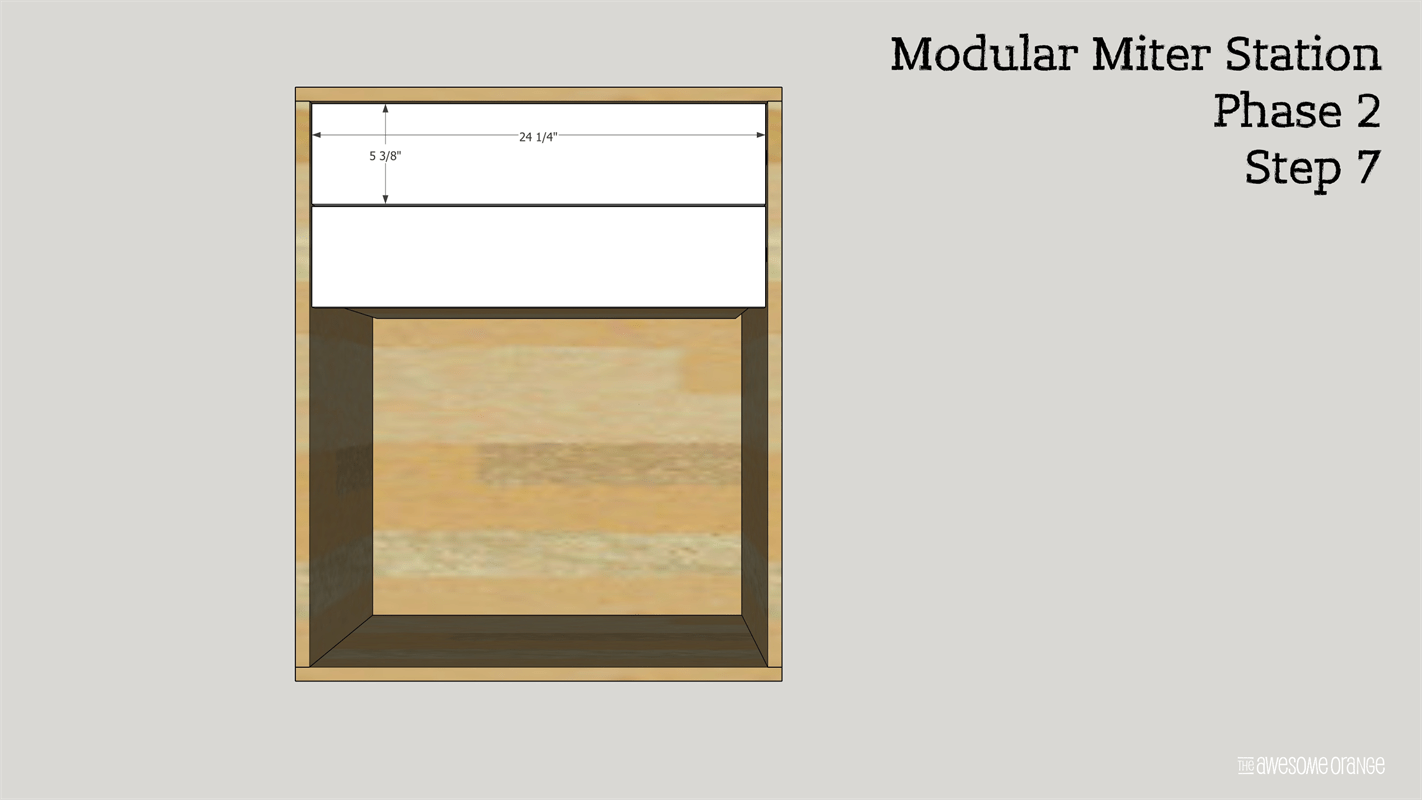
- 2 Drawer Fronts , 3/4" x 24 1/4" x 5 3/8"
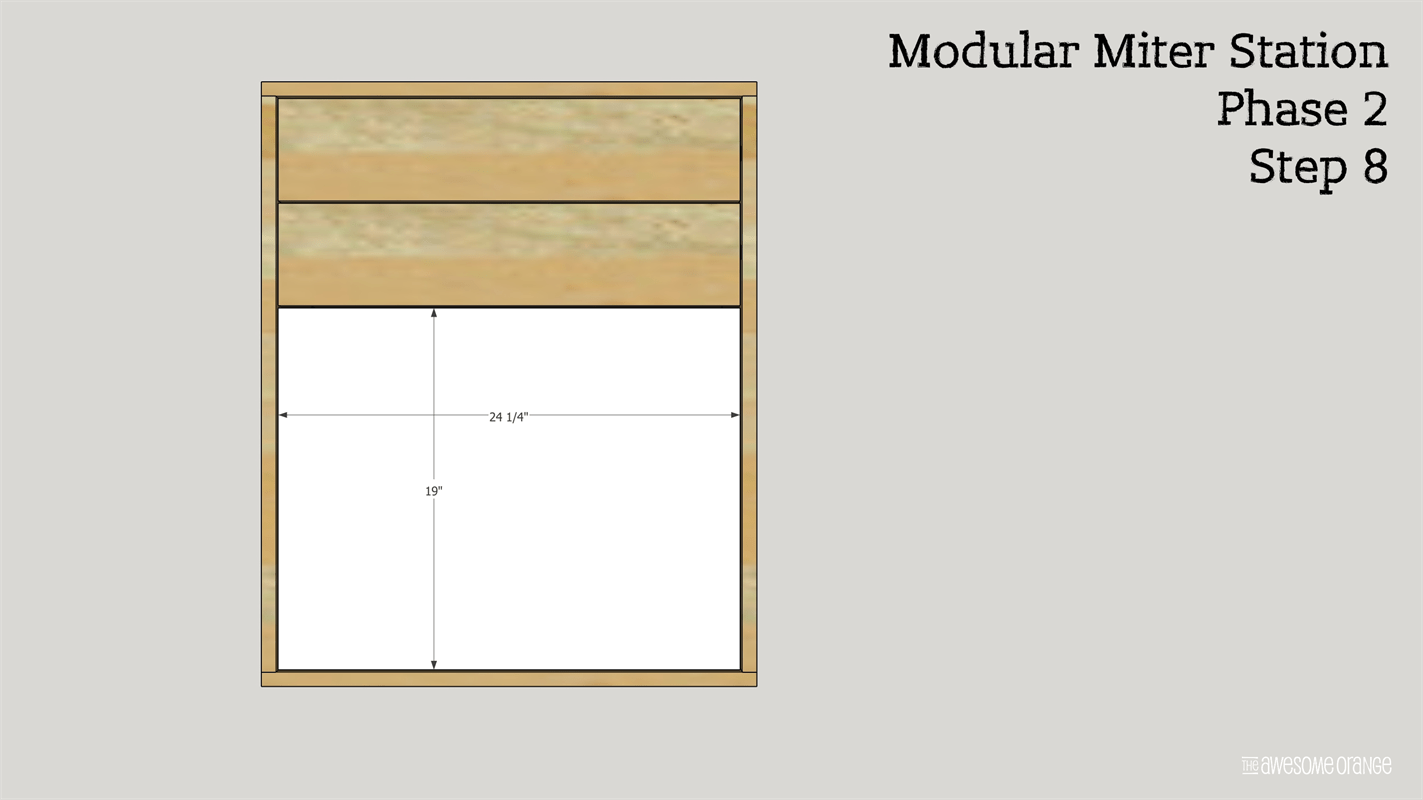
- 1 Cabinet Door , 3/4" x 24 1/4" x 19"
Directions
-
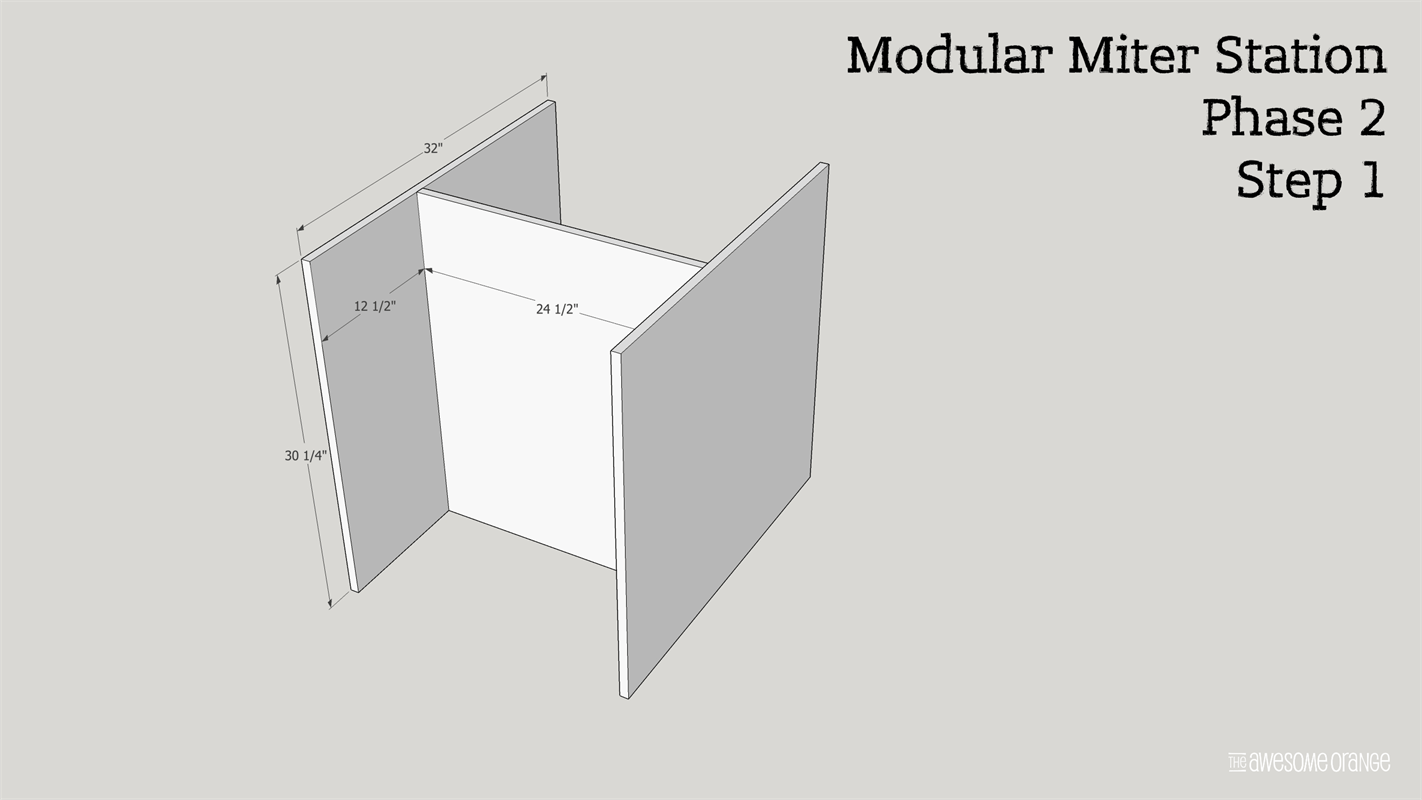
Assemble Uprights
Attach middle divider upright to two side uprights using 3/4" pocket holes with 1 1/4" coarse pocket holes screws. Use spacer block to ensure divider is evenly space 12 1/2" back on both pieces. Check for square thru-out building process.
-
Attach Top & Bottom
Attach top and bottom to upright section using 3/4" pocket holes with 1 1/4" coarse pocket hole screws.
-
Dado Shelves
Using the table saw or router rip 1/4" deep dados approximately 1 1/2" apart. Be sure that both top and both match.
-
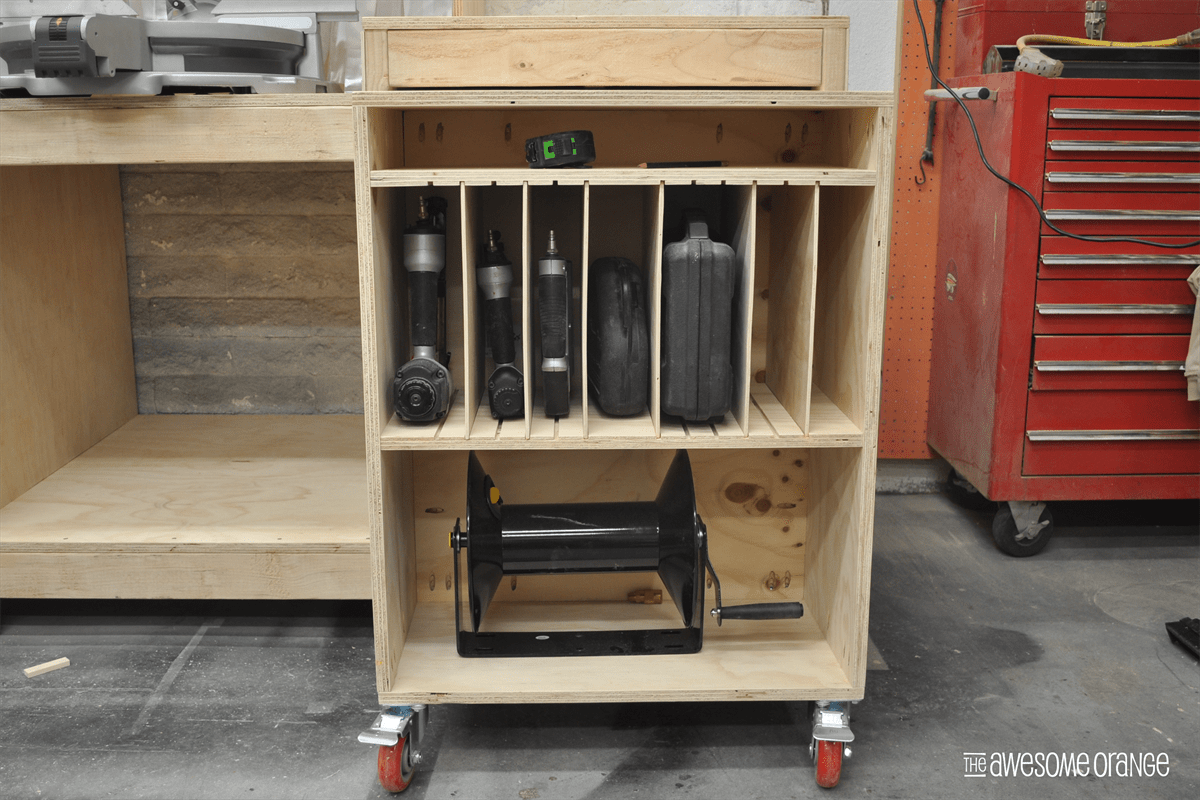
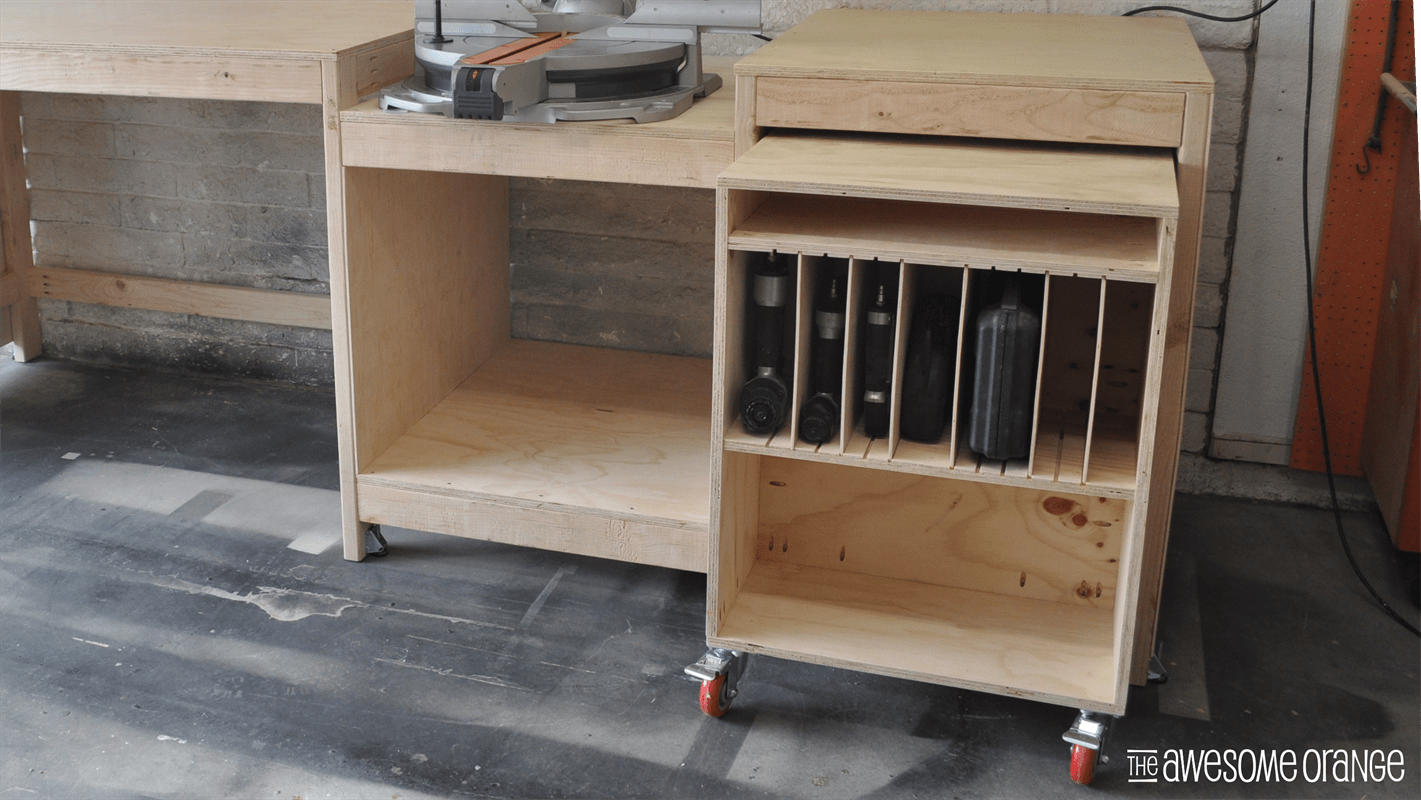
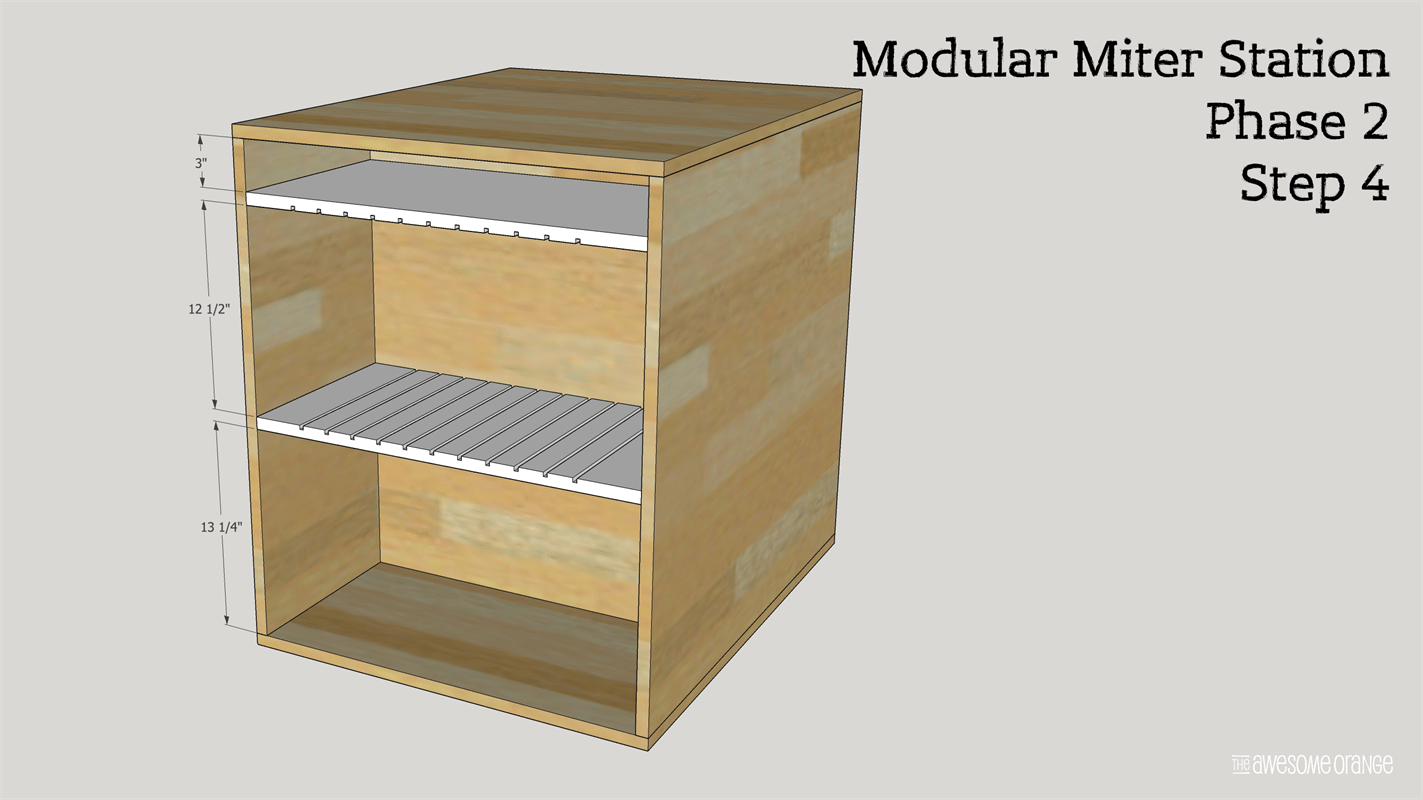
Install Shelves
Using 3/4" pocket holes with 1 1/4" coarse pocket holes screws install first shelf (dado's facing down) 3" from top. Then install second shelf the same way (dado's facing up) 12 1/2" down from there. You can adjust these measurements to fit your pneumatic tools, but these dimensions should fit most. Bottom section is for a hose reel.
-
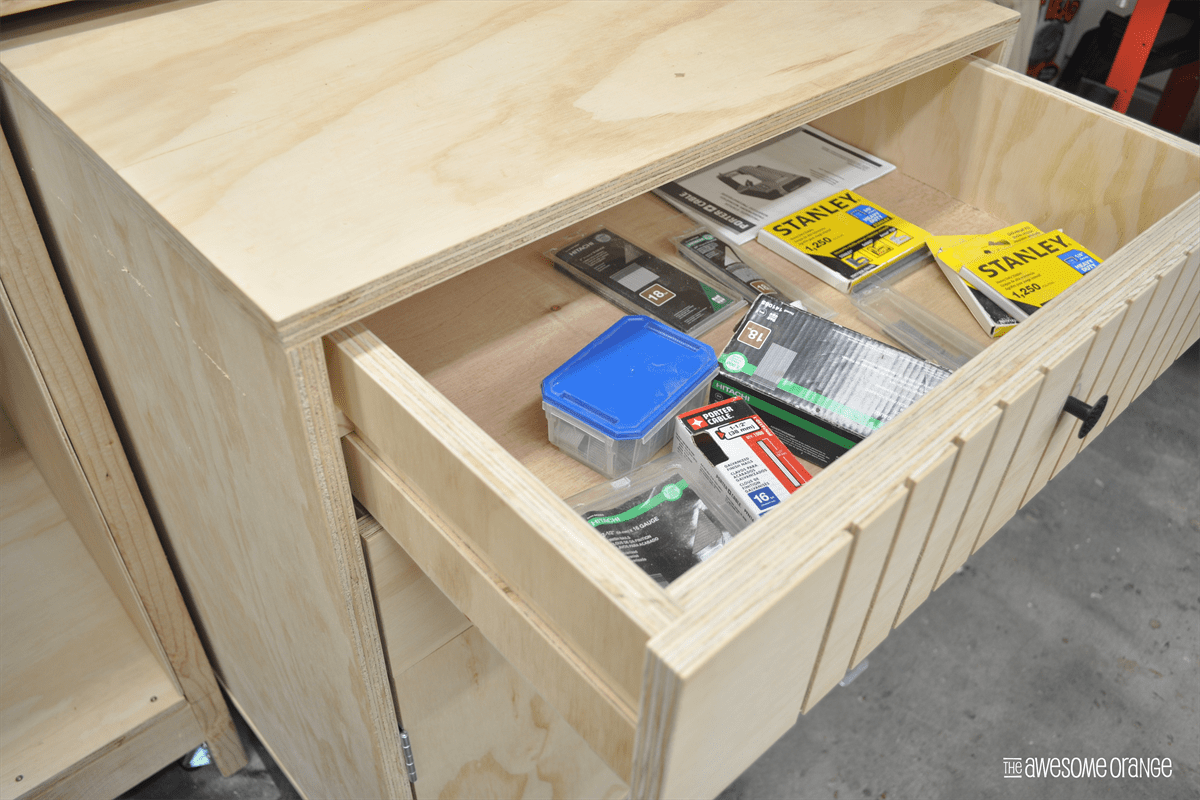
Assemble Drawer Boxes
Drill 3/4" pocket holes in the front and back panels of the drawer boxes, 4 of them. On the other 4 side panels rip a 3/4" dado 1/4" deep down 1 7/8" from the top. Assemble drawers sides using 1 1/4" coarse pocket holes screws and wood glue. Then attach bottom using wood glue and 1 1/4" 18 ga brad nails.
-
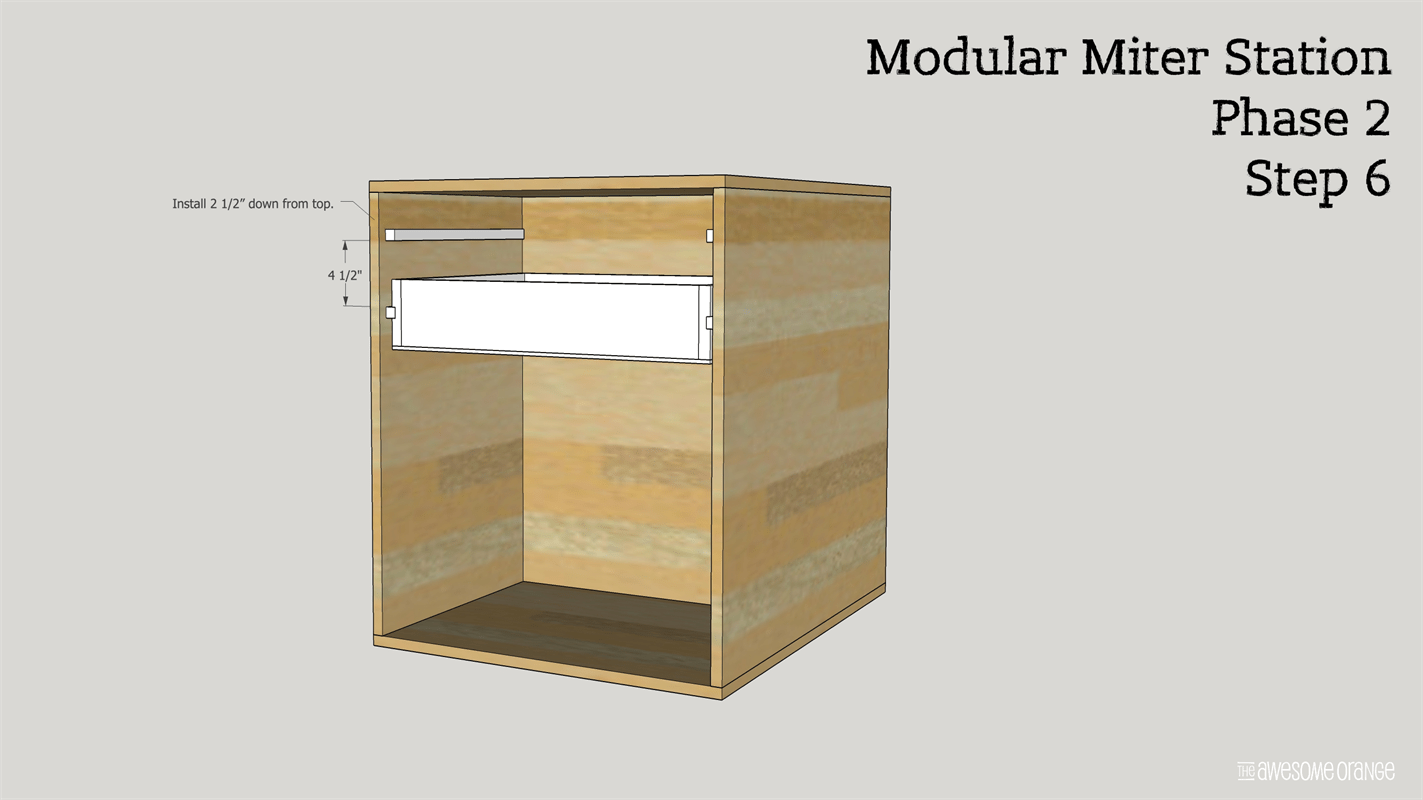
Install Drawers
Install wooden drawer slides starting from the top. Put 2 1/2" spacer blocks on the top and then install wooden drawer slide underneath using wood glue and 1 1/4" 18 ga brad nails. Then after first drawer slides use 4 1/2" spacer blocks to install 2nd drawer slides. Install drawers. NOTE: Slides should be slightly less than 3/4" so that drawer glide freely. Waxing slides will also help in drawers sliding freely.
-
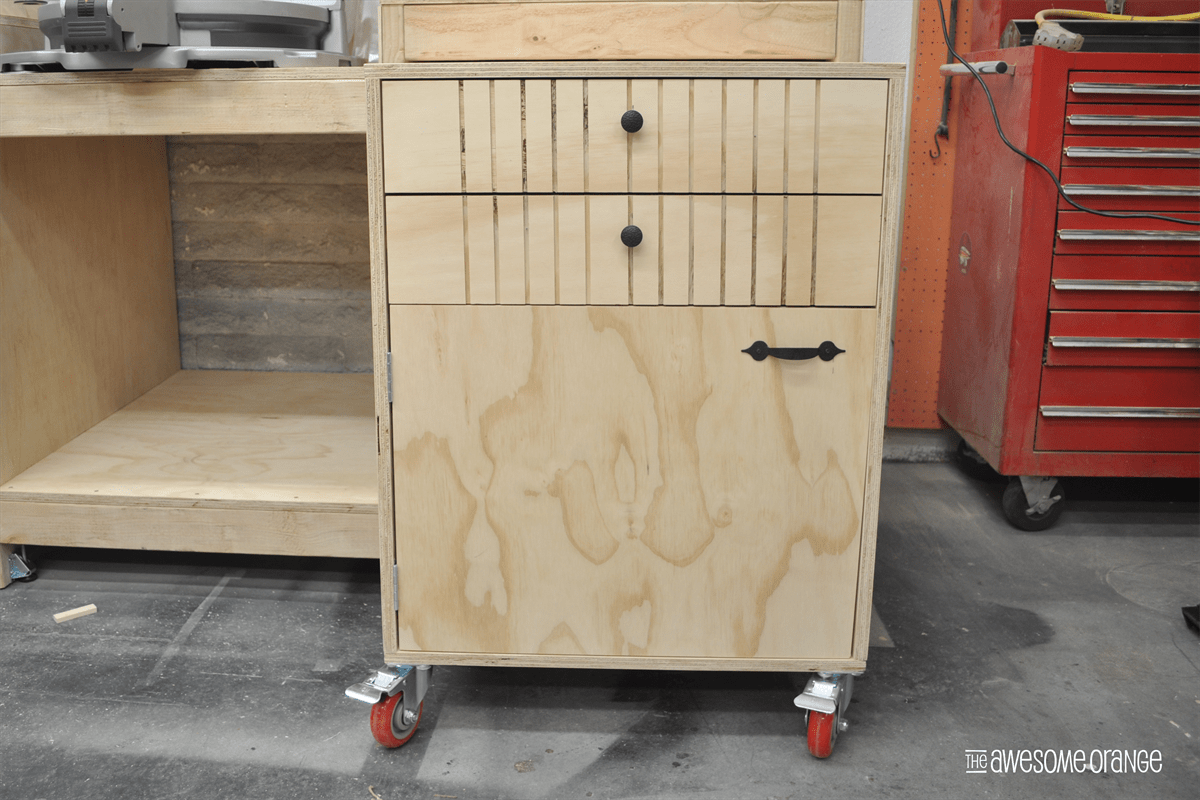
Install Drawer Fronts
Drill hole(s) for desired drawer hardware. Then line up bottom drawer front with drawer, using playing cards or business cards as spacers. Once at desired location, screw a screw thru hardware hole in drawer from into drawer box. Once that is secure pull out drawer and attached four screw from inside drawer into drawer front. Then remove screw from hardware hole and install hardware. If you need more detailed information on how to do this, I put a link in the Extras section to a detailed description.
-
Install Cabinet Door
Follow instructions that came with your inset hinges and install door.
-
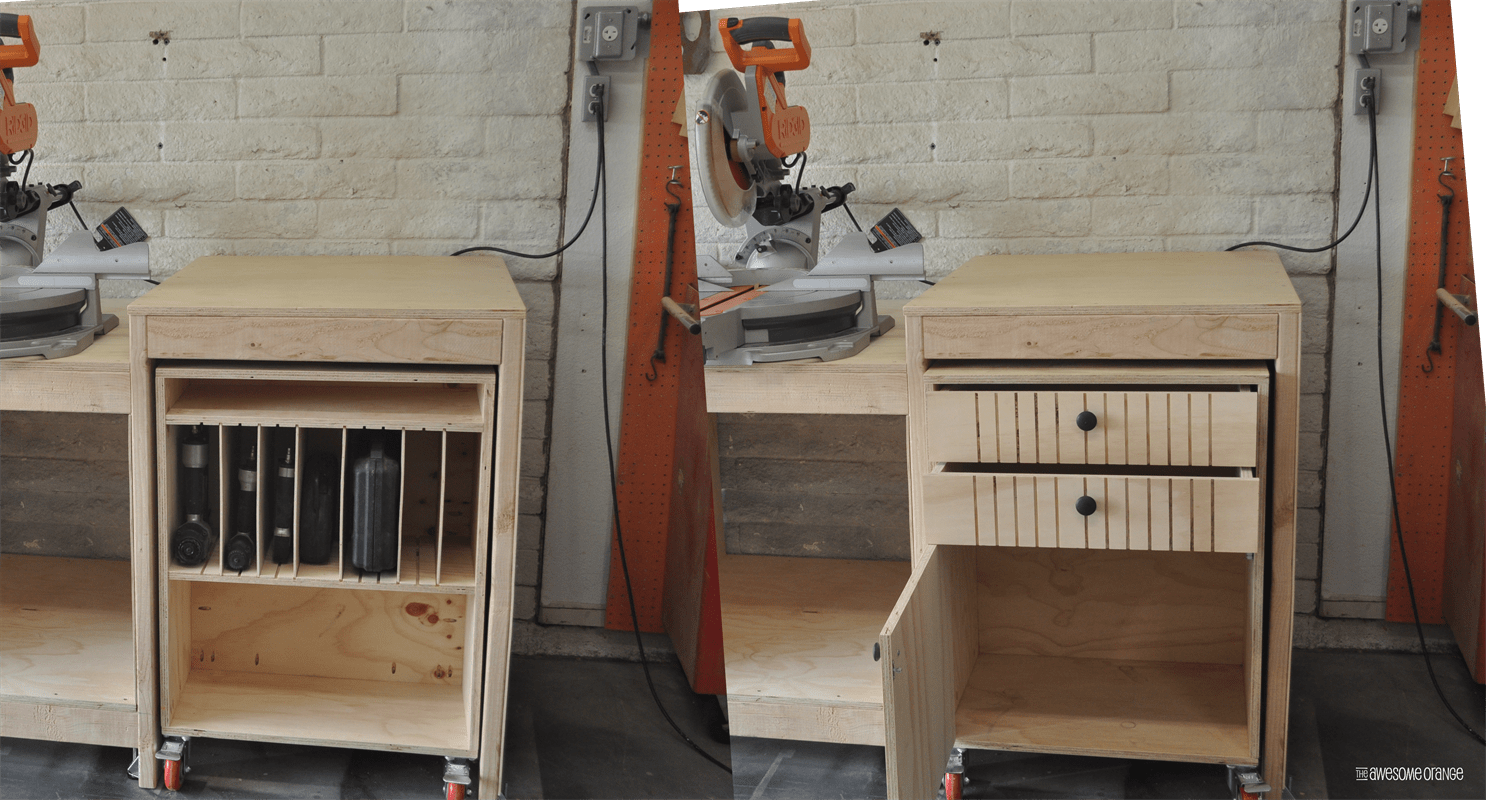
Add Accessories
Add 1/4" slot dividers per your tools, install 4" casters using 1" wood lag screws and washers, attach hose reel, drill holes from air compressor storage cabinet to hose reel side, and any other accessories as desired.
-
Visit theAwesomeOrange.com
Visit www.theAwesomeOrange.com to see more pics of this build and all Phases' of the Modular Miter Station Series.