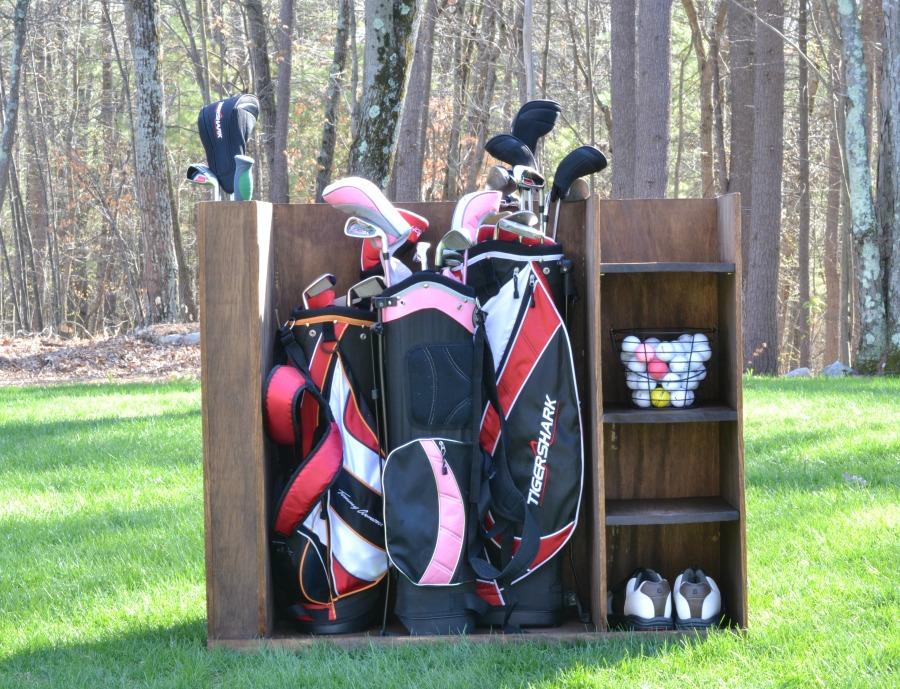
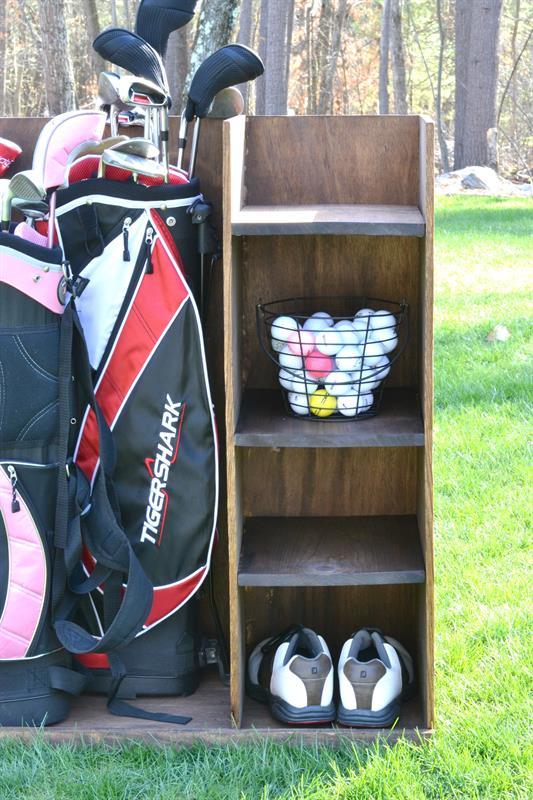
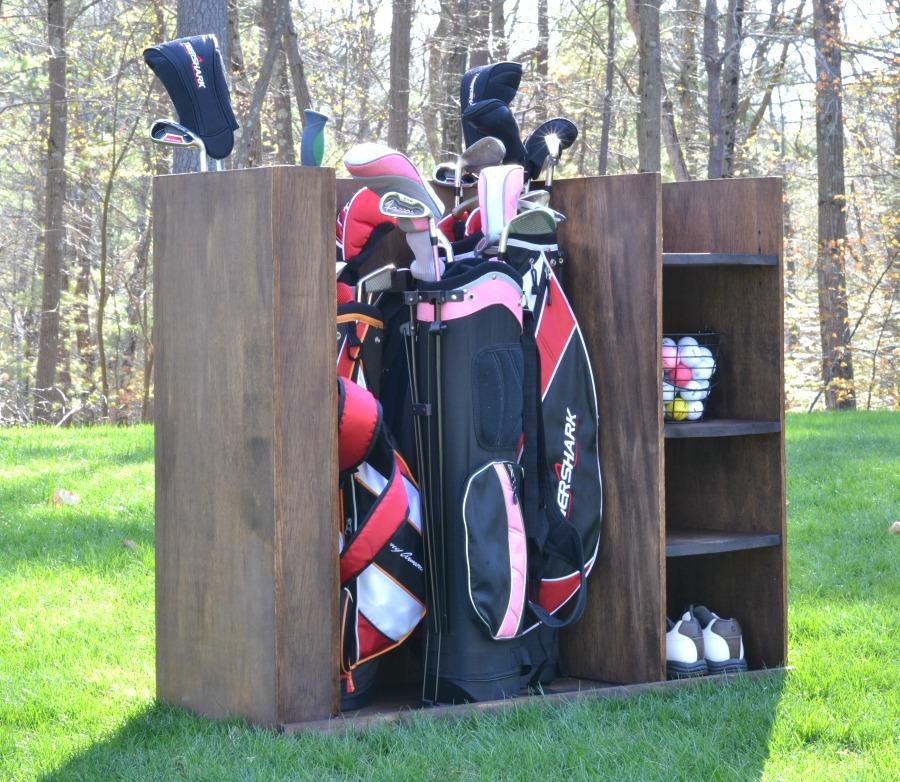


When golf season hits, searching for balls, tees and maybe even a club or two can get frustrating. This golf storage unit is a great way to keep all your equipment together with room for multiple bags and even an adjustable shelf to accommodate those odd size items.
Tools
Kreg Tools


Other Tools
-
Circular Saw (cordless)

-
Miter Saw
-
Tape Measure
-
Drill (cordless)
-
Nail Gun
-
Sander
-
Shop Vacuum
Materials
Wood Products
- 1 Plywood , 1/2" Thick , Full Sheet
- 1 Plywood , 1/2" Thick , Half Sheet
- 1 Board , 1x2 , 72"
- 1 Board , 1x12 , 48"
Hardware & Supplies
- 50 3/4" Kreg Screws
- 20 1 1/4" brad nails
- 1 Iron on plywood edge veneer
Directions
-
Overview
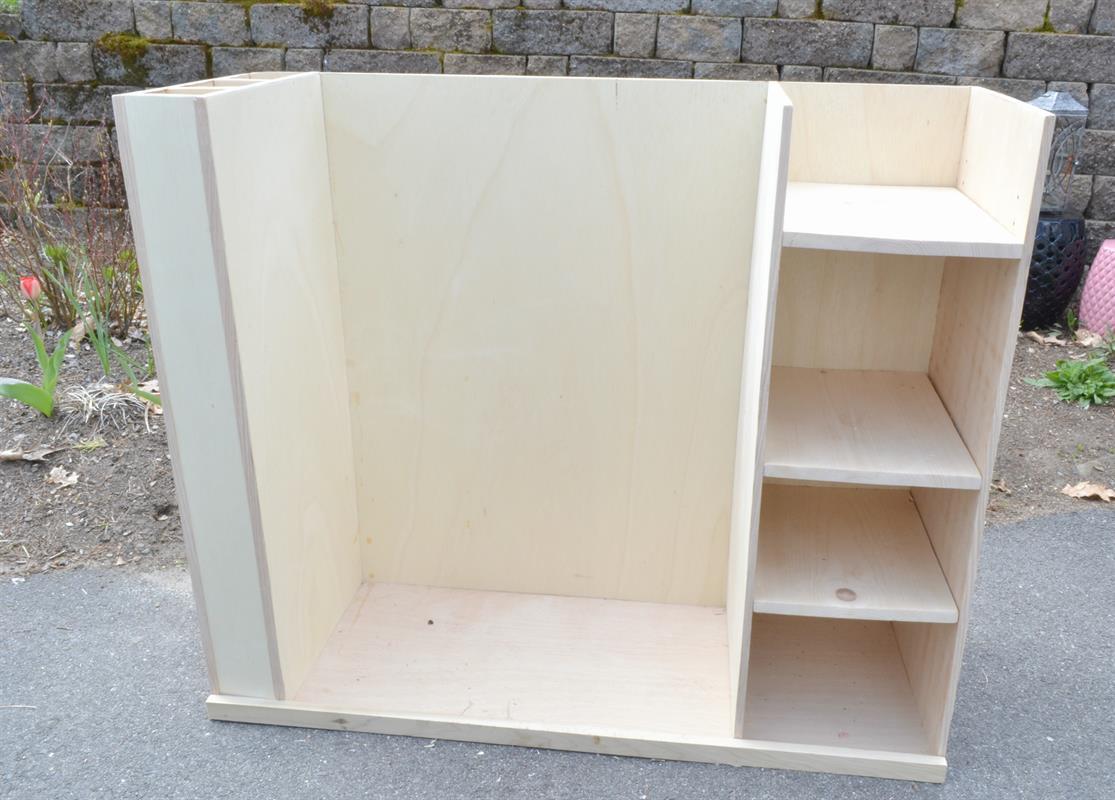
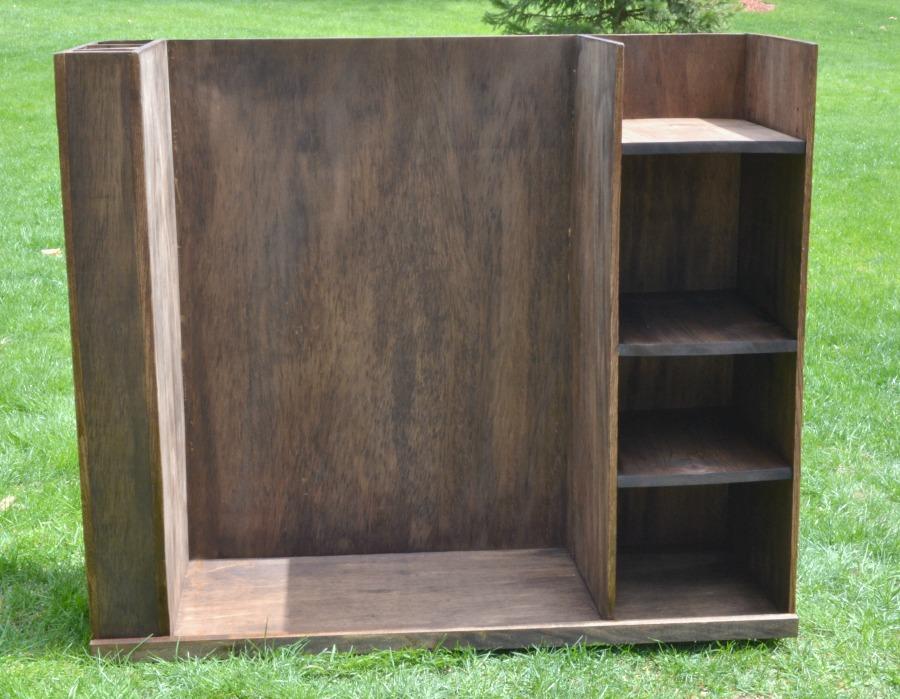
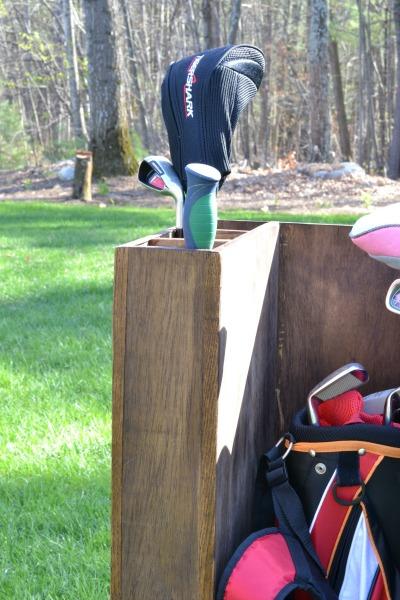
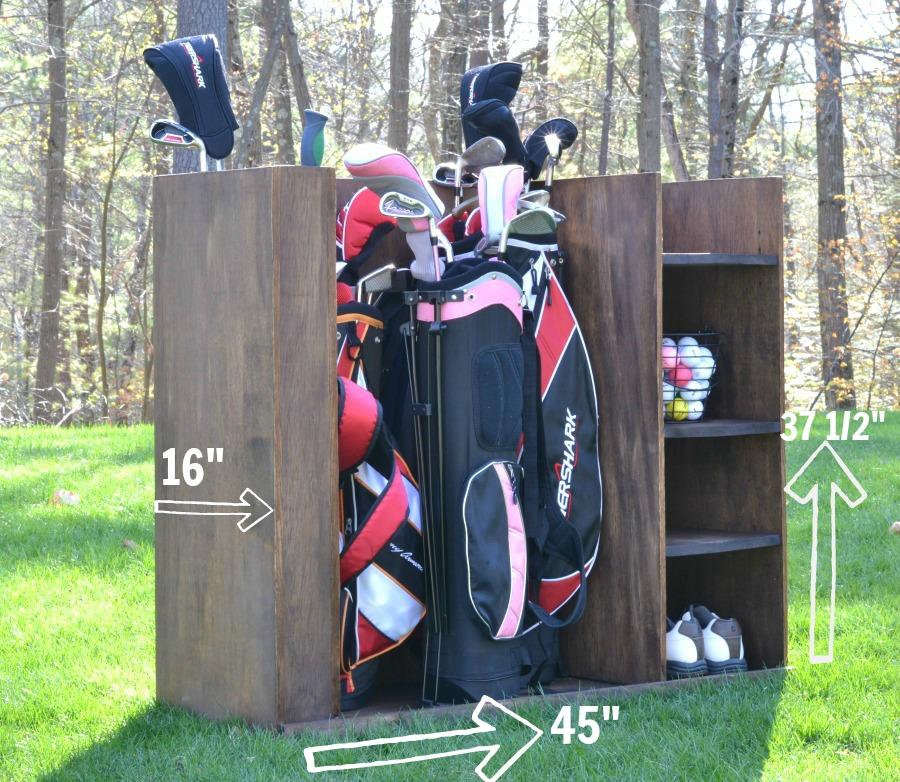
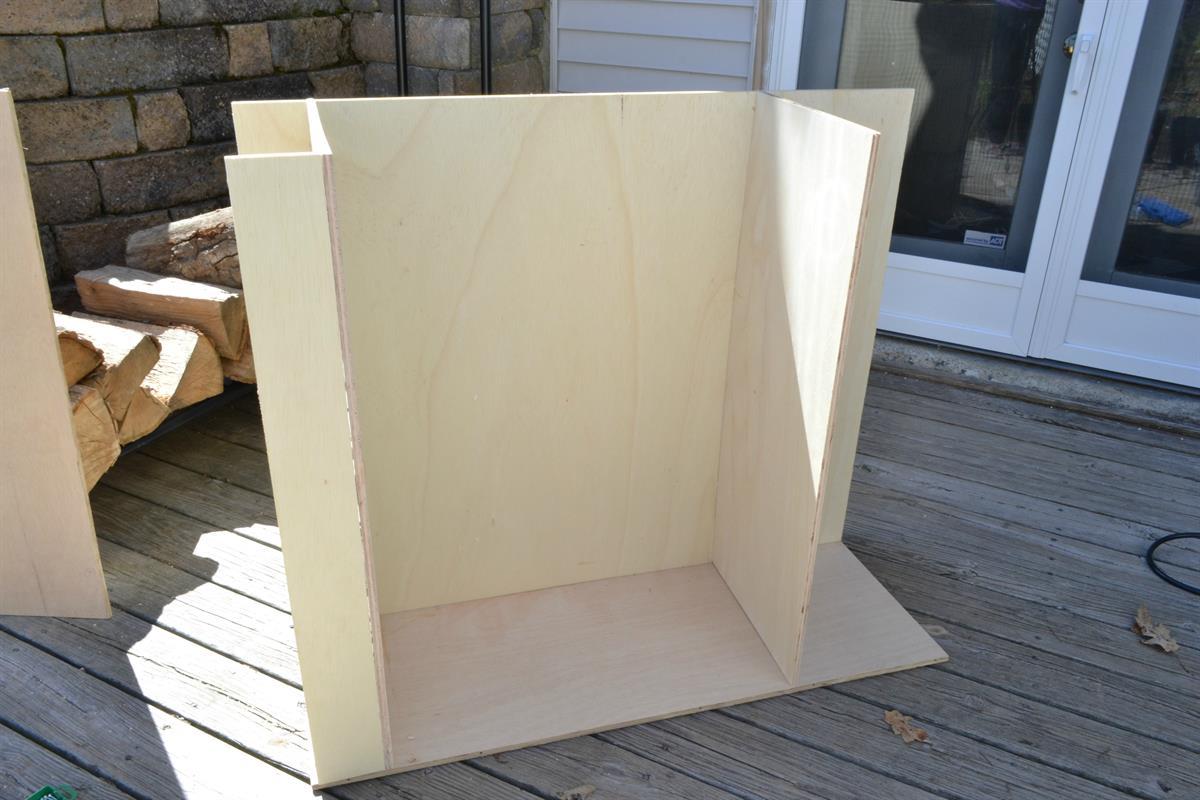
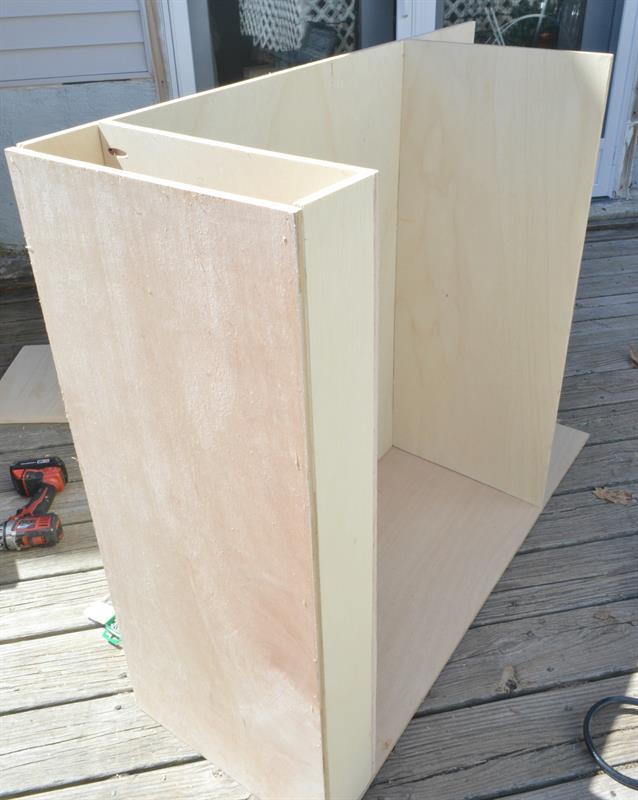
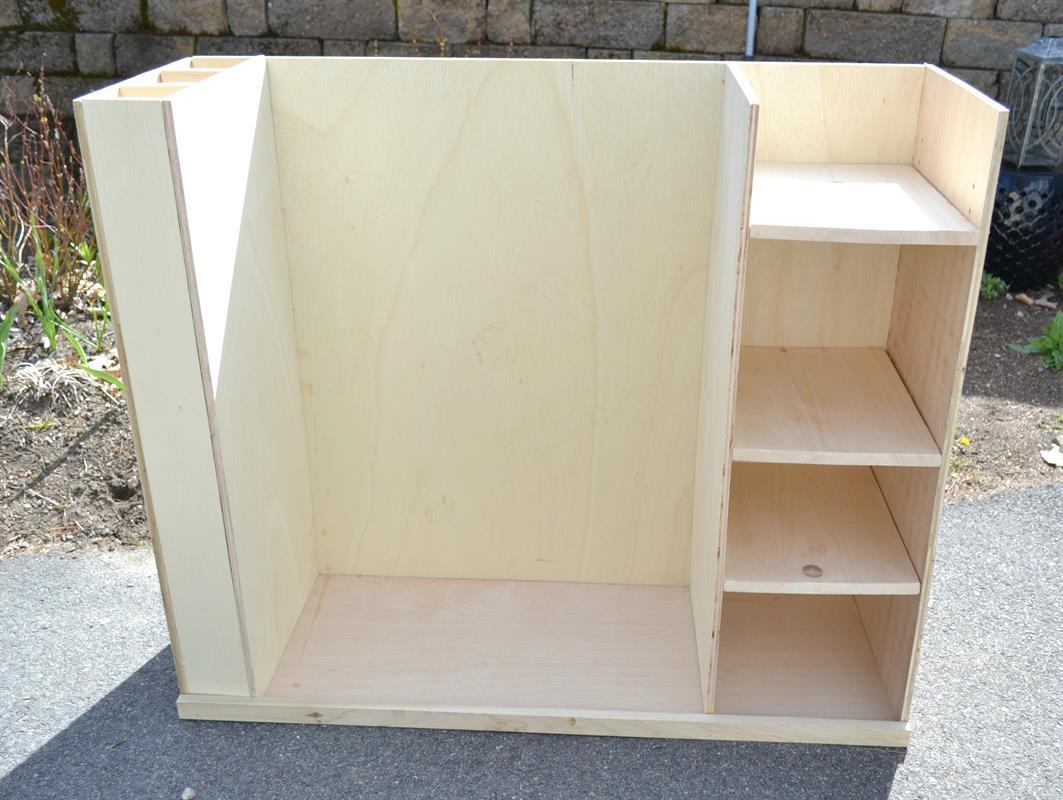
This unit stands 37 1/2" tall with a 45" width. The umbrella cubby is 4" wide giving you the ability to store extra clubs and a golf umbrella while the 11 1/4" wide shelves give you great storage capacity. The bag area is almost 28" wide which allows you to store two adult size bags or one adult and two children's bags.
-
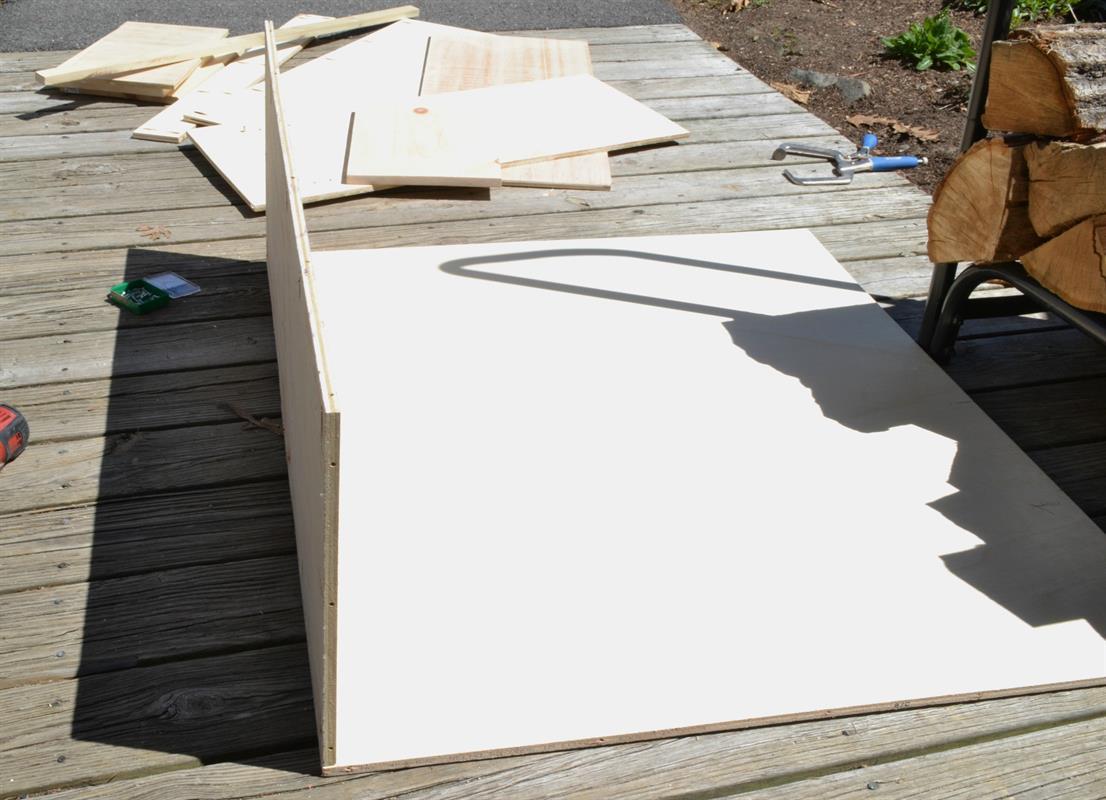
Step 1
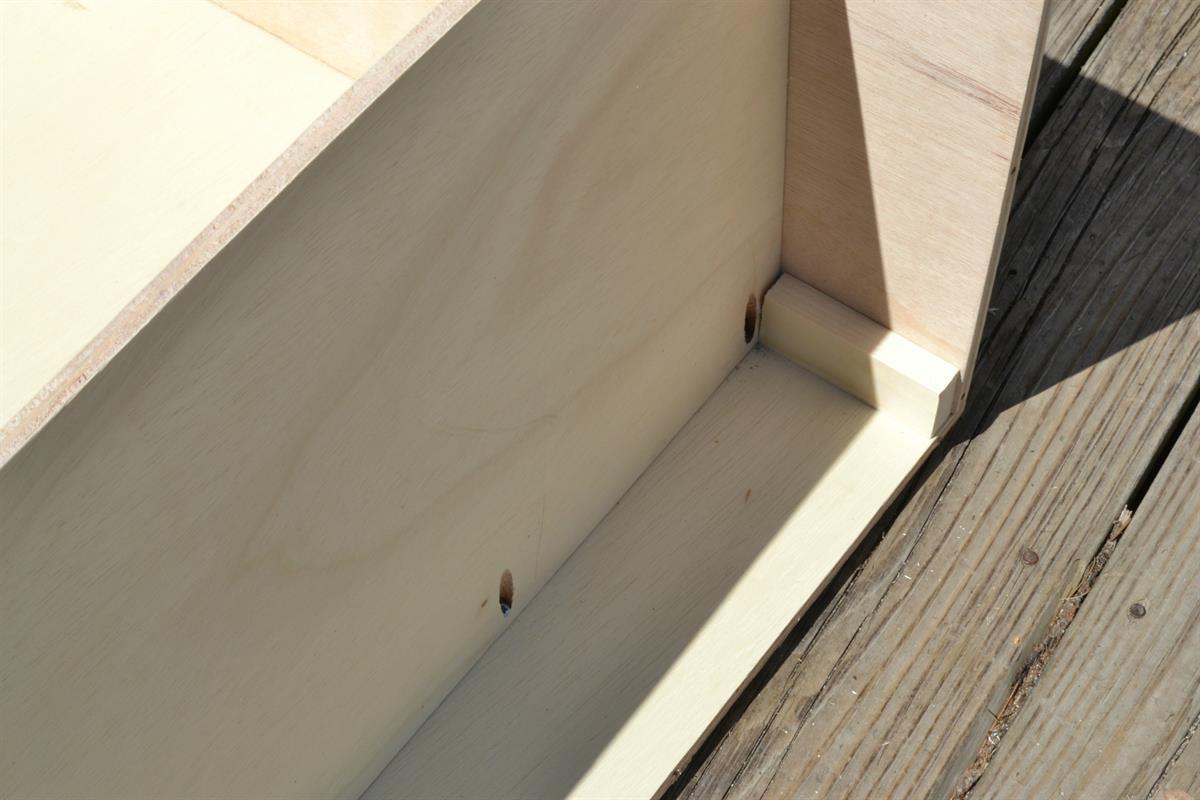
Attach the bottom 15 1/2" piece to the back using pocket hole screws.
-
Step 3
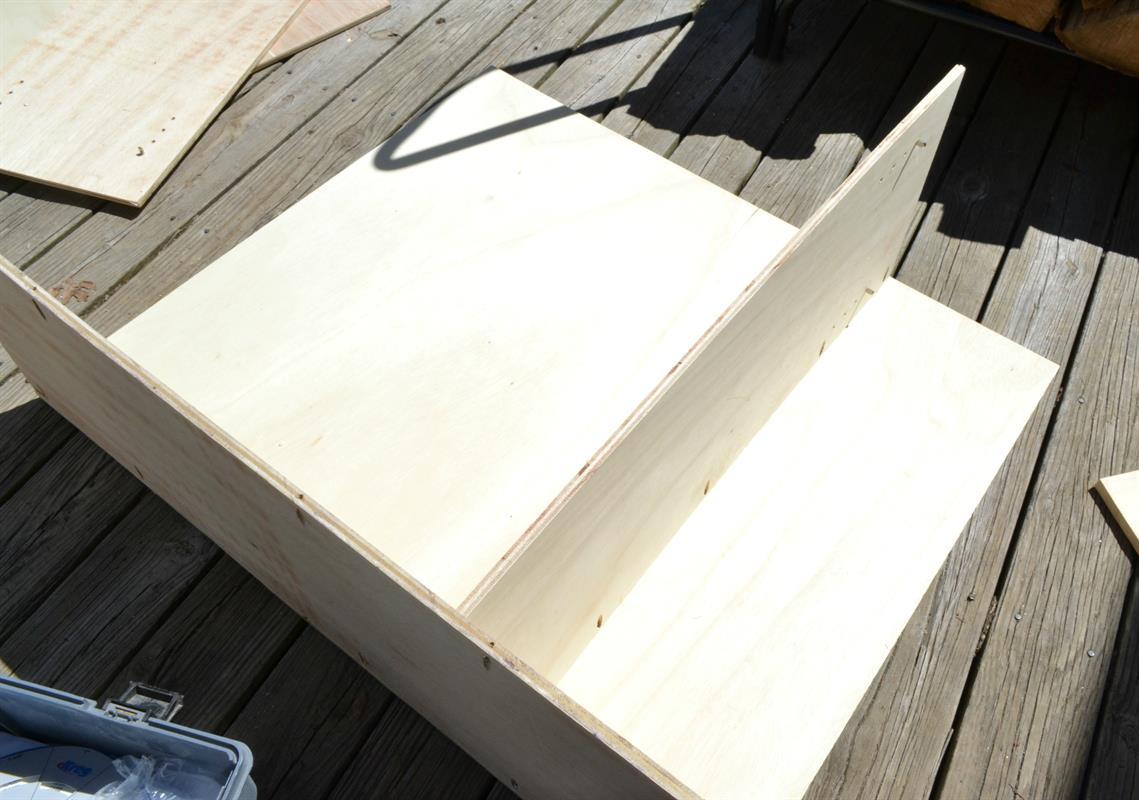
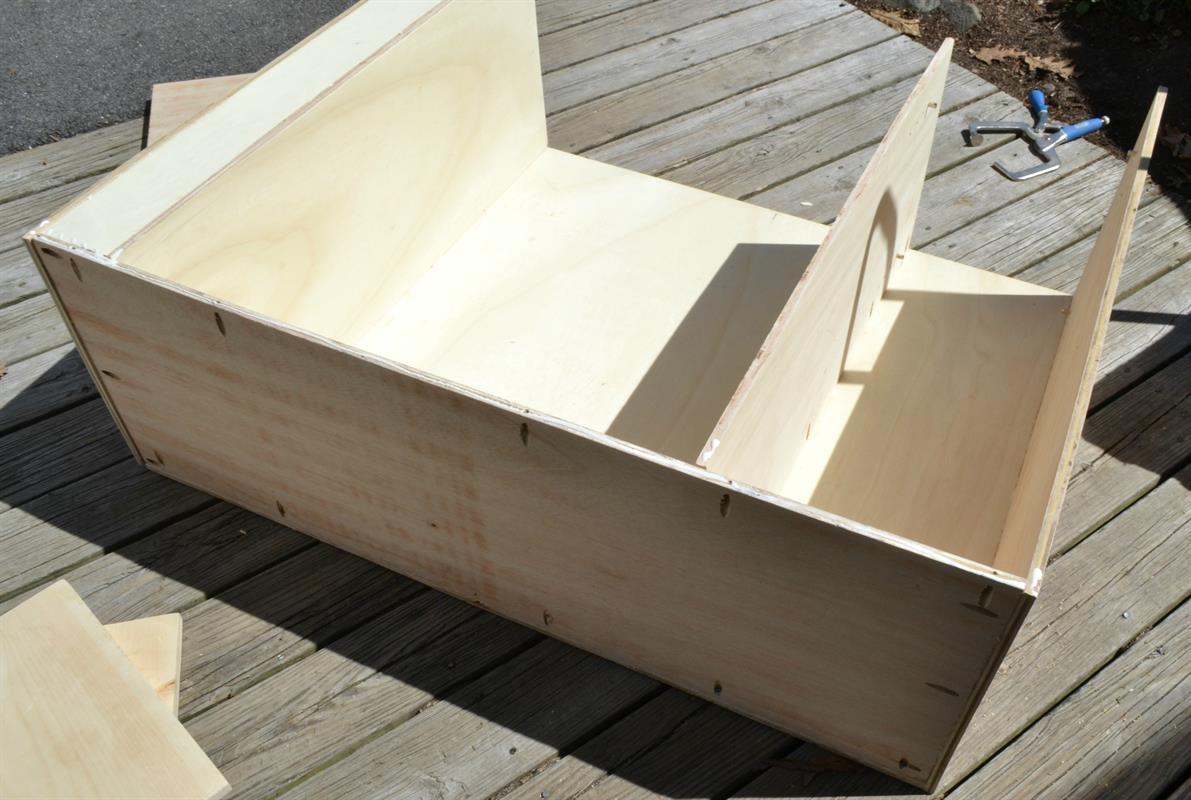
Attach the first interior side to the back using pocket holes, 11 1/4" in from the right side, using your shelves as a placement guide. This will become one side of the golf bag storage area. The pocket holes should face away from the bag storage area. This way you don't have to fill them later because they will be hidden.
-
Step 4
Attach the second interior side to the back, using pocket holes. Attach it 4" in from the left side using your 4" umbrella cubby divider as a guide.
-
Preparation
You will be using pocket holes to attach most of this piece. Predrill all the holes to make assembly quicker. Always try to evenly space the holes. Your pocket hole placement is as follows
-Back: 5 holes down each 37 1/2" side
-Bottom: 5 holes along each 44" side and 3 on each 15 1/2" sides
-Interior sides: 5 holes along one 37 1/2" side
-Front for Umbrella Cubby: 5 holes along one 37 1/2" side
-2 of the Shelves: 2 pocket holes along each 15 1/2" side (one shelf is adjustable and does not need to be screwed into place.)Always add glue to the joint prior to joining with screws.
-
Step 5
Attach the front of the umbrella cubby to the left interior side, using pocket holes.
-
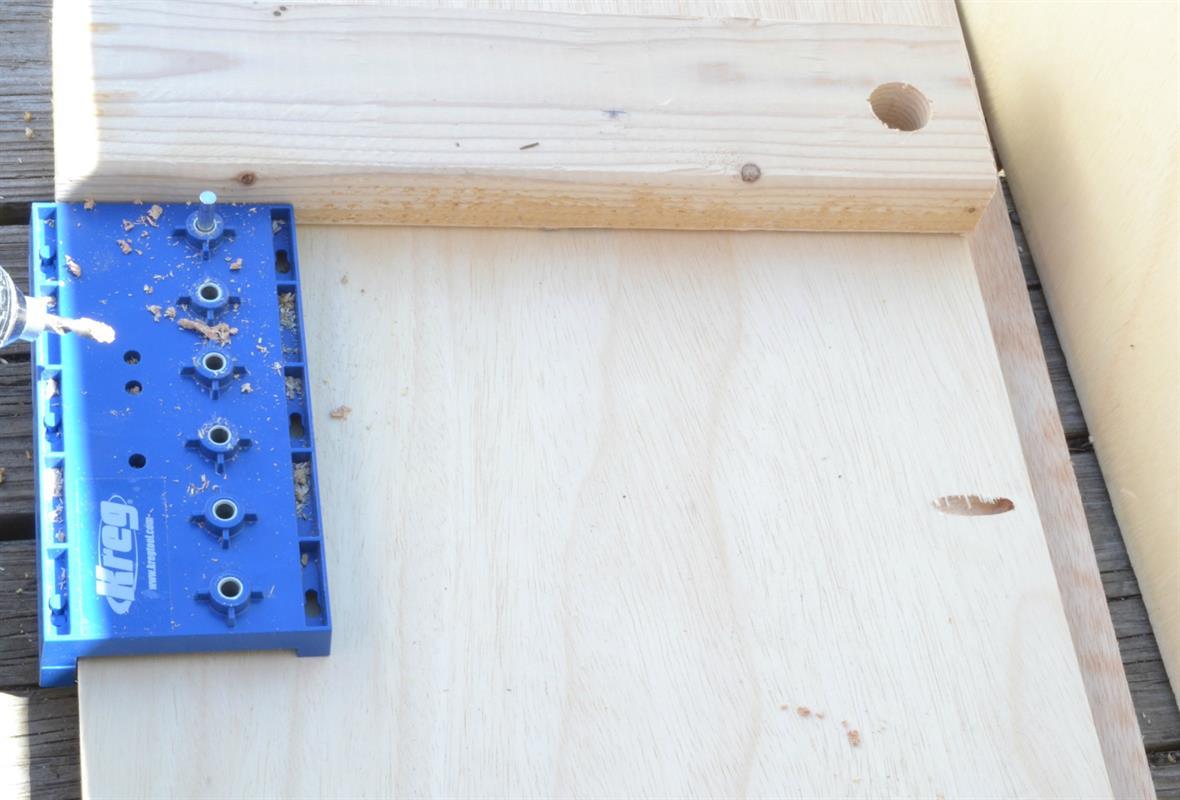
Step 2
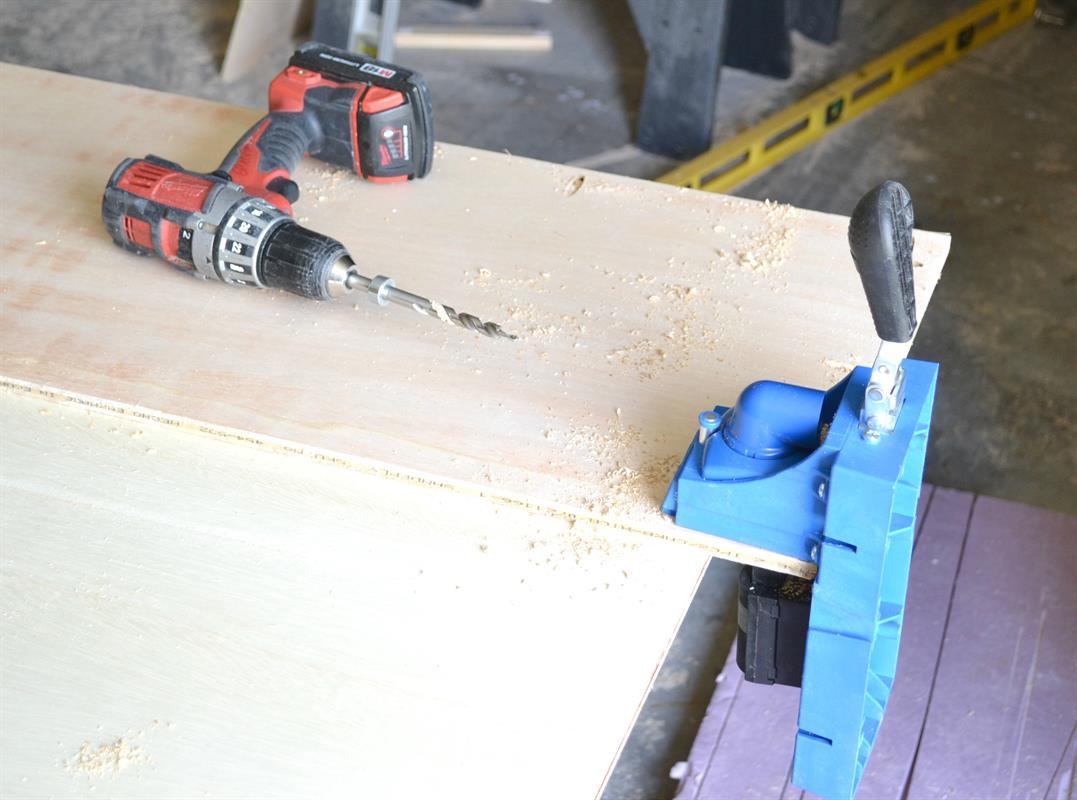
Using your Kreg Shelf Pin Jig, add the holes for your adjustable shelf. Use a 2x4 as a guide for even placement of the holes on both sides.
-
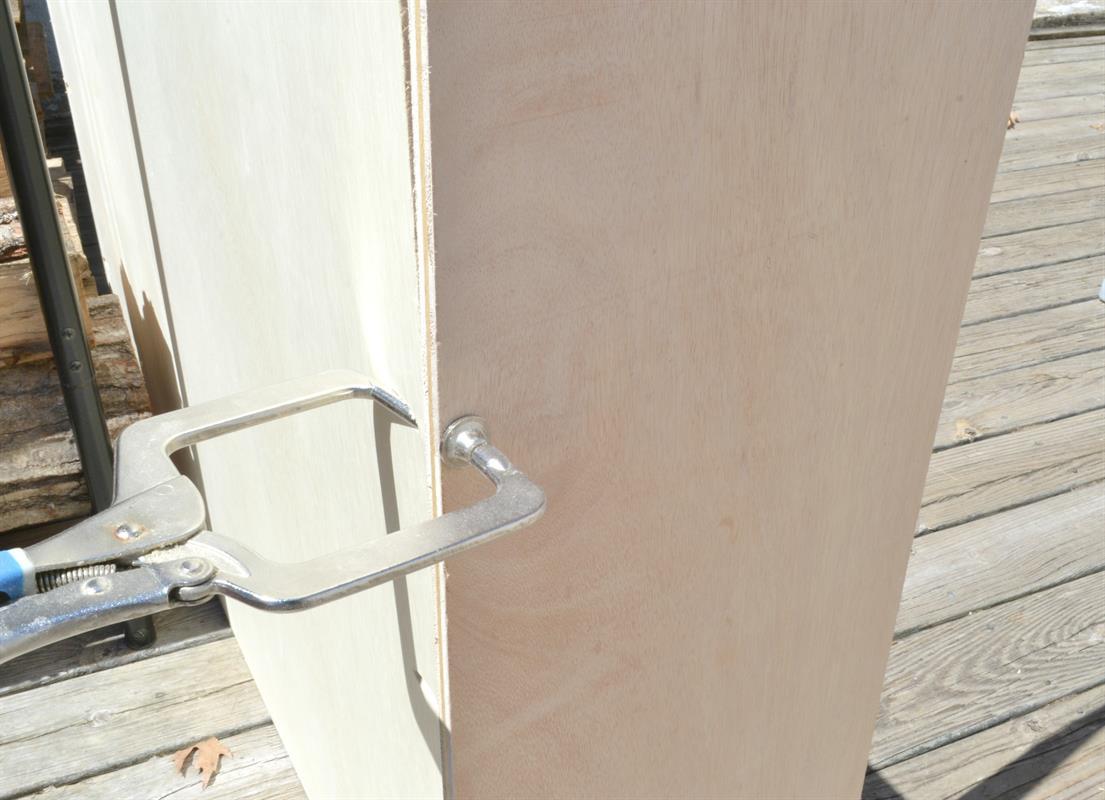
Step 6
Add the exterior sides using the pocket holes on the back piece. It is helpful to use a right angle clamp to hold the wood in place while you screw it in place.
-
Step 7
Secure the left exterior side to the umbrella cubby front using 1 1/4" brad nails.
-
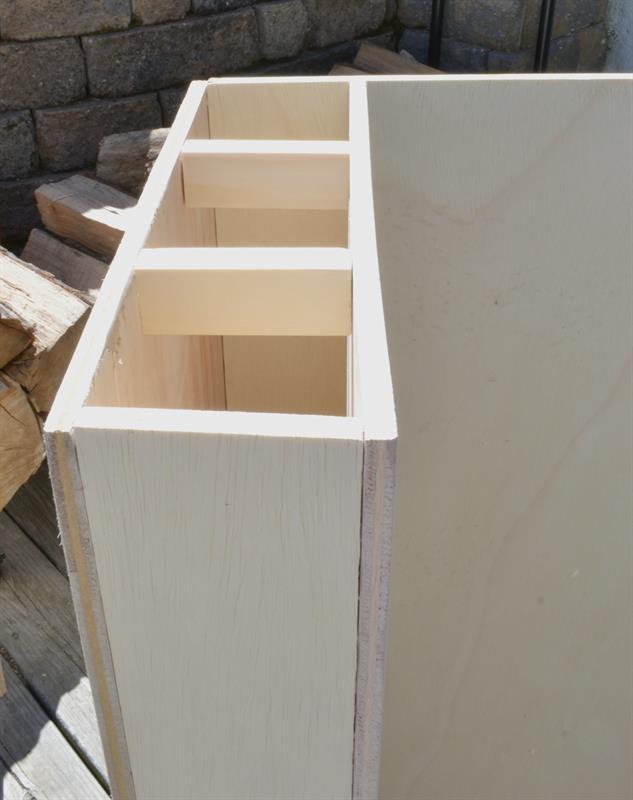
Step 8
Attach umbrella cubby dividers with, approximately, 4" spacing.
-
Step 9
Attach the 1x2x45 front trim piece along the bottom edge of the front using brad nails.
-
Step 10
Attach middle two shelves at the desired height and place the adjustable shelf with shelf pins. You could base the height of the stationary shelves on what you need to store or evenly space them.
-
Step 11
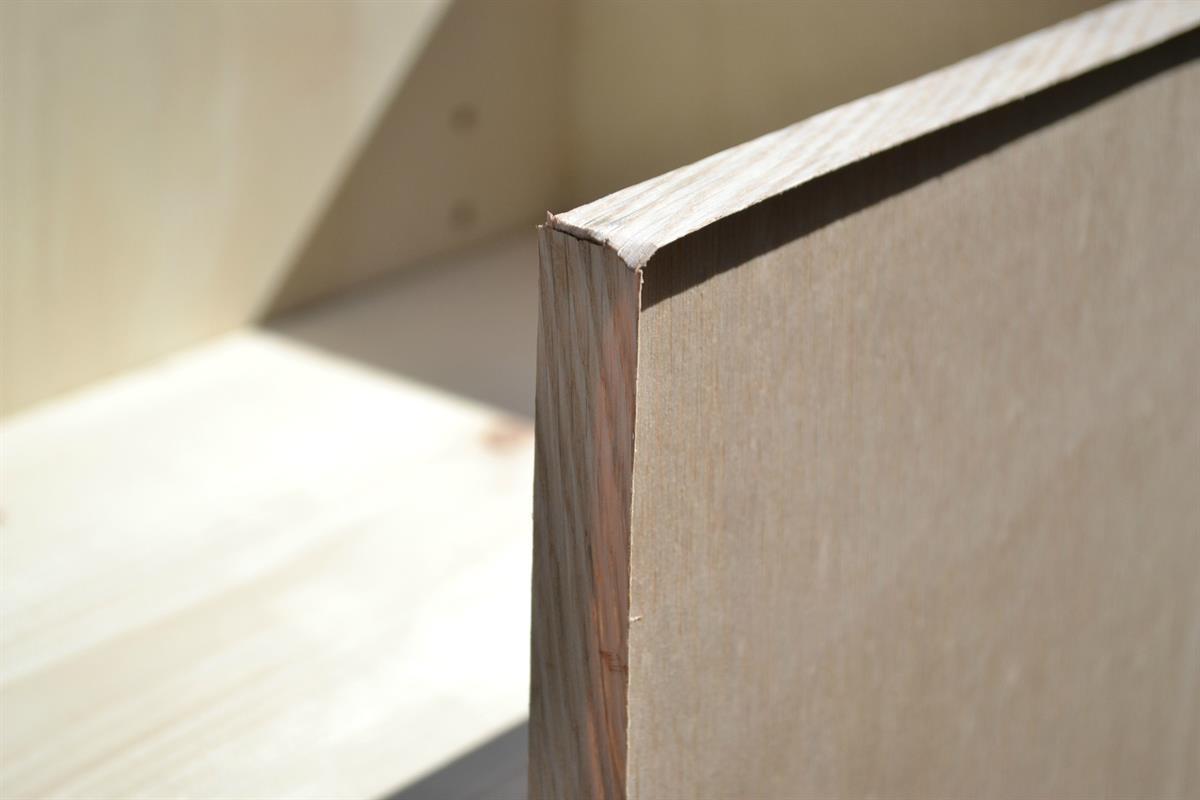
Attach plywood veneer to all exposed plywood edges, according to package directions.
-
Final Step
Stain or paint as desired.