

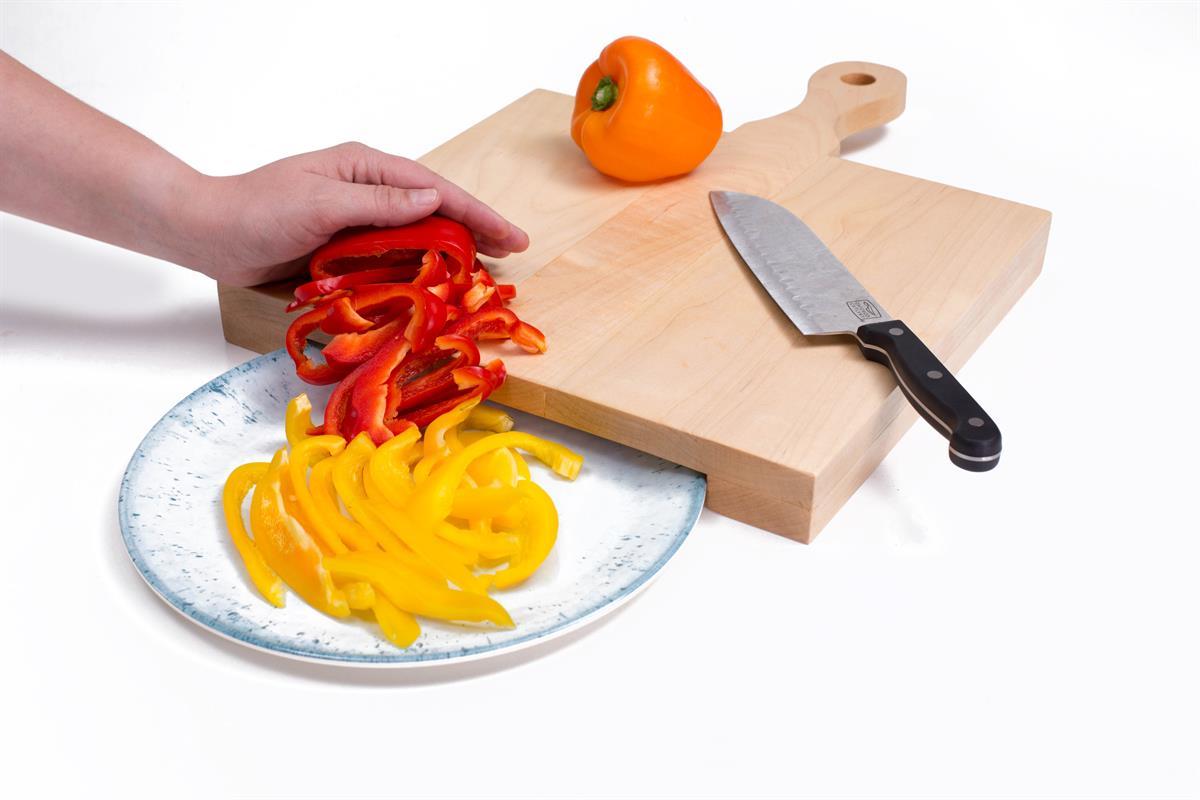
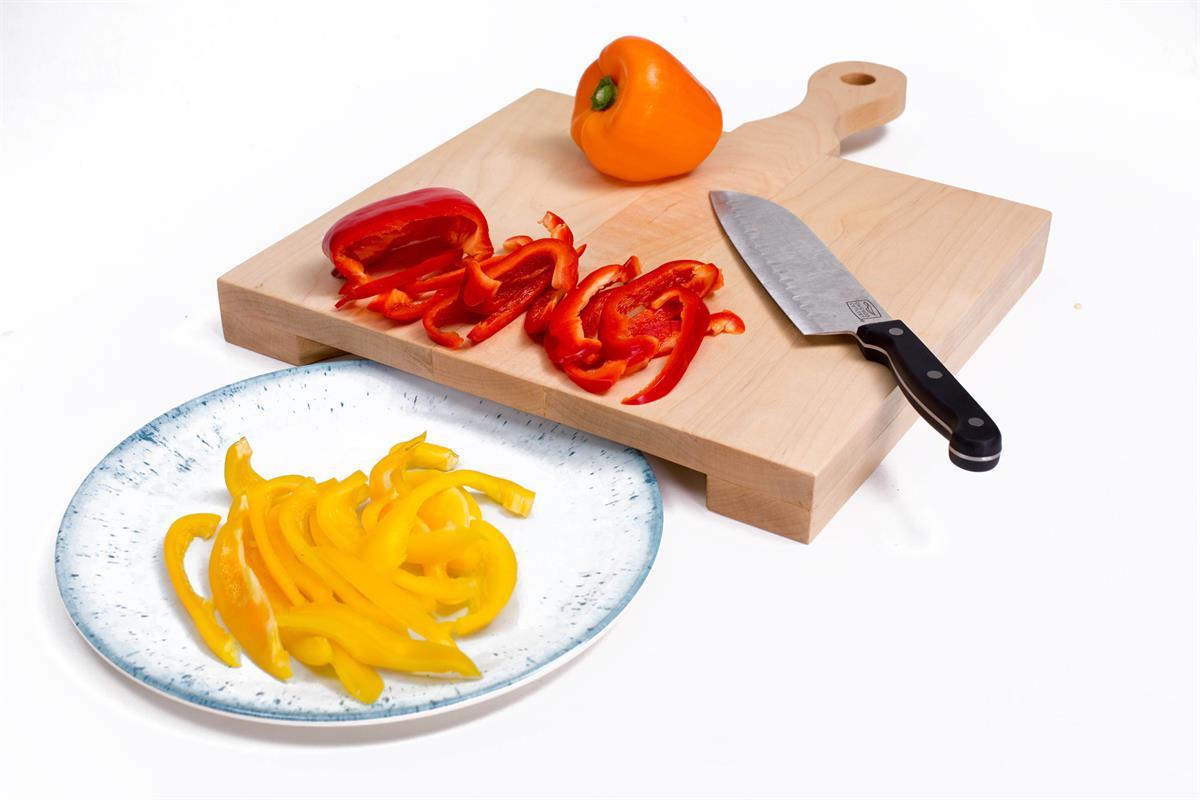
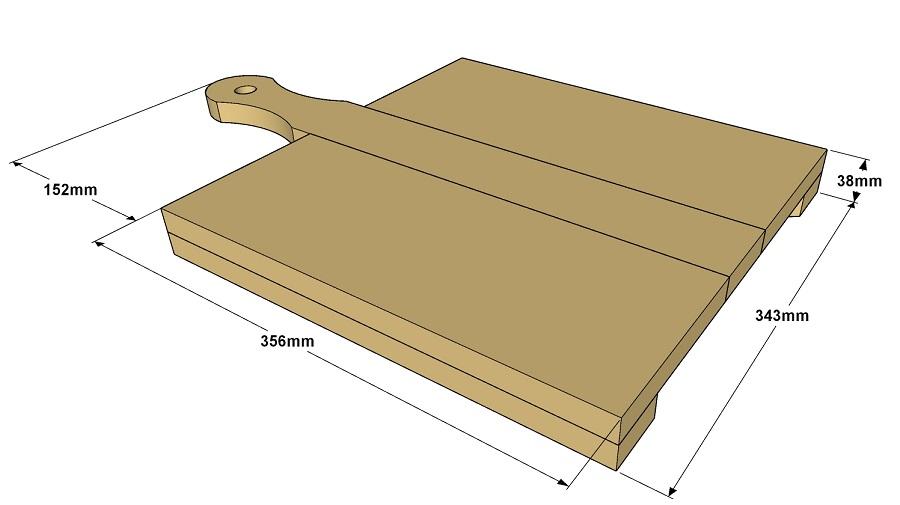


This solid-maple cutting board offers ample space for cutting and a comfortable handle, but the most-unique feature lies underneath. A cutout in the lower layer allows you to slip a plate under the edge, so that you can slide the things you’ve cut easily off the board without spilling.
Tools
Kreg Tools

Other Tools
-
Jigsaw

-
Miter Saw
-
Square
-
Tape Measure
-
Drill (cordless)
-
Sander
Materials
Wood Products
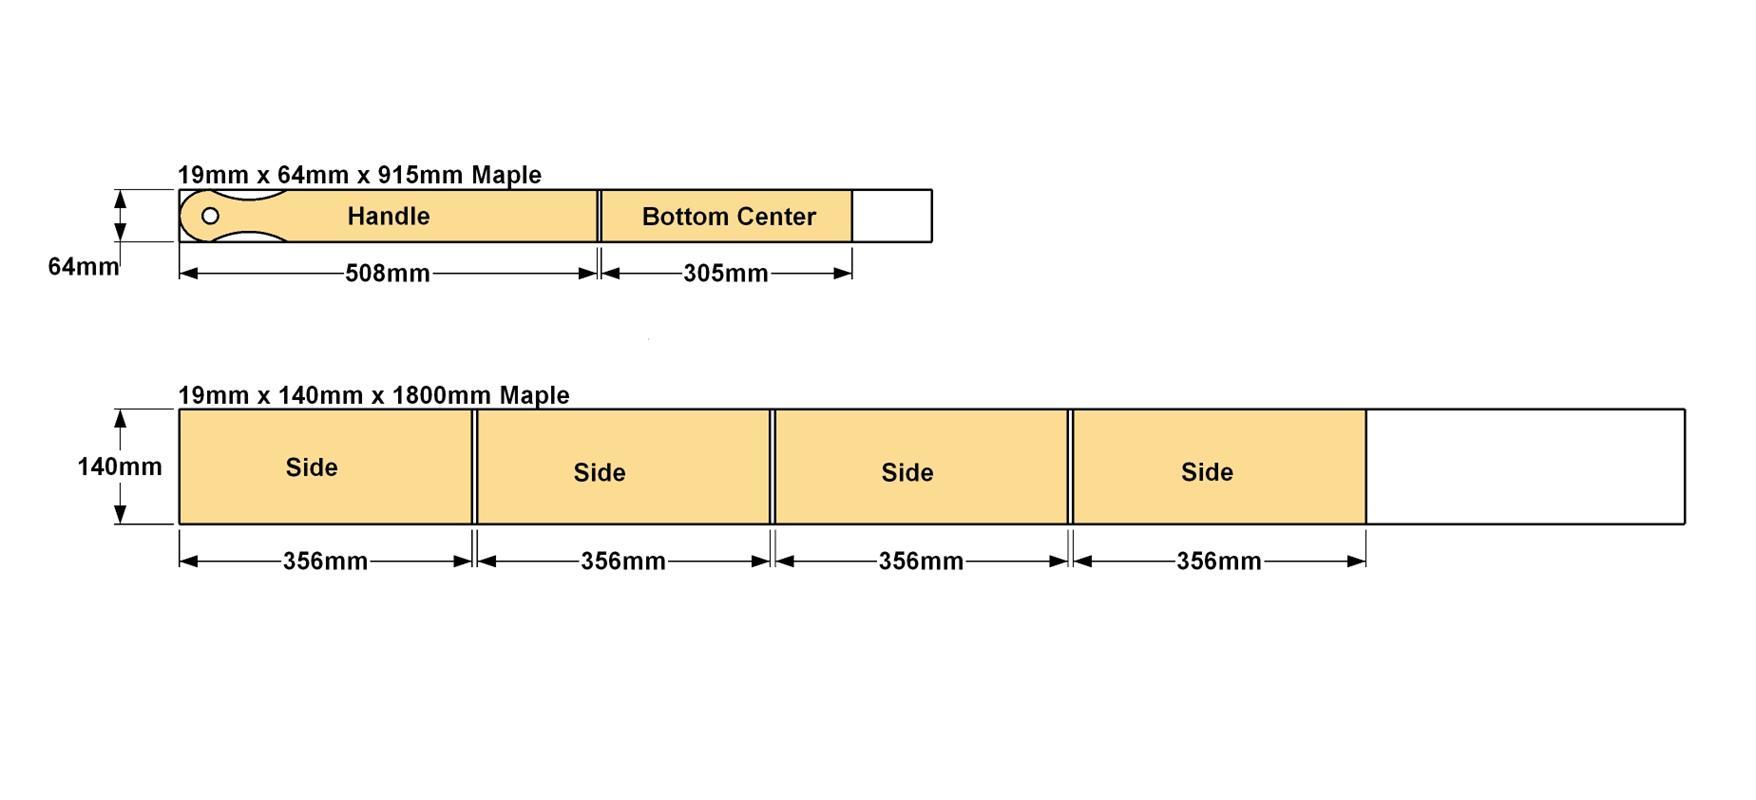
- 1 Board , 19mm x 140mm , 1800mm
- 1 Board , 19mm x 64mm , 915
Hardware & Supplies
- 1 Box of 100 - 32mm fine-thread pocket-hole screws
- 1 Waterproof wood glue
- 1 Butcher block oil
Cut List & Parts
- 4 Side , 19mm x 140mm x 356mm maple
- 1 Handle , 19mm x 64mm x 508mm maple
- 1 Bottom Center , 19mm x 64mm x 305mm maple
Directions
-
Choose the Right Material
Though it may be tempting to use any beautiful hardwood for a cutting board, there are some important safety factors to take into consideration. Only a tight, closed-grain wood (like Maple) is truly appropriate for cutting surfaces. Hardwoods in general are durable enough to perform as a cutting board; however, woods such as Oak, Ash, and Hickory should never be used due to their open grain. Open-grain woods have large pores that can harbor germs, bacteria, and decaying food particles, making them unsanitary and unsafe. Also, as you cut on an open-grain wood, tiny wood splinters can break off and wind up in your food.
-
Make the Sides
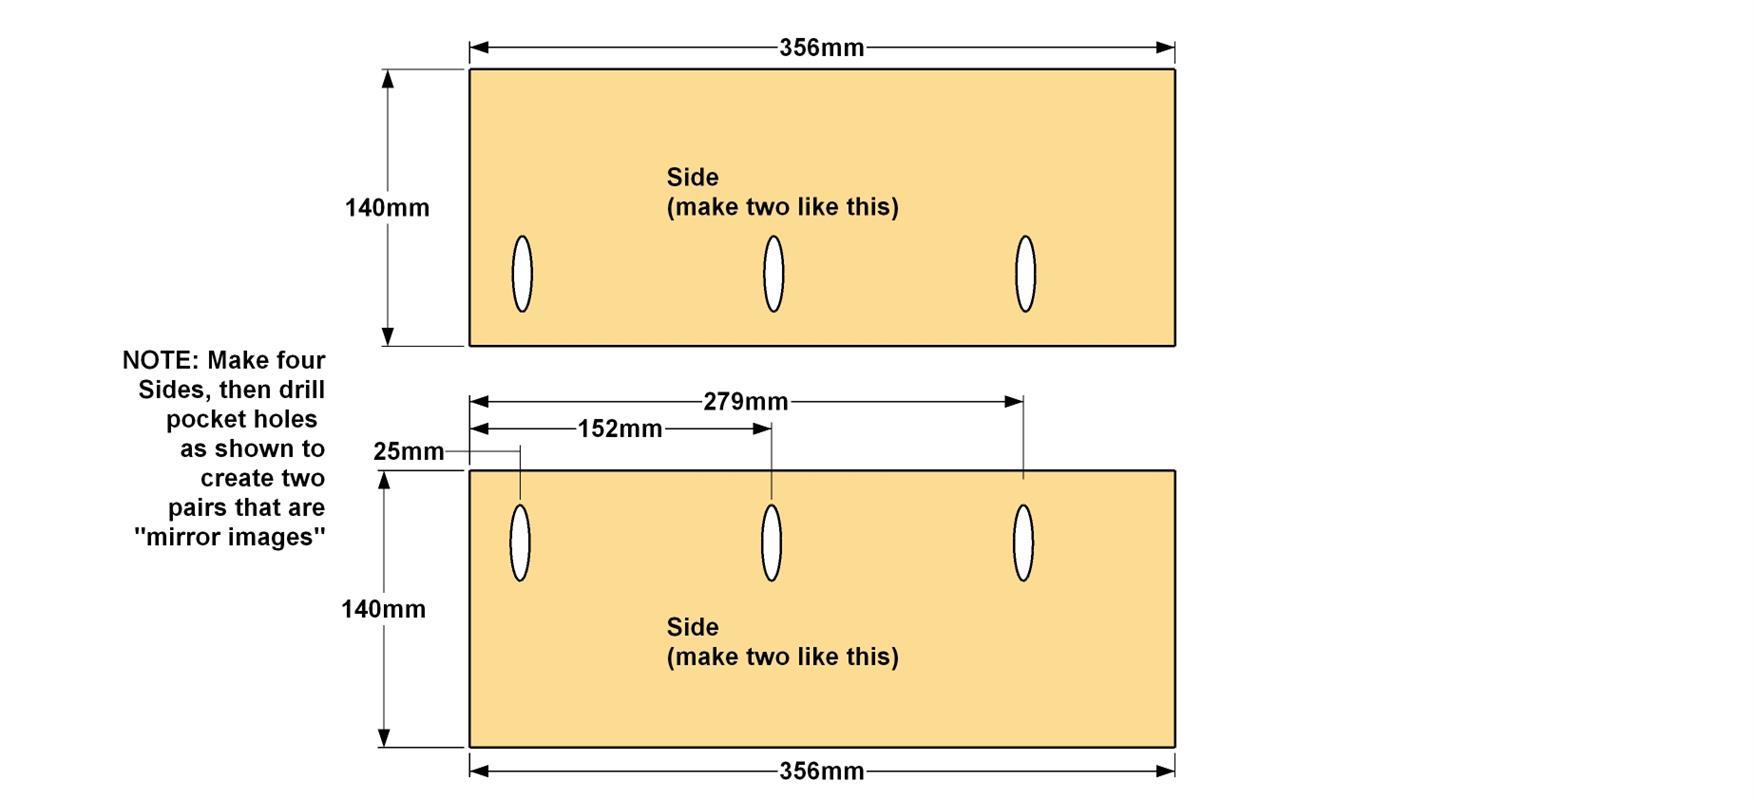
Cut four Sides to length from 19mm x 140mm maple, as shown in the cutting diagram. Set your pocket-hole jig for 19mm-thick material and drill pocket holes in each Side at the locations shown.
-
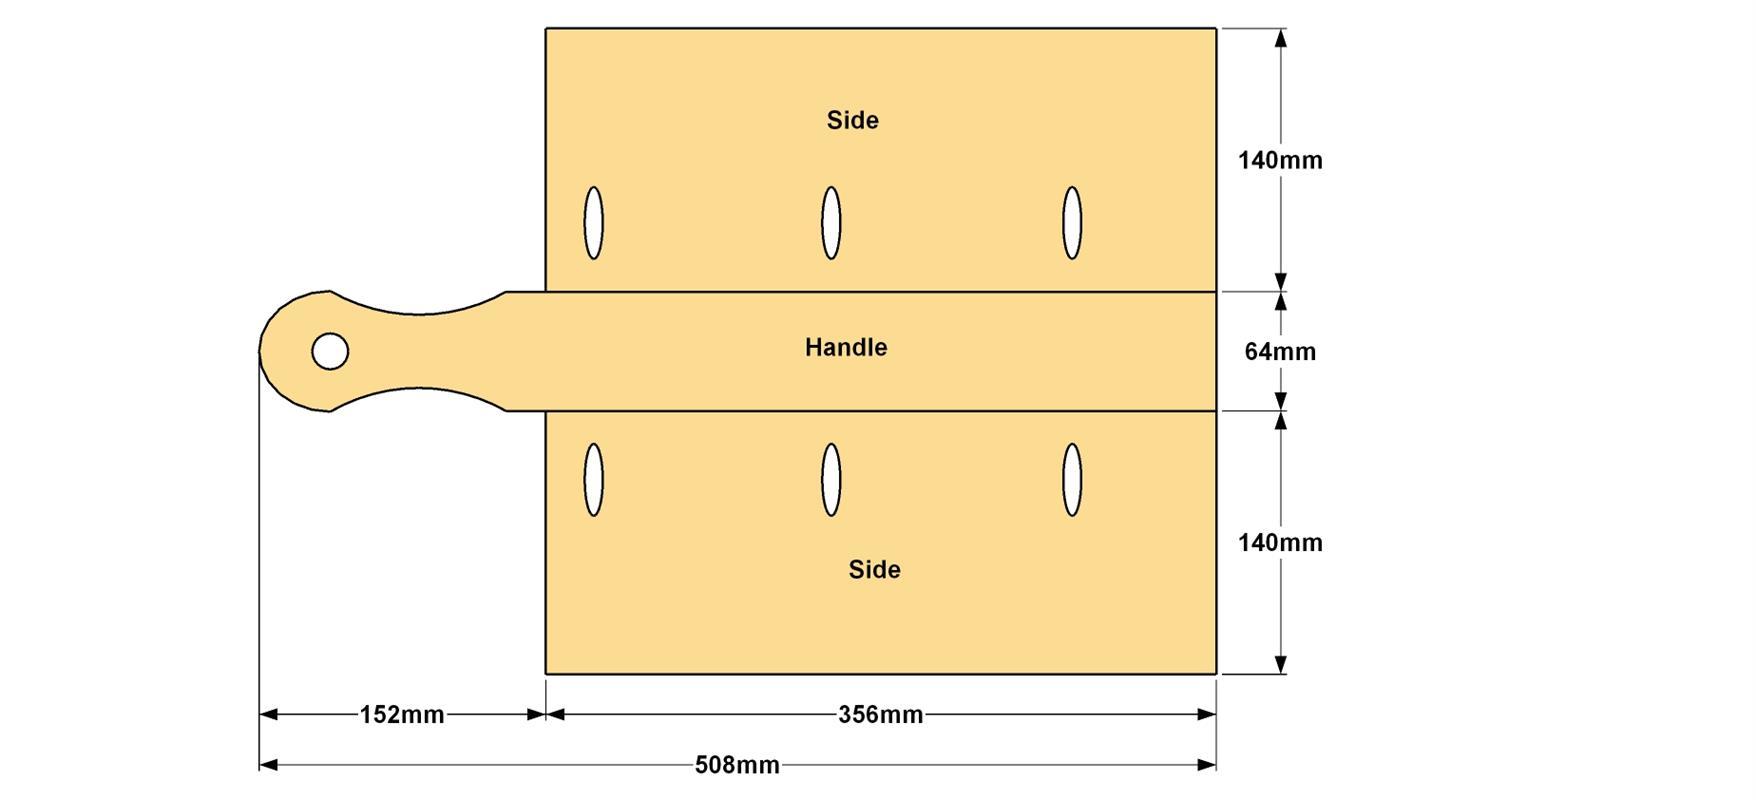
Cut the Handle and Bottom Center
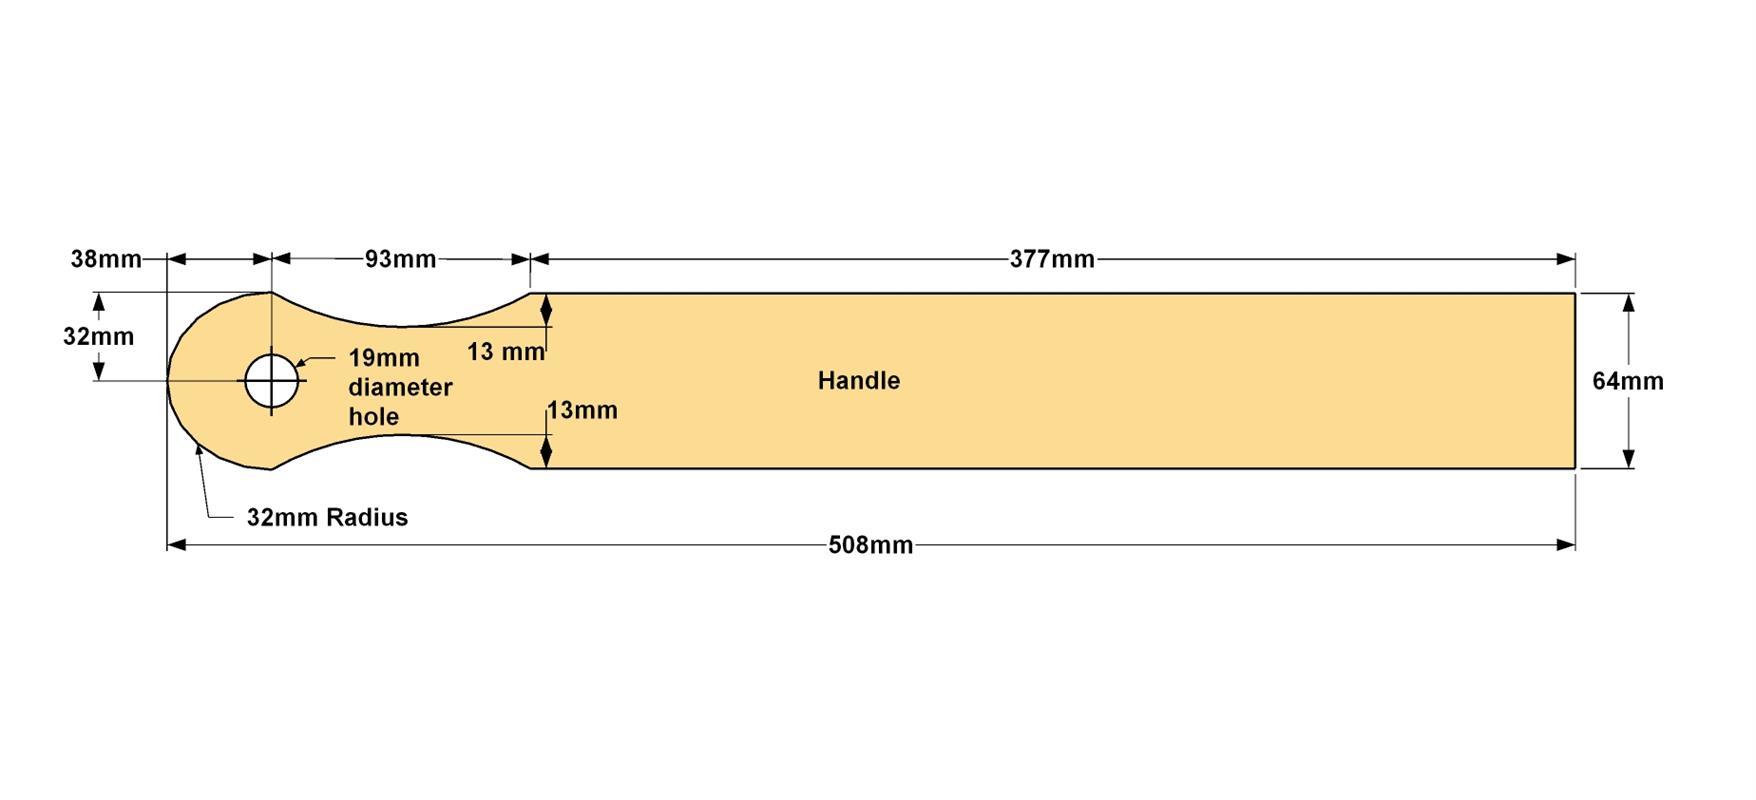
Cut one Handle and one Bottom Center to length from 19mm x 64mm maple, as shown in the cutting diagram. Set the Bottom Center aside for now. Lay out the pattern and the hole on the Handle, and then cut the handle to shape using a jigsaw and a fine-tooth blade. Then drill the hole. Sand the Handle shape smooth.
-
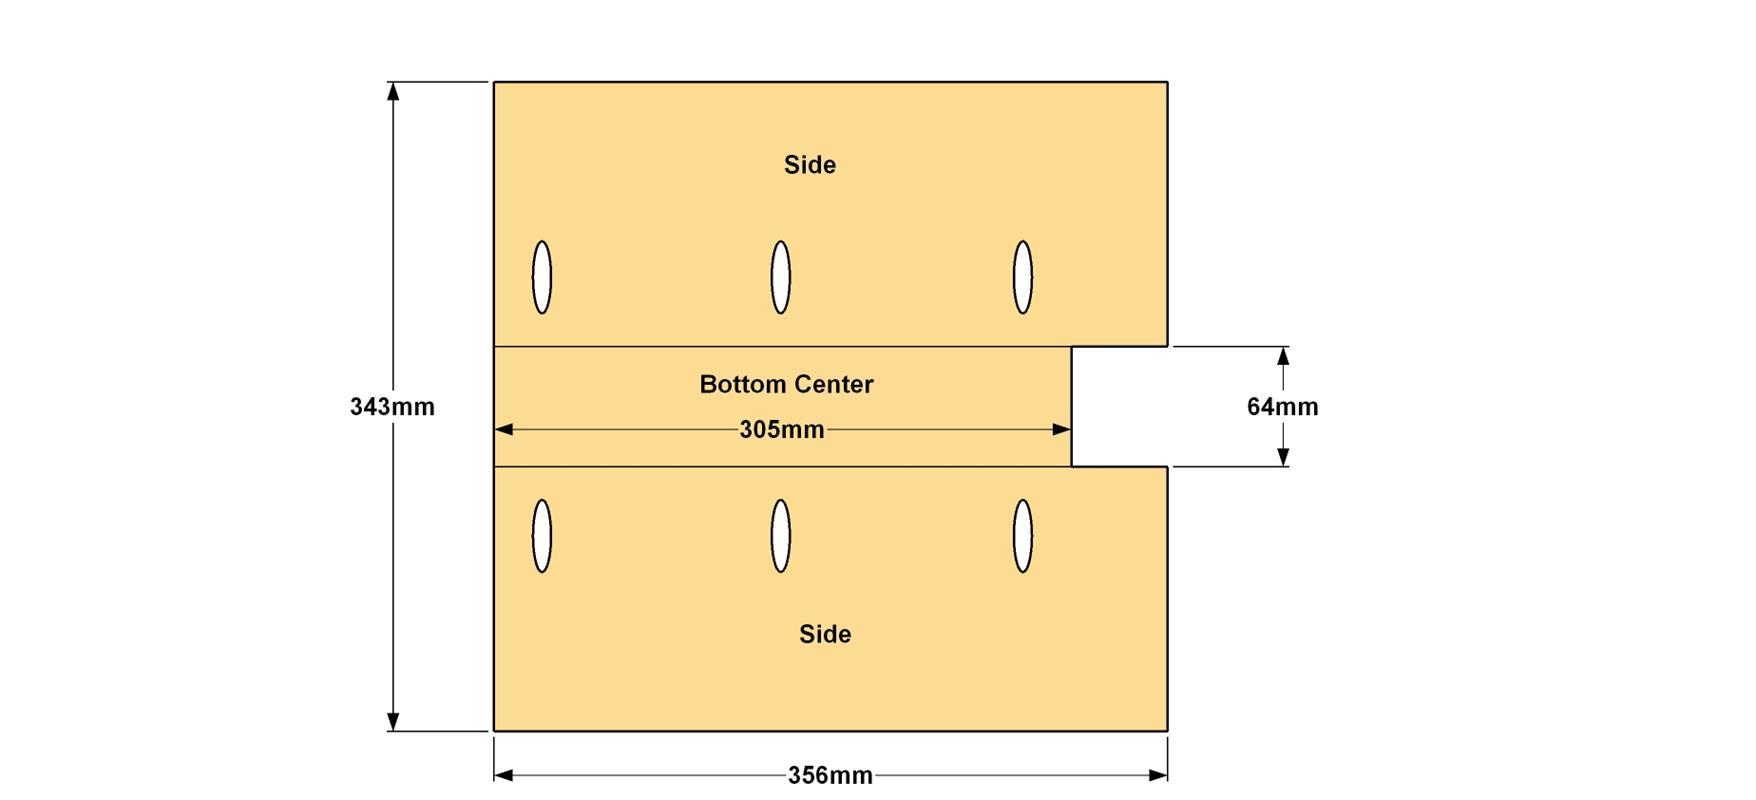
Assemble the Bottom Panel
Assemble the bottom panel using two Sides and the Bottom Center. Spread waterproof wood glue on the edges, and then secure the parts with 32mm fine-thread pocket-hole screws. Use clamps use clamps and take care to get the faces as flush as possible. After the glue dries, sand the panel flat and smooth.
-
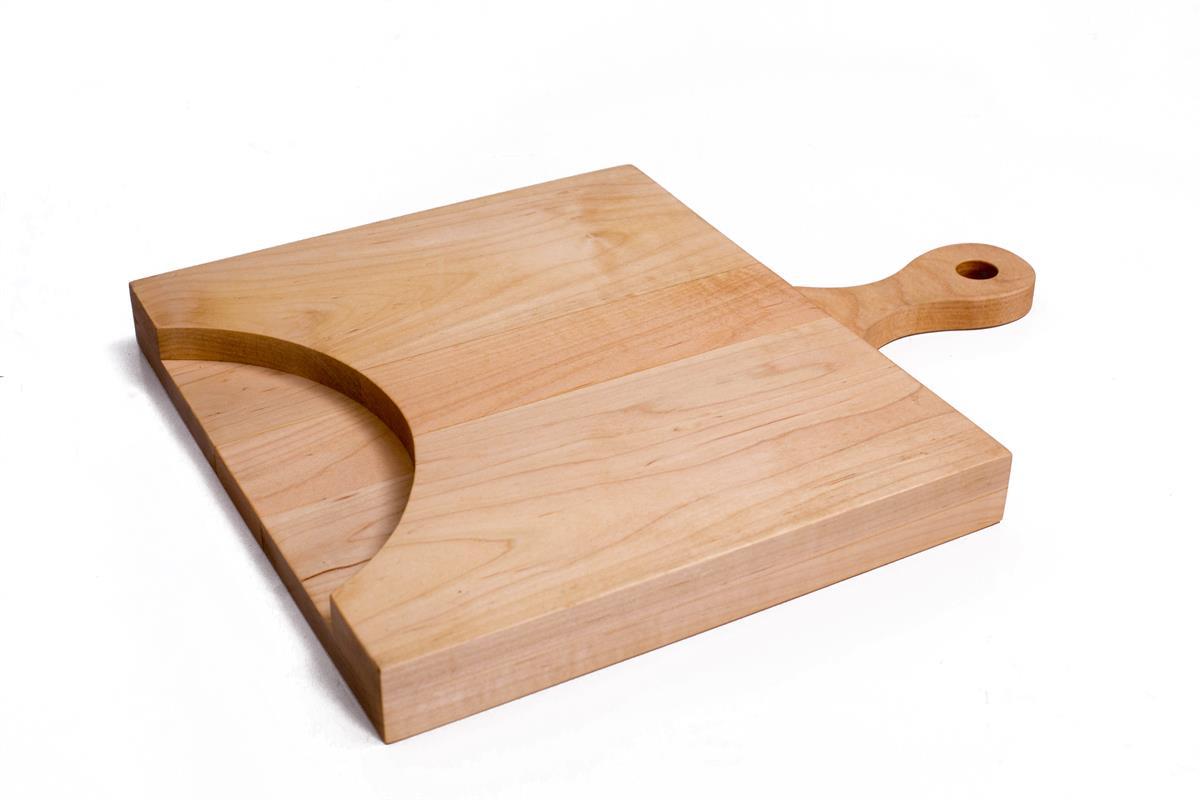
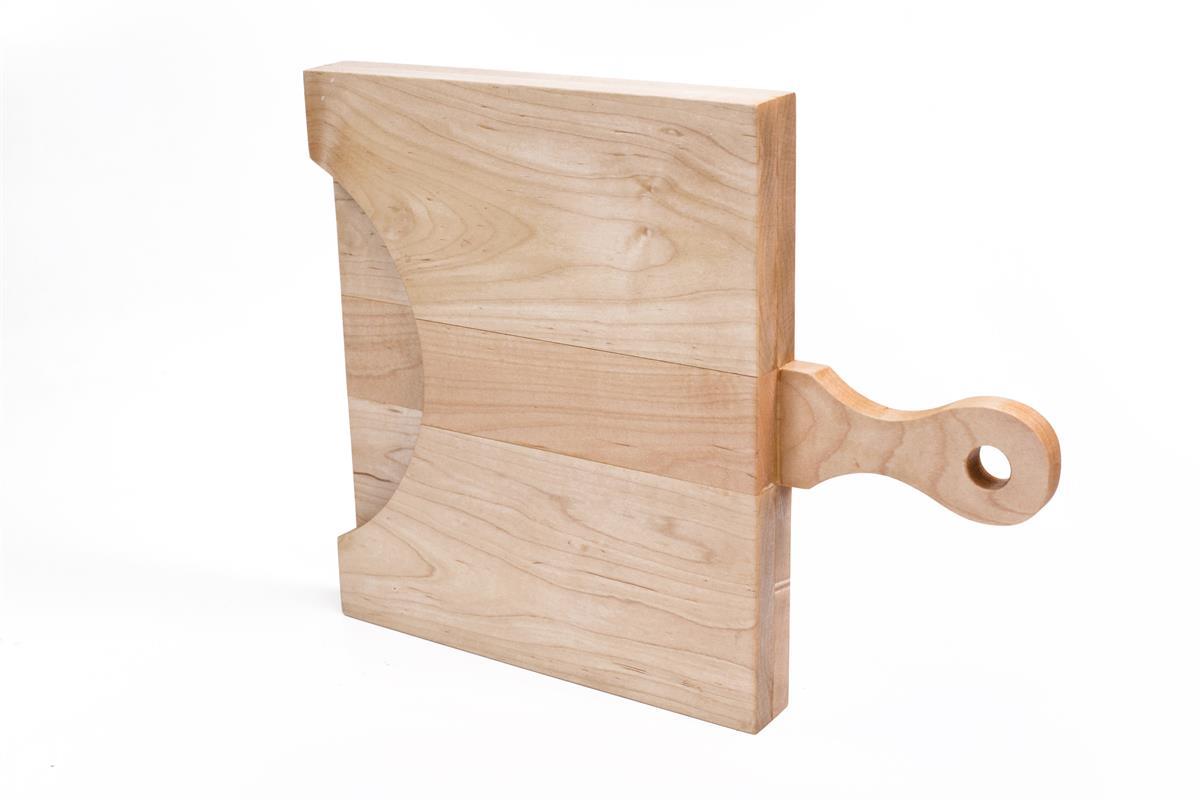
Cut the Plate Recess
Lay out the plate recess in the bottom panel as shown. Cut out the pattern using a jigsaw and a fine-tooth blade. Sand the edge smooth.

-
Assemble the Top Panel
Attach the Handle to the two remaining Sides using waterproof glue and 32mm fine-thread pocket-hole screws as shown. Again, make sure that the Handle is flush with the two Sides. Sand the panel smooth and flat after the glue dries.
-
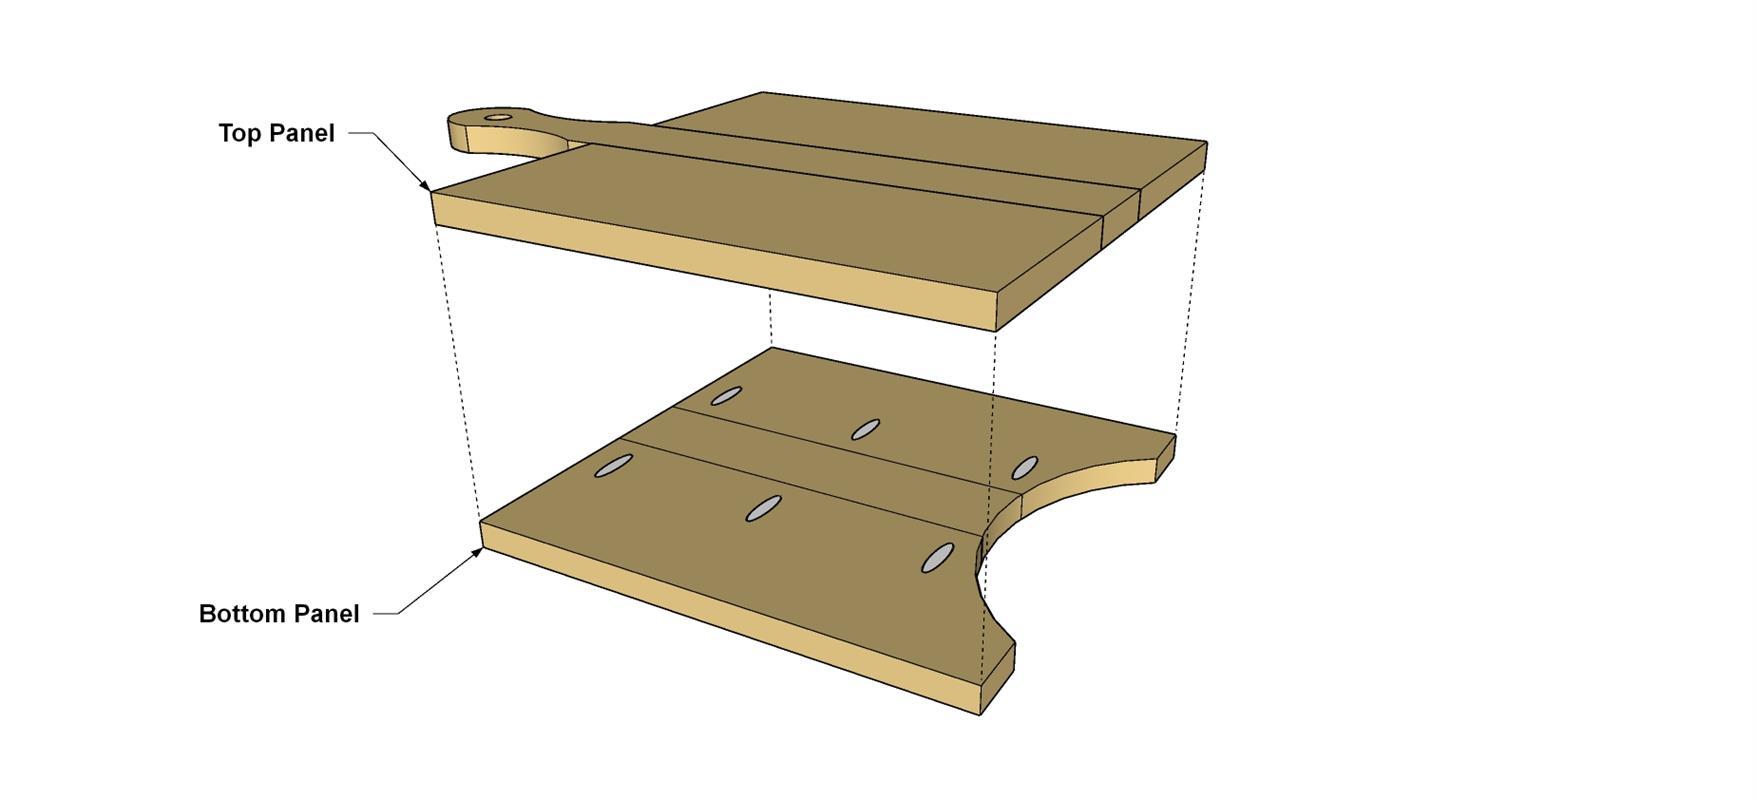
Glue Up the Cutting Board
Apply waterproof glue to the face of the lower panel that has pocket holes, spreading a thin layer evenly over the surface. Place the lower panel on the pocket-holed face of the upper panel. Align the edges of the two panels and secure them with clamps. Allow the glue to dry and then remove the clamps. Sand the edges and faces smooth, and then slightly round off the exposed corners with a sander to get rid of the sharp edges.
-
Apply the Correct Finish
Because the Cutting Board is intended for preparing food, it's important to use a food-safe finish. A couple examples of these are butcher block oil, or salad bowl finish. We chose butcher block oil. Essentially, both of these finishes are mineral oil stabilized with Vitamin E. This compound is approved by the FDA, and is safe for all food preparation surfaces. Apply a liberal coat of finish to all surfaces, and let it soak in, reapply to any areas that soak in completely. Let the cutting board sit for 15 minutes or so, and then wipe off any excess. Over time, you’ll want to reapply oil as the cutting board dries out from use and washing.