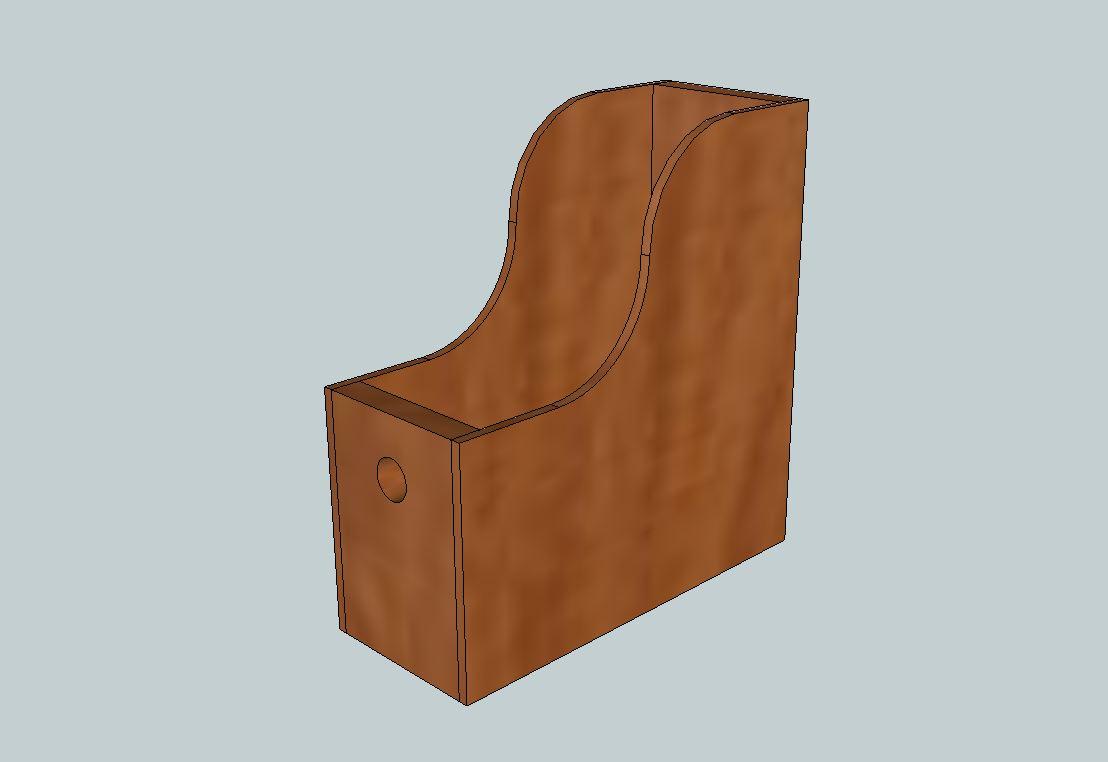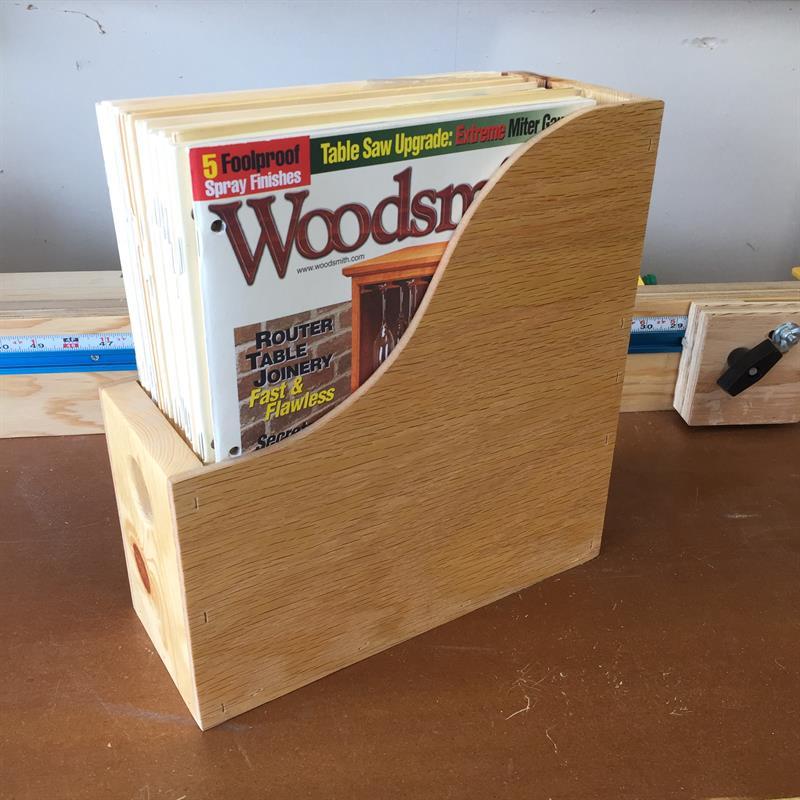
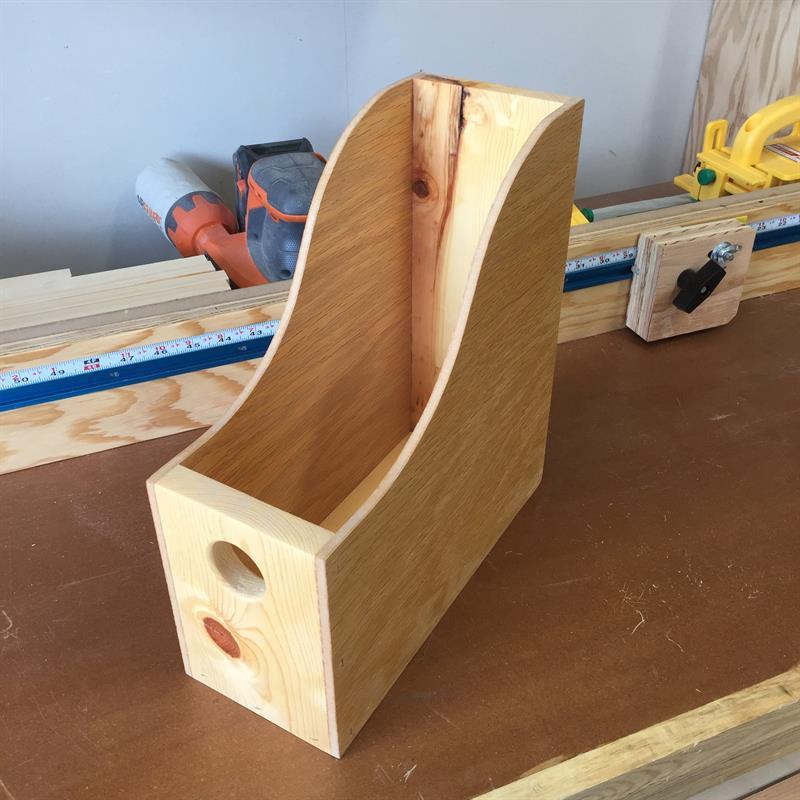
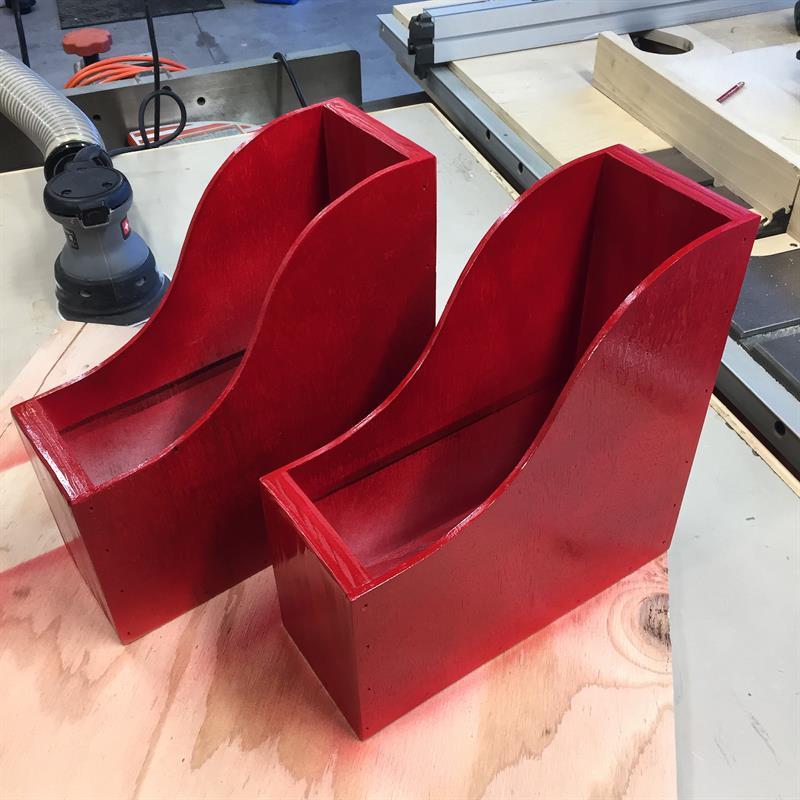


Make these simple, strong magazine files/holders for your ever growing DIY periodicals. These take up minimal space, are effective for organizing and are customize-able to your needs. Enjoy this build!
Tools
Kreg Tools

Other Tools
-
Jigsaw

-
Table Saw
-
Tape Measure
-
Drill (cordless)
-
Nail Gun
-
Sander
Materials
Wood Products
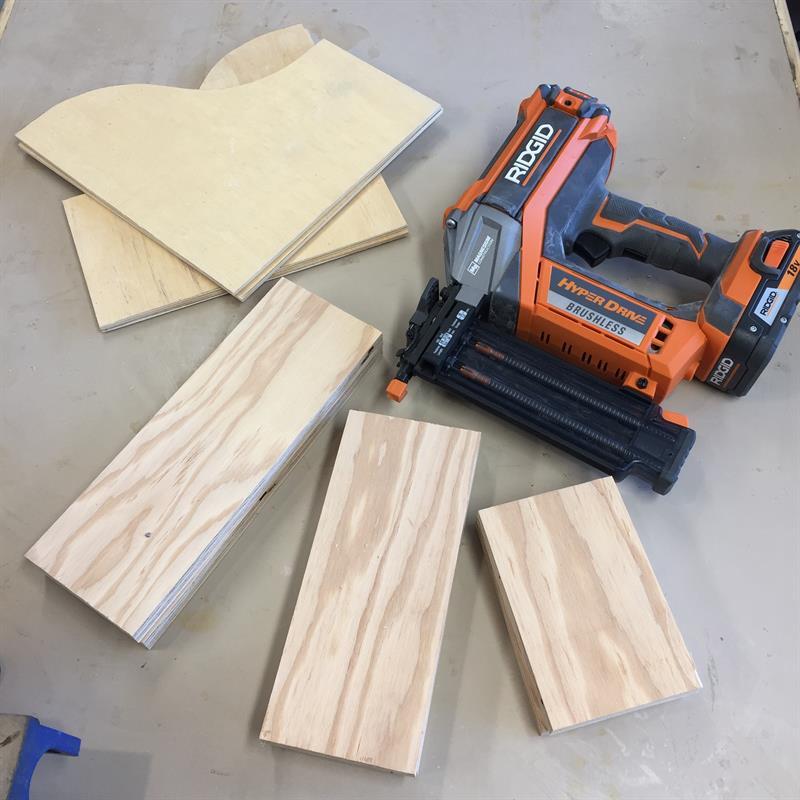
- 1 Board , 1x6 , 36"
- 1 Plywood , 1/4" Thick , Quarter Sheet
Hardware & Supplies
- 4 Kreg 1-1/4" pocket screws (optional)
- 20 18 gauge brad nails
Directions
-
Prepare front, back and bottom
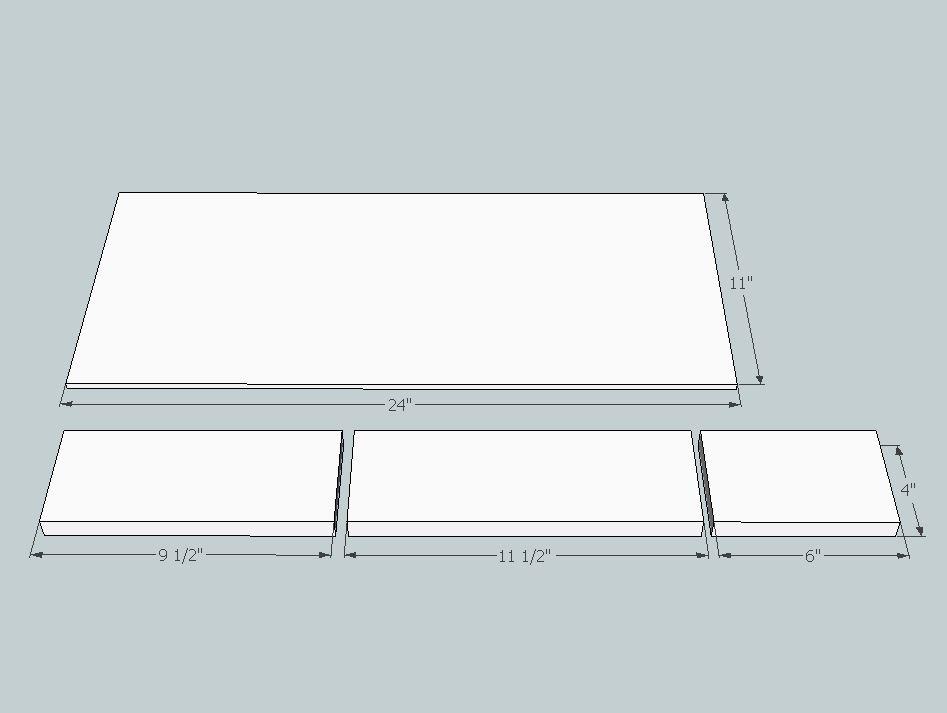
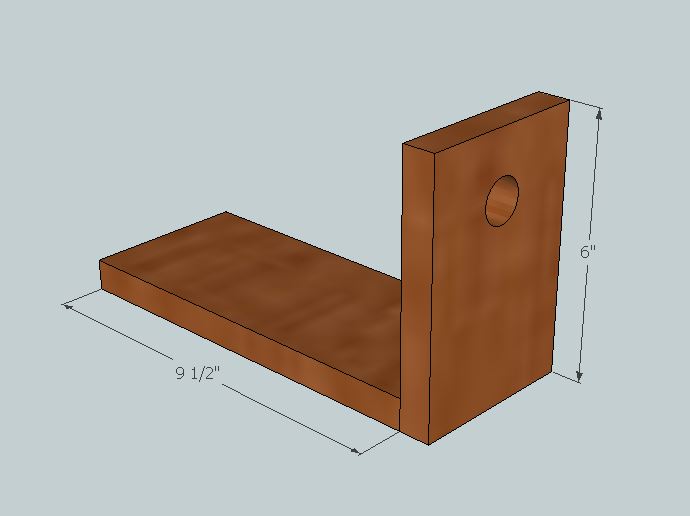
To begin, prepare the front, back and bottom to the sizes in the cut list/picture.
a)1X6 or 3/4" plywood can be ripped down to 4 inches. I have found that a 4 inch width is a perfect capacity for magazines and such. Feel free to make changes to accommodate your space or taste.
b) Next crosscut your freshly ripped pieces to the corresponding lengths in the cut list. These dimensions work well for me but can be adjusted to fit your magazines, books or space.
c) This is a perfect project to batch. Rip and crosscut till your heart is content.
d) If desired, drill a 1-1/4 inch hole in the fronts at a center mark that fits your fancy. They look great with and without holes. Round over the hole with a router or sander as desired.
-
Prepare sides
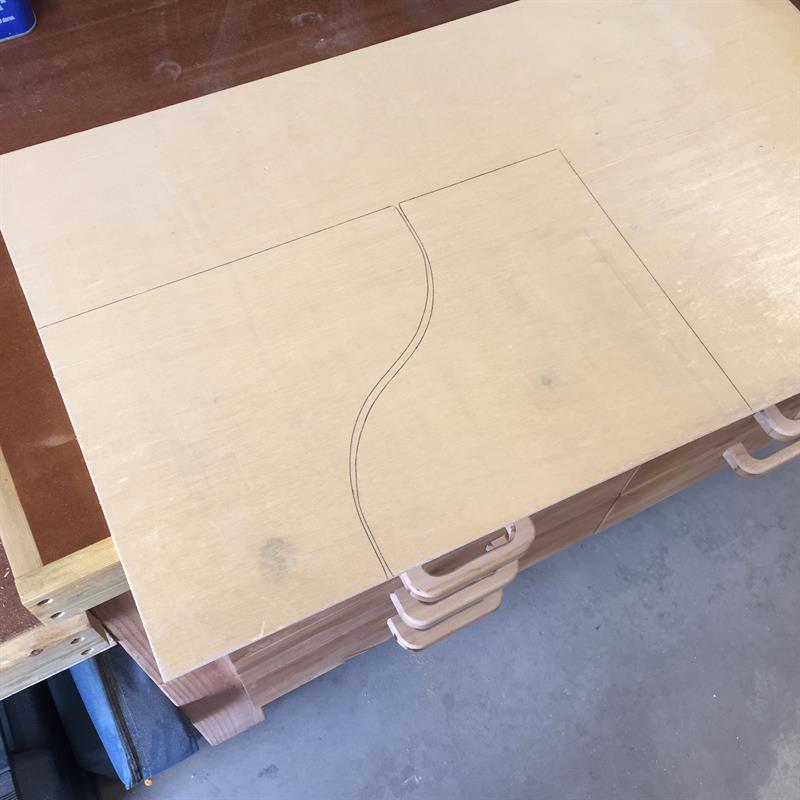
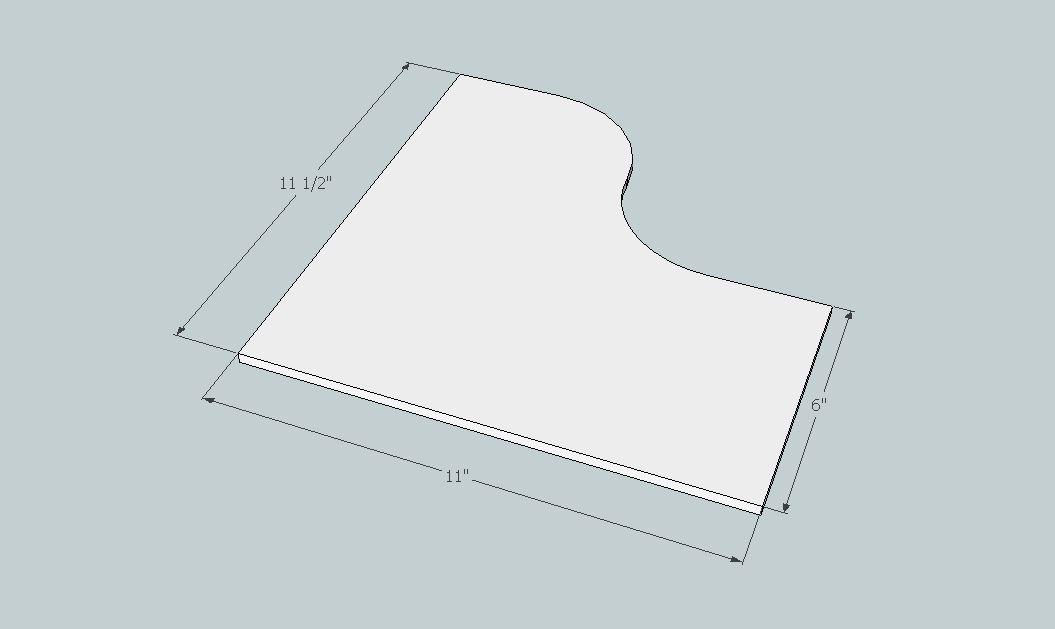
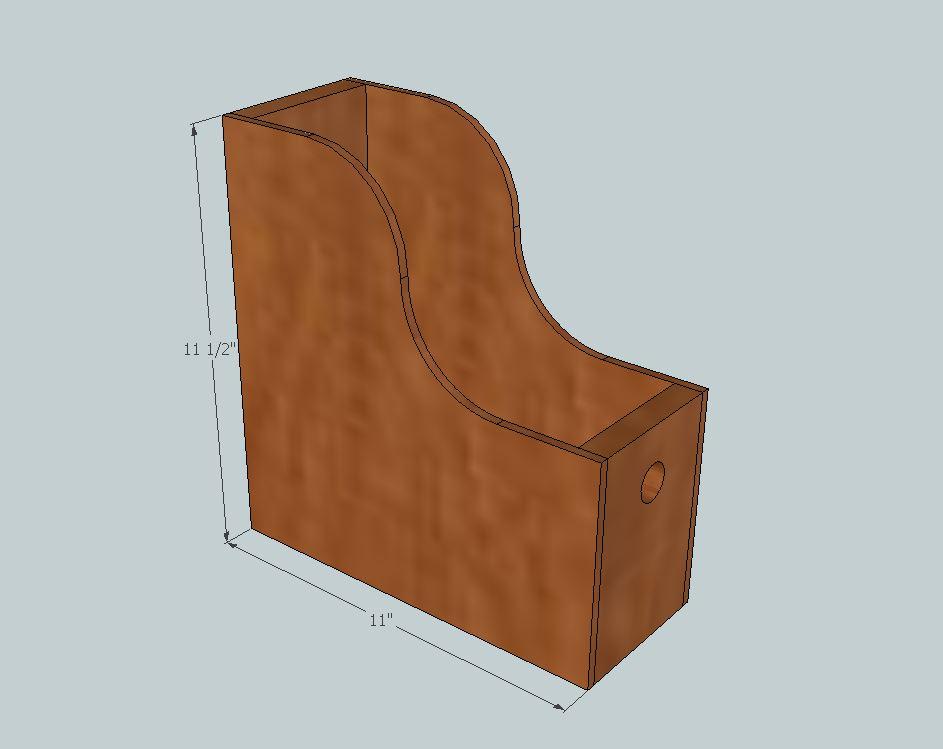
Secondly, prepare the sides for each holder from a 1/4 inch piece of plywood.
a) I have found it easiest to keep the plywood large and draw out my design for the sides then cut them out.
b) NOTE: The front is 6 inches tall so don't start your curves any lower than 6 inches from the bottom. See picture in cover images.
c) A good radius tool here is a coffee can or stain can. Taking your time to lay out lines for drawing radius lines will keep every thing consistent.
d) Once all the sides are cut out on the bandsaw or with a jigsaw, put them all together and tape the stack together. Now use a sander to smooth the curves and shape the sides to a uniform shape for all pieces. This gives them a crisp and consistent look.
-
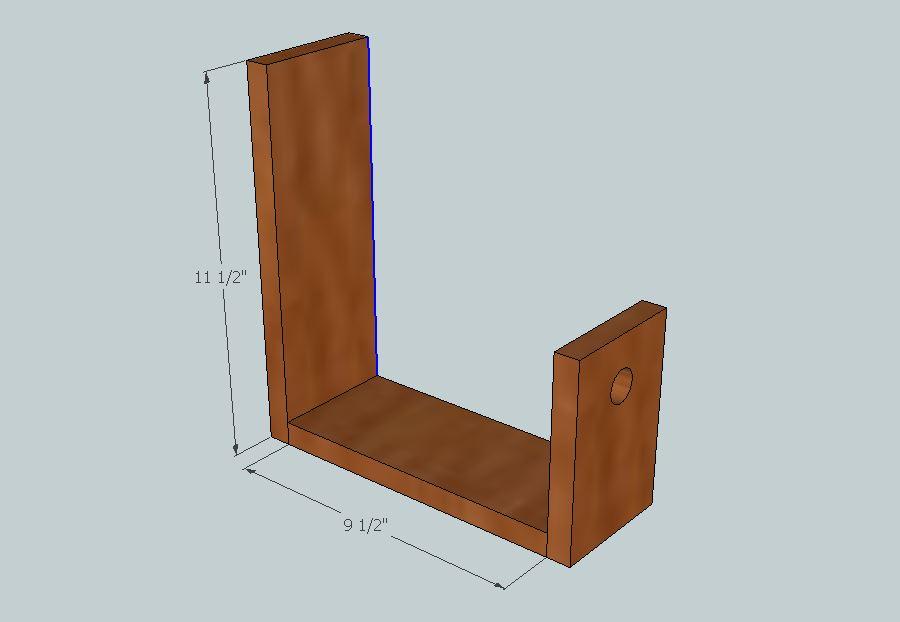
Attach bottom to front
Attach the front to the bottom with glue and nails (pocket holes optional)
a) Option #1: Drill two pocket holes in each end of the bottom. Option #2: No pocket holes. Use glue and brad nails.
b) If you use pocket holes, attach the front so that the pocket holes are on the bottom of the holder where they will not be seen inside an empty holder.
-
Attach back
Attach the back to the bottom with glue and nails. Pocket hole joinery is optional here as well.
-
Attach sides
Attach sides to frame using glue and nails
a) Apply a thin layer of glue on the holder frame.
b) Place one side flush with all sides and nail into place with 18 gauge nails. I used 1-1/4 inch nails as that's my most common size used
c) Repeat for the opposite side
d) Allow glue on all pieces to dry
-
Sand and finish
Sand and finish as desired.
a) I've found that the inside doesn't need sanding. Magazines hold up fine unless the lumber used is quite rough.
b) Sand outside to desired grit. If finishing with lacquer or clear coat I sand to 220 on all surfaces.
c) For children's rooms, painting is a good option and can be fun.