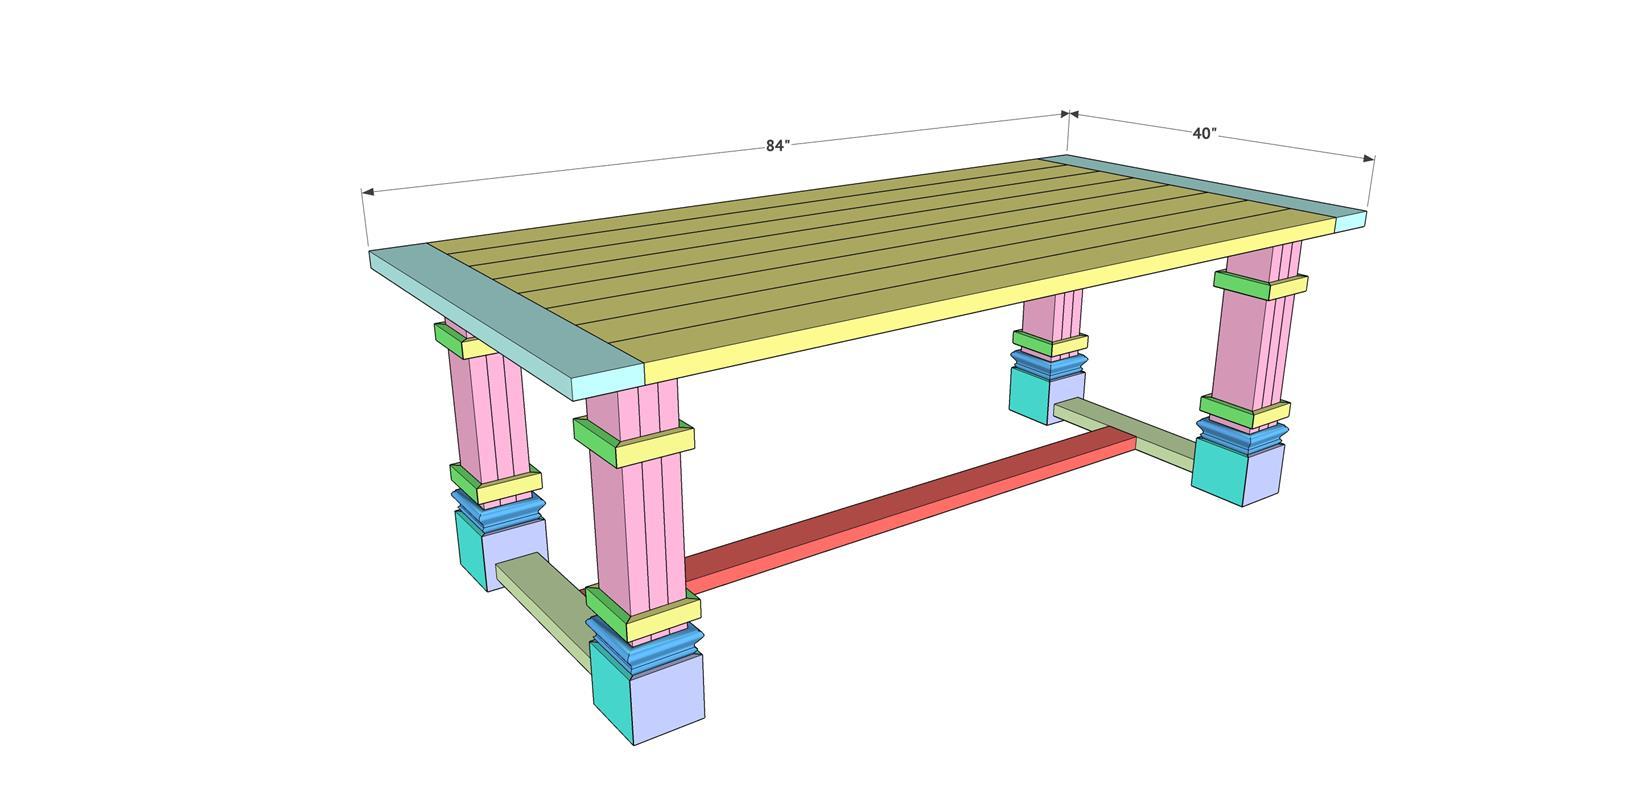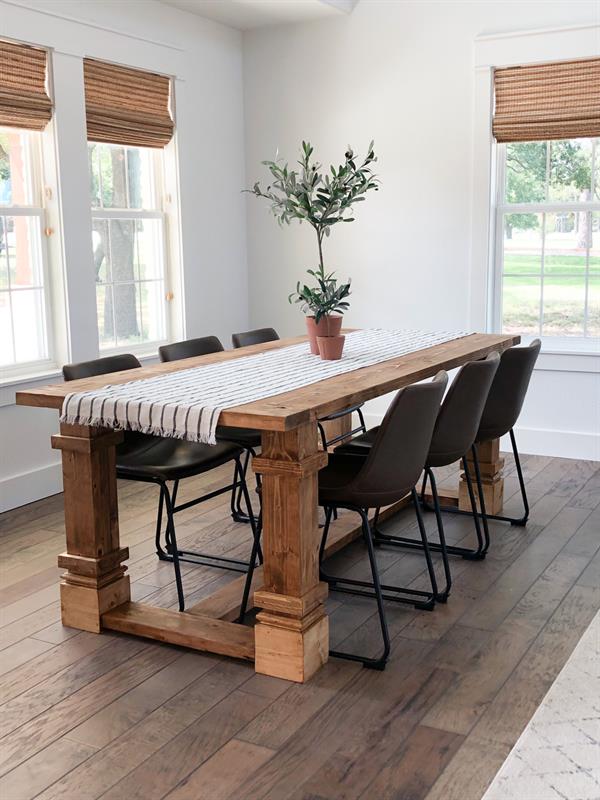


A DIY Modern Farmhouse Dining Table you can build for under $120 in lumber!
Tools
Kreg Tools

Other Tools
-
Miter Saw

-
Table Saw
-
Tape Measure
-
Drill (cordless)
-
Nail Gun
-
Sander
Materials
Wood Products
- 16 Framing wood , 2x6 , 96"
- 3 Pine or white wood , 1x2 , 72"
- 1 Pine or whitewood , 1x6 , 48"
- 1 Pine or white wood , 1x6 , 72"
- 1 Pine , Casing , 96"
Hardware & Supplies
- 50 Pocket Hole Screws - 2.5"
Cut List & Parts
- 1 Cut list , 1

Directions
-
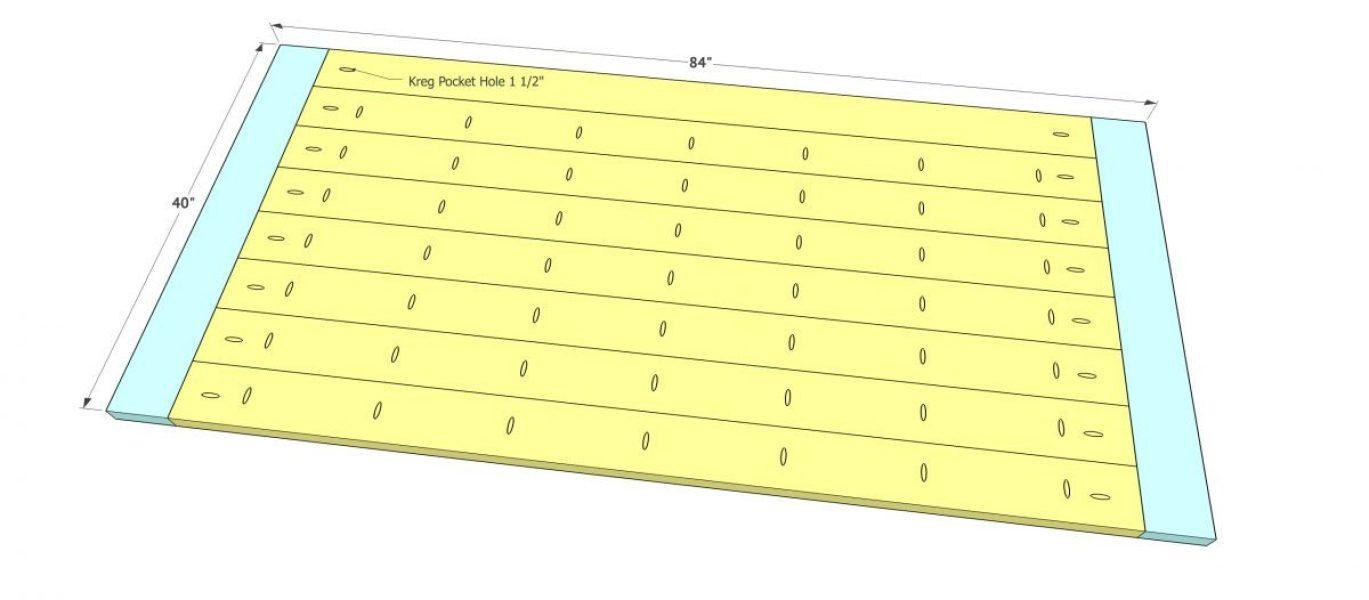
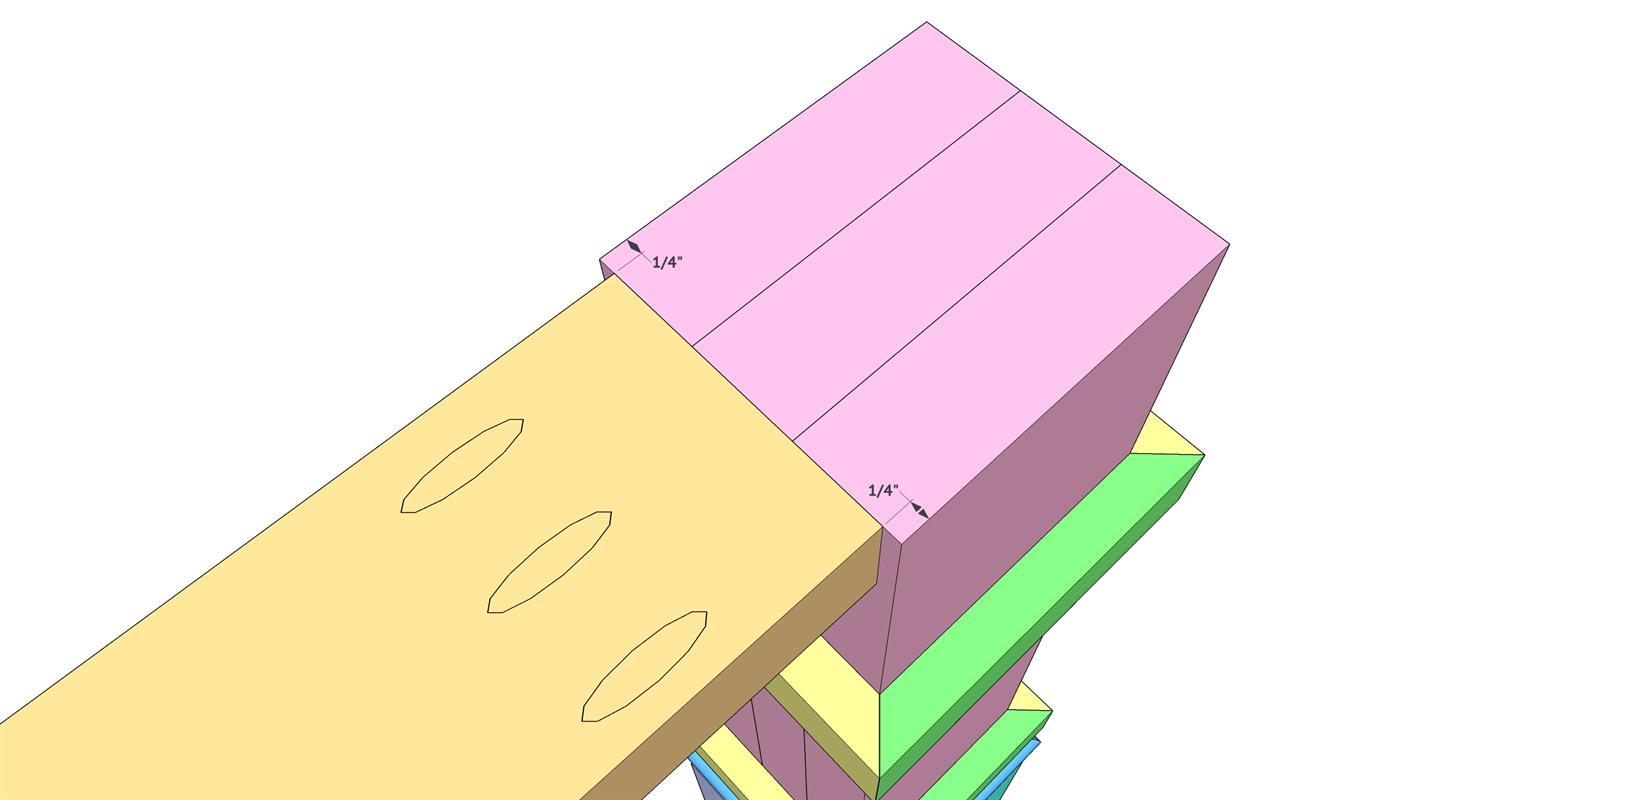
Step 1
The first step to building this table is creating the table top. These are 2×6 boards that we ripped down to 5”. We added 1.5” pocket hole screws down one long side of all but 1 of our plank boards, and also at the ends of each plank board. We attached the plank boards together first using 2.5” pocket hole screws. Once all plank boards are attached, line of the boards on each end and mark the exact measurement of the breadboards. Attach the breadboards using 2.5” pocket hole screws.
-
Step 2
Now it’s time to build the legs. You will build 4 identical leg assemblies.
The first step is to laminate 3 boards together. Add a good amount of wood
glue between each board, and attach them using 2.5” wood screws through
the outside pieces and into the inside pieces. I lined my screws up 5.5” from the top and 3” from the bottom so that the holes from the screws would be covered with trim in a later step.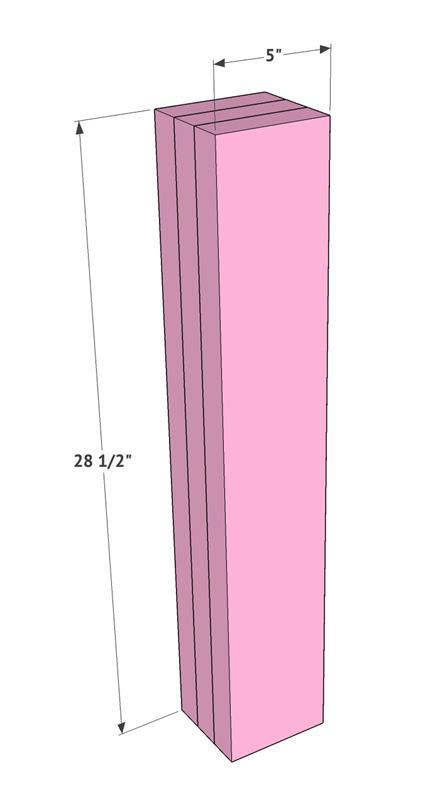
-
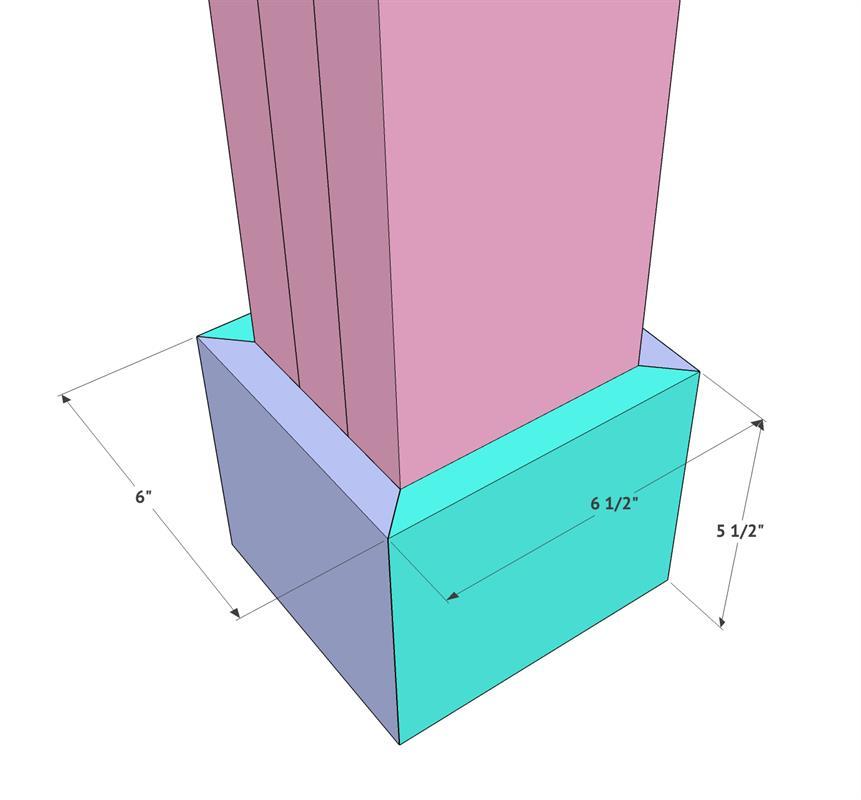
Step 3
At the bottom of your legs, measure and cut 1×6 boards and attach them using wood glue and 1.25” brad or finish nails. Each corner is cut at a 45˚ angle.
-
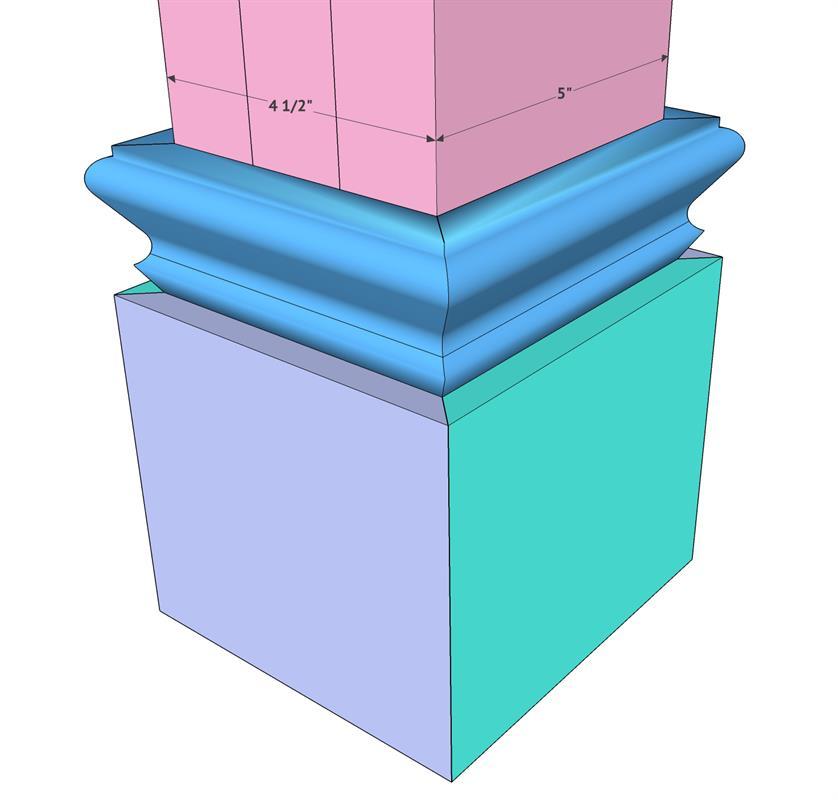
Step 4
Now add the trim. I used 1.5” wide casing, but you can have fun with this part to get a very custom look! Cut each angle to 45˚ and attach just above the 1×6 using wood glue and 1.25” brad or finish nails.
-
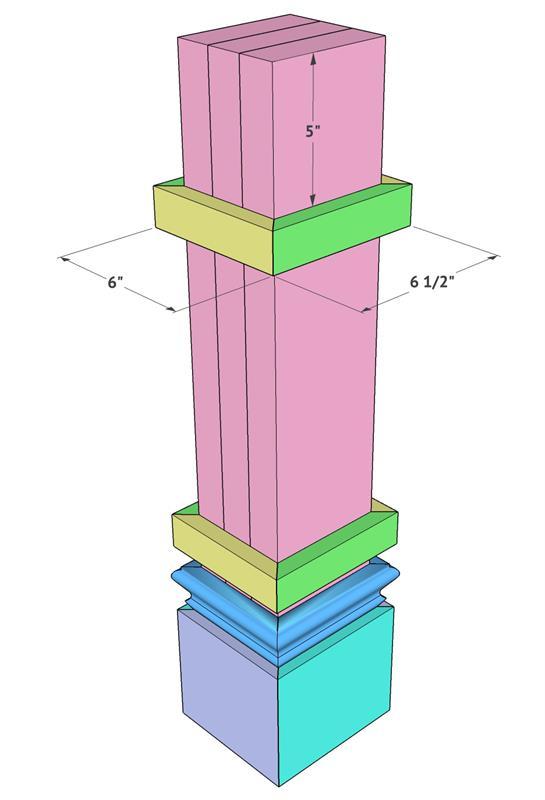
Step 5
Measure and cut the 1×2 trim next. These are also cut at 45˚ angles. Line them up 1” from the to of the trim piece, and attach using wood glue and 1.25” brad or finish nails.

-
Step 6
The top 1×2 trim will be attached the same way. Line it up 5” from the top of each leg.
-
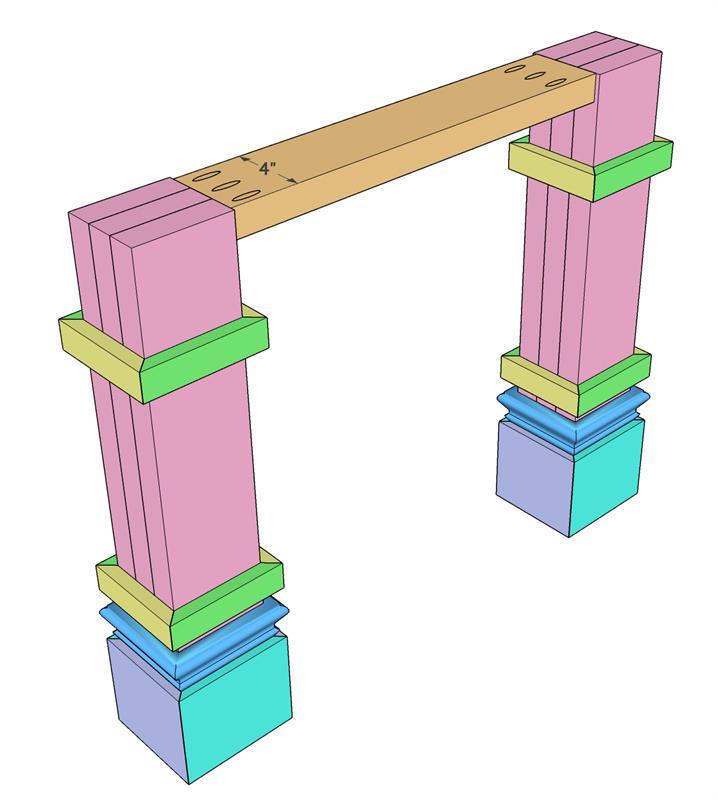
Step 7
Now, attach two of the leg assemblies together. These will attach with the 2×6 (ripped to 4”) board through 1.5” pocket holes. Line the 2×6 board up flush with the top of each leg aseembly and centered as well. Attach using wood glue and 2.5” pocket hole screws. Repeat this with the other 2 legs.
-
Step 8
Attach the bottom runner to both leg assemblies. These will be placed 1” from the bottom of each leg base and centered as well. Attach them using wood glue and 2.5” pocket hole screws through the 1.5” pocket holes.
-
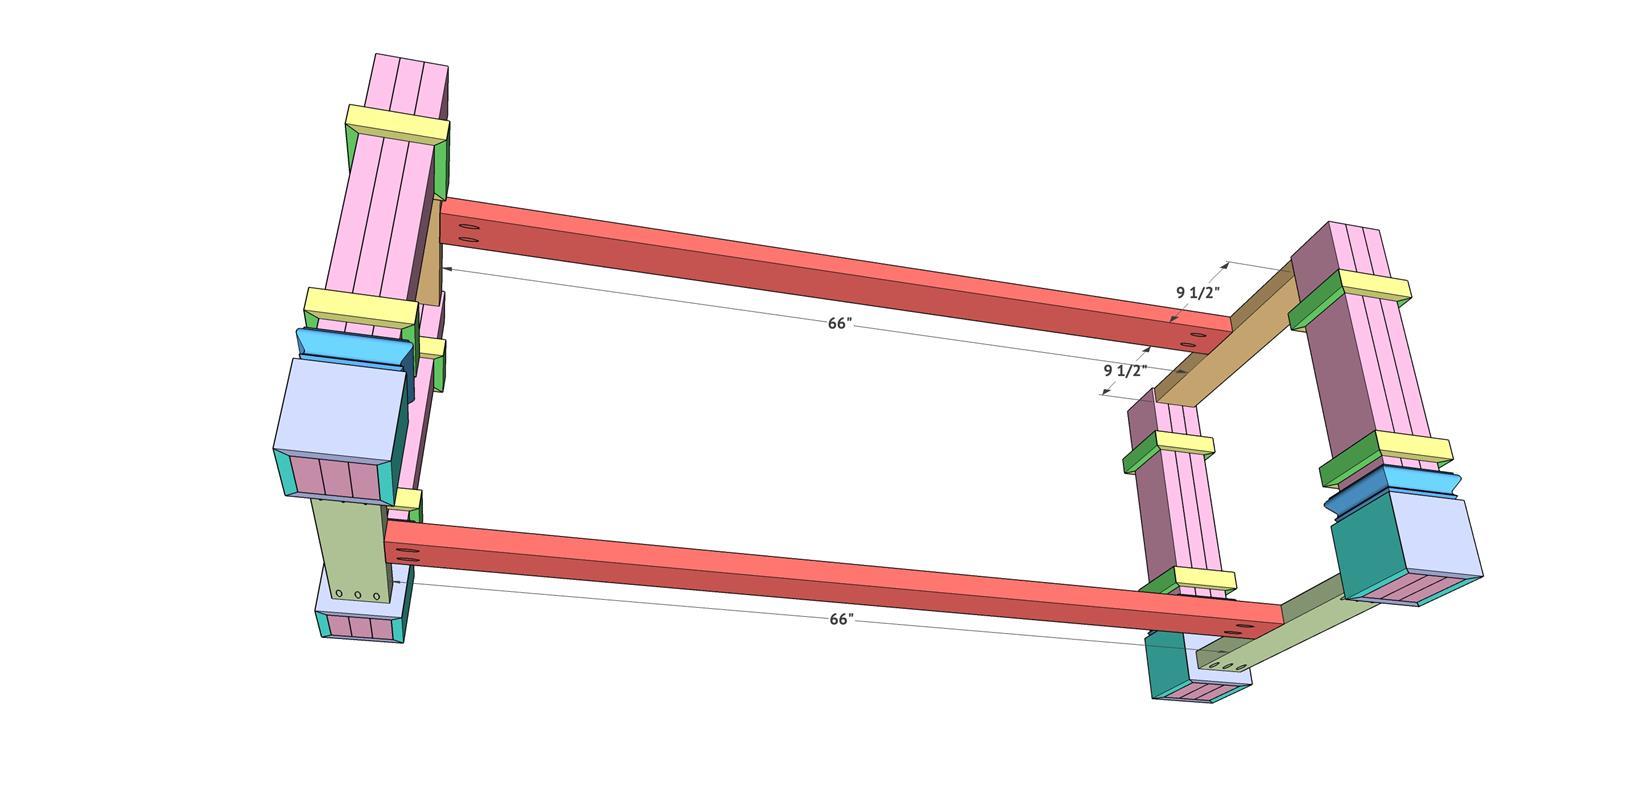
Step 9
Attach the long runners to each leg assembly. These will attach with wood glue and 2.5” pocket hole screws through 1.5” pocket holes on each end of the long runners. Make sure to keep the pocket holes facing down on this part.
-
Step 10
The final step is adding the plank table top to the base. Once you have your table placed in the room it will stay in, line the table top up centered on the base and attach with 2.5” wood screws through the top runners and into the bottom of the table top. Don’t use glue on this part so you are able to disassemble and move if needed.