

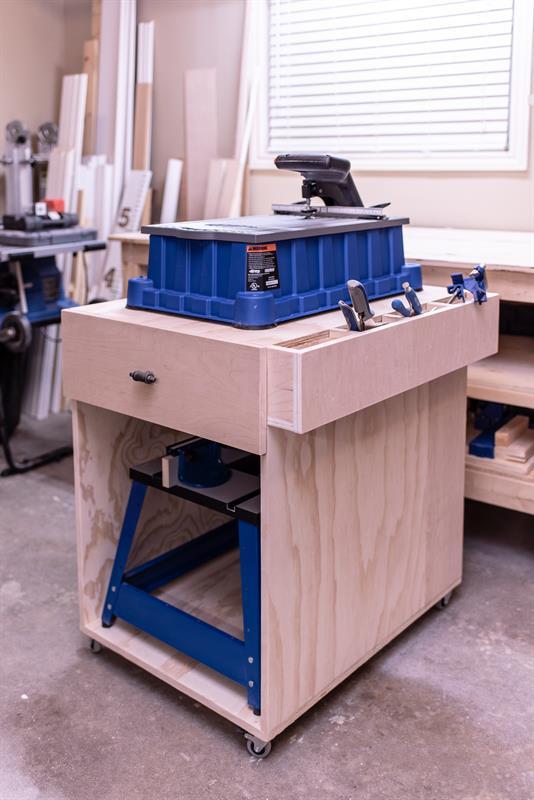
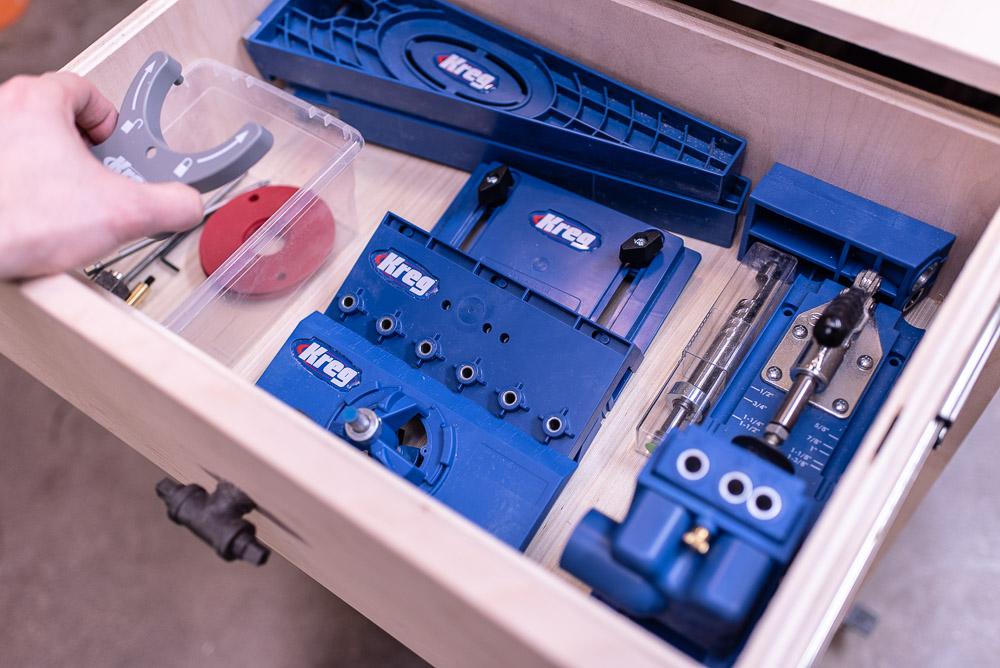
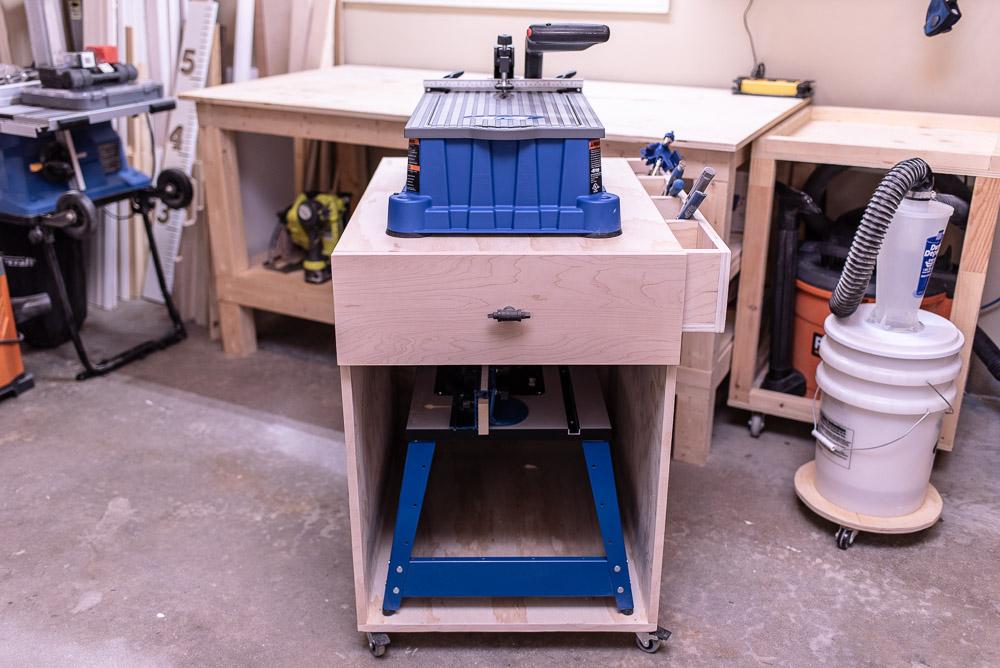


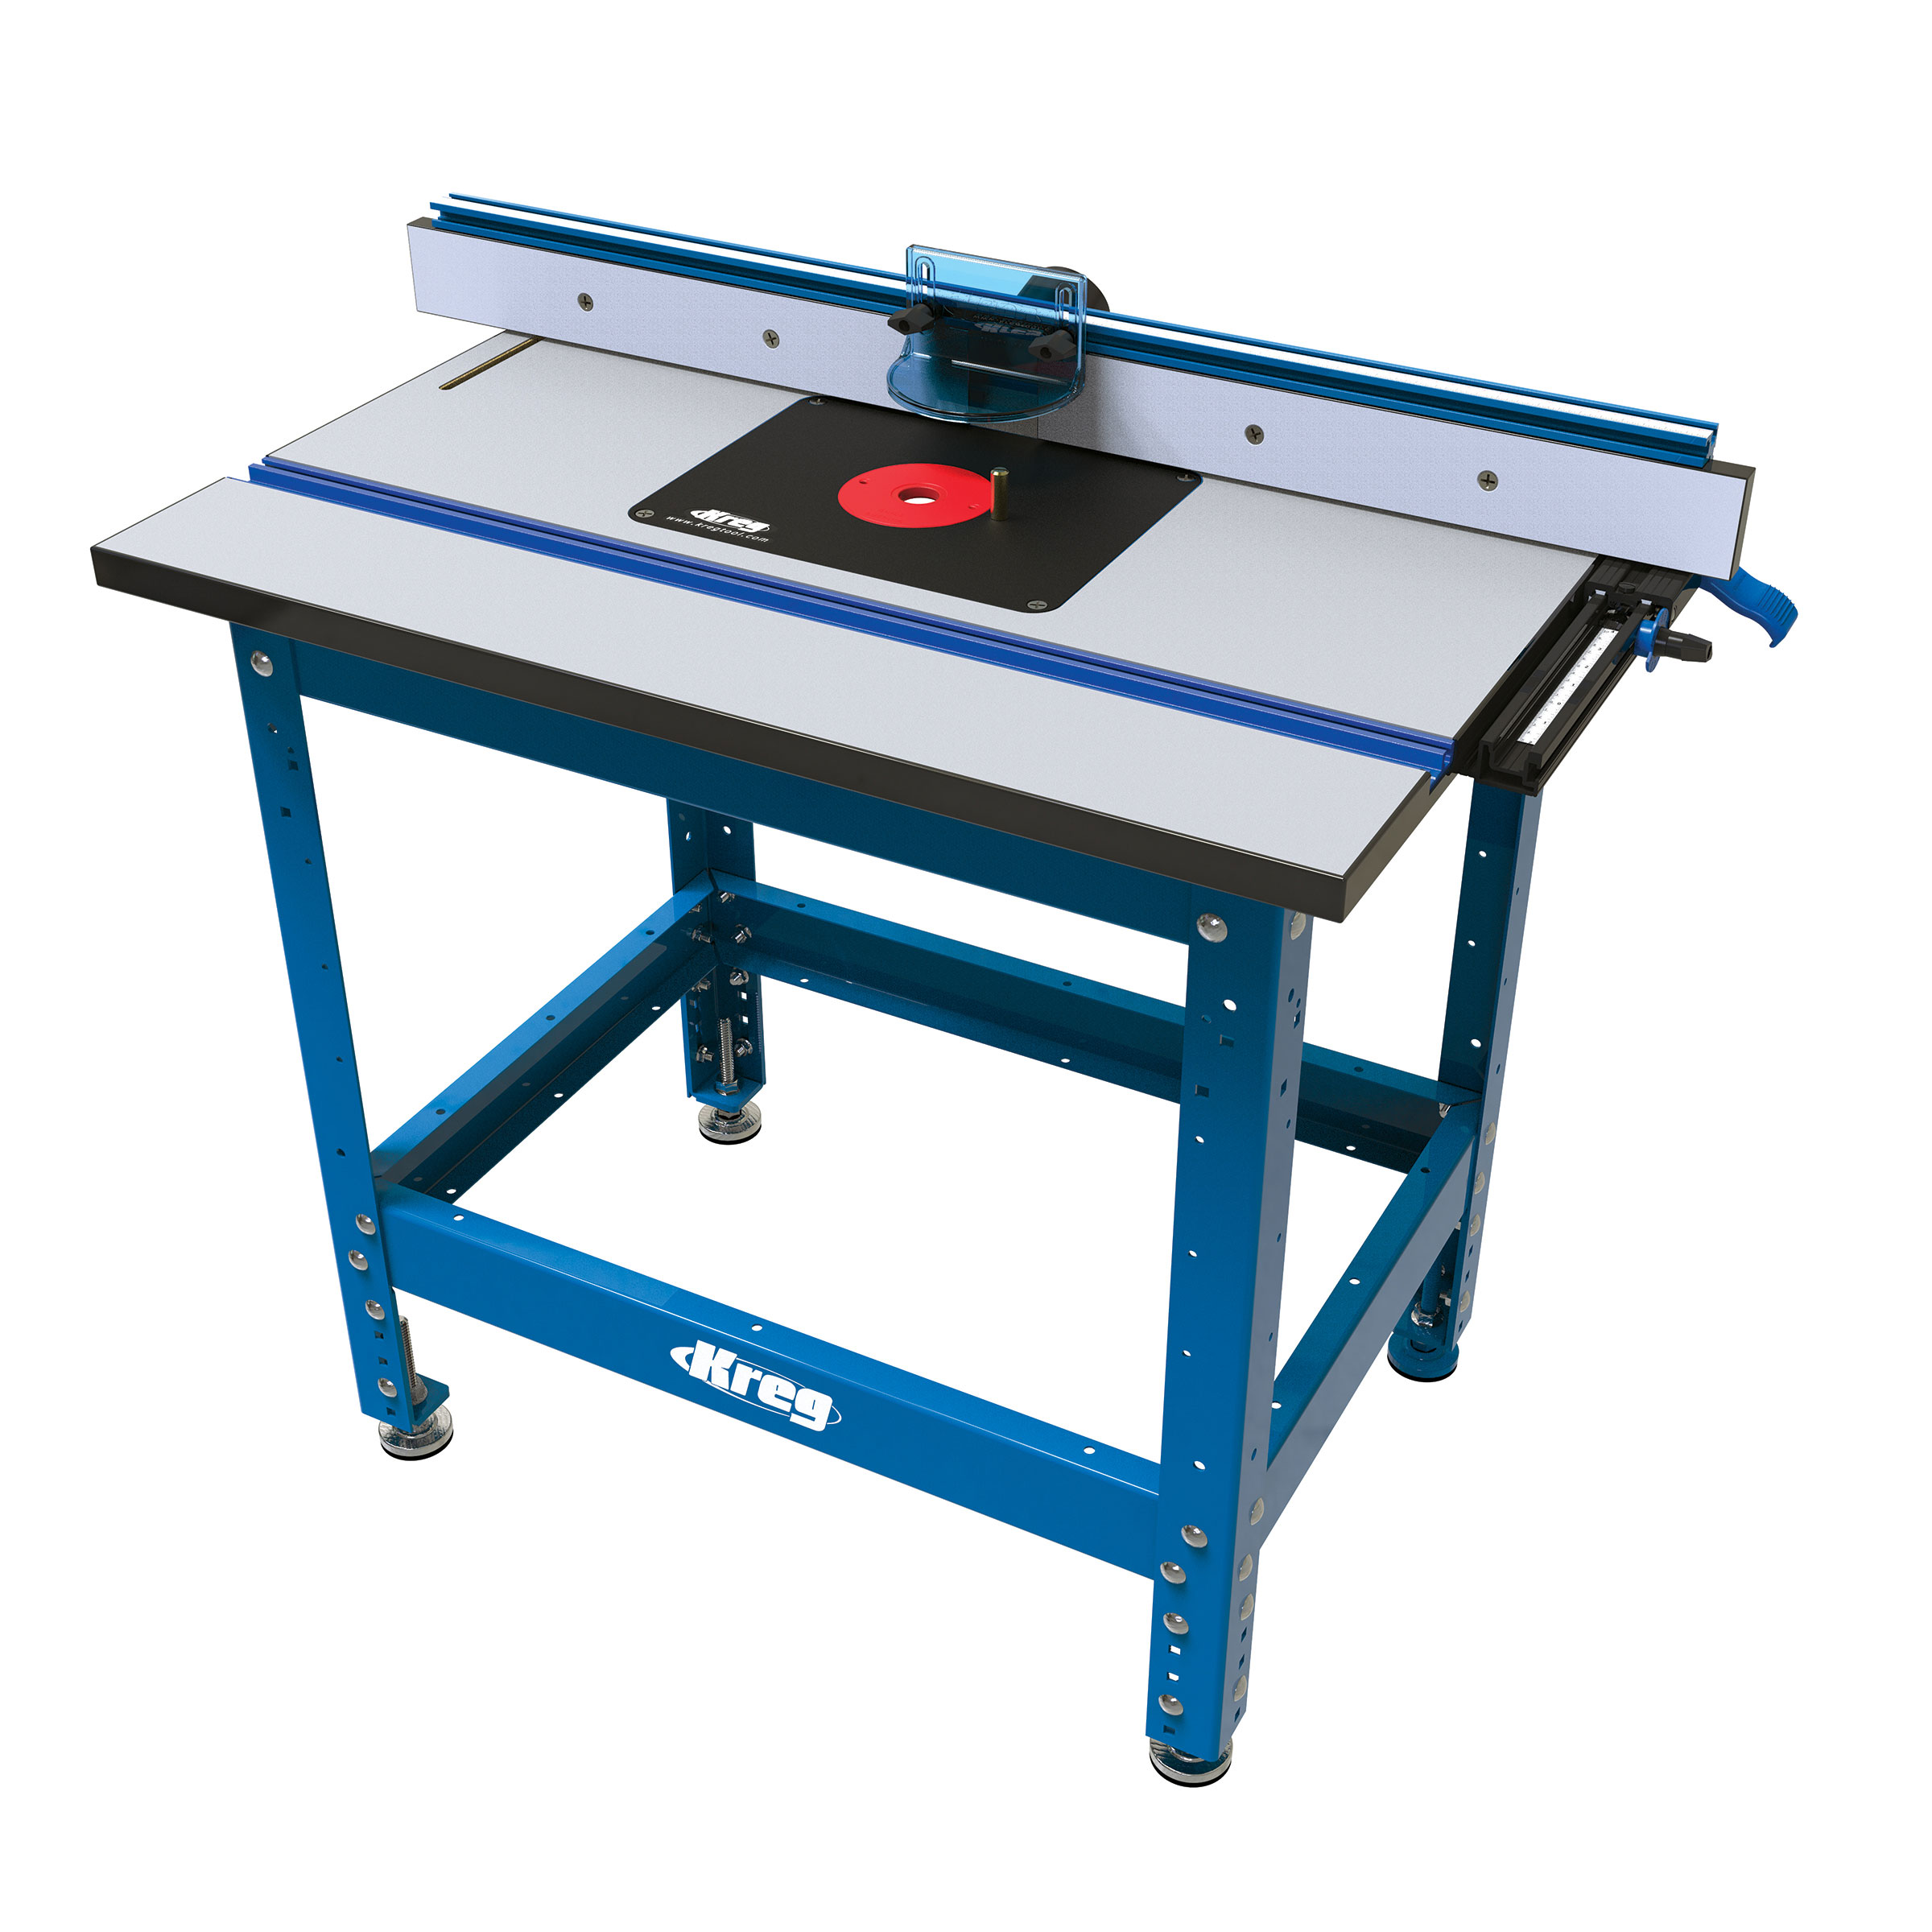
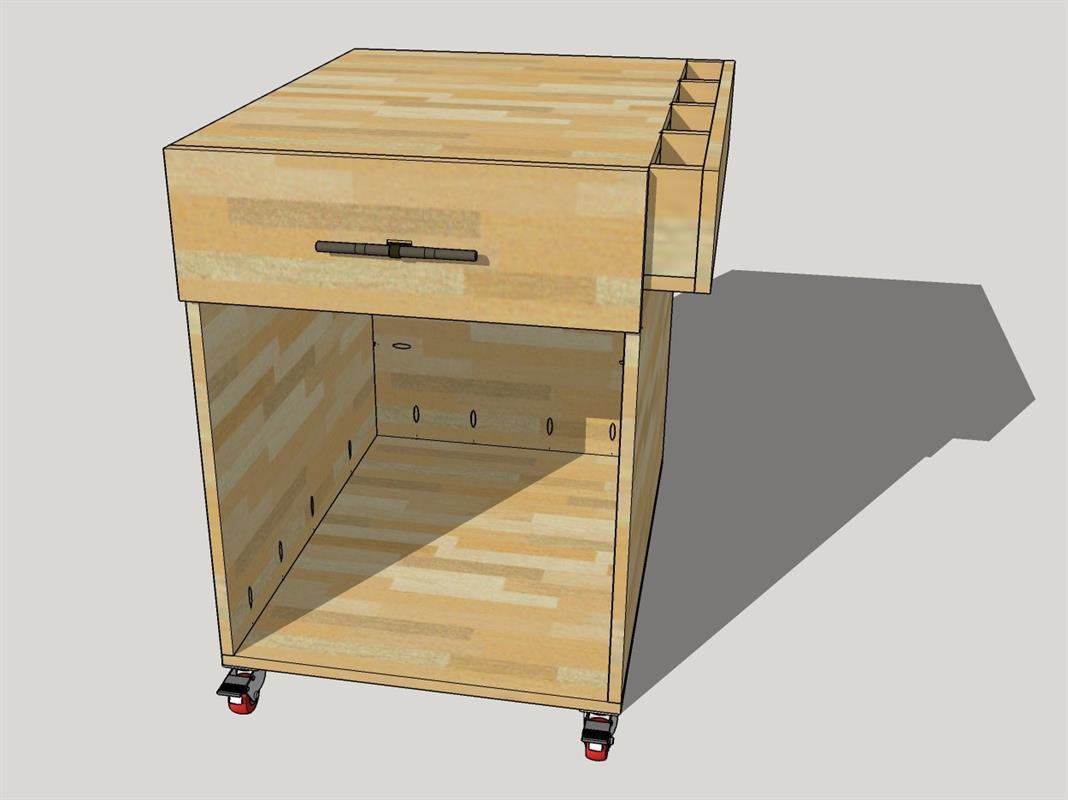
This shop cart is large and sturdy enough to hold both your Foreman or Portable Router Table and all of your Kreg accessories in one place! It can also double as an outfeed table, planer cart or small mobile workstation.
Tools
Kreg Tools


Other Tools
-
Circular Saw (cordless)

-
Drill (cordless)
-
Router
-
Sander
-
Shop Vacuum
-
Tape Measure
Materials
Wood Products
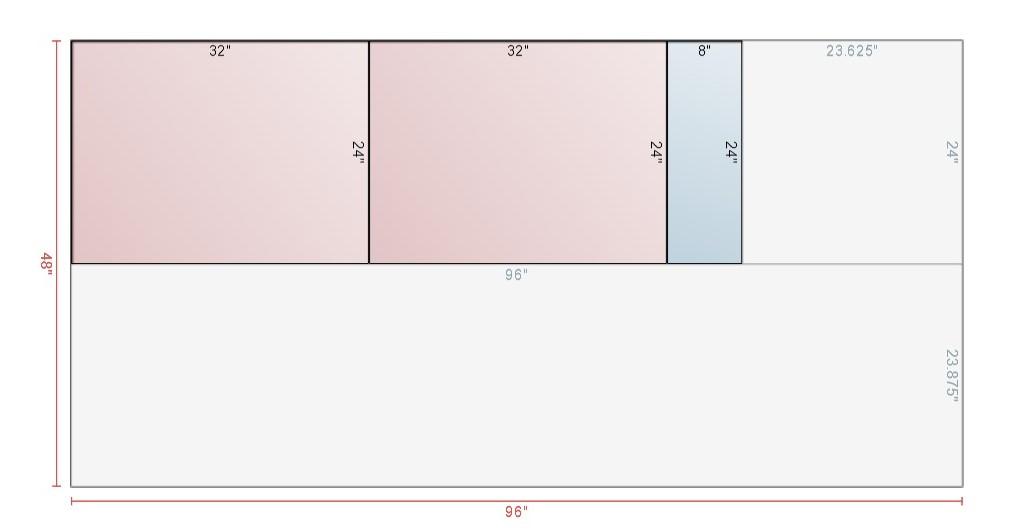
- 2 Plywood , 3/4" Thick , 96"
- 1 Plywood , 1/4" Thick , 24"
Hardware & Supplies
- 1 Set of 14" Ball Bearing Drawer Slides
- 1 Wood Glue
- 48 1 1/4" Kreg Pocket Hole Screws
- 30 2" Brad Nails
- 1 Drawer Pull
- 4 2" Locking Casters
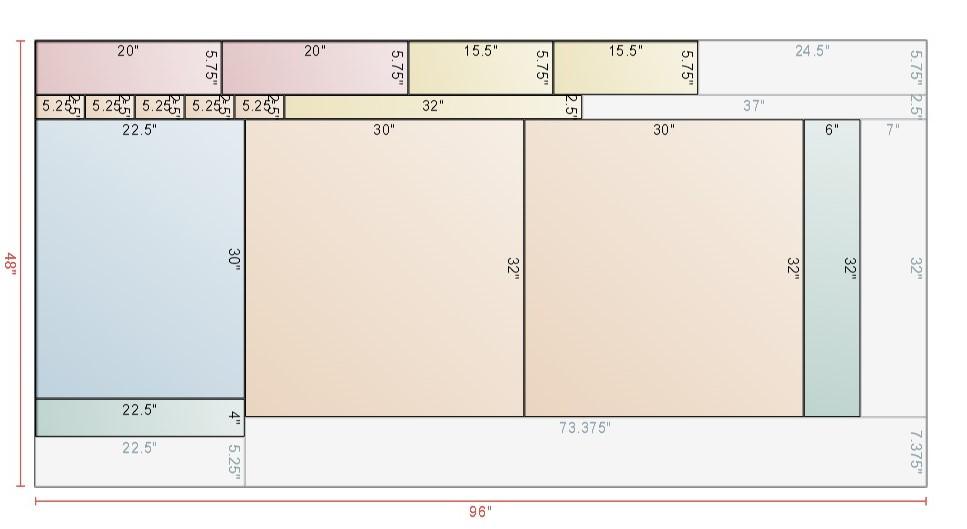
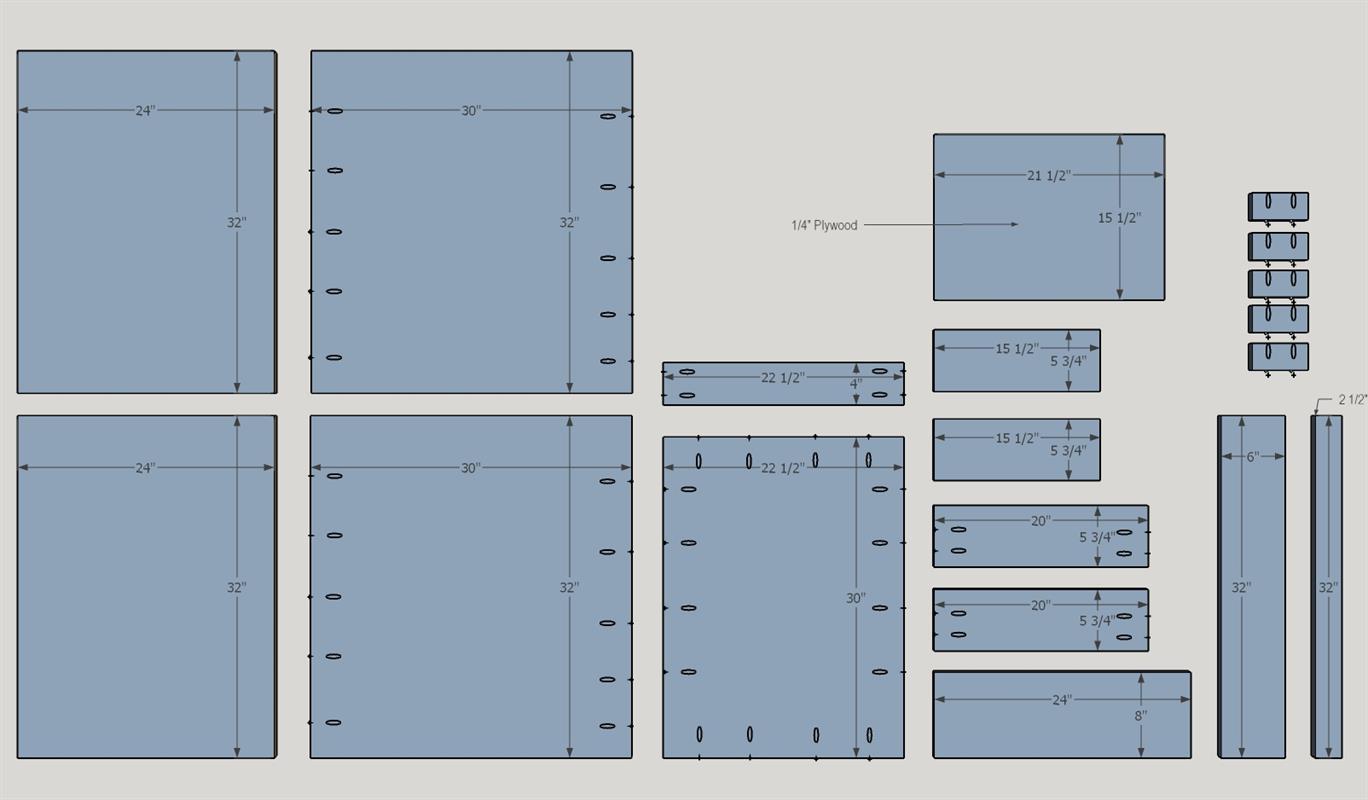
Cut List & Parts
- 1 Back , 3/4" x 30" x 22-1/2"
- 2 Top / Bottom , 3/4" x 32" x 24"
- 2 Sides , 3/4" x 32" x 30"
- 1 Mid Span , 3/4" x 4" x 22-1/2"
- 2 Drawer Guts Front & Back , 3/4" x 5-3/4" x 20"
- 2 Drawer Guts Left & Right Sides , 3/4" x 5-3/4" x 15-1/2"
- 5 Clamp Rack Small Pieces , 3/4" x 2-1/2" x 5-1/4"
- 1 Clamp Rack Outside Piece , 3/4" x 6" x 32"
- 1 Clamp Rack Bottom Piece , 3/4" x 2-1/2" x 32"
- 1 Drawer Bottom , 1/4" x 15-1/2" x 21-1/2"
- 1 Drawer Face , 3/4" x 8" x 24"
Directions
-
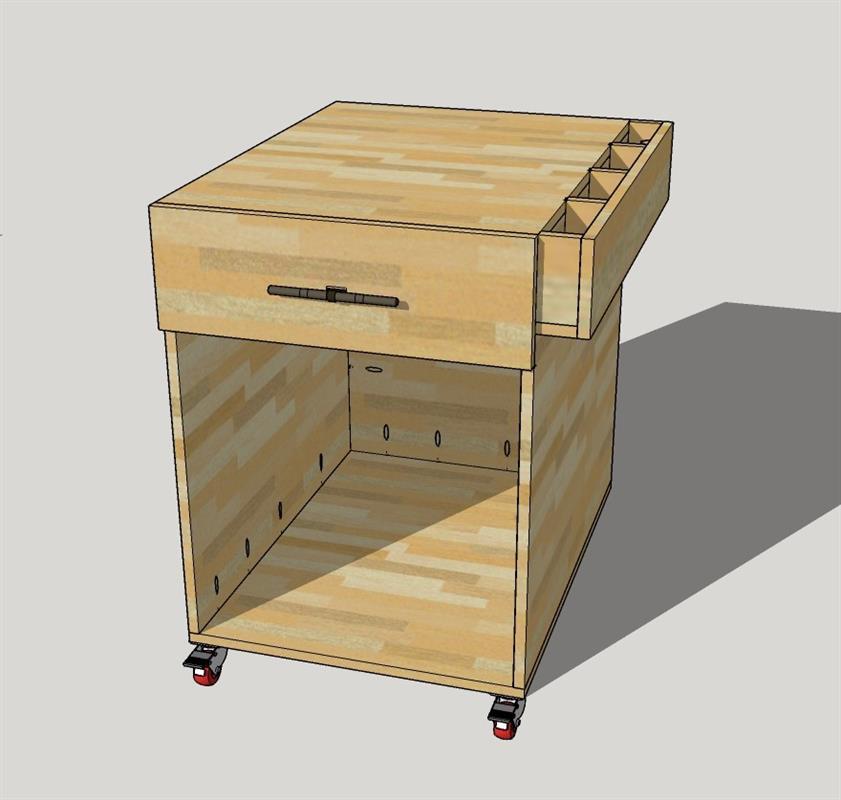
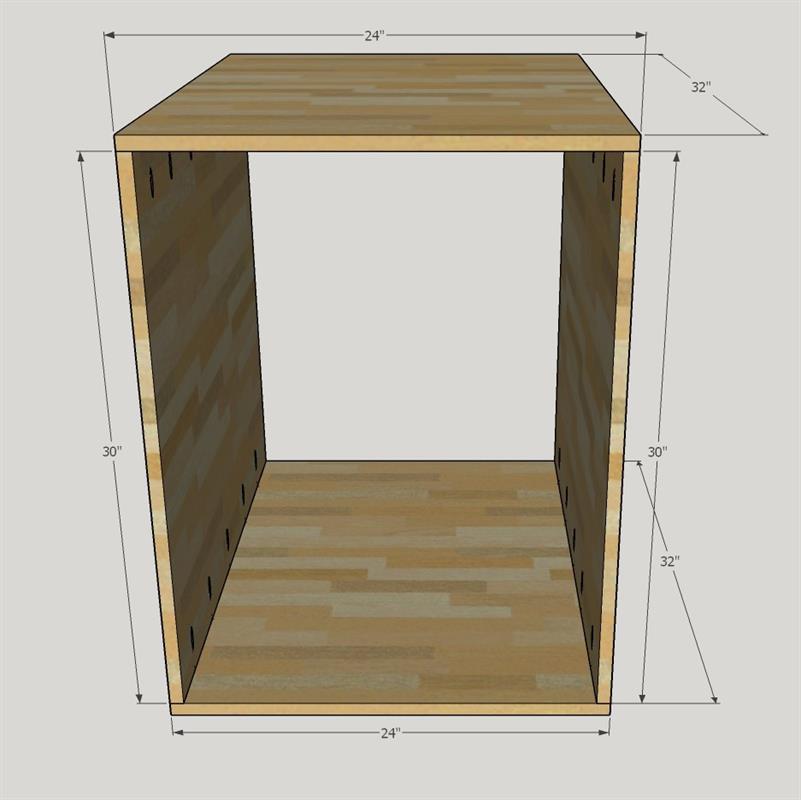
Create Base Box
Create the base box by attaching each of the SIDES to the TOP / BOTTOM pieces using wood glue and 1-1/4" pocket hole screws.
-
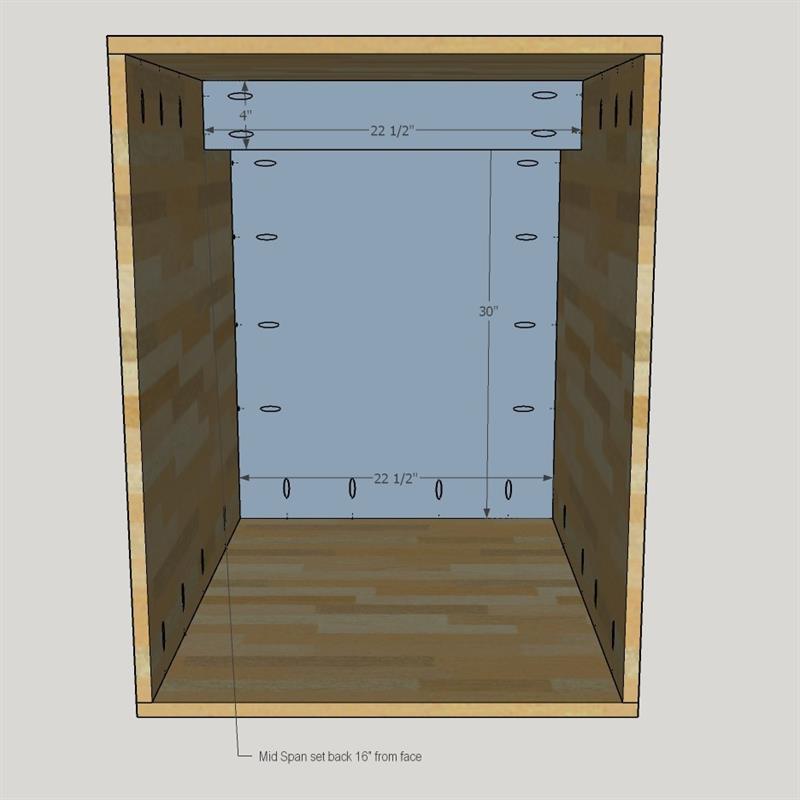
Back & Mid Span
Insert the BACK piece into the back of the box. It may help to lay the base box down so that the back is on the floor. Make sure the pocket holes are facing the inside of the box. Attach with 1-1/4" pocket hole screws around the perimeter. Then attach the MID SPAN at 16" back from the face. This will provide more stability across the center of the worktop.
-
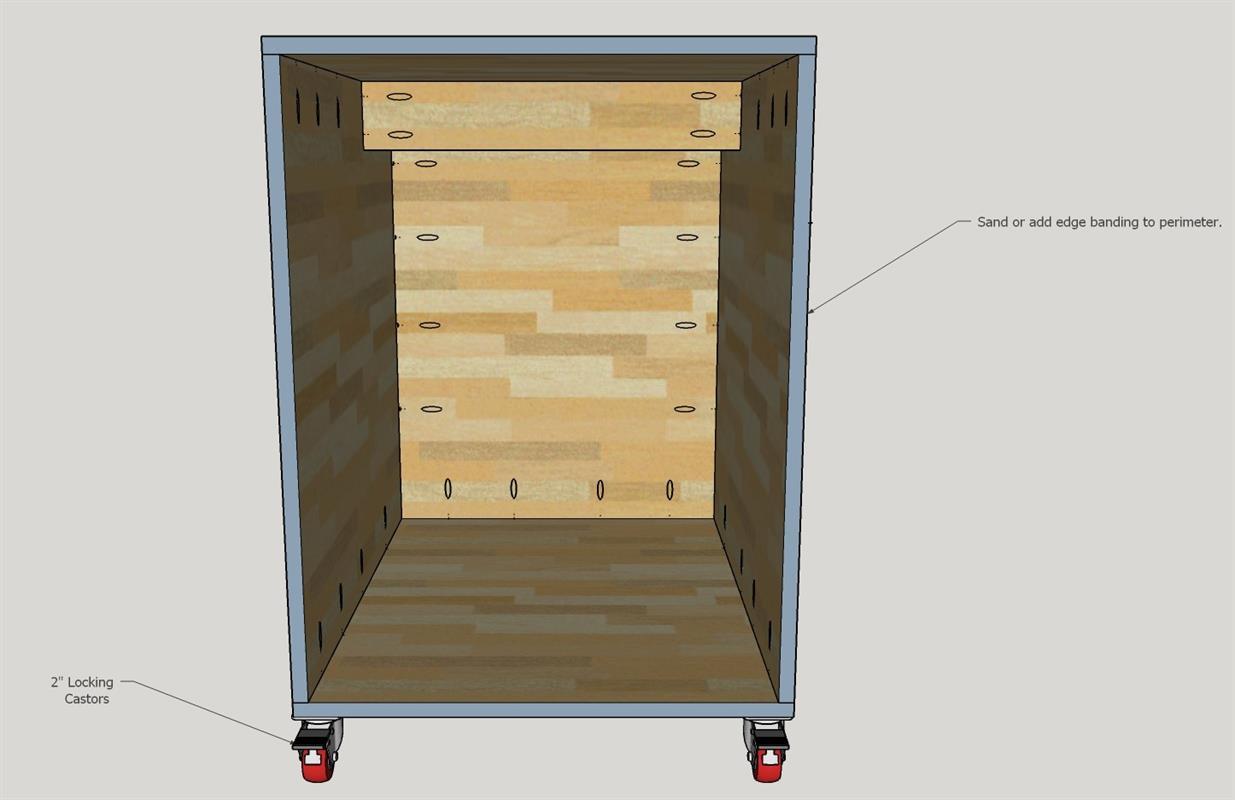
Casters & Edge Banding
Attach the locking casters to each of the four corners as per the manufacturer's instructions.
Optionally, you can add edge banding to the outer face frame, or you can just sand it smooth.
-
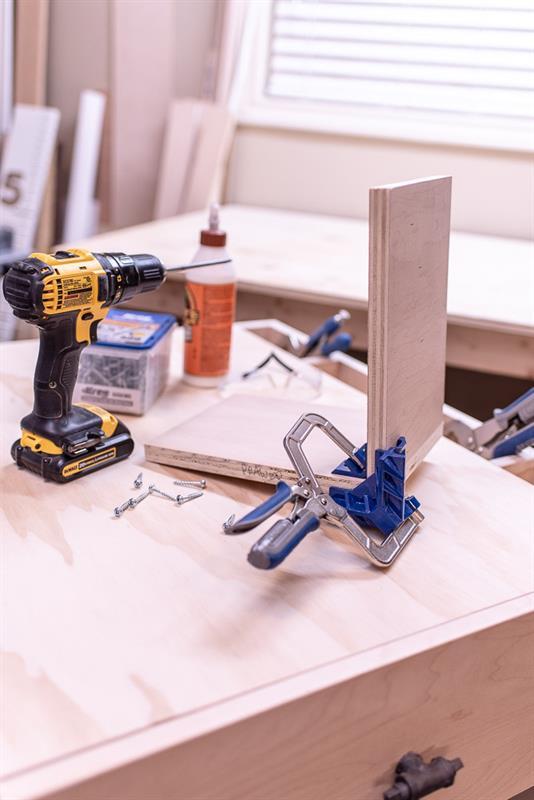
Drawer Box Fram Guts
Assemble the DRAWER GUTS FRONT & BACK, LEFT & RIGHT SIDES as shown. Attach with wood glue and 1-1/4" pocket hole screws.
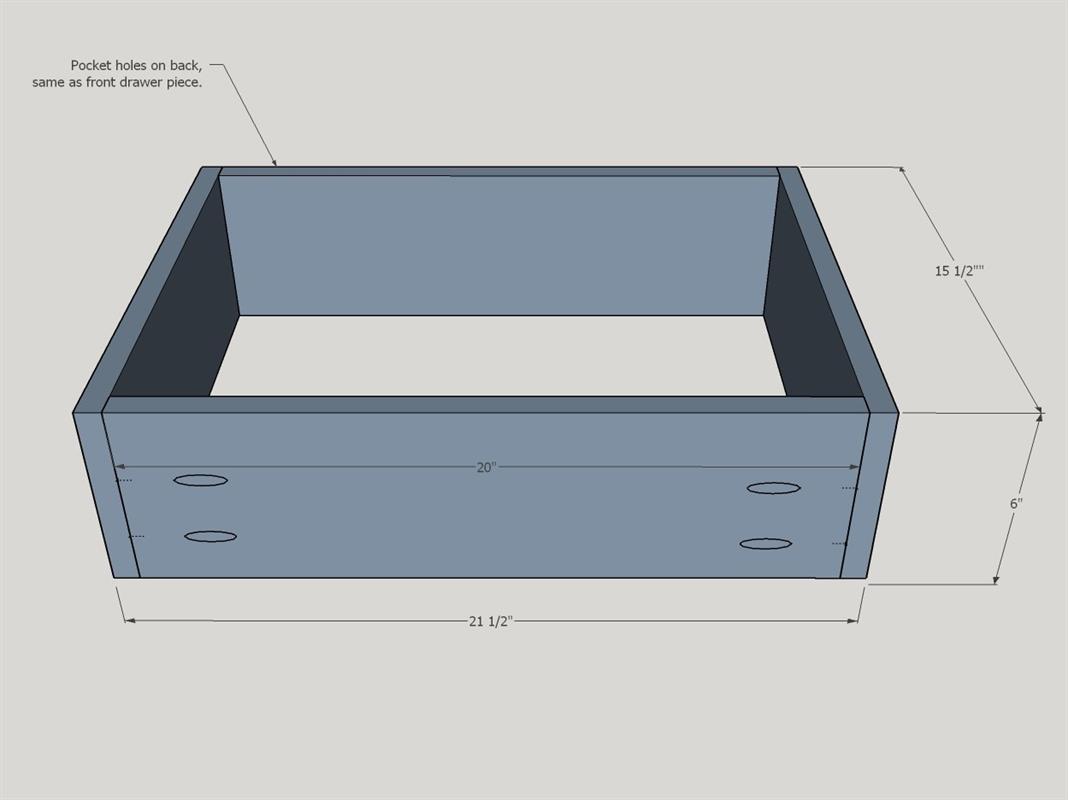
-
Drawer Box Bottom
Turn the drawer box upside down and attach DRAWER BOTTOM with wood glue and 1 1/4" brad nails around the perimeter.
-
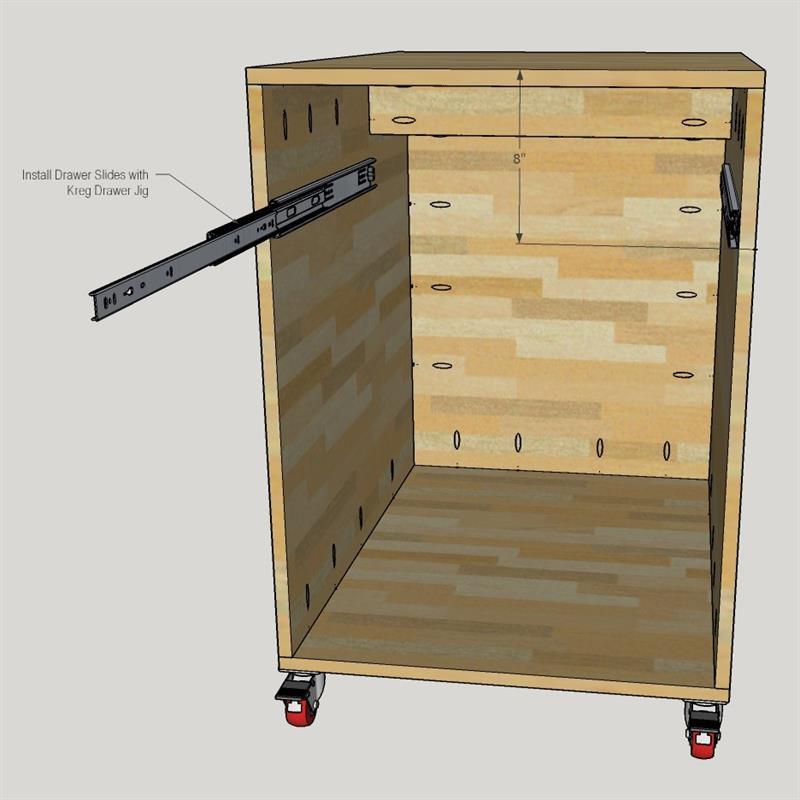
Install Drawer Slides
Using a Kreg Drawer slide jig, install your slides at 8" from the very top of the cabinet as per the instructions that come with your drawer slide. Attach the box to the slides.
-
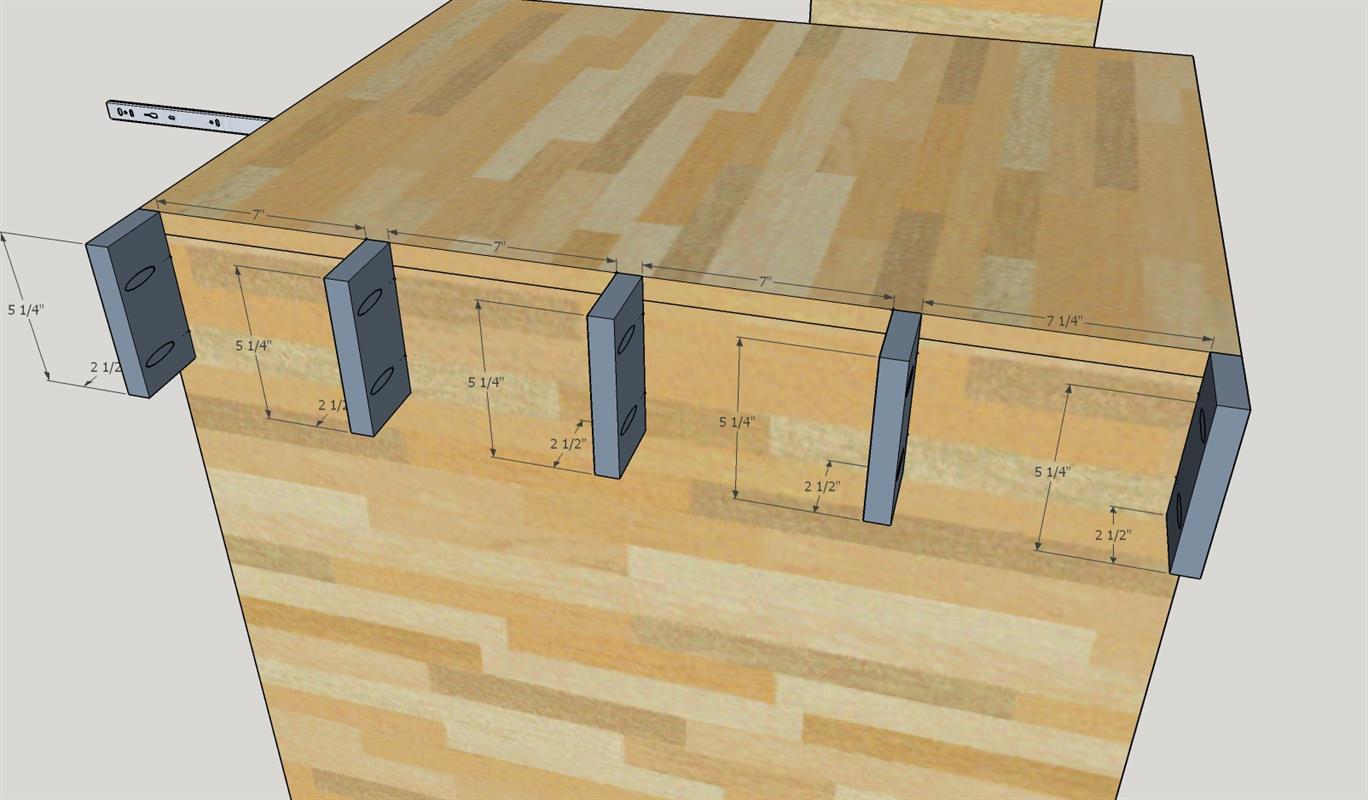
Clamp Rack: Step 1
This addition can be optional but can be handy for a variety of uses. Attach the 5 CLAMP RACK SMALL PIECES approximately 7" apart as shown. Use wood glue and 1-1/4" pocket hole screws.
-
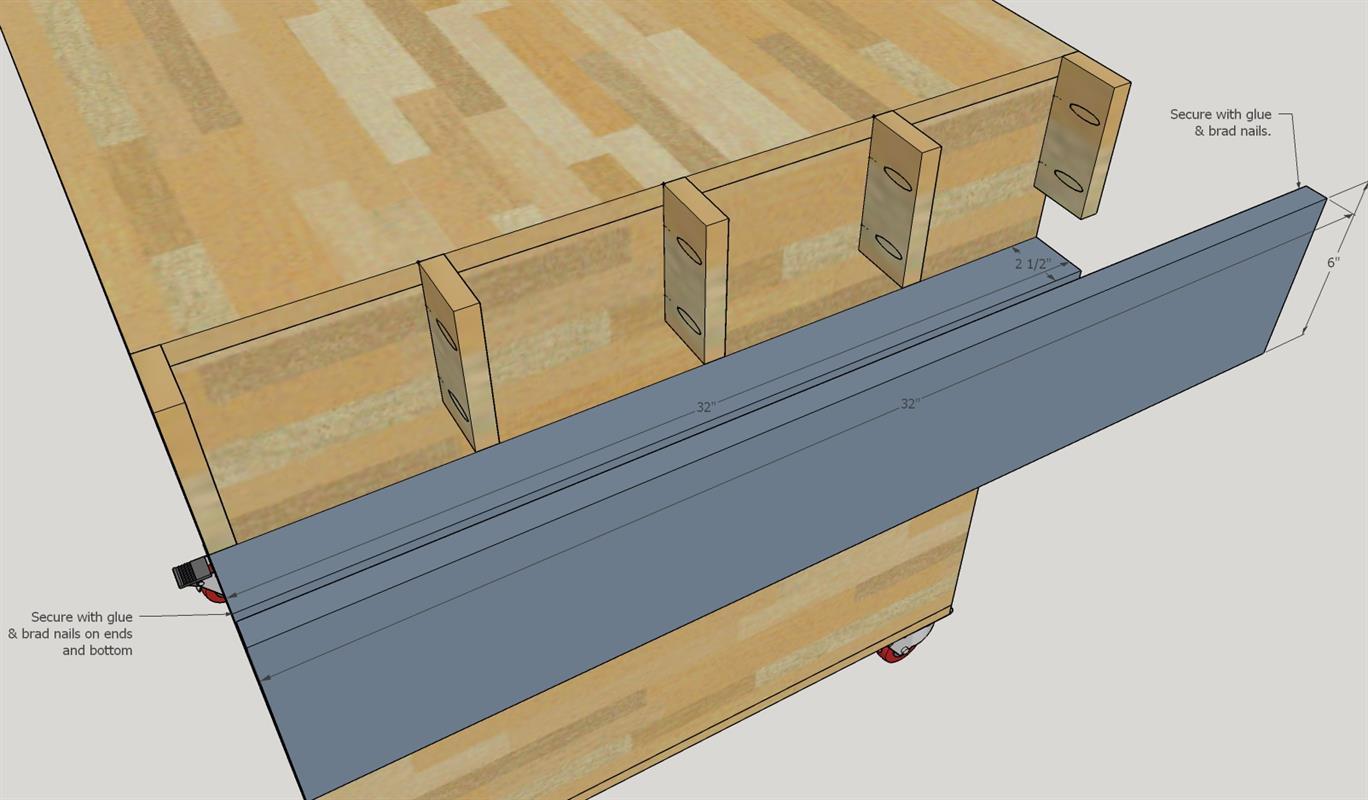
Clamp Rack: Step 2
Attach CLAMP RACK BOTTOM and CLAMP RACK OUTSIDE PIECE using wood glue and 2" brad nails.
-
Attach Drawer Face
Attach DRAWER FACE to be flush with the top and sides of the cart. TIP: Predrill the hole locations on the drawer box guts and then use some instant glue or double-sided tape to hold the drawer face in place. Then open the drawer and screw from inside the box into the face using 1-1/4" pocket hole screws. They work very well for this purpose too!
-
Drill Pocket Holes
Drill pocket holes in the approximate locations shown on each piece. See cut list and diagrams first to accurately cut the plywood sheets.
-
Optional
To help prevent your Foreman or Router Table from accidentally being pushed off of the cart, you can add a 3/4" x 3/4" piece of wood around the perimeter of the top. It also prevents screws, router bits, and other small parts from rolling off if you are using it as an assembly station.