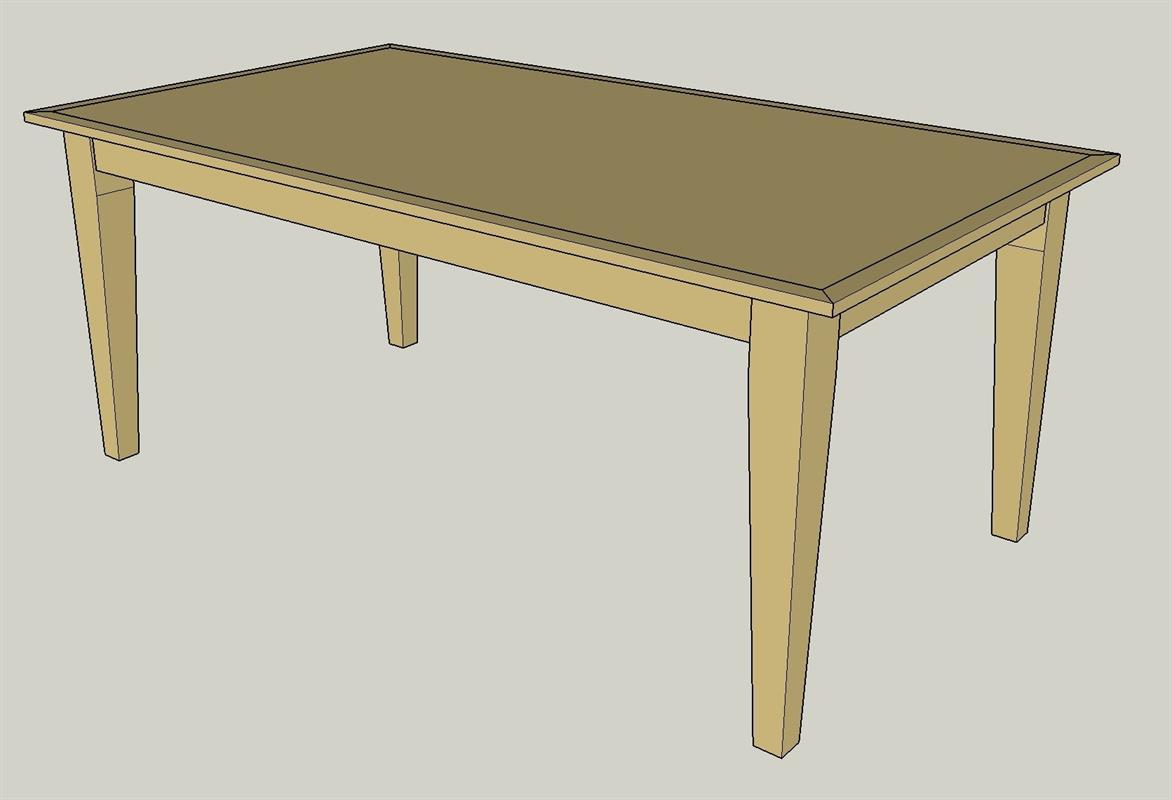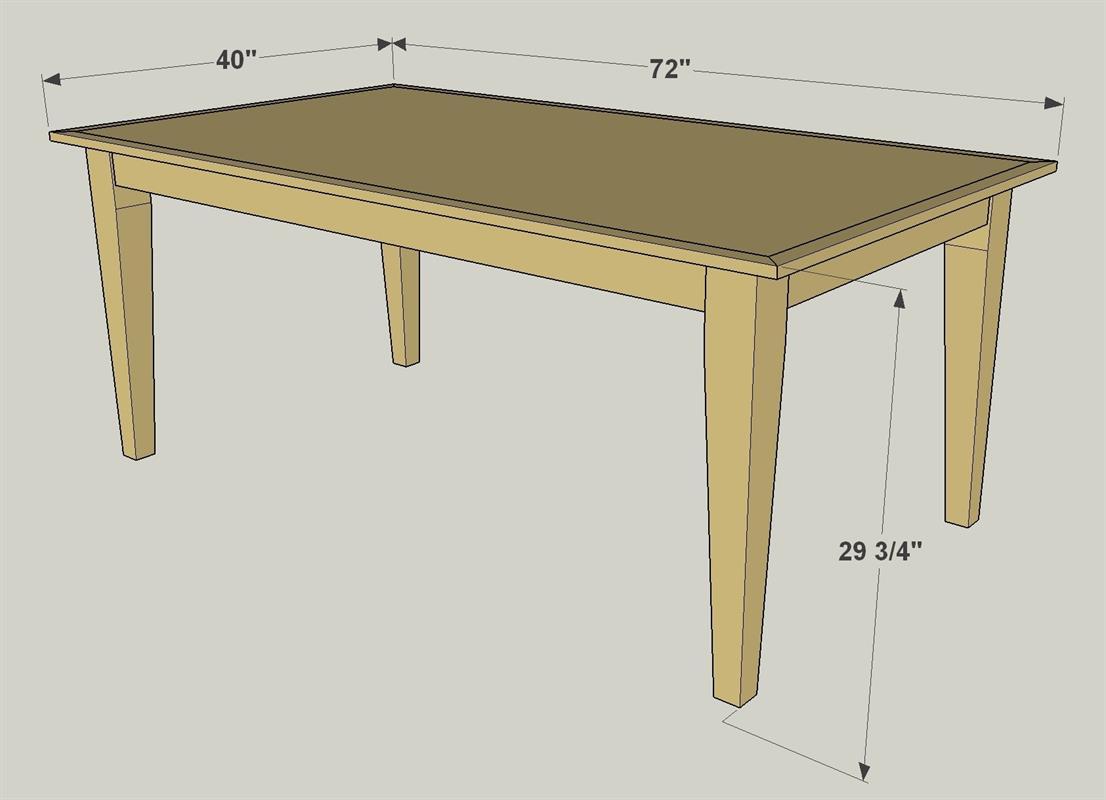

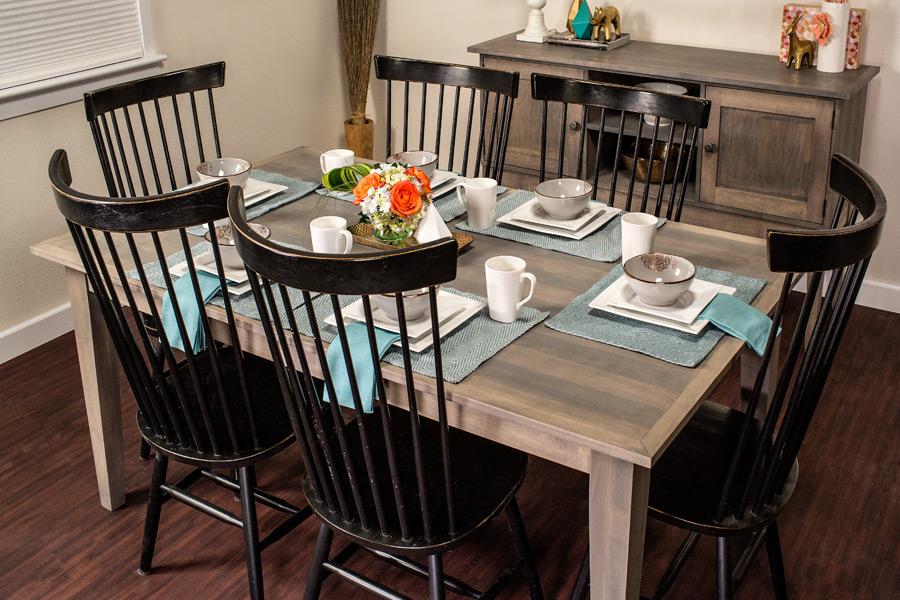


It’s easier than you think to build your own dining table, and this farmhouse-style table proves it. By starting with pre-made legs, all you have to do is make rails that connect them, and then make a table top. The classic styling will fit into a variety of decorating schemes, too.
Tools
Kreg Tools

Other Tools
-
Circular Saw (corded)

-
Miter Saw
-
Tape Measure
-
Drill (corded)
-
Sander
Materials
Wood Products
- 3 Board , 1x2 , 96"
- 3 Board , 1x4 , 96"
- 1 Plywood , 3/4" Thick , Full Sheet
Hardware & Supplies
- 4 29" tapered table legs
- 45 1 1/4" fine-thread pocket-hole screws
- 1 Wood glue
Cut List & Parts
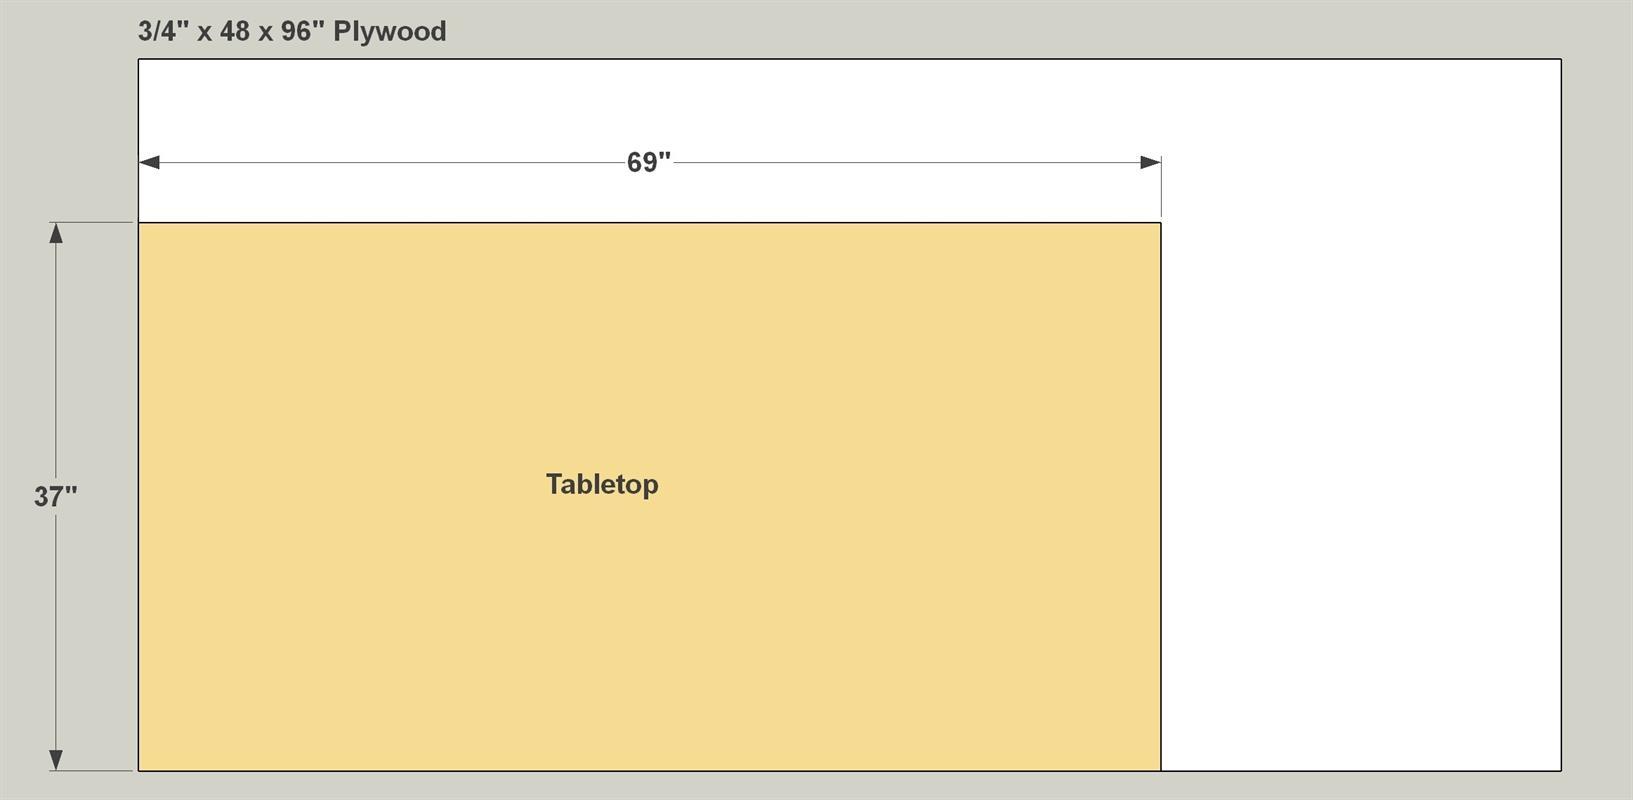
- 1 Tabletop , 3/4" plywood x 37" x 69"
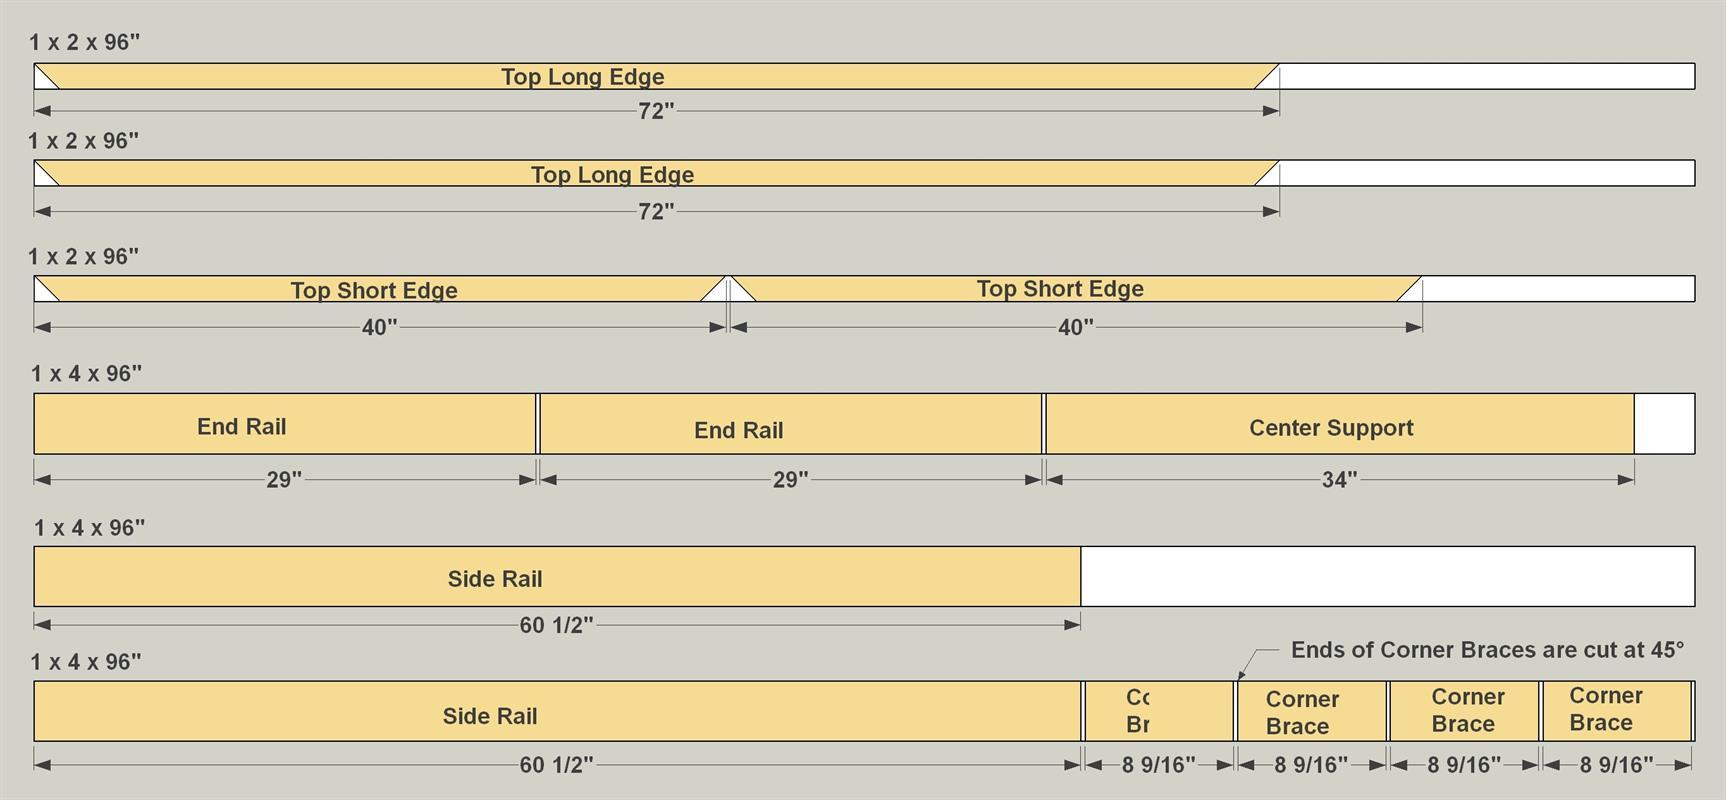
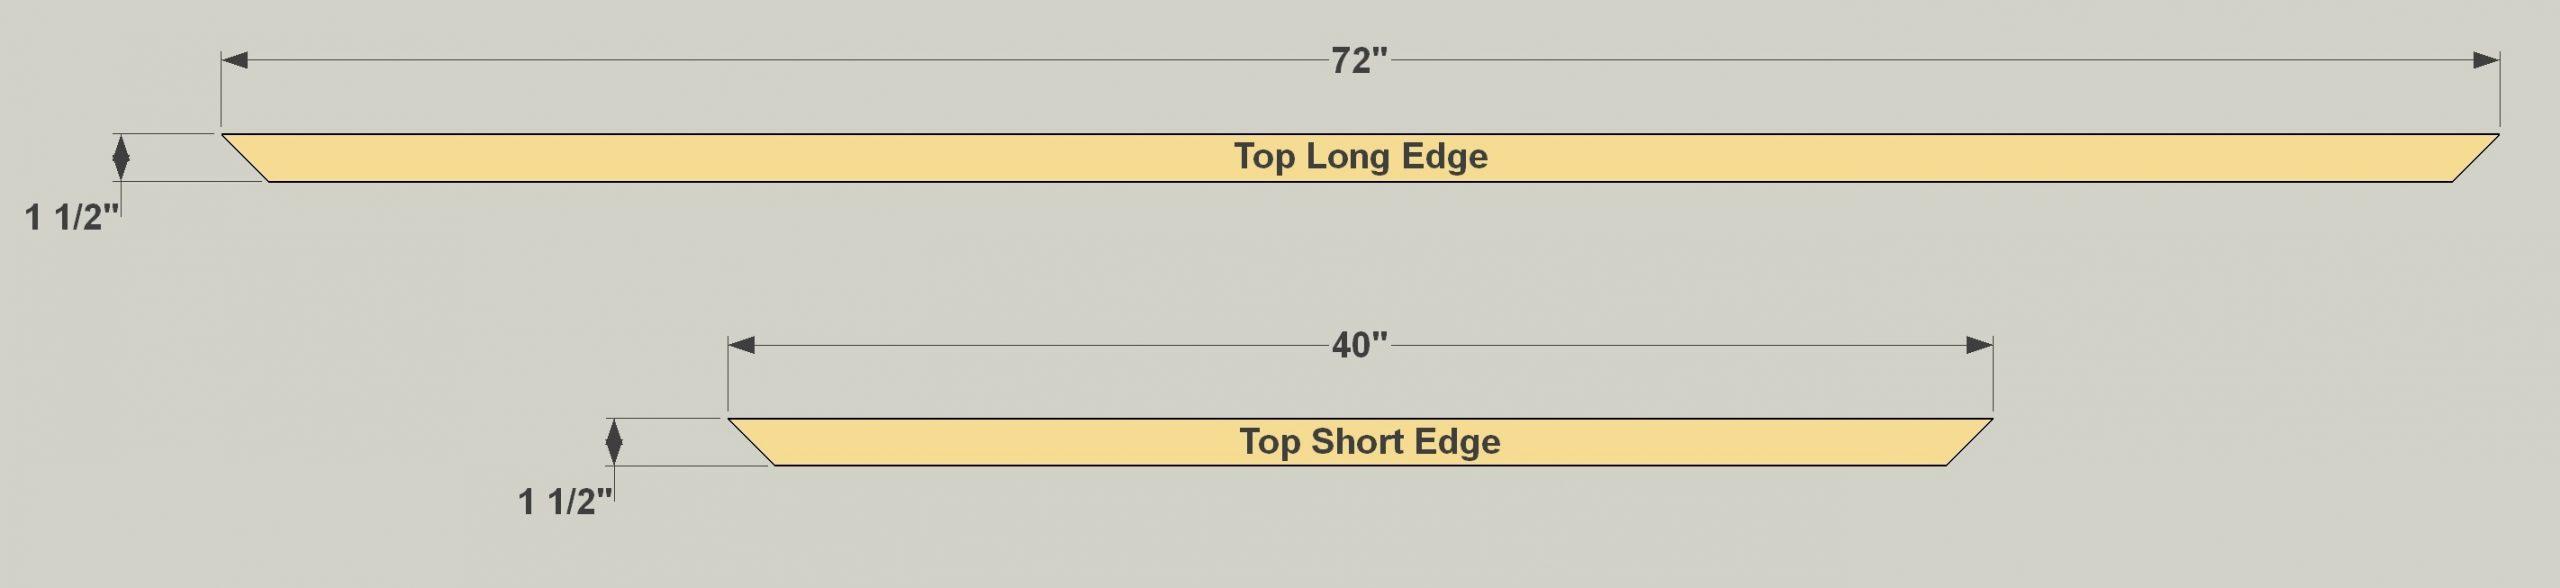
- 2 Top Long Edge , 3/4" x 1 1/2" x 72"
- 2 Top Short Edge , 3/4" x 1 1/2" 40"
- 2 Side Rail , 3/4" x 3 1/2" x 60 1/2"
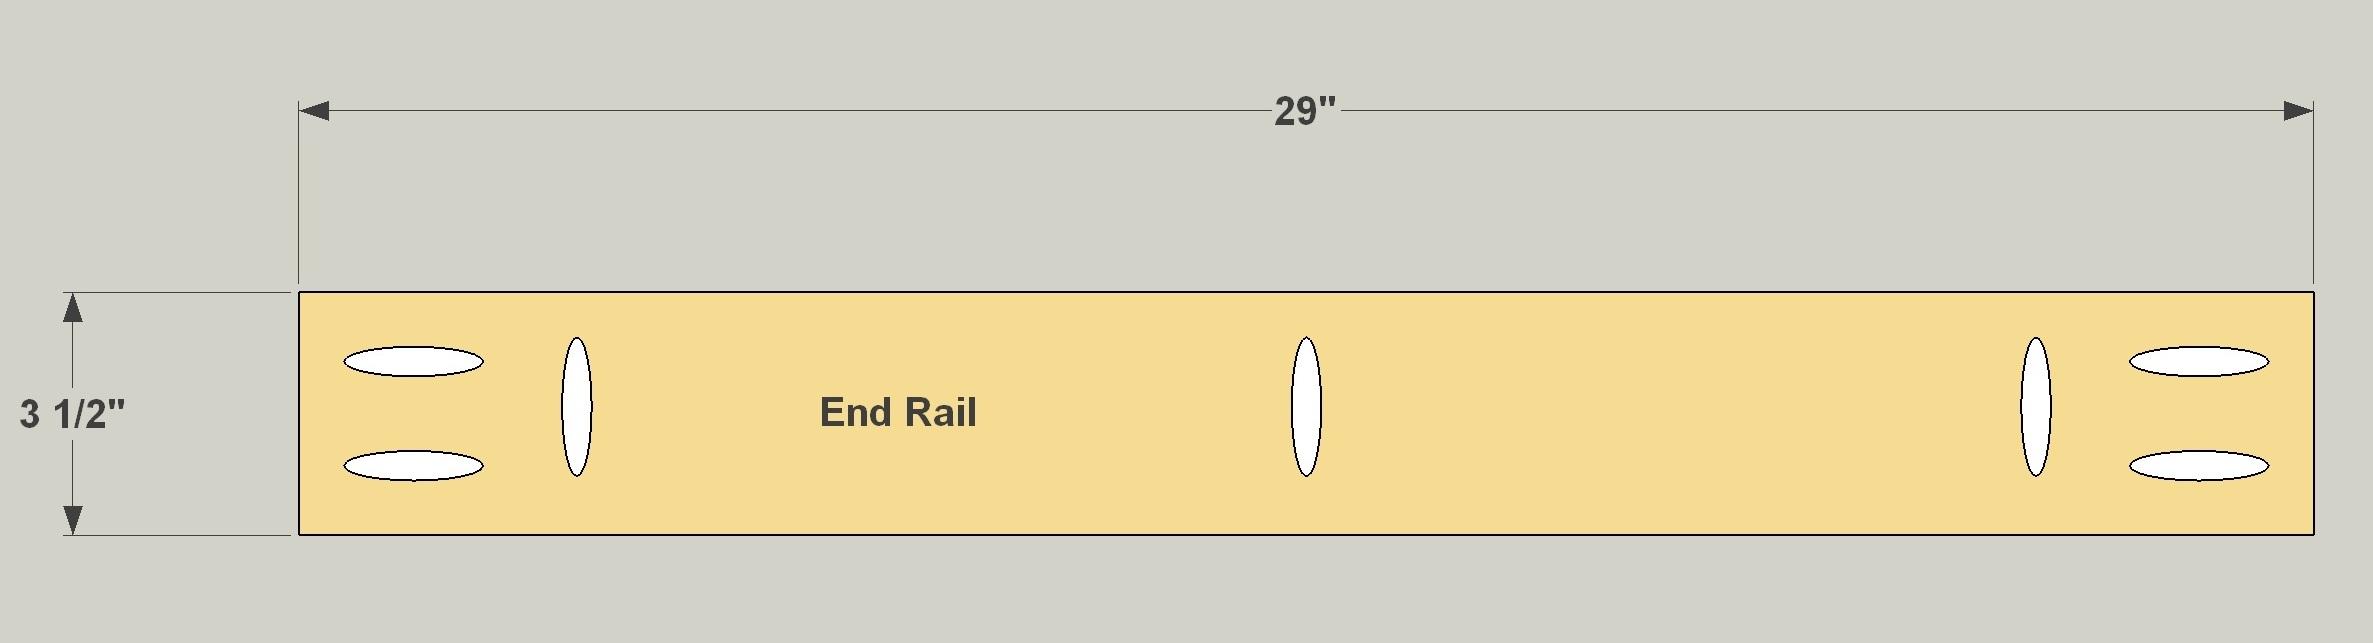
- 2 End Rail , 3/4" x 3 1/2" x 29"
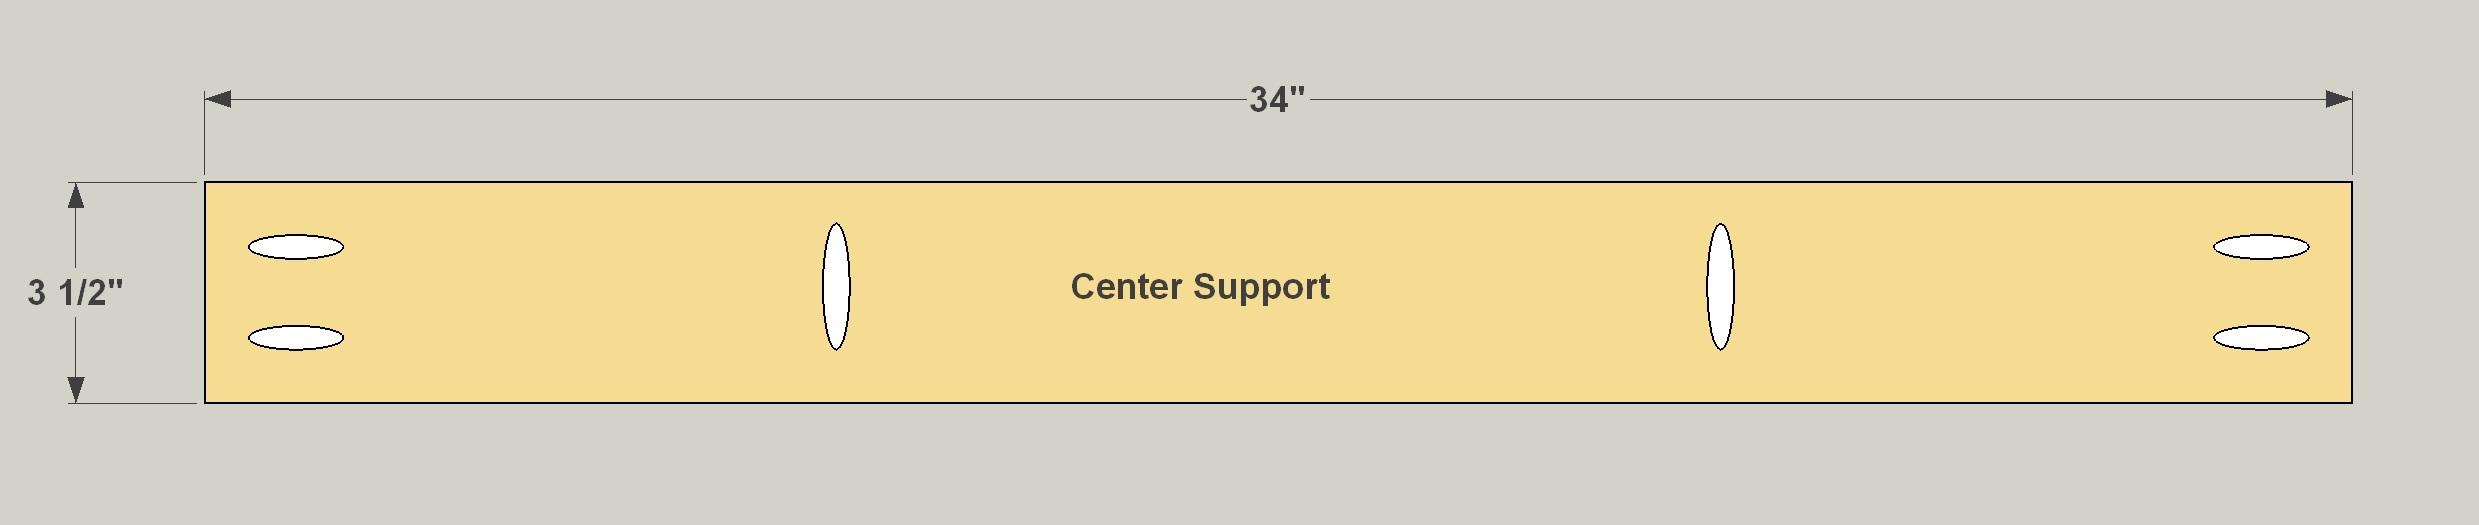
- 1 Center Support , 3/4" x 3 1/2" x 34"
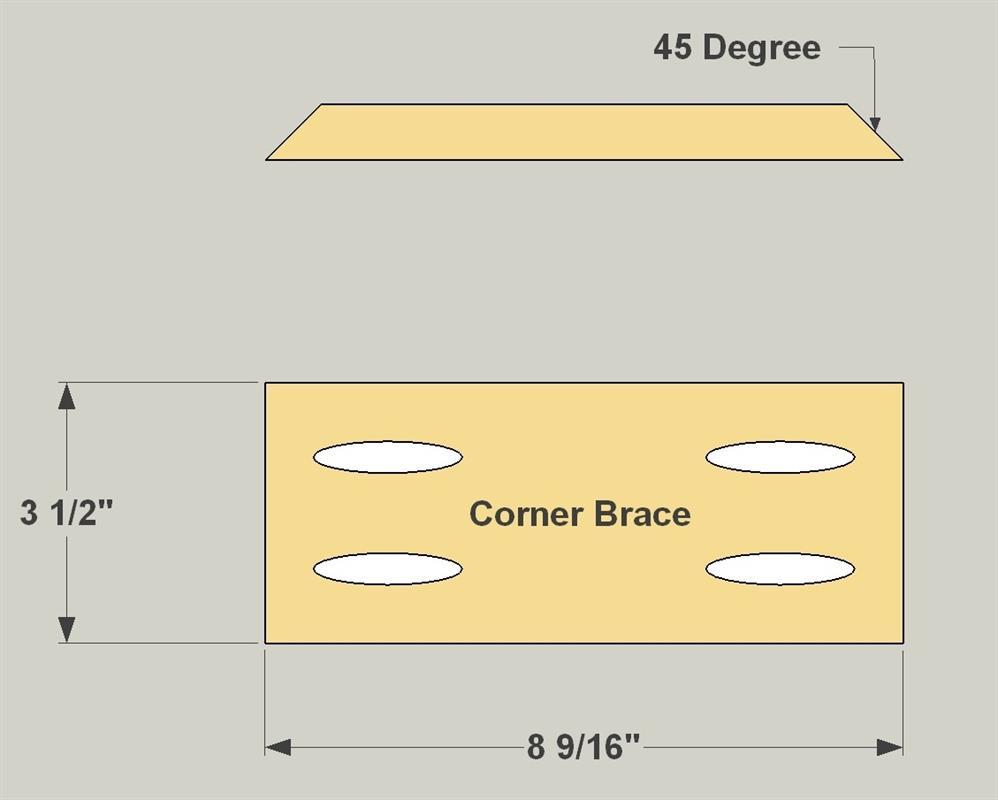
- 4 Corner Brace , 3/4" x 3 1/2" x 8 9/16"
- 4 Legs , 3 1/2" x 3 1/2" x 29"
Directions
-
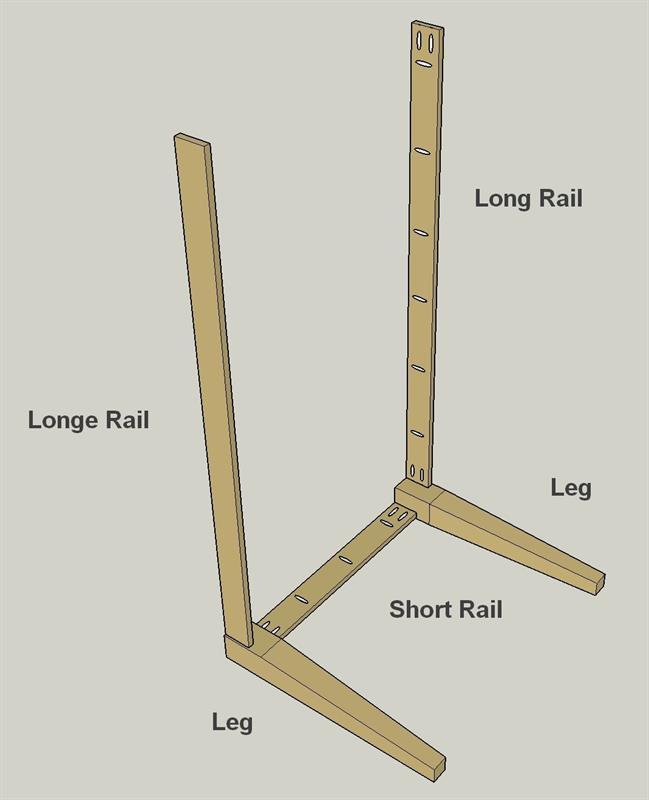
Make the End Rails
Cut two End Rails to length from a 1x4 board (we used Maple), as shown in the cutting diagram. Then, with your pocket-hole jig, set up for 3/4" material, drill pocket holes in the back face of the End Rails, as shown.
-
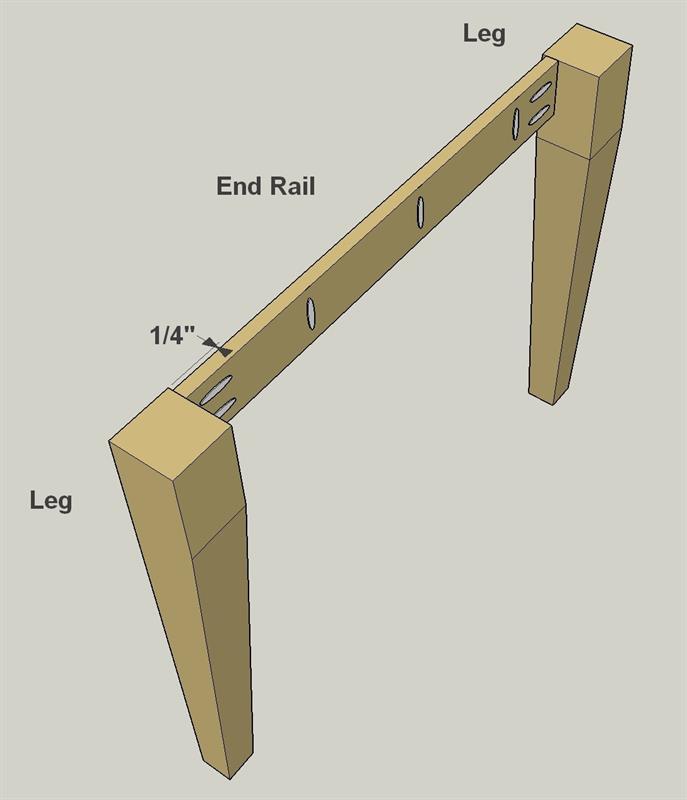
Connect End Rails and Legs
When your Legs arrive, sand them as needed. Then attach the End Rails to the Legs using 1 1/4" fine-thread pocket-hole screws. Make sure that the Tapers are pointing inward, and that the End Rails are inset 1/4" from the outside of the Legs.
-
Make a Pair of Side Rails
Cut two Side Rails to length from a 1x4 board, as shown in the cutting diagram. Then, with your pocket-hole jig, set up for 3/4" material and drill pocket holes in the back face of the Side Rails, as shown.

-
Connect the End Assemblies
Attach the long rails to one end assembly with 1 1/4" fine-thread pocket-hole screws. Make sure the rails are 1/4" inset from the outside edge of the legs. Then attach the other end assembly the same way.
-
Make a Center Support
Cut one Center Support to length from a 1x4 board, as shown in the cutting diagram.
-
Make Corner Braces
Cut four Corner Braces to length from a 1x4 board, as shown in the cutting diagram. Note that the ends are cut at 45° so the braces can span between the rails. Now you can drill pocket holes in the corner braces. To do this, you need to change your setup. Leave your pocket-hole jig set at 3/4", but change the drill bit setup to 1/2". Then drill the holes as shown.
-
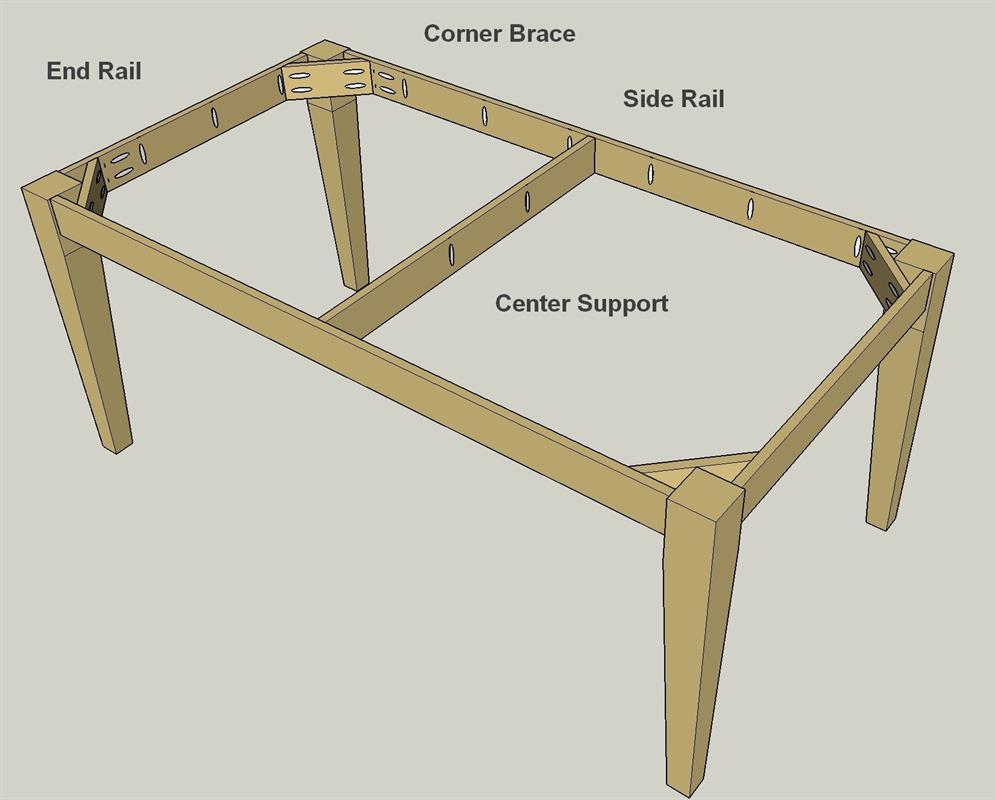
Complete the Base
Now you can wrap up the table base by attaching the Center Support and the Corner Braces using 1 1/4" fine-thread pocket-hole screws. After attaching the Braces, also drive two 1 1/4" fine-thread pocket-hole screws through each Brace and into each Leg.
-
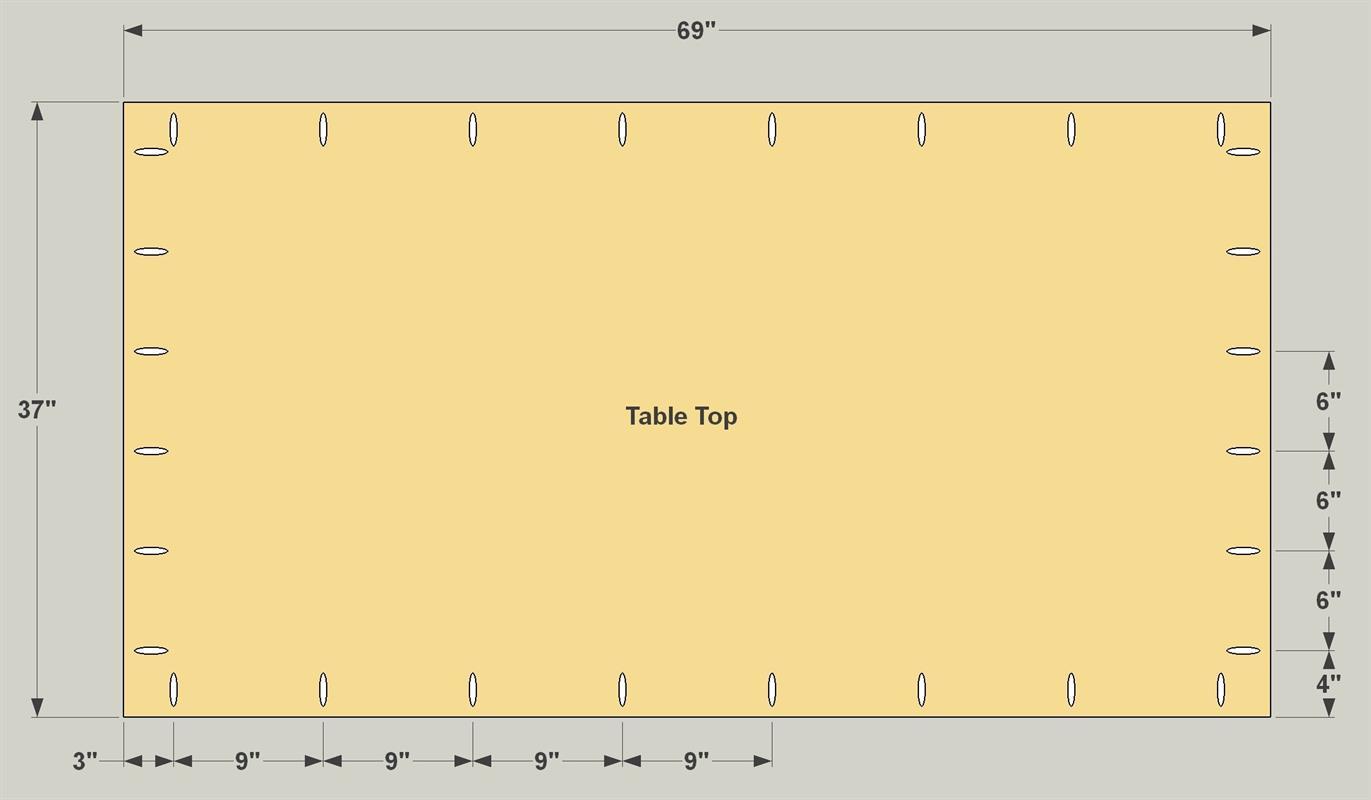
Make the Top Panel
Cut a Top Panel to size from a sheet of 3/4" plywood, as shown in the cutting diagram. Decide which face of the plywood will be the top of the table, and then drill pocket holes in the underside, as shown, with your pocket-hole jig set up for 3/4" material.
-
Cut Top Edging
Now you can cut two pieces of Top Long Edging and two pieces of Top Short Edging to length from 1x2 boards, mitering each end at 45°. Before cutting these pieces, it’s a good idea to double-check the dimensions of your Top, and then make sure that the inside length of each Edging piece match.
-
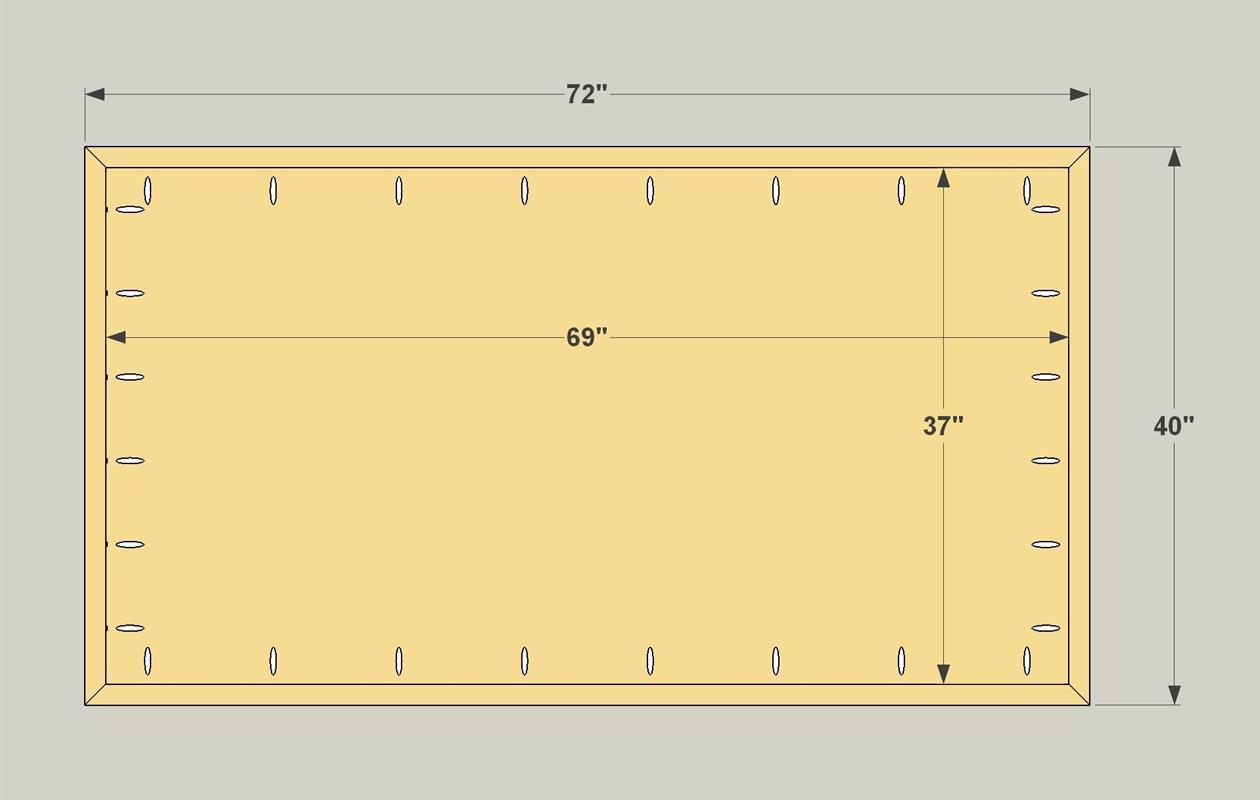
Add the Edging to the Top
Now you can add the Edging to the Top using glue and 1 1/4" fine-thread pocket-hole screws. Start with one piece. Spread glue on that table edge, and then make sure the corners are aligned and the Edging is flush with the face of the table before you drive in the screws. Move to the adjacent piece and repeat the process. Glue the ends of the Edging together, as well.
-
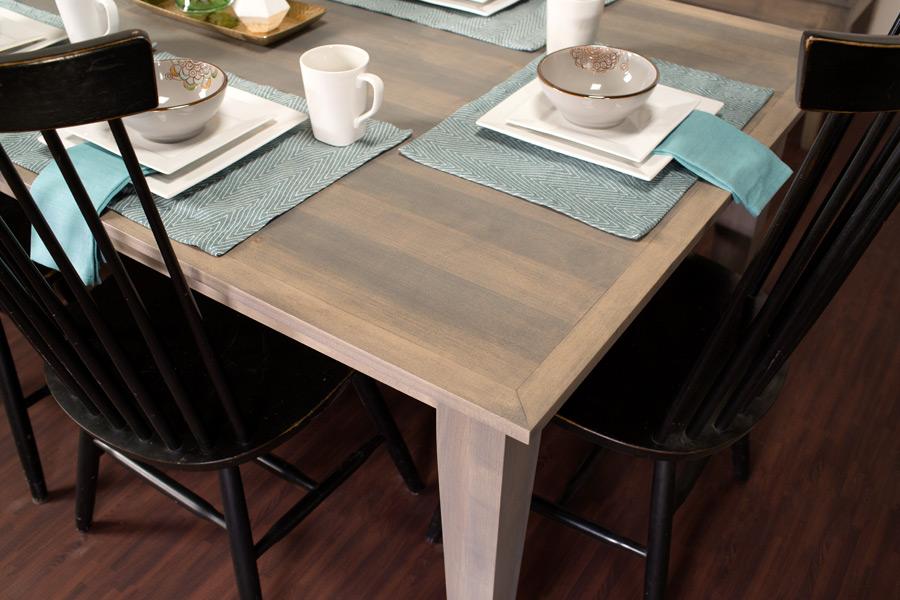
Secure the Top, then Stain
To complete your table, position the top assembly on the base, making sure the overhangs are consistent at each end, and along each side. Then attach the top using and 1 1/4" fine-thread pocket-hole screws. After that, add stain, finish, or paint to complete your dining table.
Tip: Get Gellin' for Great Color
We built our table from Maple, which can be challenging to stain. Inconsistencies in the wood can cause the color to be blotchy. To avoid that, use gel stain instead of liquid. It absorbs more evenly, giving better results in Maple, and in Pine, as well.