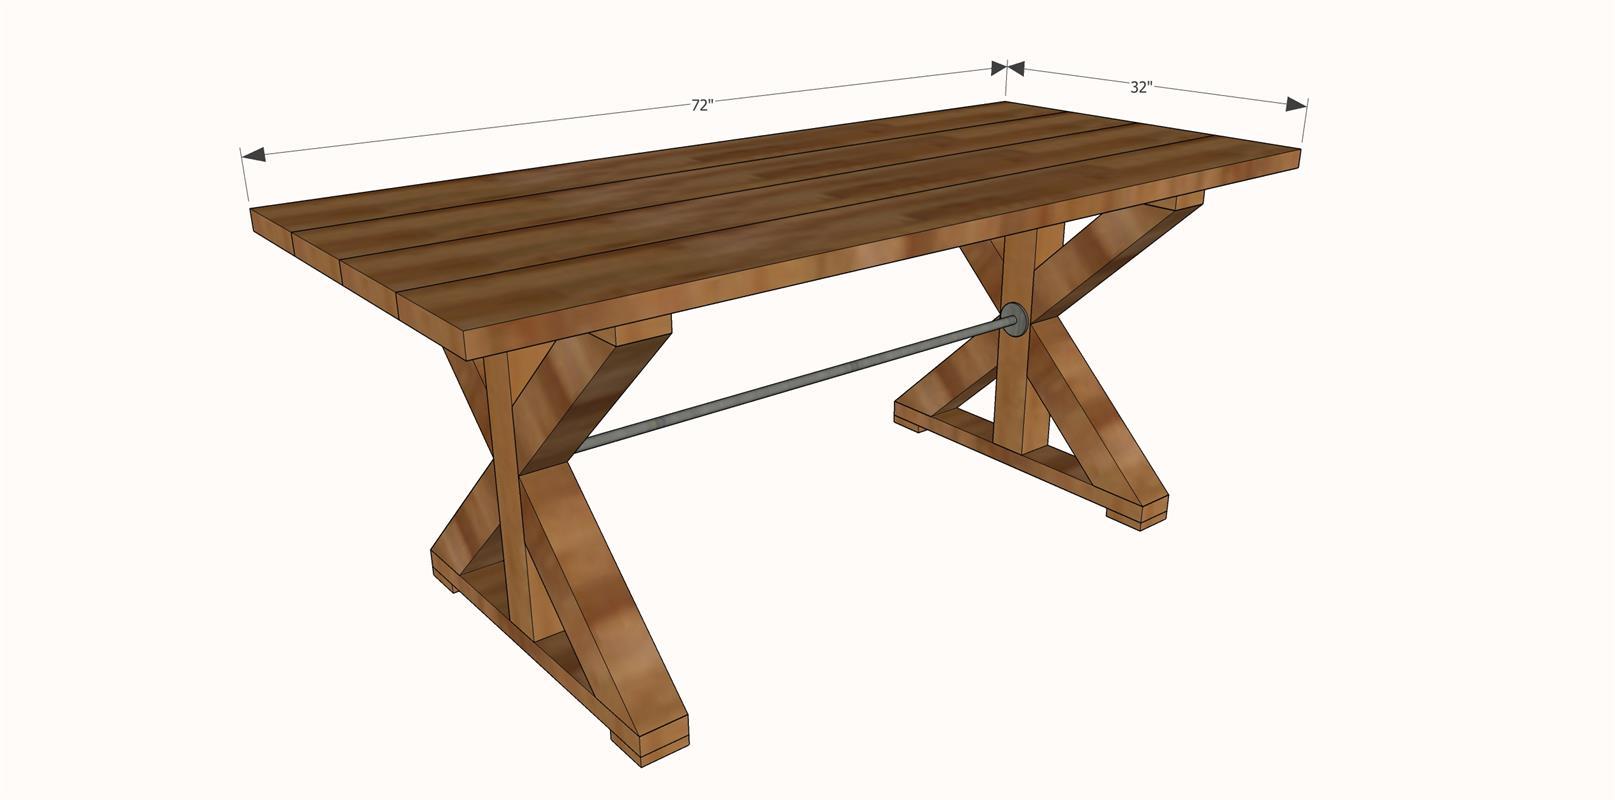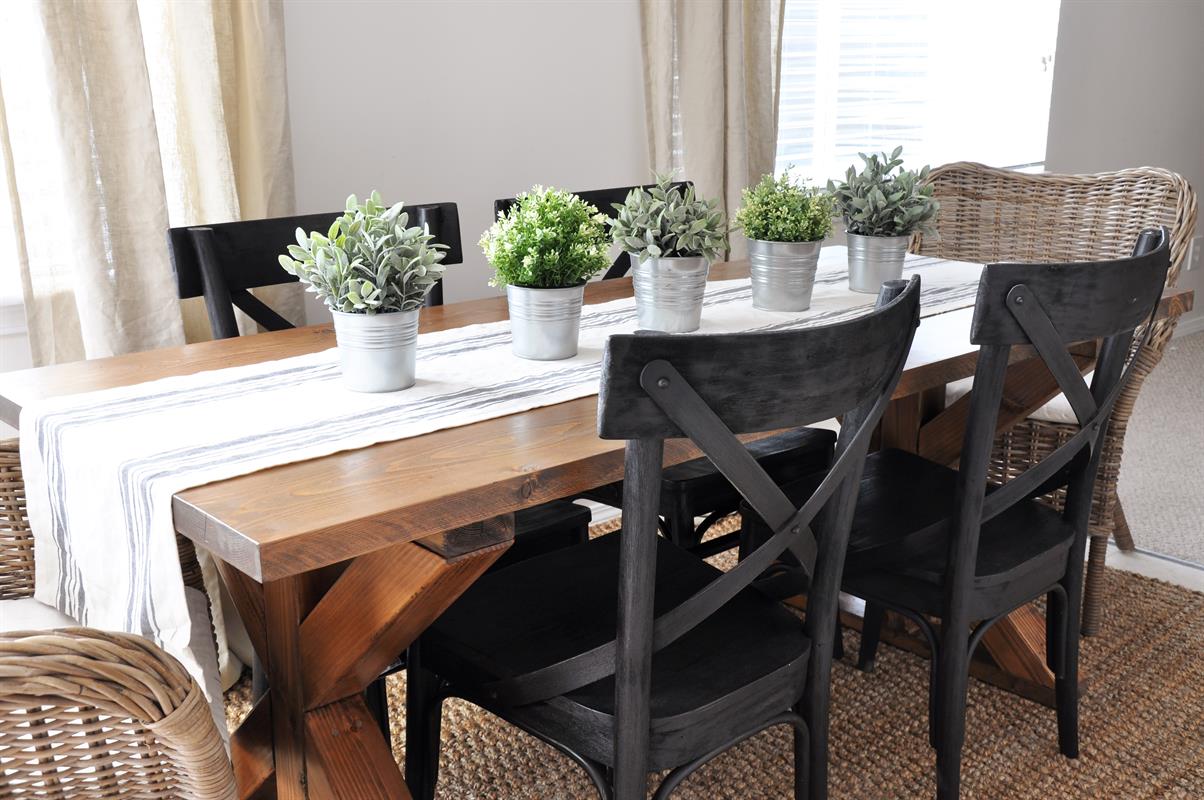


This X Style Farmhouse Dining Table is the perfect solution if you are limited on space but still desire a full size table. It is designed a little bit thinner than most tables, but still able to seat 6!
Tools
Kreg Tools

Other Tools
-
Miter Saw

-
Square
-
Table Saw
-
Tape Measure
-
Level
-
Nail Gun
-
Sander
-
Threaded Insert & Bolts
Materials
Wood Products
- 2 Board , 2x10 , 144"
- 1 Board , 2x4 , 120"
- 2 Board , 4x4 , 96"
- 1 Board , 1x4 , 72"
Hardware & Supplies
- 1 Box of 2 1/2" Coarse Kreg Jig Screws
- 1 Box of 2 1/2" Wood Screws
- 1 Countersink Drill Bit
- 2 Clamps
Directions
-
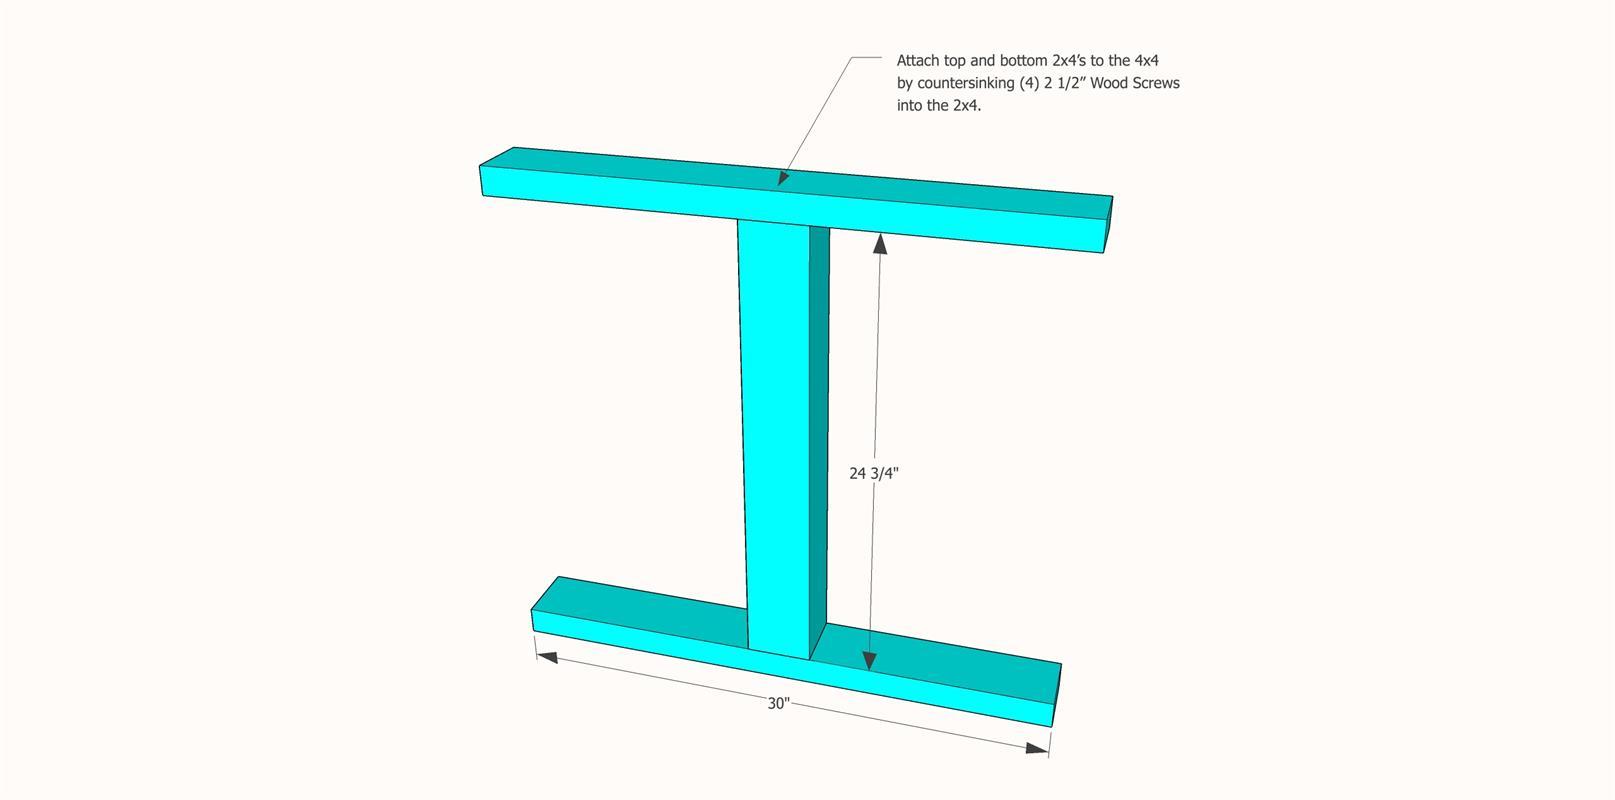
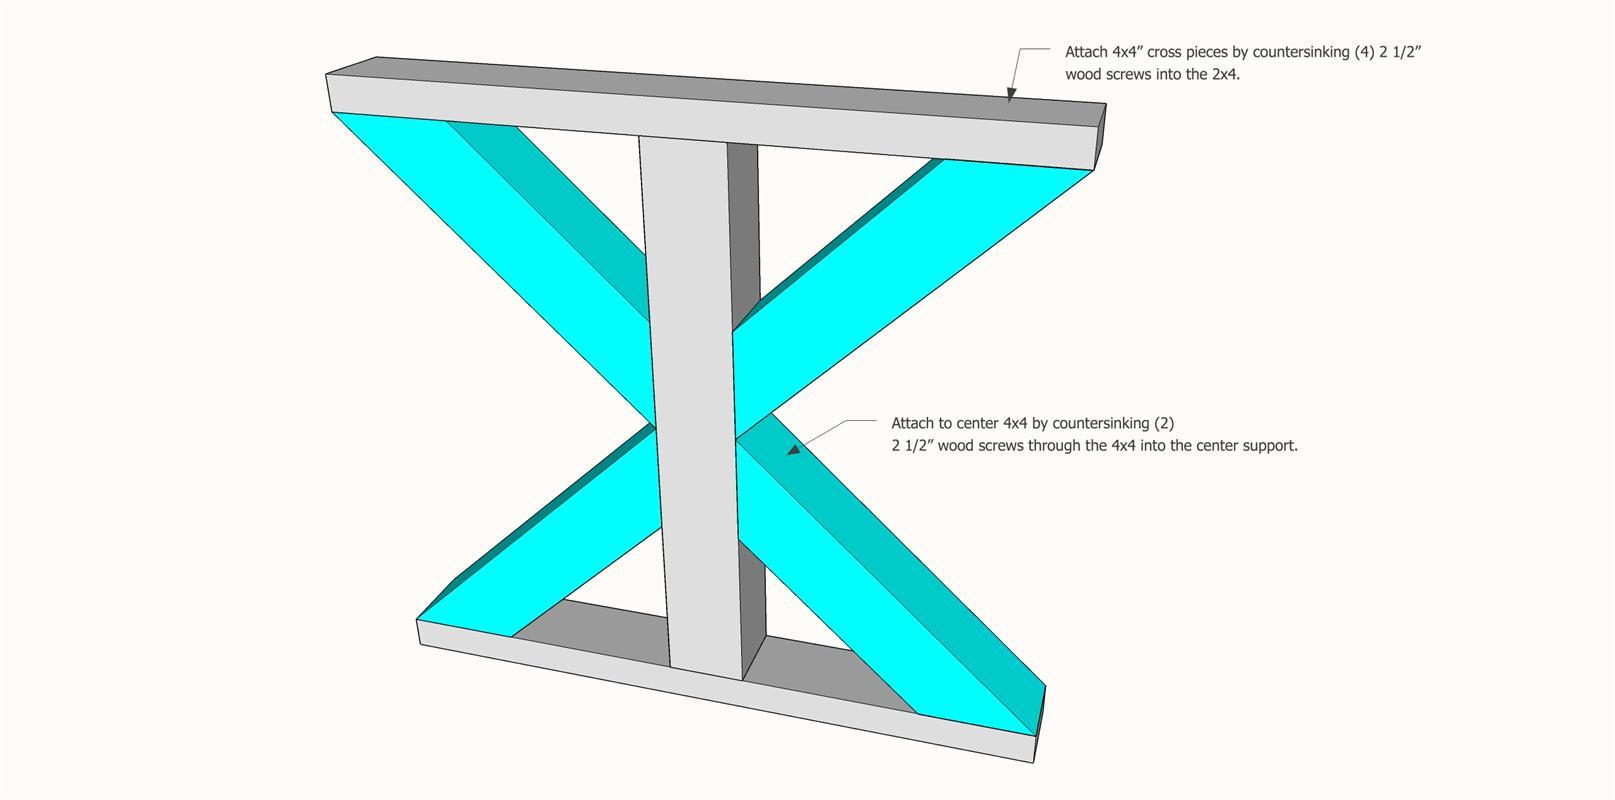
Assemble Legs
Assemble the main structure of the legs by attaching the 2x4's to the 4x4's using wood glue and 2 1/2" wood screws (countersunk). Make two legs.
-
Add "X" Support
Attach the X supports (4x4's) to the main structure of the legs with wood glue and countersinking (4) 2 1/2" wood screws through the bottom of the leg, and attach the center of the 4x4 to the main leg structure by countersinking 2 1/2" wood screws into the vertical support. The 47 degree angle rests against the 2x4, and the 43 degree angle rests against the 4x4.
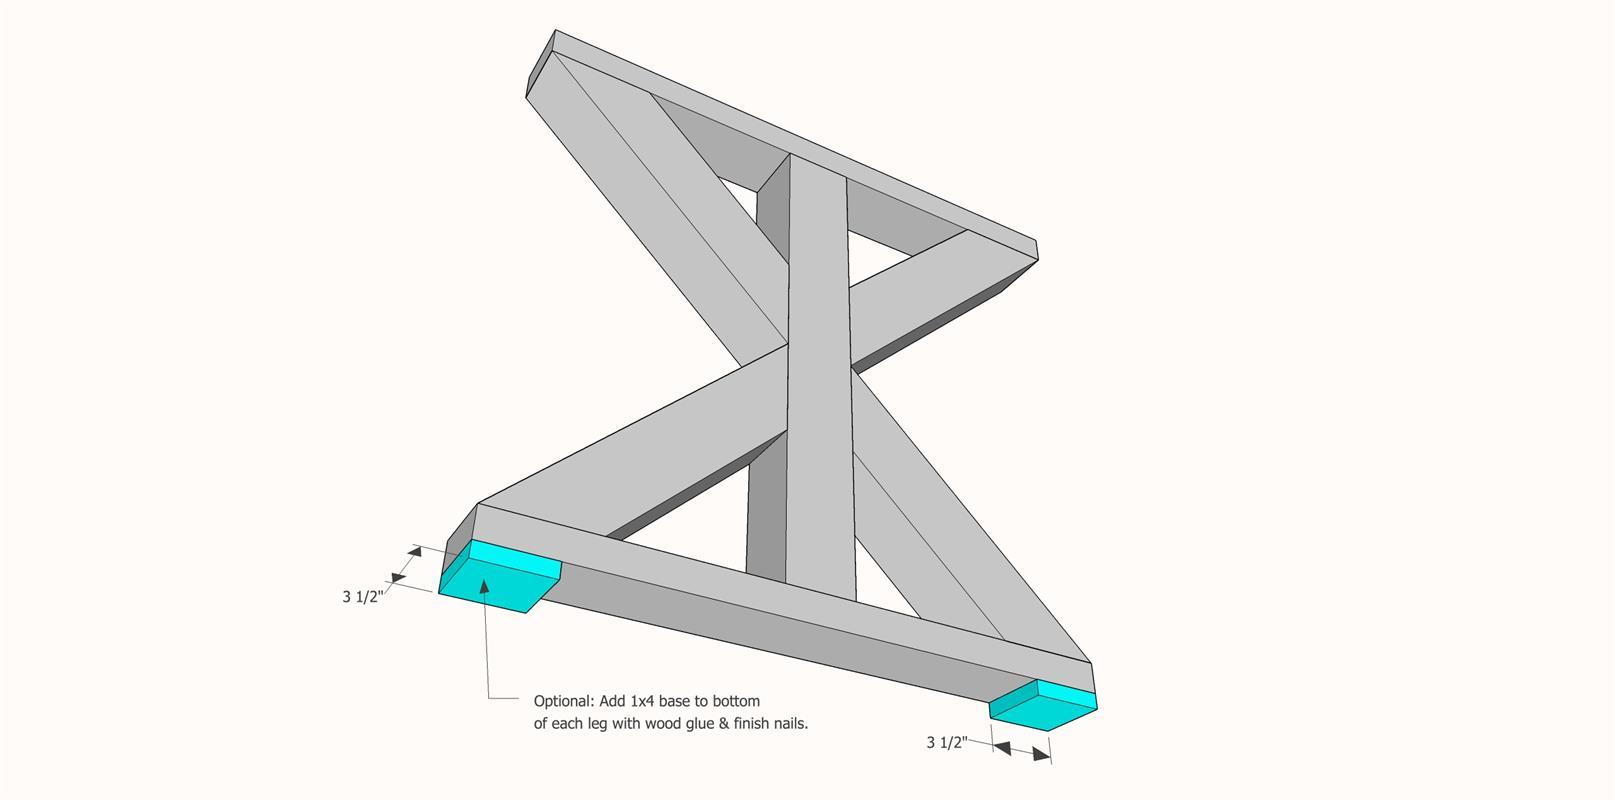
X Supports should be cut with one side at a 43 degree angle, and the other at a 47 degree angle. The longest side should measure 18 1/8"
-
Add Feet
Attach the feet to the bottom of the leg base using wood glue and finish nails.
-
Assemble Table Top
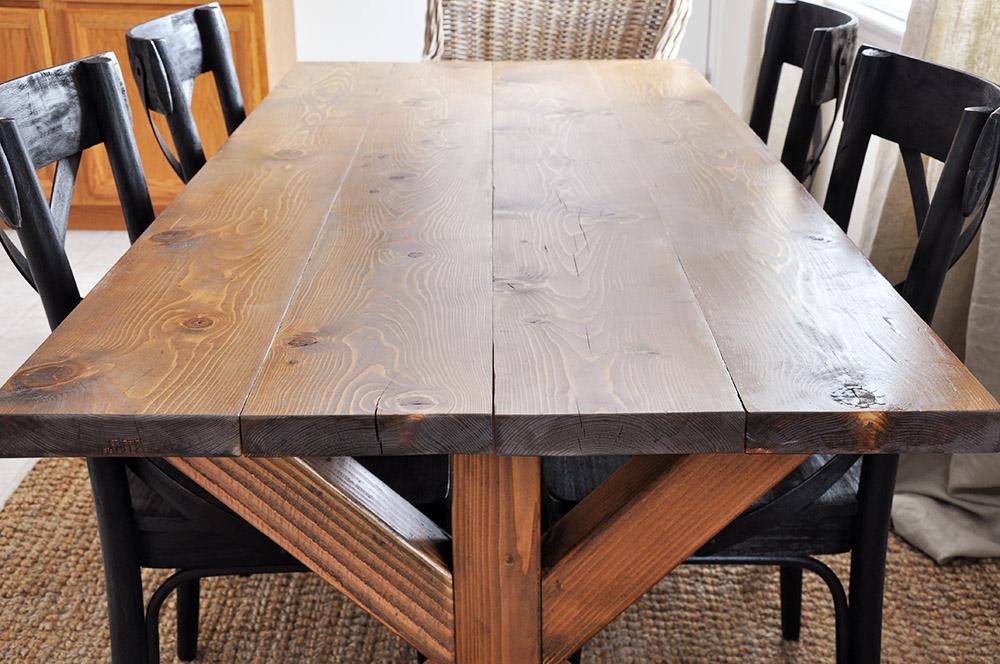
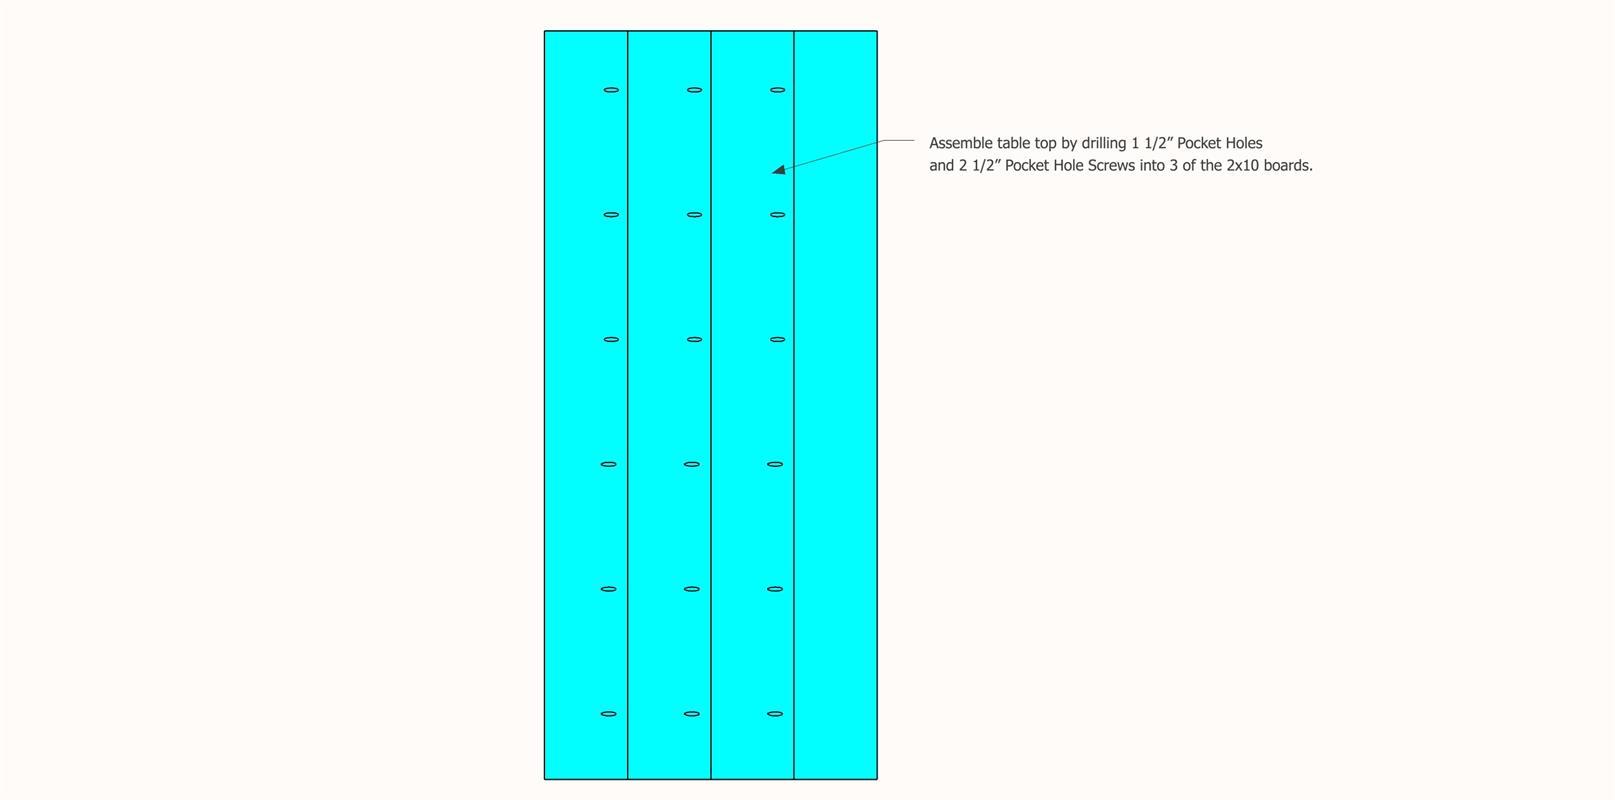
Rip down the 2x10 boards to 8" wide total. Make sure to cut from both sides of the board in order to remove the rounded edges and give it a cleaner look. Assemble the table top by adding 1 1/2" Pocket Holes and 2 1/2" Pocket Hole Screws evenly spaced on 3 of the 2x10's.
-
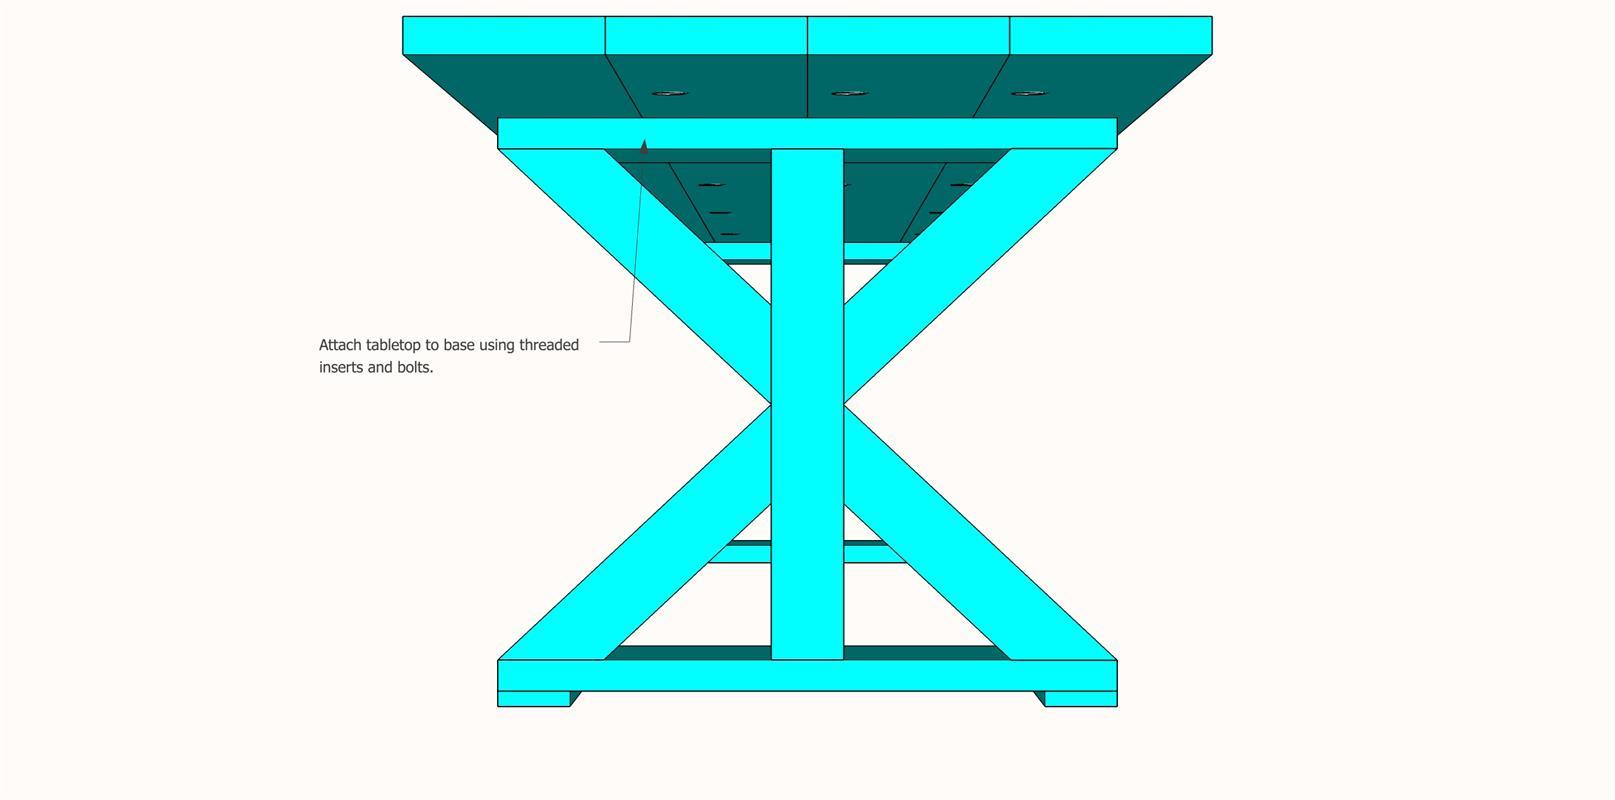
Attach Table Top to Base
Attach the table top to the base by adding threaded inserts into the tabletop and drilling holes through the top of the leg base. Attach with bolts. This allows for easy disassembly. If you will not be needing to disassemble then you can attach directly to the base with wood screws and wood glue.
-
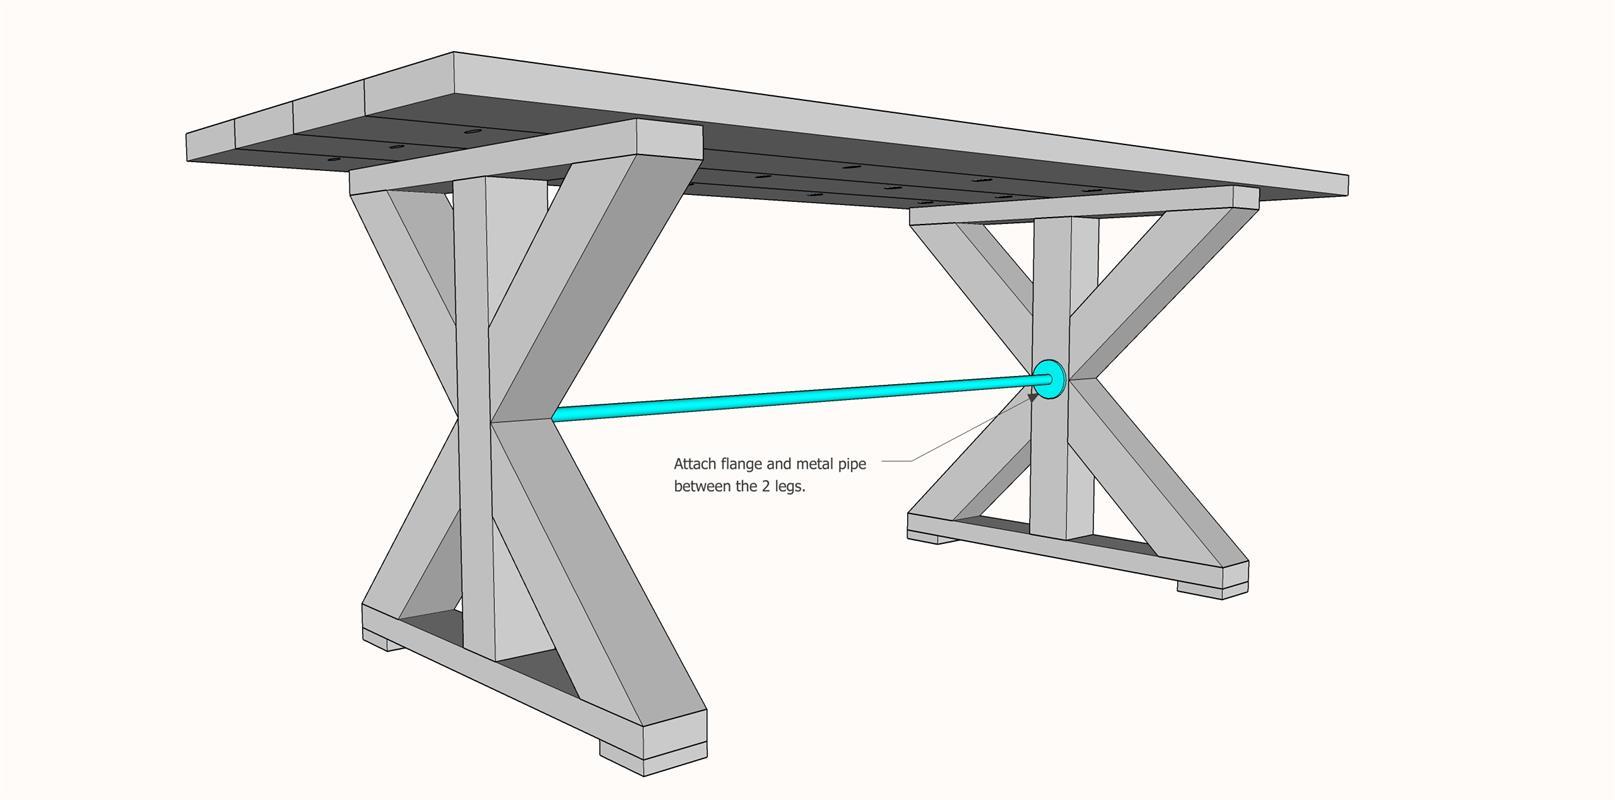
Attach Center Support
Attach the flanges and metal pipe to the inside of the legs, making sure to keep level.
-
Finish the Table
Finish the table by filling all holes with wood filler and painting or staining in the color of your choice. Make sure to add a protective coat to the entire table in order to keep it safe from food and spills.