

Learn how to transform a basic, off-the-shelf, wood sawhorse into an adjustable height, multi-function workstation. The dimensions and attachments are completely customizable to match your DIY needs.
Tools
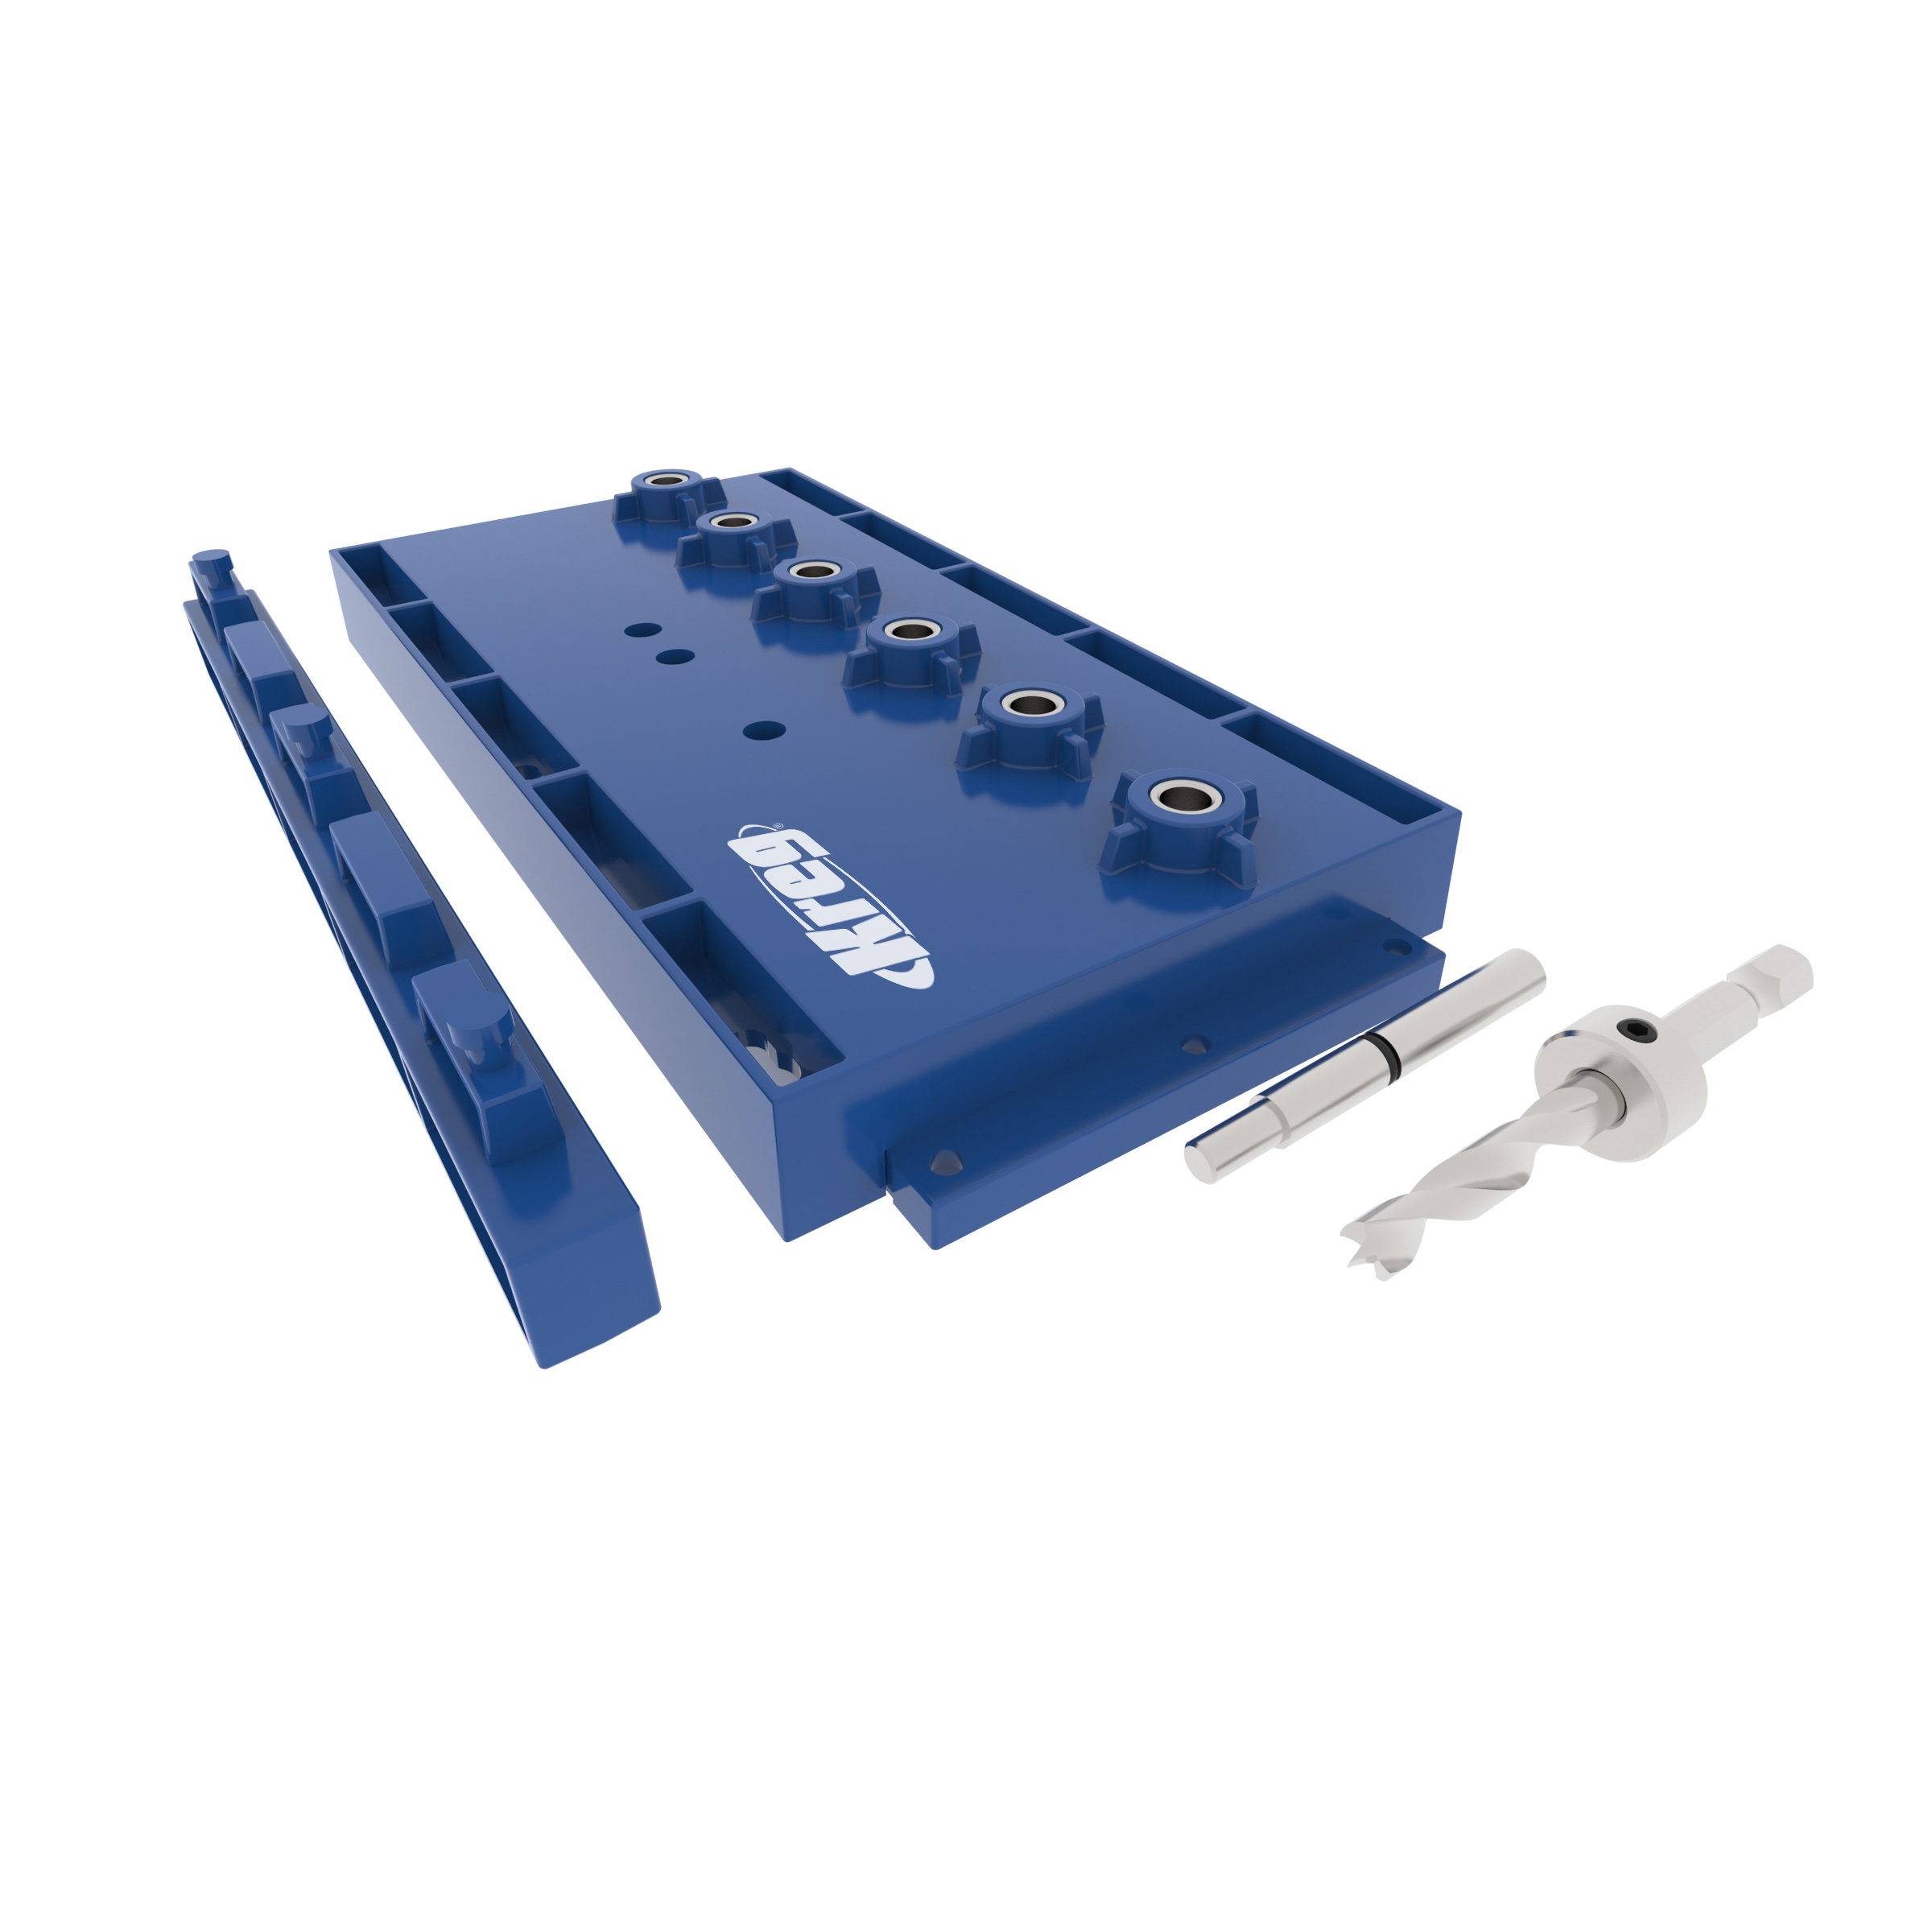
Kreg Tools
Other Tools
-
Circular Saw (cordless)

-
Tape Measure
-
Drill (cordless)
Materials
Wood Products
- 4 Board , 2x4 , 96"
- 2 Board , 1x3 , 96"
Hardware & Supplies
- 4 3/4" x 18" gas pipe - threaded on both ends
- 4 3/4" pipe floor flange
- 4 3/4" pipe cap
- 4 3/4" pipe clamps
- 2 24"- 14 gauge Slotted Steel Unistrut
- 1 12ft - 3/8" Nylon Rope
- 2 24" Tall Pre-Built Sawhorses
- 50 2" - #8 Wood Screws
- 16 1-1/4" - #8 Wood Screws
- 1 1-1/8" Drill Bit
- 1 7/16 Drill Bit
Directions
-
Sawhorses
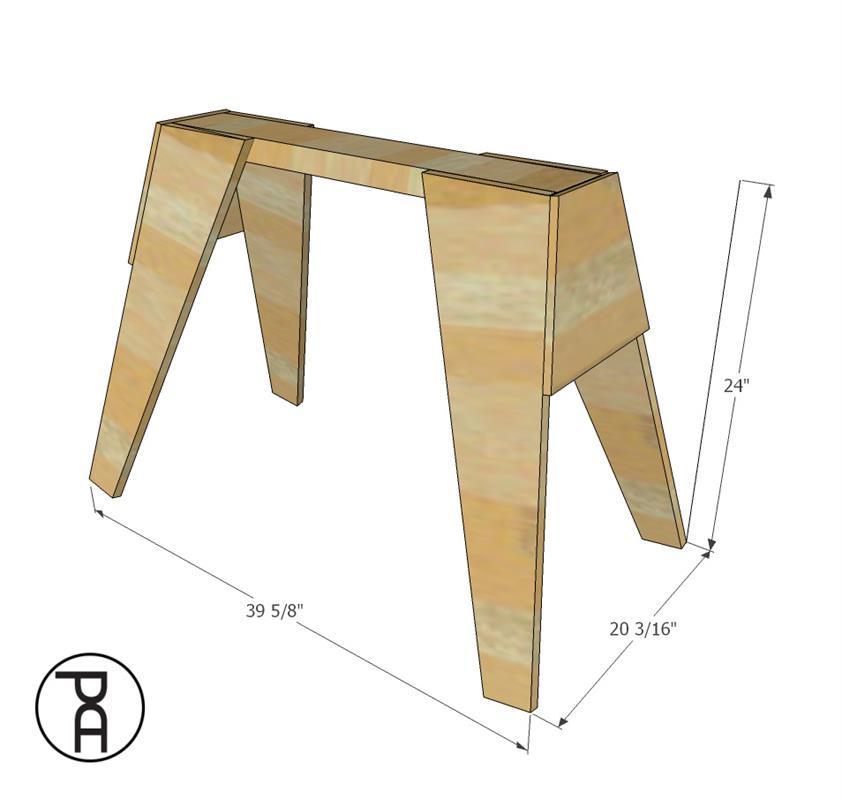
Build or purchase two, 24" tall, wood sawhorses. Make sure the top plate runs horizontally.
-
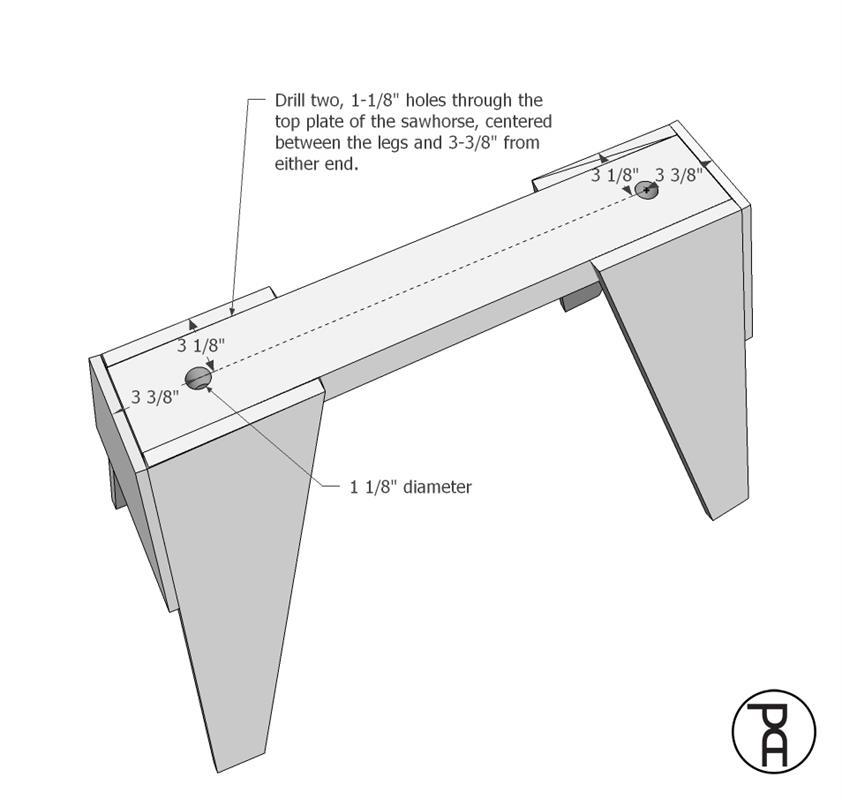
Drill Holes in Top Plate
Drill two, 1-1/8" holes through the top plate of the sawhorse, centered between the legs and 3-3/8" from either end.
-
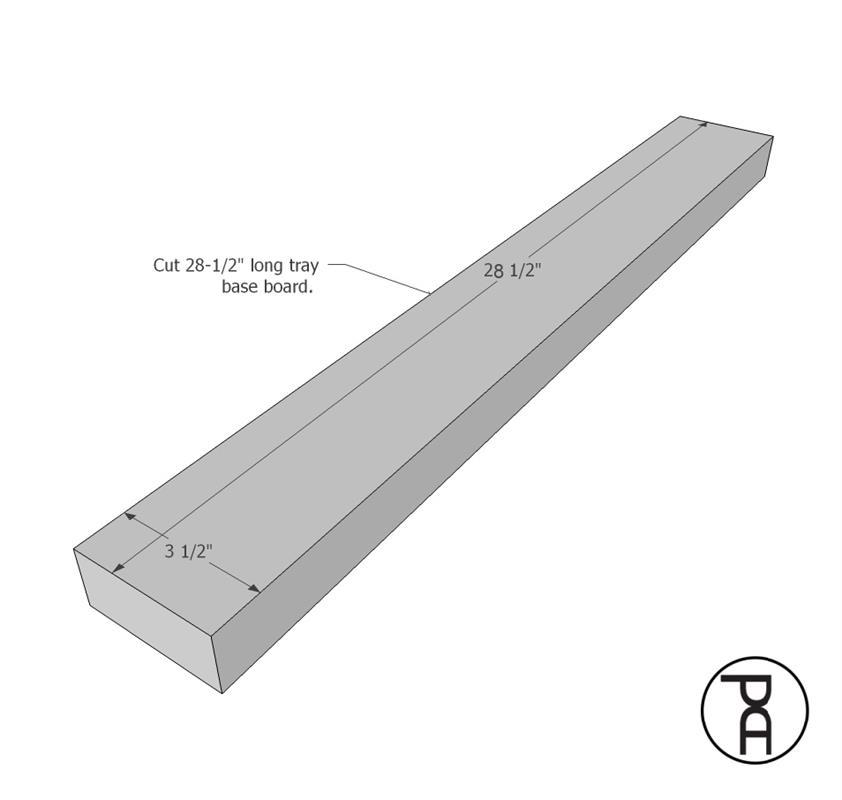
Tray Base Plate
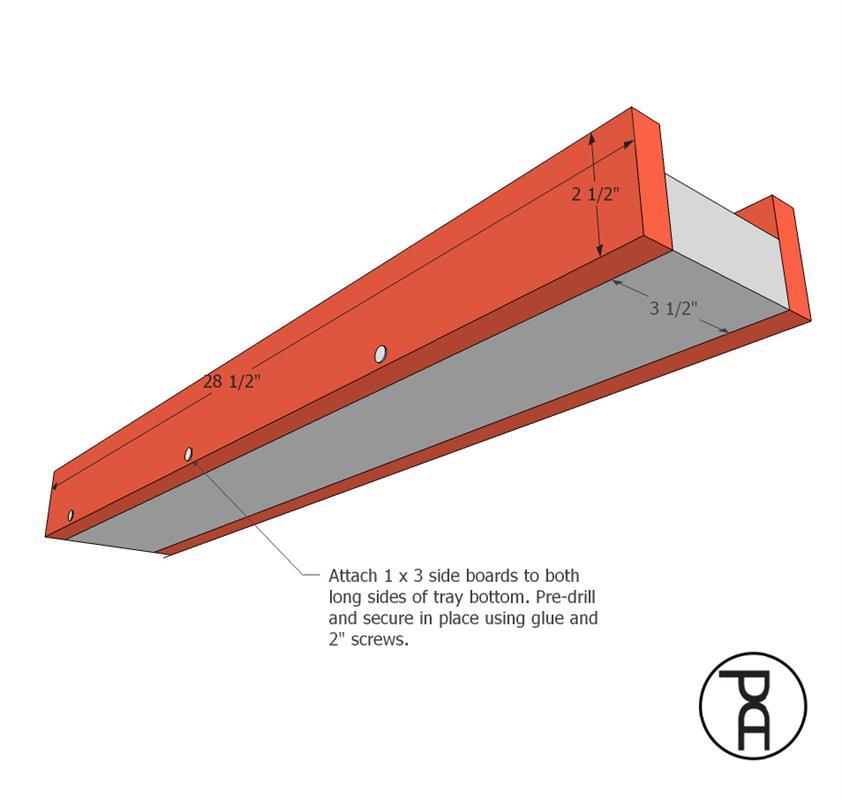
Cut a 28-1/2" long tray base board from a 2 x 4.
-
Base Sides
Attach 1 x 3 side boards to both long sides of tray bottom. Pre-drill through sides and into base. Secure in place using wood glue and 2" screws.
-
Base Ends
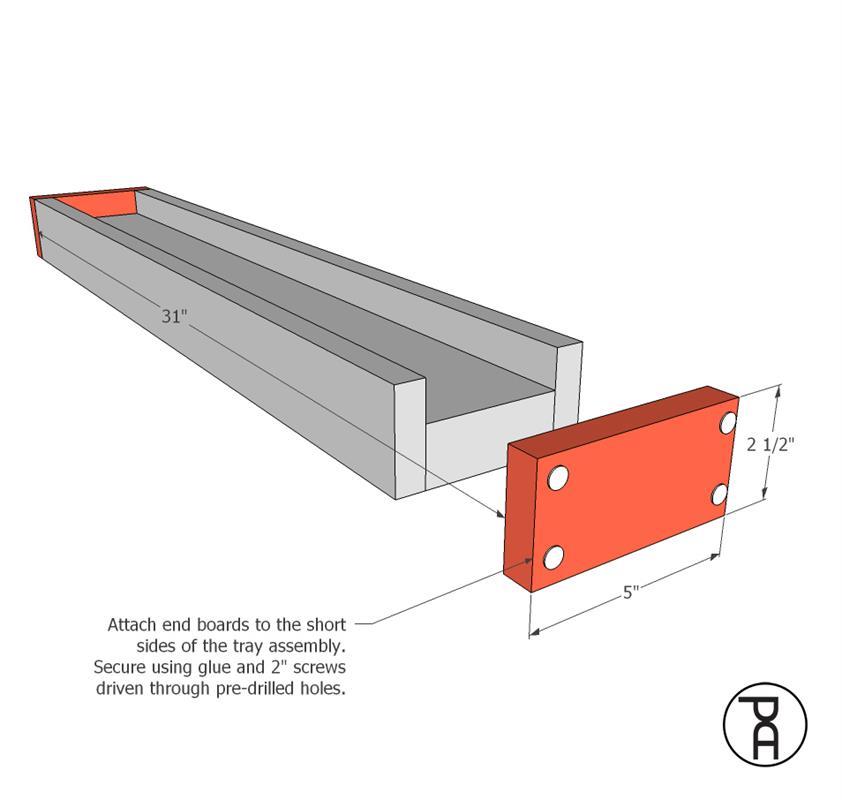
Attach 1 x 3 x 5" end boards to the short sides of the tray assembly. Secure in place using glue and 2" screws driven through pre-drilled holes.
-
Pipe Flanges
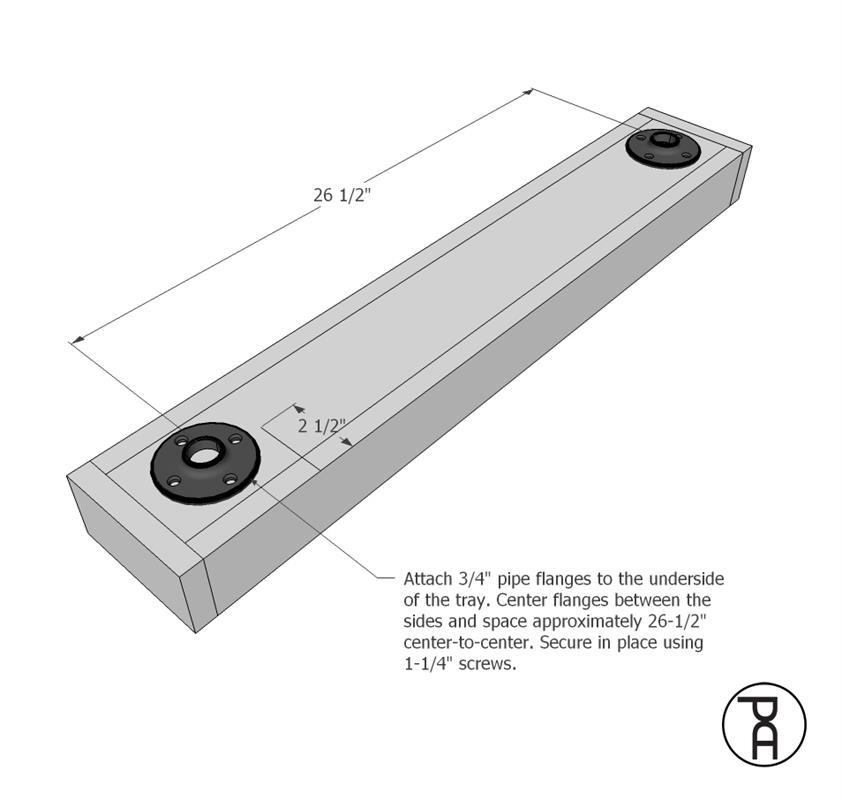
Attach 3/4" pipe flanges to the underside of the tray. Center flanges between the sides and space approximately 26-1/2" center-to-center. Secure in place using 1-1/4" screws.
-
Add Pipes
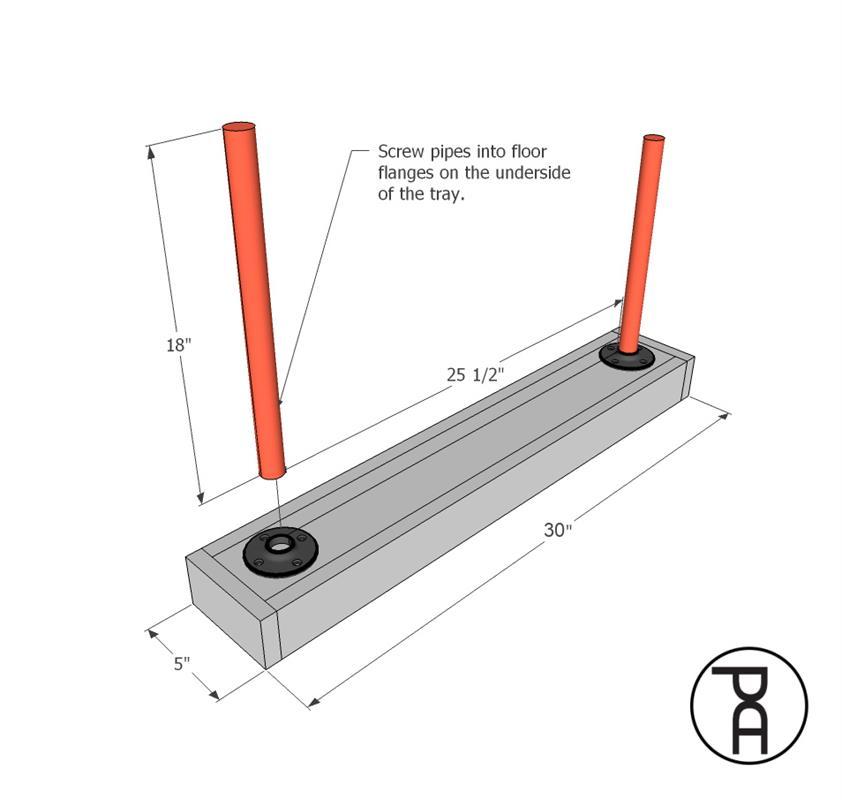
Screw 3/4" x 18" pipes into the floor flanges on the underside of the tray.
-
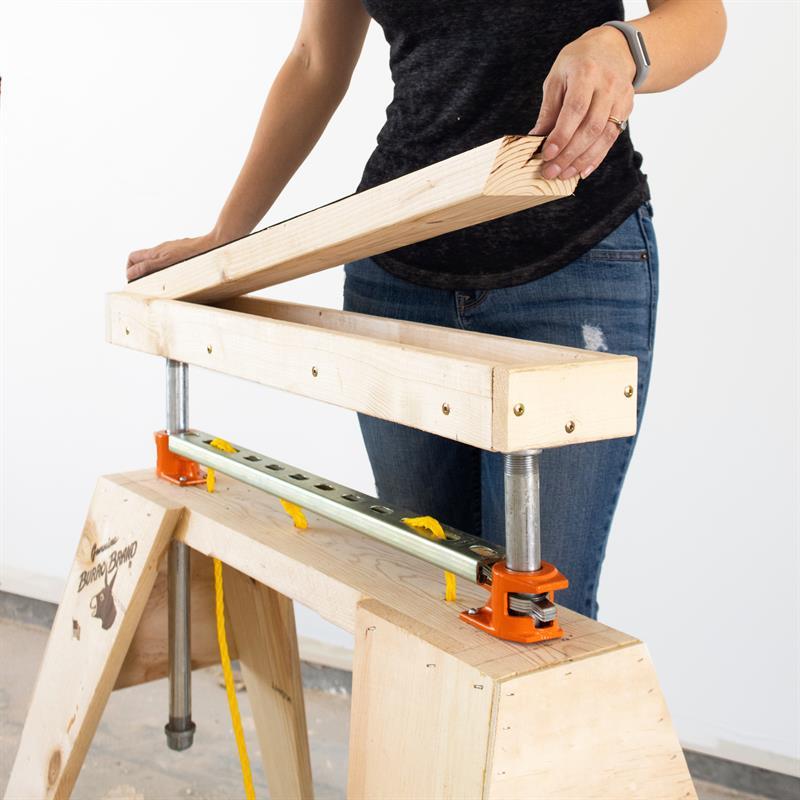
Insert Tray
Place the sliding ends of the pipe clamps over the holes drilled in the sawhorse top plate, levers facing inward. Slide ends of pipes through the openings in the clamps through the top of the sawhorse.

-
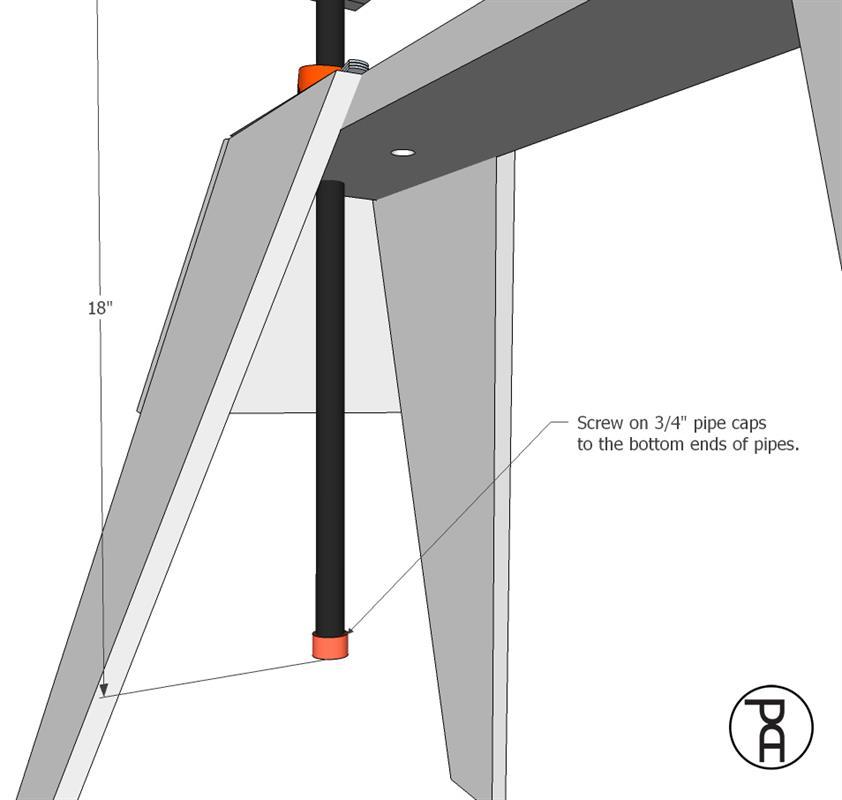
Pipe Caps
Screw on 3/4" pipe caps to the bottom ends of the 18" pipes.
-
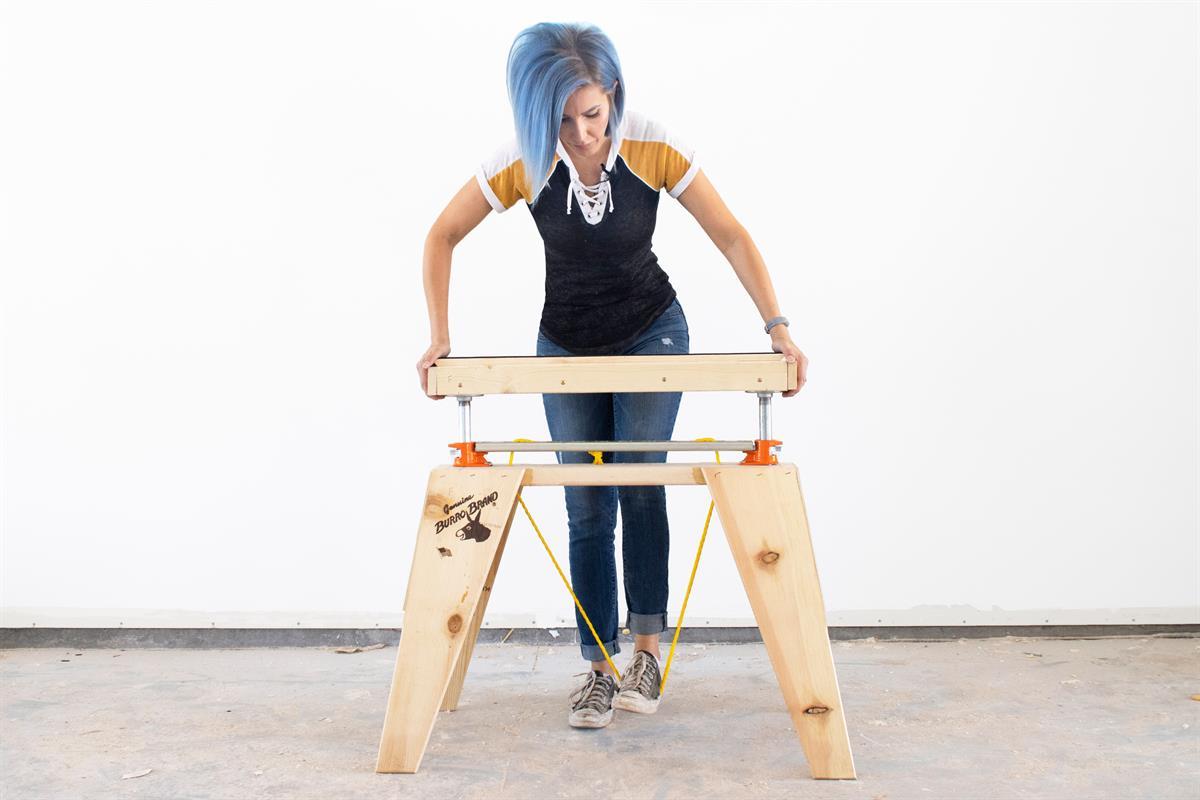
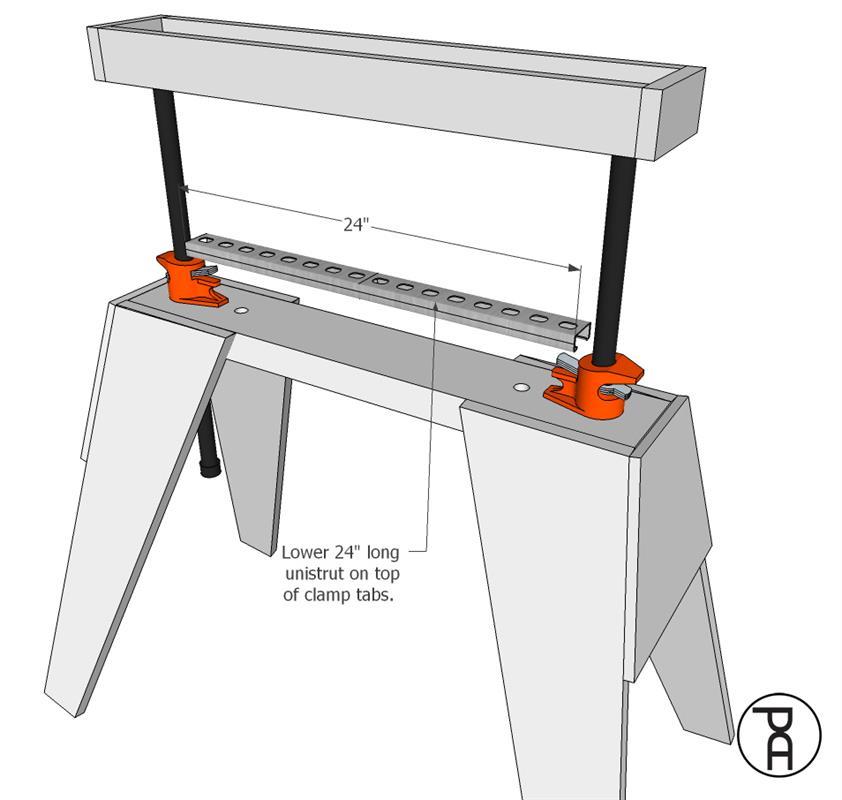
Place Unistrut
Place 24" steel Unistrut on top of the pipe clamp tabs, making sure the ends engage both clamps and allow the pipes to slide.
-
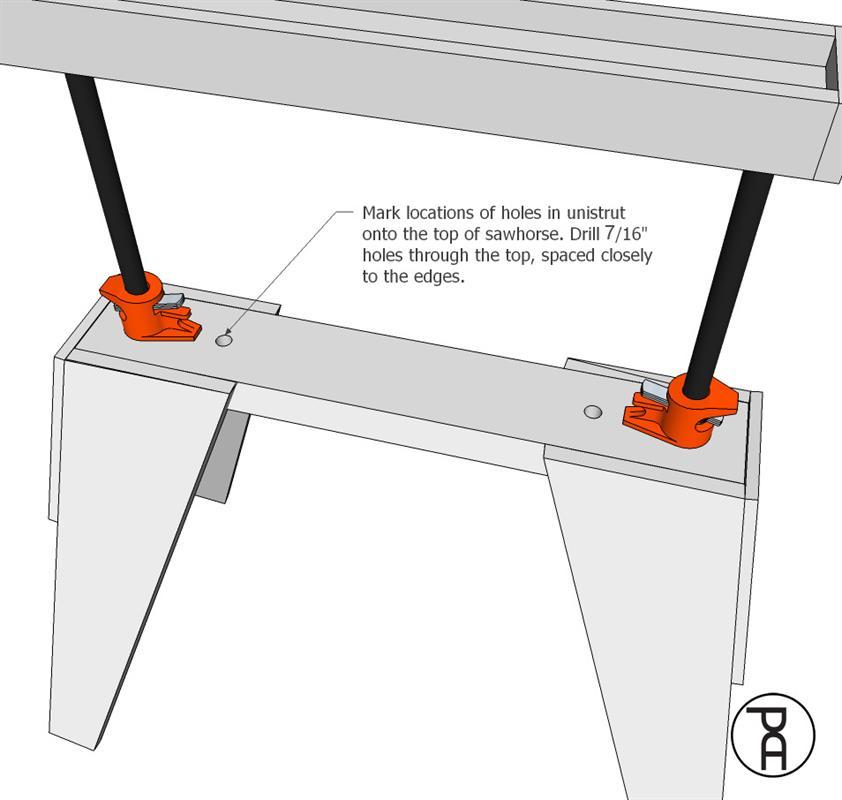
Rope Holes
Mark locations of holes in Unistrut onto the top of sawhorse. Drill 5/16" holes through the top, spaced closely to the edges.
-
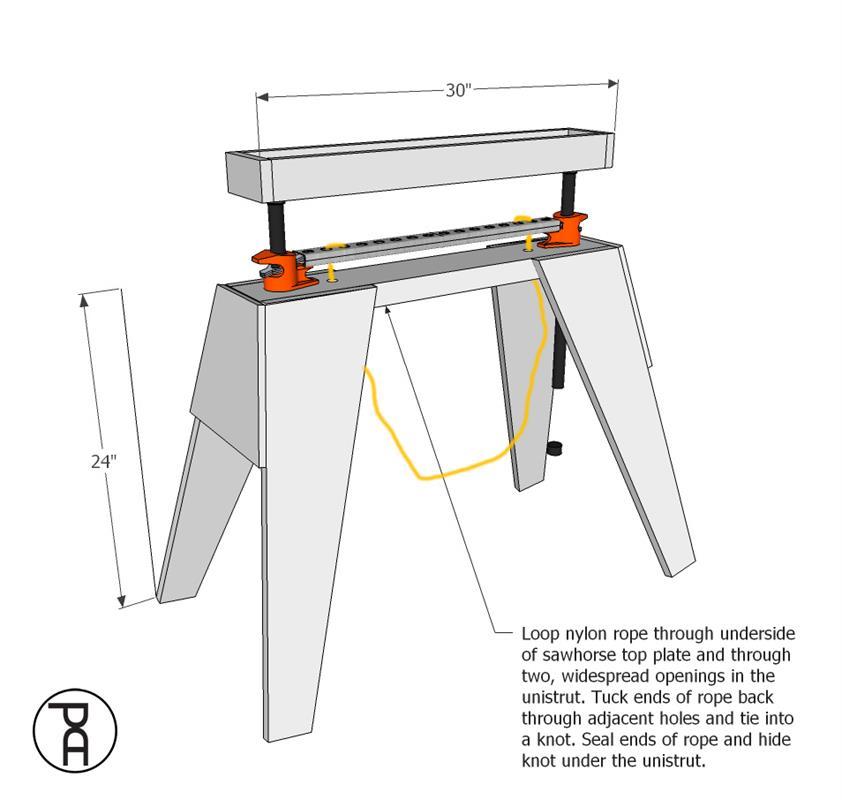
Add Rope
Loop a length of nylon rope through underside of sawhorse top plate and through two, widespread openings in the Unistrut. Adjust the length of the loop to be comfortable to pull down with your foot. Tuck the ends of rope back through adjacent holes and tie them into a knot. Seal the ends of rope and hide knot under the Unistrut.
-
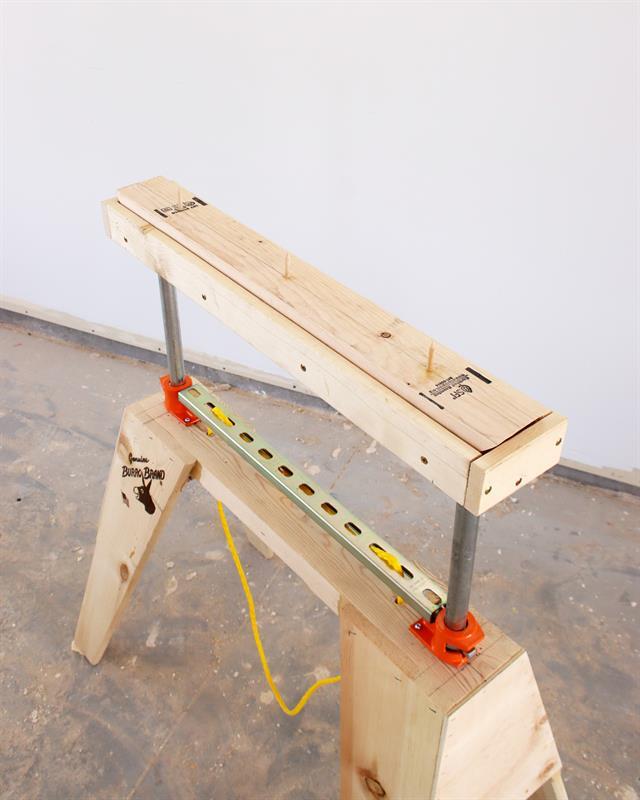
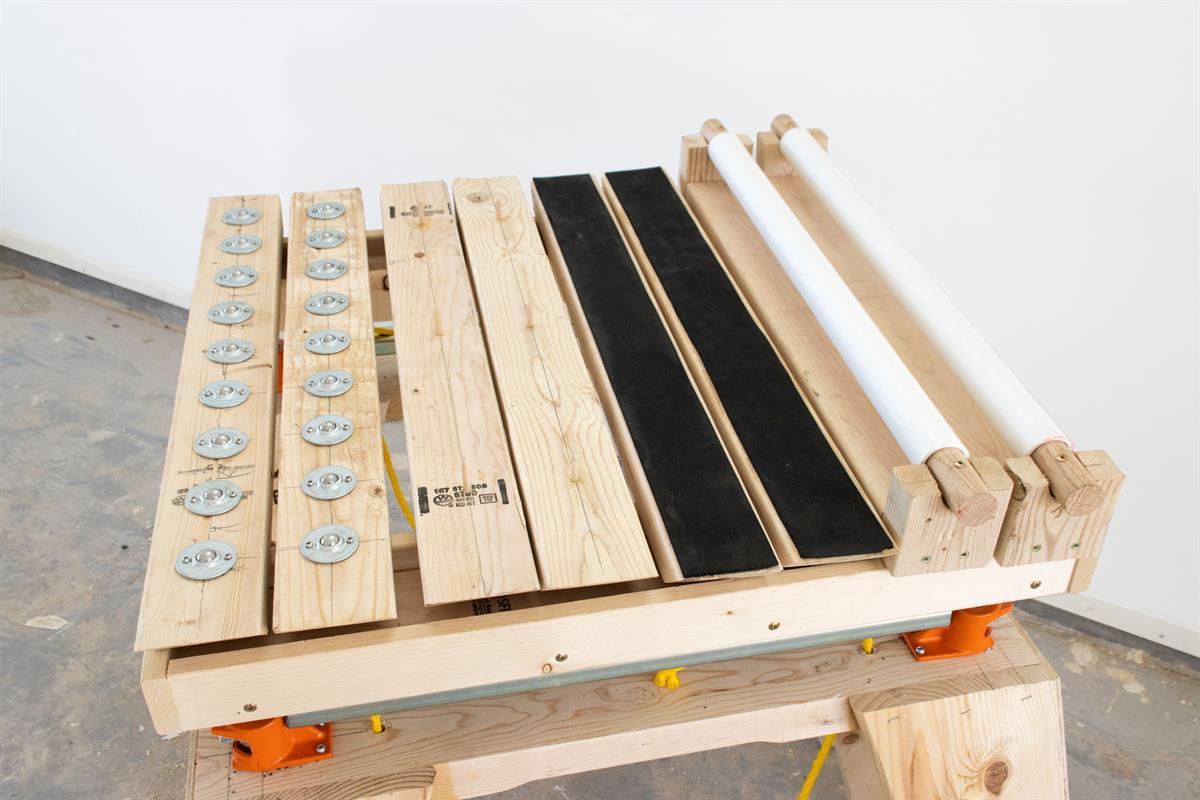
Add Sacrificial Board
Lower 2 x 4 x 28-1/2" sacrificial board or attachment top into the tray.

-
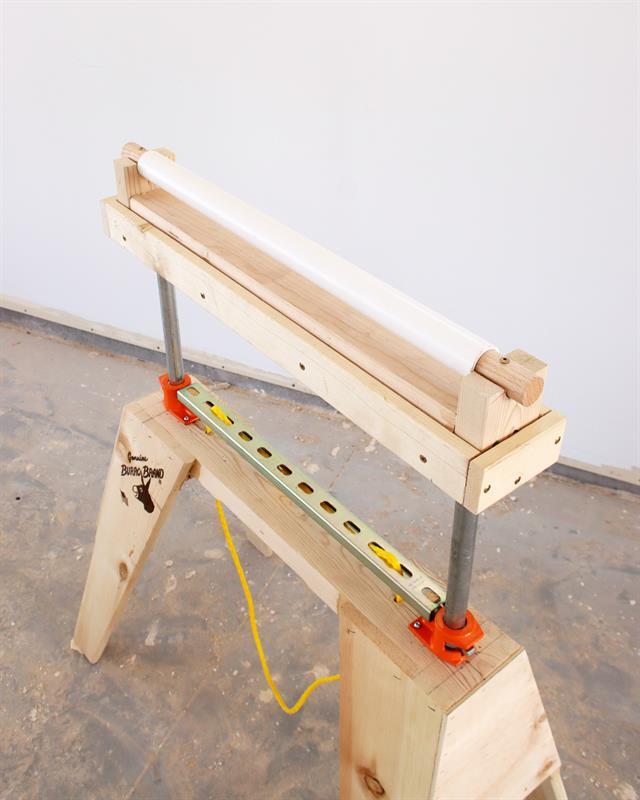
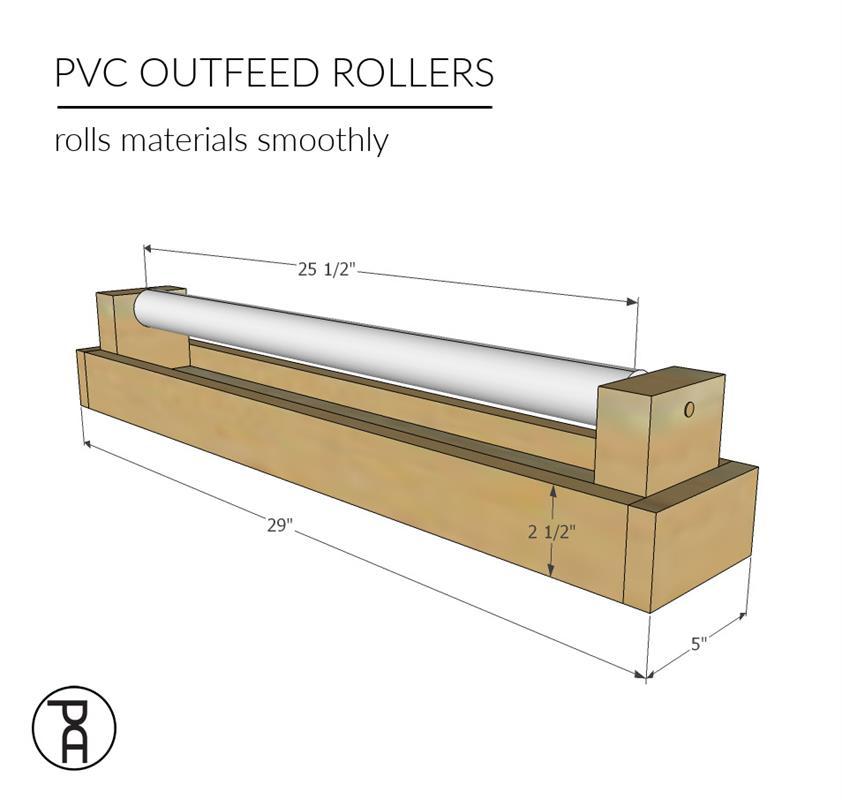
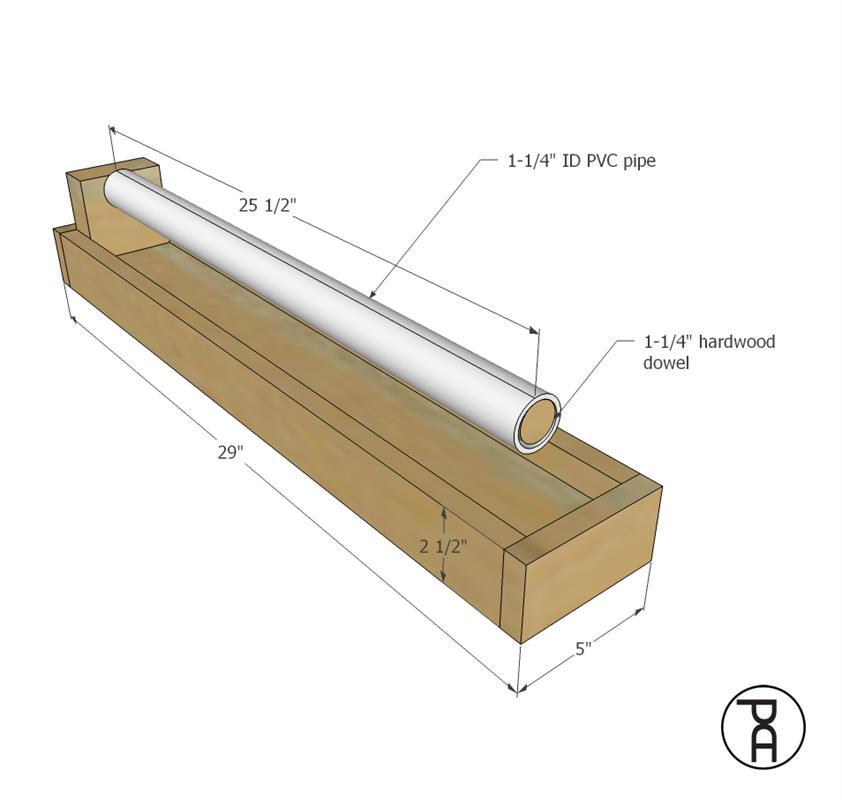
Optional: Outfeed Roller
Create a 3-1/2" x 28-1/2" hardwood and PVC roller.
-
Roller
Using a dense hardwood dowel, like oak will allow the PVC to roll easily and won't wear out quickly.
-
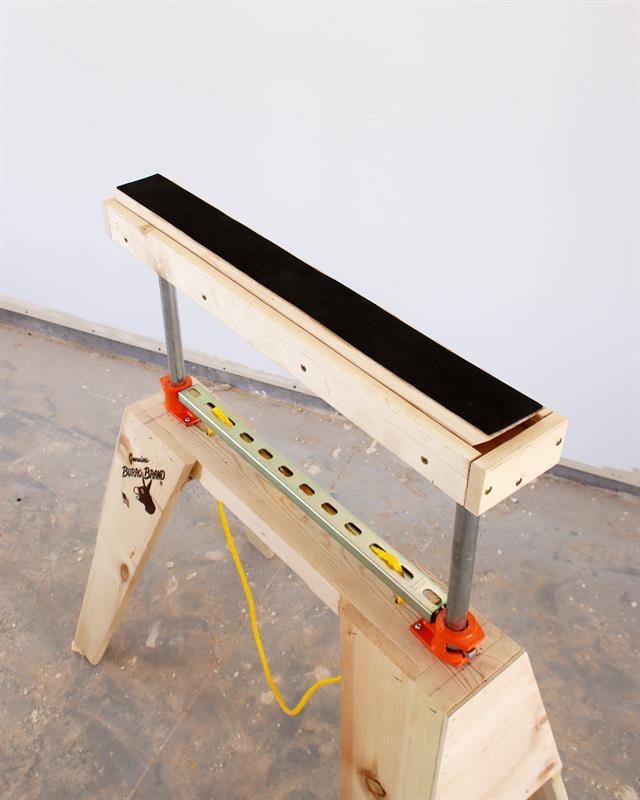
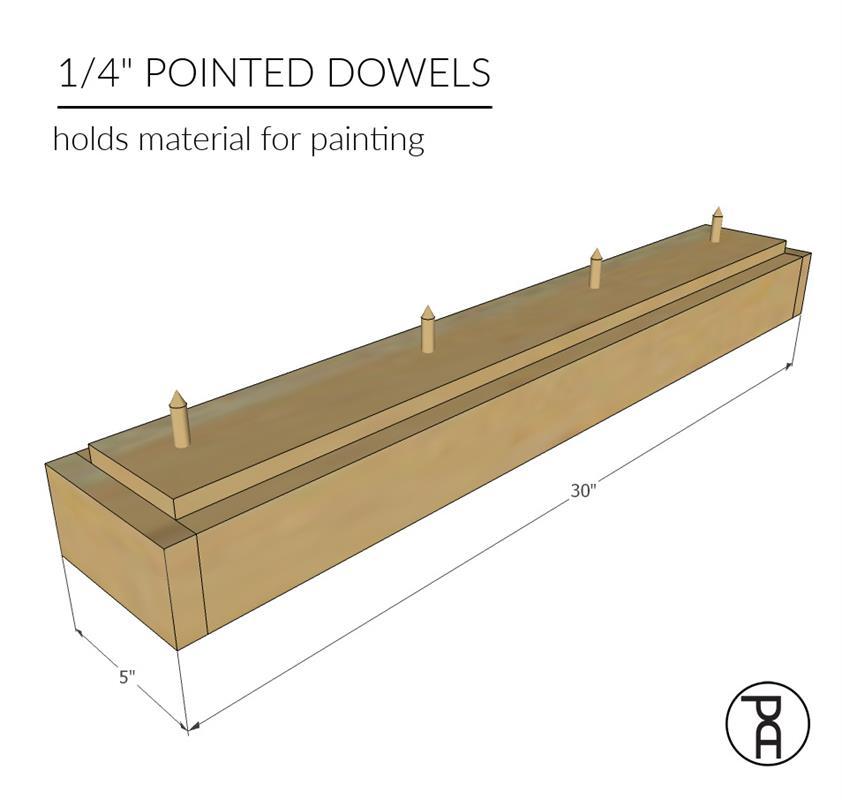
Optional: Pointed Dowels
Build a 3-1/2" x 28-1/2" insert with 1/4" pointed, sharpened dowels, glued into a base board. The pointed dowels work well to support a freshly painted surface.
-
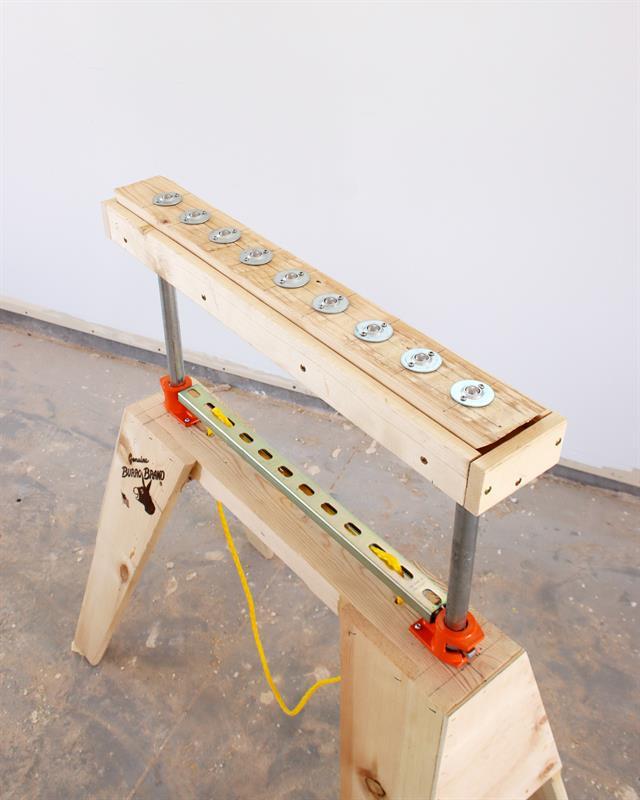
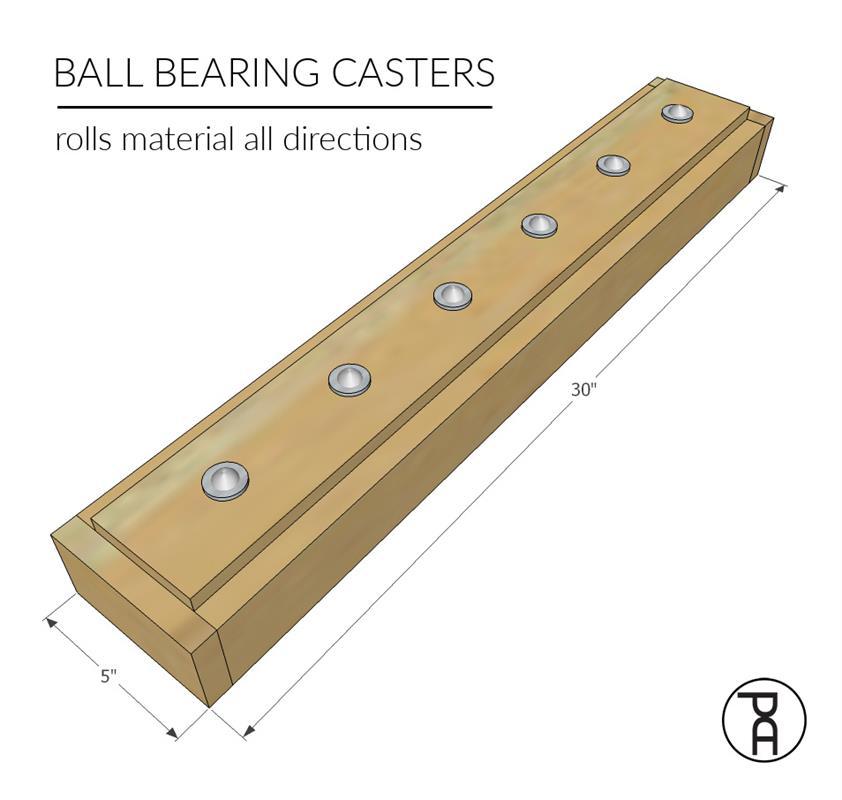
Optional: Ball Bearing Casters
Build a 3-1/2" x 28-1/2" insert and attach inset ball bearing casters. Ball bearing casters spin in all directions and are good to moving large or heavy materials.
-
Get More Ideas
Check out the Pneumatic Addict channel on YouTube and visit PneumaticAddict.com for more free project plans and DIY ideas.