

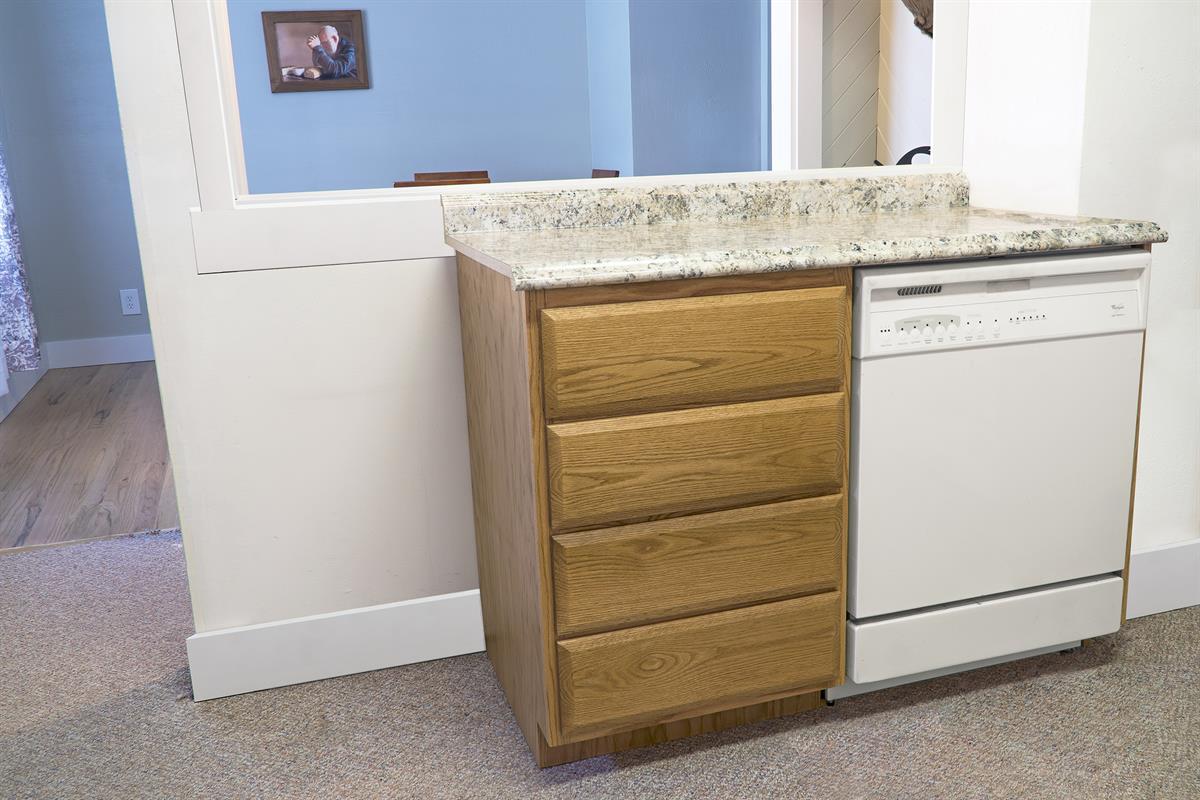


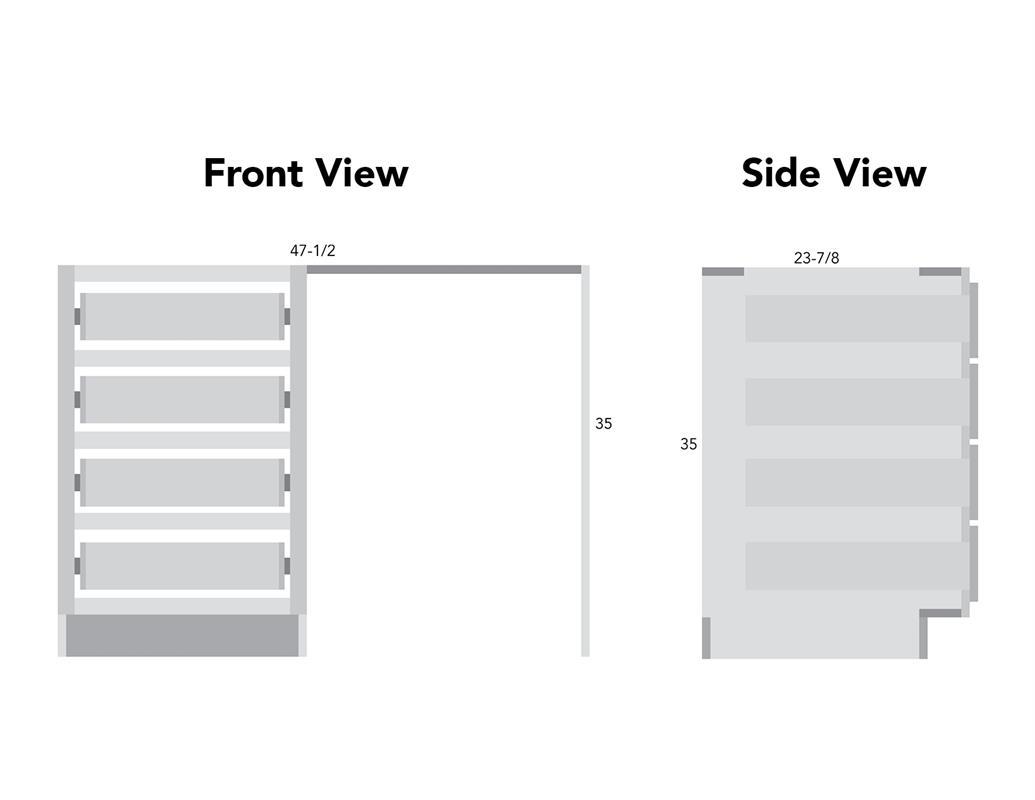
My Kitchen needed an update, and the first thing I tackled was a new cabinet for the dishwasher to fit into. The old one was ugly, odd shaped, took up too much space yet had no storage. Time to fix all that. It should be easy to tweak these plans should you find yourself in a similar situation.
Tools
Kreg Tools


Other Tools
-
Circular Saw (cordless)

-
Jigsaw
-
Square
-
Table Saw
-
Tape Measure
-
Clamps
-
Drill (cordless)
-
Impact Driver
-
Nail Gun
-
Sander
-
Workbench
Materials
Wood Products
- 1 Plywood , 3/4" Thick , Full Sheet
- 1 Plywood , 1/2" Thick , Half Sheet
- 2 Board , 1x8 , 72"
- 1 Plywood , 1/4" Thick , Half Sheet
Hardware & Supplies
- 4 Drawer Slide Sets
- 100 Pocket Hole Screws
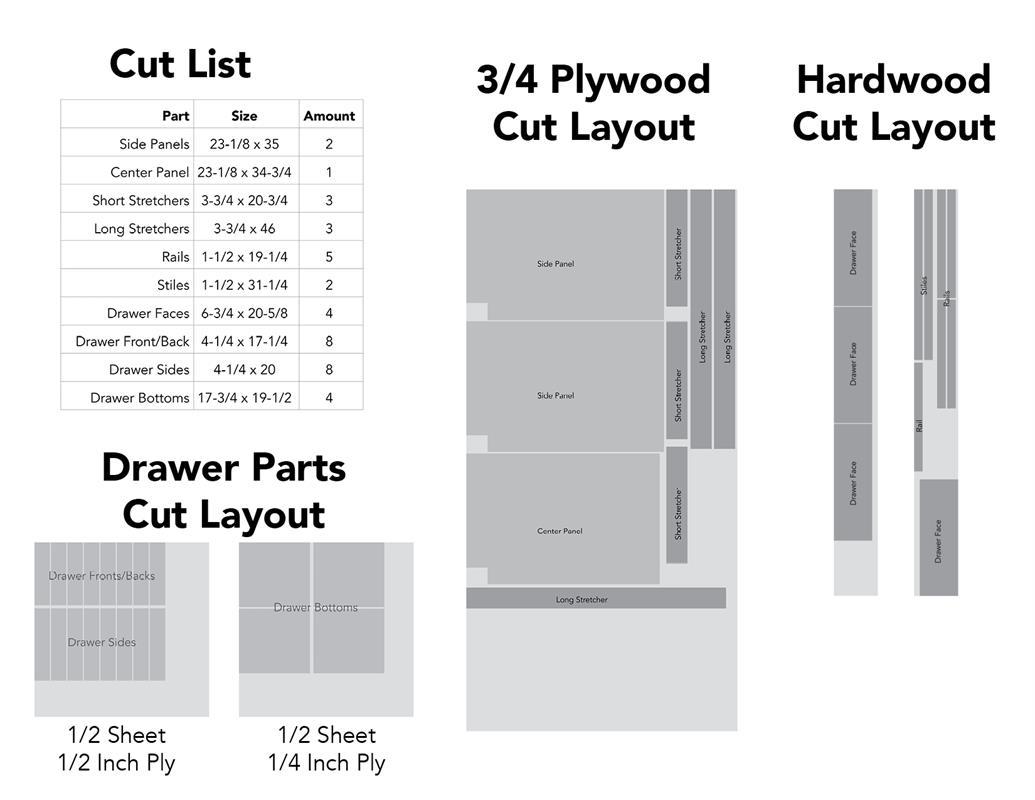
Cut List & Parts
- 2 Side Panels , 23-1/8 x 35
- 1 Center Panel , 23-1/8 x 34-3/4
- 3 Short Stretchers , 3-3/4 x 20-3/4
- 3 Long Stretchers , 3-3/4 x 46
- 5 Rails , 1-1/2 x 19-1/4
- 2 Stiles , 1-1/2 x 31-1/4
- 4 Drawer Faces , 6-3/4 x 20-5/8
- 8 Drawer Fronts/Backs , 4-1/4 x 17-1/4
- 8 Drawer Sides , 4-1/4 x 20
- 4 Drawer Bottoms , 17-3/4 x 19-1/2
Directions
-
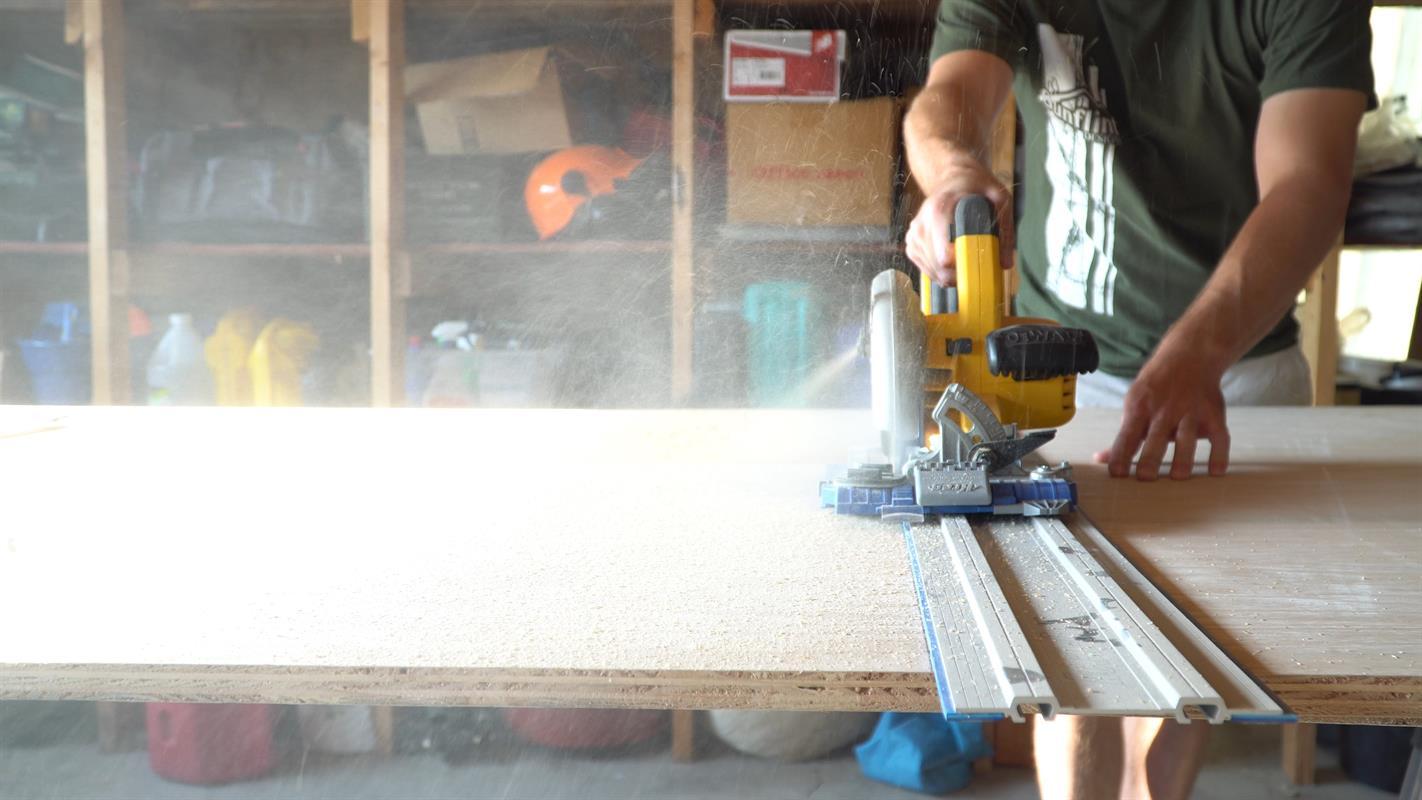
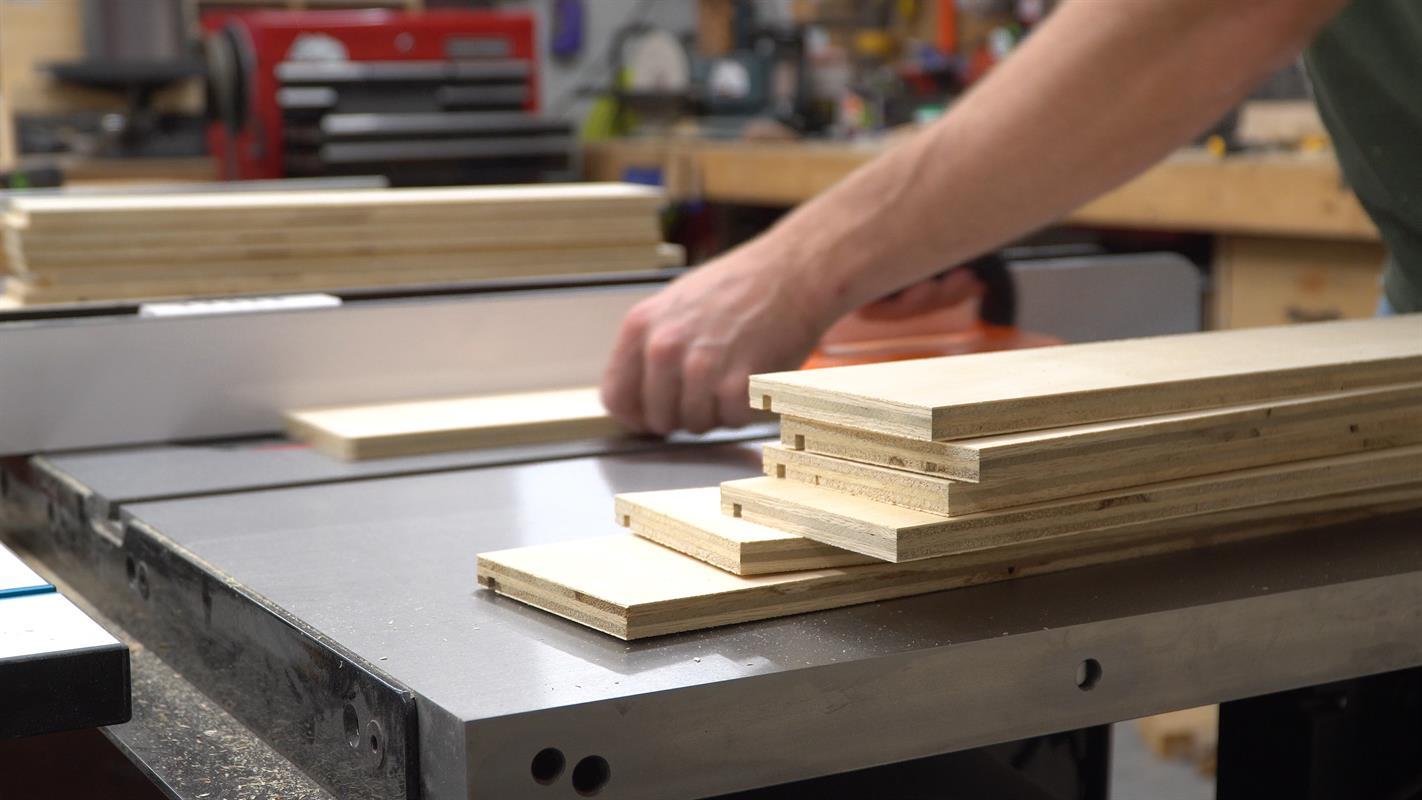
Gather & Cut Materials
Cut all the materials down to size. You could do this all at once to save time. I chose to break this project into 3 stages - the body, the face frame and the drawers. It definitely took longer to do it this way, but it allowed me to double check all my measurements before moving on, resulting in a more precise finished product.
-
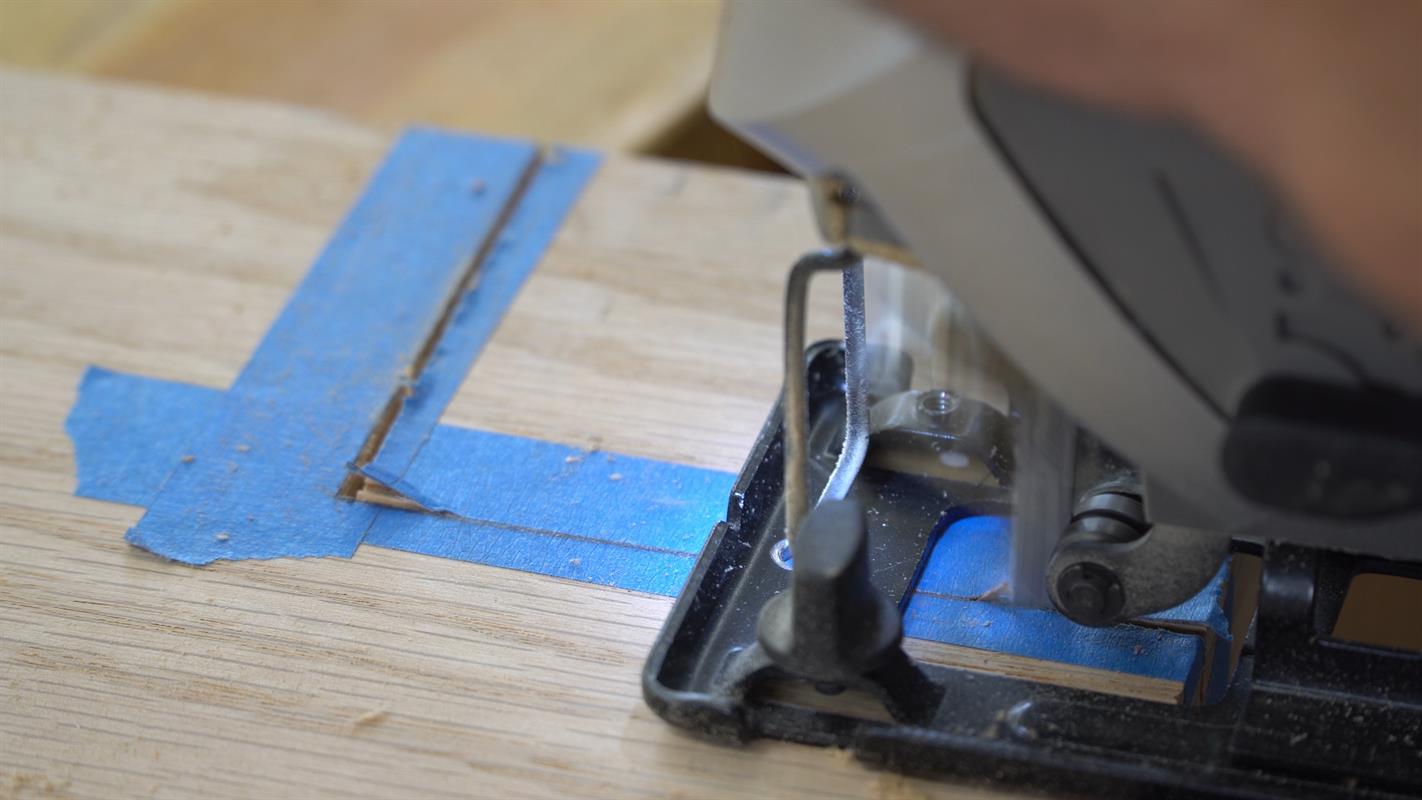
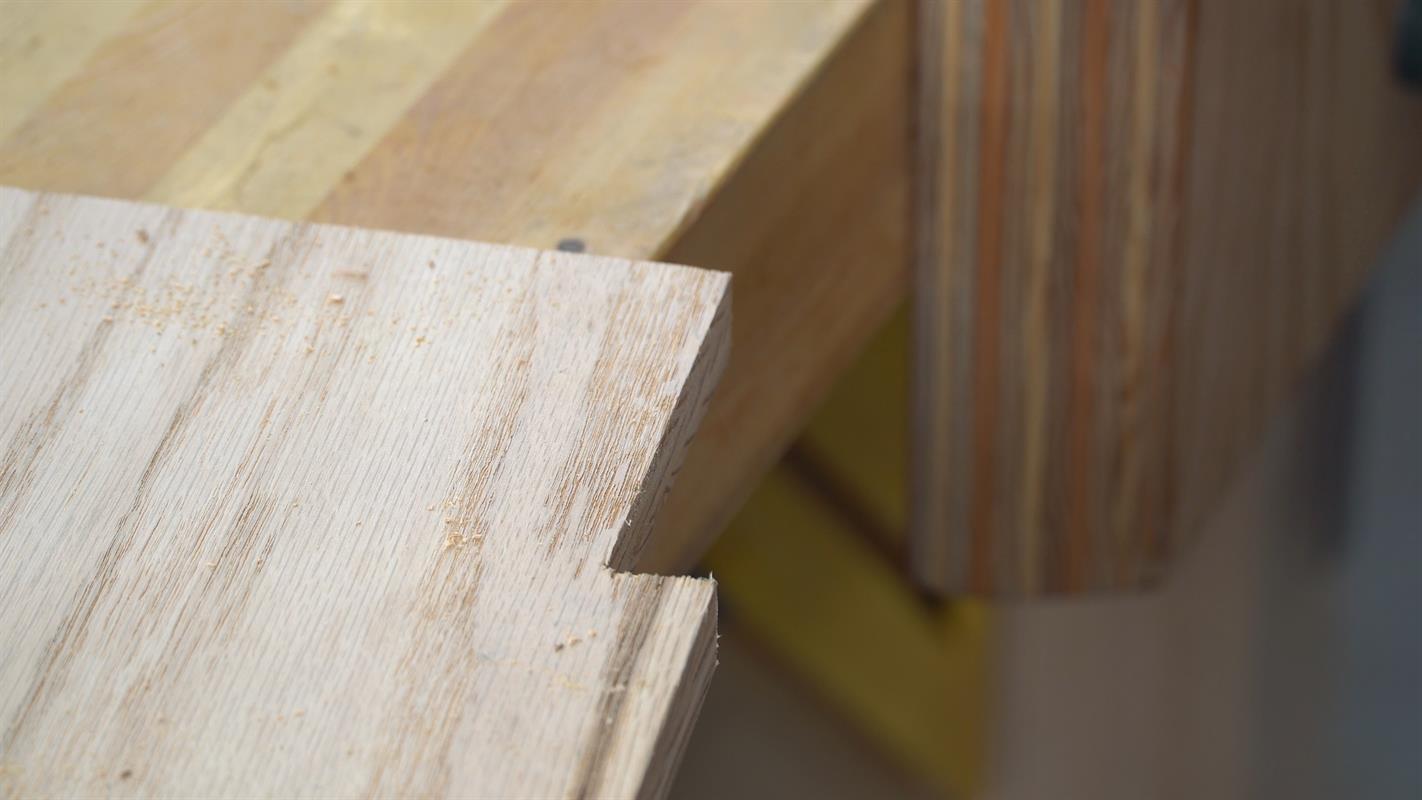
Cut Out Toe Kick
Cut out notches for the toe kick area. I made a quick jig out of scraps to make it easier to cut consistent shapes.
-
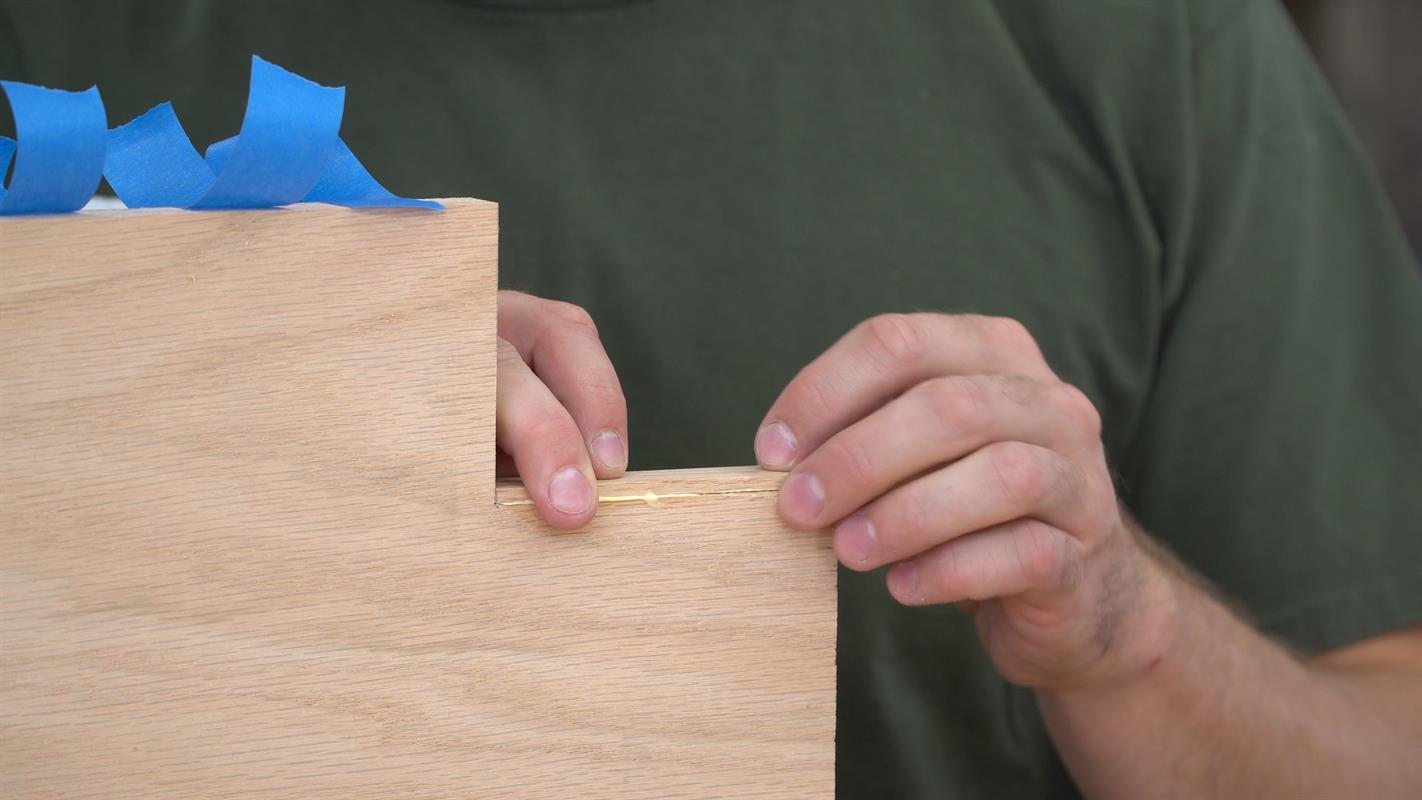
Hide Plywood Edge
Glue short, thin pieces of solid wood to the forward facing edge of the toe-kick to hide the plywood.
-
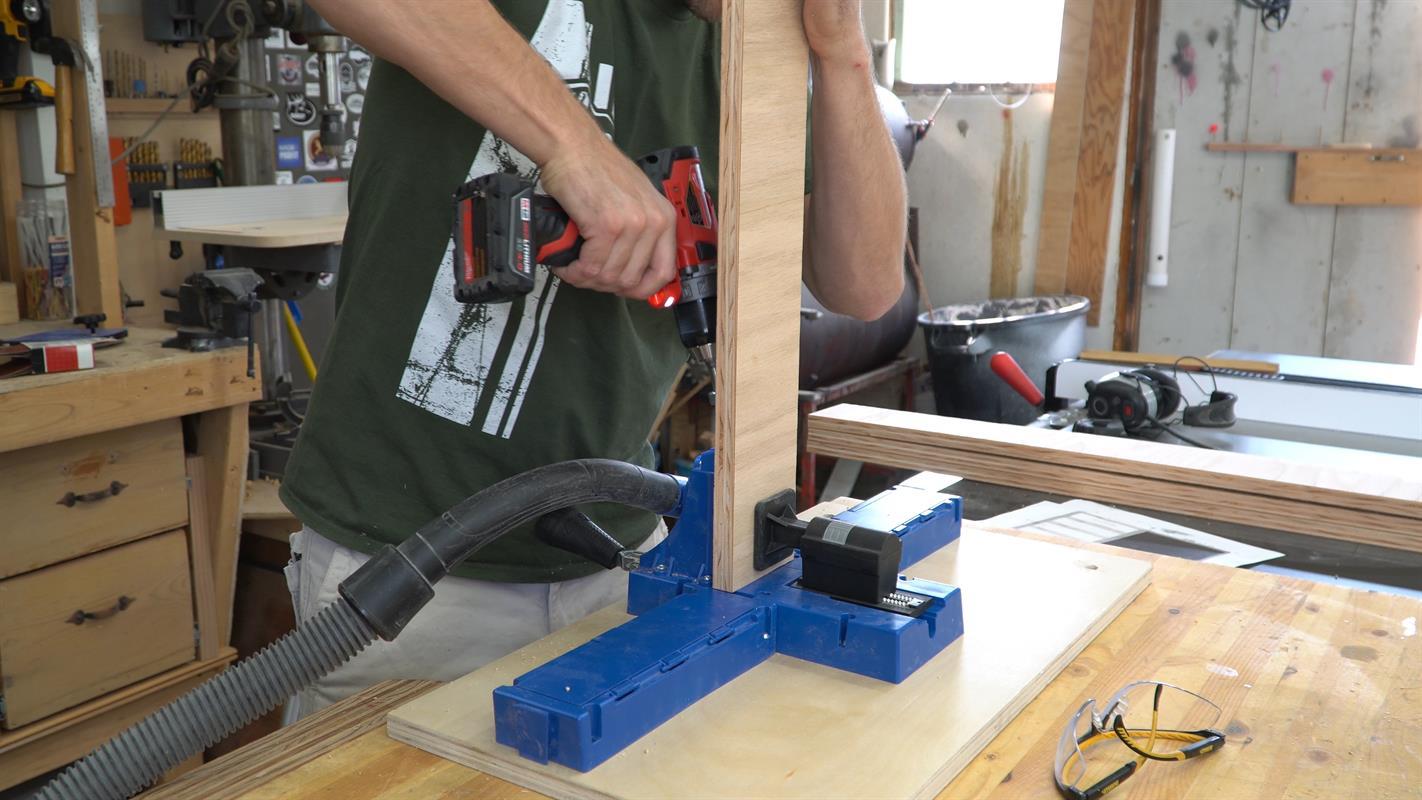
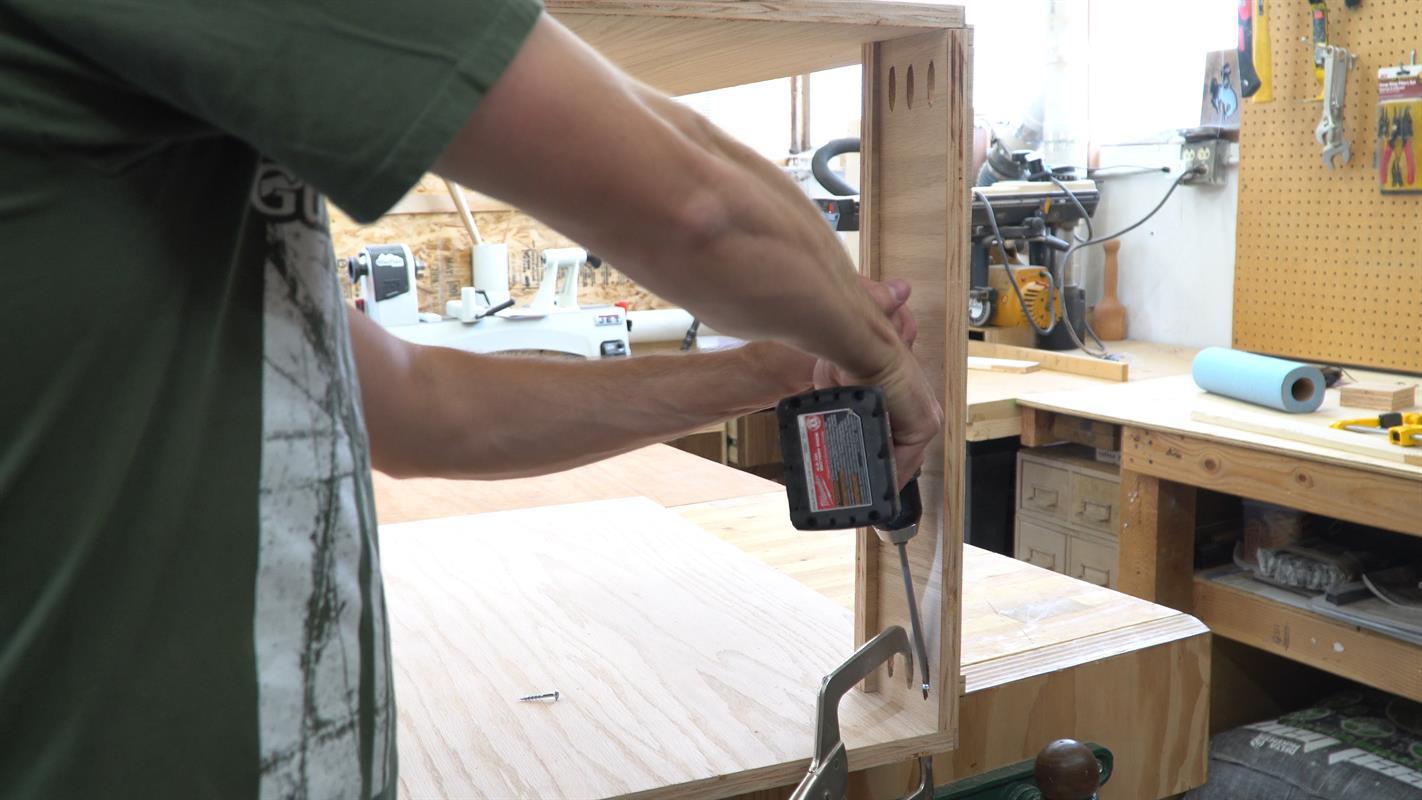
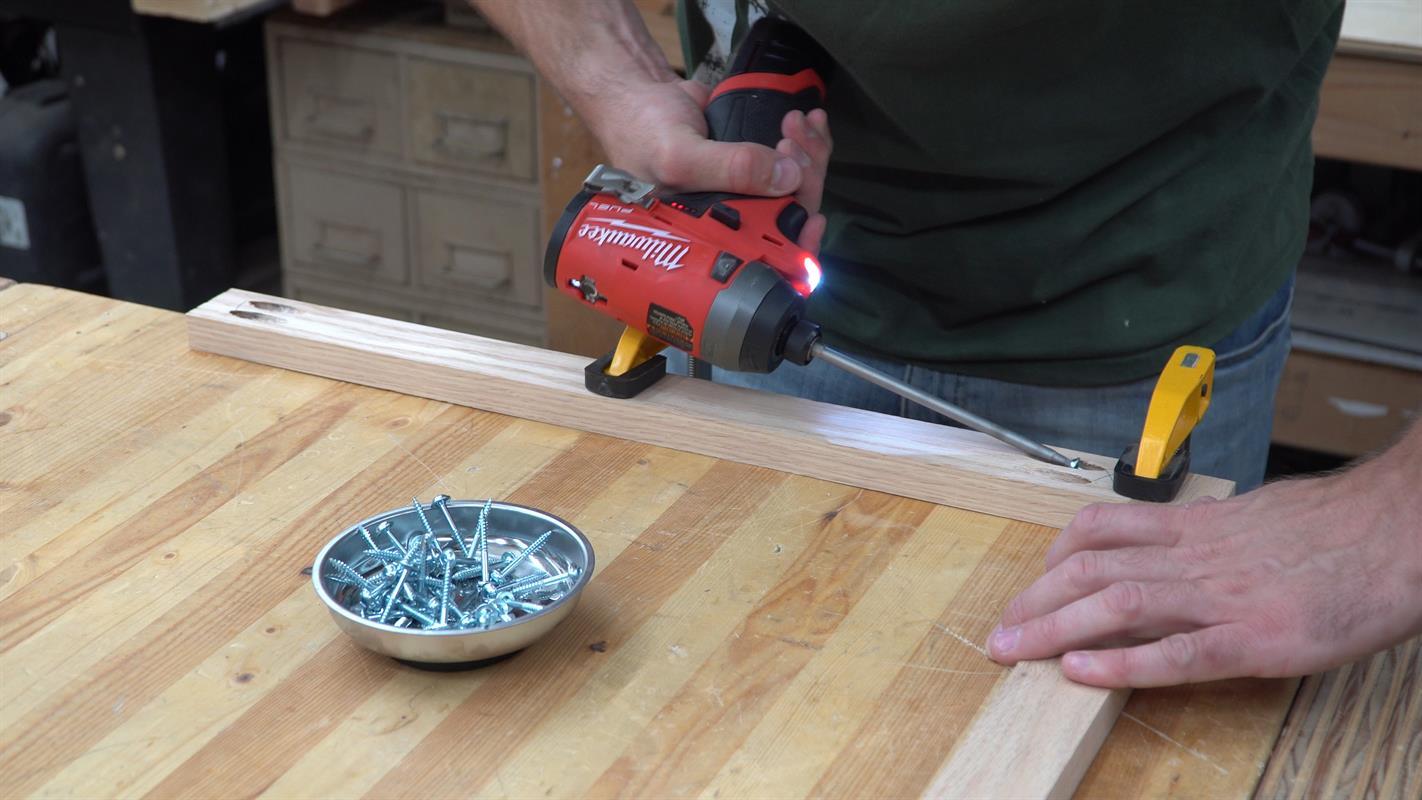
Drill Pocket Holes
Drill pocket holes in the ends of all the stretchers. Once again, if you cut out all your materials for all three stages ahead of time, you could drill all your pockets holes at this point.
-
Cut Notch In Panel
The center panel is just a little different than the outside ones. It is three quarters of an inch shorter to accommodate the top stretchers, and requires a little cut out in the back for the back stretcher.
-
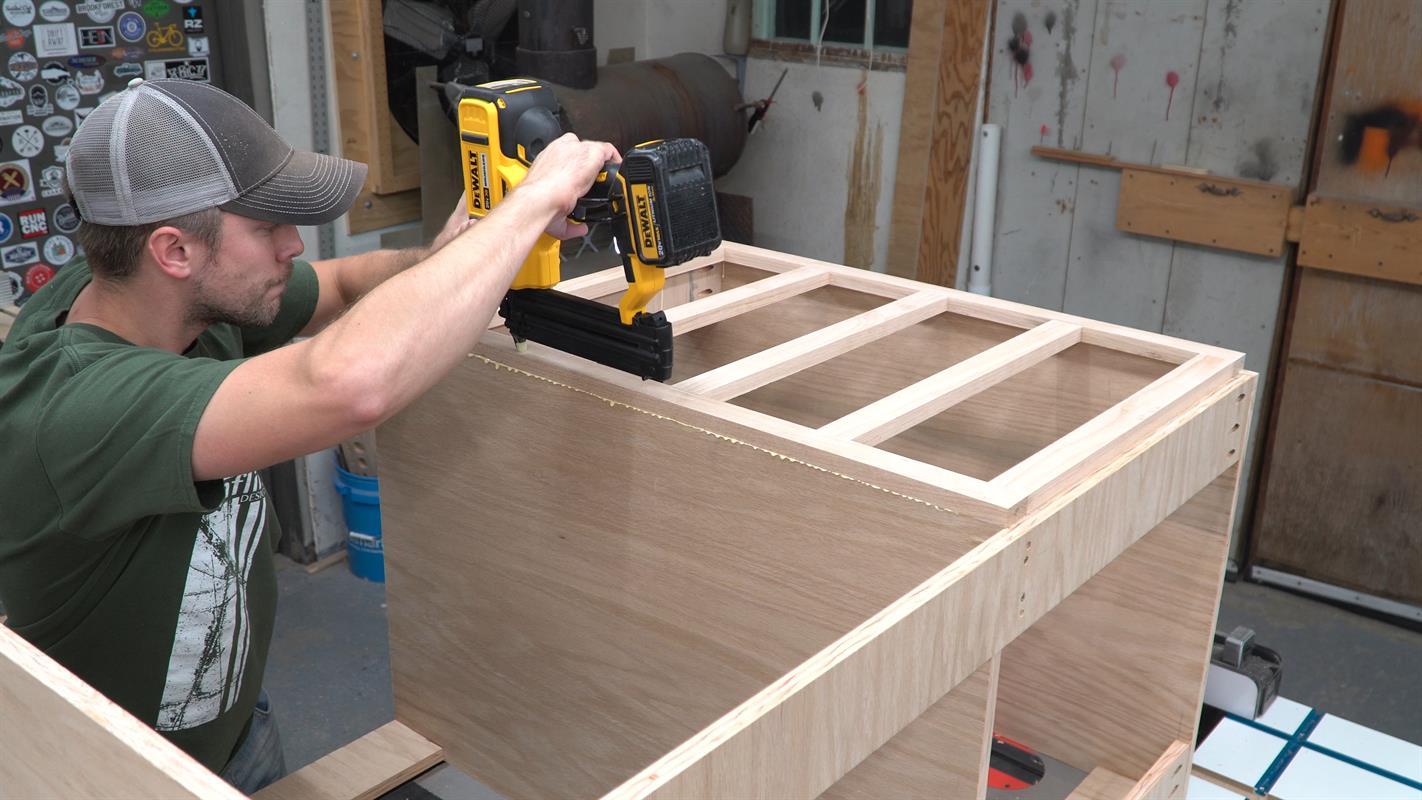
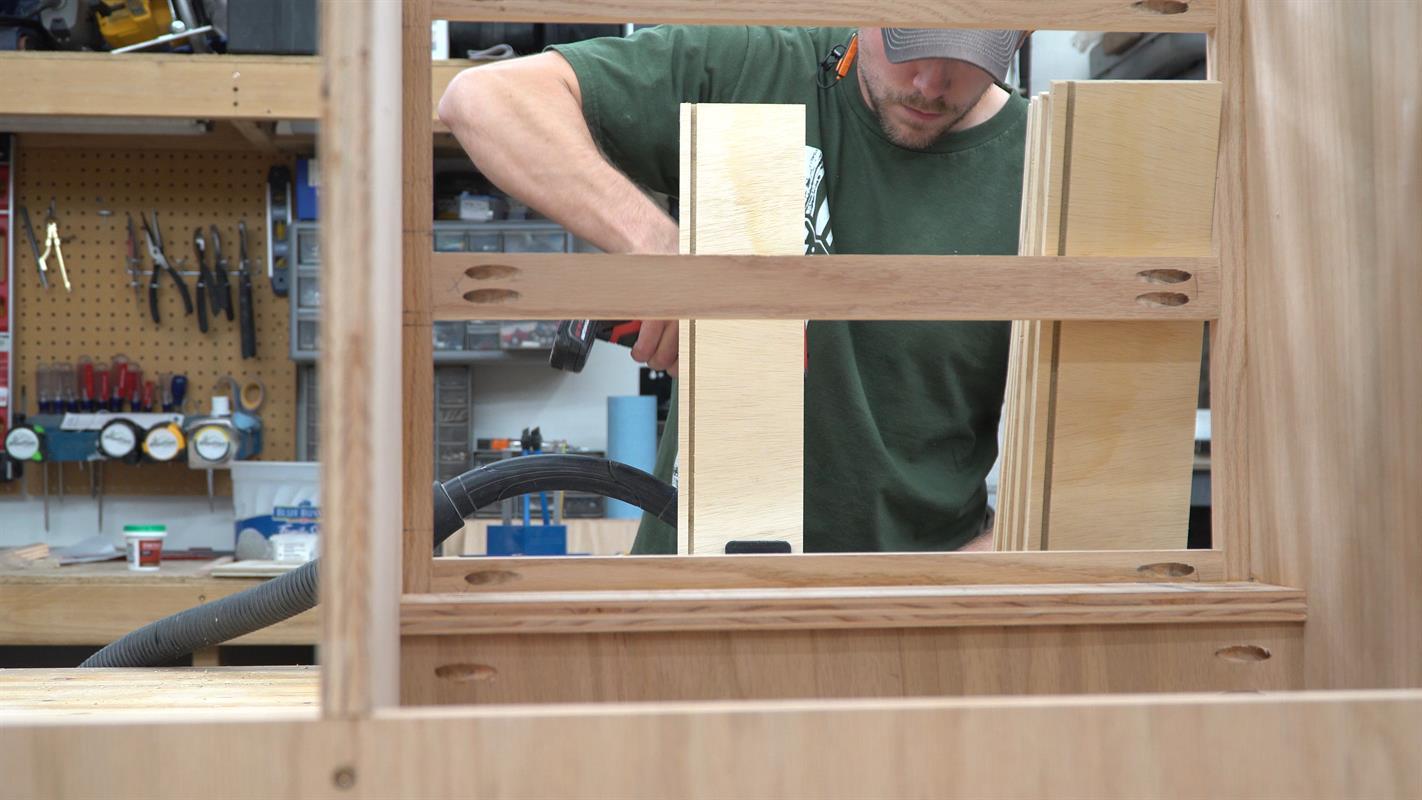
Assemble Cabinet Body
I found it easiest to start on the drawer size using the short stretchers first, then adding the long stretchers and ultimately the far side panel.
-
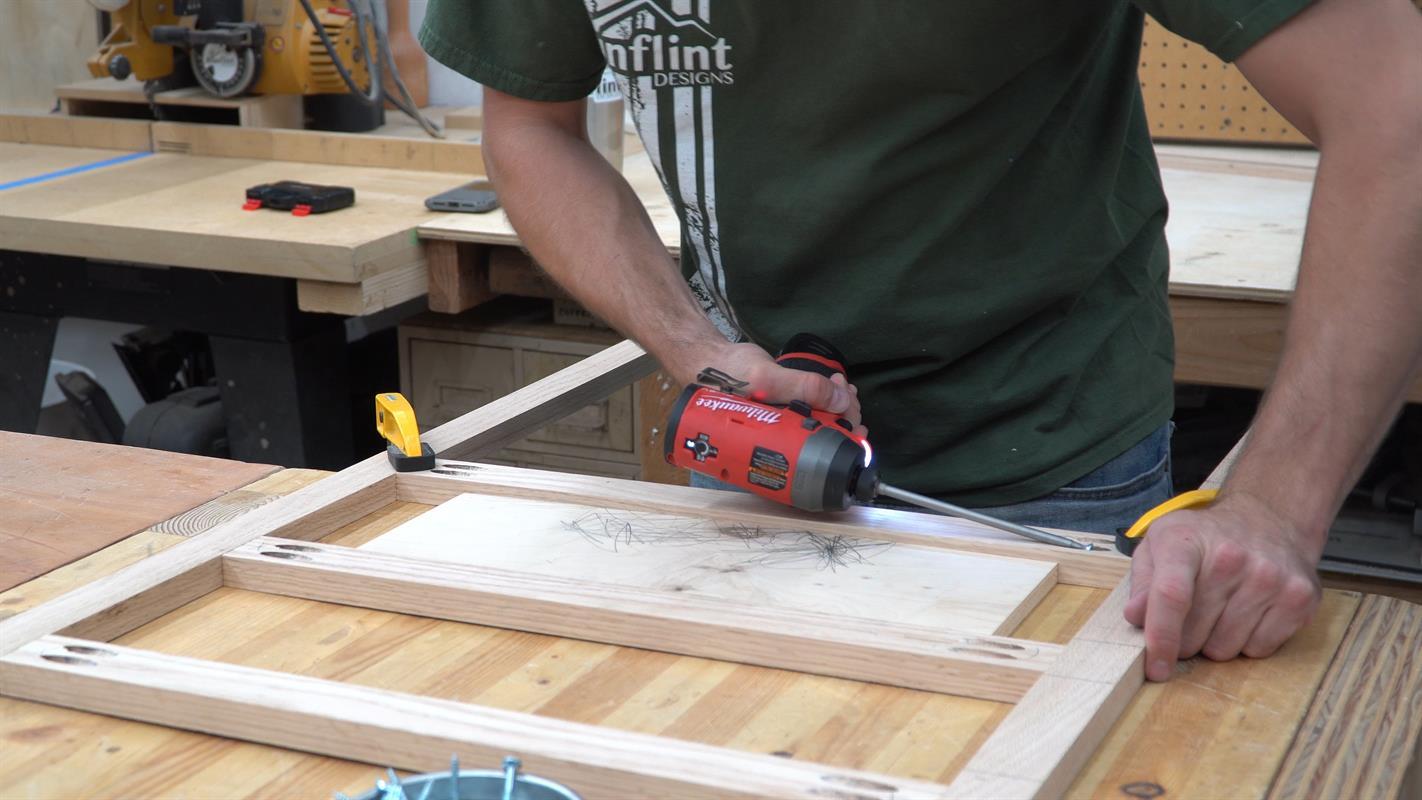
The Face Frame
Drill 2 pocket holes in each end of every hardwood rail. When assembling, firmly clamp the intersection of every joint down to a flat surface to make sure the joints come out flush. Then, run pocket hole screws through the rails, into the stiles.
-
The Secret to Perfect Spacing
A scrap of plywood cut to the exact size of the drawer opening helps provide perfect spacing perfect spacing, as well as keeping all of the rails parallel with each other. Just put this spacer up against the previous rail, clamp everything down and run in more screws, then repeat until the whole face frame is complete.
-
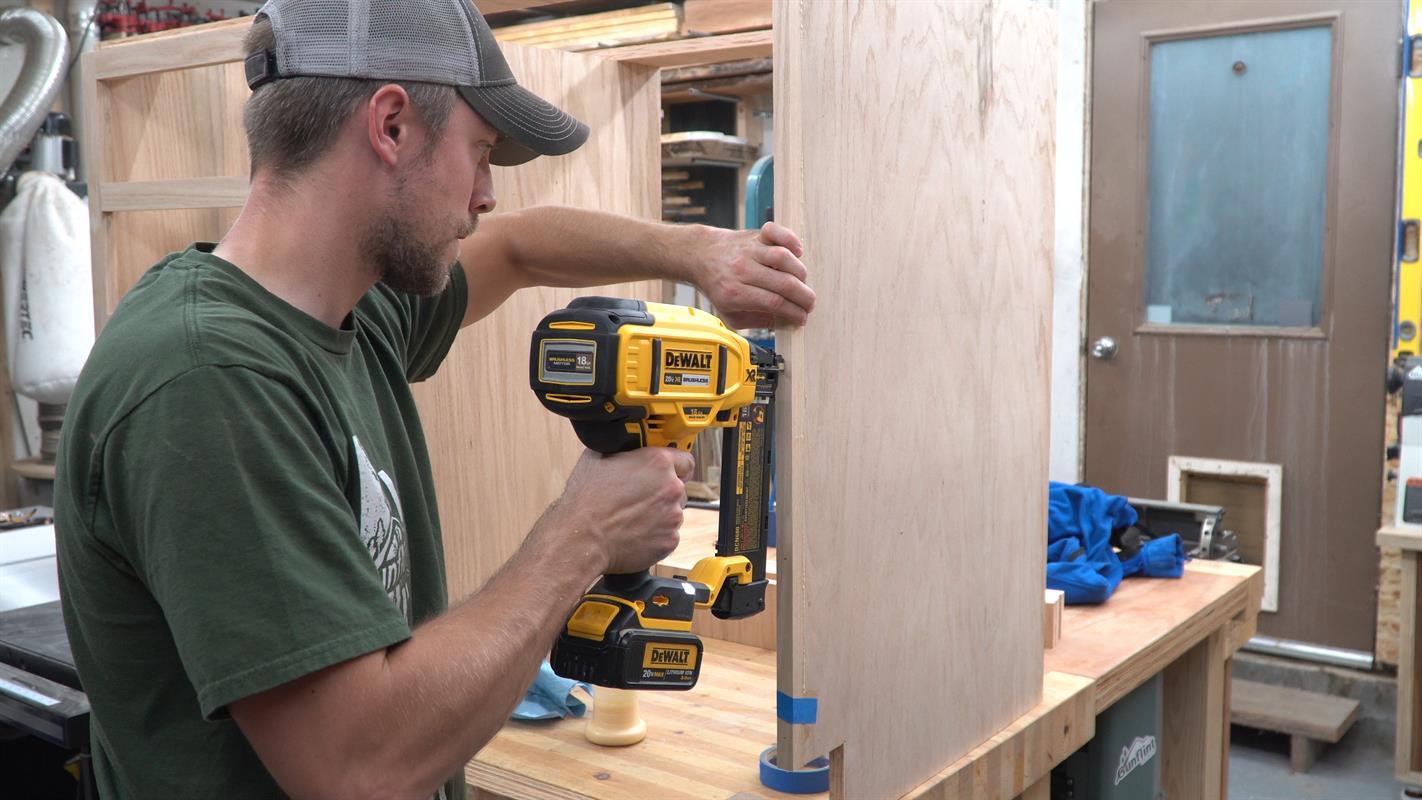
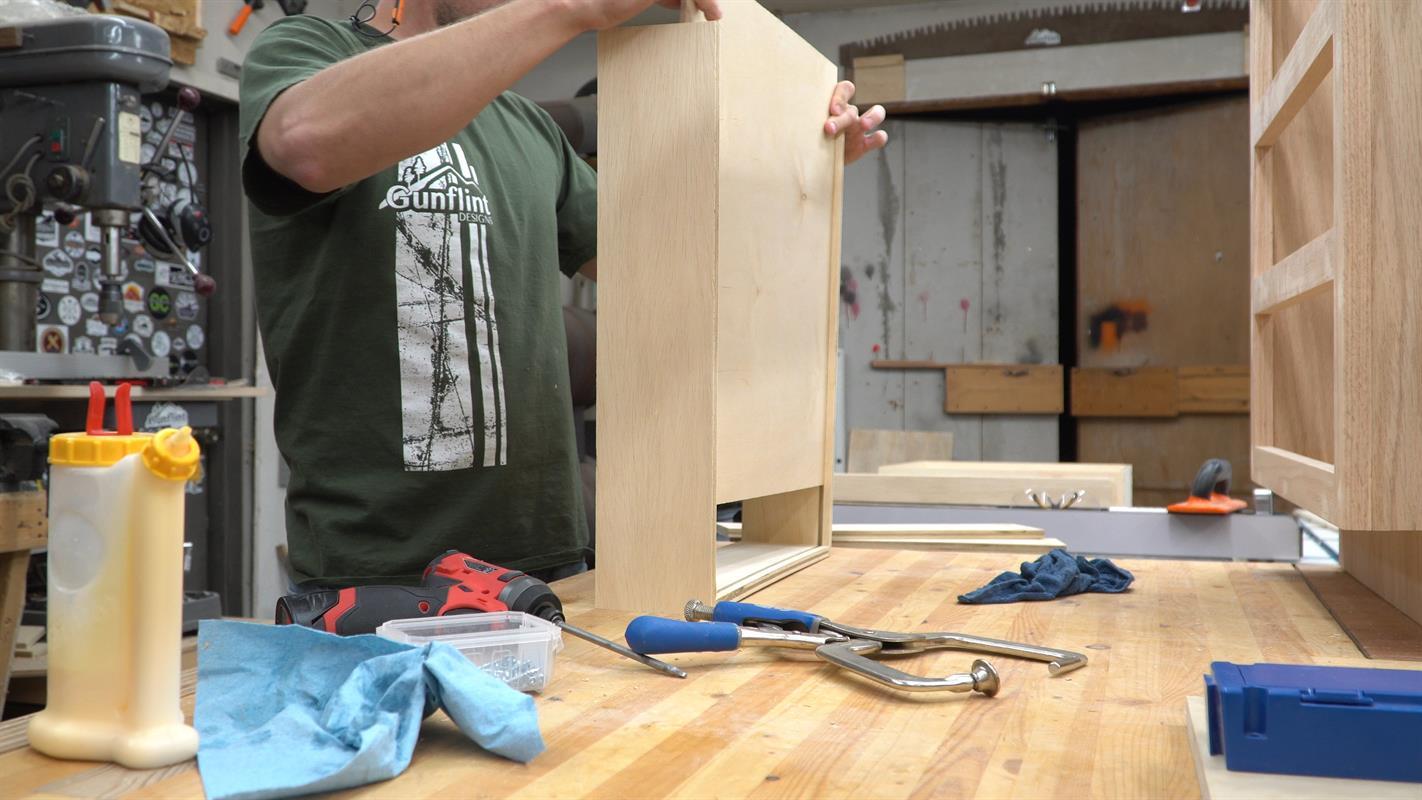
Attach The Face Frame
This could be done with pocket hole screws coming from the side panels which would be stronger, but for speed and simplicity, I just used glue and brad nails. Followed later on by wood putty to hide the holes.
-
Hide Plywood Edge (Again)
Attach a strip of hardwood the same thickness as the face frame on the bare plywood edge of the stand alone panel.
-
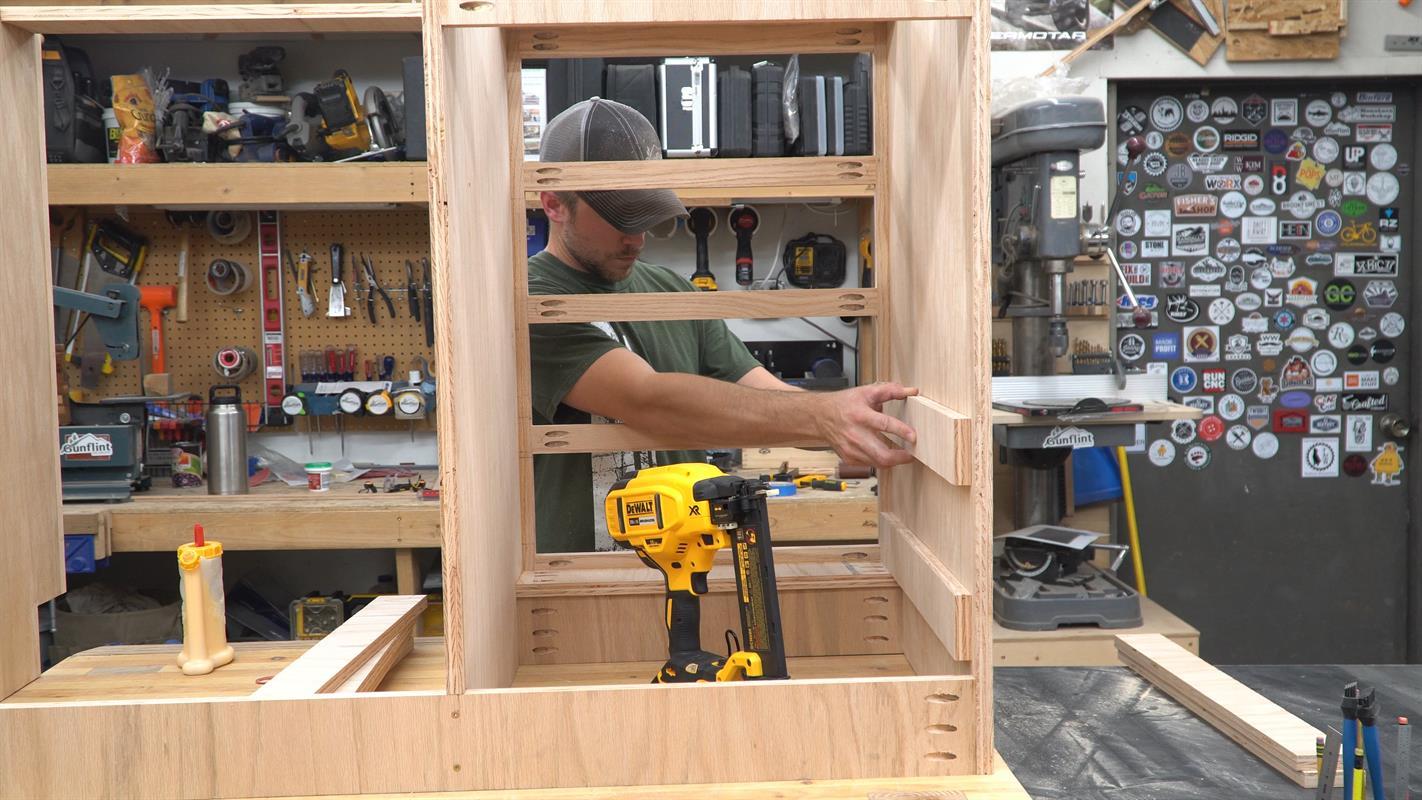
Add Drawer Support
Add strips of scrap plywood to the inside of the cabinet to make attachment points for the drawer slides. In essence, this will bring the inside walls out flush with the edge of the stiles.
-
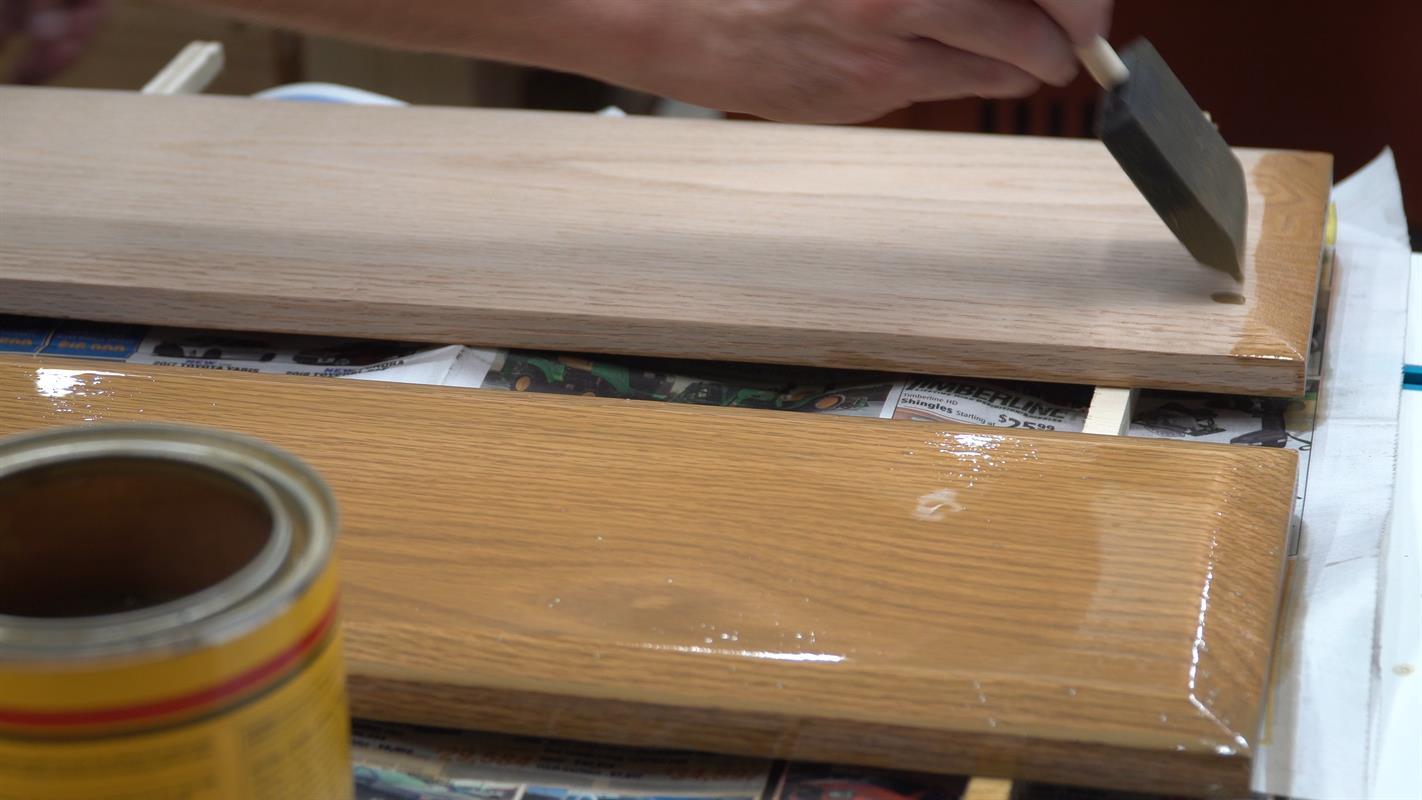
Apply Finish
Apply your choice of finish to all the outward facing portions of the cabinet. I chose to use the same color we used when we had the hardwood floors refinished throughout the main floor of our house. I thought having the floors and cabinets match would be a good way to tie everything together.
-
Cut Drawer Parts
The final stage of this project is the drawers. Cut all the pieces to size (if you haven’t already), then added a groove in the bottom of each piece for the drawer bottoms to sit in.
-
Drill Pocket Holes
Drill more pocket holes in the ends of the front and back facing drawer pieces. You’ll never see the back of the drawer, and the front piece will be covered up by the drawer faces.
-
Assemble Drawers
Attach two side pieces to the front piece, then slide the bottom into the groove. Make sure everything fits together easily and square, then attach the back piece to trap the bottom inside.
-
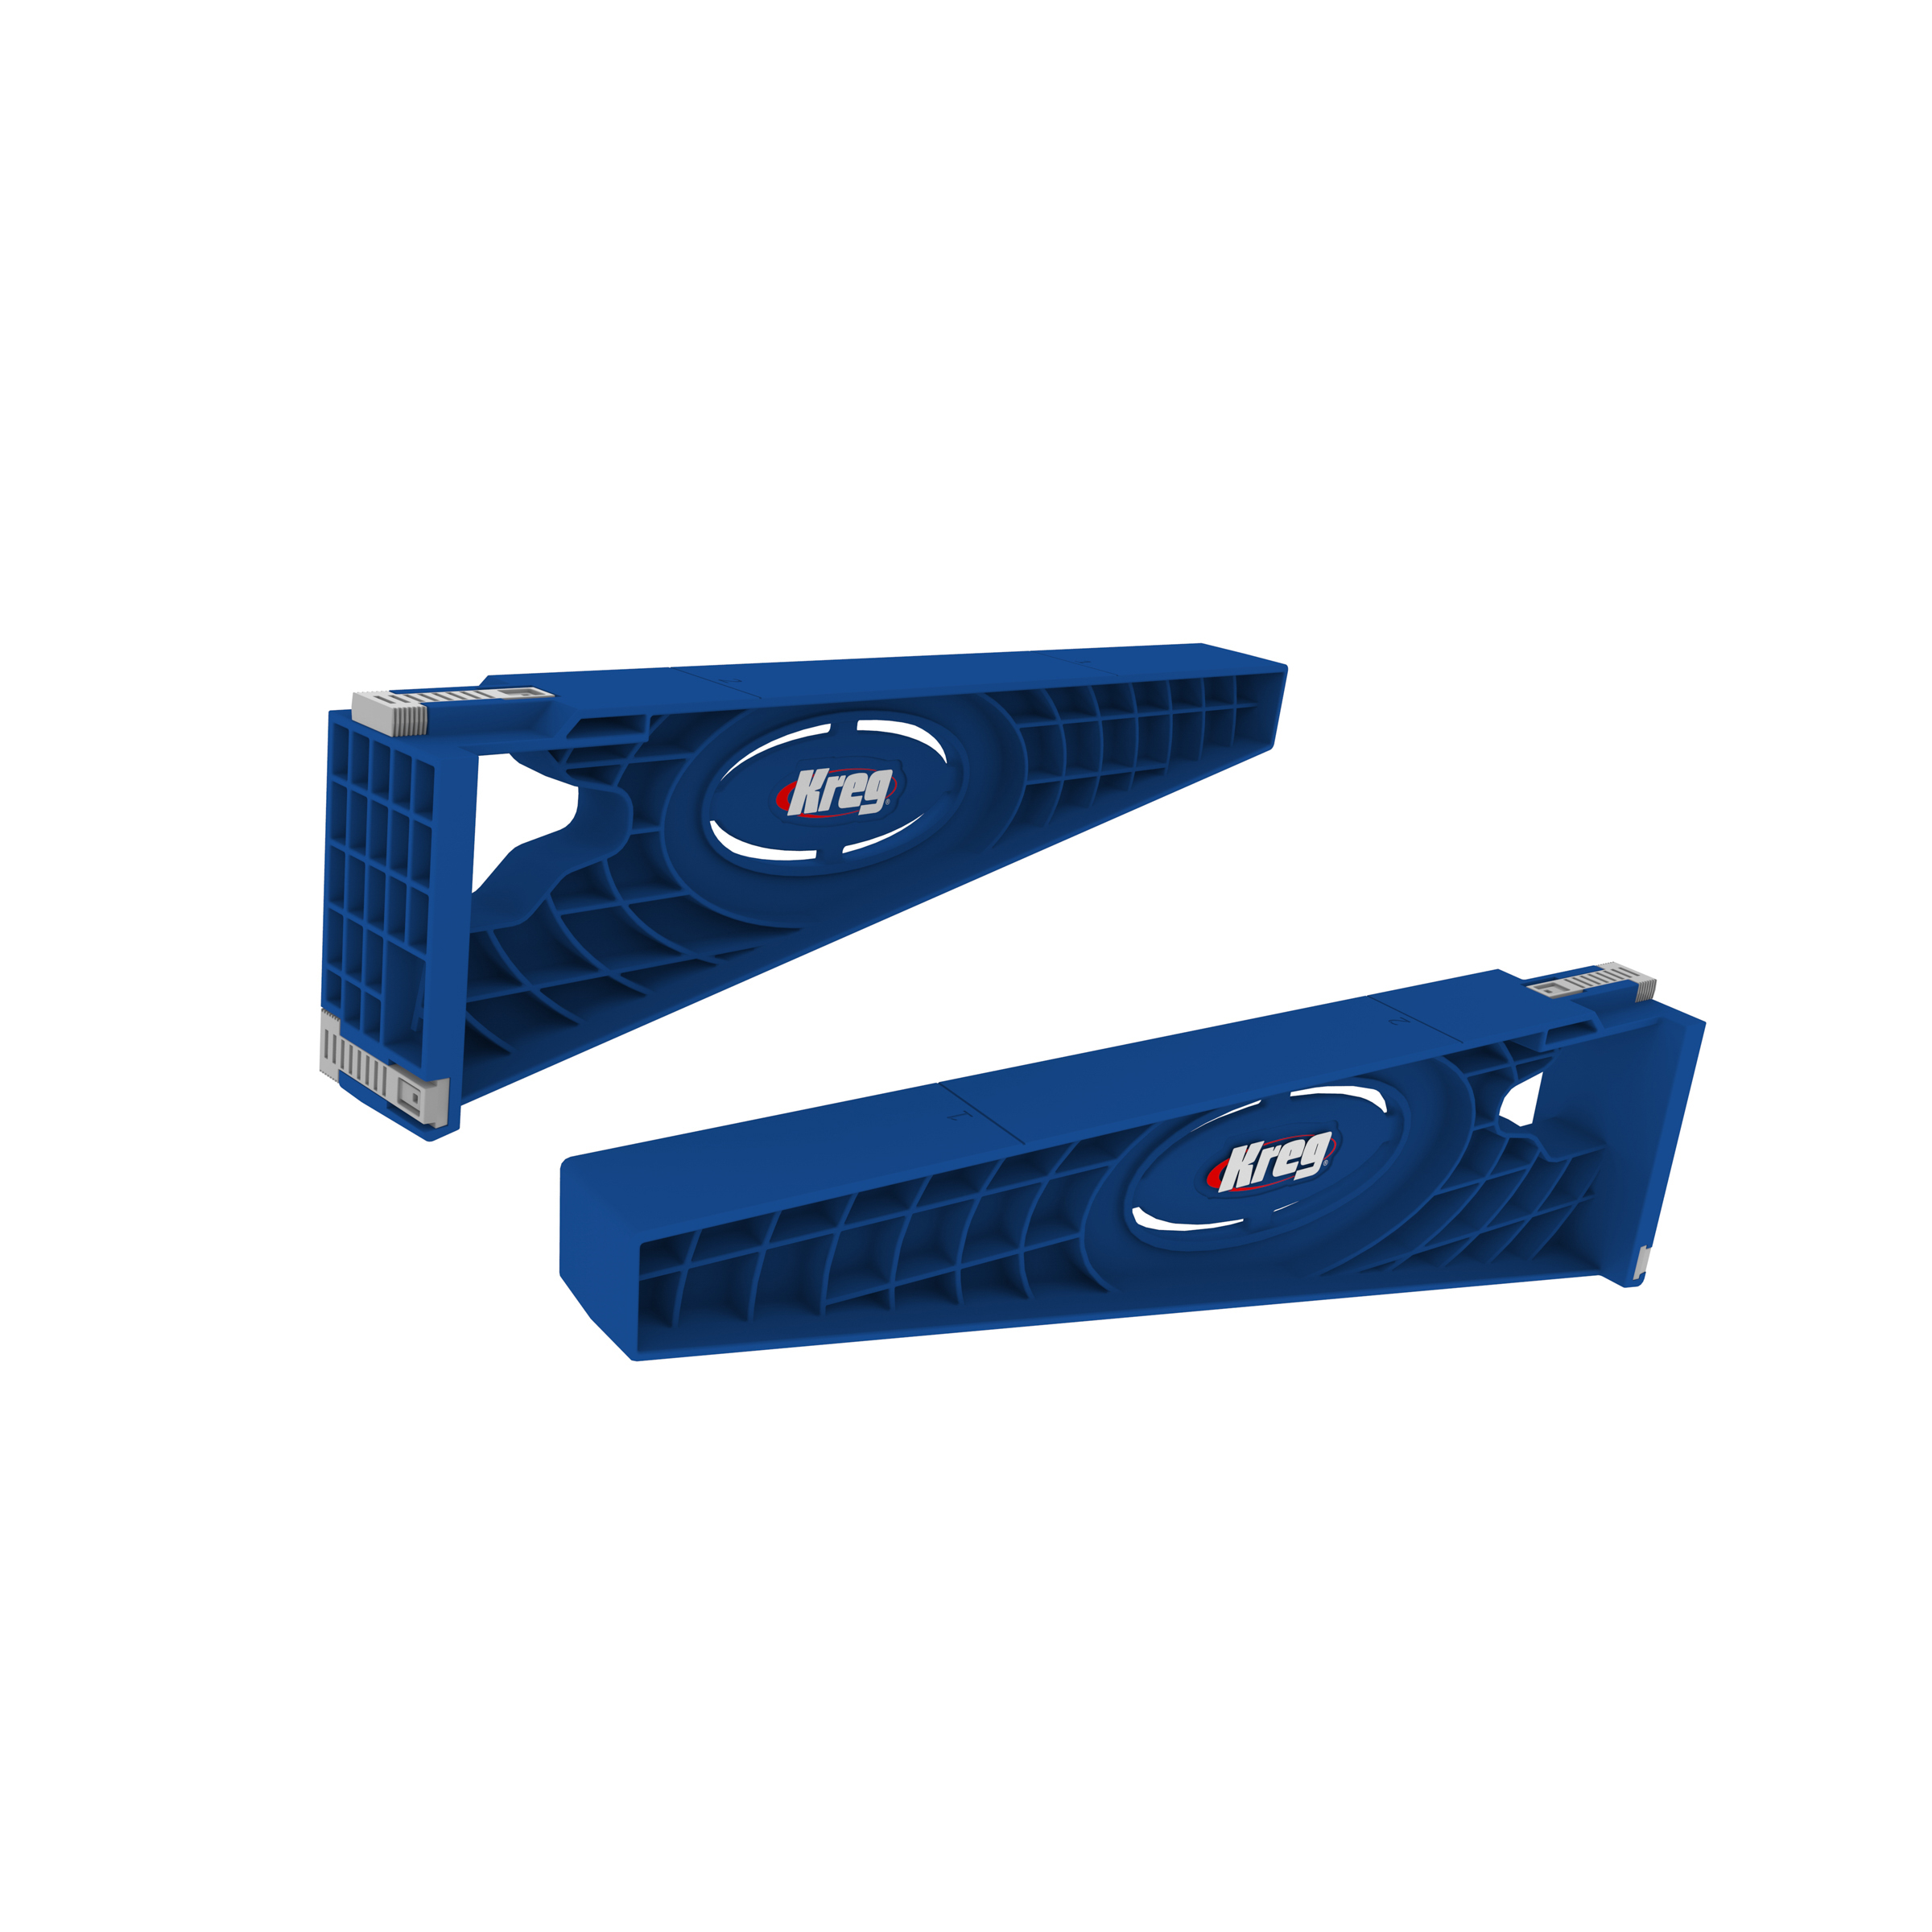
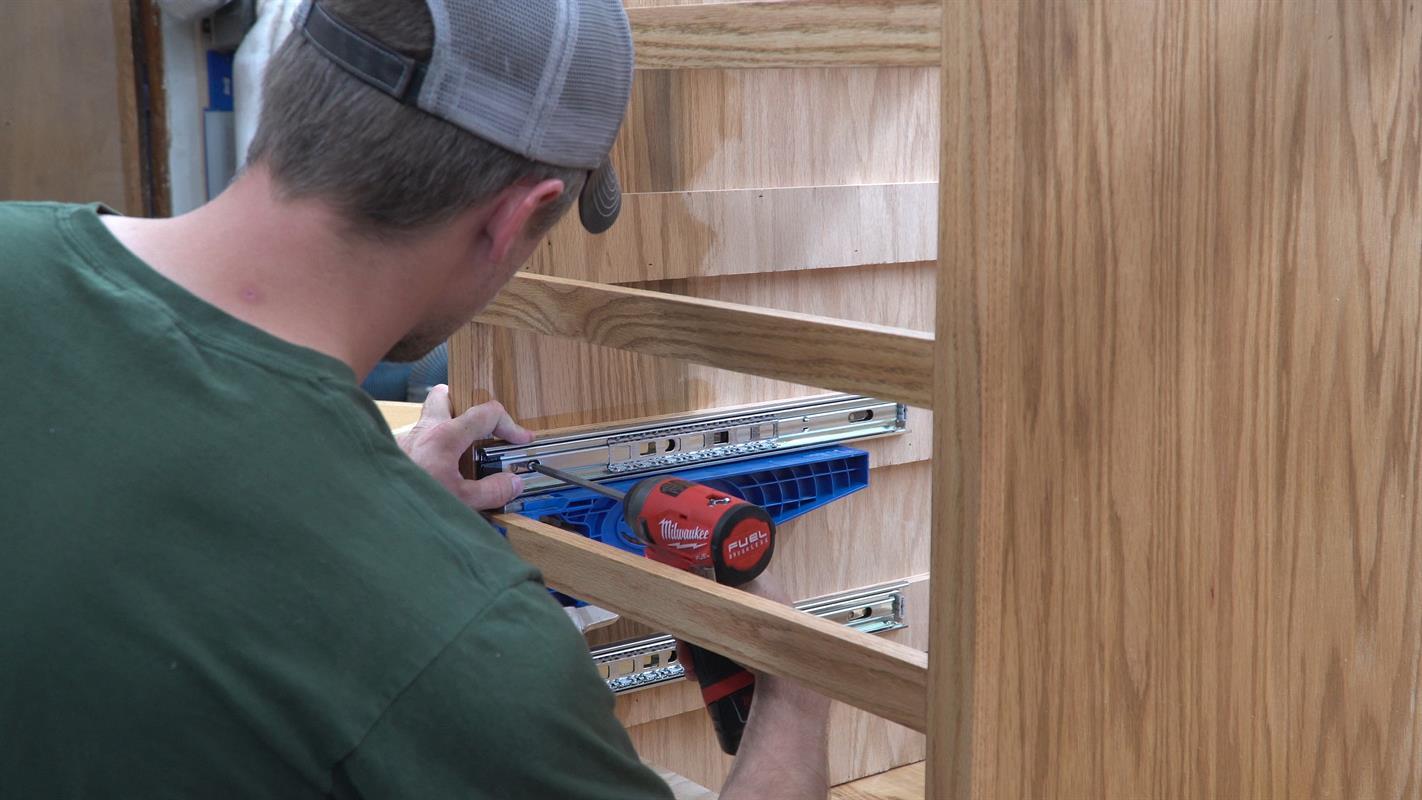
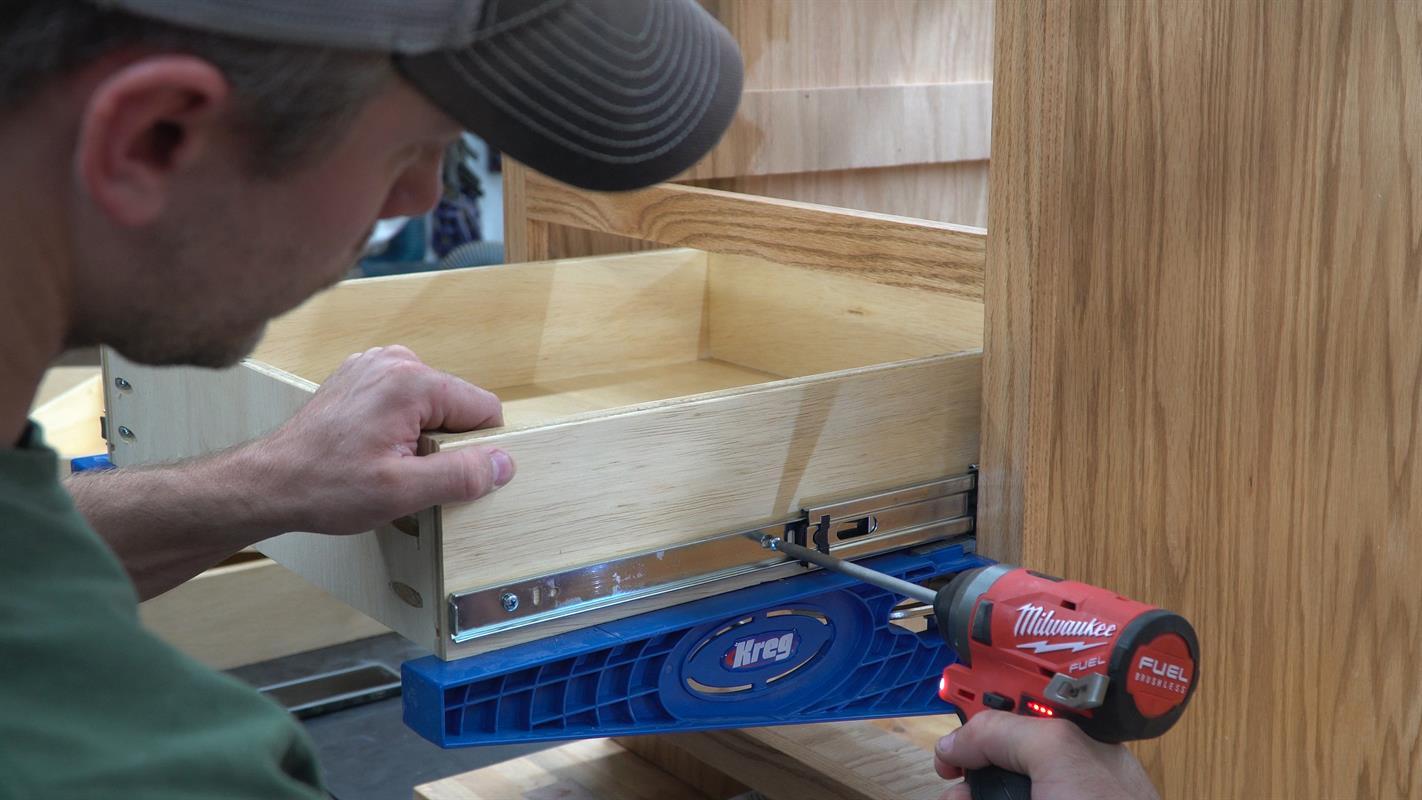
Install Drawer Slides
I used Kreg’s Drawer Slide Jig to make this process easier. Clamp the jig to the face frame, then set the slides on top and screw them to the side of the cabinet.
-
Hang The Drawers
Reverse the jig so it’s outside the cabinet and set the drawers on top. The jig holds everything in place while the screws are run through the slides and into the drawers.
-
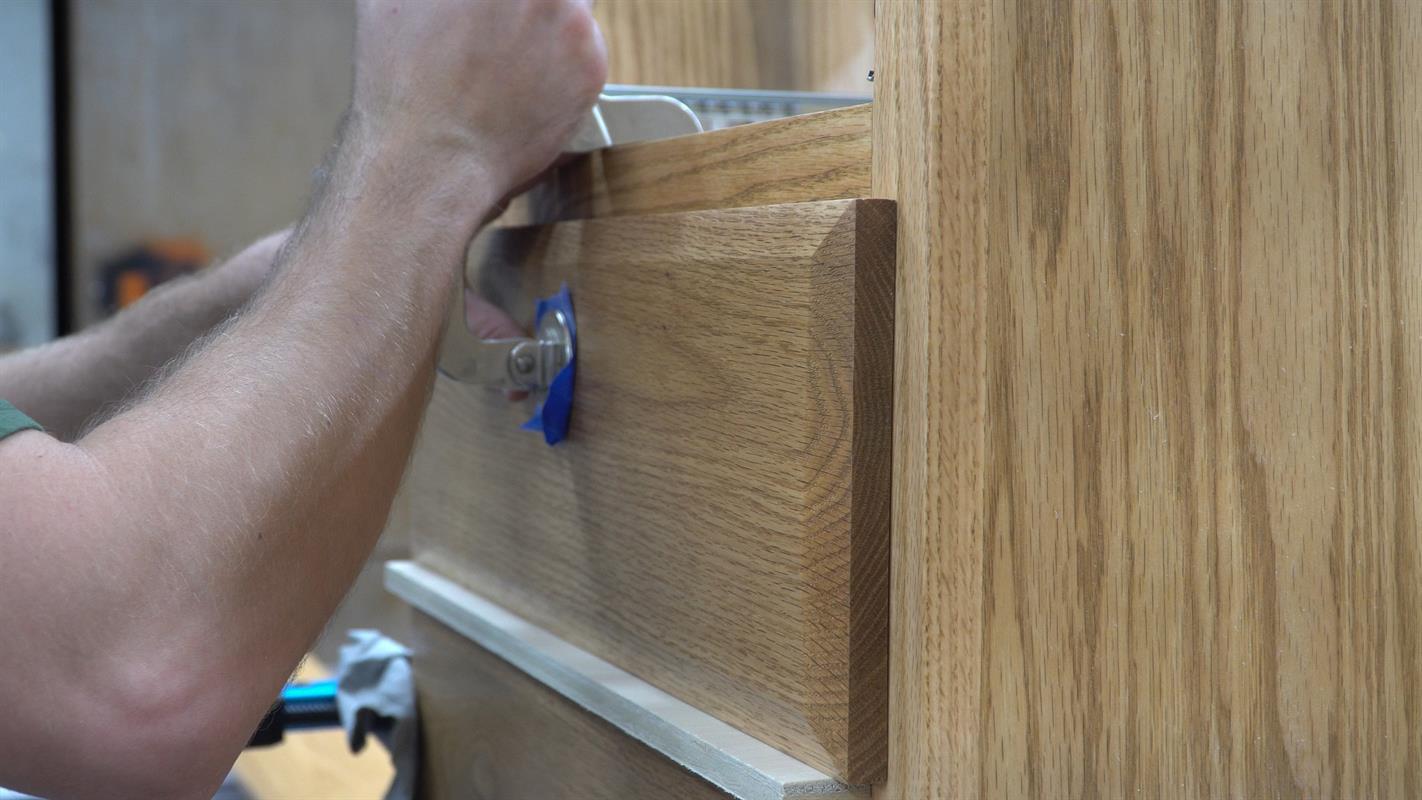
Mount Drawer Faces
I used a scrap of wood to get correct vertical spacing then checked for correct left and right alignment before firmly clamping the face to the drawer body. Then I ran screws through pre-drilled holes from the inside of the drawer into the face.
-
Wrapping It Up
At this point the cabinet should be finished, all that’s left to do is put it in your kitchen and install your countertop of choice. We went with a premade laminate countertop, but you could just as easily make one yourself.
Make sure you check out the YouTube video on the Extras Tab to see more details in how this comes together.