

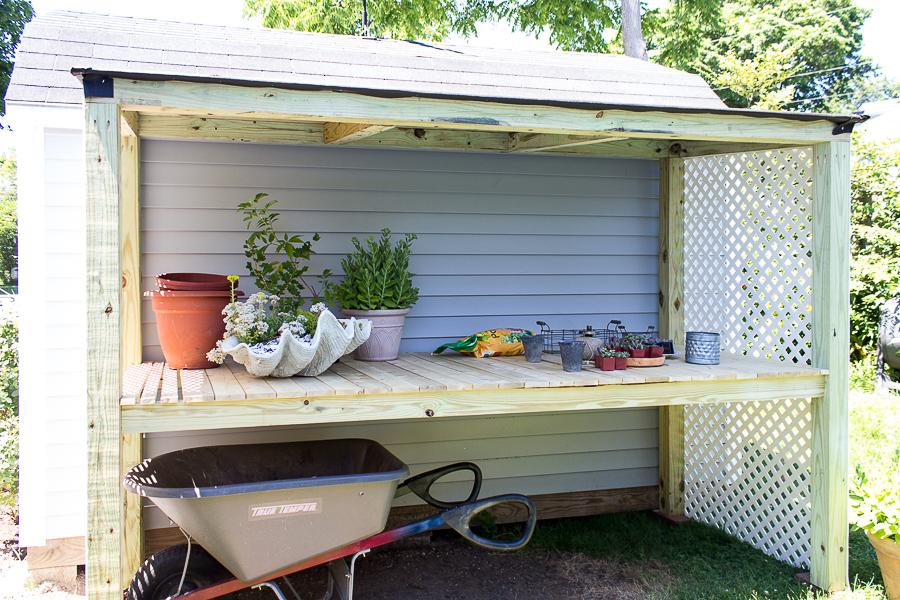
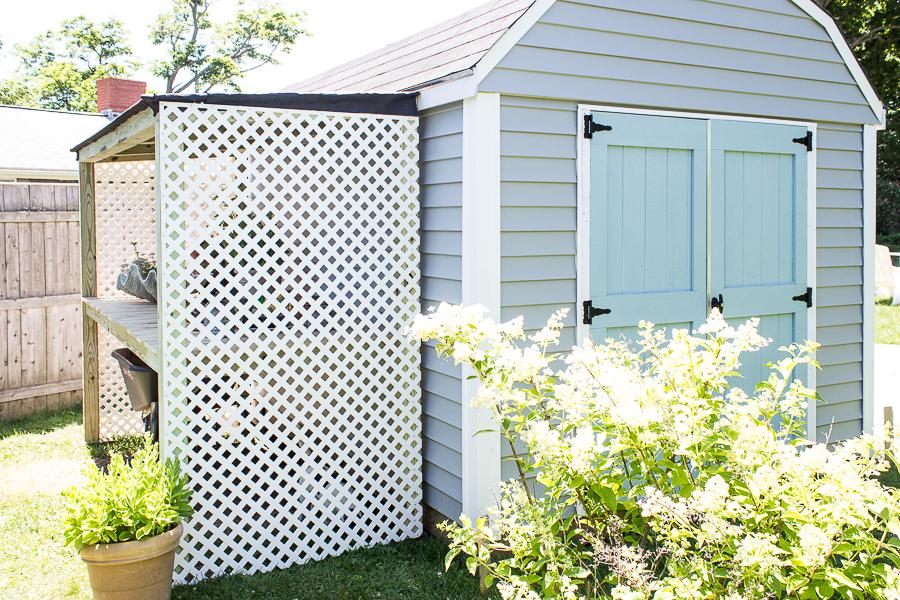


This DIY Lean-To Potting Shed gives you plenty of sheltered storage for gardening and planting. Built from durable pressure treated timbers and cedar makes this structure long lasting and strong. Also helps prevent mess in the yard with plenty of hidden storage and a large work area.
Tools
Kreg Tools


Other Tools
-
Miter Saw

-
Scroll Saw
-
Square
-
Table Saw
-
Tape Measure
-
Track Saw
-
Drill (cordless)
-
Stapler
-
Shop Vacuum
-
Sawhorse
-
Level
Materials
Wood Products
- 2 Pressure Treated , 4x4 , 120"
- 6 Pressure Treated , 4x4 , 96"
- 2 Pressure Treated , 2x4 , 120"
- 2 Pressure Treated , 2x4 , 96"
- 1 Pressure Treated Ply or Dry Ply , 1/2" Thick , Full Sheet
- 1 Pressure Treated Ply or Dry Ply , 1/2" Thick , Half Sheet
- 15 Cedar Board , 1x4 , 96"
Hardware & Supplies
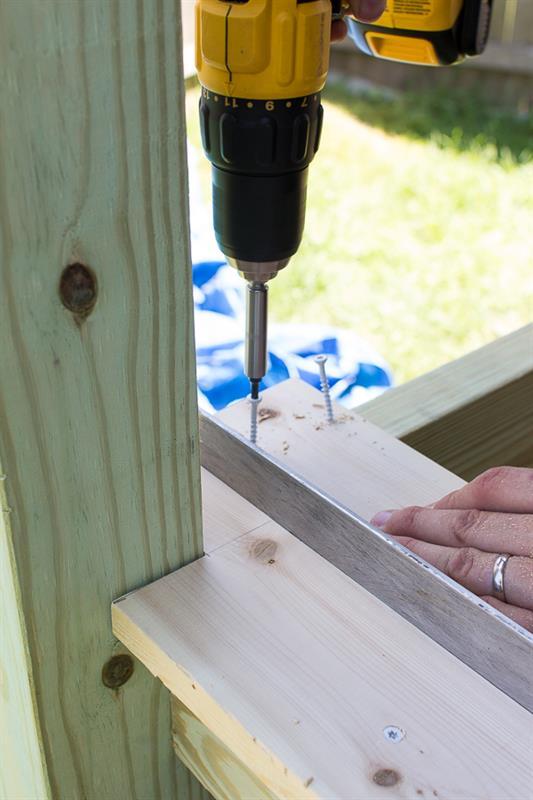
- 150 2 1/2" exterior Kreg screws
- 1 Box roofing tacks
- 1 Roll of roofing felt
- 1 Box exterior staples
- 2 Plastic trellis panels
- 200 1 5/8" exterior white topped screws
- 4 Bricks or blocks to stand legs on
Directions
-
Create rear support
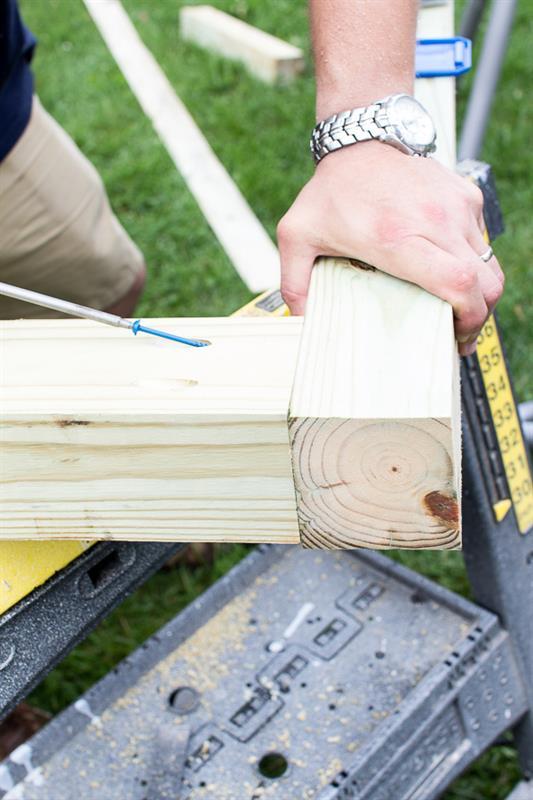
Drill Pocket holes on at least 3 sides of the tops of the rear legs. Attach one Header to the top of the rear legs, using Kreg screws; such that the header has the 4.5° angle on it's top edge, and the highest point is at the back.
-
Create front support
Drill Pocket holes on at least 3 sides of the tops of the front legs. Attach one Header to the top of the front legs, using Kreg screws; such that the header has the 4.5° angle on it's top edge, and the highest point is at the back.
NB: When standing in position, the front header should be 3" lower than the rear header. This is to create a slope in the roof. The measurements for the lengths of the leg are approximate, and change based on your ground.
-
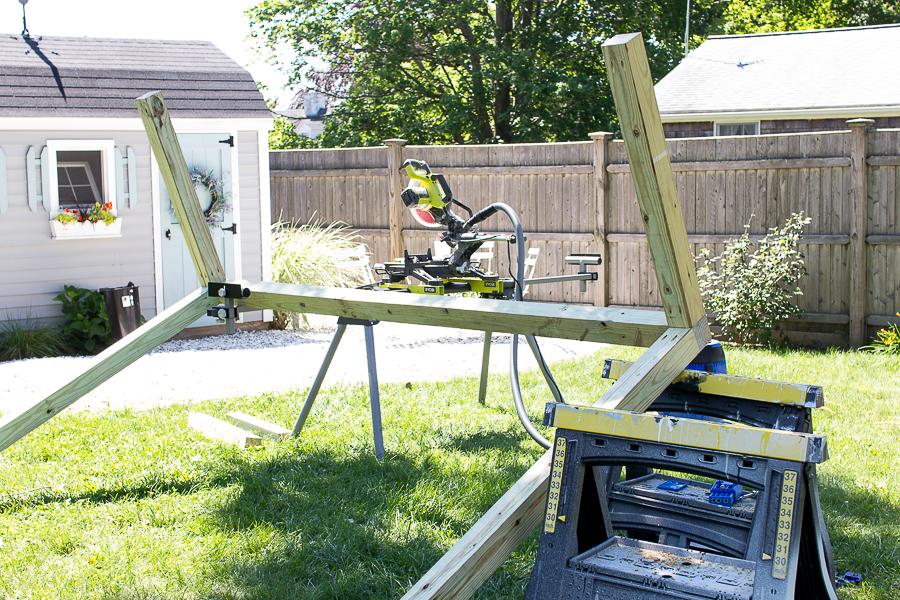
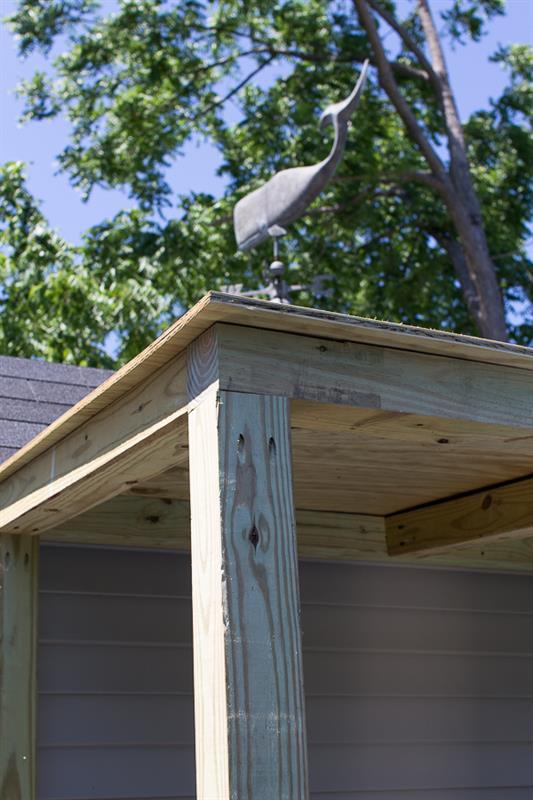
Attach two side roof supports
Drill pocket holes in at least three sides of each end, of 2 of the roof supports. Attach to each end of the top of the rear support. The roof supports should be attached so that the 4.5° angle causes them to be higher at the rear.
-
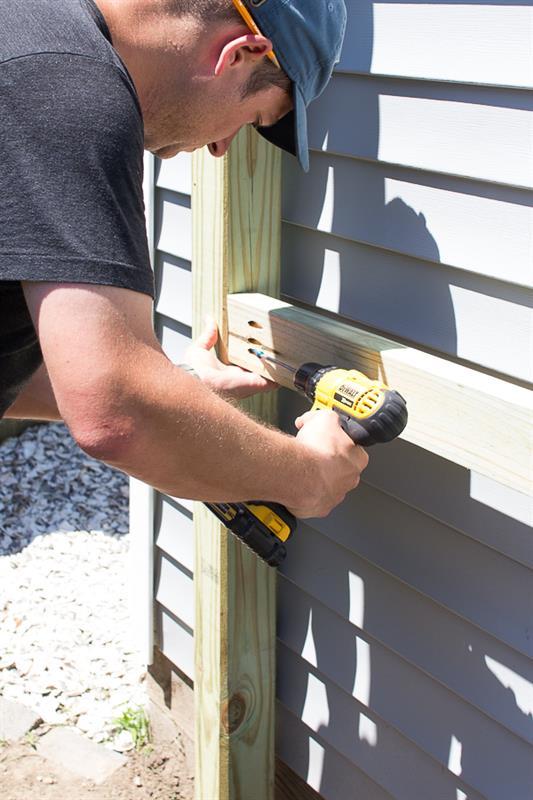
Stand the rear support
Stand the frame, on bricks, against the shed (or other support structure). Make sure that the rear header is level. Drill holes half way through the header, using the Kreg pocket hole bit, at about 12" centers. Using Kreg screws attach the header to the support structure.
-
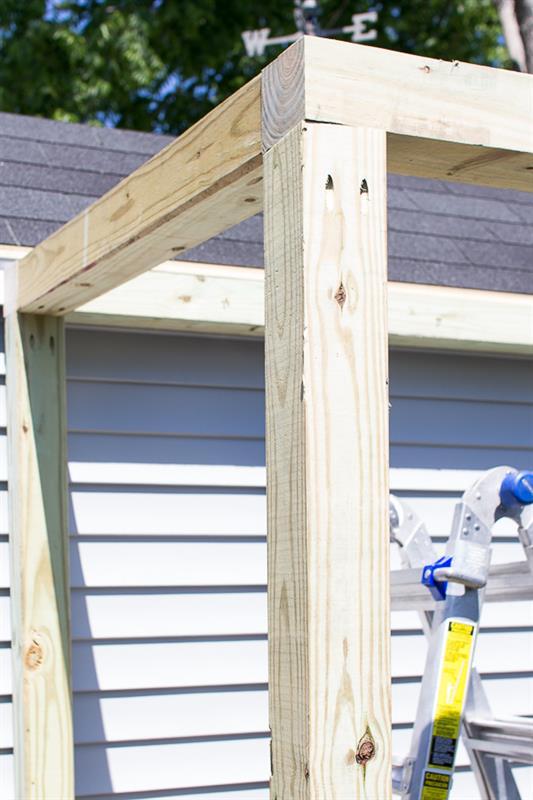
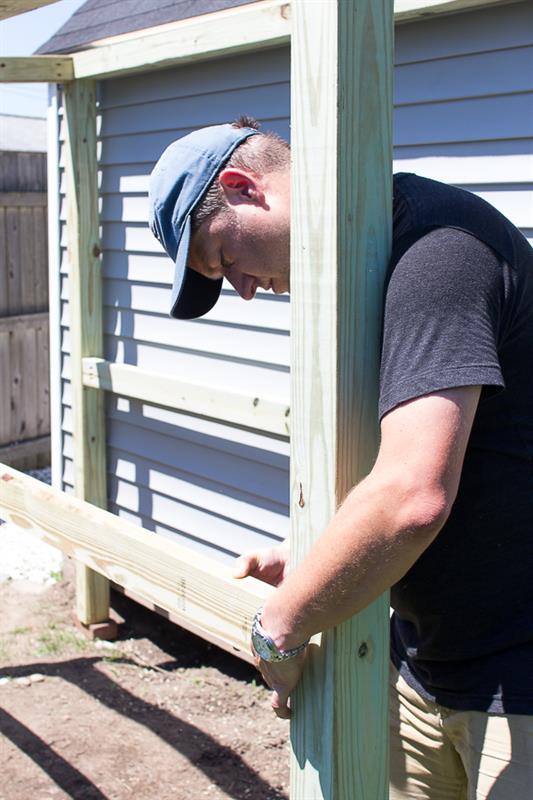
Stand the front support
Stand the front support on bricks, so that the header is level and touches the outstretched roof supports. Using Kreg screws, attach the roof supports to the front support
-
Mark height of table top
Choose the height of the table top; we chose 38". Mark the location on the front and rear legs, so that the table top will be level.

-
Attach rear table top support
Drill pocket holes on one side of each end of one 2"x4"x9' table support. Using Kreg screws, attach between the rear legs, at the marked height, so it is flush with the front of the rear legs.
-
Attach front table top support
Drill pocket holes on one side of each end of the other 2"x4"x9' table support. Using Kreg screws, attach between the front legs, at the marked height, so it is flush with the rear of the front legs.
-
Attach end table top braces
Screw pocket holes in one side, at both ends, of two of the 2"x4"x36" table top braces. Attach between the front and rear legs, at the height of the table top, and flush with the insides of the front and rear legs.
-
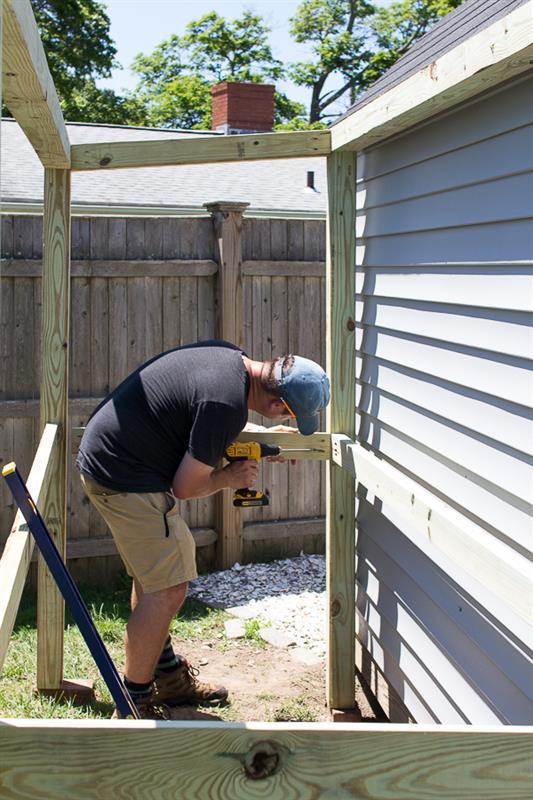
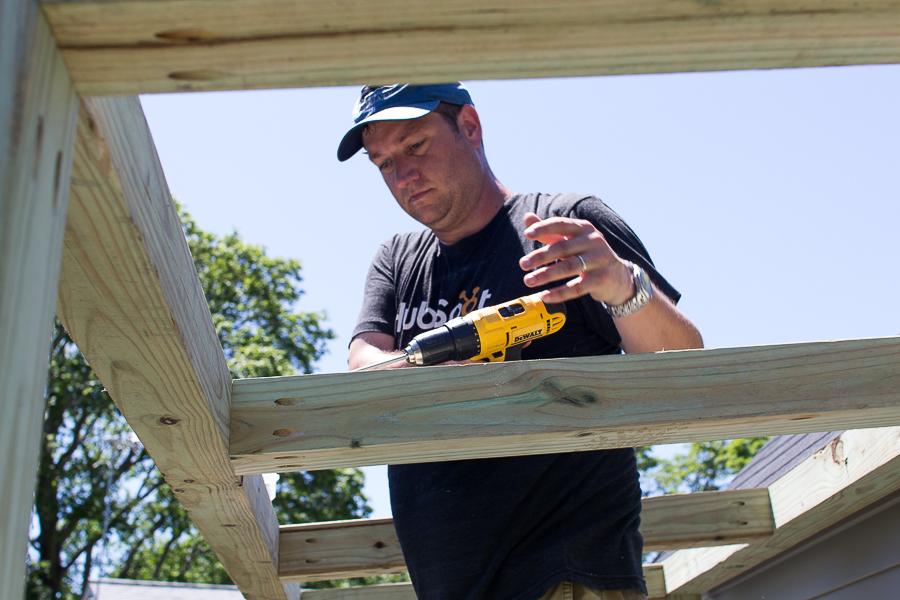
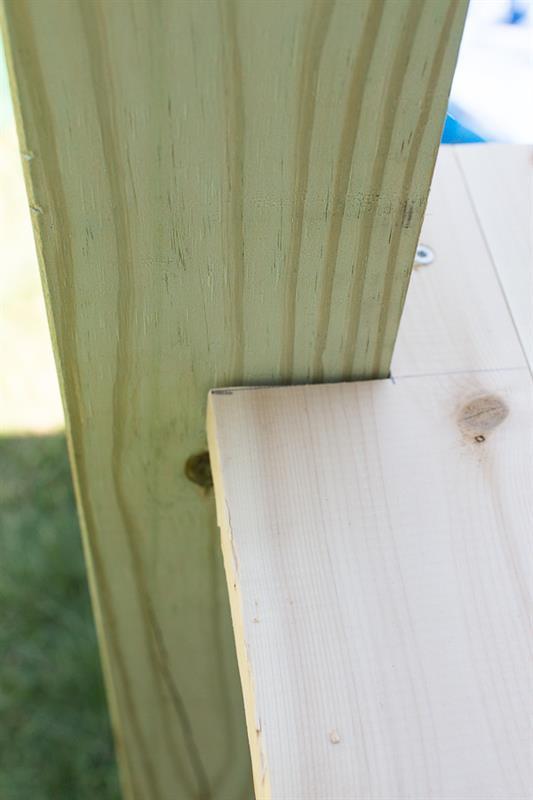
Attach additional roof supports
Drill pocket holes in at least 3 sides of the remaining two roof supports. At 33" from each end, attach the roof supports between the front and rear headers.
-
Attach roof
Measure the depth of your roof, adding 1" for overhang. Ours was about 43". Cut both sheets of ply to that width. Cut the ply in lengths such that there will be 1" overhang at each end, and they meet over one of the mid positioned roof supports. Using exterior 1 5/8" screws attach the ply to the roof supports
-
Attach additional table top braces
Drill pocket holes on one side of each end of the remaining two 2"x4"x36" table top braces. Attach the braces in between the front and rear table top supports, so they are 33" from each end.

-
Attach end cedar table top pieces
Using a scroll saw, cut two corners two 1"x4"x43" cedar boards, so that they can overhang the end table top braces. Attach to front and rear table top supports, in between front and rear legs, using 1 5/8" screws.
-
Attach remaining table pieces
Space out the remaining 1"x4"x43" cedar boards, using a rigid piece of metal, or other material. Pre-drill 2 holes at each end of the board to prevent splitting. Attach to the front and rear table top supports with 1 5/8" screws.
-
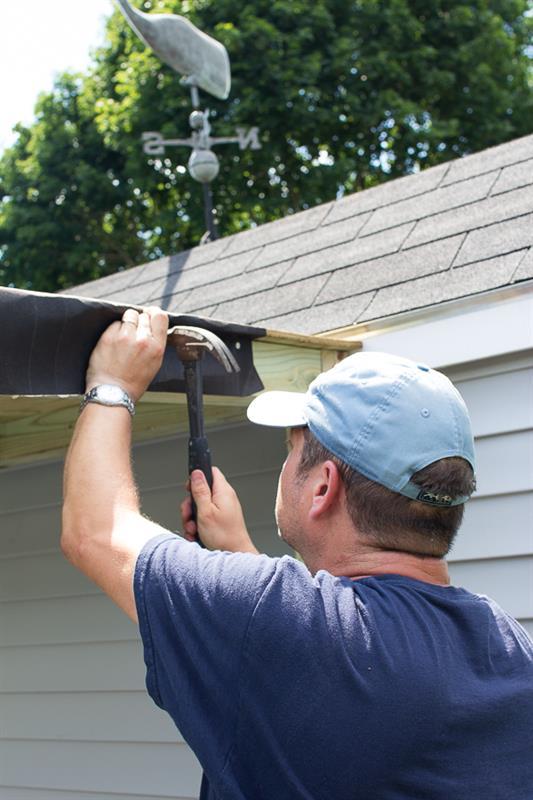
Lay the roofing felt
Roll out roofing felt across the front of the roof; ensuring that it has a lot of overlap around the ply. Attach to the ply with roofing tacks, and staples. Secure around the soffit of the header and end roof supports, using the tacks and staples. Roll out felt at the rear of the roof, ensuring that there is overlap with the front piece of felt. Attach to the ply, and soffit, in the same way. Cut off excess hanging felt.
-
Attach trellis
Using a track saw, cut the trellis panels to cover the ends of the potting shed.
Pre-drill through the plastic panels along the top and side edges, at about 6" centers, to prevent cracking. Attach panels to the roof support, and legs, using the white capped 1 5/8" screws.