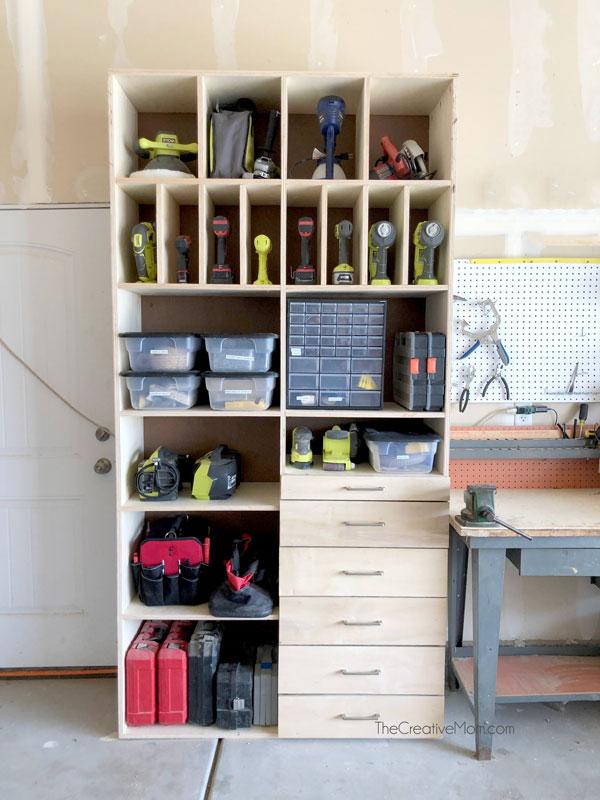
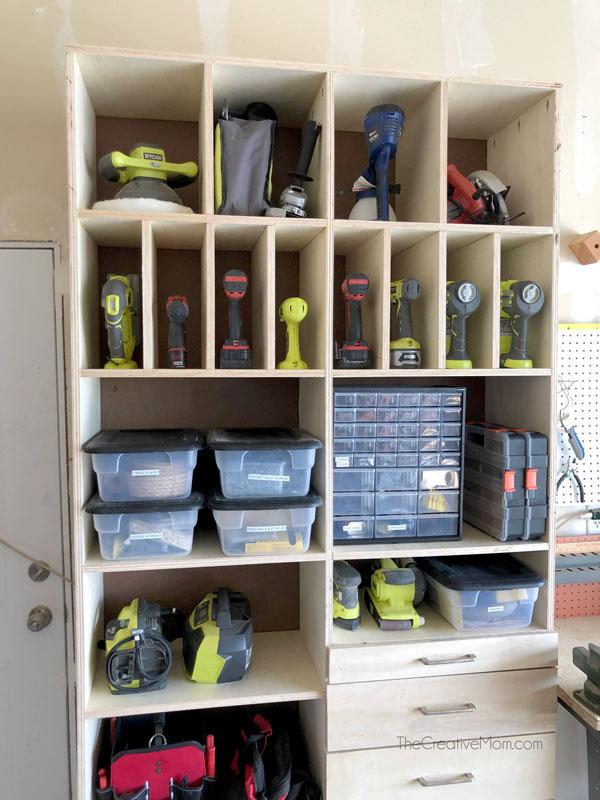
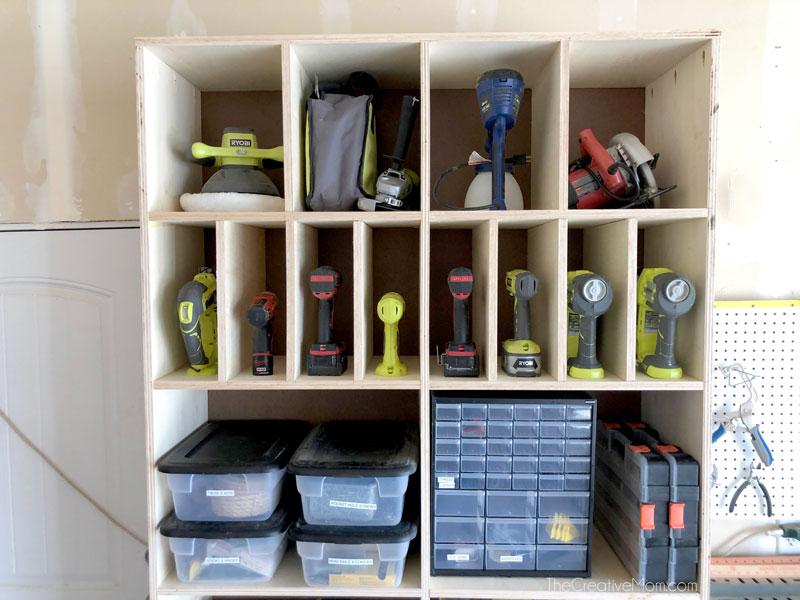


This is an intermediate build for a tool shelf organizer. The build is pretty straightforward, but it does require ripping plywood and building drawers. This tool shelf organizer is perfect for your garage or woodshop. Individual cubbies keep your powertools, hand tools, and toolboxes organized.
Tools
Kreg Tools

Other Tools
-
Circular Saw (cordless)

-
Miter Saw
-
Tape Measure
-
Clamps
-
Drill (cordless)
-
Nail Gun
-
Sander
Materials
Wood Products
- 3 Plywood , 3/4" Thick , Full Sheet
- 1 Plywood , 3/4" Thick , Half Sheet
- 5 Board , 1x6 , 96"
- 1 Plywood , 1/4" Thick , Full Sheet
Hardware & Supplies
- 6 Drawer Pulls
- 100 1 1/4" pocket hole screws
- 1 Wood Glue
- 50 1 1/4" Brad Nails
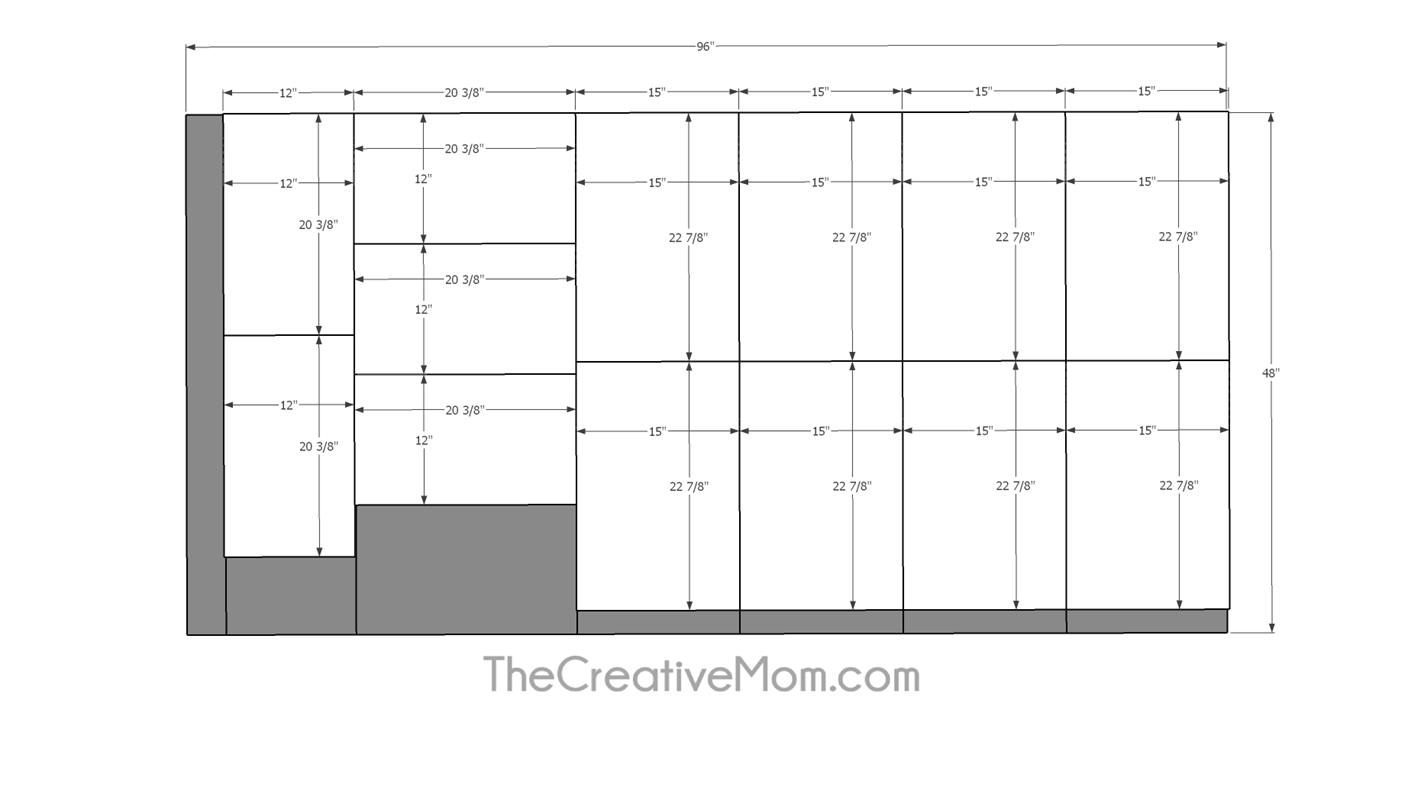
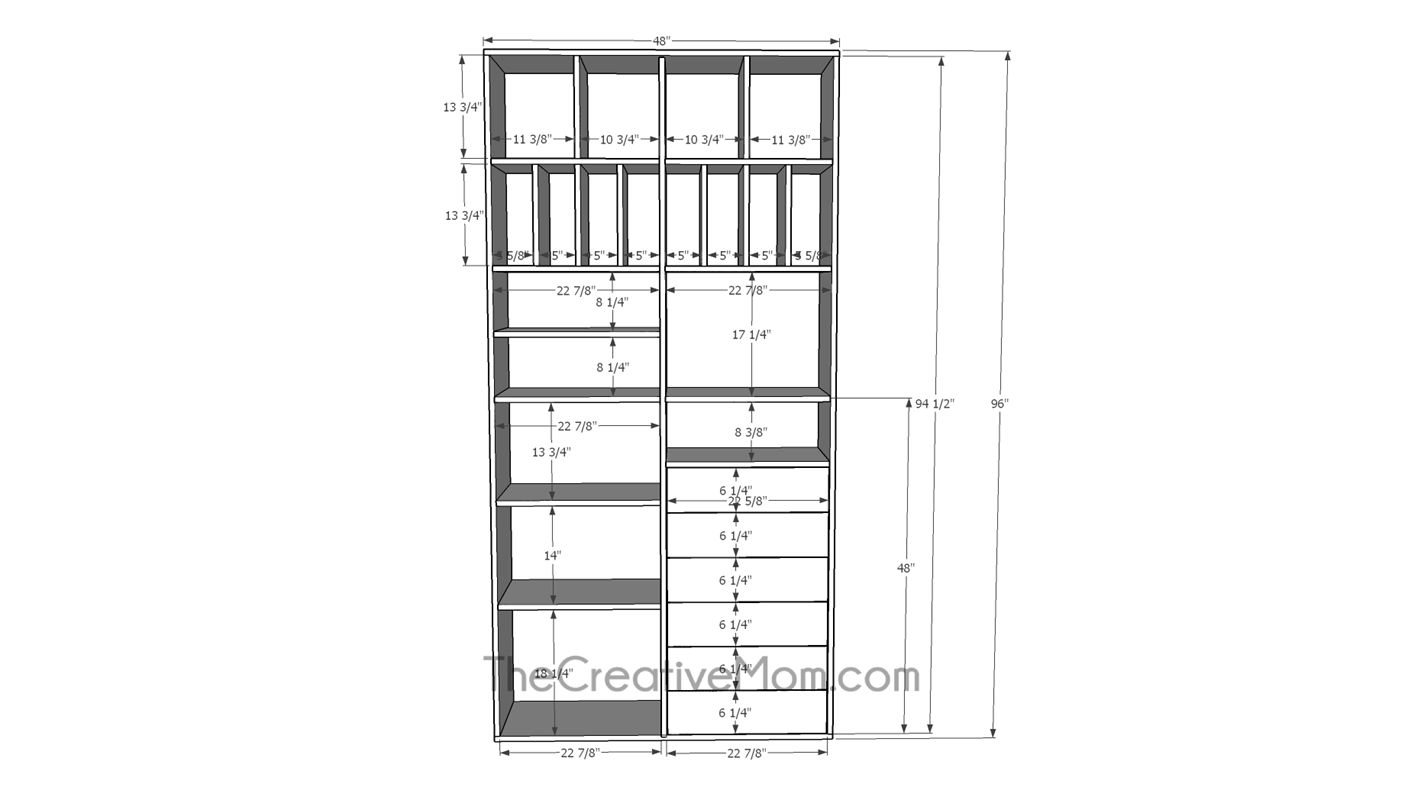
Cut List & Parts
- 2 Top and Bottom , (15" x 48") 3/4" plywood
- 3 Vertical Supports , (15" x 94 1/2") 3/4" plywood
- 10 Shelves , (15" x 22 7/8") 3/4" plywood
- 8 Vertical Divider , (15" x 13 3/4") 3/4" plywood
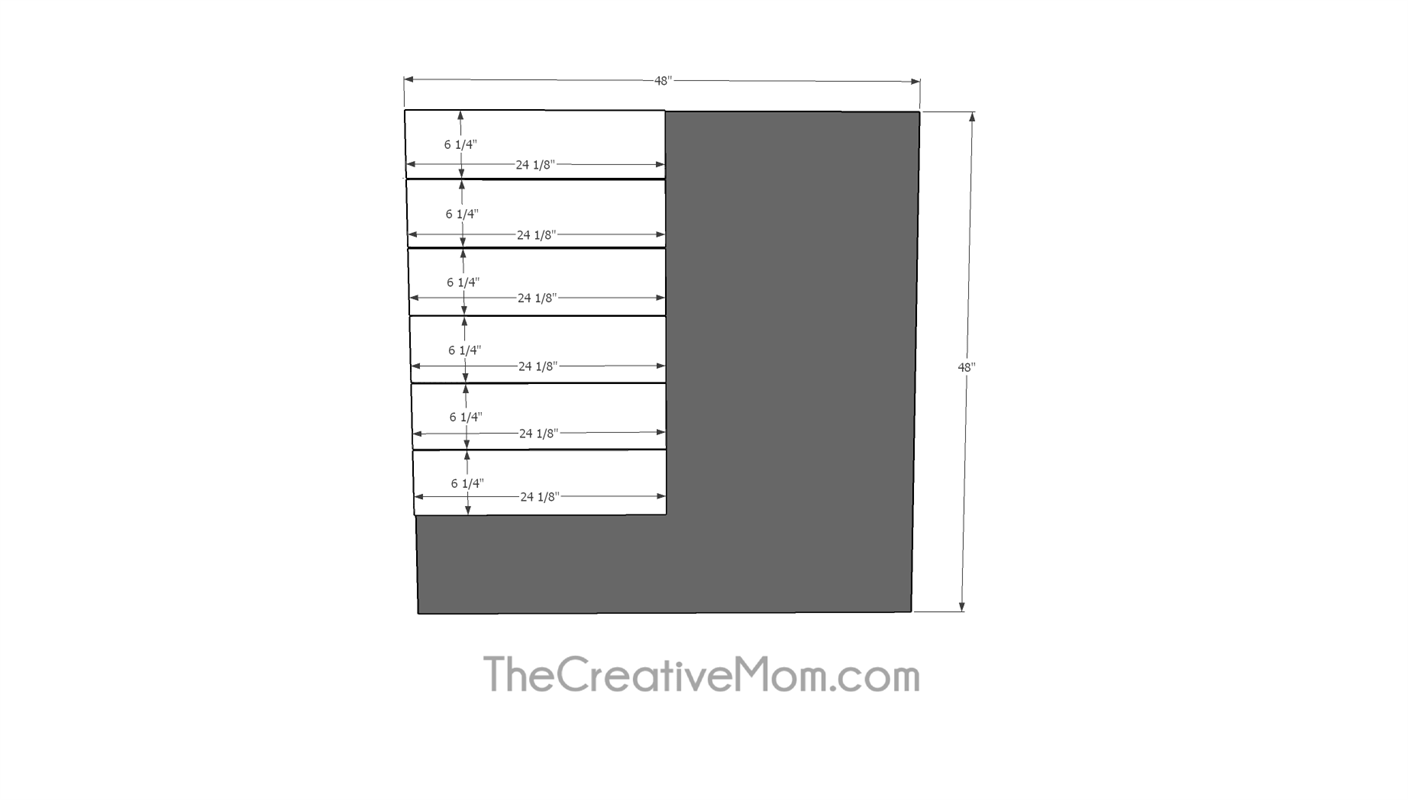
- 12 Drawer Box Sides , (13 1/2") 1x6
- 12 Drawer Box Fronts & Backs , (20 3/8") 1x6
- 6 Drawer Bottoms , (12" x 20 3/8") 3/4" plywood
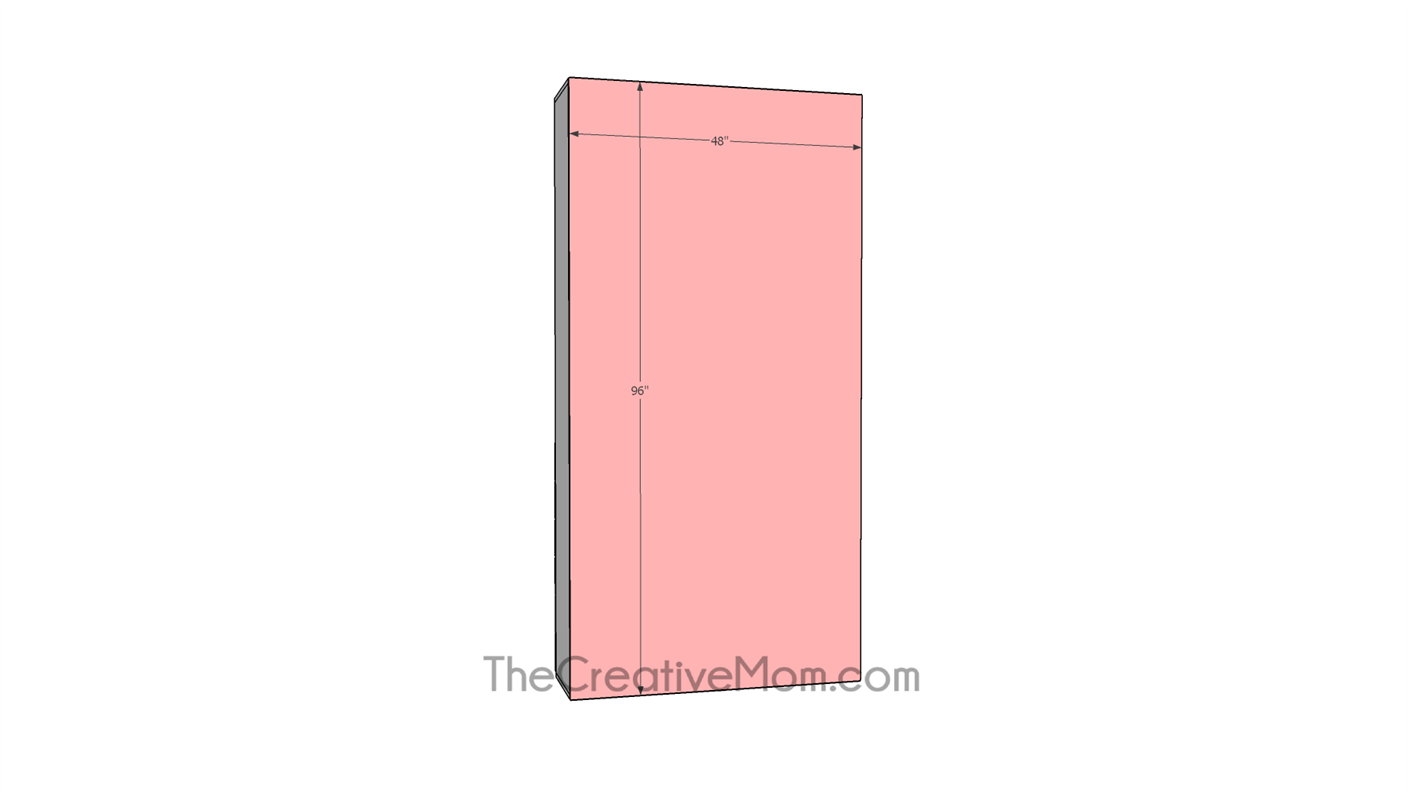
- 1 Backing , Full Sheet (48" x 96") 1/8 plywood
Directions
-
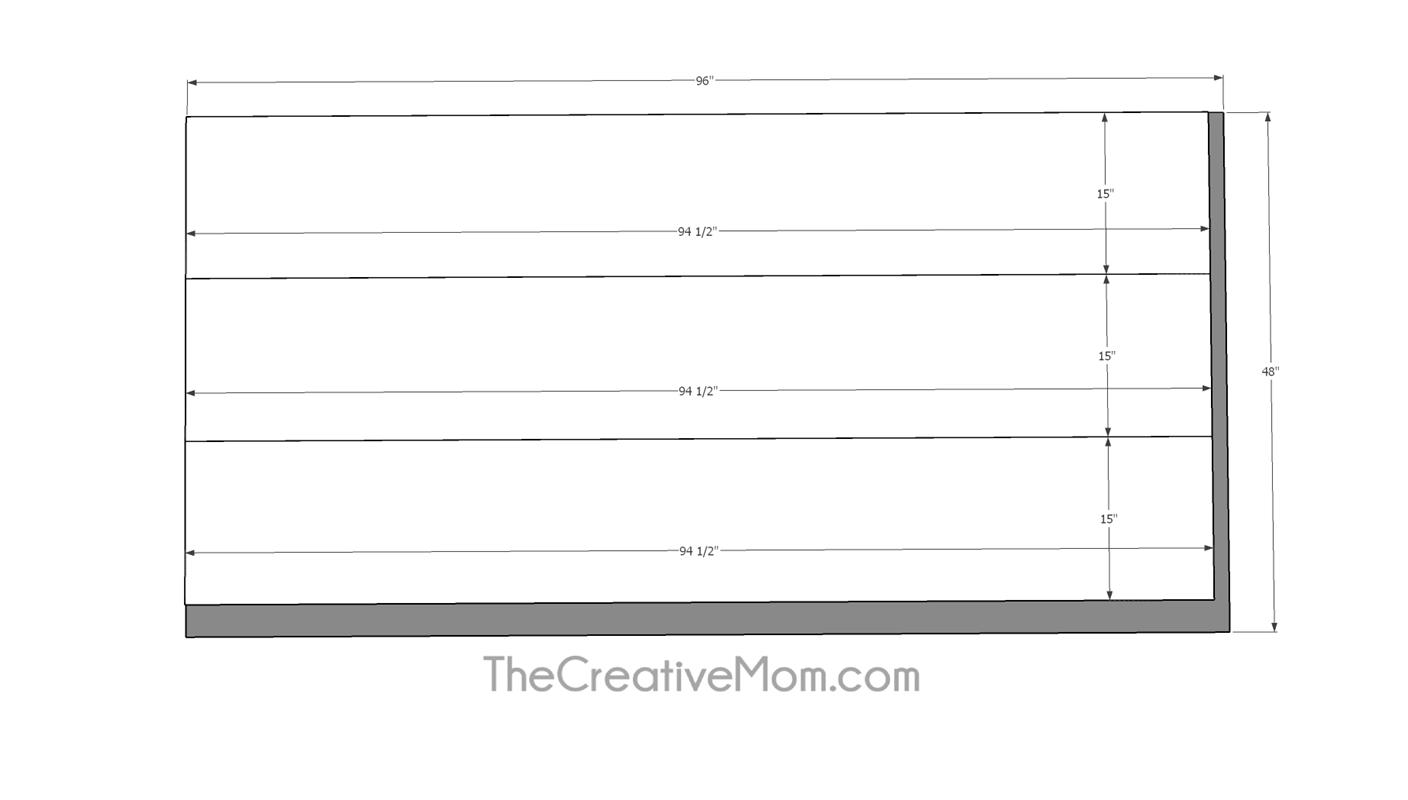
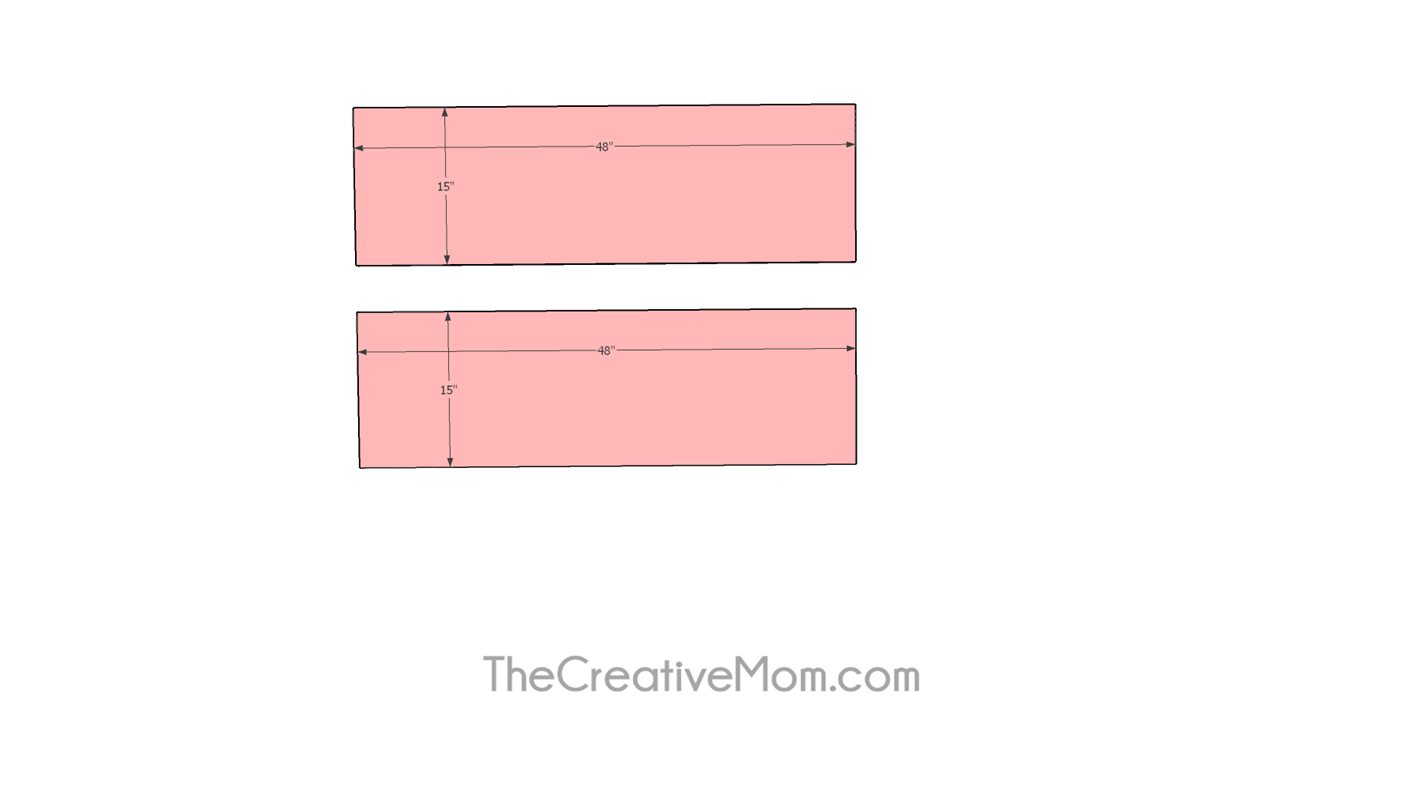
Cut Shelf Top and Bottom
Cut Two 15" x 48" pieces of 3/4" plywood.
-
Vertical Supports
Cut Three 15" x 94 1/2" pieces of 3/4" plywood. Drill pocket holes in both ends of all three pieces. Using wood glue and 1 1/4" pocket hole screws, attach to the top and bottom pieces you just cut.
Make sure to use a level and speed square to keep everything level, plumb, and square.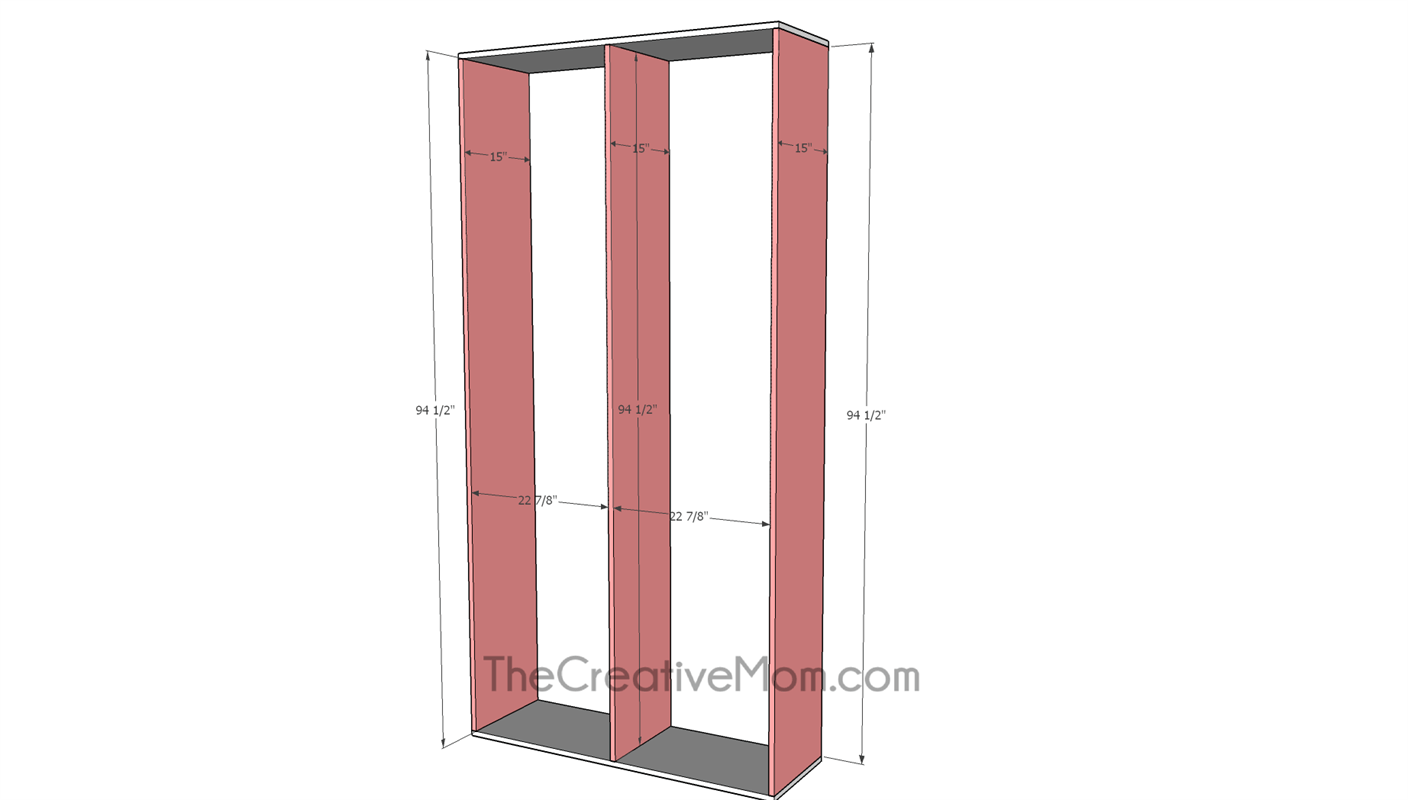
-
Add Shelves
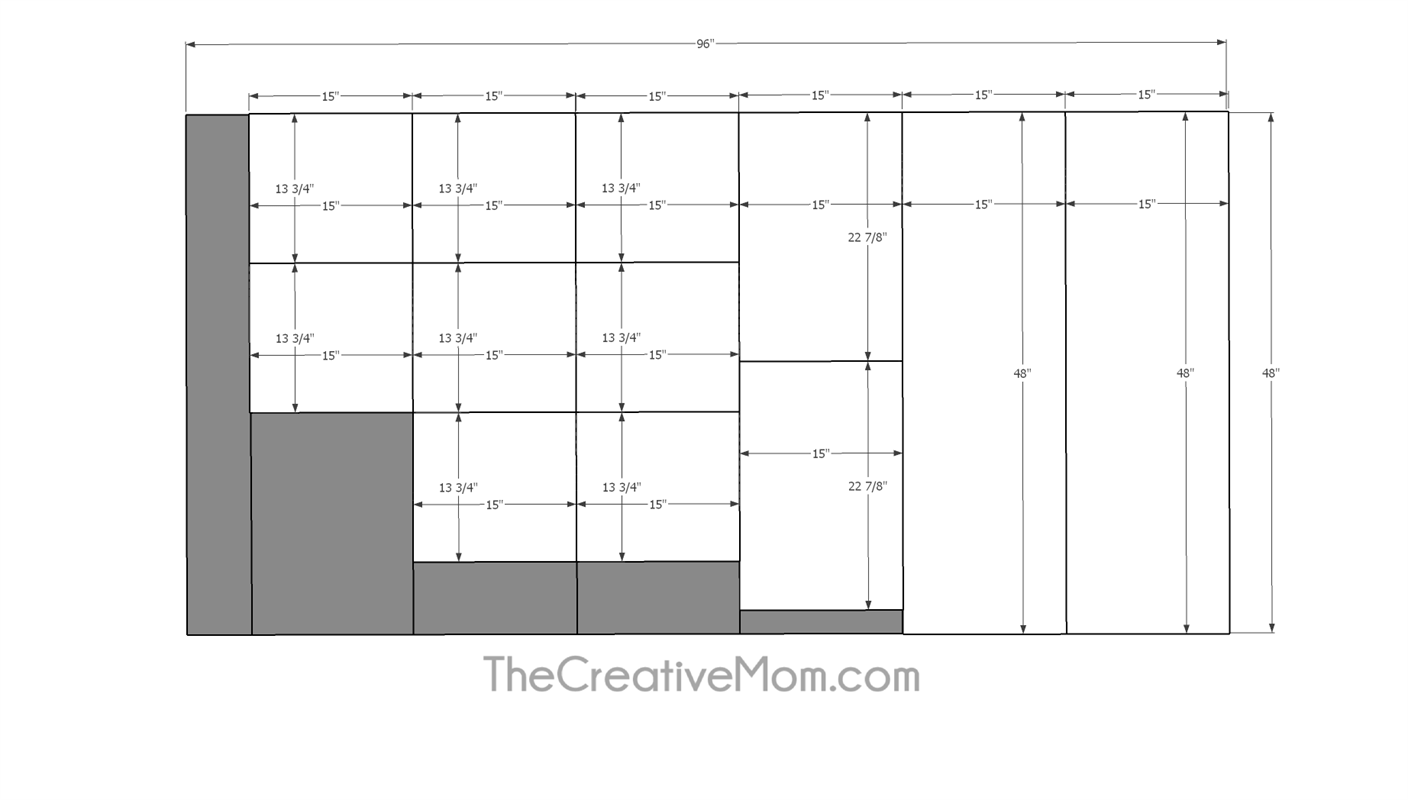
Cut as many shelves as you desire. I have 10 in my plans, but you can customize your shelves however you would like.
Shelves should be 15" x 22 7/8" pieces of 3/4" plywood.
Drill pocket holes on both of the 15" sides of the shelves. Using wood glue and 1 1/4" pocket hole screws, attach to the vertical supports.
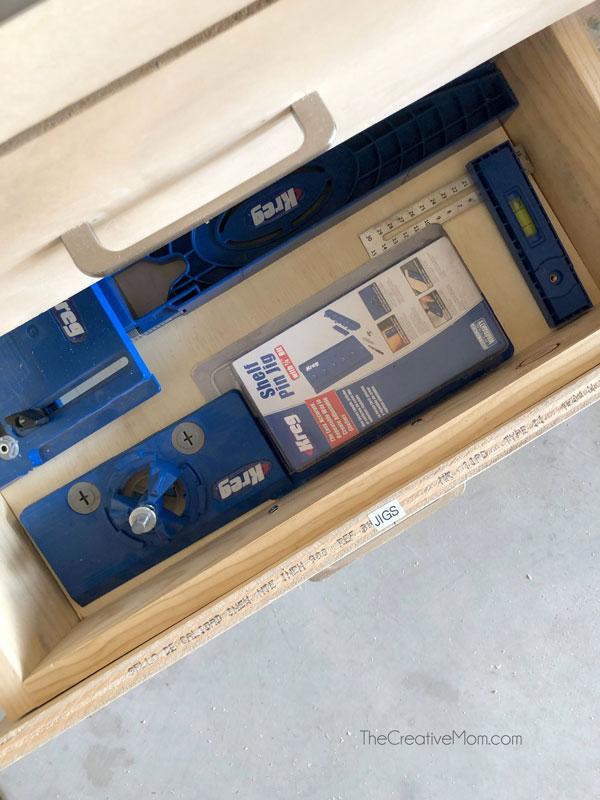
You could also Kreg's shelf pin jig and use shelf pins if you wanted to be able to move your shelves up and down.
Make sure to use a level and speed square to keep everything level, plumb, and square.
-
Bottom Shelves
Add shelves to the bottom half of your unit. Shelves should be 15" x 22 7/8" pieces of 3/4" plywood.
Drill pocket holes on both of the 15" sides of the shelves. Using wood glue and 1 1/4" pocket hole screws, attach to the vertical supports.
TIP: For ease in building, I would wait to add the shelf above the drawers until after the drawers are installed. This will give you a tight fit, and allow for your shelf to sit right on top of the drawers without problems.
-
Top Shelves
Add shelves to the bottom half of your unit. Shelves should be 15" x 22 7/8" pieces of 3/4" plywood.
Drill pocket holes on both of the 15" sides of the shelves. Using wood glue and 1 1/4" pocket hole screws, attach to the vertical supports.
You could also Kreg's shelf pin jig and use shelf pins if you wanted to be able to move your shelves up and down.
Make sure to use a level and speed square to keep everything level, plumb, and square.
-
Vertical Dividers
Cut as many vertical dividers as you desire. I have 8 in my plans, but you can customize your dividers however you would like.
Shelves should be 15" x 22 7/8". In my build, I used 3/4" plywood and attached with wood glue and brad nails, but you could use any size plywood you have, and attach with brad nails and wood glue, or dados.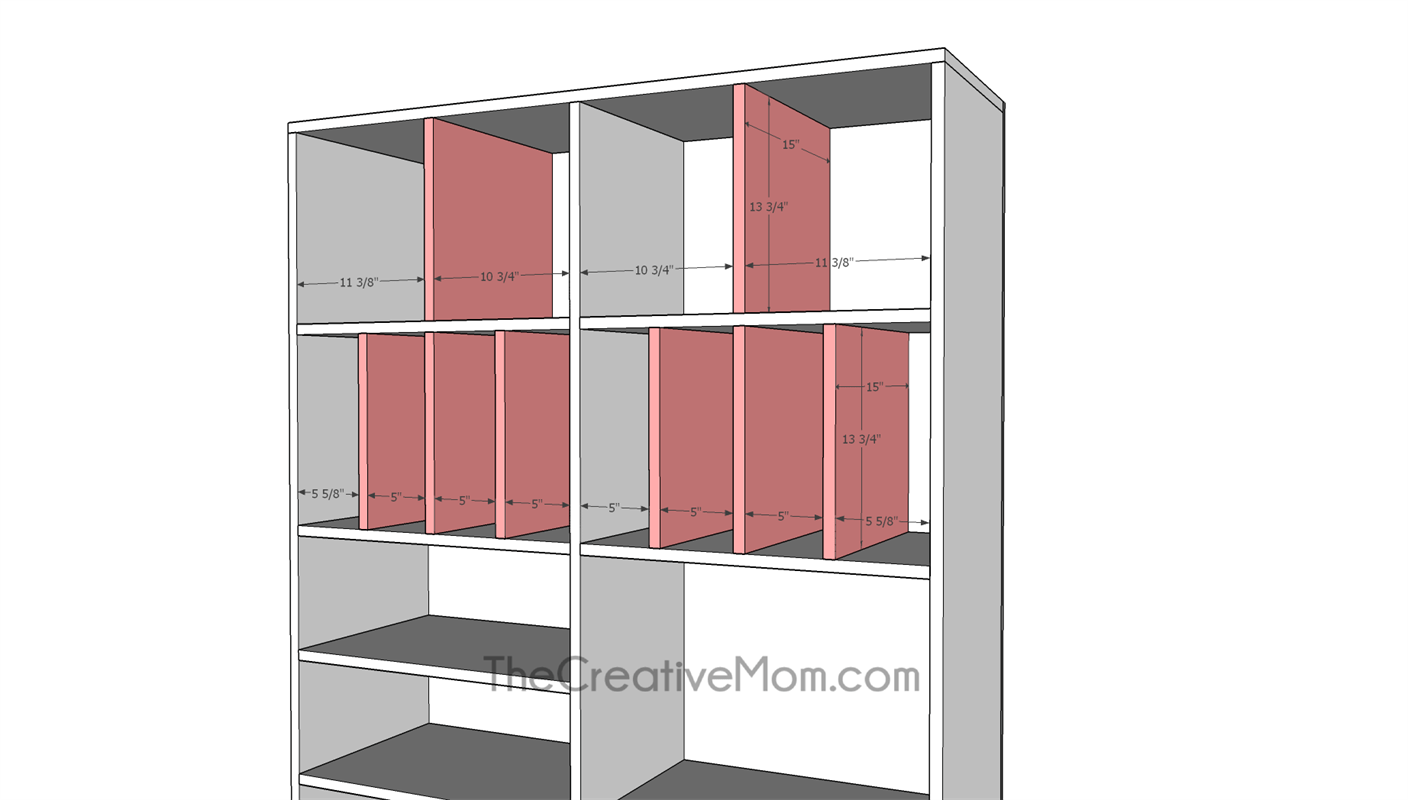
-
Build Drawers
We will build 6 drawers. Cut 12 1x6's at 20 3/8" and drill pocket holes on each end.
Cut 12 1x6's at 13 1/2".
Using wood glue and 1 1/4" pocket hole screws, attach to the boards to create a box.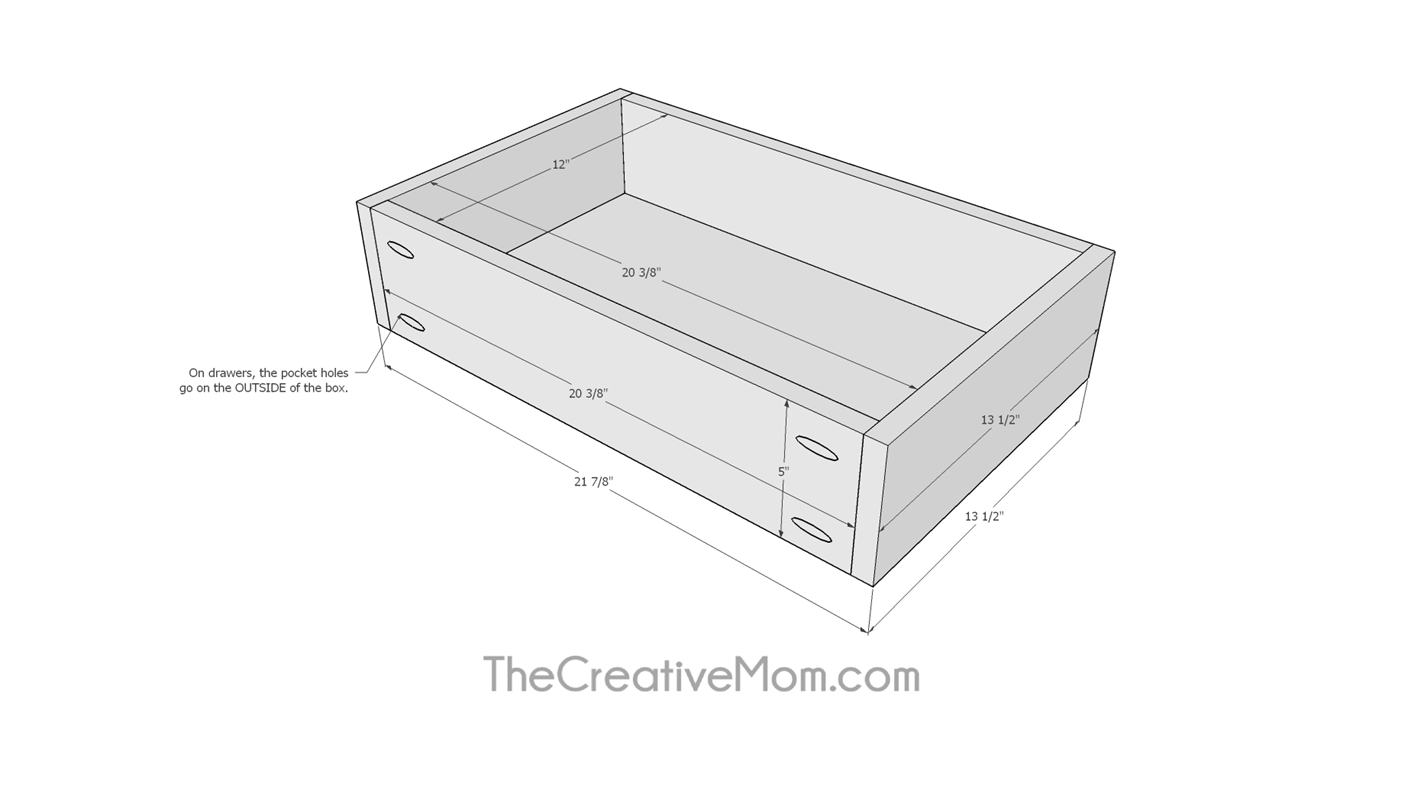
-
Drawer Bottoms
Cut 6 drawer bottoms from 3/4" plywood at 12" x 20 3/8".
Drill pocket holes on all four sides, and Using wood glue and 1 1/4" pocket hole screws, attach to the drawer box.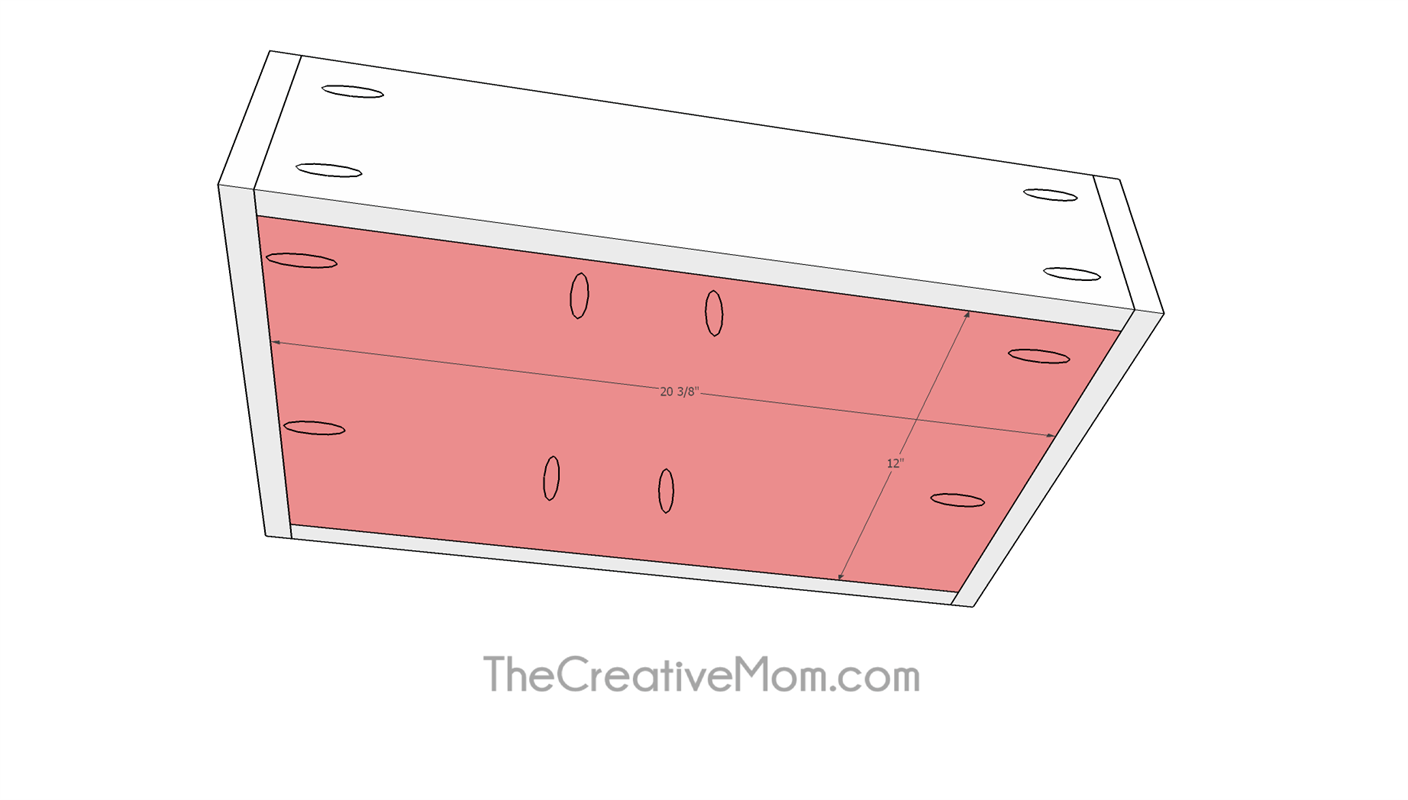
-
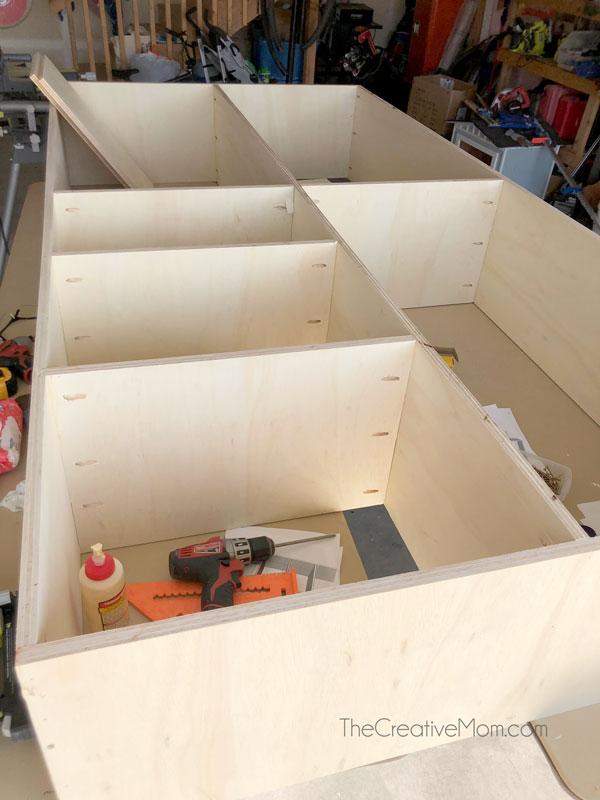
Shelf Unit
Make sure all of your pocket holes are on the bottom and inside of your shelving unit.
-
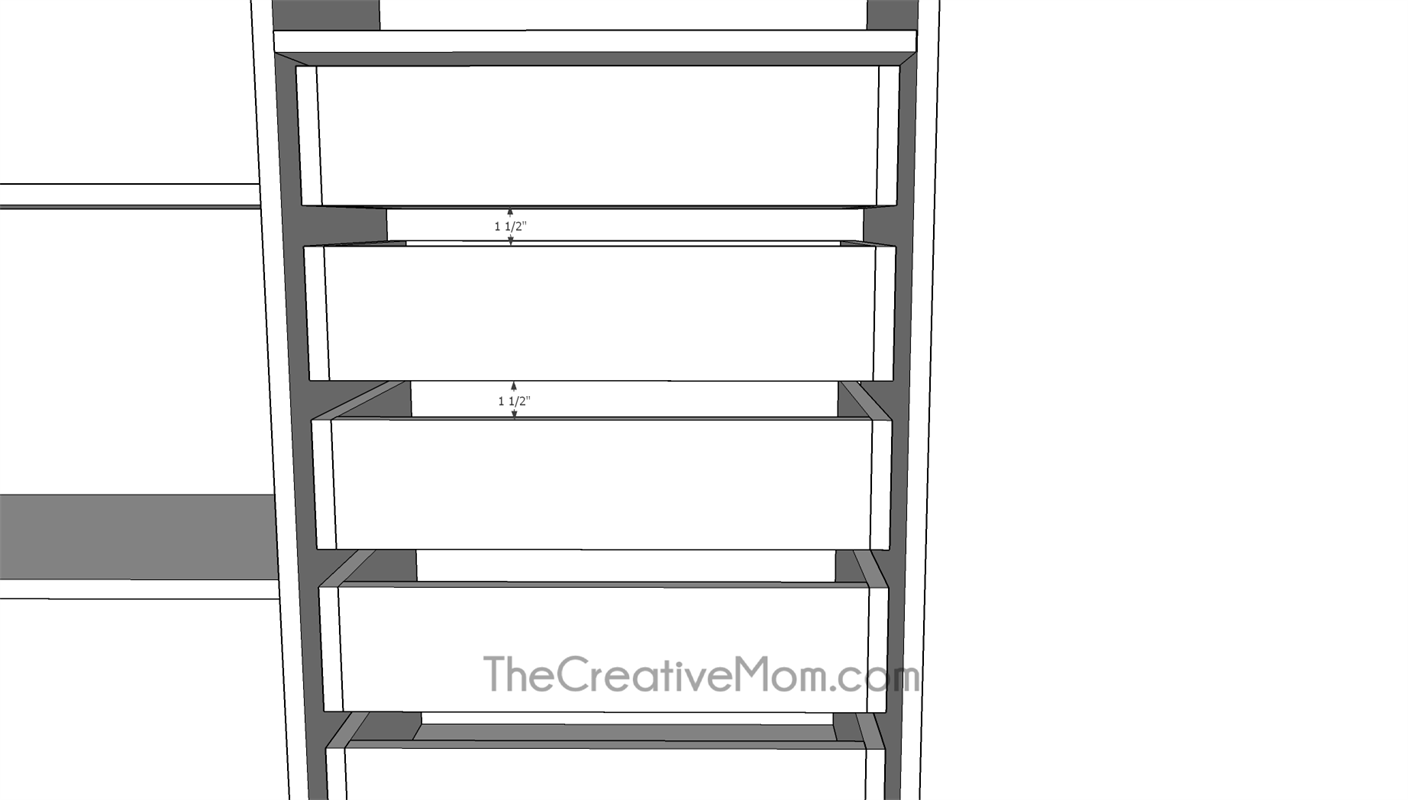
Install Drawers
Starting from the bottom, working your way upward, install your drawers, leaving 1 1/2" gap at the bottom and between each drawer.
-
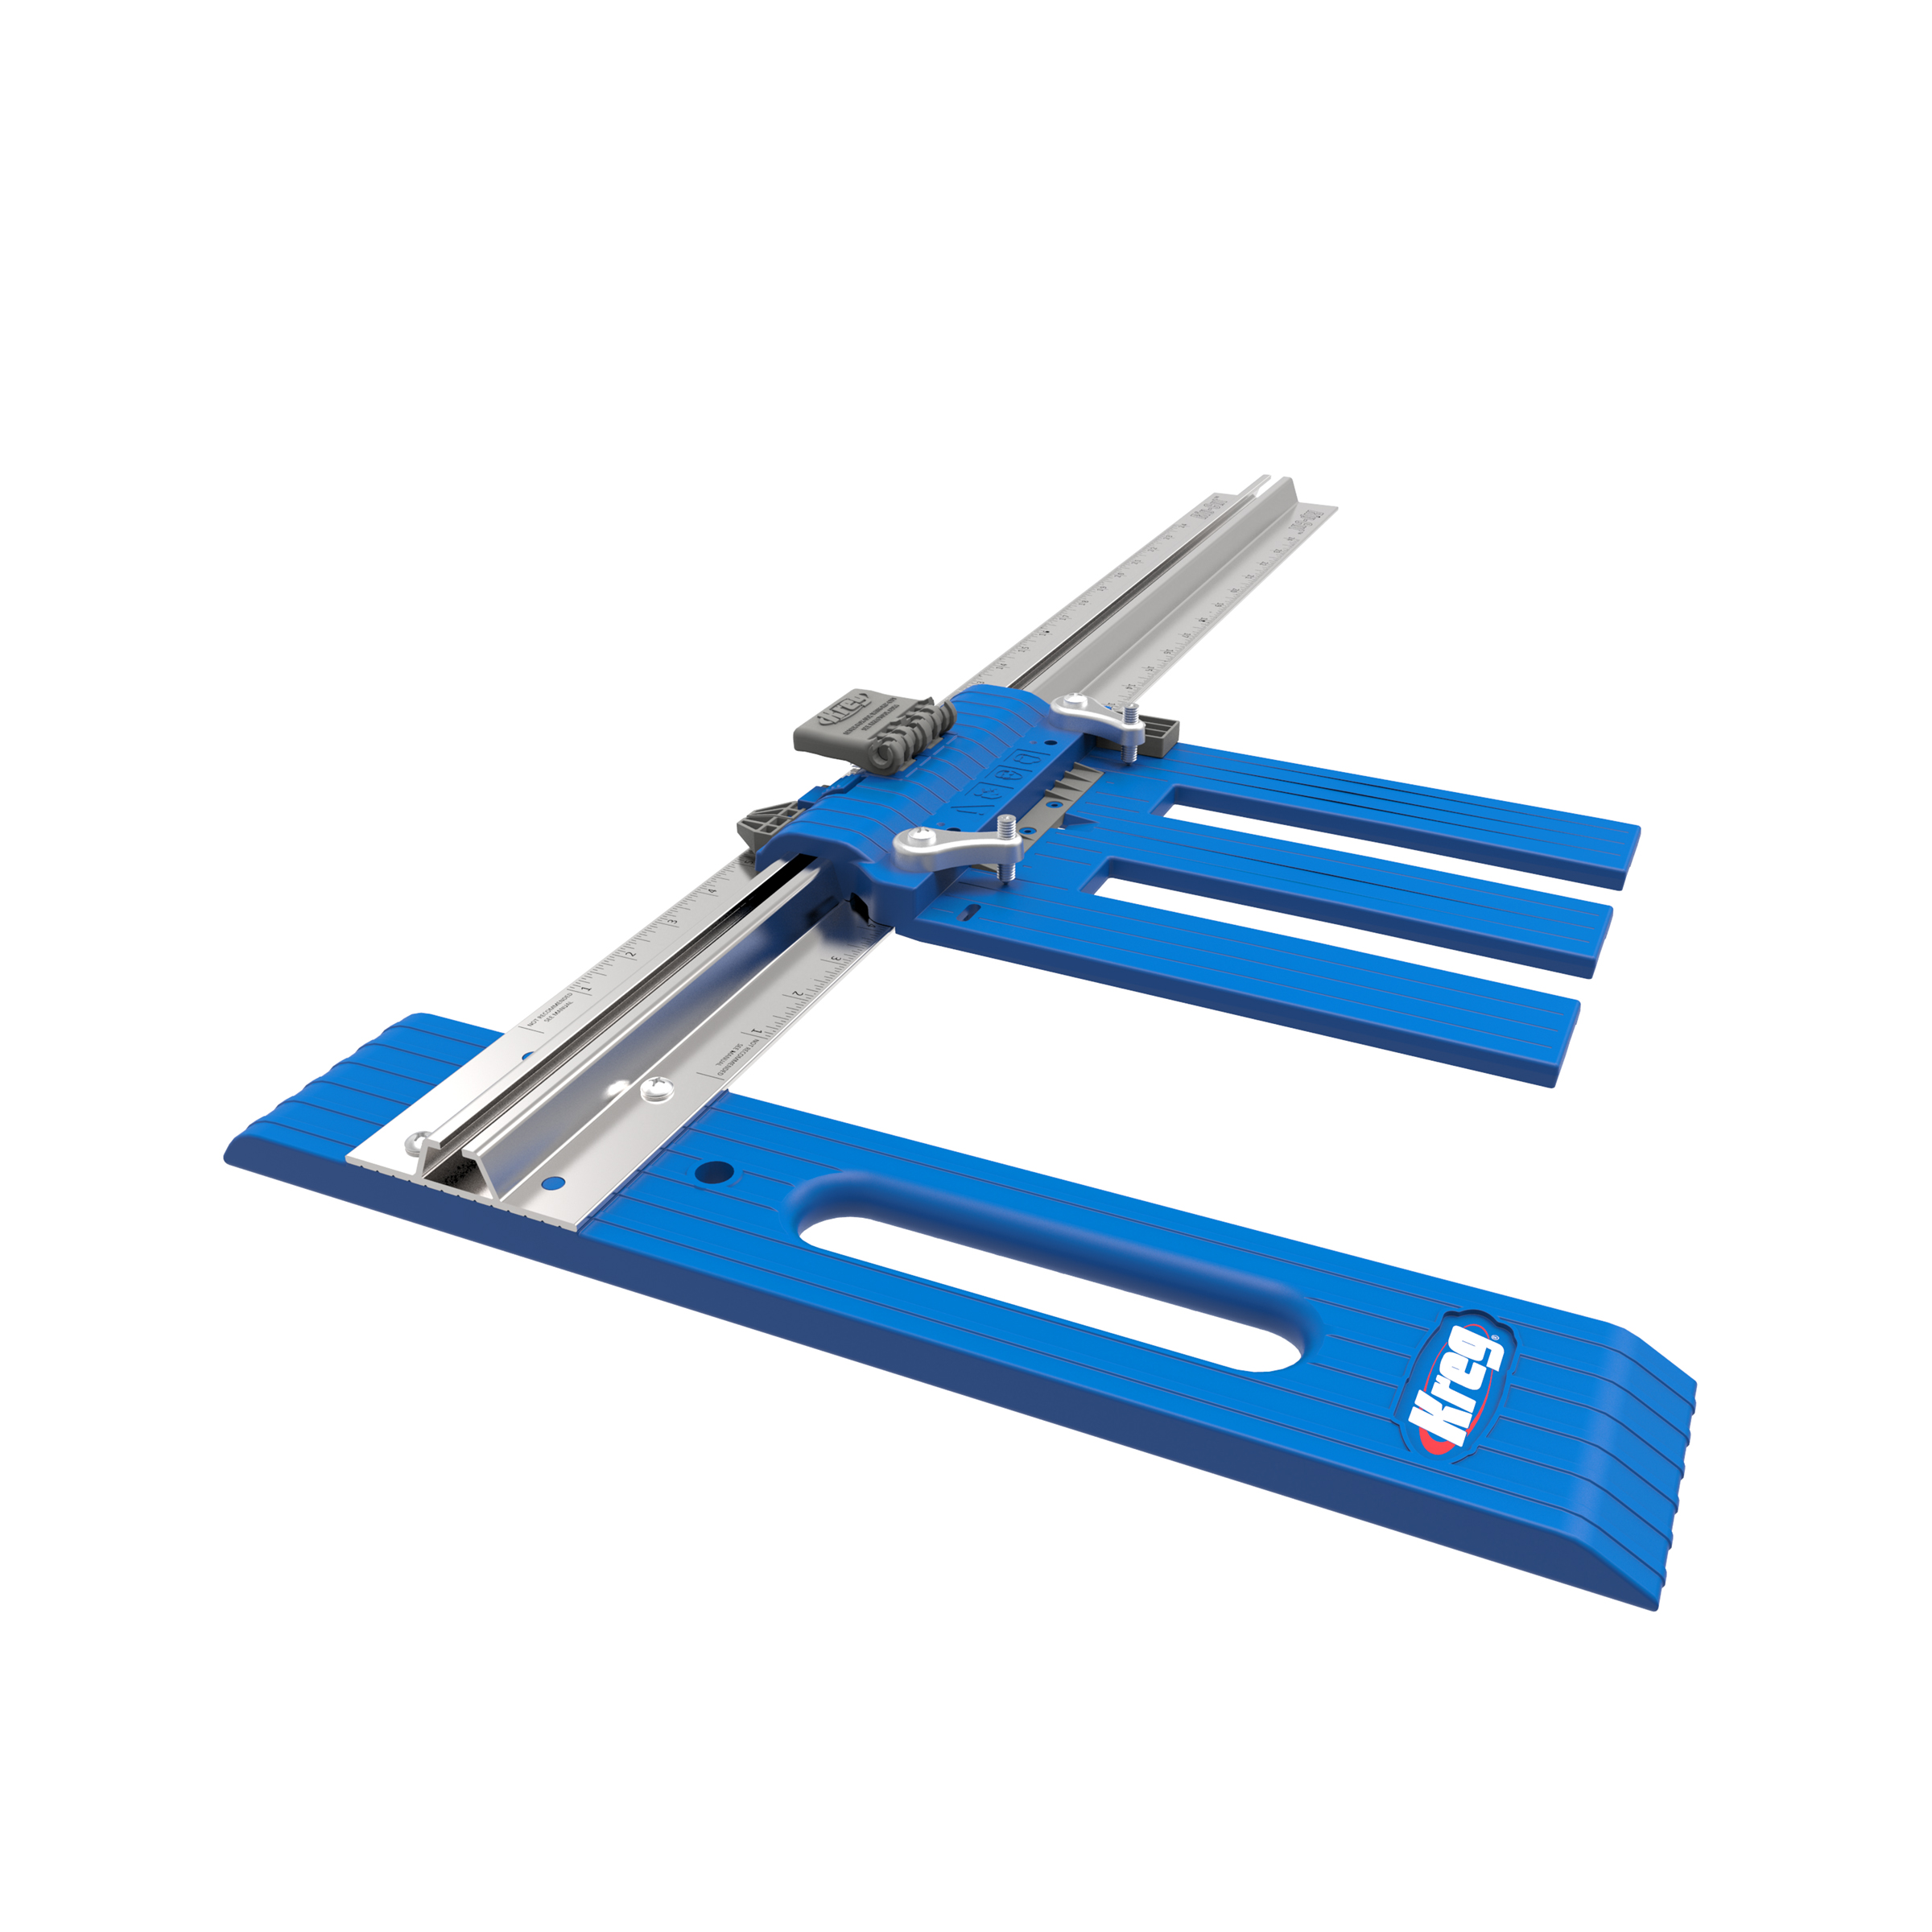
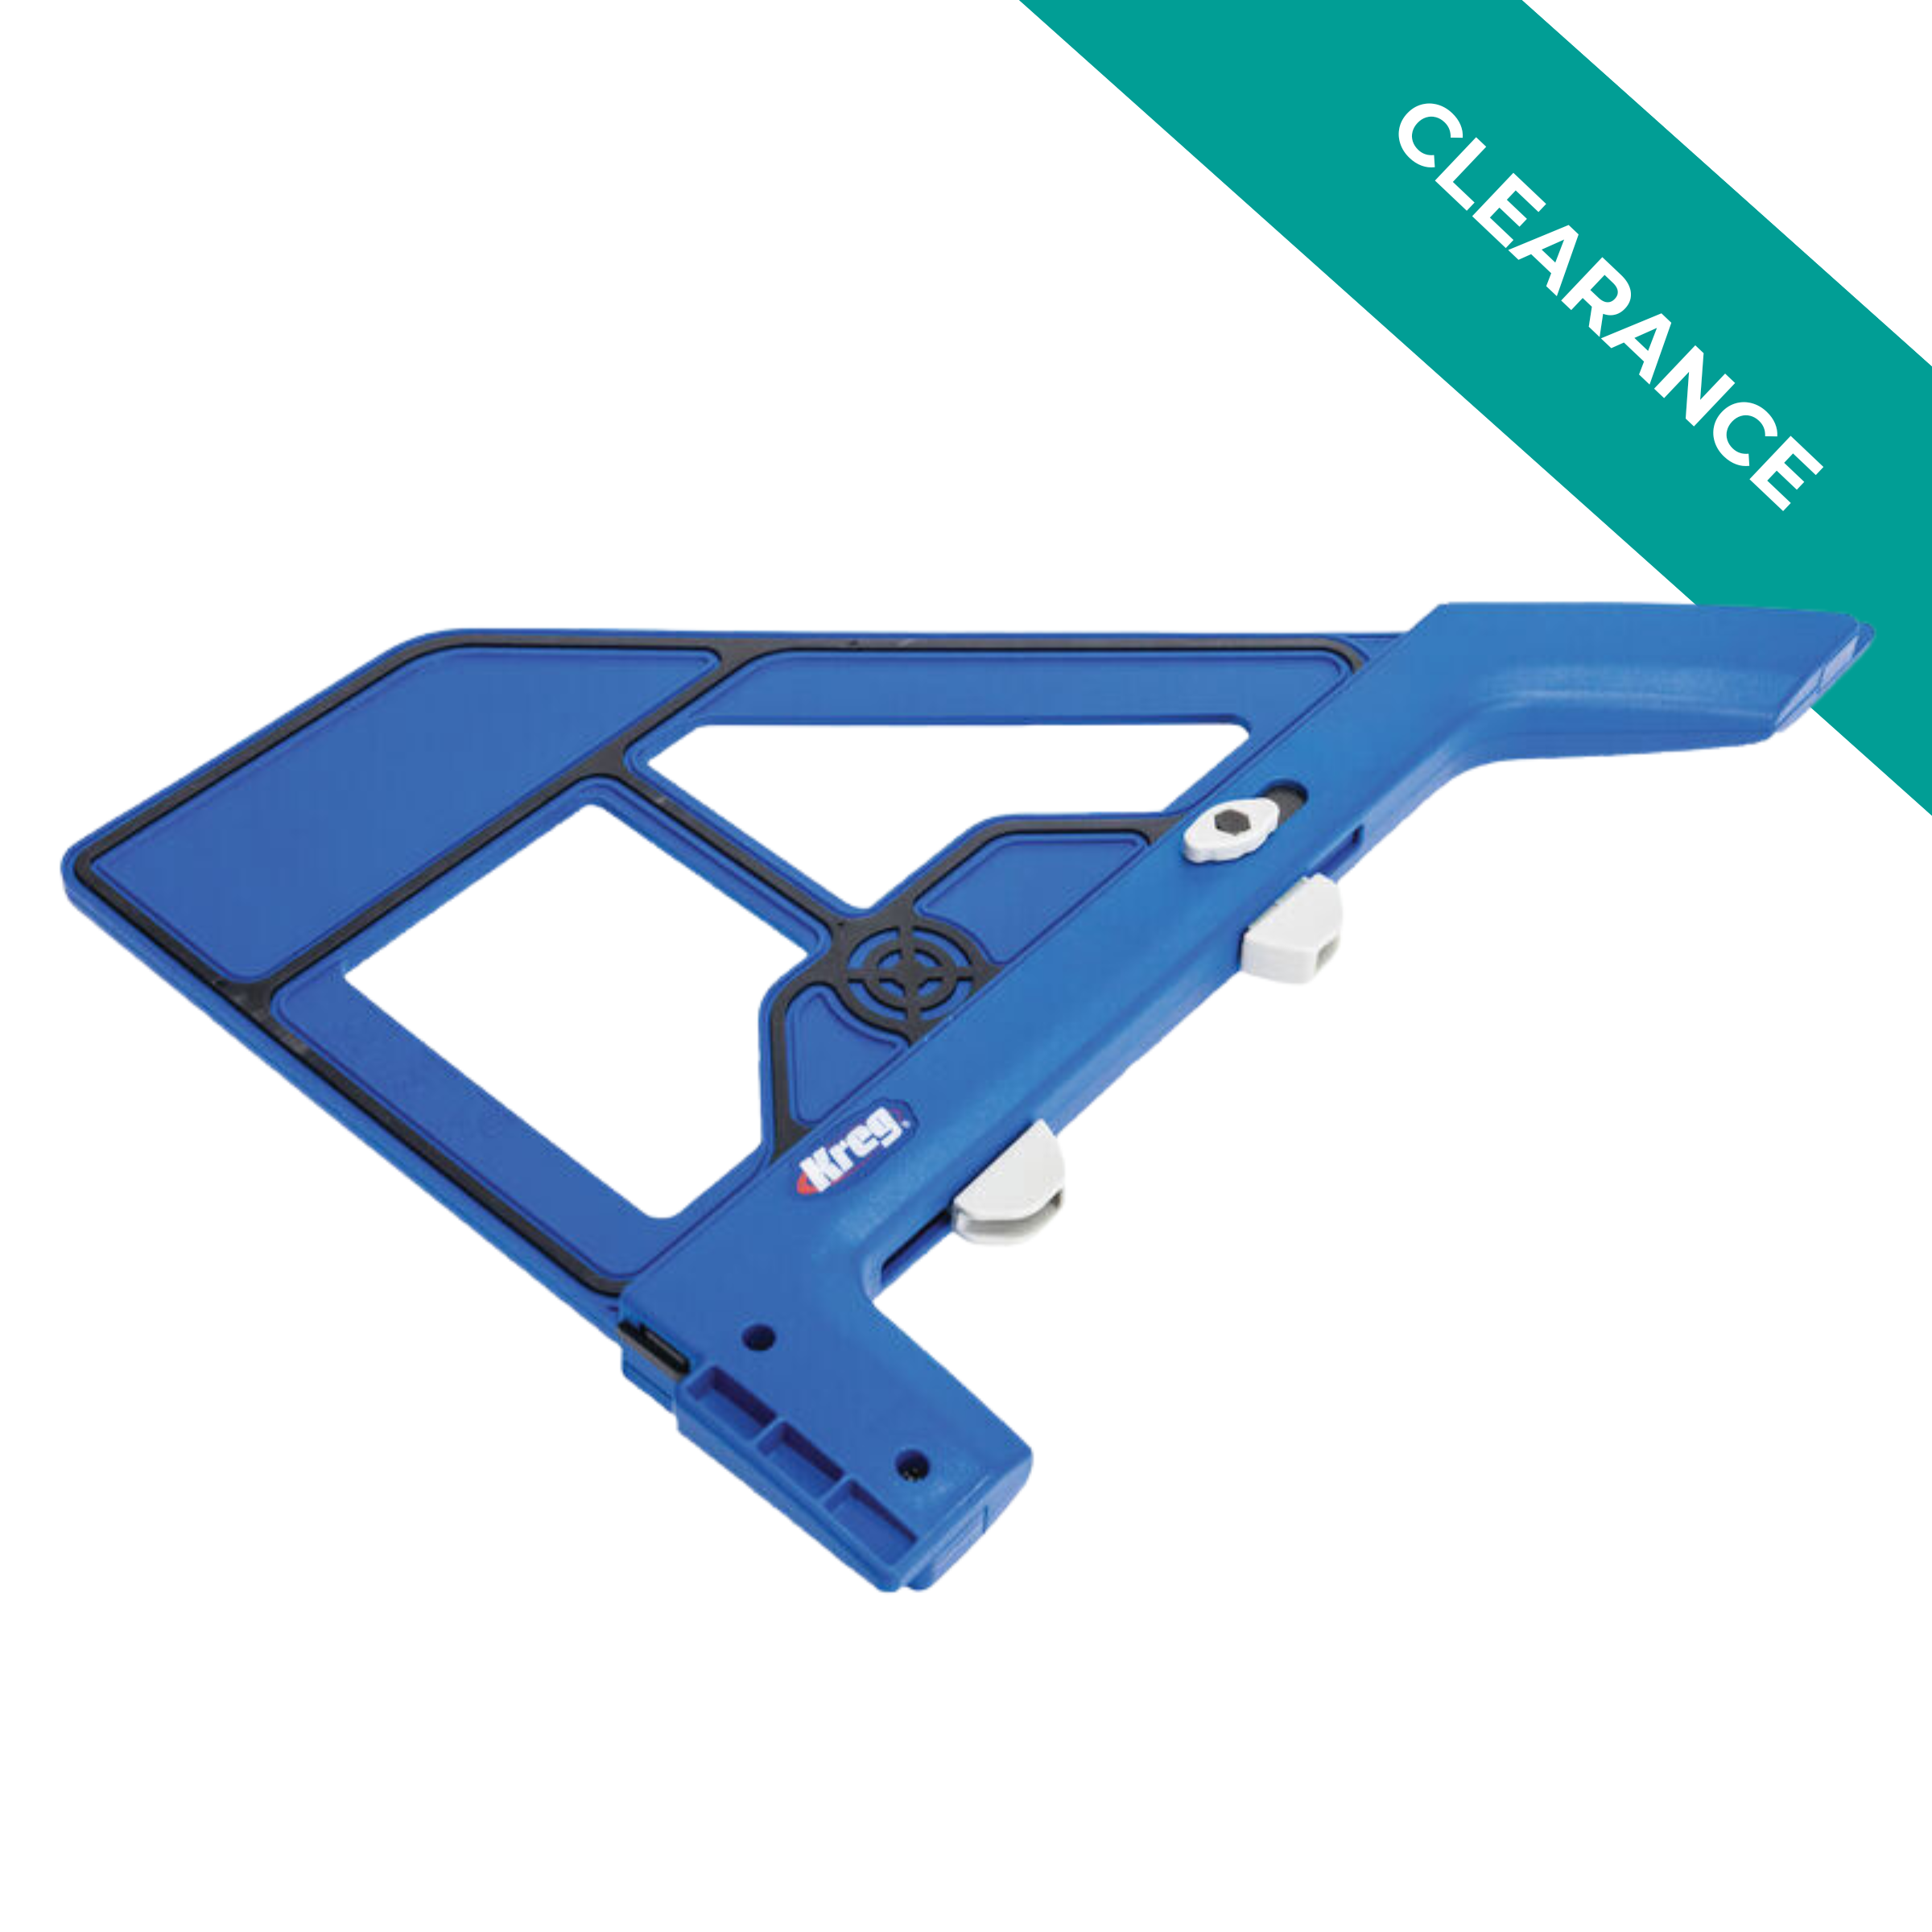
Drawer Slides
14" drawer slides will work for this project. The Kreg drawer slide jig is a lifesaver in the installation process.
-
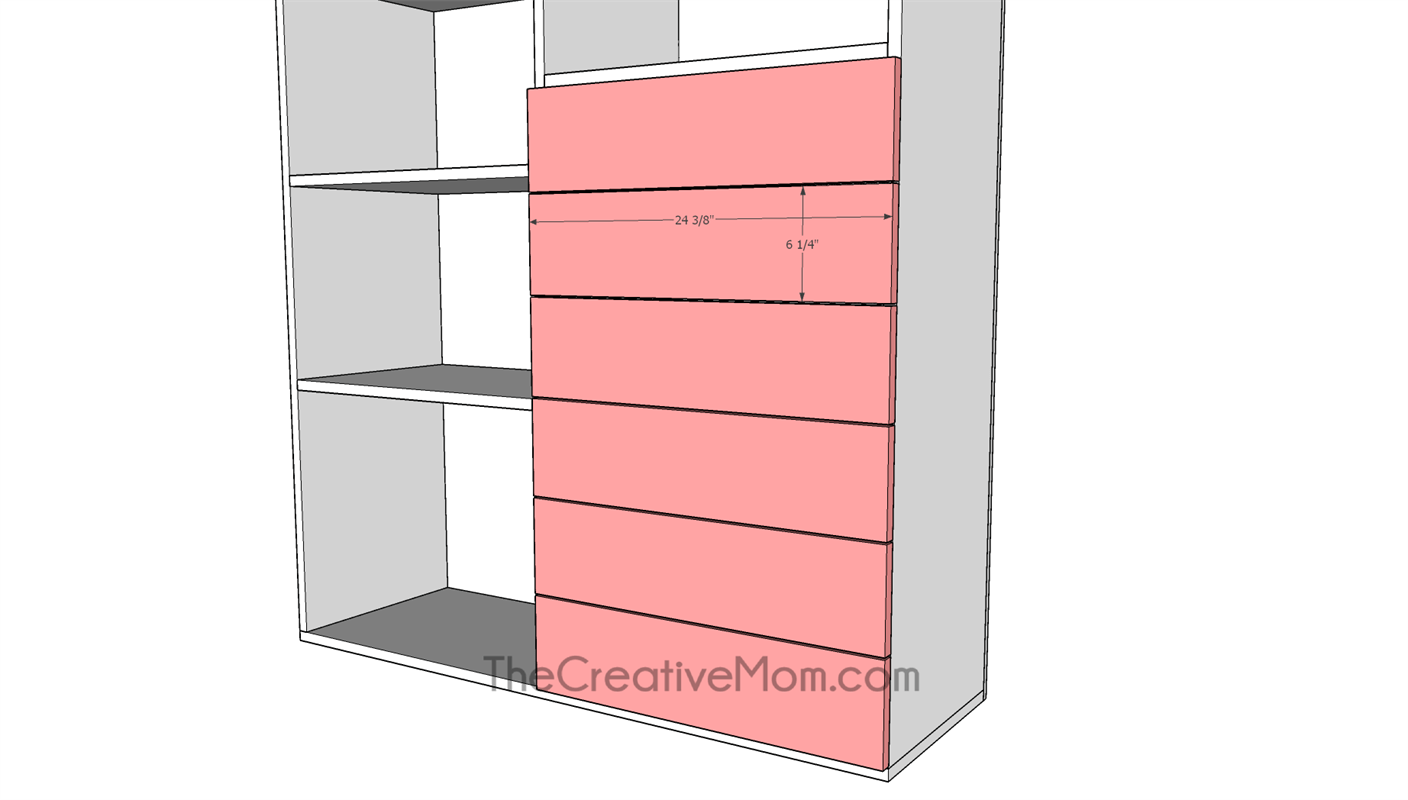
Drawer Fronts
Please measure before cutting the drawer fronts. Cut the drawer fronts and install.
-
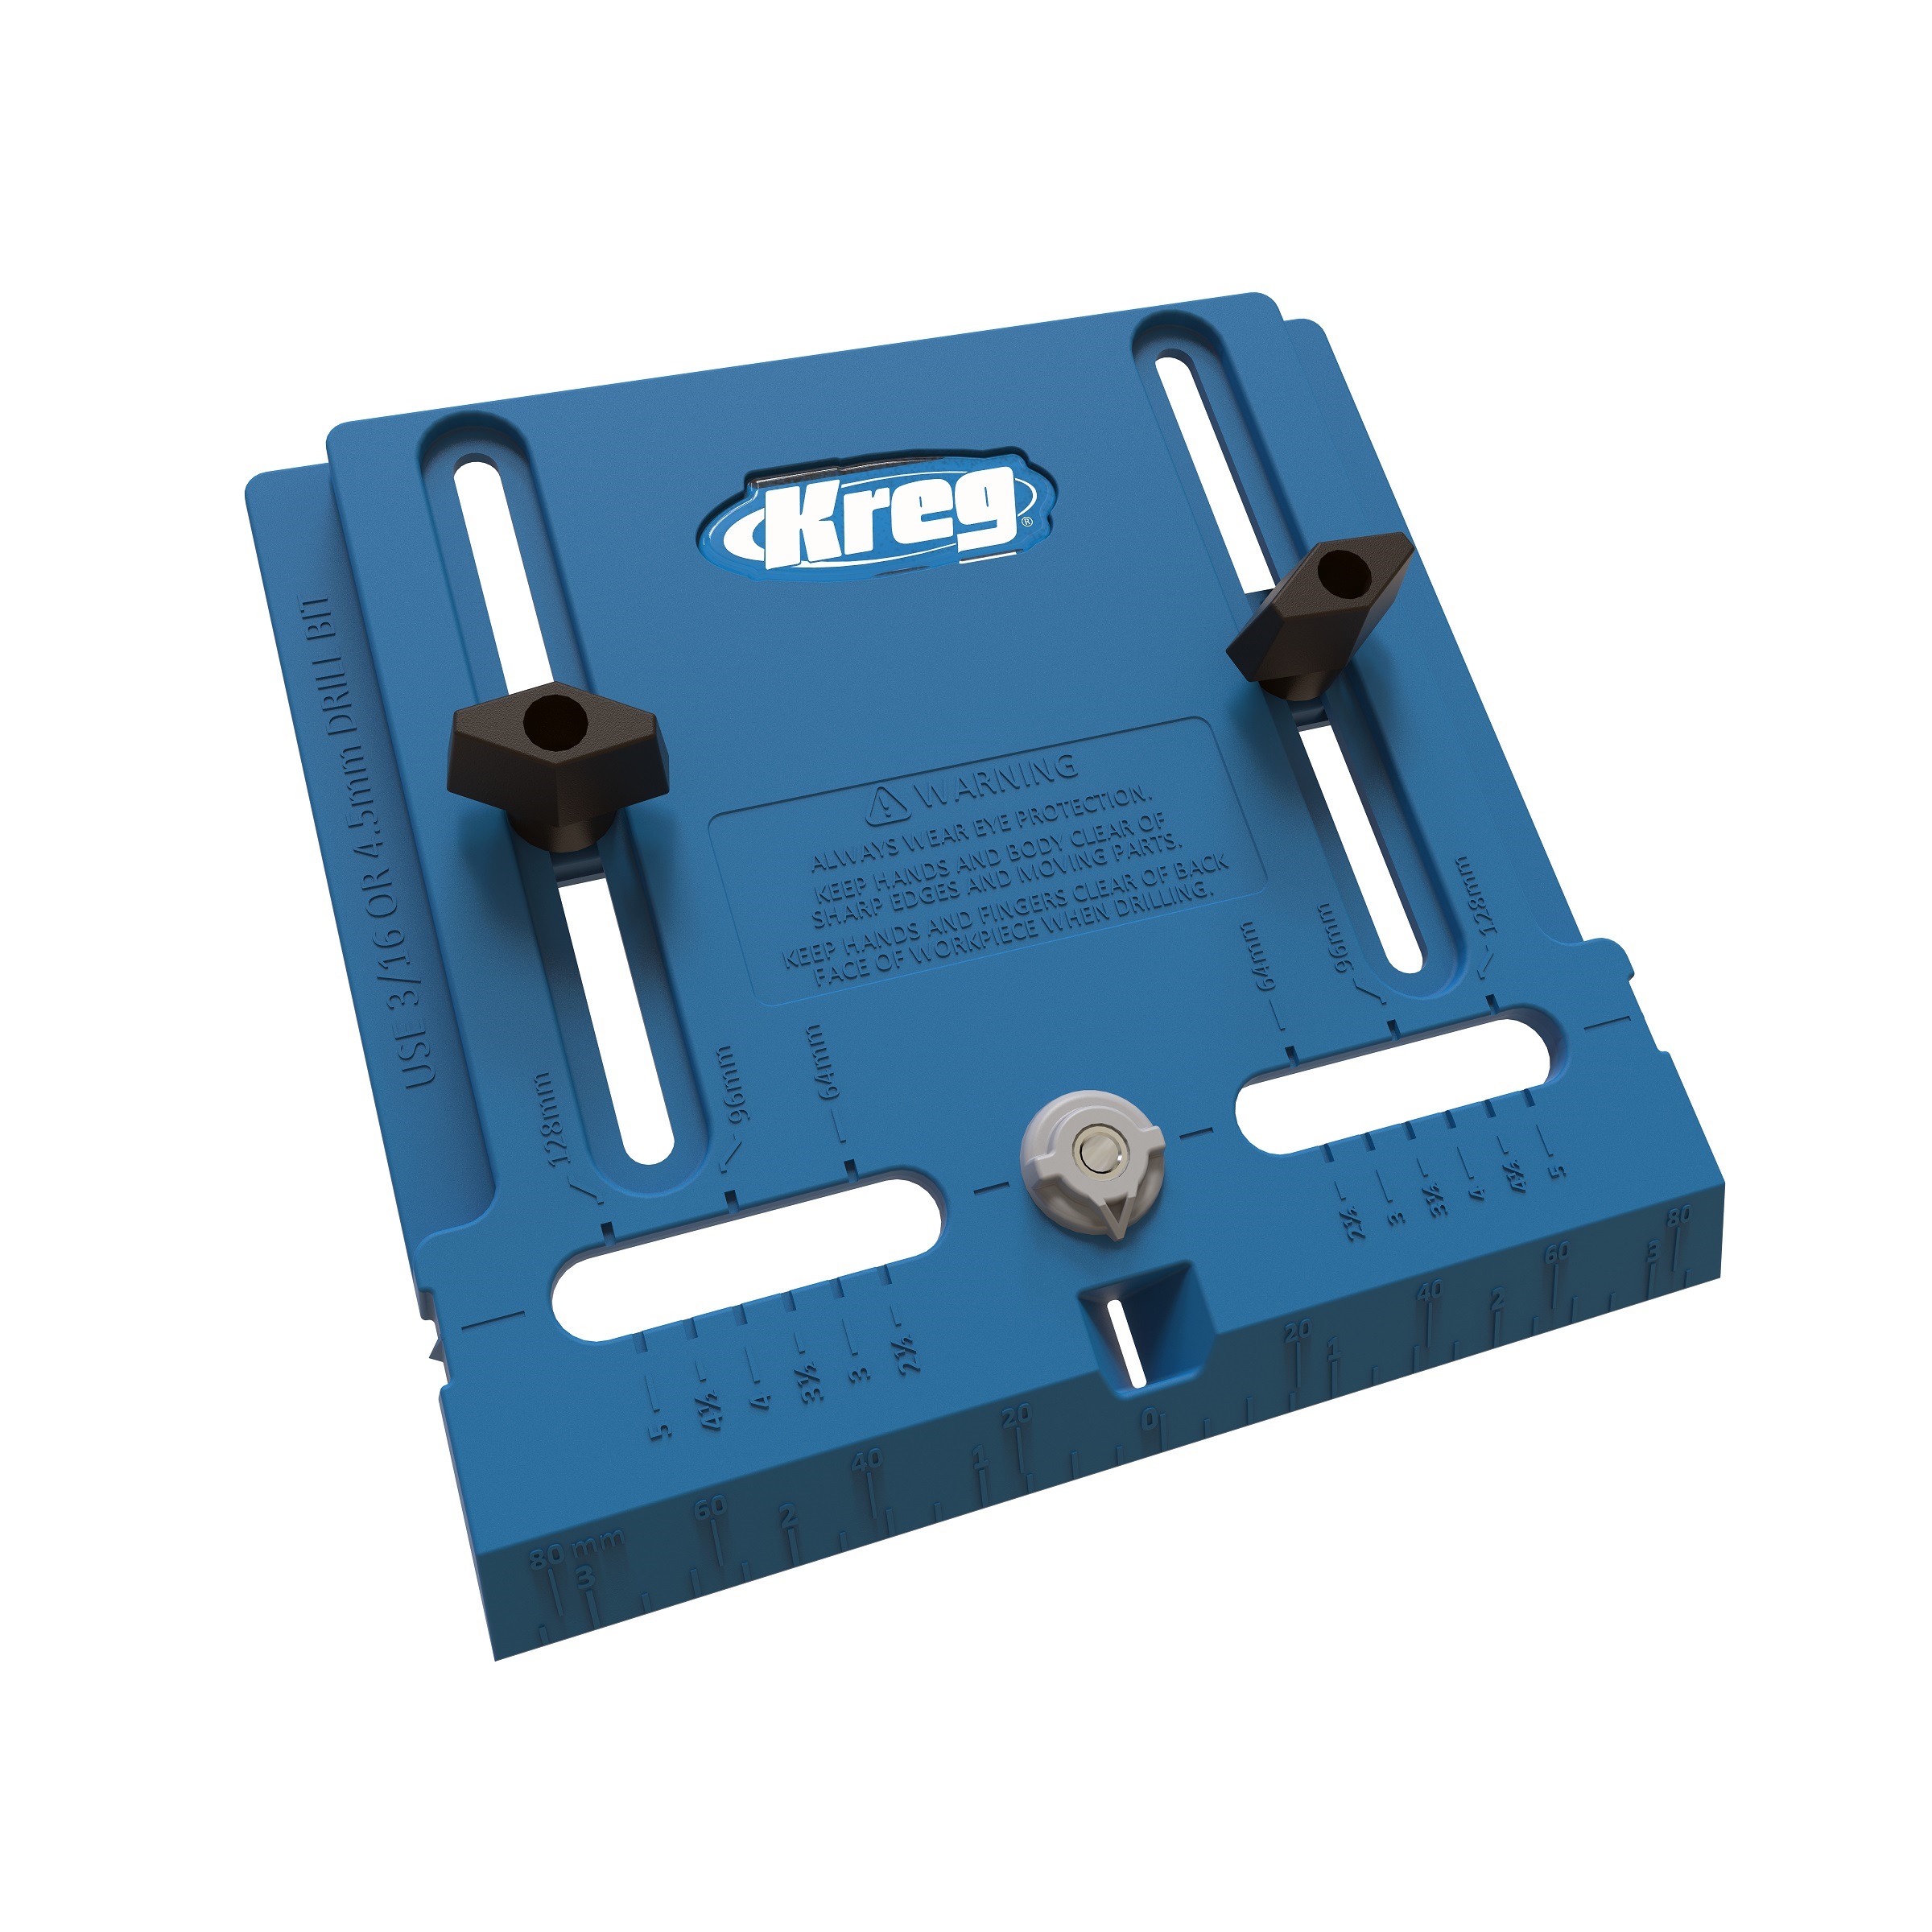
Install Drawer Pulls
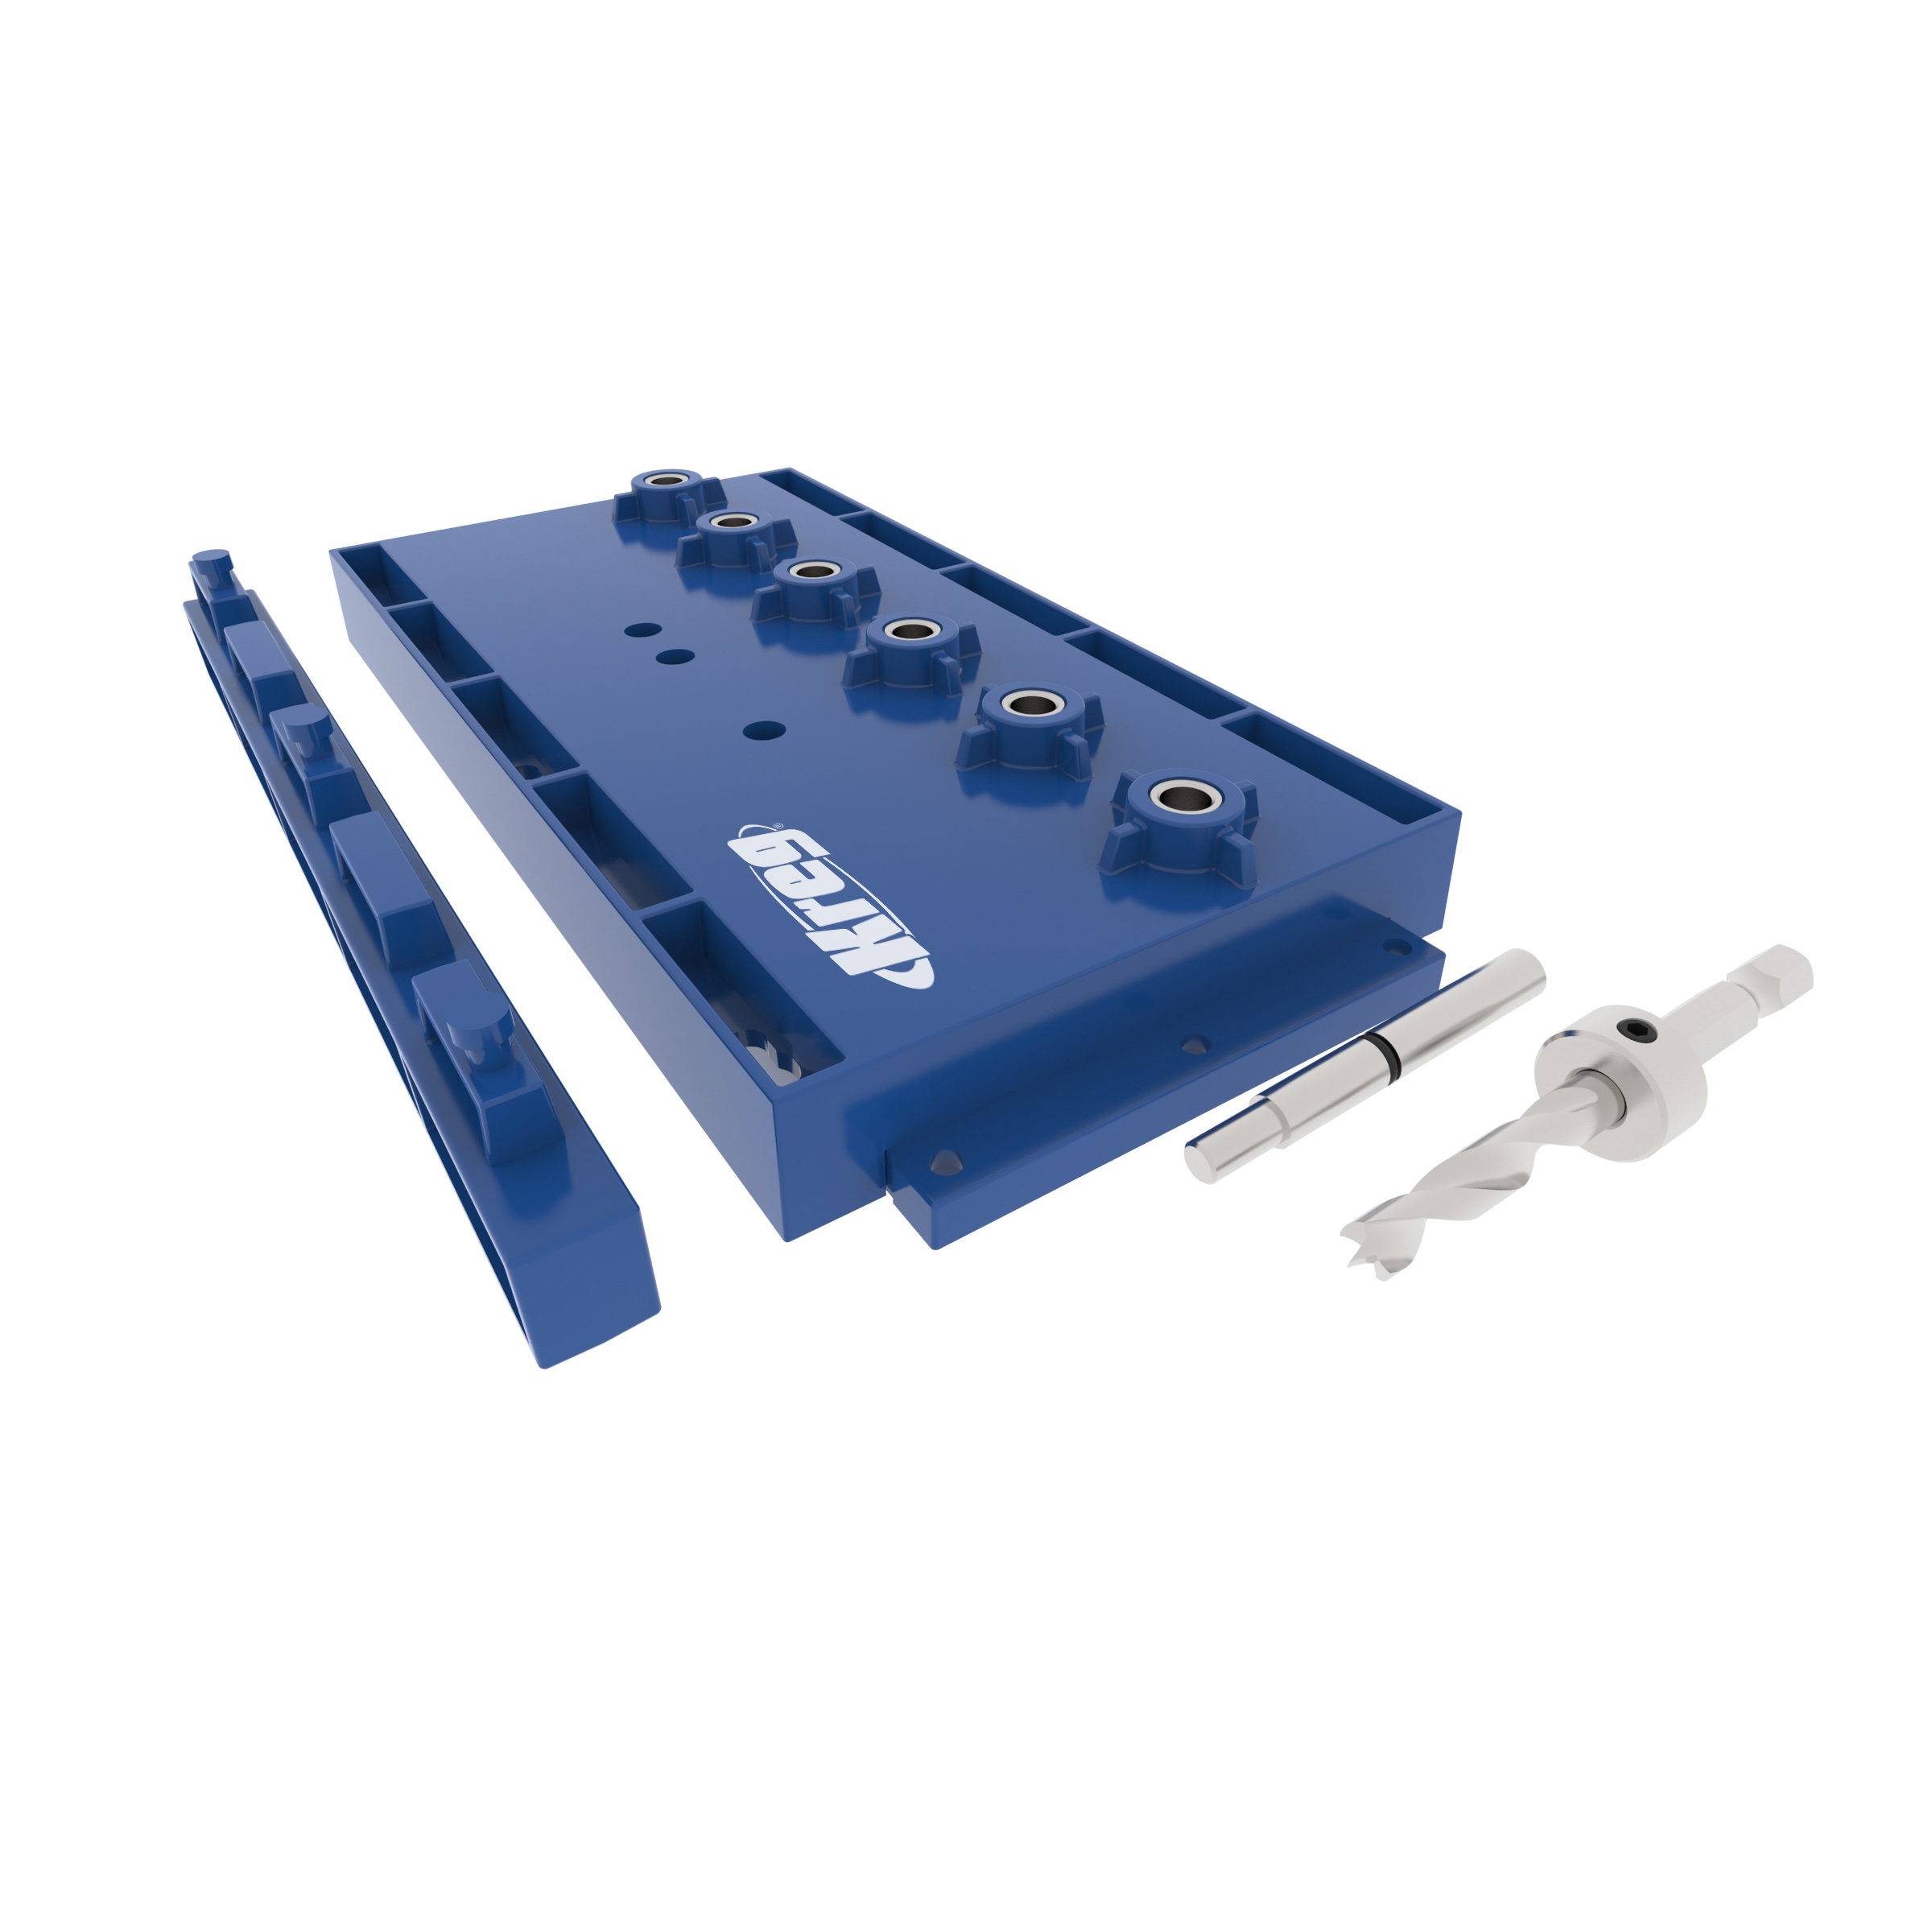
Using the Kreg Drawer Pull Jig, install the drawer pulls.
-
Fasten to the Wall
This unit is very large and heavy. It can tip easily. To prevent injury, please make sure to fasten the unit to the wall. It is best to fasten in three places, and into at least one stud.
-
Fasten Unit to the Wall
This unit is very large and heavy. It can tip easily. To prevent injury, please make sure to fasten the unit to the wall. It is best to fasten in three places, and into at least one stud.
-
Add Backing
Using a brad nailer or staple gun, fasten 1/8" (48" x 96") plywood or Eucaboard to the back of the unit.