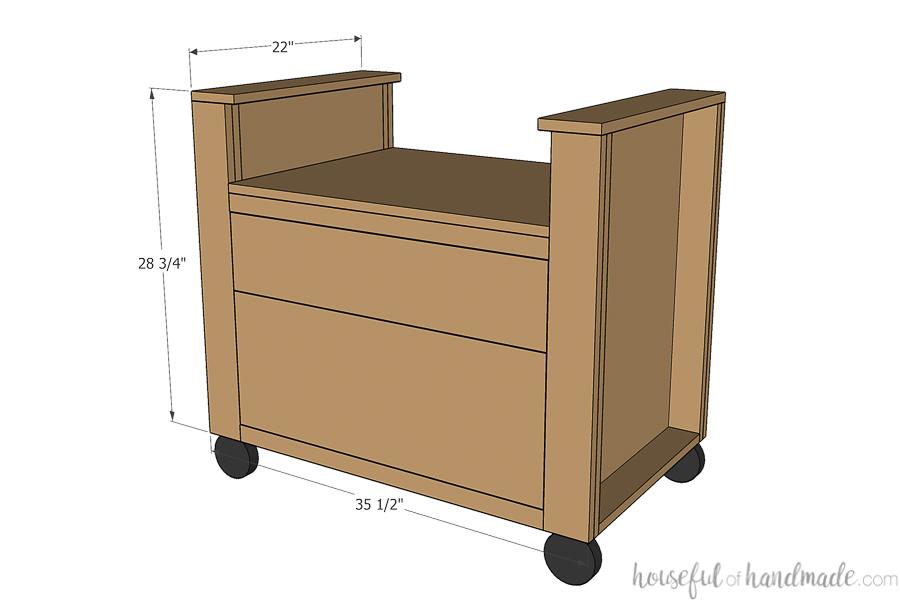
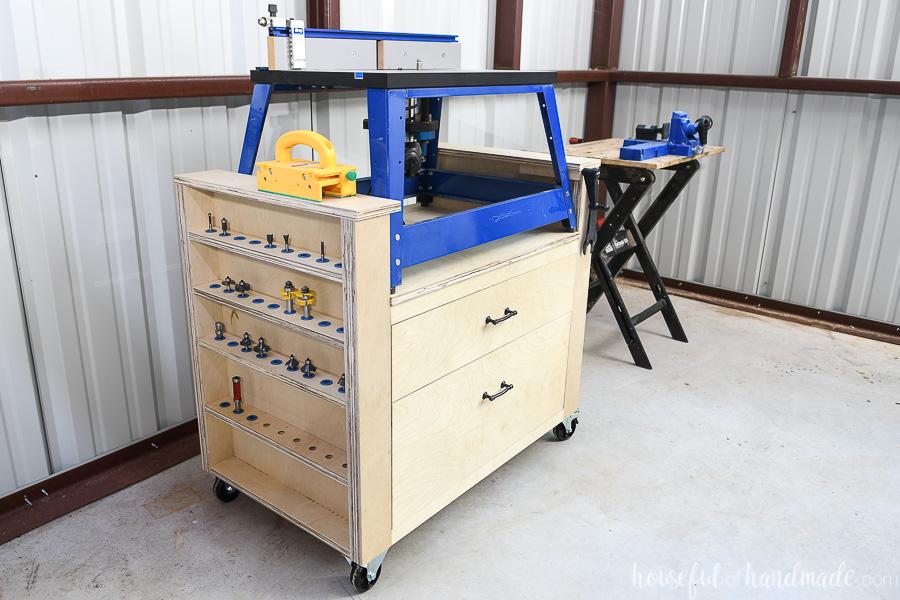


Create the perfect router cart for your bench top router table with loads of storage. This table is sized to fit the Kreg bench top router table. The sides have tons of room for router bit storage and router accessory storage. And the table has two large drawers for even more workshop storage.
Tools
Kreg Tools


Other Tools
-
Circular Saw (corded)

-
Table Saw
-
Tape Measure
-
Drill (cordless)
-
Impact Driver
-
Nail Gun
-
Stapler
-
Air Compressor
Materials
Wood Products
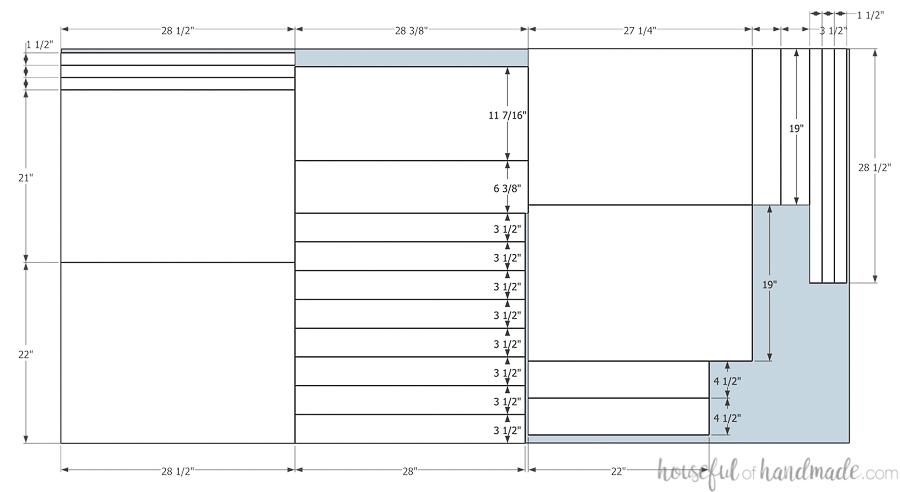
- 1 Plywood , 3/4" Thick , Full Sheet
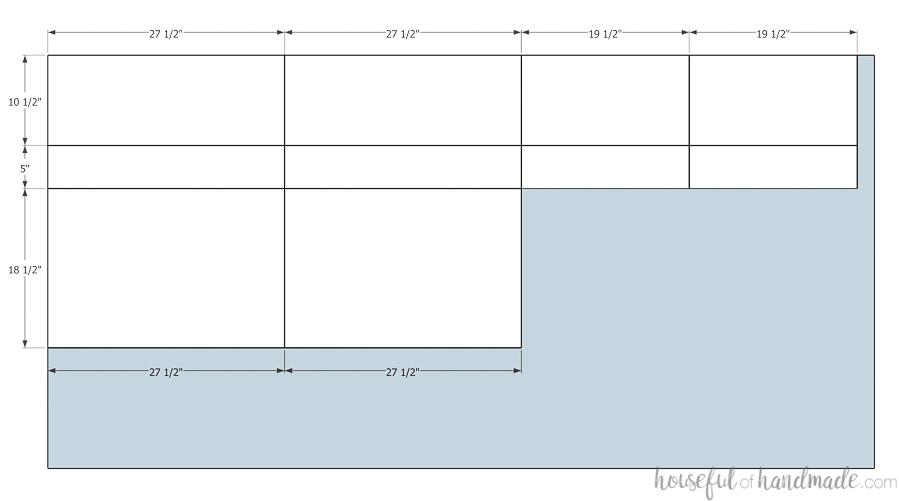
- 1 Plywood , 1/2" Thick , Full Sheet
Hardware & Supplies
- 50 1 1/4" pocket hole screws
- 16 2 1/2" pocket hole screws
- 100 1 1/4" finish nails
- 100 1" staples
- 1 Wood glue
- 2 Pair 20" long drawer slides
- 2 Drawer pulls
- 5 Large cup hooks
- 30 Router bit storage inserts (optional)
Cut List & Parts
- 8 Legs , 3/4" x 3 1/2" x 28"
- 2 Side bottoms , 3/4" x 3 1/2" x 19"
- 2 Side backs , 3/4" x 19" x 27 1/4"
- 2 Side tops , 3/4" x 4 1/2" x 22"
- 6 Front/back supports , 3/4" x 1 1/2" x 28 1/2"
- 1 Back , 3/4" x 21" x 28 1/2"
- 1 Table top , 3/4" x 22" x 28 1/2"
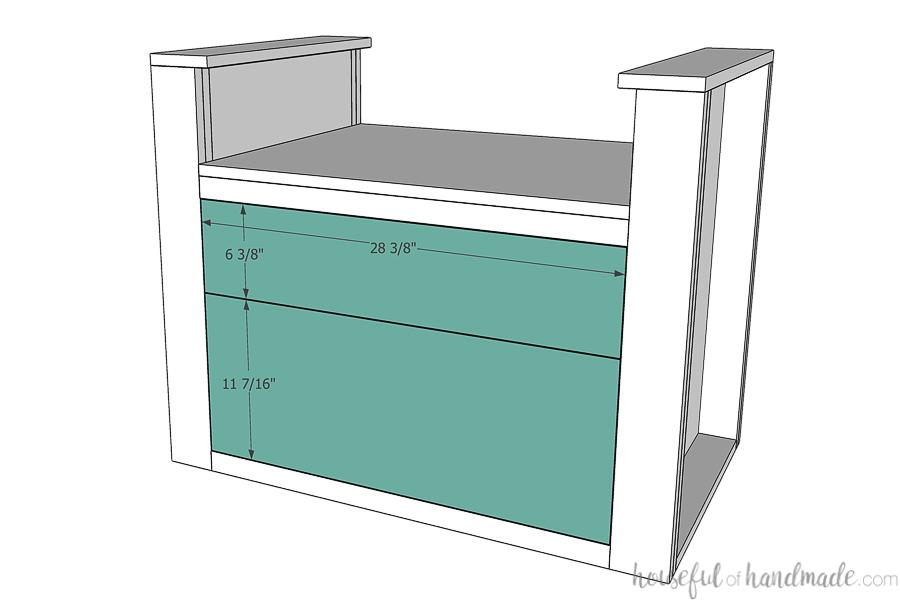
- 1 Top drawer front , 3/4" x 6 3/8" x 28 3/8"
- 1 Bottom drawer front , 3/4" x 11 7/16" x 28 3/8"
- 2 Top drawer box sides , 1/2" x 5" x 19 1/2"
- 2 Top drawer box front/back , 1/2" x 5" x 27 1/2"
- 2 Bottom drawer box sides , 1/2" x 10 1/2" x 19 1/2"
- 2 Bottom drawer box front/back , 1/2" x 10 1/2" x 27 1/2"
- 2 Drawer box bottoms , 1/2" x 18 1/2" x 27 1/2"
Directions
-
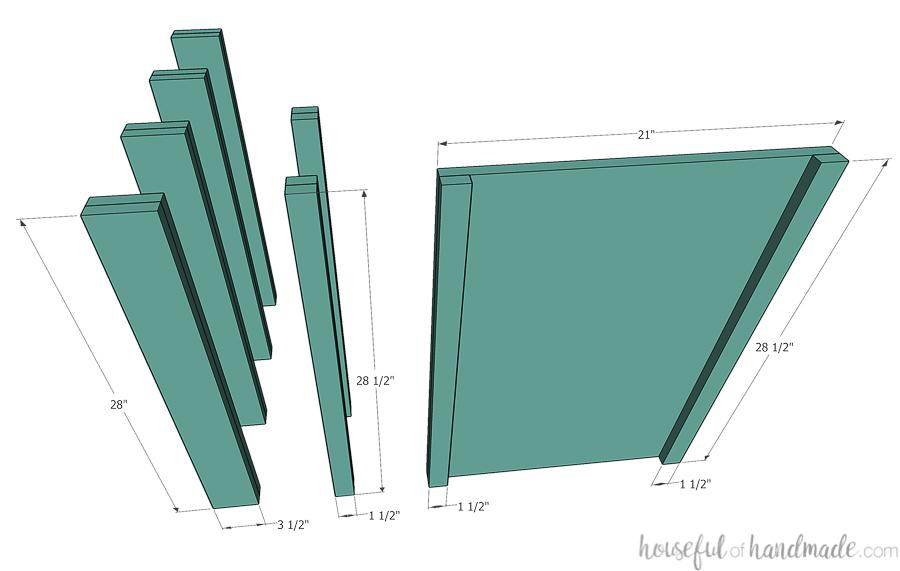
Create 2x boards from plywood
After cutting all the pieces from the plywood, it's time to glue together the legs and front/back support pieces to turn them into 2x boards. If you want, you can use 2x4 and 2x2 boards instead of this part. For the legs, glue together the (8) 3/4" x 3 1/2" x 28" pieces into groups of 2 to create (4) 1 1/2" x 3 1/2" x 28" pieces. Then glue together (4) of the 3/4" x 1 1/2" x 28 1/2" pieces into groups of 2 to create (2) 1 1/2" x 1 1/2" x 28 1/2" pieces. Finish by glueing the remaining (2) 3/4" x 1 1/2" x 28 1/2" pieces to the top and bottom of the 3/4" x 21" x 28 1/2" back piece to create a 1 1/2" thick top and bottom section.
-
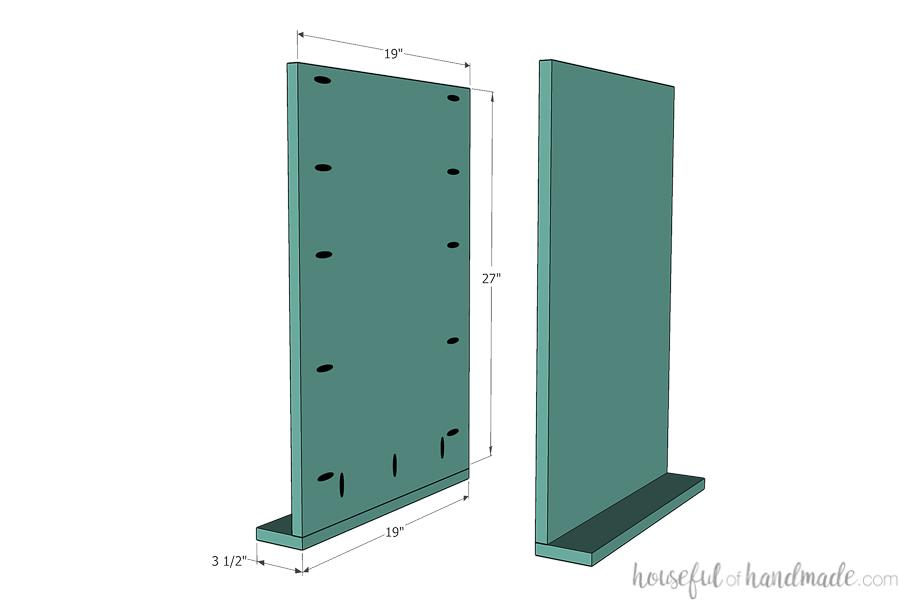
Start building sides
Set your pocket hole jig for 3/4" thick material. Drill pocket holes on the bottom and sides of the side back pieces. Also drill 2 pocket holes on each side the side bottom pieces. Attach the side bottom piece to the bottom of the back piece with 1 1/4" pocket hole screws and wood glue at a 90 degree angle. Make sure the sides are flush.
-
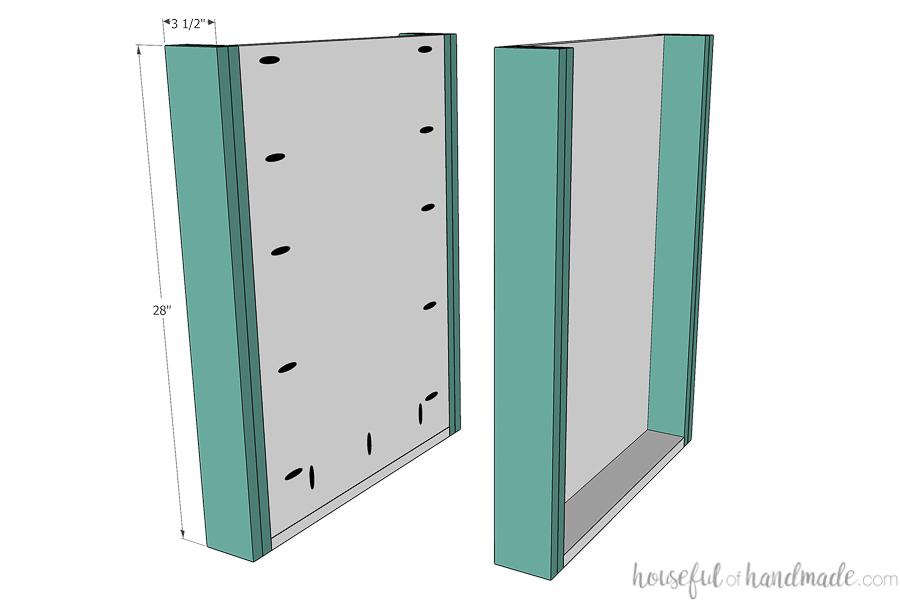
Finish building the sides
Attach the legs to assembled side pieces with 1 1/4" pocket hole screws and wood glue using the pocket holes drilled in the sides of the side back and side bottom pieces.
-
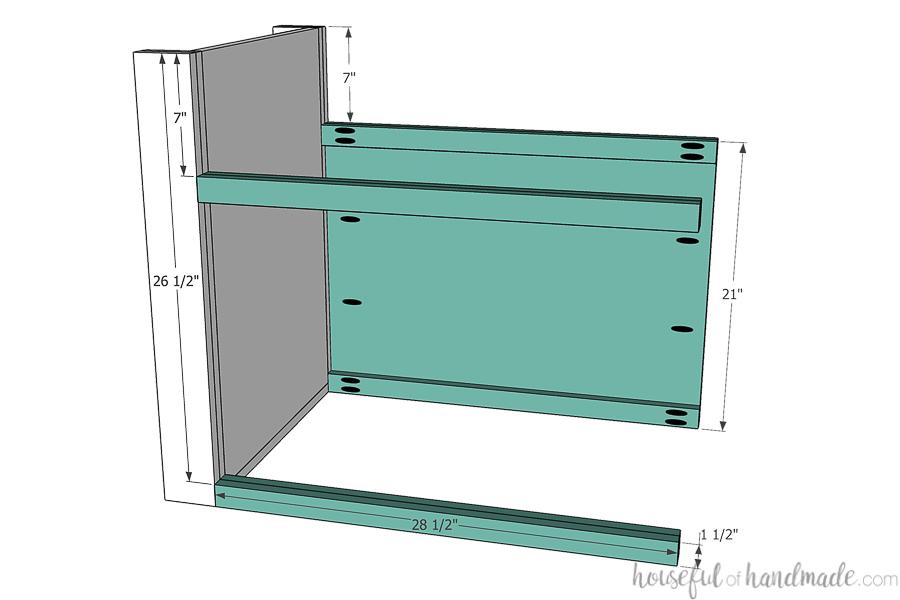
Attach back & supports to one side
With your pocket hole jig still set for 3/4" thick material, drill a couple pocket holes in the sides of the back piece not where the 1 1/2" supports are attached. Then switch the pocket hole for 1 1/2" thick material and drill 2 pocket holes in each of the 1 1/2" supports. Also drill 2 pocket holes in the other 1 1/2" support pieces. Attach the back and support pieces to one of the assembled side pieces so the top is 7" down from the top of the sides and the bottom is flush with the bottom of the legs. Use the 2 1/2" pocket hole screws for the 1 1/2" thick boards and the 1 1/4" pocket holes for the pocket holes in the 3/4" thick material.
-
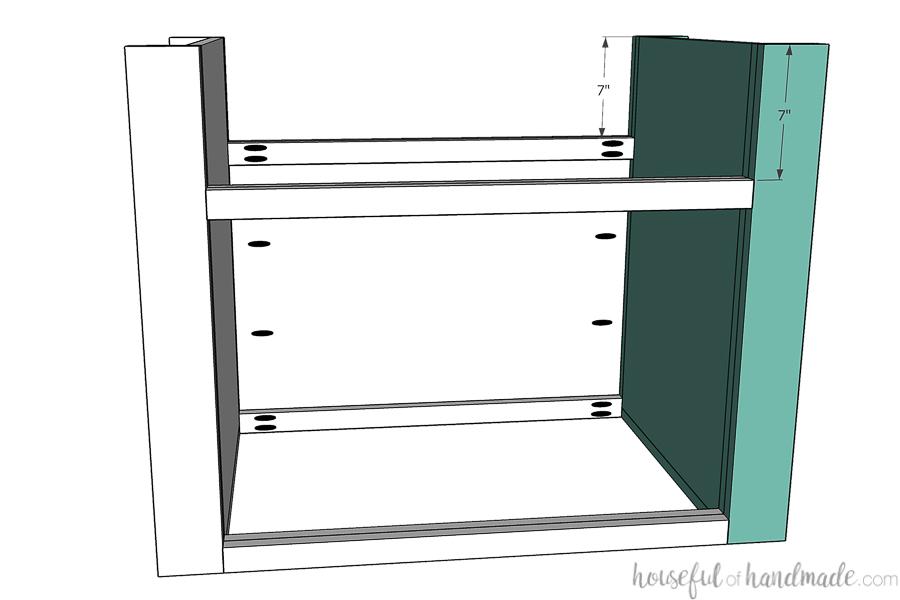
Attach other side
Attach the other assembled side piece to the other side of the back and supports to match the first side.
-
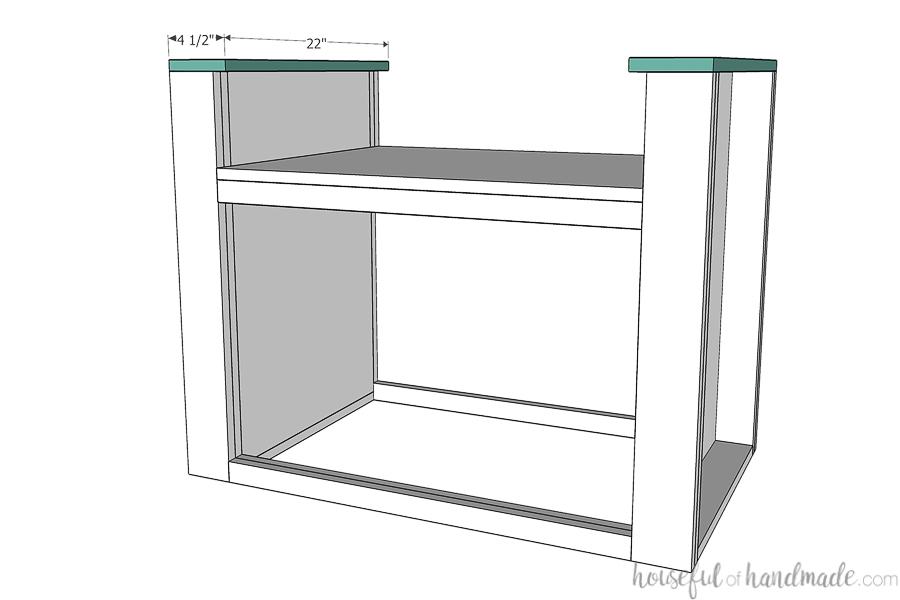
Add side tops
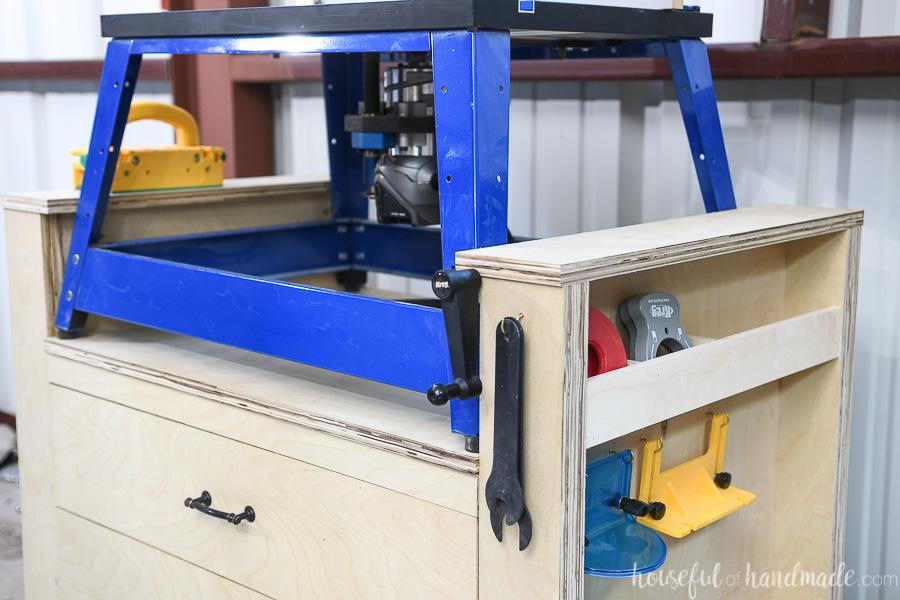
Attach the side top boards to the top of the sides so they are flush with the outside and hang over the inside edge 1". Attach with finish nails and wood glue. If you want to add a slot to hold a crank for a router lift, cut a 1" scrap of plywood the length of your crank rod. Using the table saw, cut a 1/4" x 1/4" notch out of one corner of it (adjust as needed to snuggly hold your crank). Attach under the ledge of one of the side tops to create a hole to slide the crank into.
-
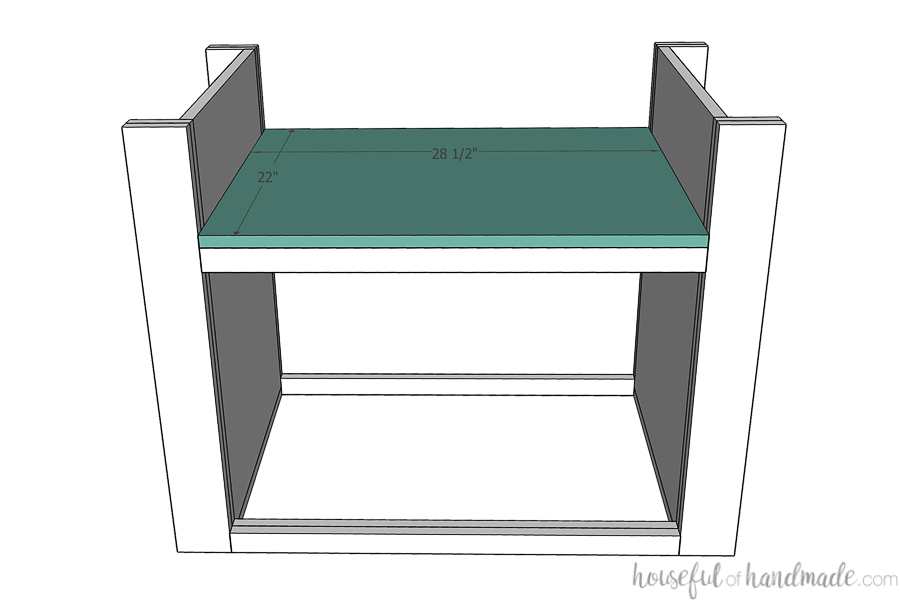
Add the table top
Drill pocket holes on the sides of the table top board. Attach it on top of the supports between the sides. Secure to the supports with wood glue and finish nails. Secure to the sides with 1 1/4" pocket hole screws.
-
Add wheels
Attach casters to the bottom corners of the cart. Make sure to use locking casters so you can lock the table when routing to prevent it from moving.
-
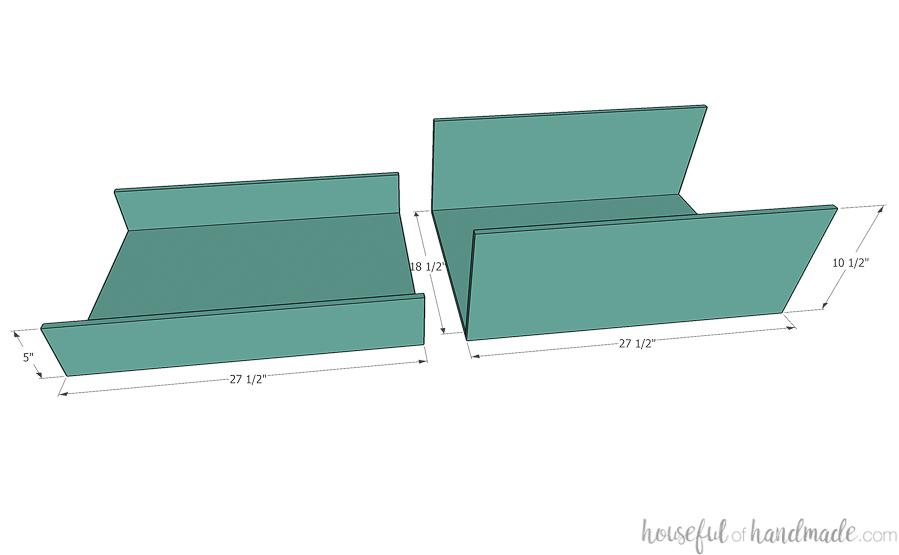
Build drawer box
For the drawer boxes, I chose to use a simple 1/2" plywood box built with pneumatic nails. You can build your drawer boxes however you wish. For these simple to assemble boxes, attach the drawer box front/back boards to the front/back of the drawer box bottoms. Secure with wood glue and 1" long nails into the plywood bottom.
-
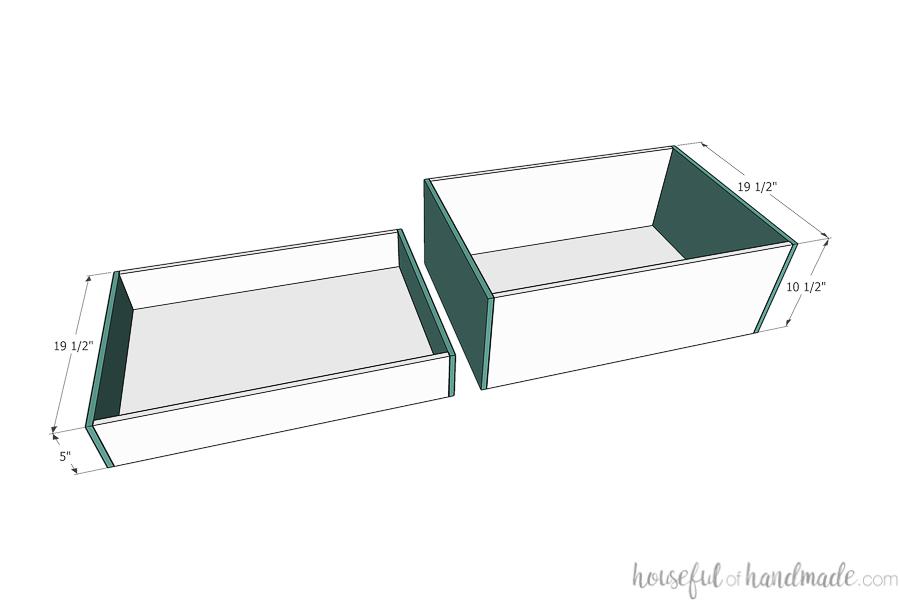
Finish drawer boxes
Then finish the drawer boxes by attaching the drawer box side pieces to the sides of the box with wood glue and 1" nails into the plywood sides and bottom of the box. Install the drawer boxes into the router cart with drawer slides that need 1/2" clearance on either side.
-
Attach the drawer fronts
Attach the drawer fronts to the drawer boxes so there is a 1/16" gap around all sides. Since these are workshop drawers, I lined up the drawer fronts, then quickly attached them with a couple finish nails. Then finished securing them with drawer pulls. Use the cabinet hardware jig to drill holes for the drawer pulls.
-
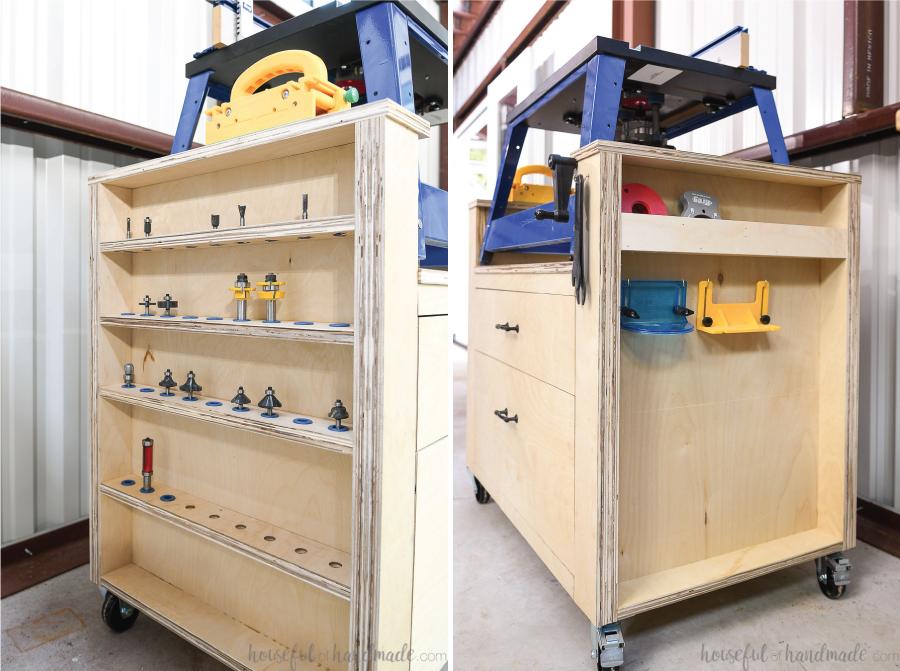
Create storage in the sides
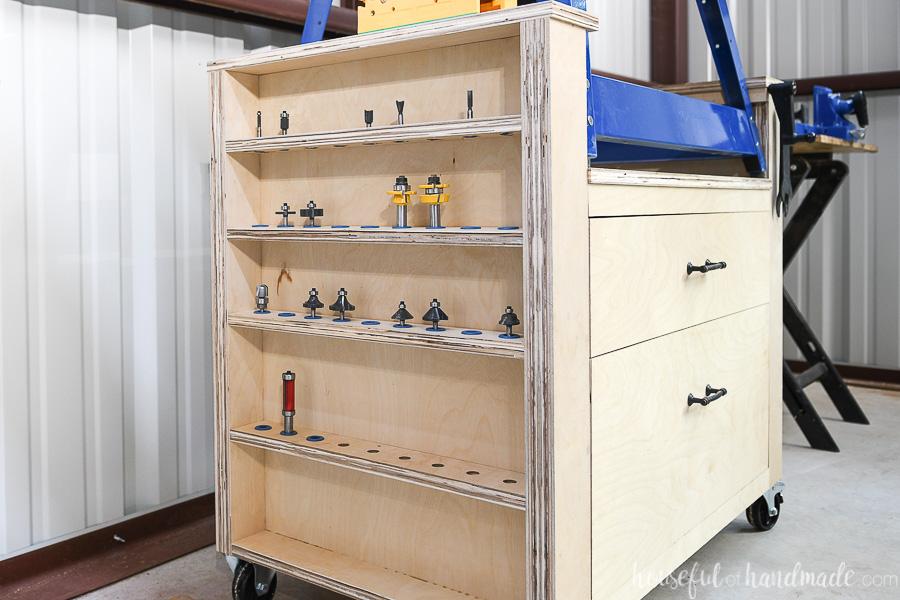
Now you can use all the remaining plywood scraps to create shelves to store your router bits. Attach the shelves with pocket hole screws, but no glue so you can move them if needed to add more shelves as your router bit collection grows. Also on the other side, you can create more router bit storage or cubbies for your router table accessories like I did. I love that there is still so much room to continue to grow into this router table as I continue to grow as a woodworker.
-
Finish & enjoy
You can apply a finish to the router table if you want. Then fill up those large drawers and start using it! Then make sure to come say hi at Housefulofhandmade.com for more fun things to build.