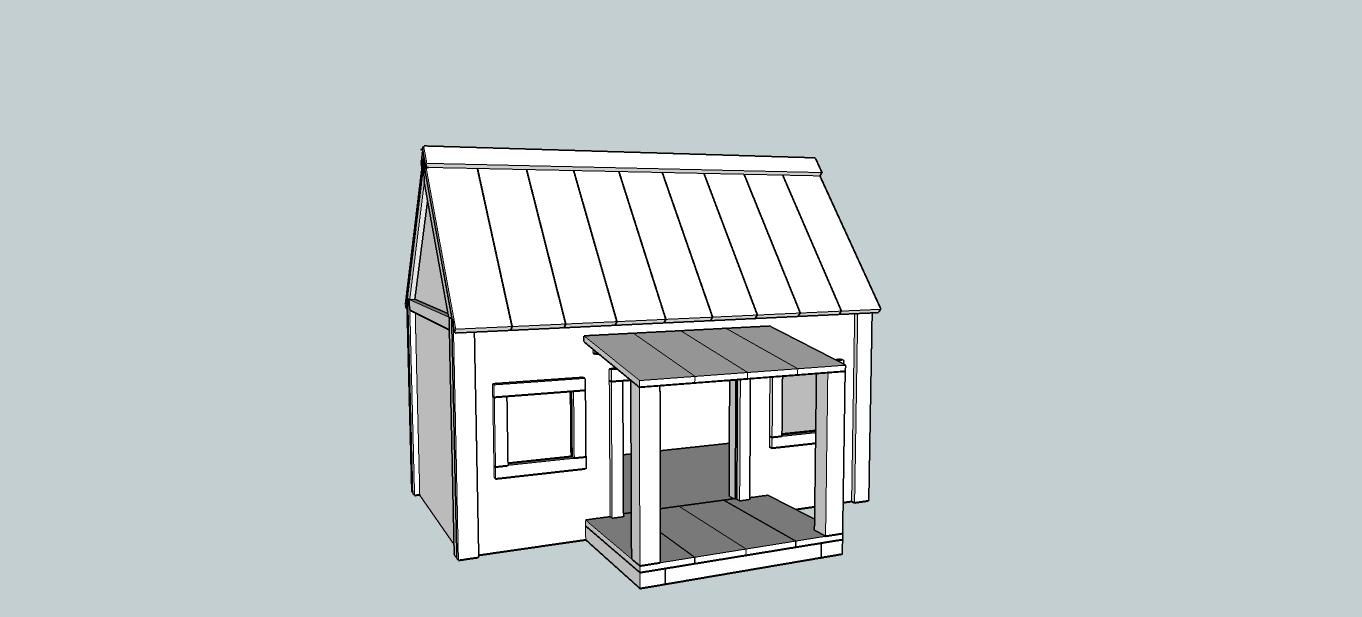
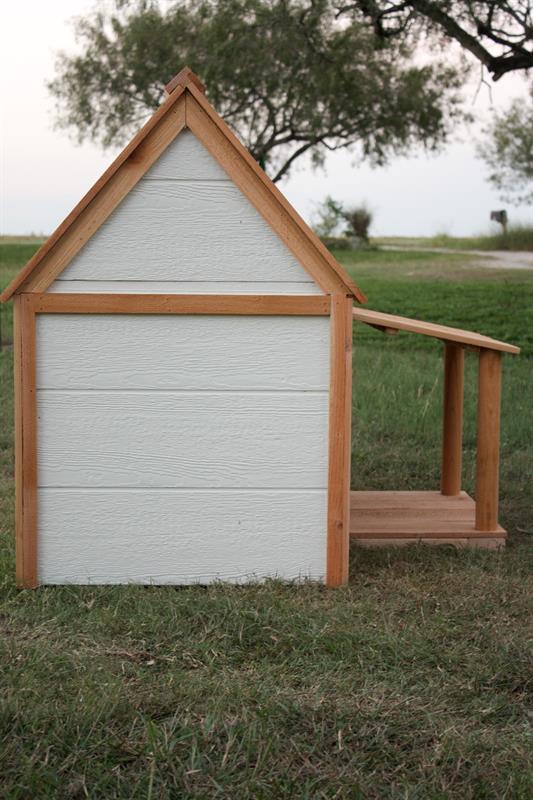


It won't be so bad to be "In the Doghouse" now!! This adorable dog house is sure to please dogs and owners alike!! Easily customize the exterior to match the exterior of your home, and Fido's home will no longer be an eye sore in your yard!!
Tools
Kreg Tools


Other Tools
-
Circular Saw (cordless)

-
Jigsaw
-
Miter Saw
-
Tape Measure
-
Nail Gun
-
Sander
Materials
Wood Products
- 8 Board , 2x4 , 96"
- 11 Cedar Fence Picket , 1x6 , 72"
- 1 Plywood Siding , 3/8" , Full Sheet
- 1 Plywood , 1/2" Thick , Full Sheet
- 1 Dowel Rod , 2x2 , 48"
Hardware & Supplies
- 1 2 1/2" Pocket Hole Screws
- 1 1 1/4" screws
Directions
-
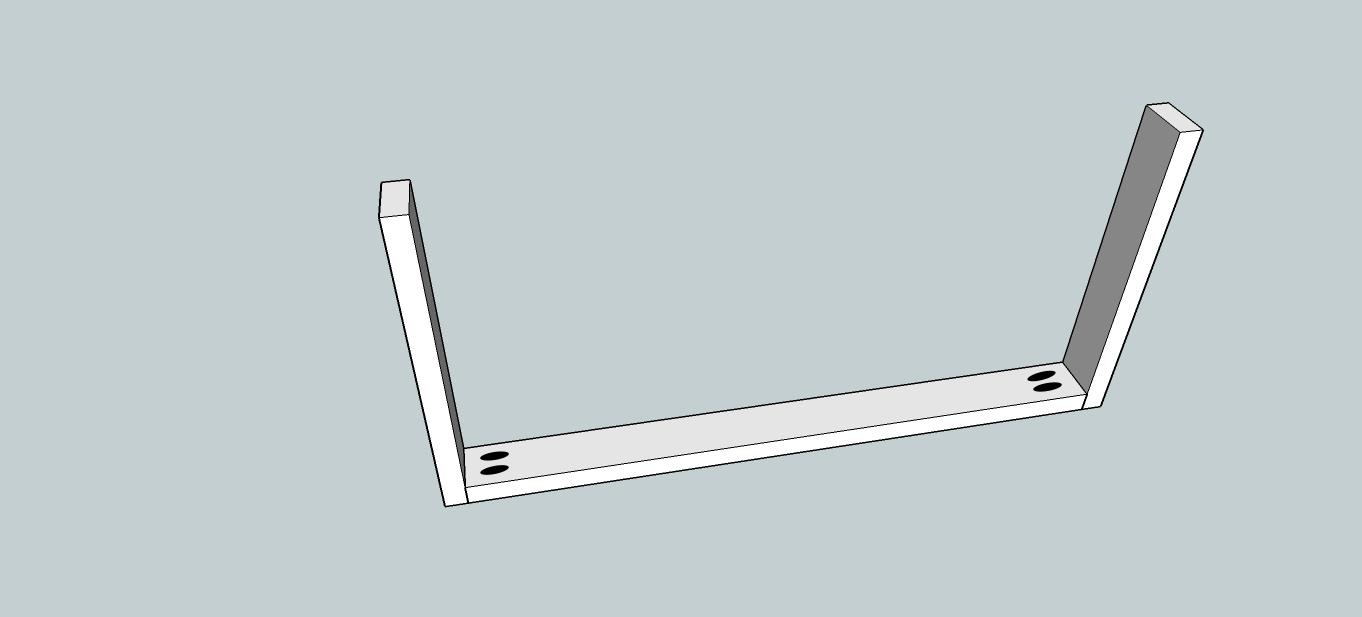
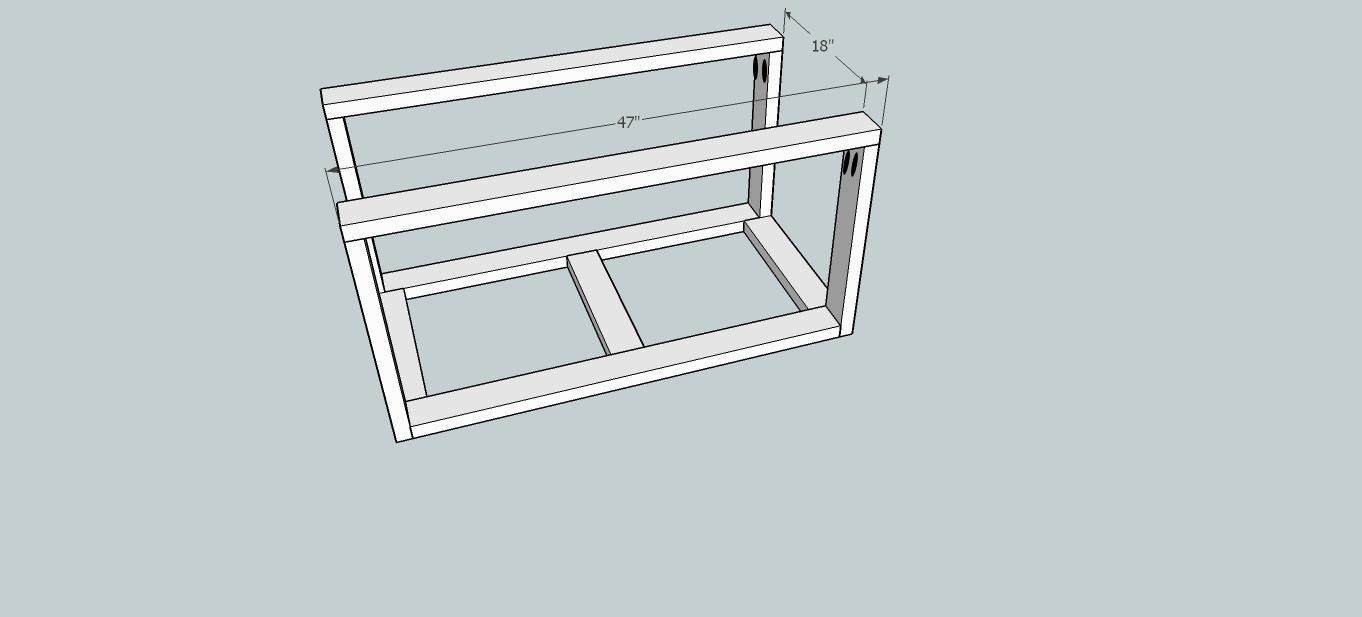
Step 1
To get started attach the bottom rails to the legs! The black ovals represent the pocket hole location throughout the plan! This plan consists of all pocket holes drilled at 1 1/2", and you will use 2 1/2" blue kote pocket hole screws (they are made for outdoor use)and outdoor wood glue to attach!
-
Step 2
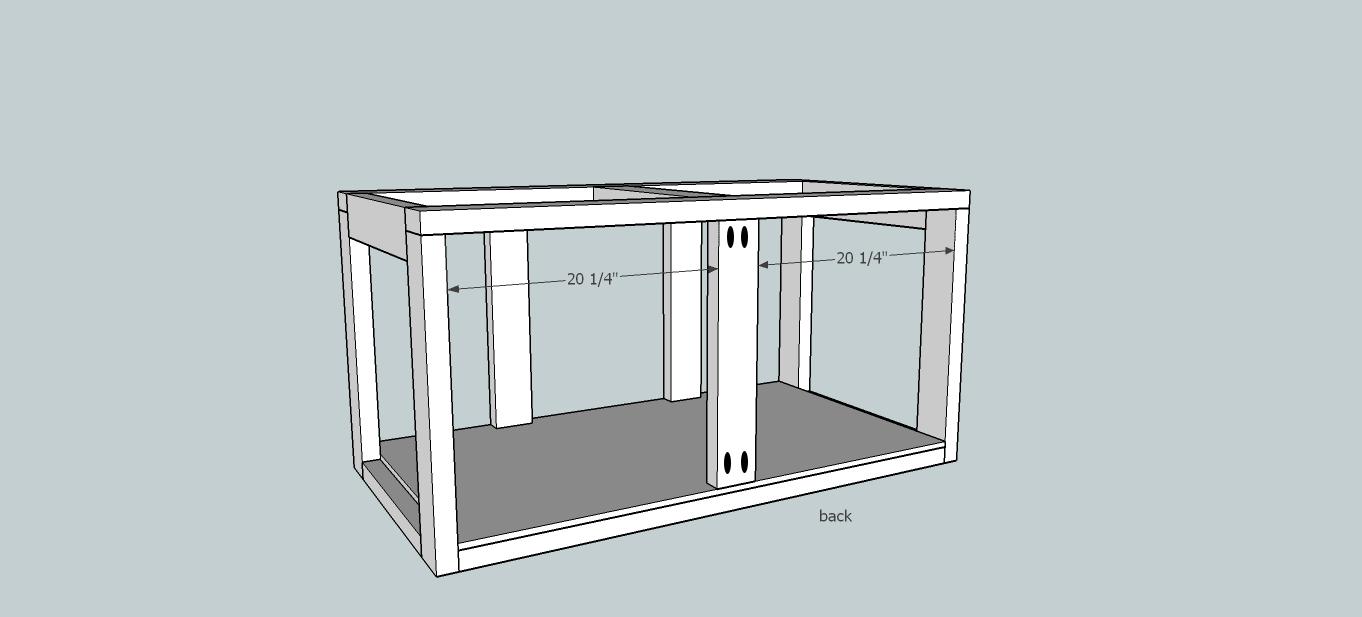
Next add two of your side rails and one of your support rails!
-
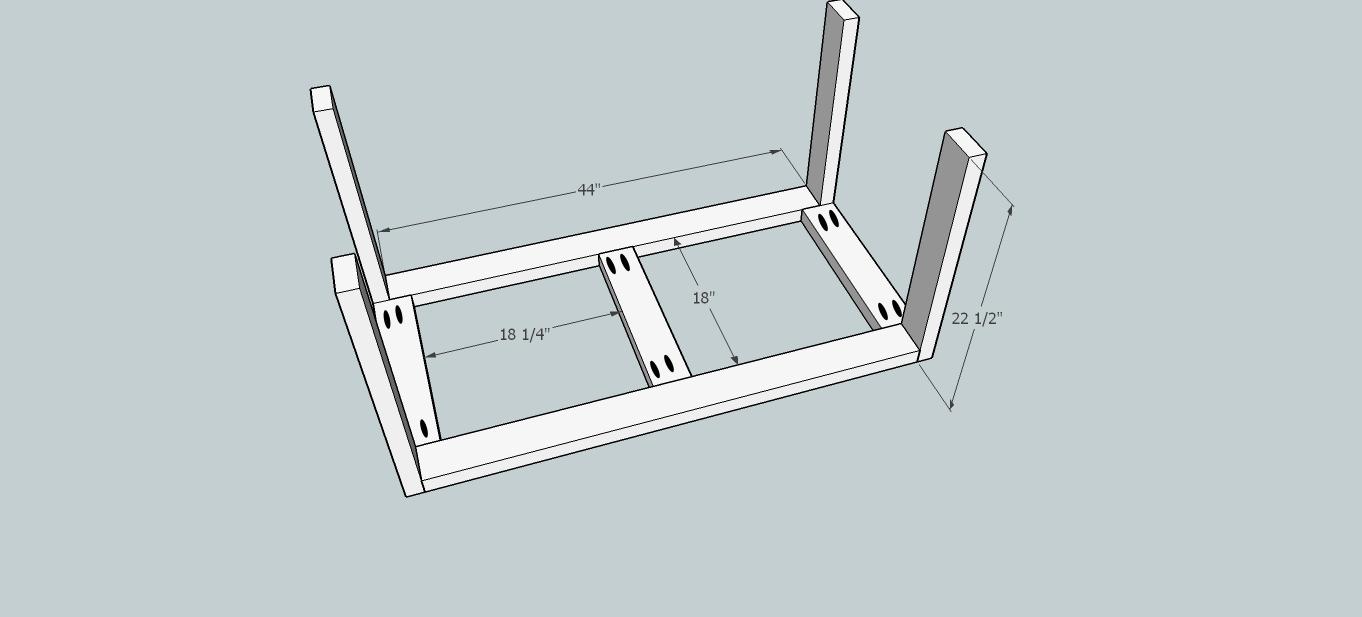
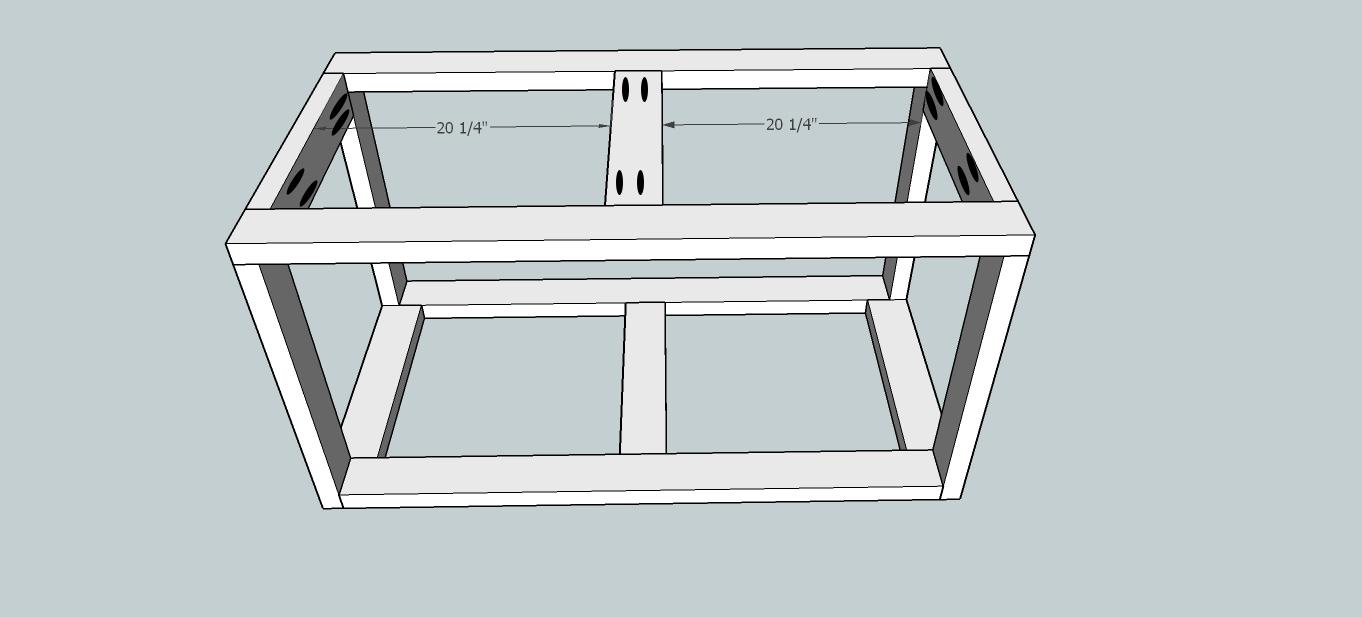
Step 3
Add the top rails! The frame is already taking shape! Notice the pocket holes are drilled into the legs and going up into the top rails...you will want to drill the holes before Step 1!
-
Step 4
Add the rest of the side rails and support rails!
-
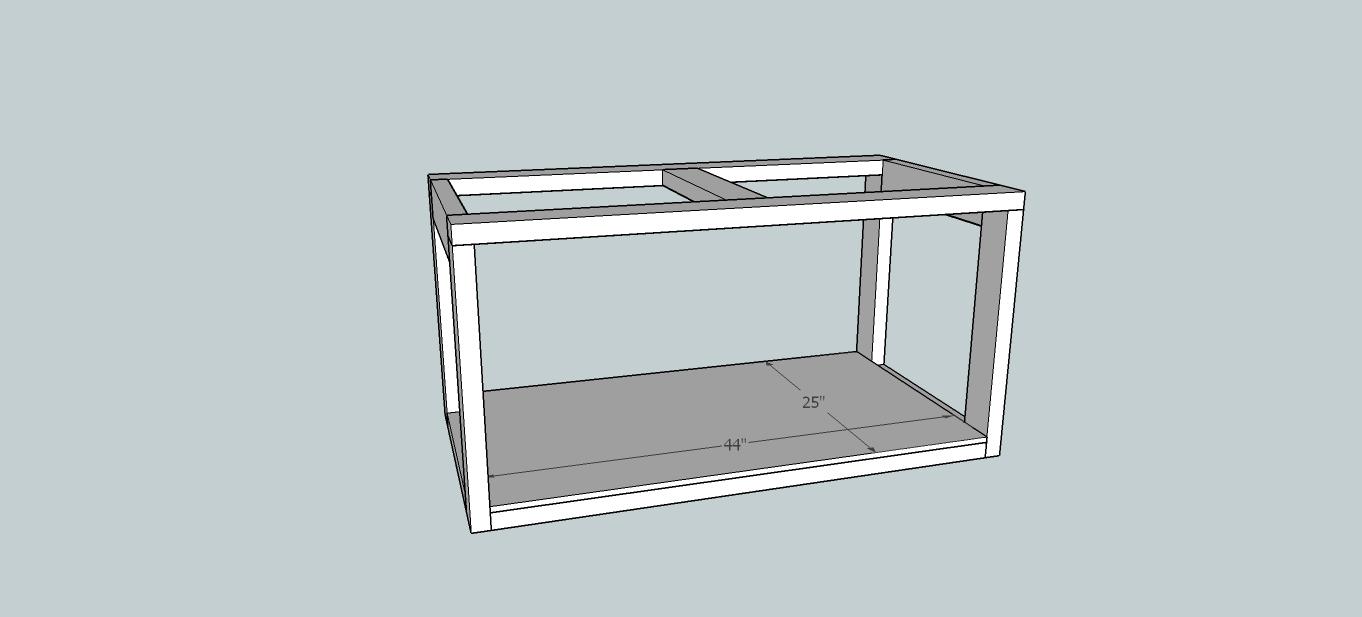
Step 5
Before we close the dog house in too much, we need to go ahead and lay the floor plywood! Just use 1 1/4" screws to attach to the bottom 2x4s! Note: You may want to cut notches in your plywood so that it reaches the side walls, I didn't as I don't think my dogs will mind!! Lol!
-
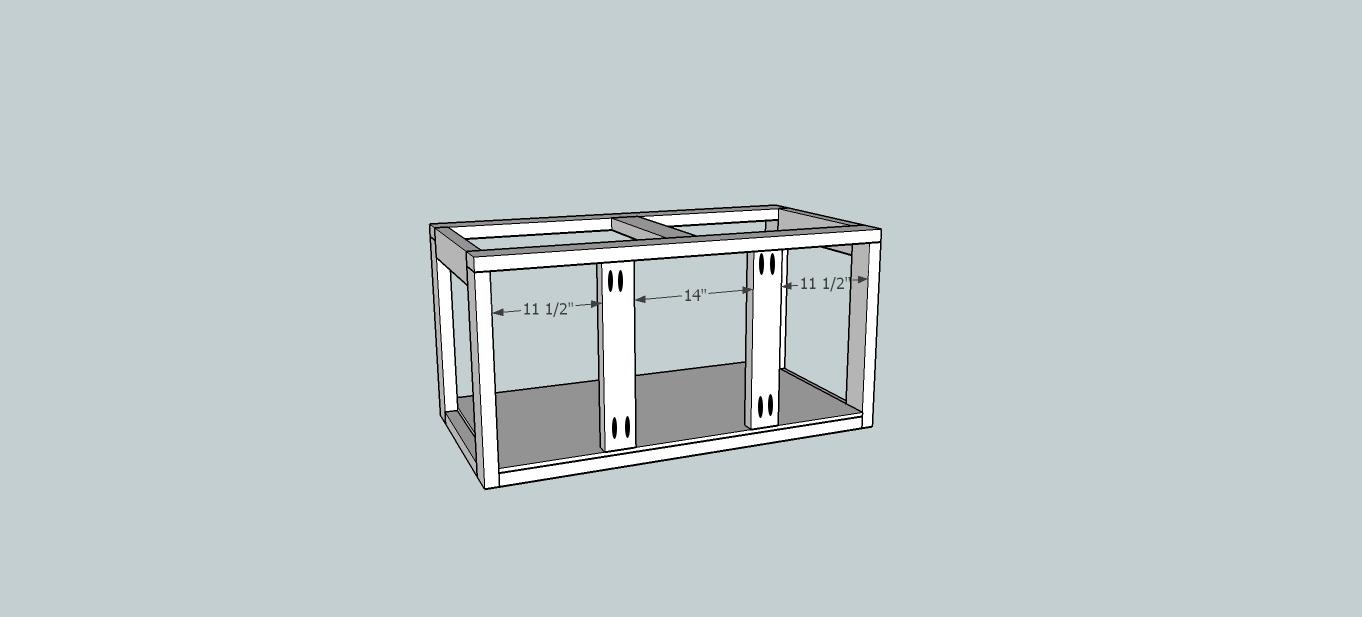
Step 6
Next add the front two support stiles, we will add the back one in the next step, it was just hard to see so I separated them into two steps!
-
Step 7
Add the back support stile!
-
Step 8
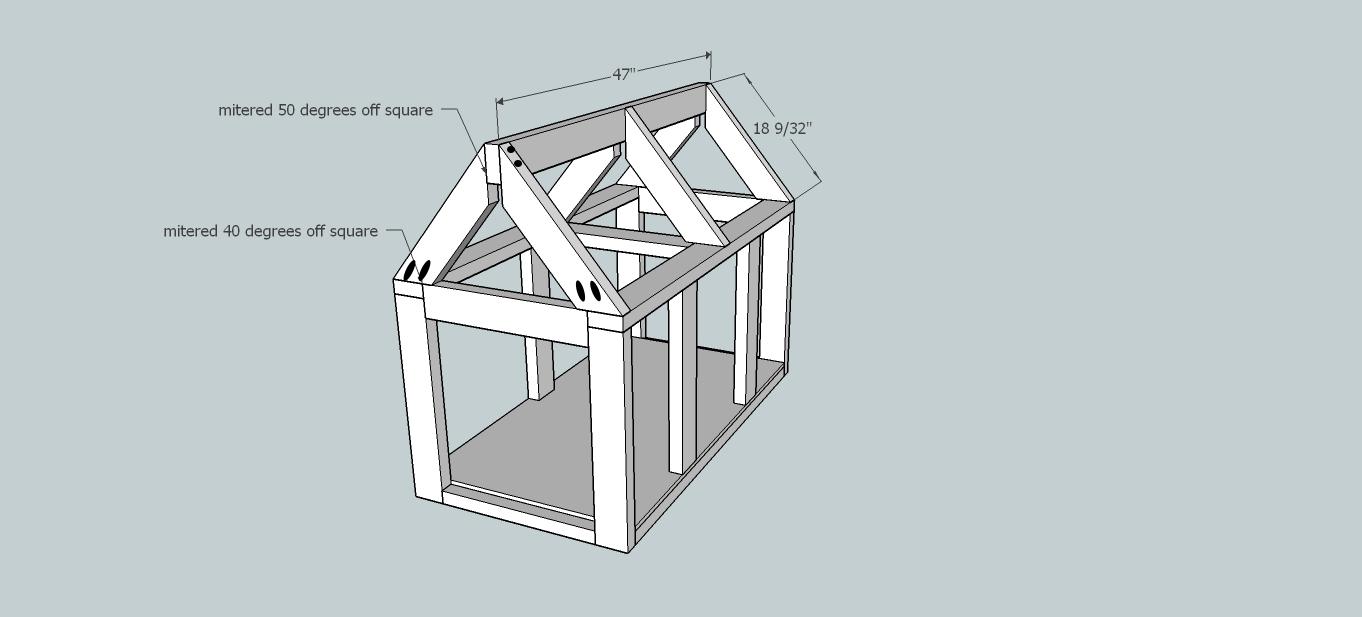
Next the roof rafters need attached to the roof ridge! The angles are shown in the picture. The 40 degree mitered end will be pocket holed to the frame, but the top being greater than 45 degrees can't be pocket holed! I just counter sunk 2 1/2" screws with a countersink drill bit, the black dots on the board represent the counter sunk screws! Just to note, I am not crazy about how tall the roof is, if you would like a slightly lower roof, you can cut all the angles at 45 degrees off square and I think it would look better! I originally drew up the plans with the angles at 45 degrees and as I started building I thought it was too short but now I wish I would have left it shorter! The length of the rafters will need to be adjusted though!
-
Step 9
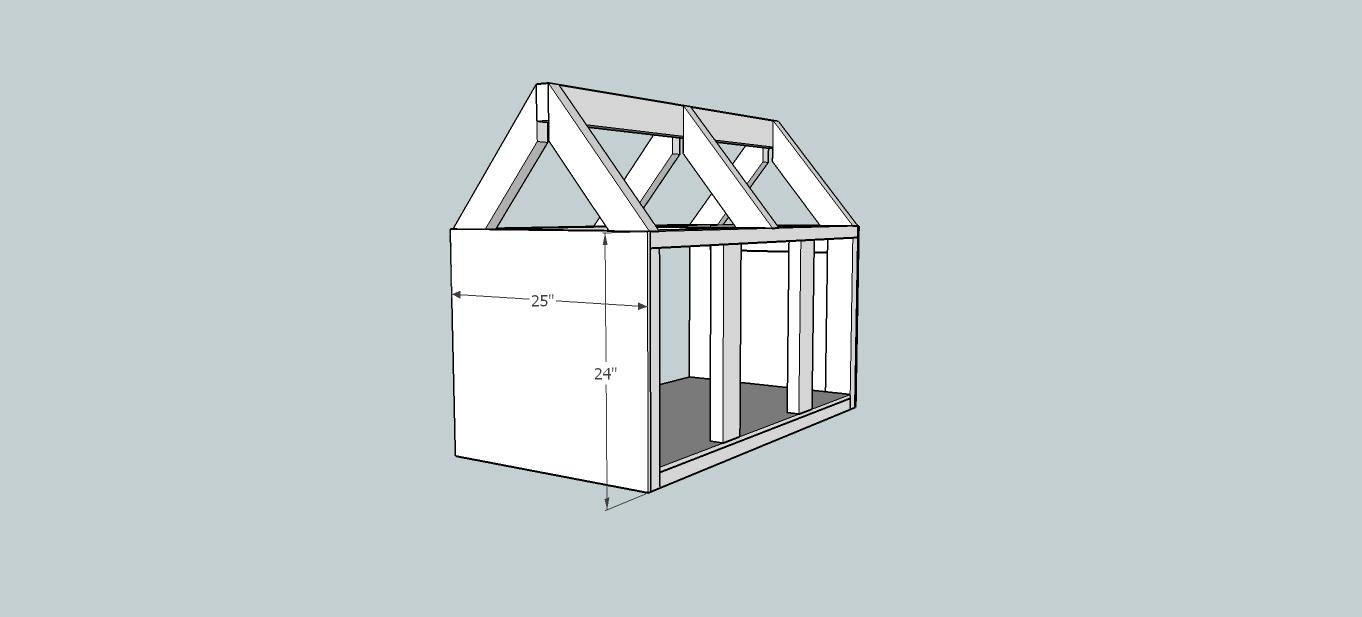
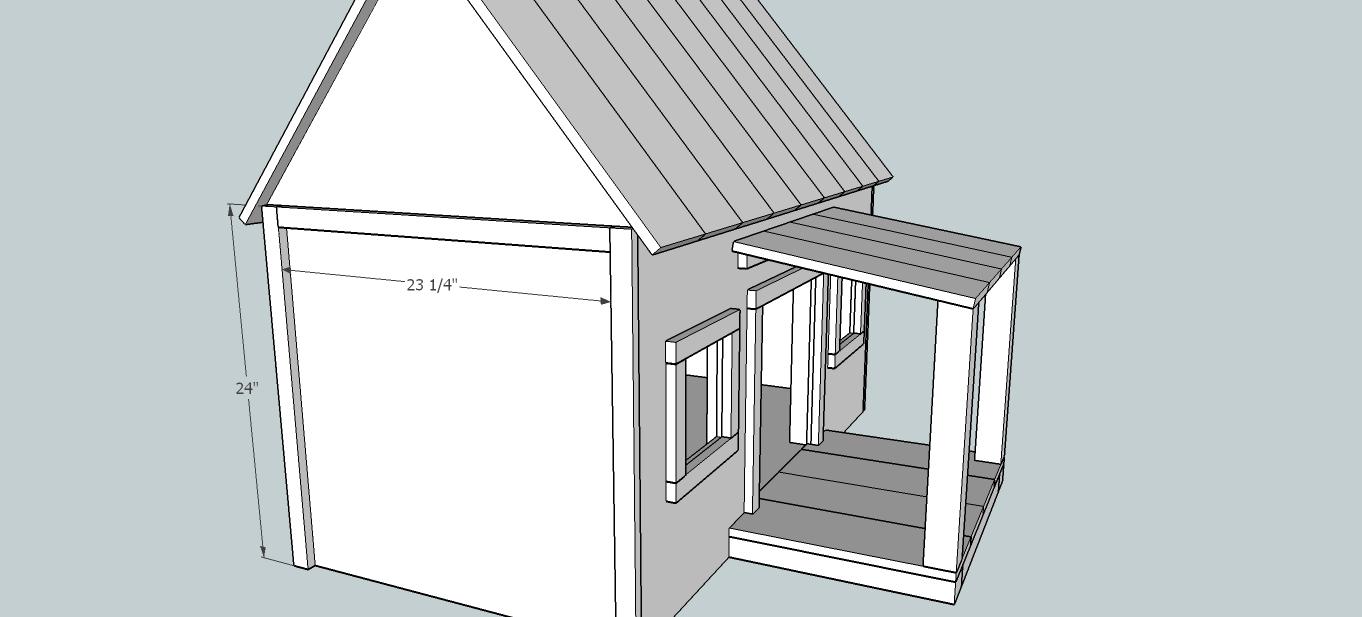
Next attach the side siding to the sides! I just used the same 1 1/4" screws to attach!
-
Step 10
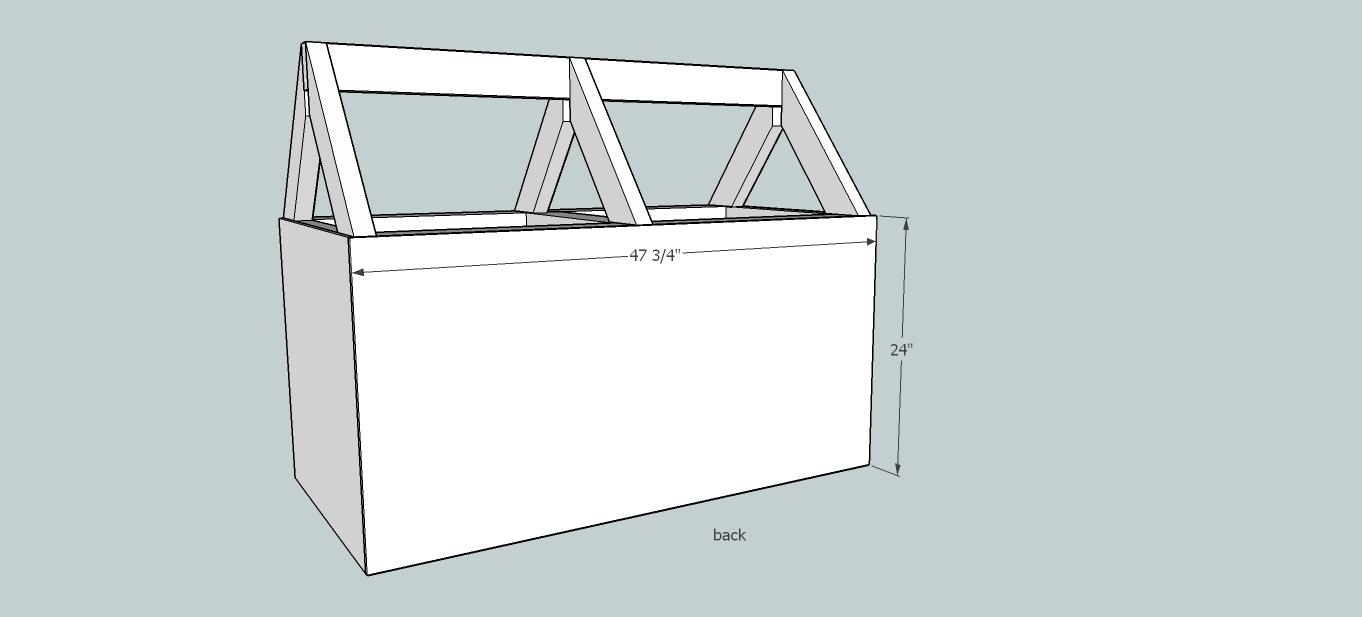
Attach back siding the same way! Make sure and measure before cutting just to be sure!!
-
Step 11
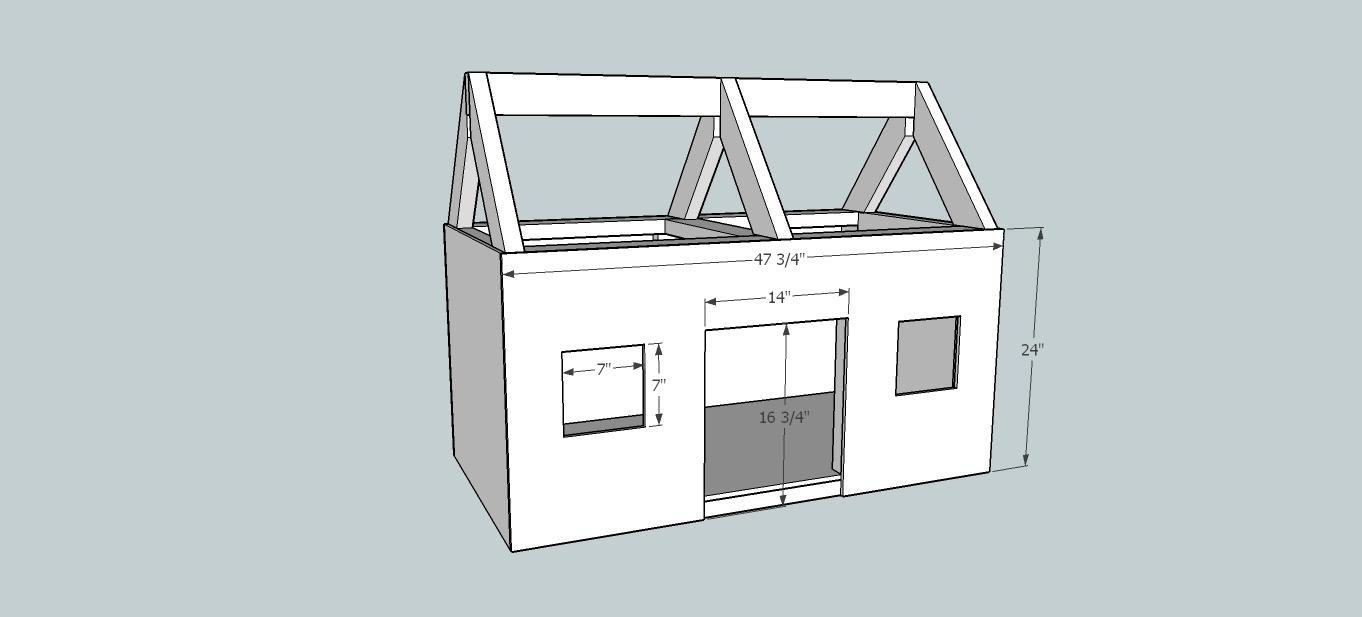
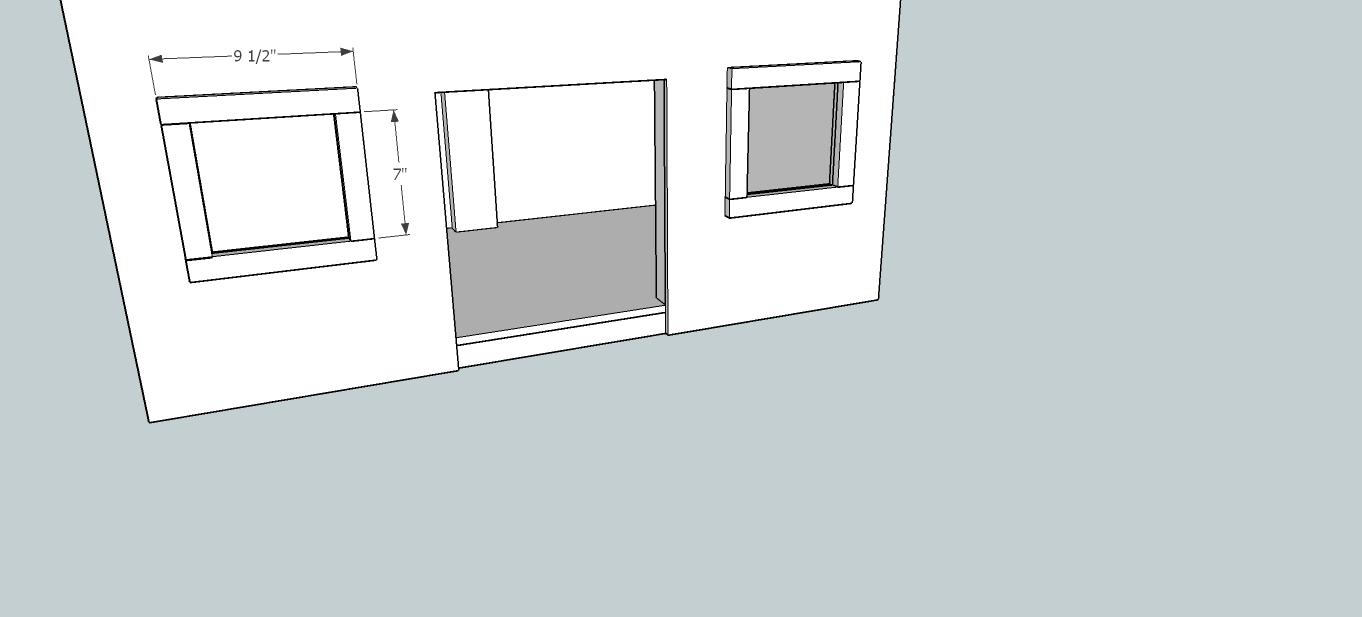
Next step is to get the front siding attached, making sure to cut any windows or doors that you may want before attaching!
-
Step 12
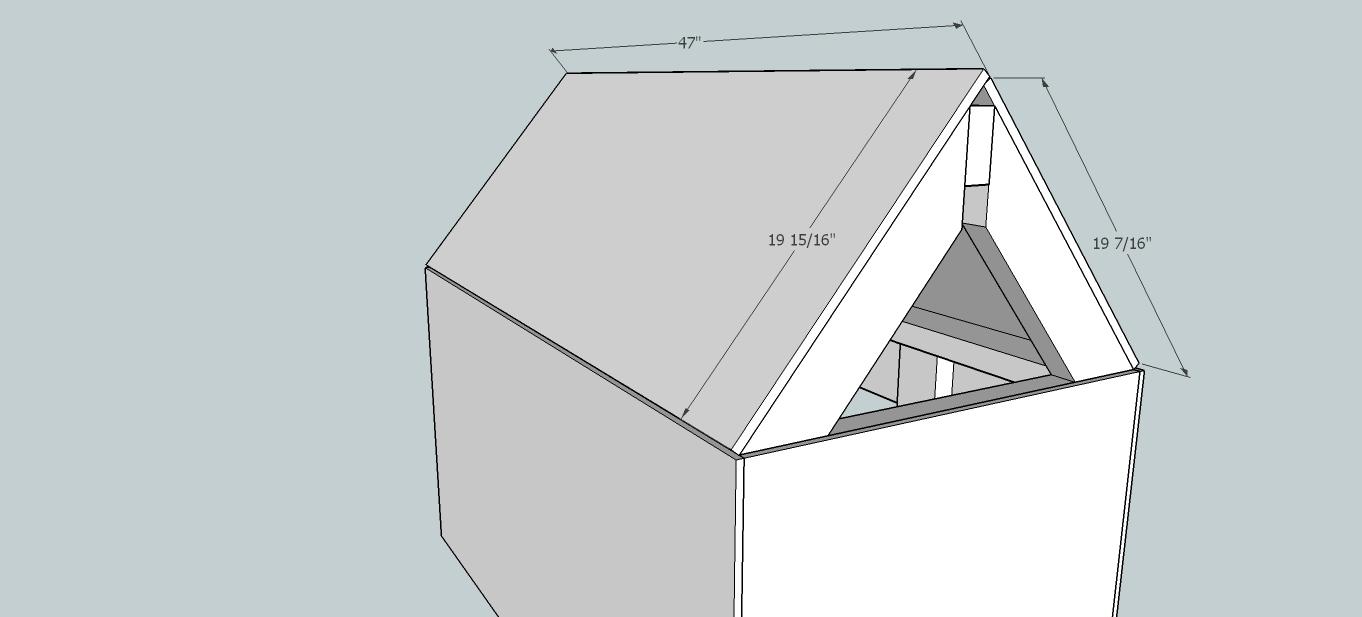
Next attach your two roof plywood pieces, notice they are slightly different sizes so they can overlap at the top!
-
Step 13
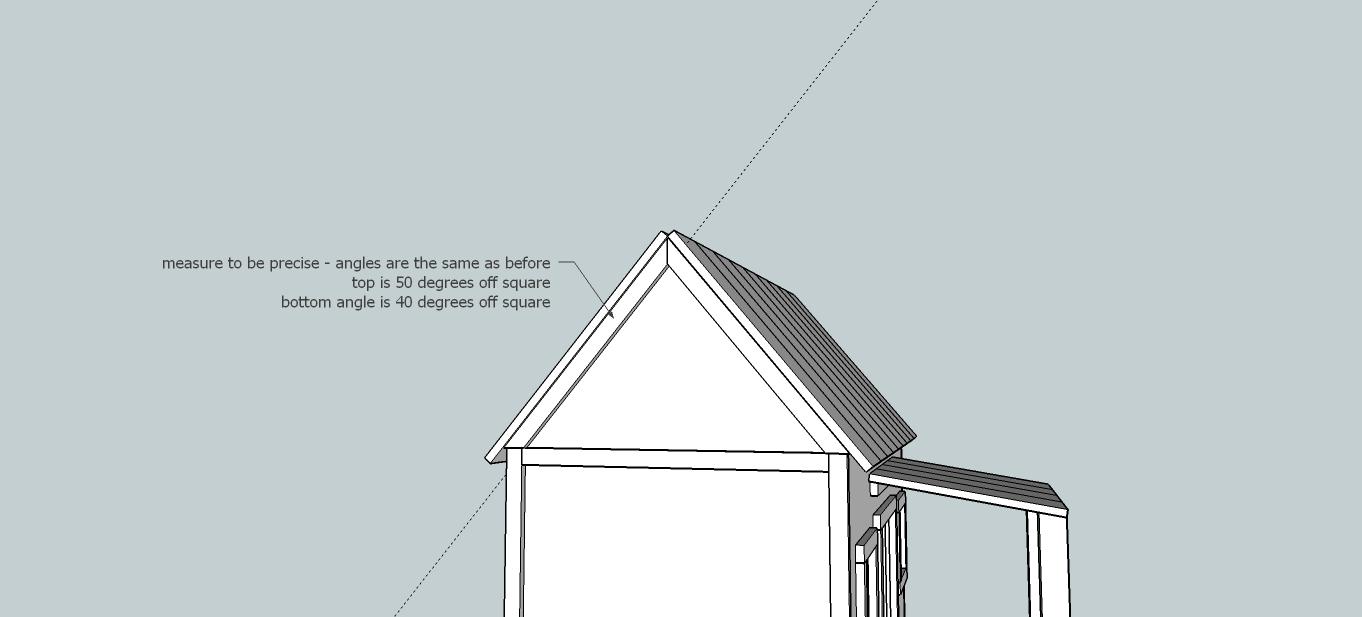
Next area up for work is the gable...at least that's what I think it is called...but I am not a roofer so someone please correct me if I am wrong!! LOL!! The triangular part of the side wall under the roof! Make sure and measure and cut this to size out of the same siding!
-
Step 14
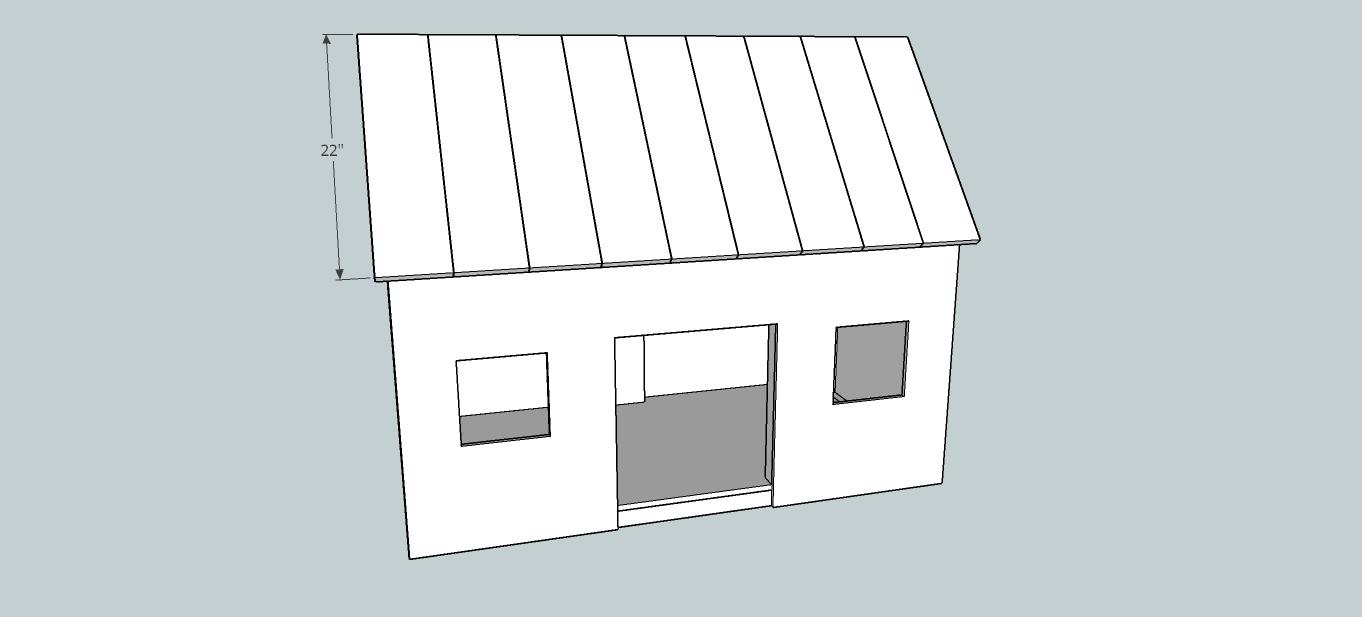
Add your roof boards on top of your plywood! I just attached the boards by using glue and brad nails...I didn't want to see any screws! Do this on both sides of the dog house!
-
Step 15
Go ahead and add a little trim to the windows now to see how cute that little touch makes the dog house! I just used liquid nails and my brad nailer to attach the trim! I didn't trim out the door unitl after I built the porch!
-
Step 16
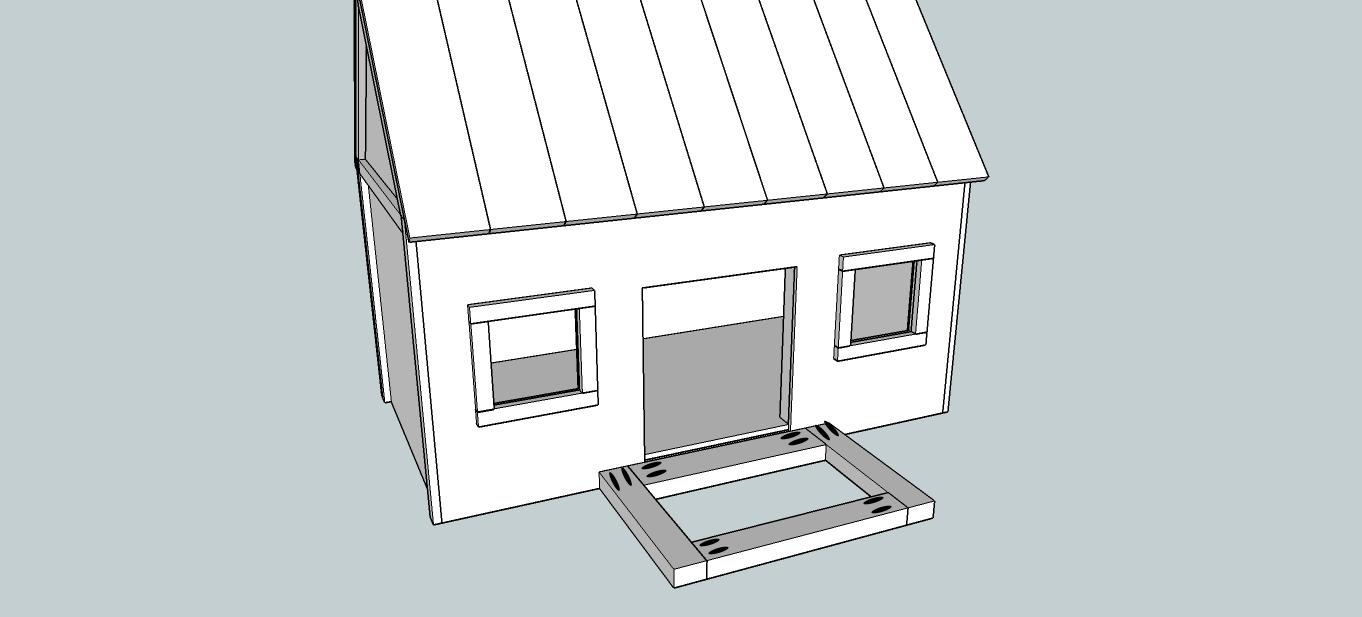
Let the porch building begin!! Attach boards as shown still using 1 1/2" pocket holes and 2 1/2" screws!
-
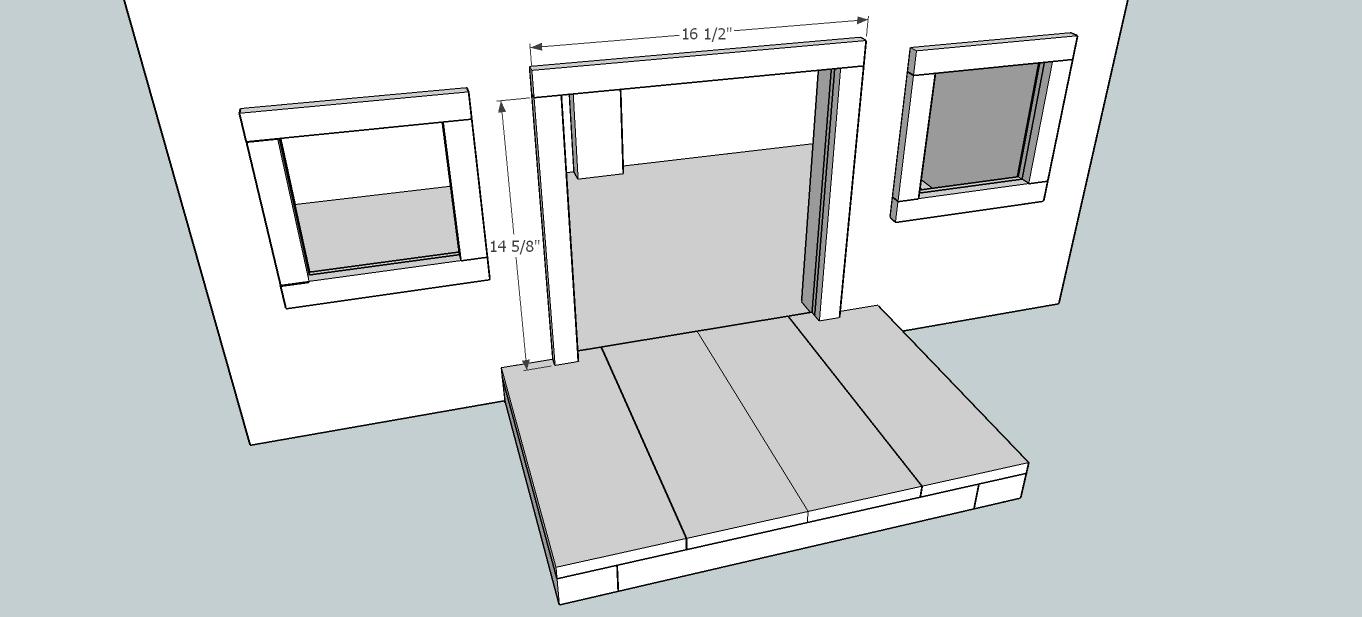
Step 17
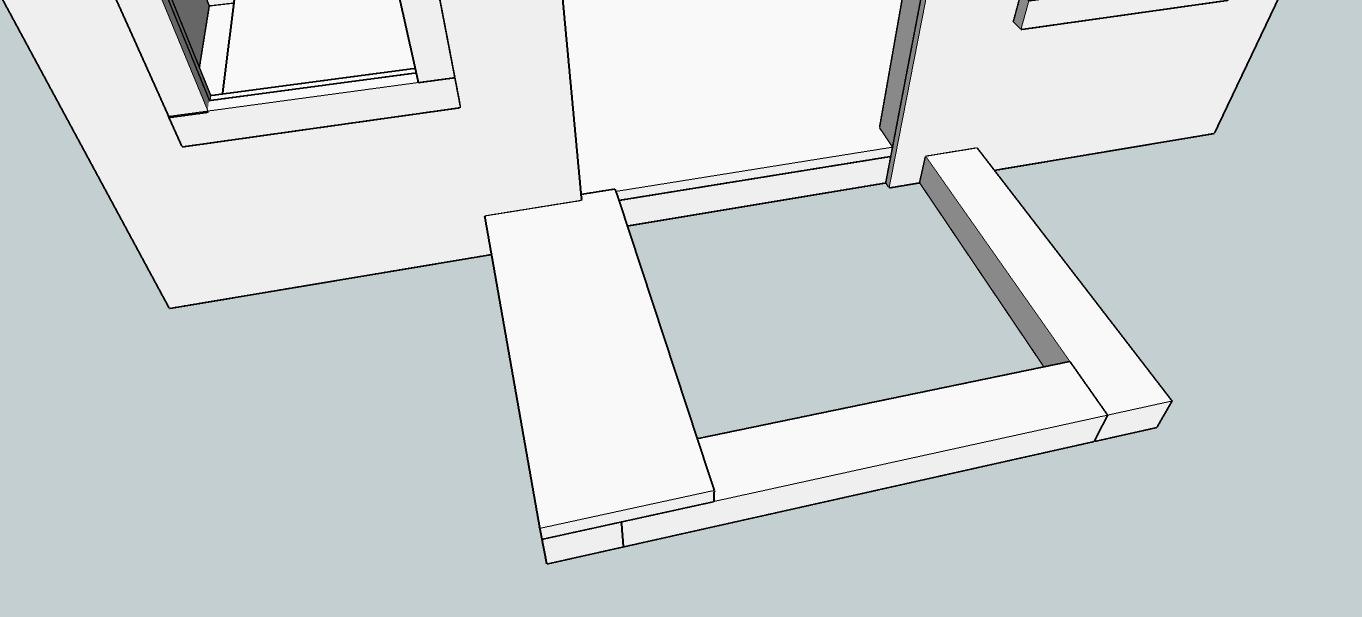
Next step, attaching the porch floor boards, measure and cut out the small area so that it sits flush with the floor plywood as shown in the picture!
-
Step 18
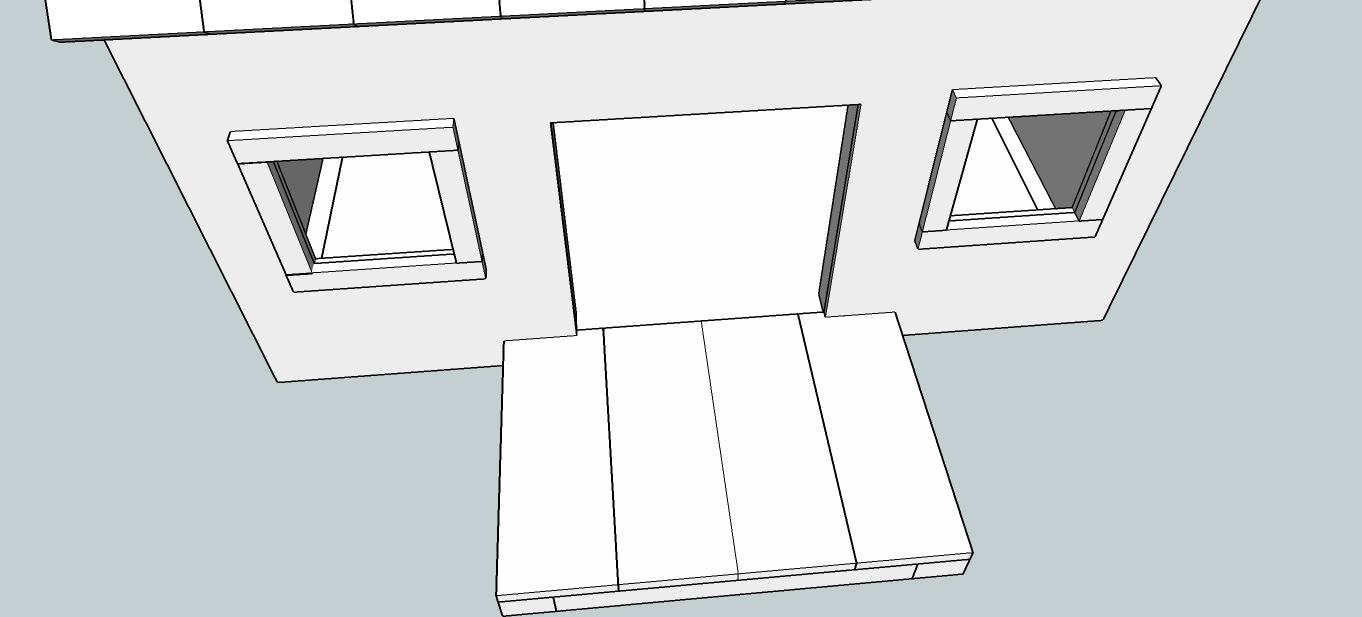
Finish attaching the porch floor boards!
-
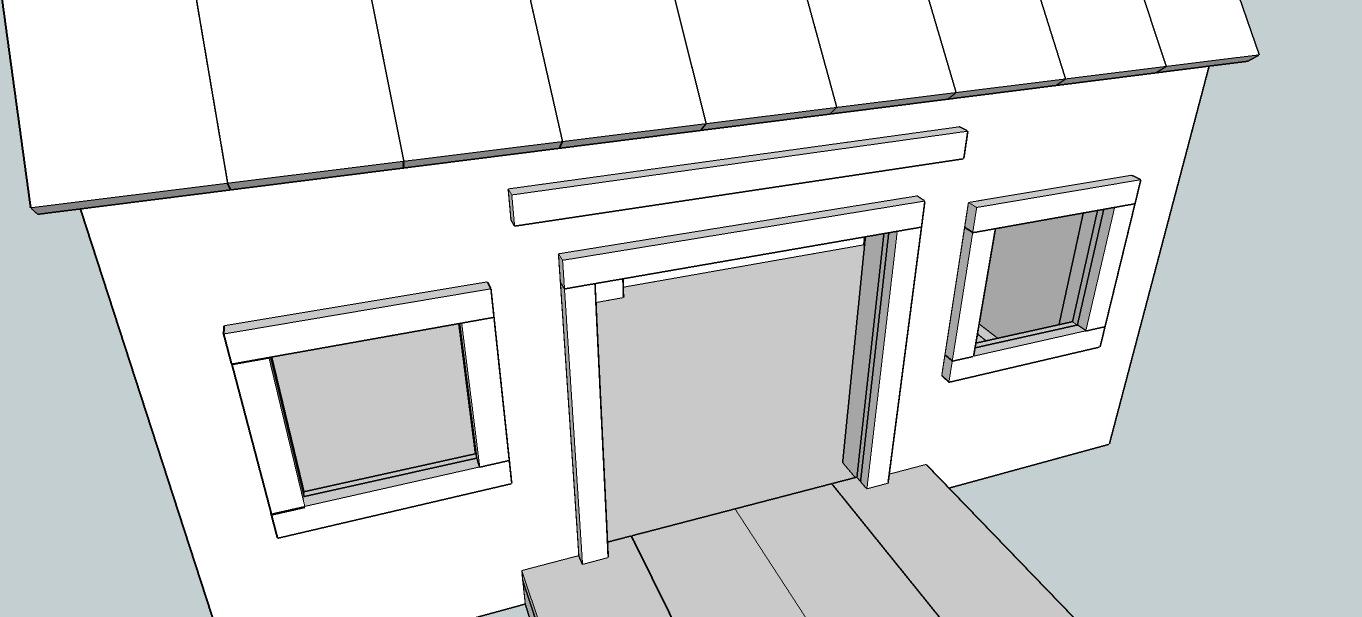
Step 19
It's time you can frame out the door! I just ripped some of the same cedar fence pickets down to 1 1/2" to make the door framing!
-
Step 20
Next up is adding the porch roof, to start we will add the porch roof brace centered above the door! Again, this is the same fence pickets I ripped down!
-
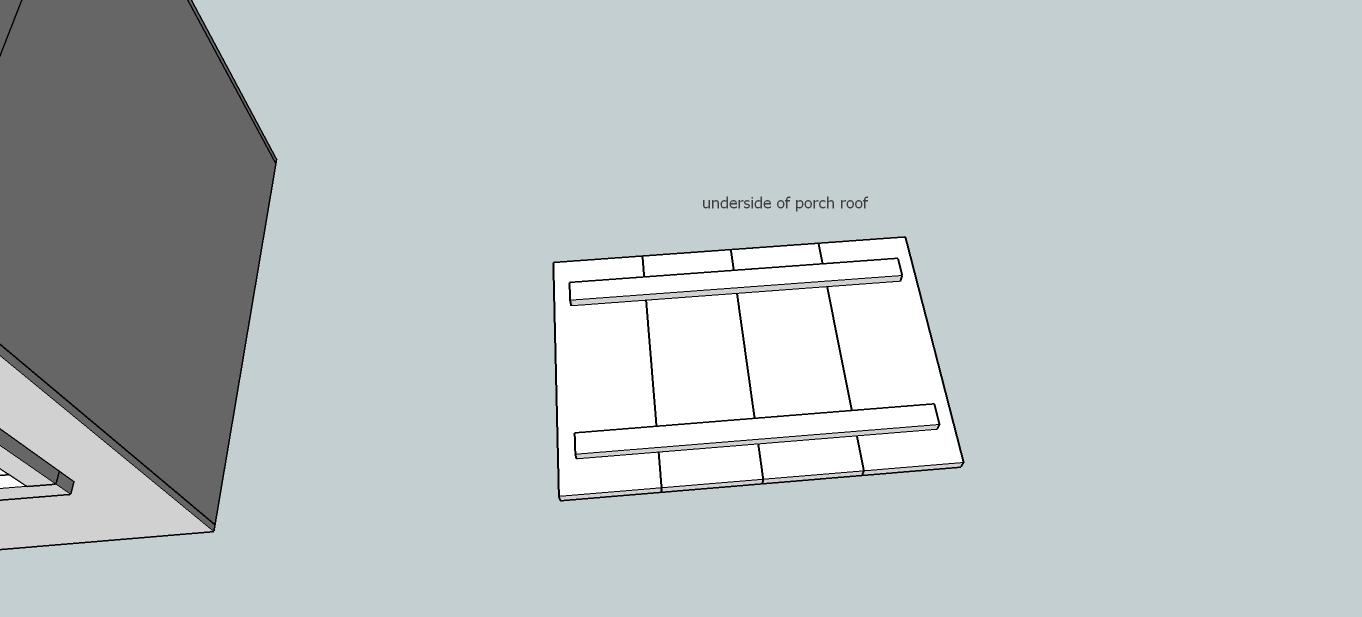
Step 21
Make the porch roof to the side before attaching it! Taking your four porch roof boards, just lay the two porch roof runners on top of the boards and glue and brad nail/staple or screw it together if you would like! This will be the underside of the porch roof!
-
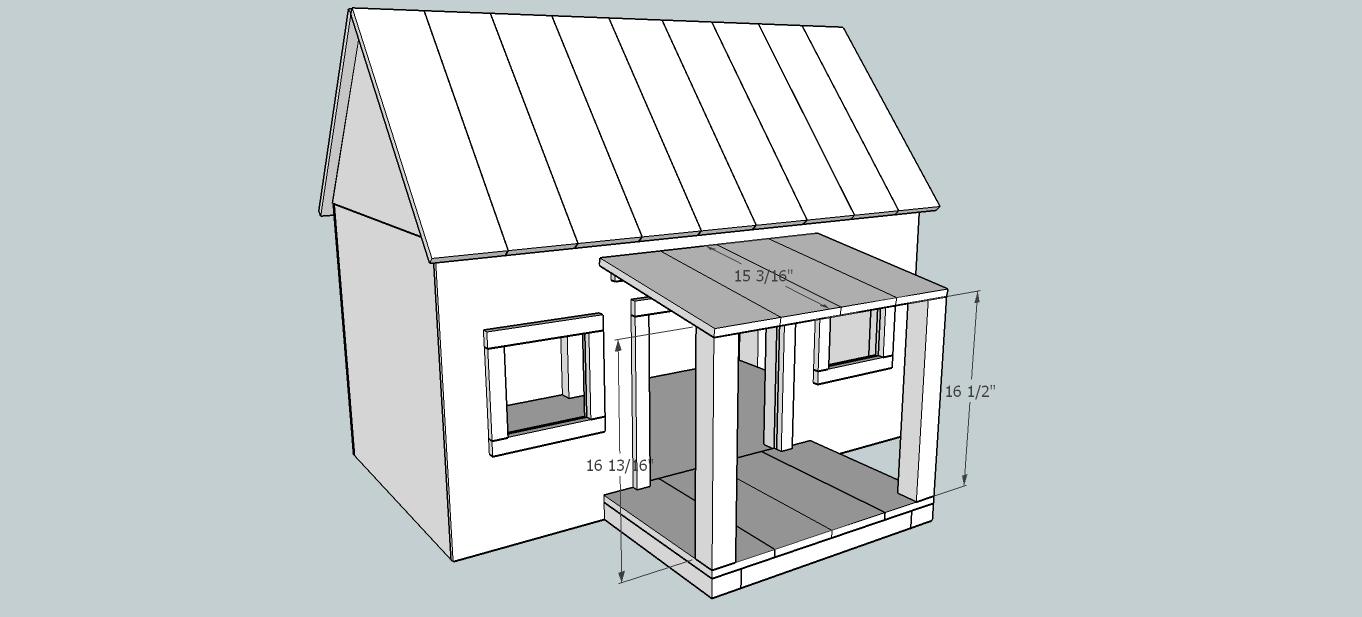
Step 22
Depending on the slope you want on your porch roof, cut your porch pillars (2" dowel rod) down to about 16 13/16" and miter it at about 1o degrees off square, this gives it just an ever so slight slope! Attach the porch roof boards to both the dowel rod and the roof brace!
-
Step 23
Everything is really cosmetic from here! I added the trim to the front and sides just so you wouldn't have to see where the siding meets up on the corners! I started on the sides so I could bring the front and back out past the sides!
-
Step 24
Attach the top trim to the triangles (I believe this is called fascia but I can't be certain)! Lol! It is mitered the same as the other roof boards!
-
Step 25
Attach front trim! I also ripped this trim down from the same fence pickets I just made it slightly wider at 2"! I covered the side framing with the front and back framing boards!
-
Step 26
Last but not least the top needs it's finishing touch and I don't even have the slightest clue what it is called! LOL! I will call it the wooden flashing!! Instead of beveling the boards together I took the easy route and just made one slightly larger and it overlapped the other! Does that make sense? This will leave the ever so slightest gap and I just cut a small square of wood and glued it in there! Very professional, I know!! Hehe!!
-
Step 27
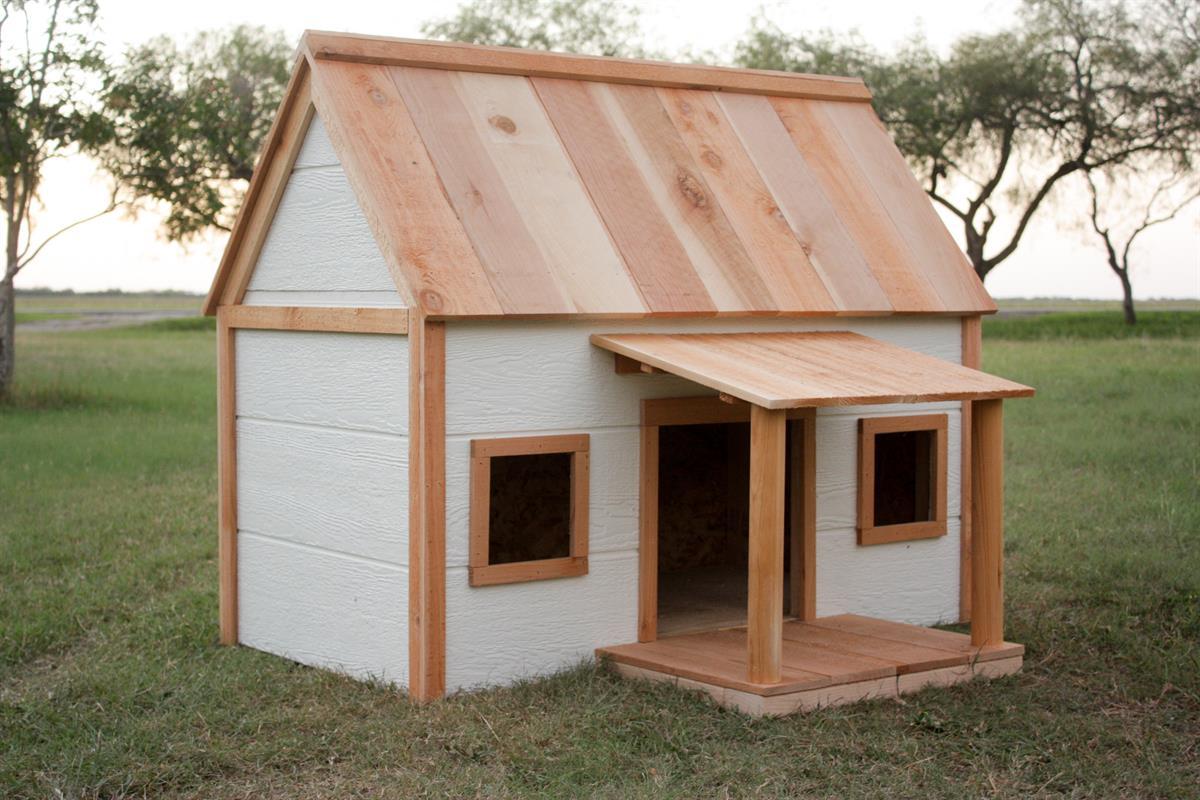
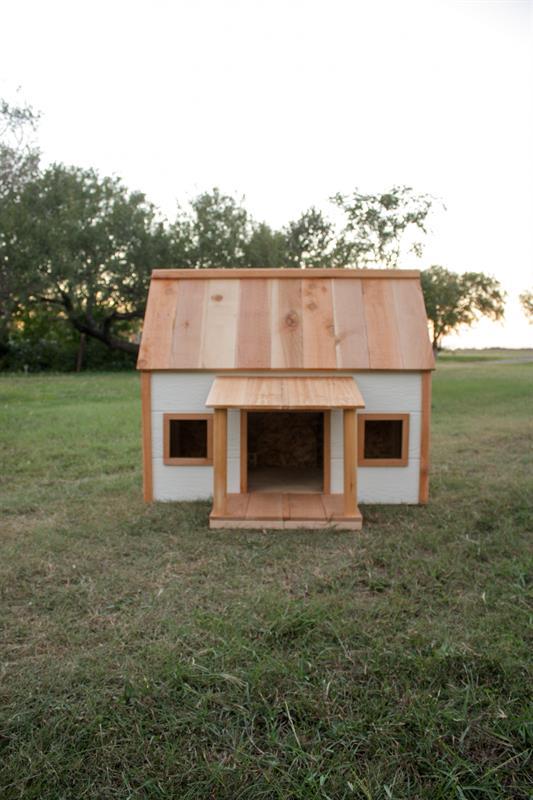
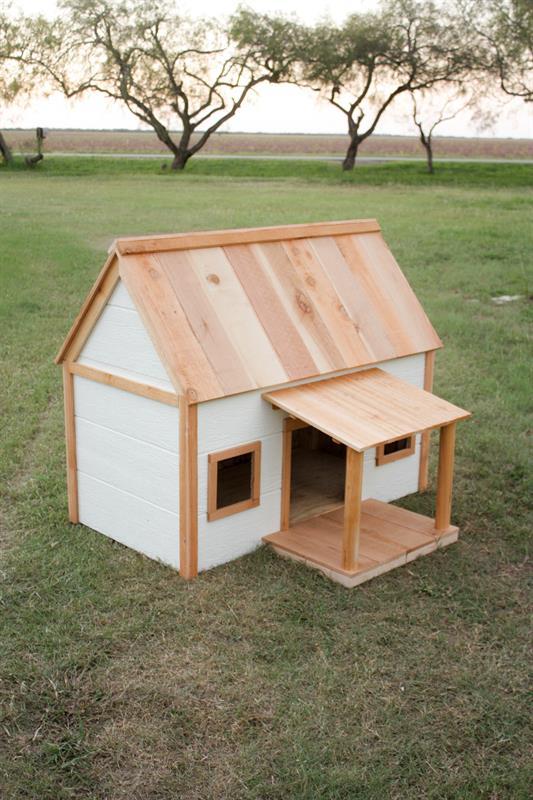
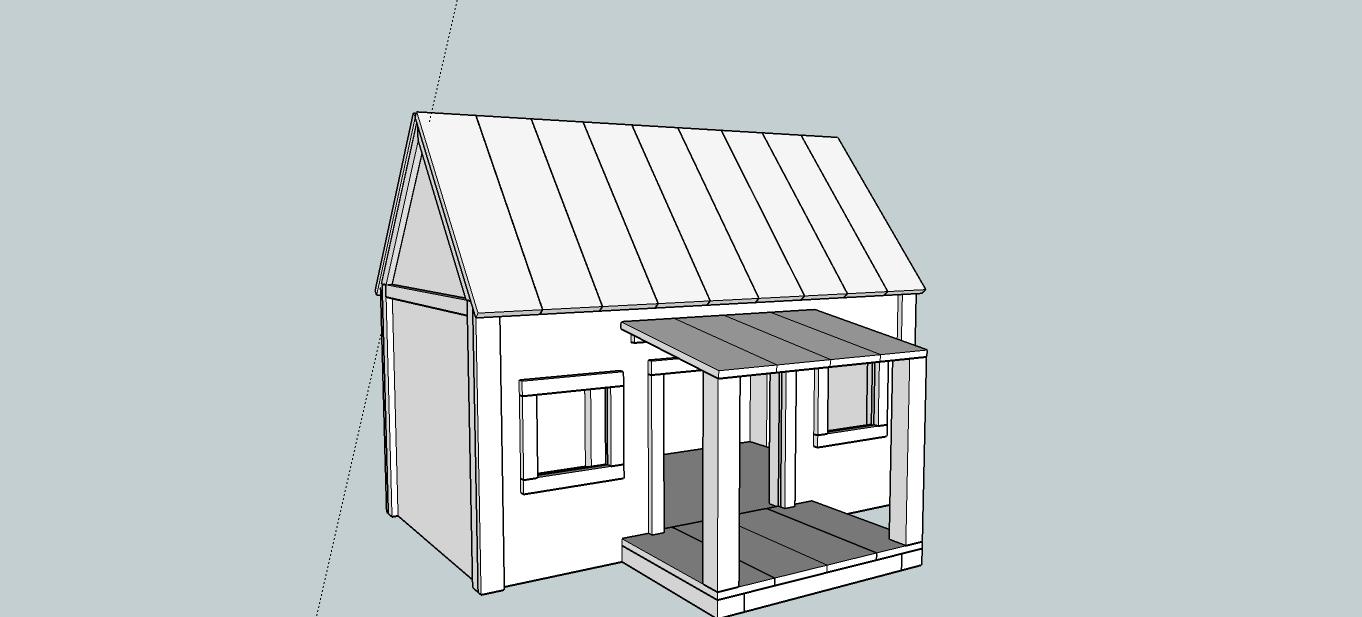
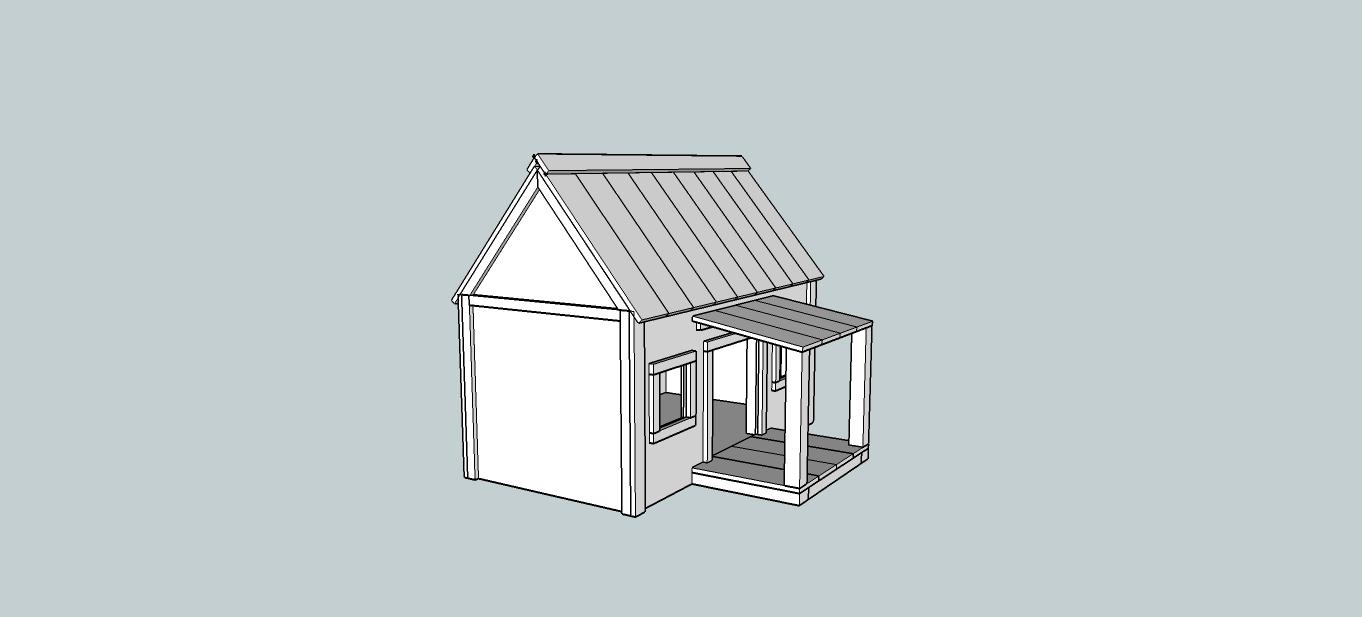
Check out your fantastic work and let Fido move in!! My dogs wouldn't even get near it!! Lol!!
Just a little FYI, I did paint the siding off-white by Behr, the siding was a taupe color from the store! And the cedar, well I can't wait for it to start losing it's bright orange and start graying with time!!
Make sure and visit my website http://builditcraftitloveit.com for more free furniture plans!!