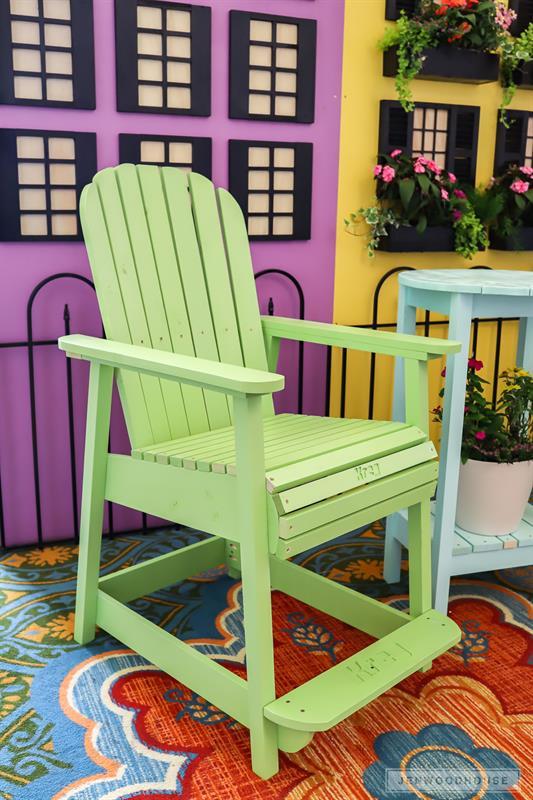
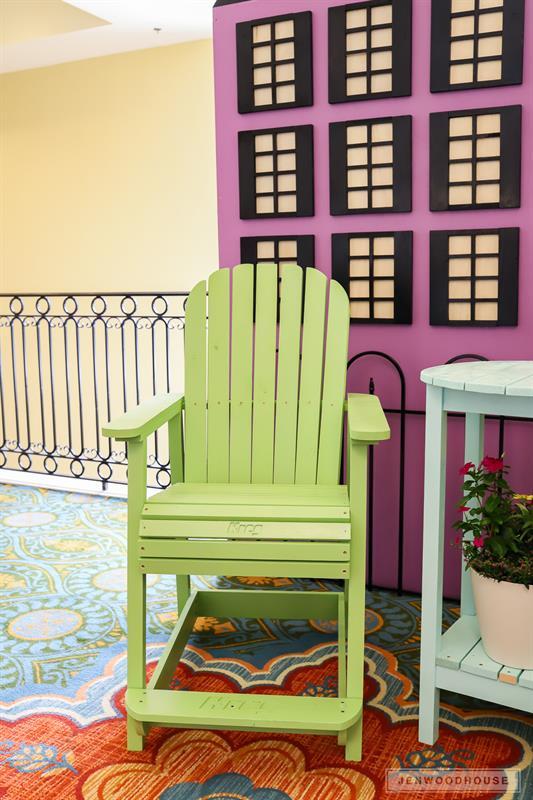
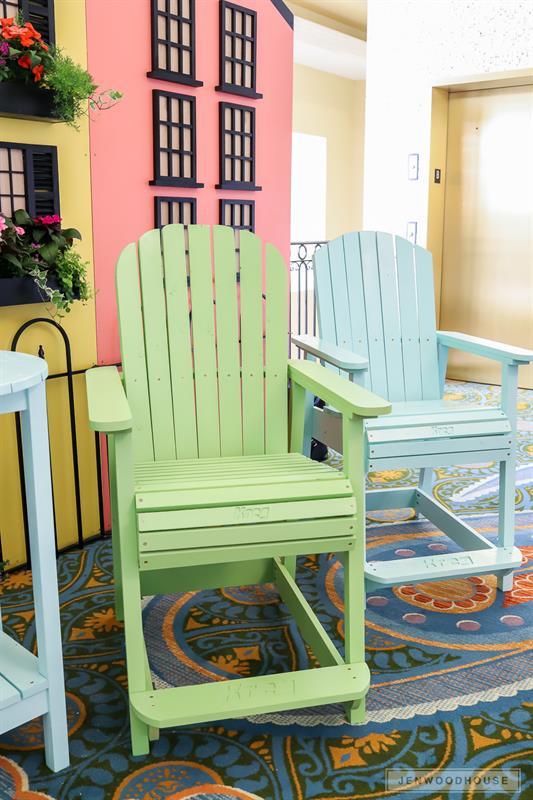
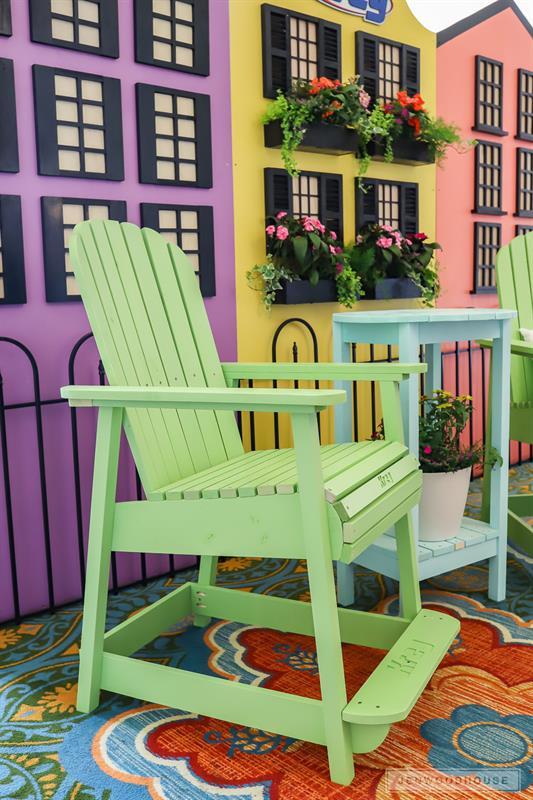


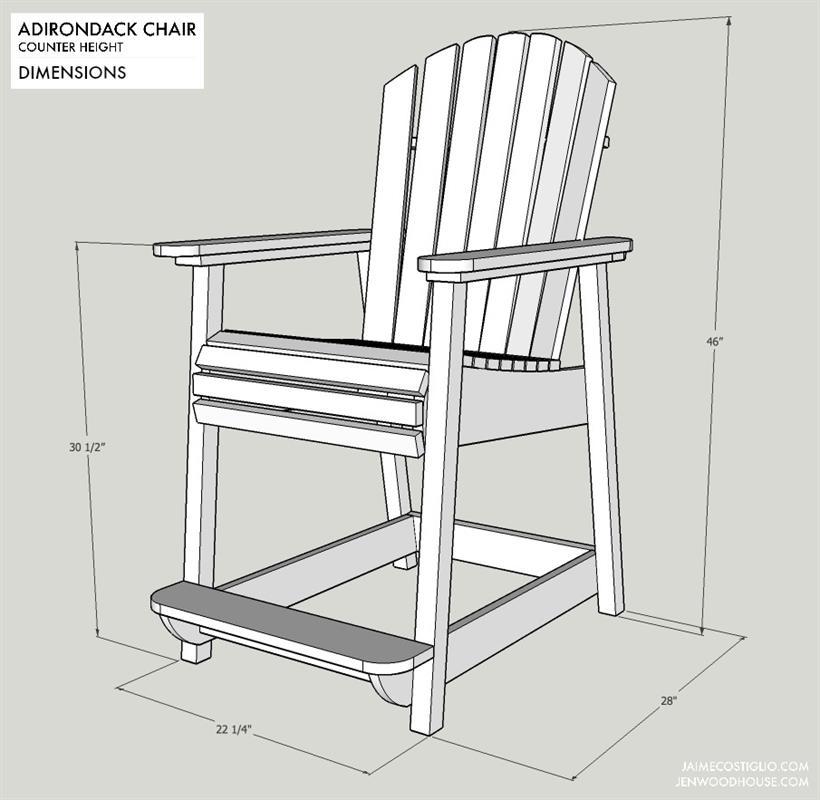
A comfortable and roomy Adirondack style chair with foot rest. Relax in style after building this counter height Adirondack stool complete with generous arm rests, a foot rest, sloped seat and curved back. The perfect chair for the patio, yard or any outdoor space.
Tools
Kreg Tools


Other Tools
-
Jigsaw

-
Miter Saw
-
Square
-
Tape Measure
-
Drill (cordless)
-
Sander
Materials
Wood Products
- 4 Board , 1x2 , 96"
- 3 Board , 1x3 , 96"
- 2 Board , 1x4 , 96"
- 1 Board , 1x5 , 72"
- 1 Board , 1x6 , 72"
- 2 Board , 2x2 , 72"
- 1 Board , 2x4 , 24"
Hardware & Supplies
- 24 2" wood screws
- 24 1 1/4" pocket hole screws
- 24 1 1/4" wood screws
- 4 2" pocket hole screws
Cut List & Parts
- 1 Foot rest , 1 x 5 @ 22 1/4"
- 2 Foot rest rails , 1 x 4 @ 30", one end 10 degree angle
- 1 Foot rest front apron , 1 x 3 @ 17 3/4"
- 1 Back stretcher , 1 x 4 @ 19 1/4"
- 2 Arm rest , 1 x 4 @ 27"
- 2 Arms , 1 x 3 @ 20 1/2"
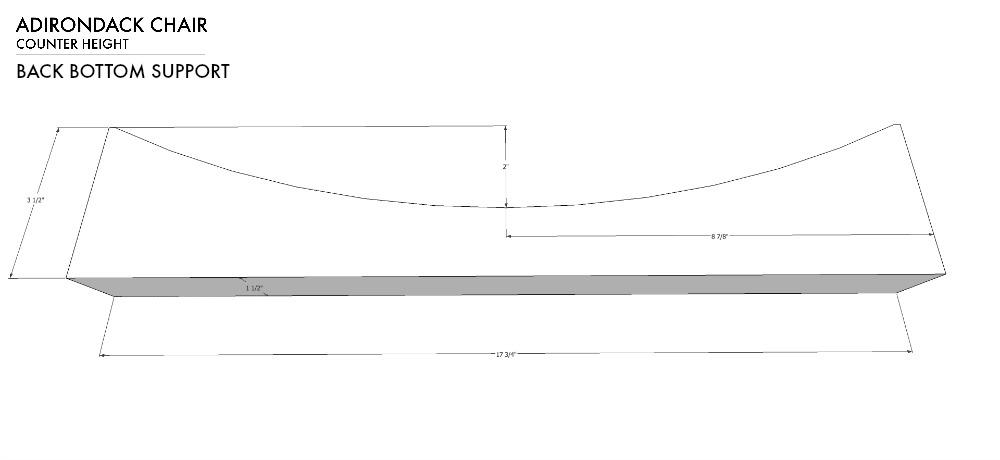
- 1 Bottom back support , 2 x 4 @ 17 3/4"
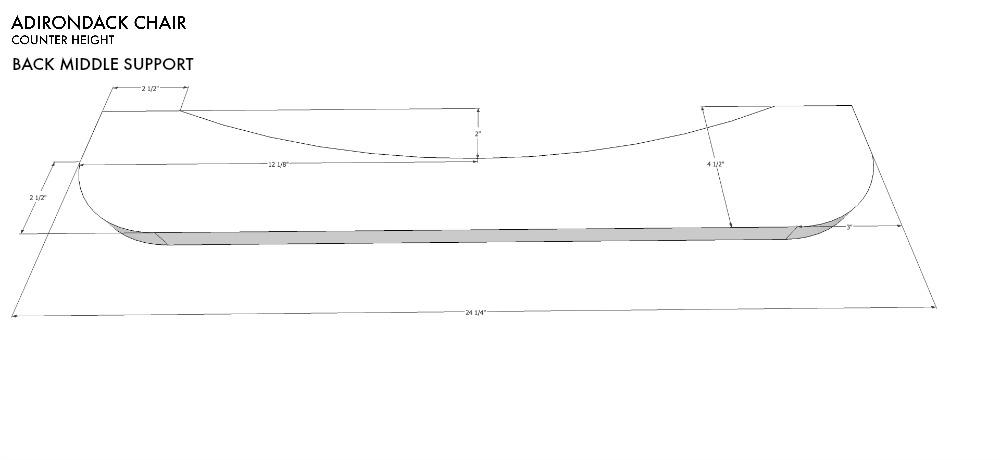
- 1 Middle back support , 1 x 5 @ 24 1/4"
- 1 Top back support , 1 x 4 @ 19"
- 2 Front legs , 2 x 2 @ 30", both ends 5 degree cut
- 2 Back legs , 2 x 2 @ 30", both ends 10 degree cut
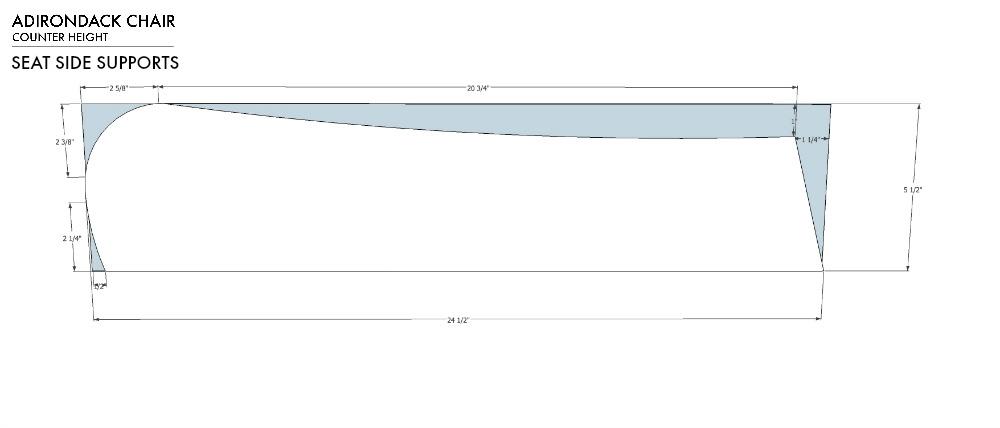
- 2 Seat side supports , 1 x 6 @ 24 1/2"
- 13 Seat slats , 1 x 2 @ 19 1/4"
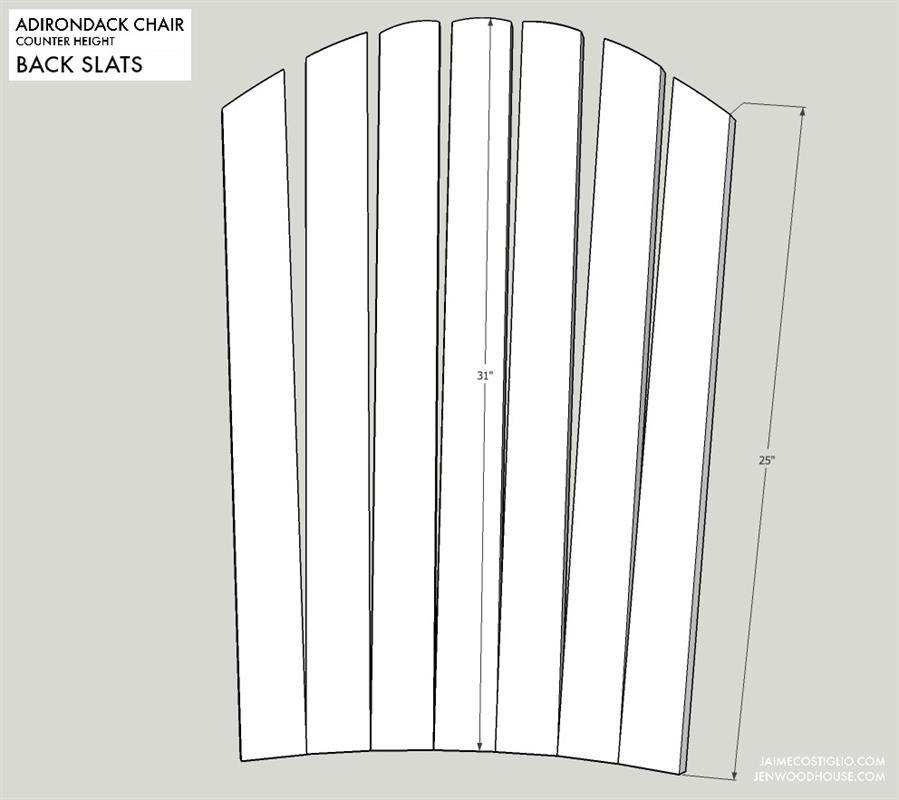
- 2 Back slats , 1 x 3 @ 28"
- 2 Back slats , 1 x 3 @ 30"
- 3 Back slats , 1 x 3 @ 31"

Directions
-
Dimensions
Overall size: 46"h x 28"d x 26 1/4"w
-
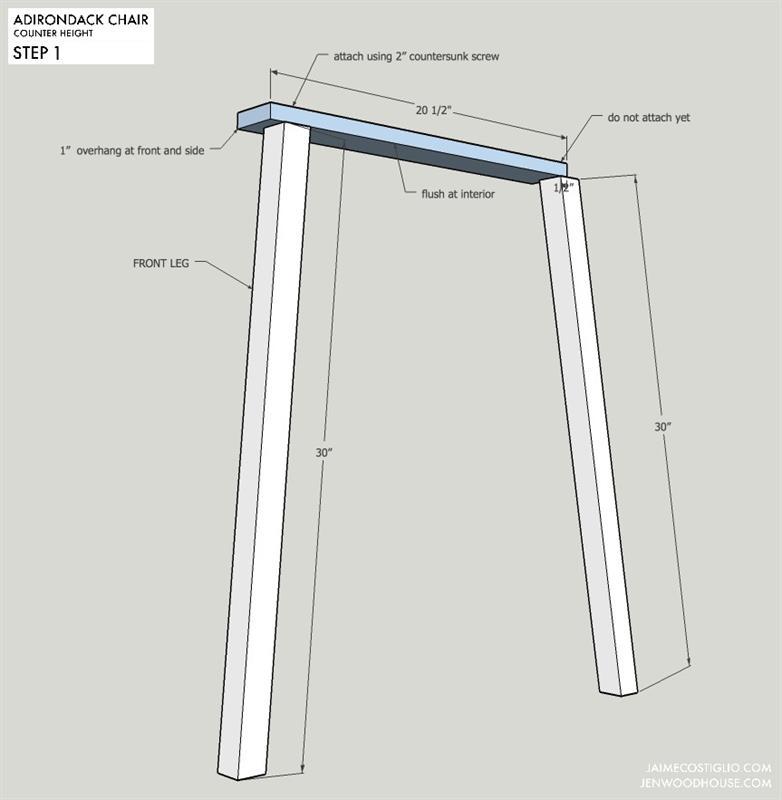
Step 1
STEP 1: Attach arms to front leg using 2” countersunk screws. Make two opposing sets.
-
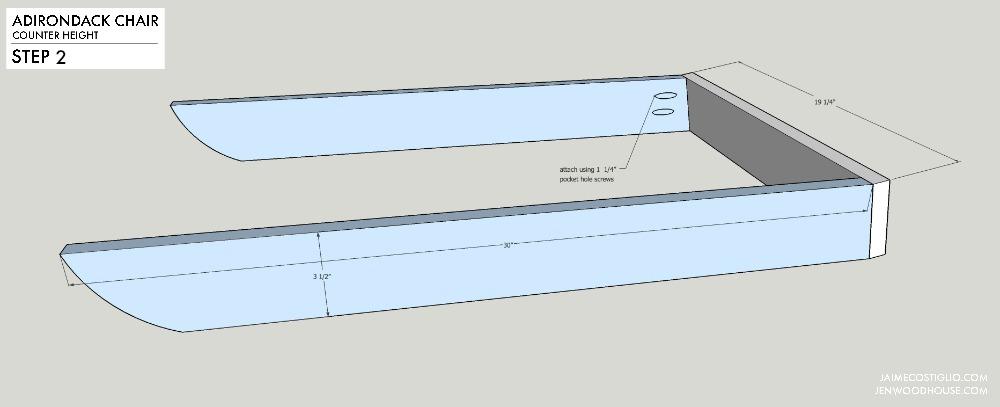
Step 2
STEP 2: Assemble lower stretcher. Attach foot rest side rails to back stretcher using 1 ¼” pocket hole screws.
-
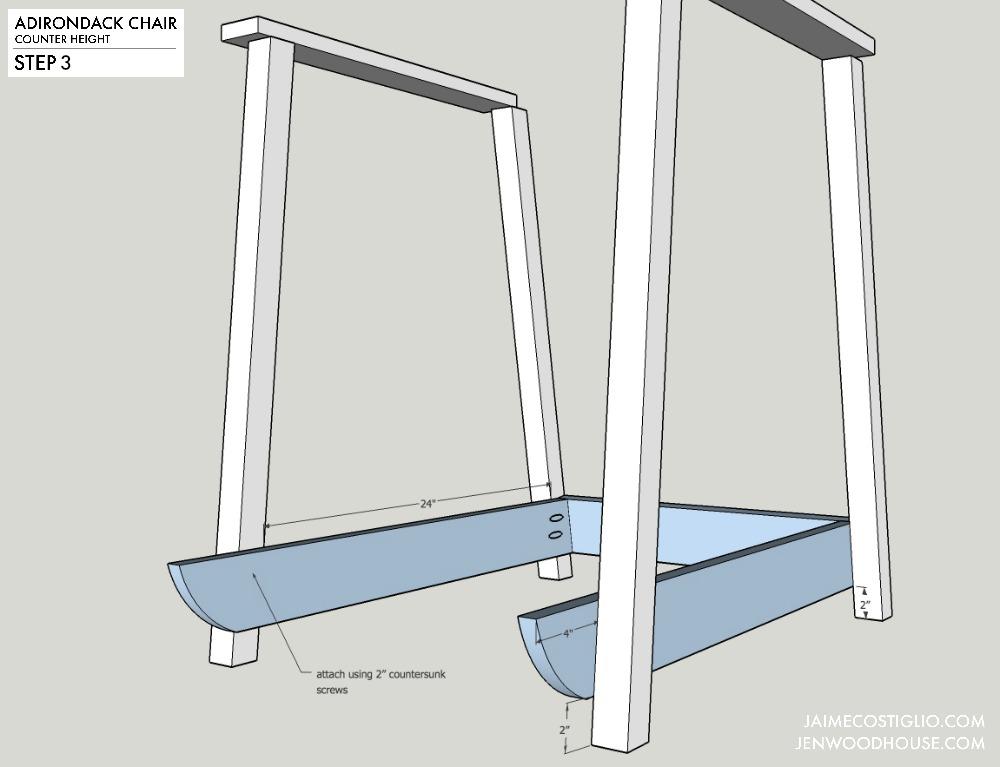
Step 3
STEP 3: Attach lower stretcher to legs using 2” countersunk wood screws.
-
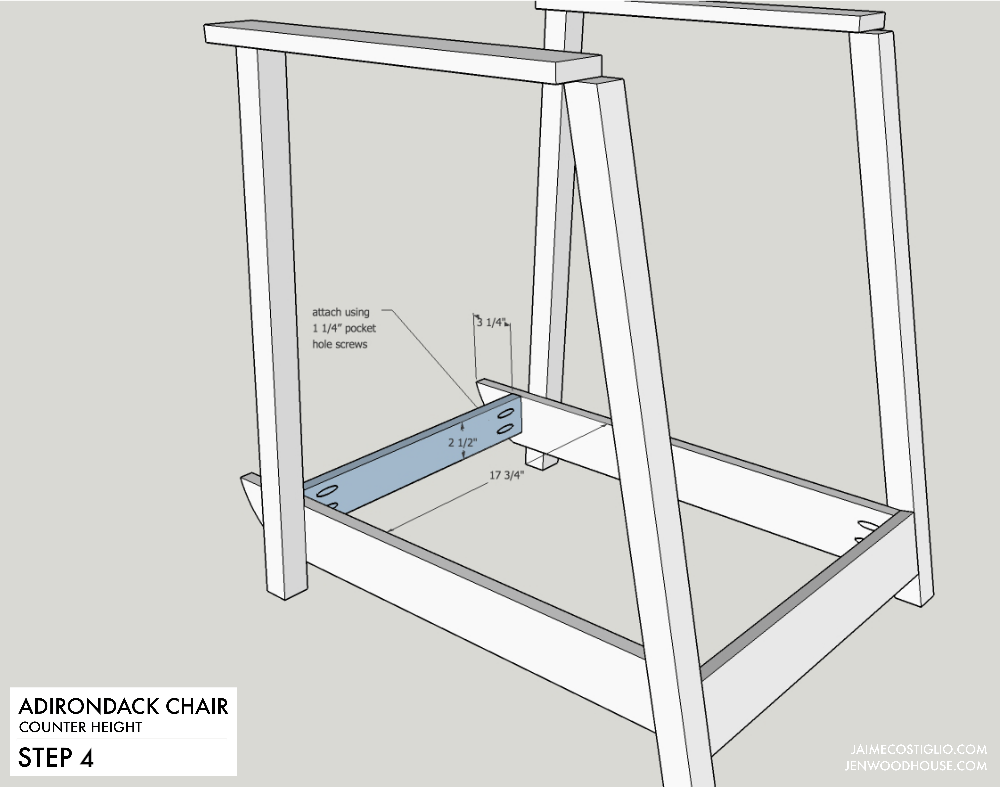
Step 4
STEP 4: Attach foot rest front apron to side rails using 1 ¼” pocket hole screws.
-
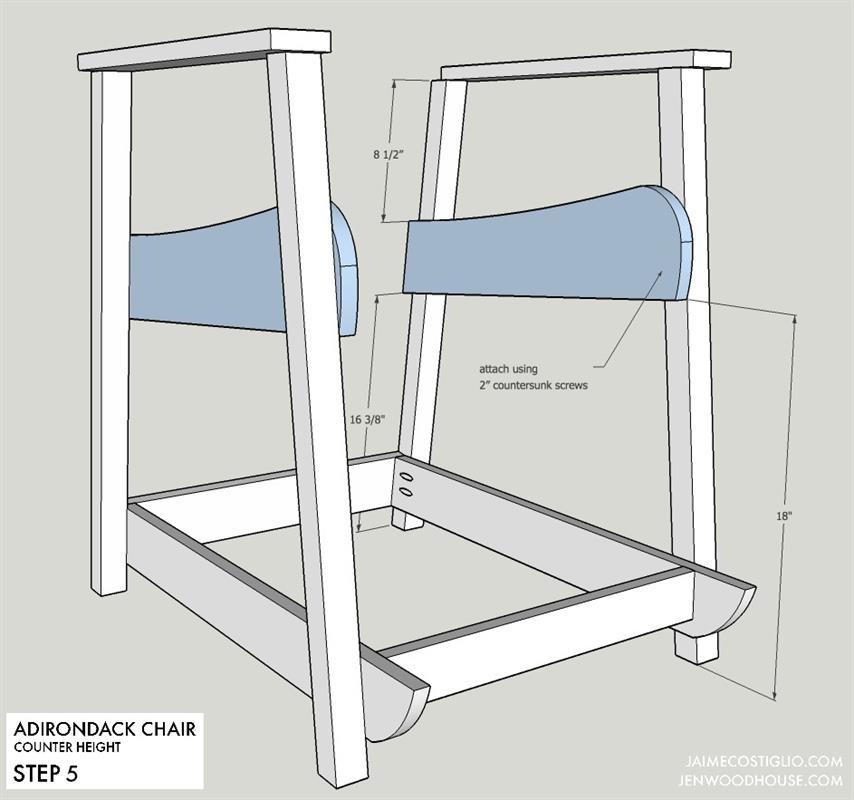
Step 5
STEP 5: Attach seat side supports to legs using 2” countersunk screws.
-
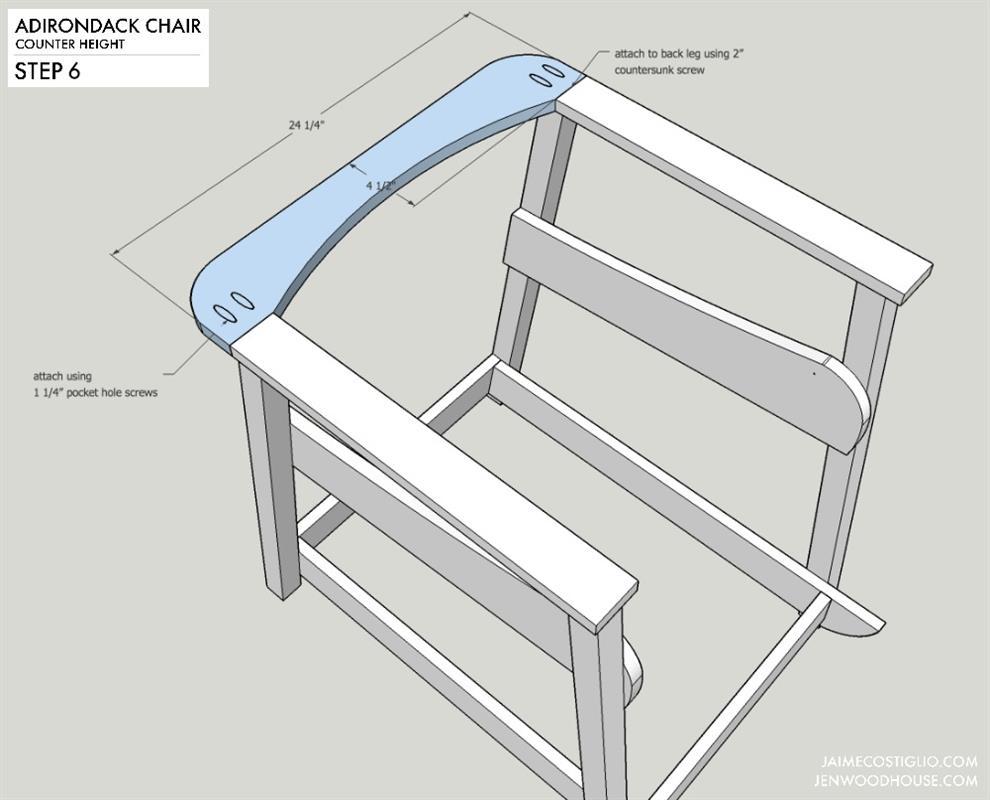
Step 6
STEP 6: Attach back middle support to arms using 1 ¼” pocket hole screws. Then attach to back leg using 2” countersunk wood screws.
-
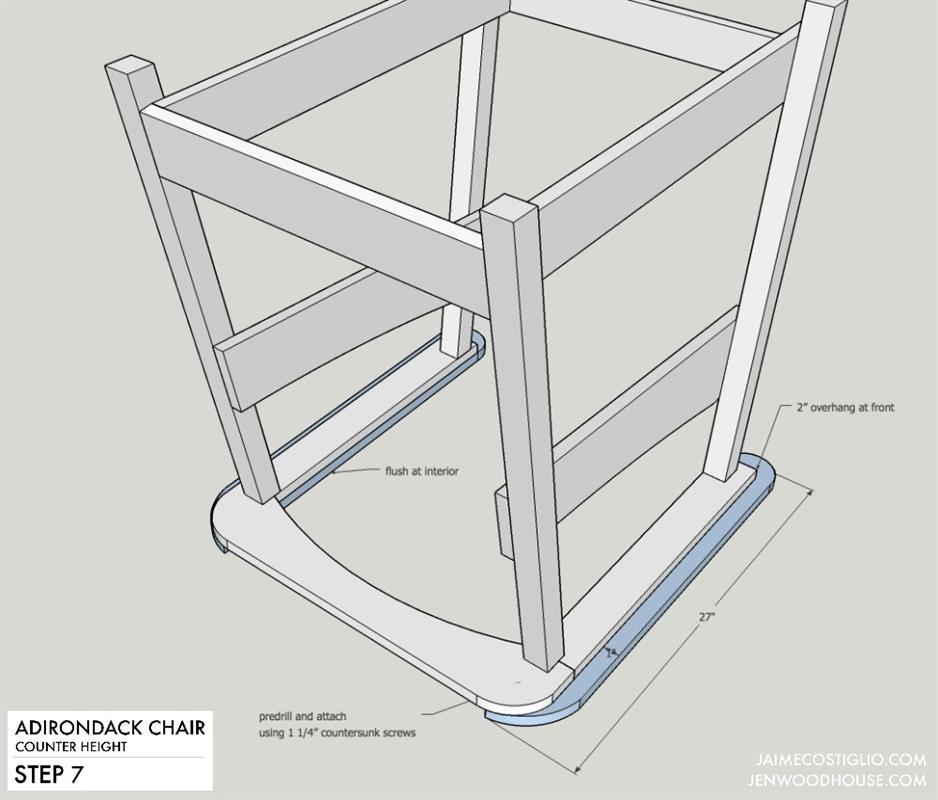
Step 7
STEP 7: Attach arm rests to arm and back middle support using 1 ¼” countersunk screws from underside.
-
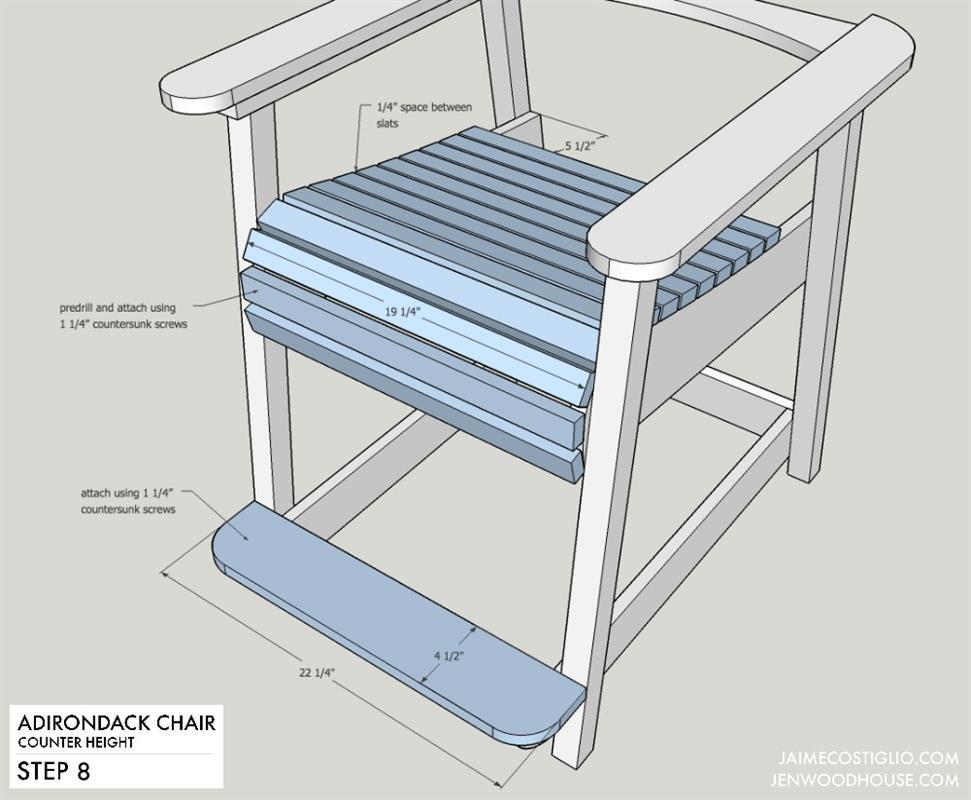
Step 8
STEP 8: Attach foot rest to rails using 1 ¼” countersunk screws. Attach seat slats to supports using 1 ¼” countersunk screws.
-
Step 9A
Use a jigsaw to cut curve into back slats before assembly.
-
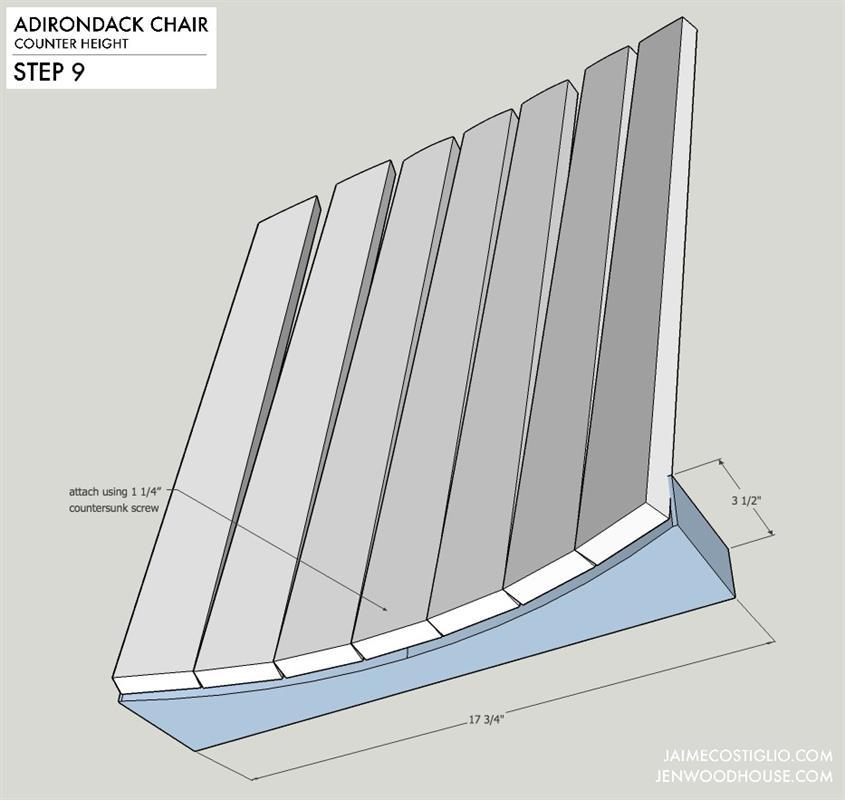
Step 9
STEP 9: Attach back slats to back bottom support using (1) 1 1/4” countersunk wood screw at center of each board.
-
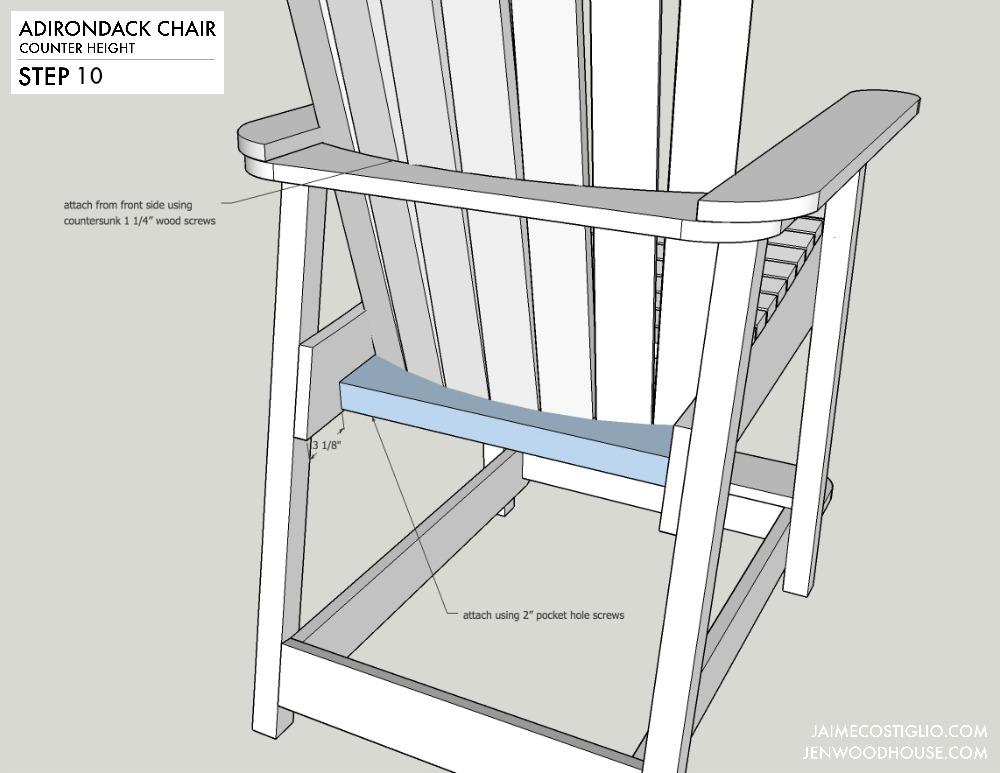
Step 10
STEP 10: Attach back bottom support to seat side support rails using 2” pocket hole screw. Adjust back slats to fan out and rest against back middle support. Attach to back middle support using 1 ¼” countersunk screw from front.
-
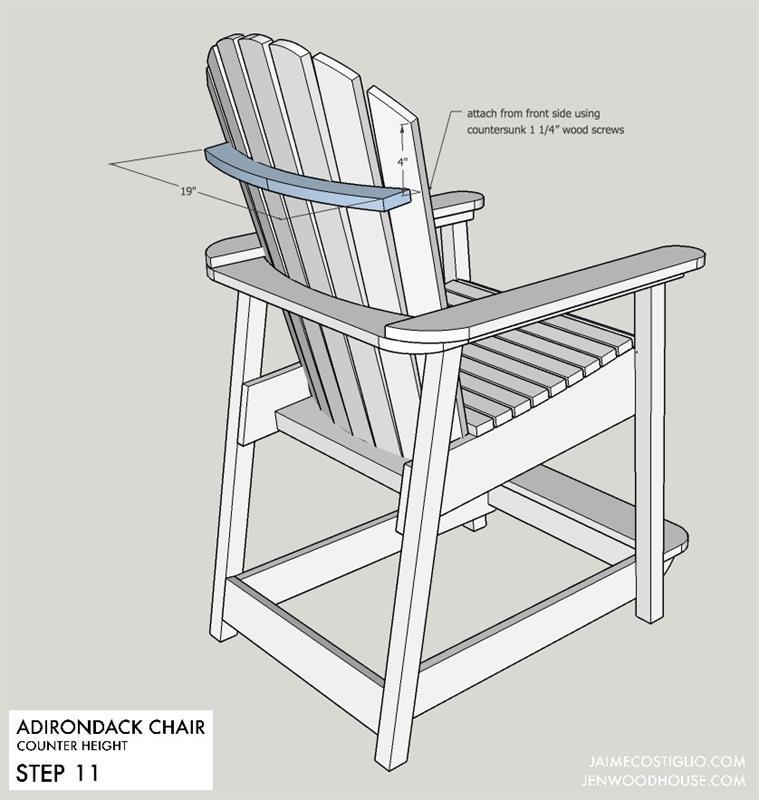
Step 11
STEP 11: Attach back top support to back slats if desired. Use 1 ¼” countersunk wood screws from front.